

1⁄32February MOM Winner
14
Comments

History
The Roland D.VI was designed by the L.F.G. Company late in 1917, with the prototype being the 1000th aircraft to be built by L.F.G., first flying in November 1917. Concieved from the outset as a light fighter, the D.VI was a single bay biplane, which unlike its older brothers C.II, D.I and D.II with the L.F.G.-Roland patented Wickelrumpf (literally "wrapped body"), constructed with two layers of thin plywood strips, introduced the equally unusual (for aircraft use) Klinkerrumpf construction where the fuselage was built of overlapping thin strips of spruce over a light wooden framework. Visibility for the pilot was good, while the aircraft had above average manoeuvrability.In January 1918, two D.VIs were entered into the first fighter competition, one powered by a 160 hp (119 kW) Mercedes D.III engine and the other by a Benz Bz.IIIa of similar power and, like the Mercedes, another upright, inline, six cylinder engine. Although the winner of the competition was the Fokker D.VII, orders were placed for the Roland as insurance against production problems with the Fokker. A total of 350 Roland D.VI fighters were built, 150 D.VIa powered by the Mercedes, while the remaining 200 were powered by the Benz and were called D.VIb. Deliveries started in May 1918, with 70 D.VIs in frontline service on 31 August 1918.
The only surviving LFG Roland D.VI still existing in the 21st century is the complete fuselage of a D.VIb, displaying IdFlieg military serial number 2225/18, on display at the Polish Aviation Museum in Kraków, Poland.
The model kit
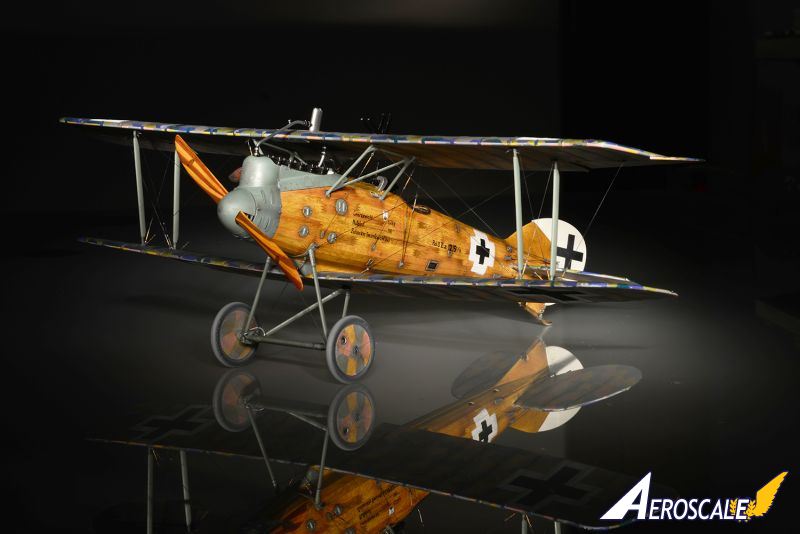
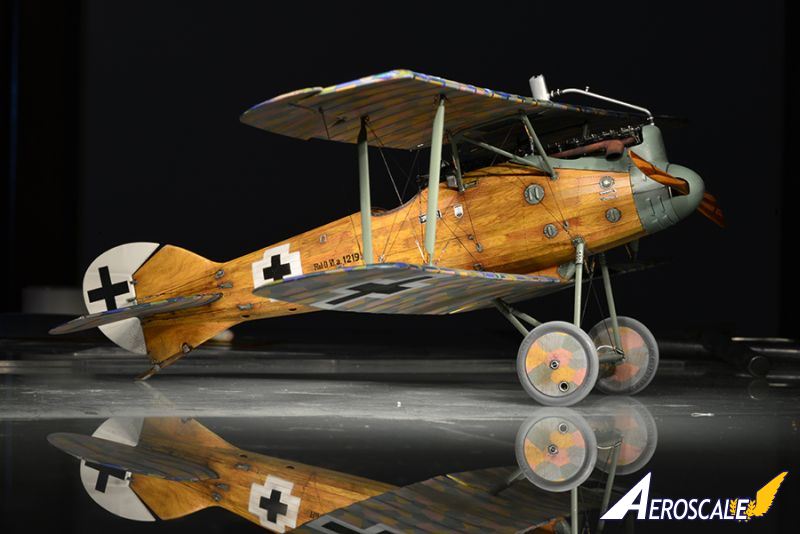
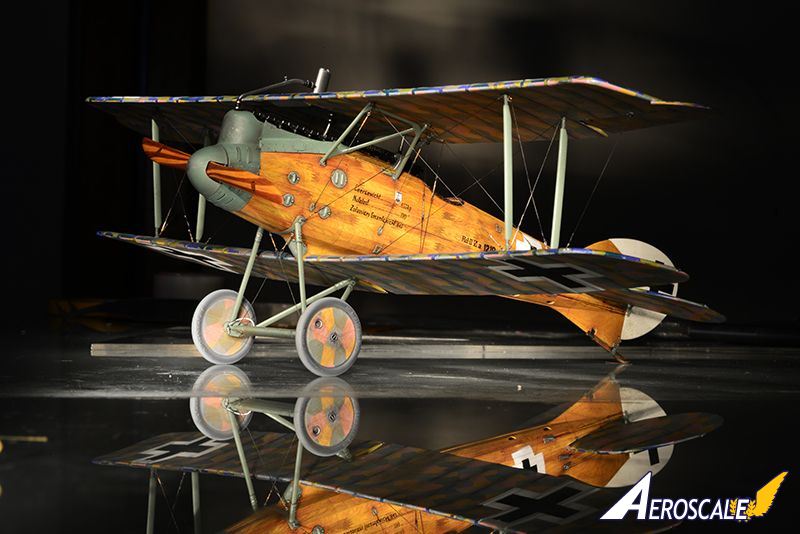
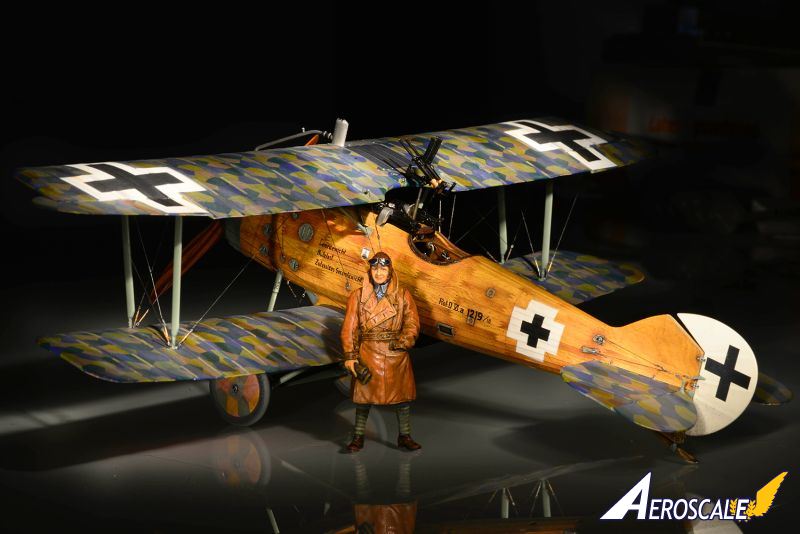
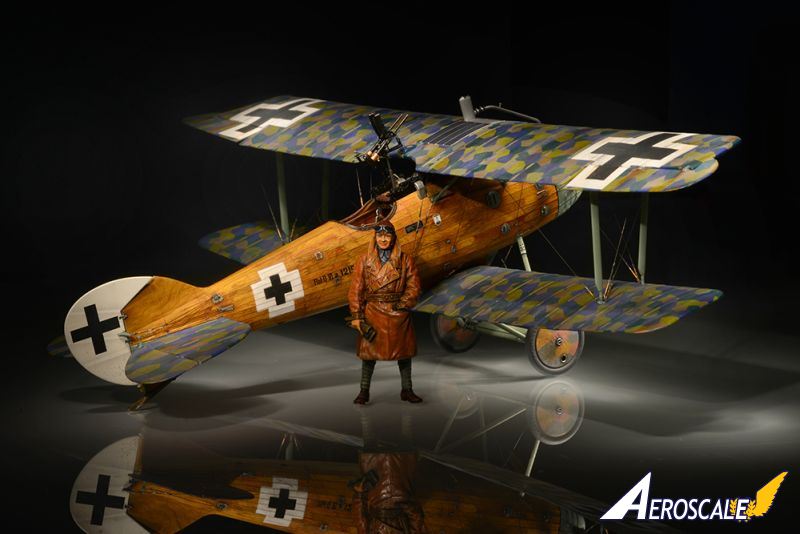
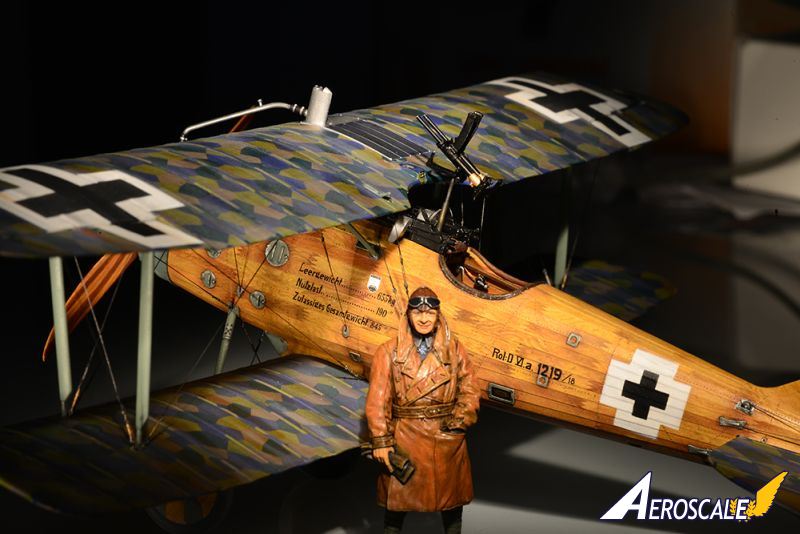
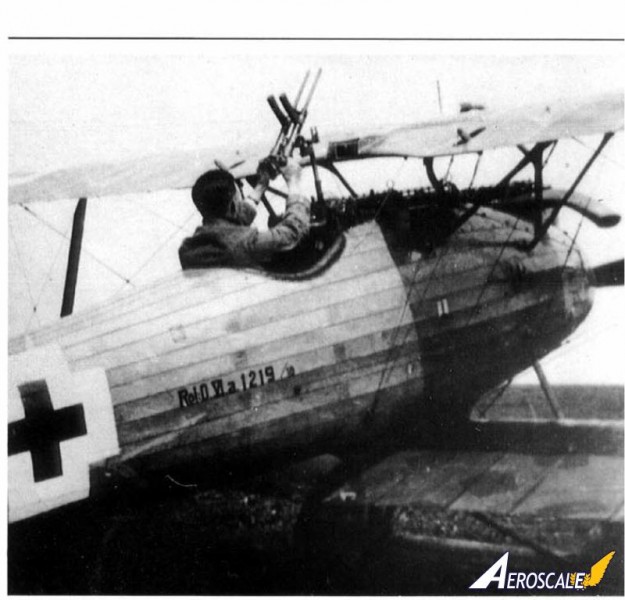
The kit is of course Wingnut Wings model in 1/32 scale. This is in fact my first 1/32 scale model, as previously I considered the 1/48 scale to be just right for my taste. As I love building WW1 aircraft, I decided to try to build one in 1/32 scale and my choice fell on Roland D.VI, whose wooden fuselage presented a sort of a challenge for my skills.As for the markings, I chose an unusual subject a Roland D.VIa from Jasta 30 equipped with additional armament in the form of twin Villar Perosa submachine gun of 9 mm calibre, mounted to fire over the upper wing. It had an unpainted wooden fuselage, just what I was looking for.
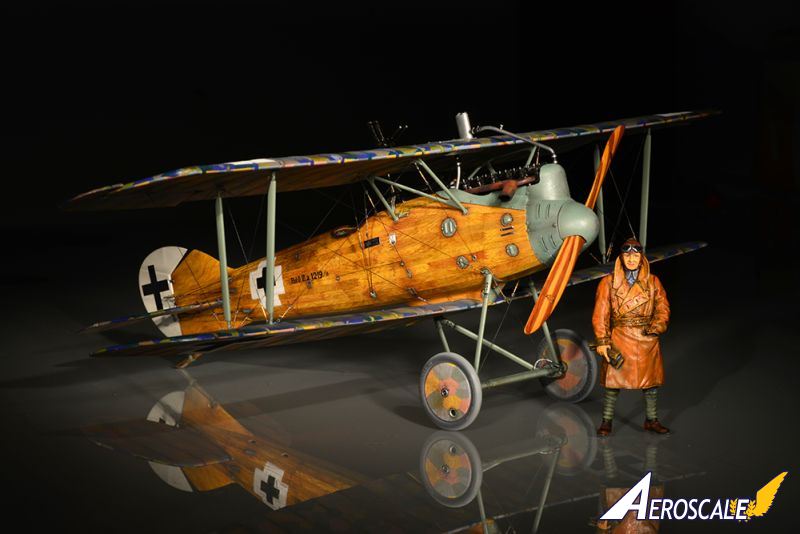
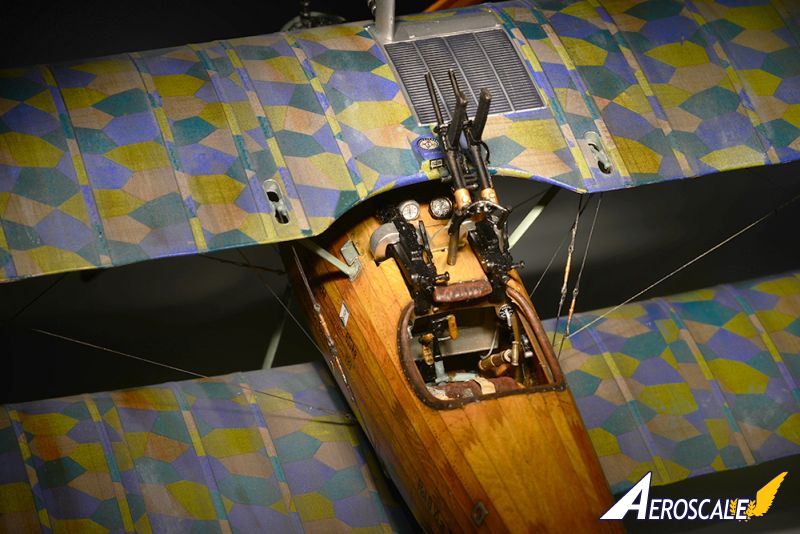
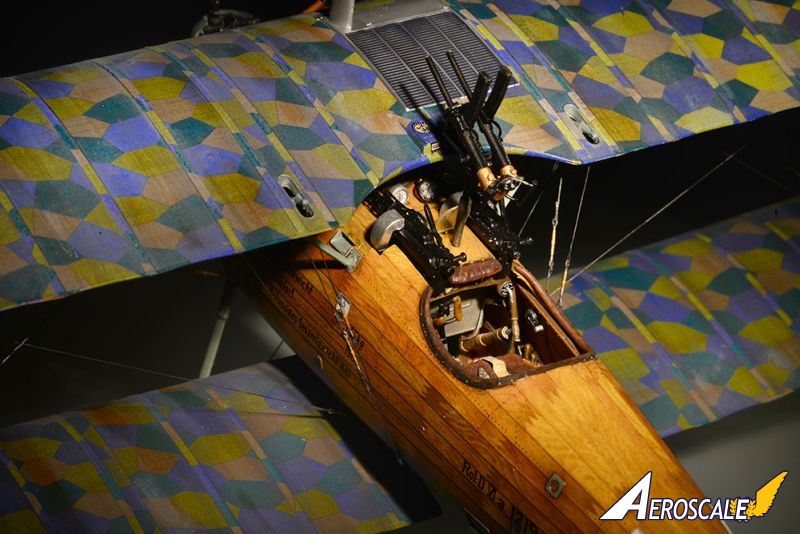
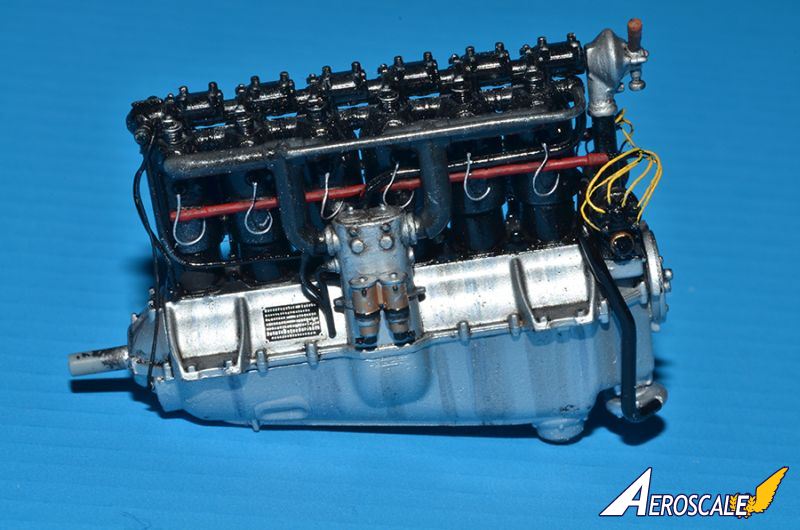
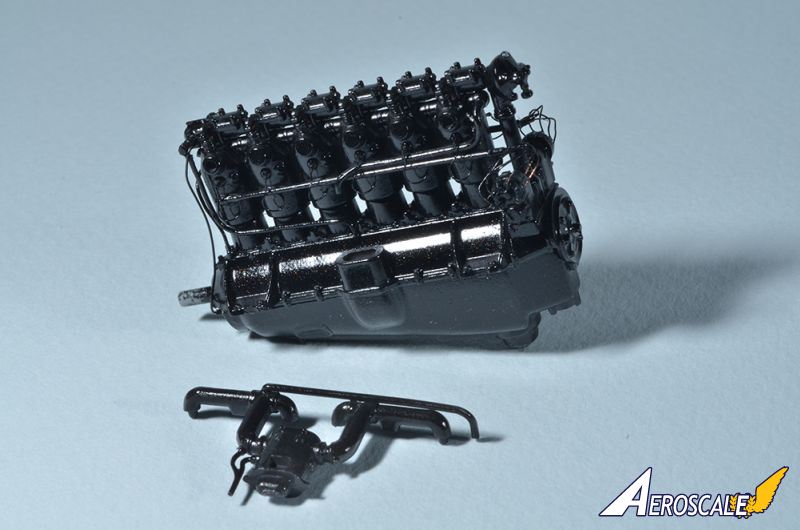
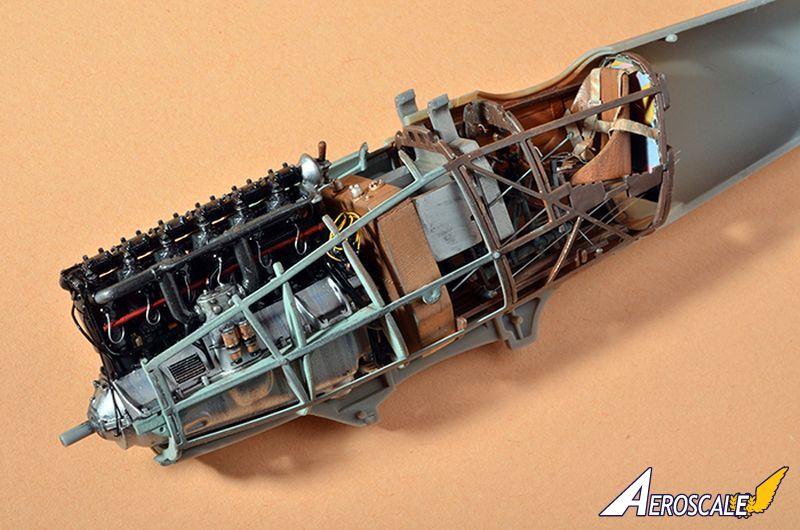
Building of the interior was quite straightforward, with many details added to the engine valve springs, spark plugs and various tubes. Cockpit received similar attention although I can say that it was quite detailed straight from the box.
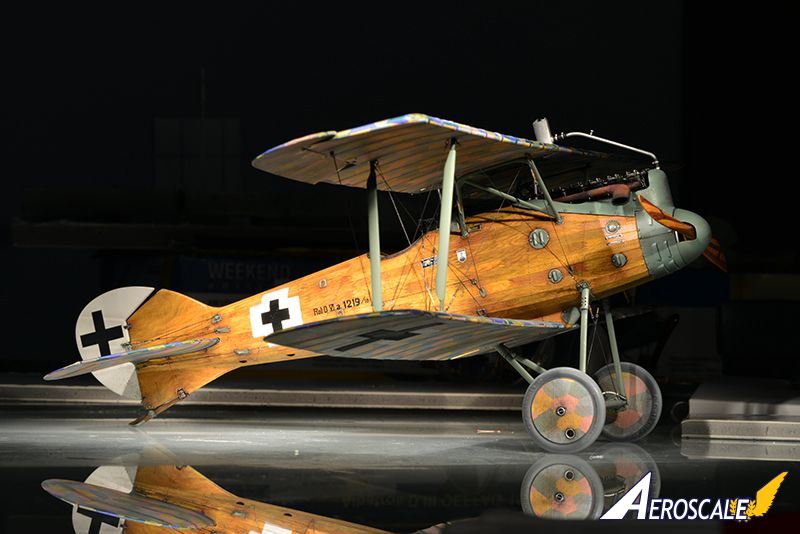
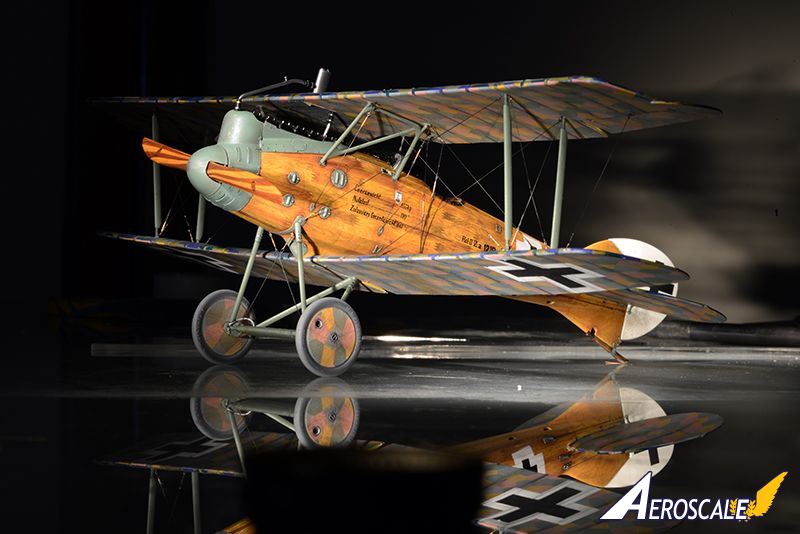
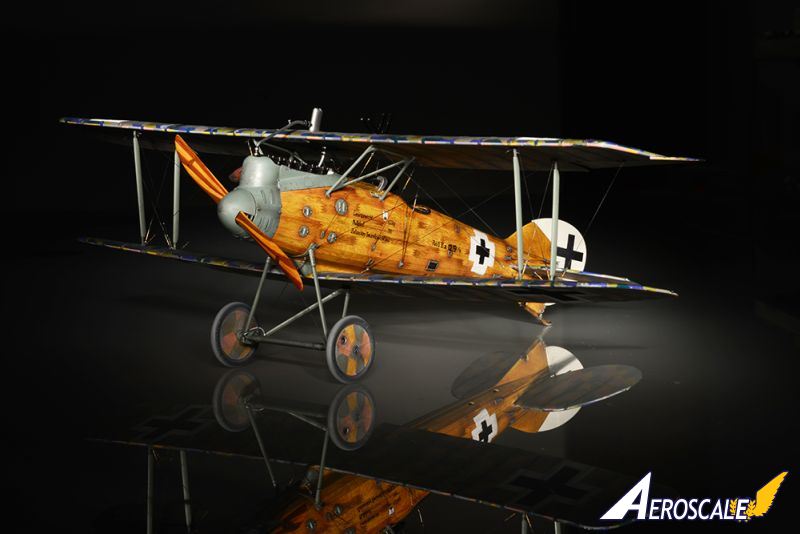
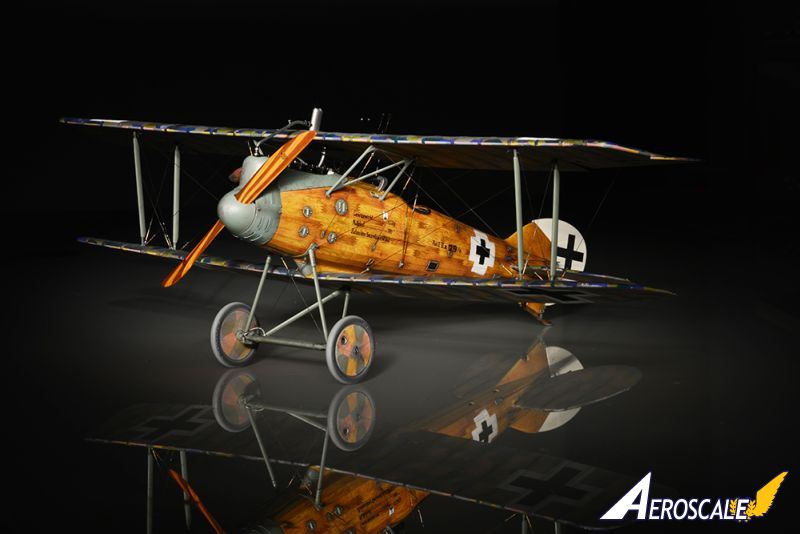
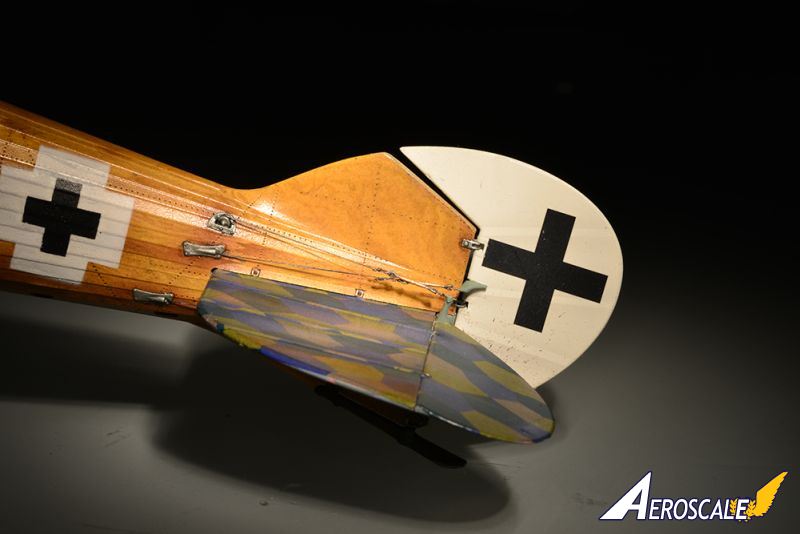
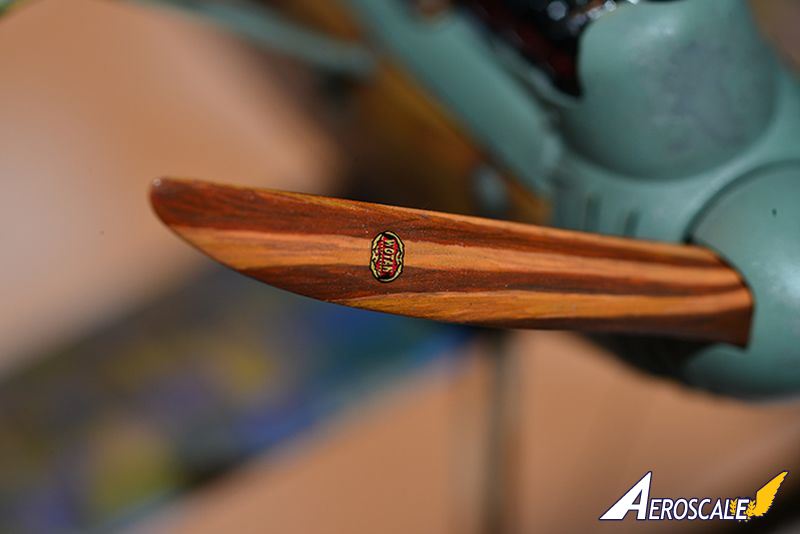
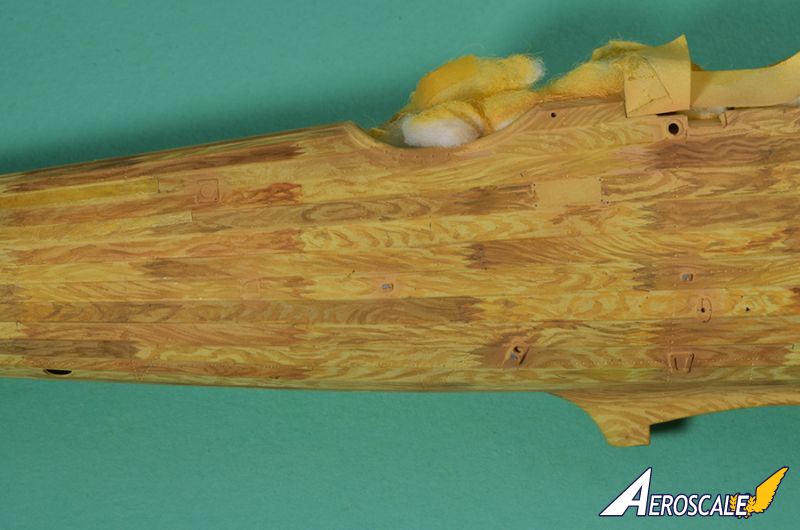
Once assembled, the fuselage was sprayed with flat light sand colour and then all wooden pattern of various shades of brown was hand painted with artist tempera colours using fine brush, taking care to change pattern for every plank. I also represented the method of joining the planks by zig-zag pattern, using airbrush and pre-cut masks. After all wood pattern was finished, the fuselage was sprayed with gloss clear lacquer to protect the tempera paint below.
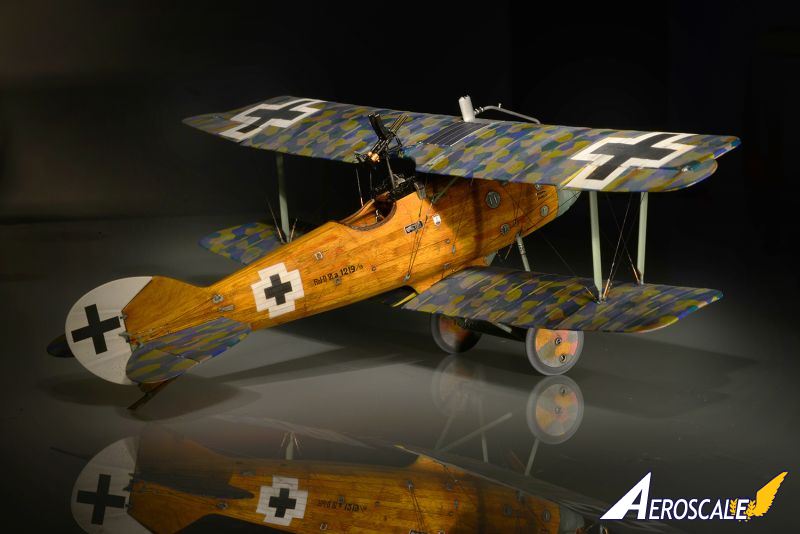
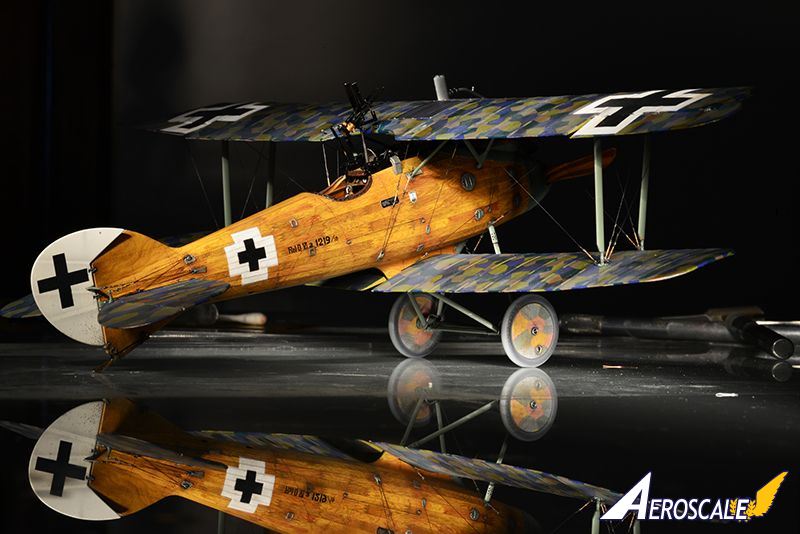
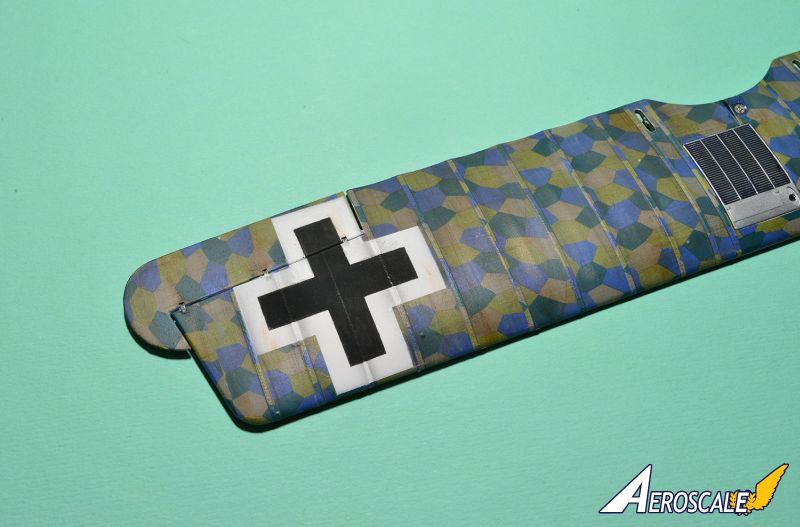
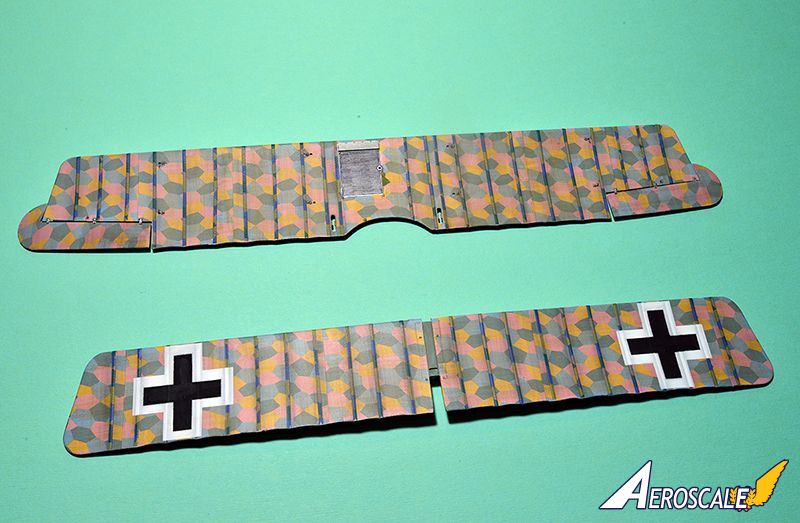
The wings were treated with gloss white paint and lozenge decals added, as well as lozenge strips from the kit decals. Wing, fuselage and tail crosses were all airbrushed directly on the model, using tape masks. I decided to reproduce the fabric surface of wings and tail by gently painting a thin layer of very diluted dark brown tempera colour with a wide flat brush. After drying, another layer was added at 90 degrees angle so that both thin layers produced a subtle fabric effect.
Rigging was done using EZ line. I used Gaspatch fasteners and painted the central part with brass colour. The Villar Perosa gun was built from scratch using brass tubes and polystyrene bits and pieces. It was added to the model at the end.
I thoroughly enjoyed building my Roland and I am looking forward to my next WNW model.


About the Author


Comments
You should send the images to WNW for them to use on their website gallery.
MAR 17, 2014 - 03:28 AM
Daniel,
Your Roland is absolutely gorgeous! Your woodgrain work is perfect and using thinned paint to replicate the fabric effect is brilliant. I'll have to remember that technique for my next WWI build.
Cheers,
Eric
MAR 20, 2014 - 06:33 AM

Hi Danijel
That is simply amazing! Please, show us more of your work!
All the best
Rowan
MAR 21, 2014 - 10:31 AM

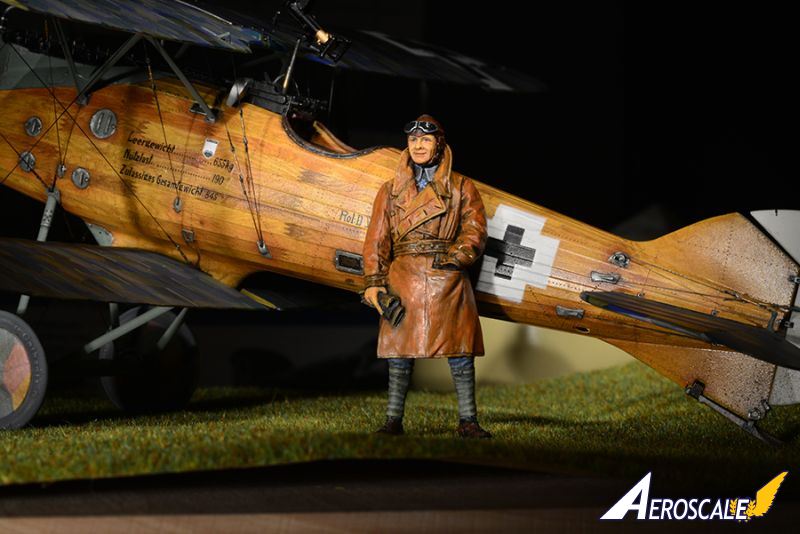
Danijel, Congratulations on the MOM winner. You did an OUTSTANDING job. The wood looks terrific and the details are simply AMAZING - the turnbuckles, the decal on the prop, etc. And I really like what you have done with our figure - it looks PERFECT with the aircraft. Keep up the great work. regards, Paul at Model Cellar
MAR 24, 2014 - 10:11 AM
An absolutely perfect build. I've seen quite a few WW1 aircraft, and many had some visible bare wooden parts, none looked nearly as convincing, nor as realistic as yours does. And your fabric work is as good as it can get as well.
A true masters touch.
Joel
MAR 27, 2014 - 09:43 AM

I'm going to assume based on the fact that you only have 1 post to date that I wont get a response, but can you PLEASE write a step-by-step feature article on how you did the wood grain?
DEC 27, 2014 - 05:40 AM
Dear all,
First of all my apologies for my silence and this late answer but I was completely unaware of the forum comments on my work. However I was really surprised to read all the nice comments on my Roland.
Well, in my article I described briefly the build, and as some of you wanted to know more about my technique of painting the wood grain, here are some details:
It was not the first time for me to paint wood grain by hand, as I built several ww1 models before - the last one being the Austro-Hungarian seaplane Hansa-Brandenburg CC in 1/48 scale - but the Roland had a very light toned wooden fuselage so it was a great challenge te represent it correctly. I must admit that although I admire products such as Uschi's wood grain decals, I decided to paint the wood grain by hand, just to prove that I can do it at least as good.
To the contrary of other modelers who use acrylic or enamel paints for this job, I chose water based tempera colours, primarily because I was affraid of failing to achieve realistic effects. Tempera could be easily removed with a soft cloth and a bit of water, and the process could be restarted without fear of damaging the model forever. I am also an artist (I produce box covers for Revell) and work with tempera is familiar to me so I was pretty assured that the experiment will end up happily.
It is important for tempera work that the surface is first sprayed with very flat acrylic or enamel base coat - satin or clear shiny finish will make the diluted tempera to "run away" and it would be impossible to paint. So, after the light sand colored base coat has dried, I prepared several shades of brown tempera diluted with water so that it can be easily painted by sharp pointed brush of 0, 00 and 000 sizes. Each plank was then painted by hand taking care to change grain patterns. I simply looked at the photos of the real machine in WNW superb instruction sheet, but I also looked to the wooden floor in my dining room, trying to represent similar patterns. For the zig-zag joints which must be clearly visible on the planks, I made some masks from Tamiya tape cut by a very sharp scalpel knife, and once masked they were painted with airbrush using lighter and darker shades of brown. This didn't turn very well, so I had to correct every such joint with some dark paint and a 000 brush. At first the painted wood grain looked a bit too contrasting in respect to the base coat, but I didn't worry too much about that because I intended to tone down the complete wooden surface with successive coats of satin varnish.
I advise you to wear thin latex gloves while handling the fuselage during the wood grain painting process, to prevent that you accidentally wipe away all that lovely wood detail with your wet fingers before applying the protective varnish.
After the painting of the wood grain structure, I sprayed several protective layers of acrylic transparent paint, all of them being very diluted in order to retain the fine surface details such as nail holes. I added a few drops of reddish brown flat paint in the first layer of flat trqnsparent coat so that after spraying, it effectively toned down the contrast between the base coat and painted wood grain structure. The last layer was a satin one and it effectively protected the fuselage during subsequent building work on the model.
I was quite satisfied with my model, my only regret was that I didn't leave that nice engine opened...
Recently I bought a WNW Roland D.VIb and it will undergo a similar treatment, but this time with an opened engine for inspection.
Regarding my other works I shall post some very soon. Currently I am working on a completepy different project - a scratchbuilt airplane from the pioneer years of Croatian aviation - Szarits No.2 in 1/32 scale.
DEC 27, 2014 - 12:44 PM
One more thing - Model Cellar figures are absolutely fantastic and without the figure the model would look pretty dull. Thumbs up for MC and I hope that they will surprise us with many exciting news!!!
DEC 27, 2014 - 12:54 PM
Copyright ©2021 by Daniel Frka. Images also by copyright holder unless otherwise noted. The views and opinions expressed herein are solely the views and opinions of the authors and/or contributors to this Web site and do not necessarily represent the views and/or opinions of AeroScale, KitMaker Network, or Silver Star Enterrpises. Images also by copyright holder unless otherwise noted. Opinions expressed are those of the author(s) and not necessarily those of AeroScale. All rights reserved. Originally published on: 2014-03-15 01:27:46. Unique Reads: 6965

WEB HOSTING BY


Copyright ©2021 AeroScale and Kitmaker Network, a subsidiary of Silver Star Enterprises
All Rights Reserved. Please read our Conditions of Use and Privacy Policy.
All Rights Reserved. Please read our Conditions of Use and Privacy Policy.