

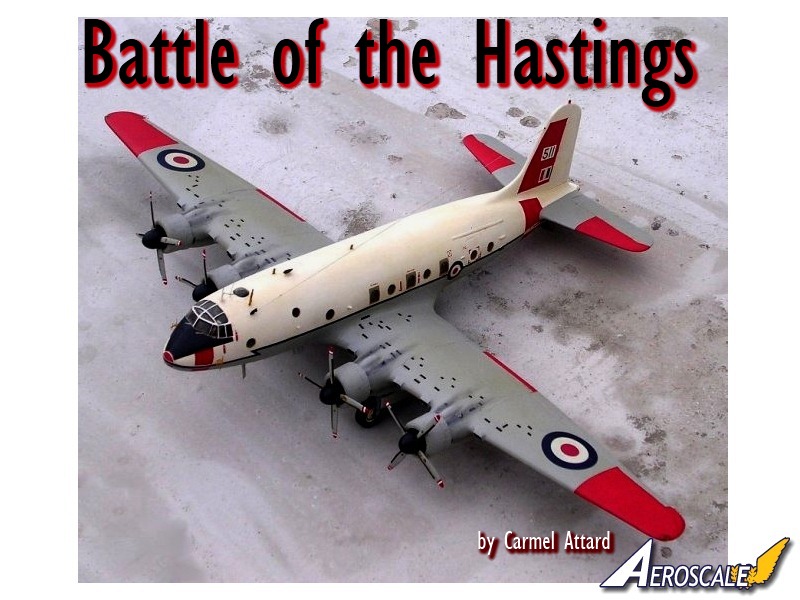
1⁄72Battle of the Hastings
4
Comments
History
Design of the Hastings heavy freighter and troop transport began during World War II and the prototype first flew on May 7, 1946. An initial batch of 100 was built, designated C.Mk1., and these entered service with Transport Command in time to play their part in the Berlin Airlift of 1948-49.The initial production batch was followed by about 50 C.Mk2 aircraft, which had more powerful engines and other changes. With Transport Command, the Hastings put in long and distinguished service until replaced by the Hercules in 1967. Some Hastings remained in service with No.90 (Signals) Group of Strike Command. Others were used for training, including the Hastings T.Mk5, of which eight were produced I 1959, by converting C.Mk1s to have radar bomb-sights and equipment to train V-bomber crews, three at a time. Powered by four 1,640 h.p. Bristol Hercules engines, the T.mk.5 could be recognised by the large radome under its fuselage. The Hastings had a maximum speed of 354 mph. A range of 3,260 miles was achieved at 276 mph.
The kit
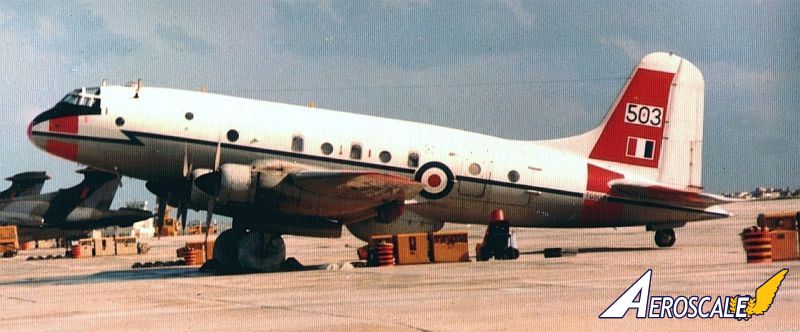
One of the interesting vacform kits I made that brings back many happy memories of a time before the A.W.Argosy and then C-130K took over transport duties with the RAF is the Hastings and Formaplane comes in with their issue of the type some decades ago. With the release of the Hastings I am sure that they have been able to satisfy many modellers as they did with their Bobcat, Nimrod, Caribou, Sea fox, all of which were released long before they appeared in injected styrene form. In the case of the Hastings it is a different matter because as yet there is no such kit in any other form to scale of 1/72. Formaplane produced an interesting and reasonably good kit, which comes in white styrene and includes all the necessary parts to produce a realistic 4-engine scale model of this transport workhorse.The kit must have interested many modellers particularly those in UK or living close to British air bases. Fortunately several Hastings have been preserved which include a C2 at Duxford and another, a T5, at Newark Aviation Museum both of which I had the opportunity to visit and photograph. Hastings also used to make daily stop over at Luqa airfield, Malta, on their way to the Near and Middle Eastern bases with logistic support to RAF military bases.
The kit brings the roundness of fuselage and nose and tail fin contours quite effectively. At time of release the kit cost LM5 (today equivalent to EUR 11.7), with clear mouldings, canopy transparency and a piece of plastic rod to assist building the undercarriage legs. The instruction has an exploded view of how the parts were to fit together; and also a useful 1/72 scale plan. The engine cowling and propeller hubs are accurate but have very thin section that can easily get damaged particularly at the corners where the Vac-drawing process makes them so thin. I do not recall having a decal that one can use to complement the kit. There is a line side view on the box cover and it is only as an indication of the type of aircraft kit inside.
construction
Just like the Nimrod model that I have made before by same kit maker, the Hastings was a large kit to handle and required a clear work table/sanding platform whilst rubbing down and assembling the parts. The canopy was of an accurate shape but not quite as clear as I first thought and unless one moulds a replacement canopy from clear acetate there seemed to be no scope to detail the cockpit more than the rudimentary 2 crew seats, instrument panel, console and control handles. This certainly was proving not to be a kit that one could rush over a weekend but more the type that one could make a little progress at a time during the construction work.The parts are first scribed with a sharp pointed Exacto blade so that each component is then sanded down one at a time and storing the small pieces in a container to avoid getting them lost. A sheet of wet and dry, medium grade was glued to a large board using a double-sided tape. I often prefer to do the sanding down of large components like the fuselage and wing parts in a dry procedure, thus avoiding a messy wet workbench. Whilst sanding down one needs to watch out for uneven sanding due to varying amounts of pressure at different points. Before items like wing parts are glued together I found it necessary to re scribe the surface panelling, hinge lines etc., while moulding pips are removed and their place sanded even. Each wing half had air intakes cut and the undercarriage wells cut open using a pair of scissors. The wing parts were then checked for fit and glued together using liquid cement but using tube cement for thick sections. Tail plane parts were attended to and assembled making sure that the end joining section was flat and straight. The fuselage halves were sanded to bring to correct round section checking with plan and side views as I went along. The window apertures were cut out by drilling a small hole followed by another using a larger diameter twist drill until filed to the final shape using a set of round files. These windows are left open until the final stage where they are filled with Kristal Klear in preference to the clear strip of plastic that was intended to be bonded on the inside of the fuselage in the way of windows. The interior was painted medium grey and attention was then given to the tail wheel well, glazed ventral panel opening under nose, and the cockpit canopy ensuring the right fit in each case. Bulkheads for the fuselage interior were cut, trimmed and fixed in different places inside.
Wing roots recesses in form of slots were cut and plastic card strips reinforced the slot sides. A tail wheel attachment point made from scrap plastic sheet was fixed on the inside. The two fuselage halves had the cockpit arrangement added and short tabs added to the inside of joint to act as guides as the two halves were brought close together and glued. These were held together with masking tape as the cement set. Revell Plasto filler was applied to wherever there is a joining part principally fuselage seam, wing roots etc. The final stage involved fitting the radial engines, propeller sub assemblies, undercarriage components, transparencies tail wheel, antennae, and wheel doors.
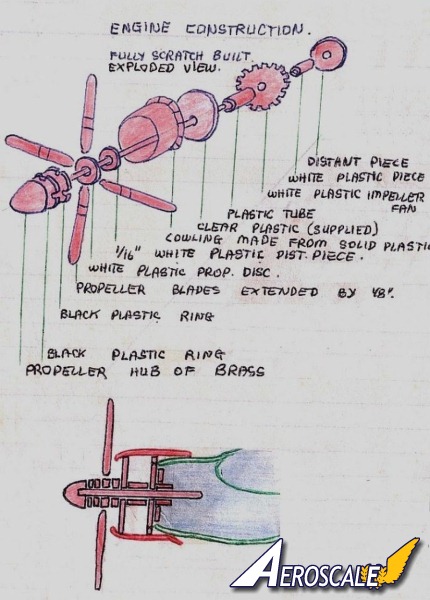
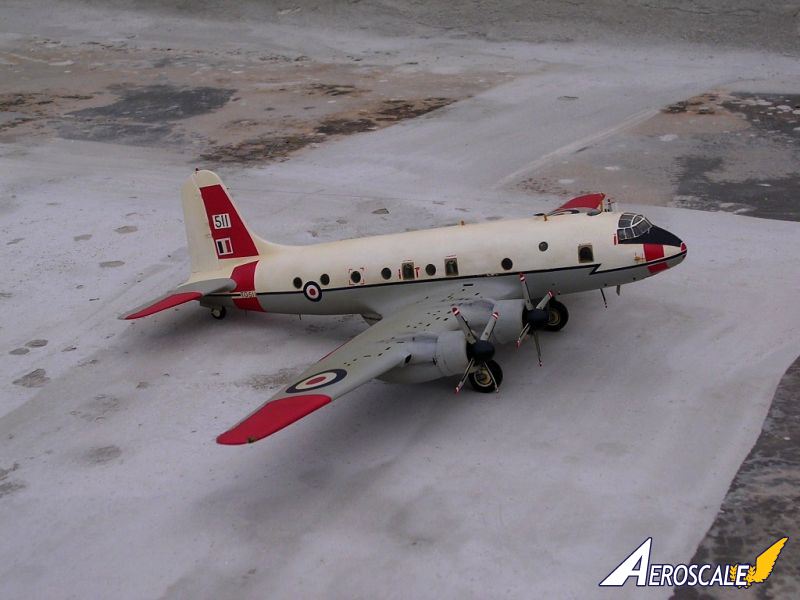
The radial engine cowlings that come with the kit were unsuitable. They are small in diameter, short in length and poorly produced and I replaced with four accurate ones turned from solid Teflon. If one has not this facility one could use four radial cowlings from an Airfix Halifax kit. Spinners are badly attenuated and replaced with solid ones turned from brass. The propeller blades were undersized and were extended by 1/8 inch by inserting a central piece made from plastic card. Since the blades had a concave back, as these were vac form single blades, 16 in number, and were filled with putty. The final stage involved fitting the radial engines, propeller sub assemblies depicted in the drawing and the assembly was repeated for all 4 engines. Undercarriage wheel wells were built out of plastic card and doors were added.
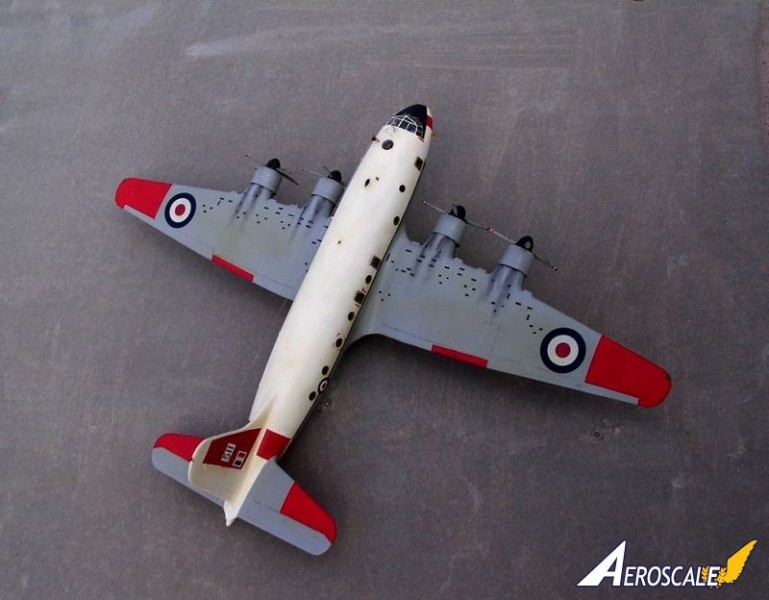
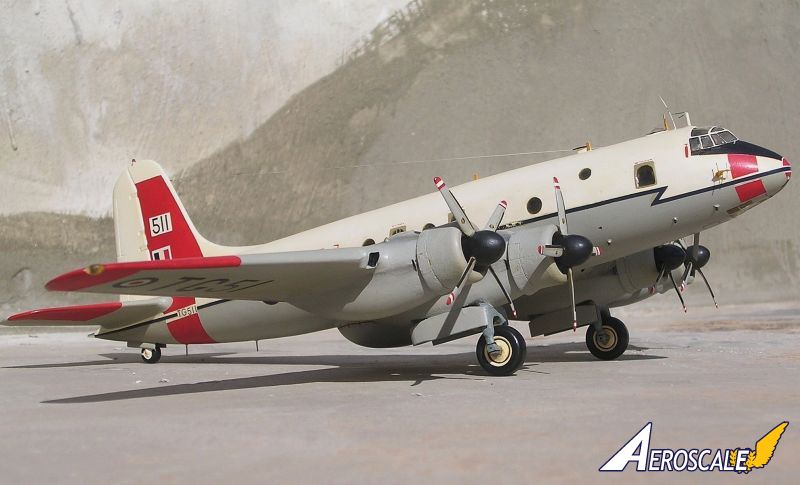
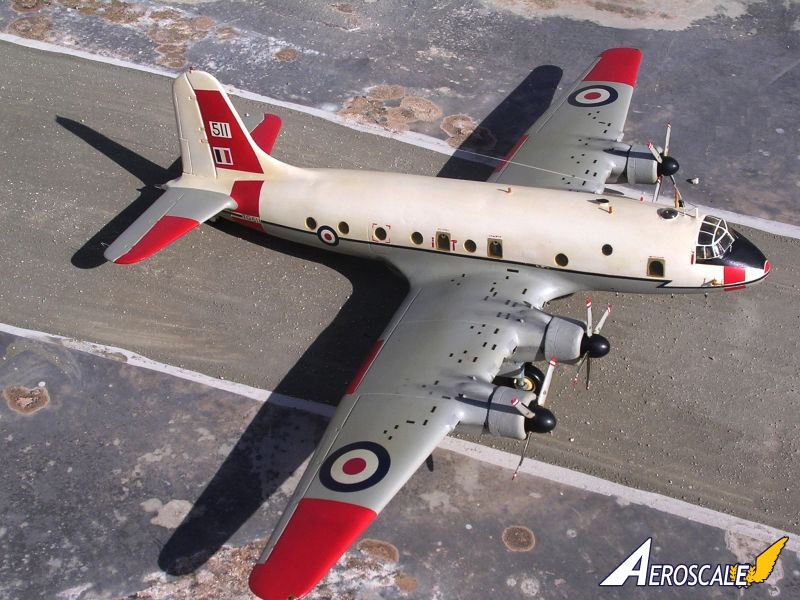
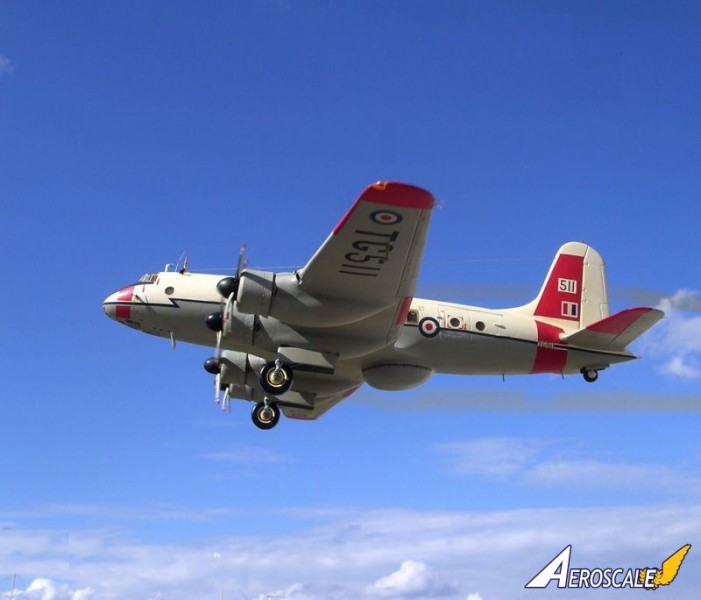
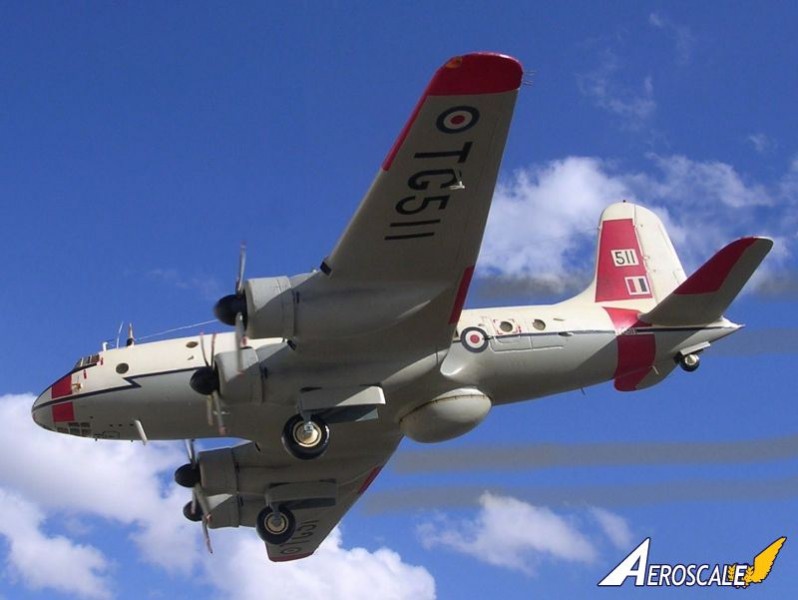
Any areas requiring more filler were attended to with more filler particularly around the canopy and nose Perspex. I also added a belly radome as I converted my Hastings into a T5. The radome was shaped from a solid piece of yellow pine and treated with sanding sealer and sanded smooth. The assembled model was finally given a coat of matte light grey so that any scratches, undercuts, or uneven surface patches will show up and treated again with more filler.
painting and decals
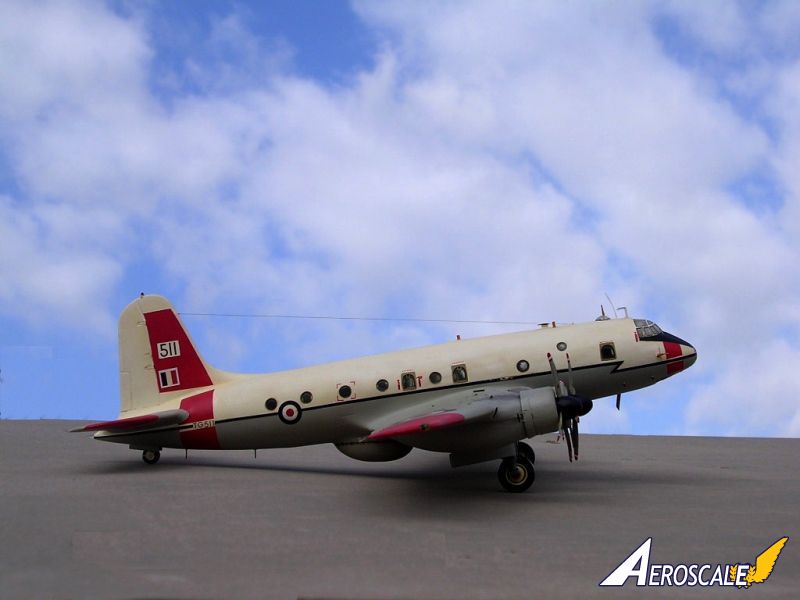
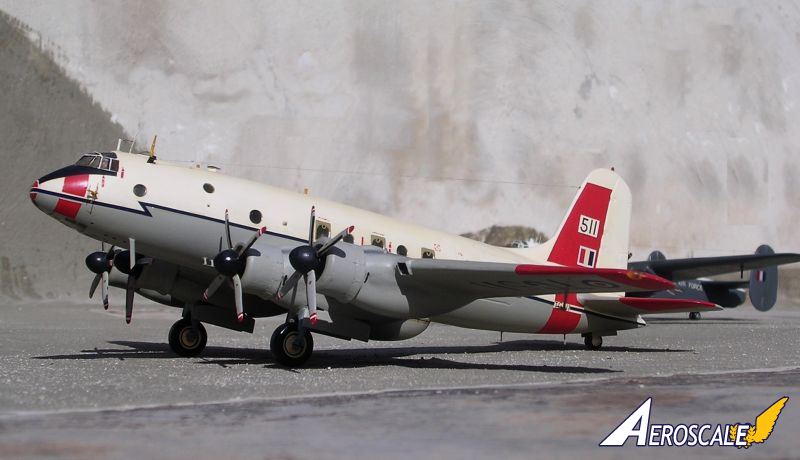
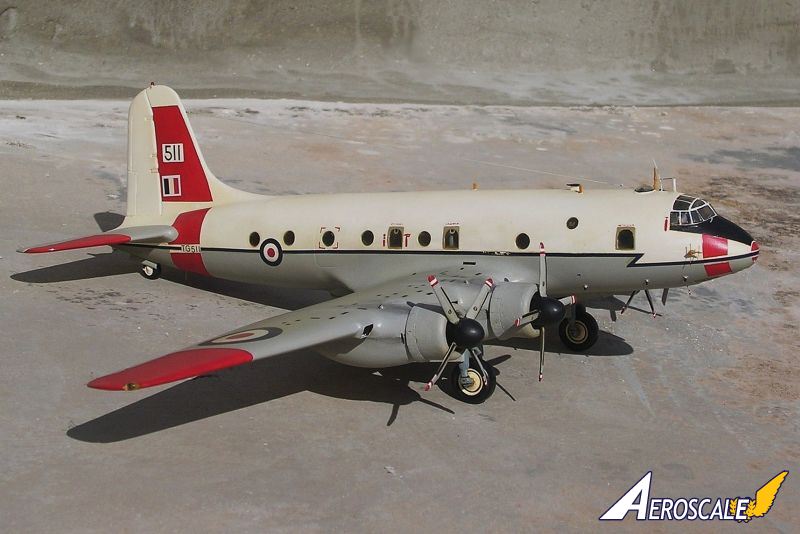
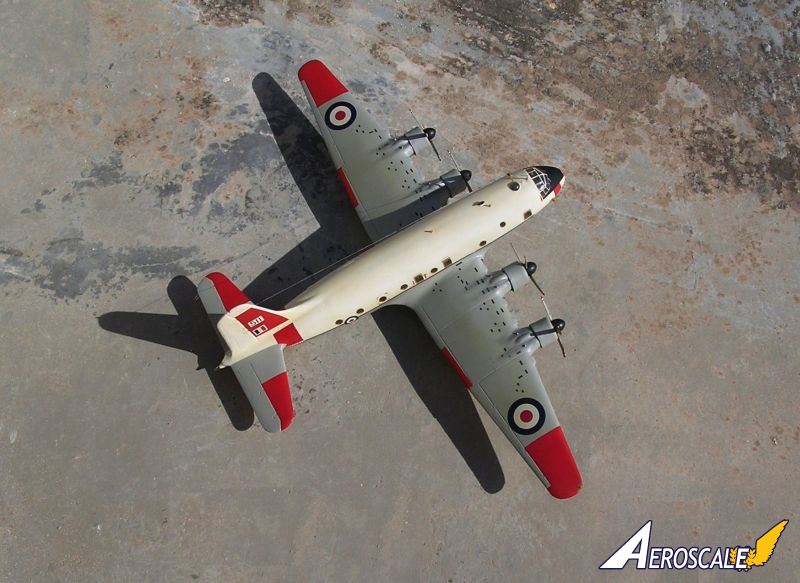
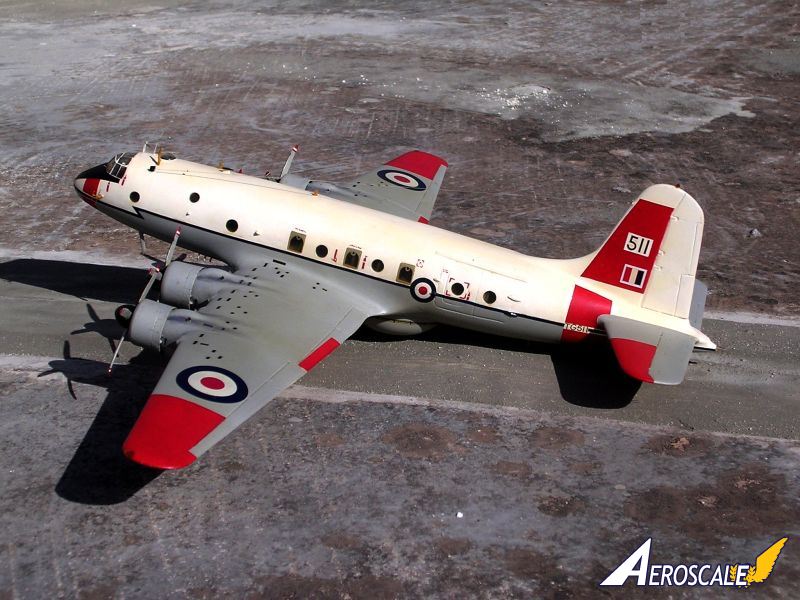
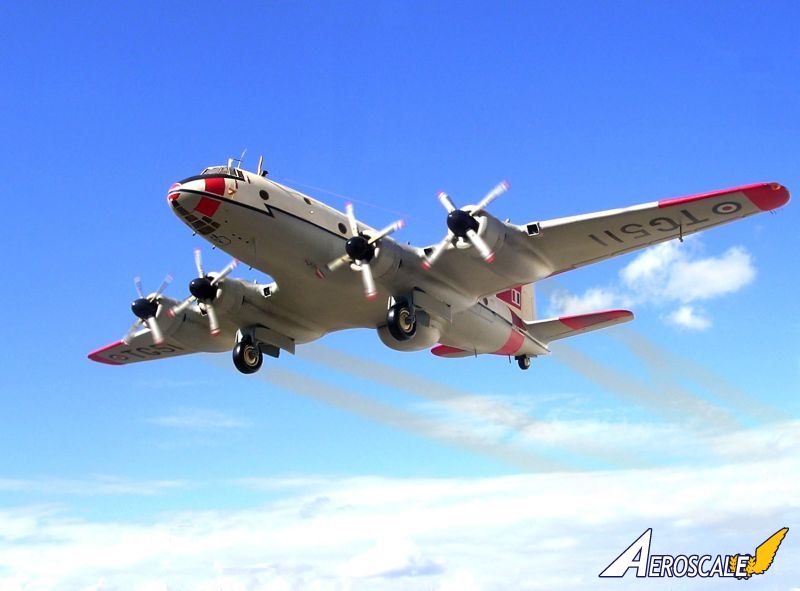
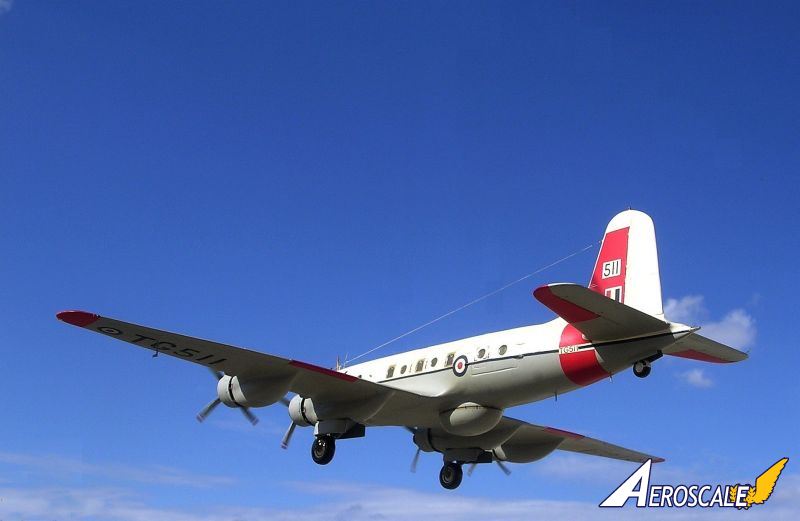
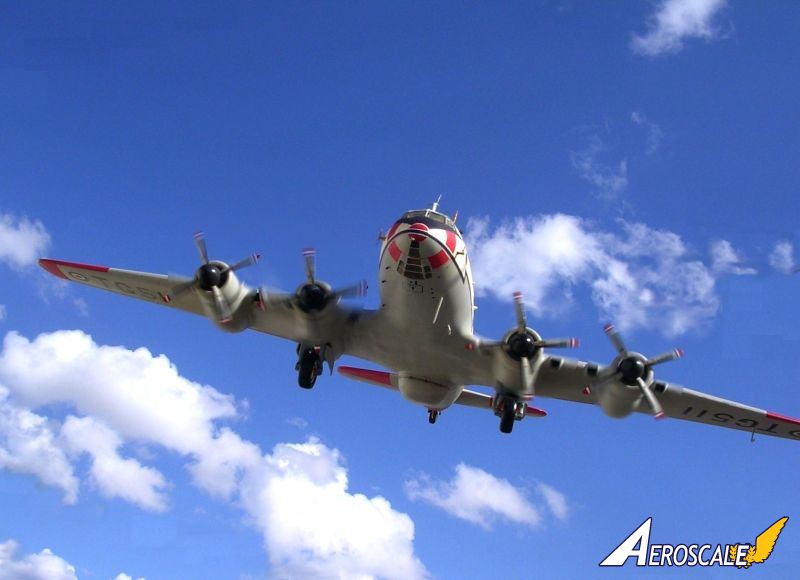
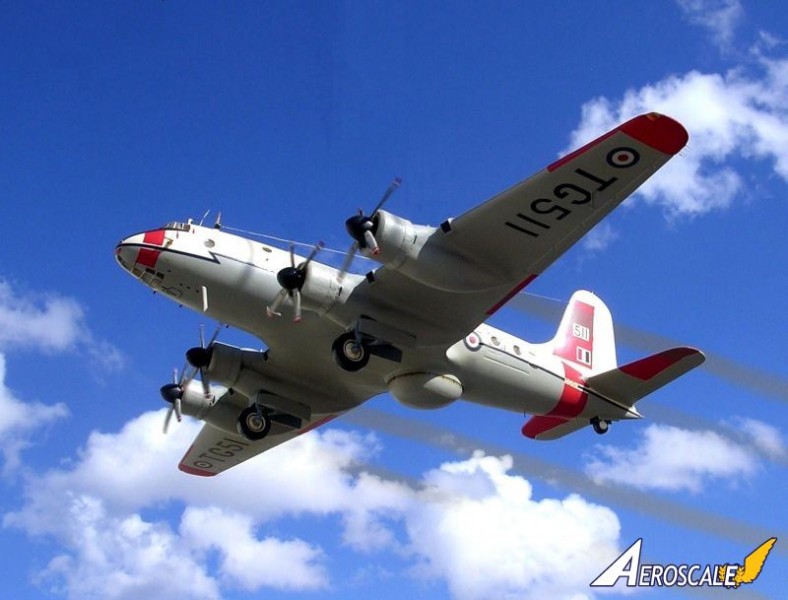
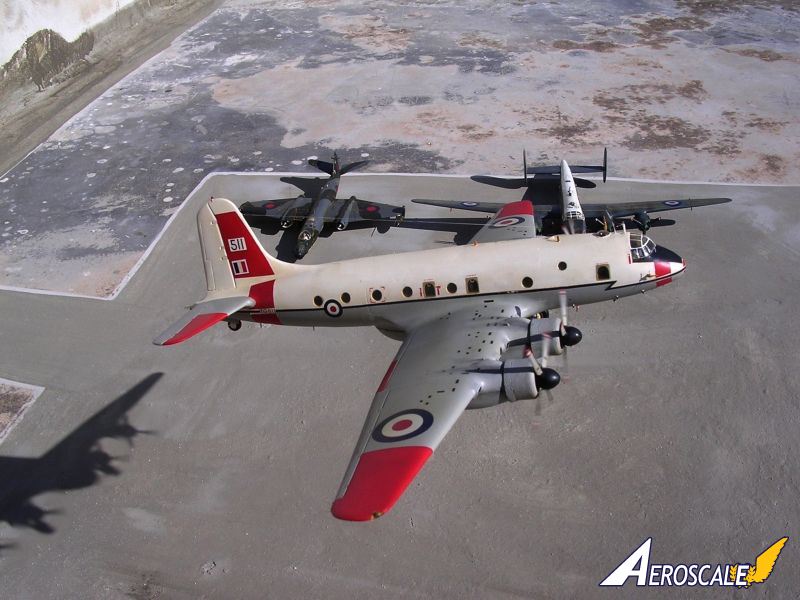
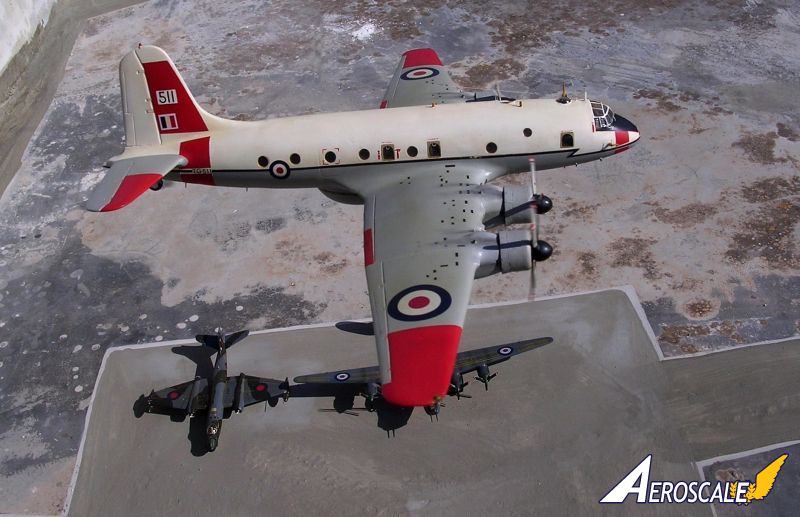
I have made careful study of photos of the Hastings T5 that I took at Luqa airfield. These showed the aircraft having light aircraft grey fuselage and wings with upper fuselage in white. The two colours being separated by a dark blue cheat line running along the length of the fuselage. I have used decal strip from a micro scale post war RAF insignia sheet, while Model decals provided the serial letters and numbers under the wings and side of fuselage aft. Roundels came from a Frog Canberra sheet. Other surface markings on wings and fuselage came from black decal sheet making reference to photos for their correct placements. Humbrol bright red was applied to nose, wing tips and tail fin areas. The kit was finally given an overall coat of semi gloss Micro varnish.conclusion
This was a delightful model of an unusual subject. It was one of the larger vac-form kits I have built. Since the subject required a certain amount of research work and planning prior to building, I reckon this is not a kit for the beginner and definitely needs experience and perseverance. In the end it turns into a pleasing model of an important transport and trainer aircraft that saw service with the Royal Air Force for a good number of years.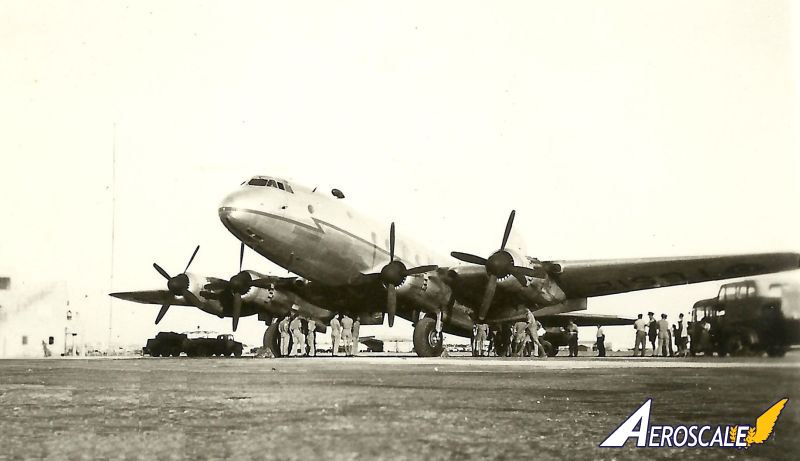
About the Author


Comments

Carmel,
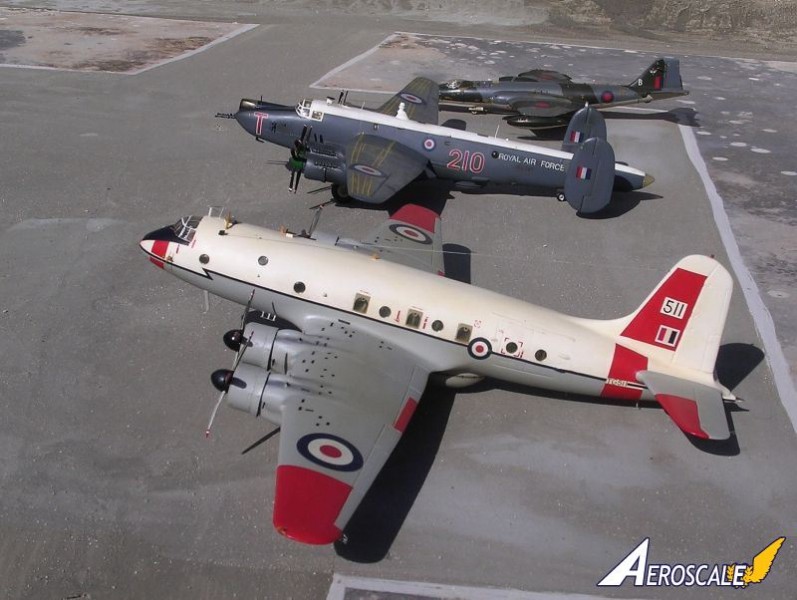
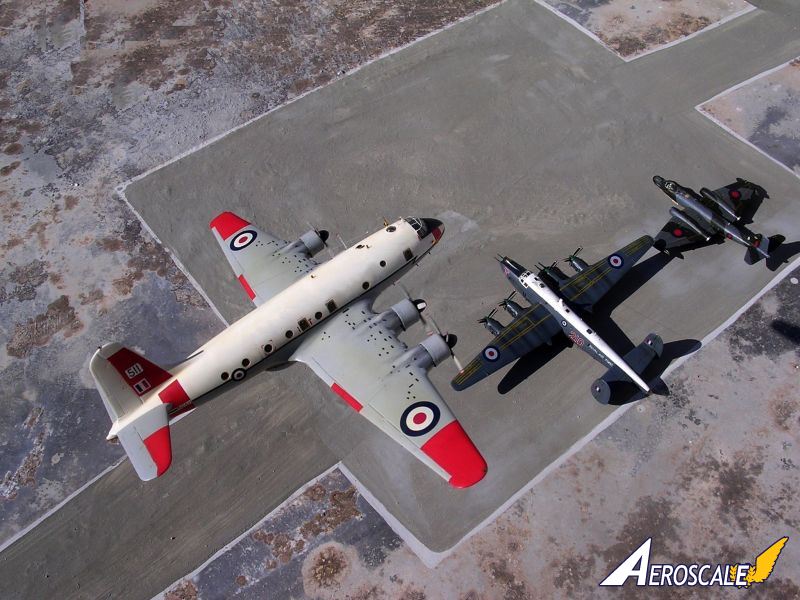
That is an exceptional model! Classy high-visibility colors with that lightning step just behind the cockpit. I have to ask how you did the in-flight shots? Glass? Also, your diorama base and the "fly past" scene - excellent!
DEC 29, 2013 - 02:09 AM
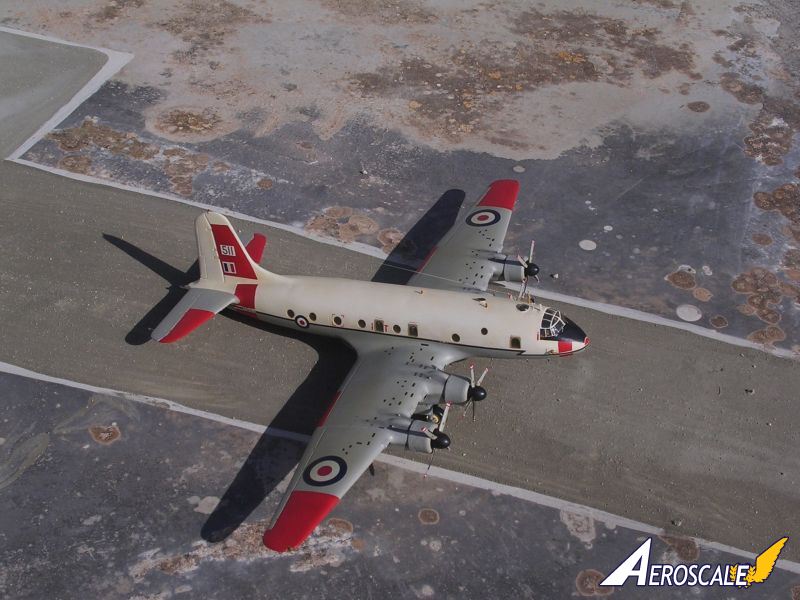
Carmel, just an outstanding build. One would have never guessed it's a vacuum form model. It's that good. Perfect paint and decaling. Your flying scenes are near on perfect. The slightly blurred props, and the ground shadows all add to the total effect.
My only suggestion since the top of the aircraft and associated flying control surfaces are gloss white, is a black pin wash to help with the illusion of separation.
Joel
DEC 29, 2013 - 05:13 AM

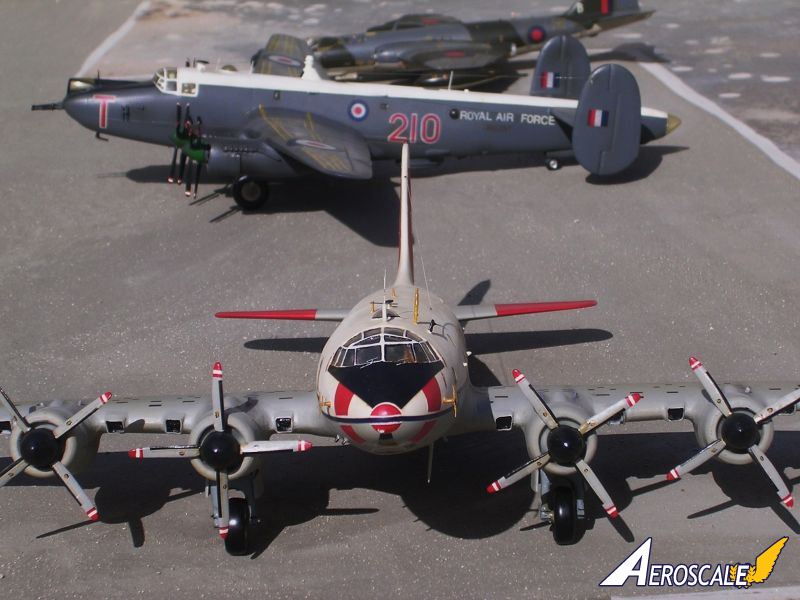
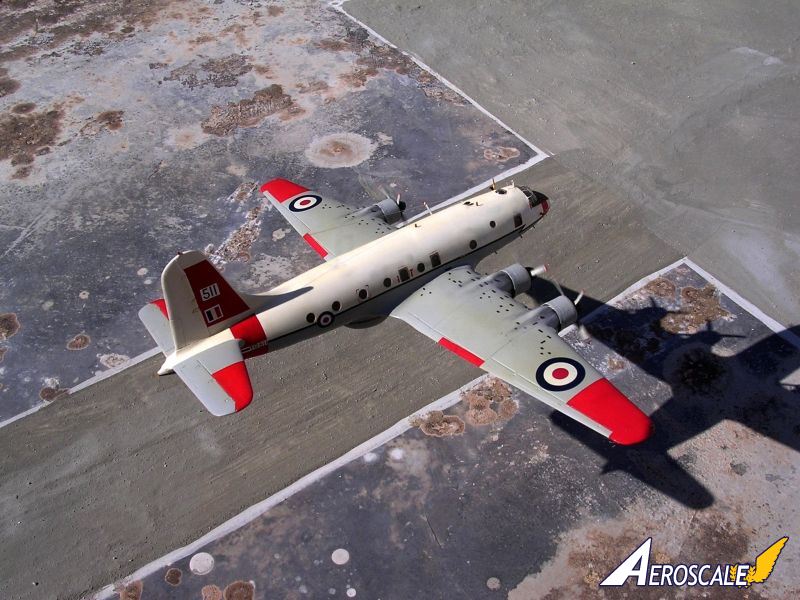
The Hastins T5 was once a very common sight in Malta airspace training V-bomber air crew. In flight shots I tie the model with invisible thread or very thin fishing line and shoot from below or from above. The diorama is no base at all. It is the flat roof of my house at Mosta. I drew runways and dispersal areas and they are there permanently. It can be spotted on Google earth believe it of not...Carmel
JAN 02, 2014 - 07:39 AM

Cracking model, brings back memories of being a young Air Cadet being shown around one of these as well as a Varsity whilst in maintenance.
JAN 08, 2014 - 07:44 AM
Copyright ©2021 by Carmel John Attard. Images also by copyright holder unless otherwise noted. The views and opinions expressed herein are solely the views and opinions of the authors and/or contributors to this Web site and do not necessarily represent the views and/or opinions of AeroScale, KitMaker Network, or Silver Star Enterrpises. Images also by copyright holder unless otherwise noted. Opinions expressed are those of the author(s) and not necessarily those of AeroScale. All rights reserved. Originally published on: 2013-12-28 00:38:10. Unique Reads: 5471

WEB HOSTING BY


Copyright ©2021 AeroScale and Kitmaker Network, a subsidiary of Silver Star Enterprises
All Rights Reserved. Please read our Conditions of Use and Privacy Policy.
All Rights Reserved. Please read our Conditions of Use and Privacy Policy.