

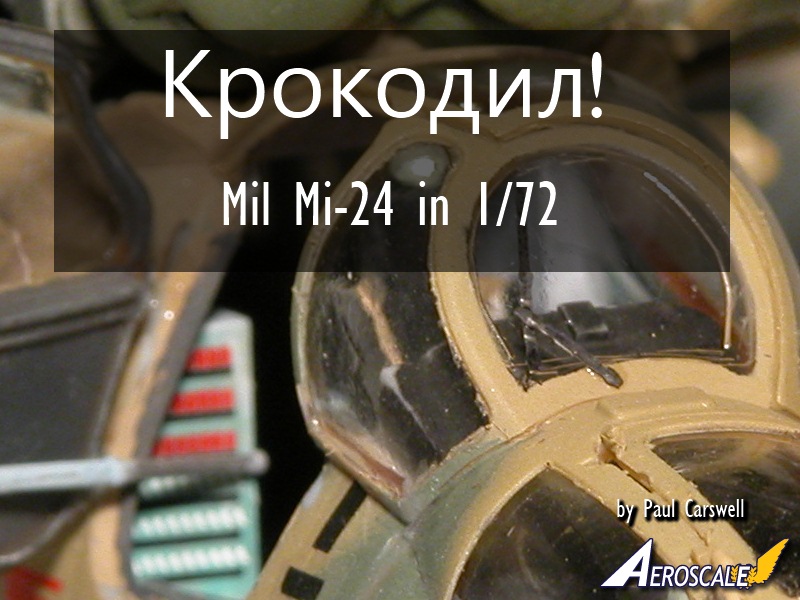
1⁄72Крокодил! Mi-24
3
Comments
history
The Mil Mi-24 (Миль Ми-24, NATO reporting name: Hind) is a large helicopter gunship and attack helicopter and low-capacity troop transport with room for eight passengers. It is produced by Mil Moscow Helicopter Plant and operated since 1972 by the Soviet Air Force, its successors, and more than 30 other nations.In NATO circles, the export versions, Mi-25 and Mi-35, are denoted with a letter suffix as "Hind D" and "Hind E" respectively. Soviet pilots called the Mi-24 the "flying tank", or летающий танк (letayushchiy tank). More common unofficial nicknames were "Crocodile" (Крокодил or Krokodil) due to the helicopter's camouflage scheme[2] and "Drinking Glass" (Стакан or Stakan) because of the flat glass plates which surround the cockpit of the Mi-24.
History adapted from Wikipedia.
building the model
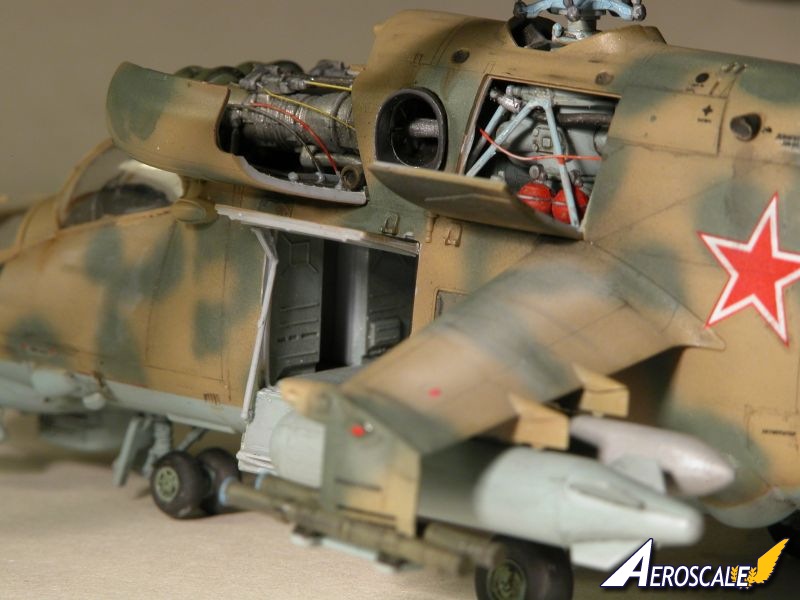
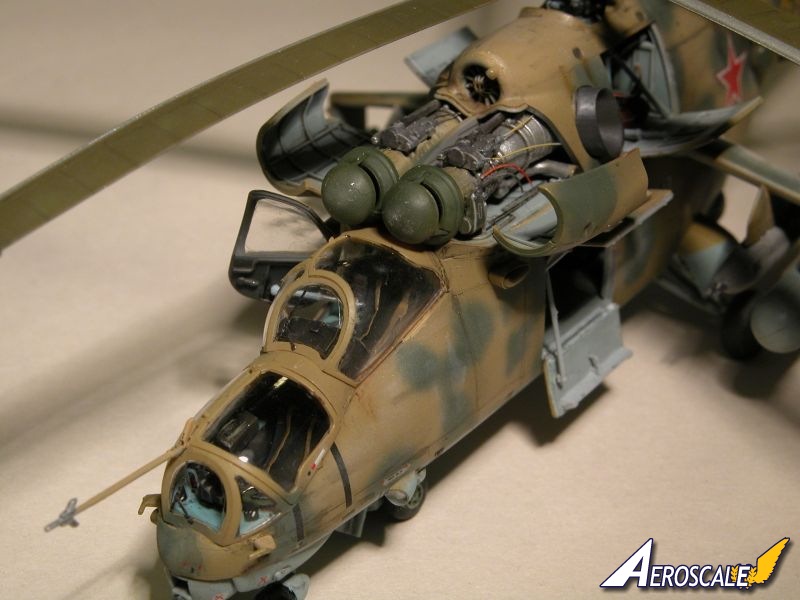
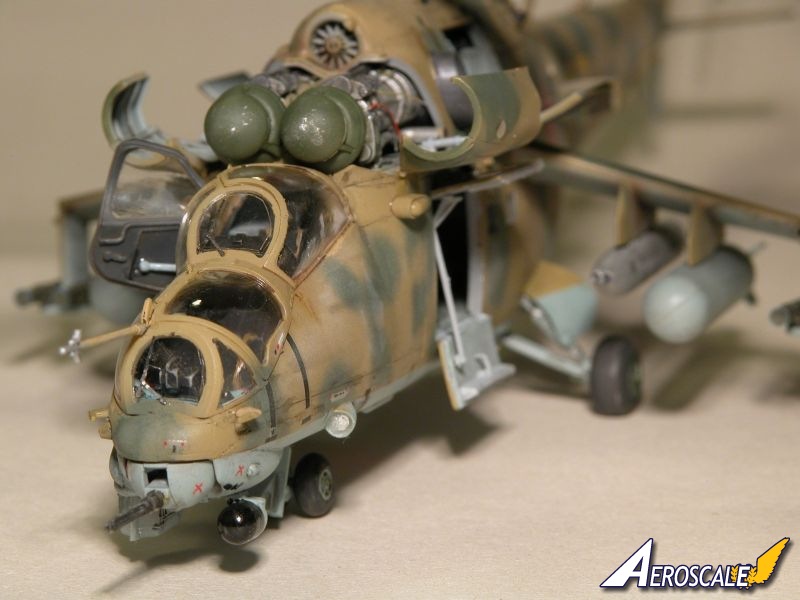
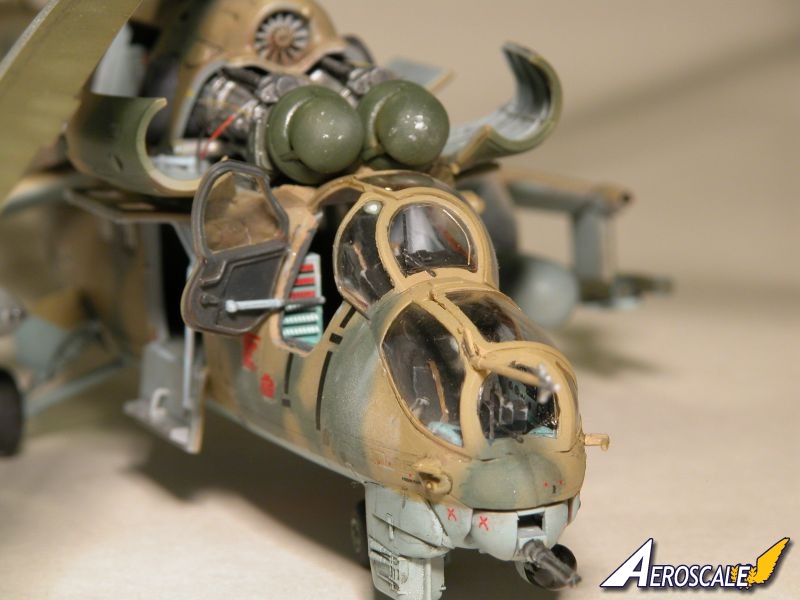
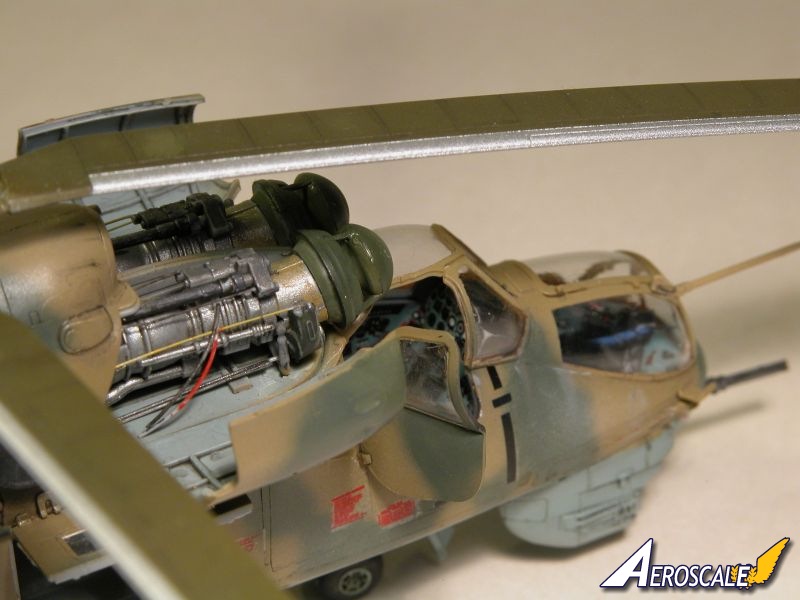
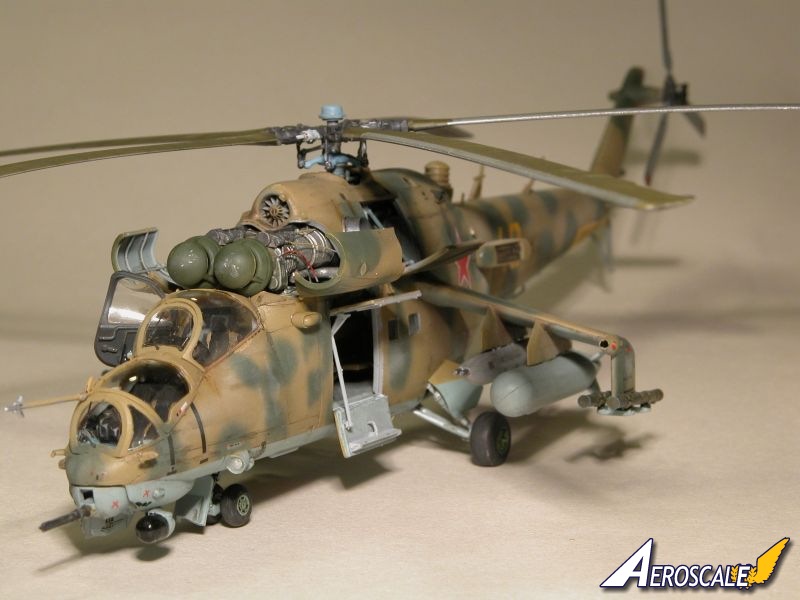
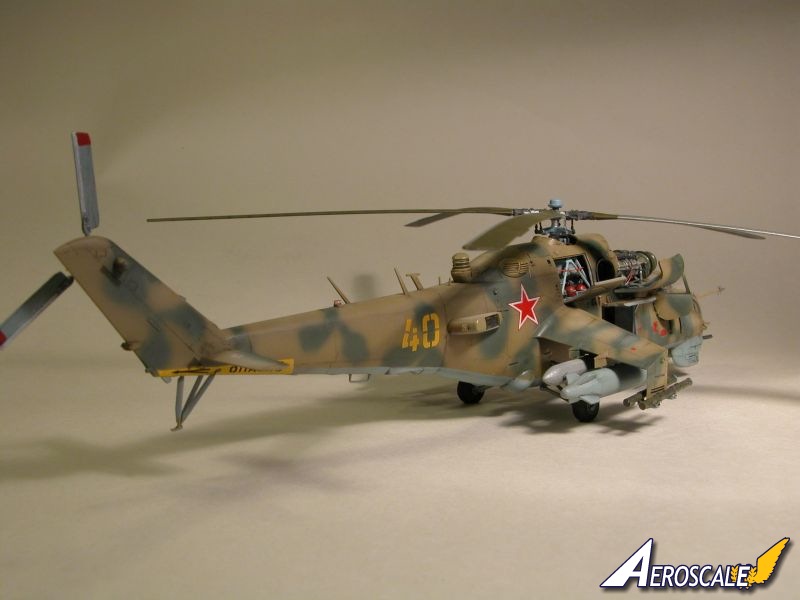
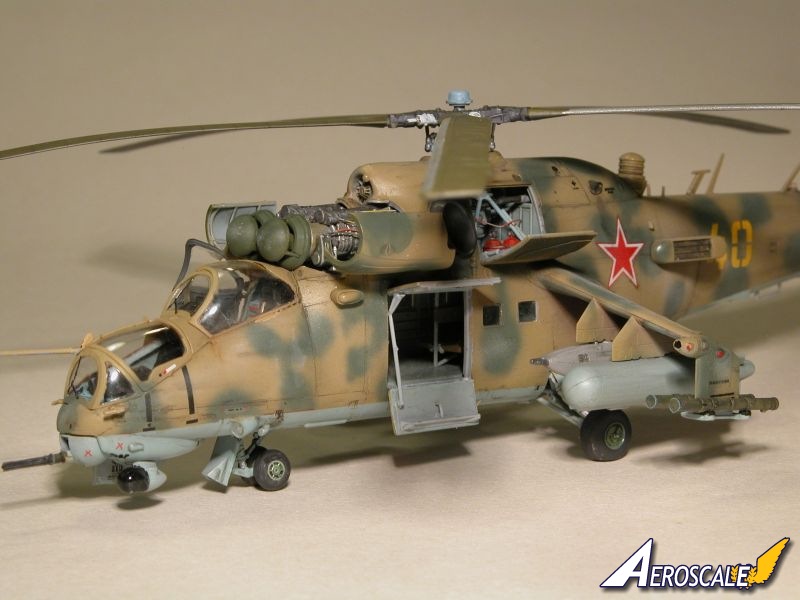
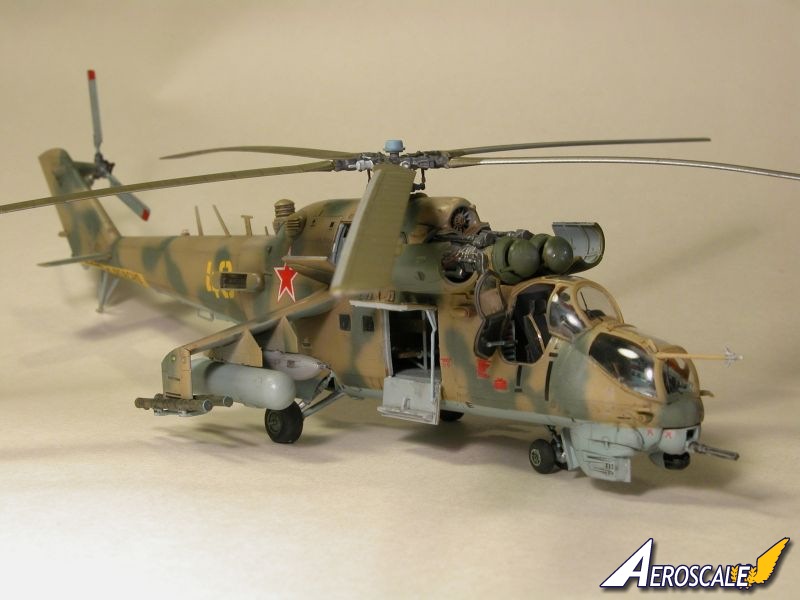
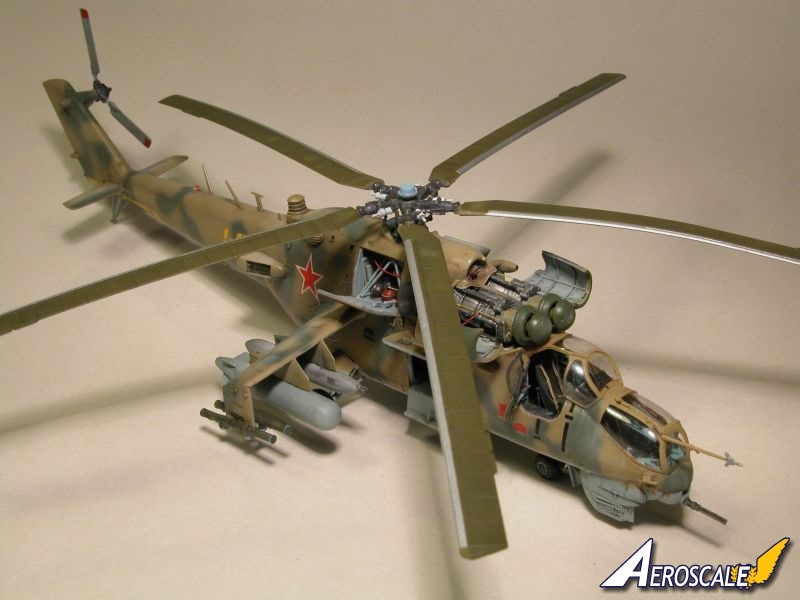
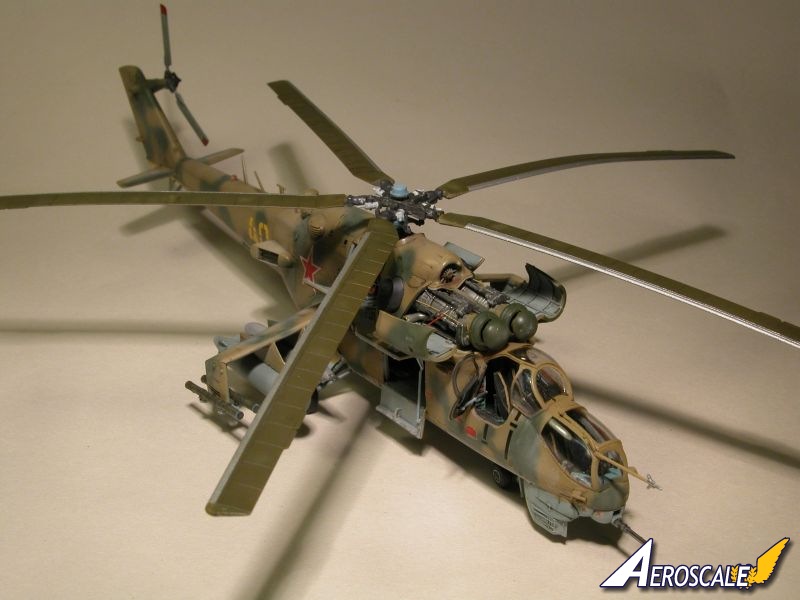
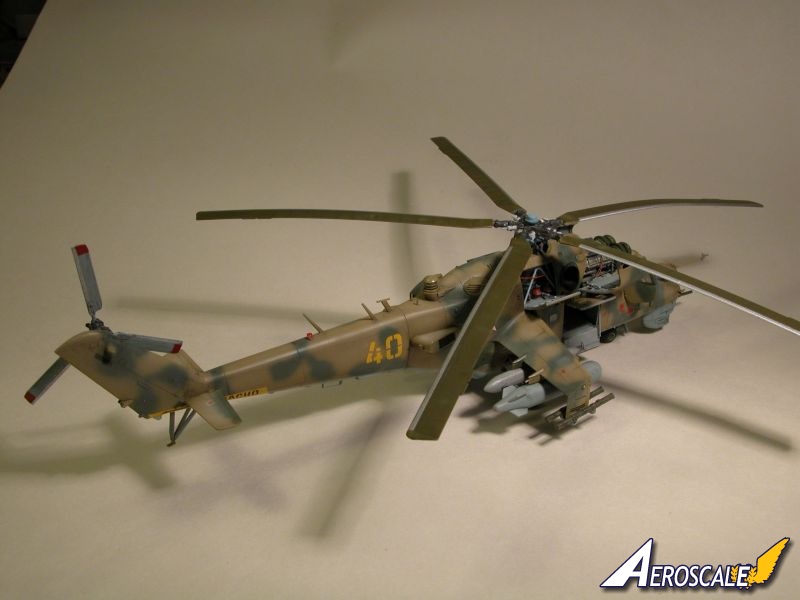
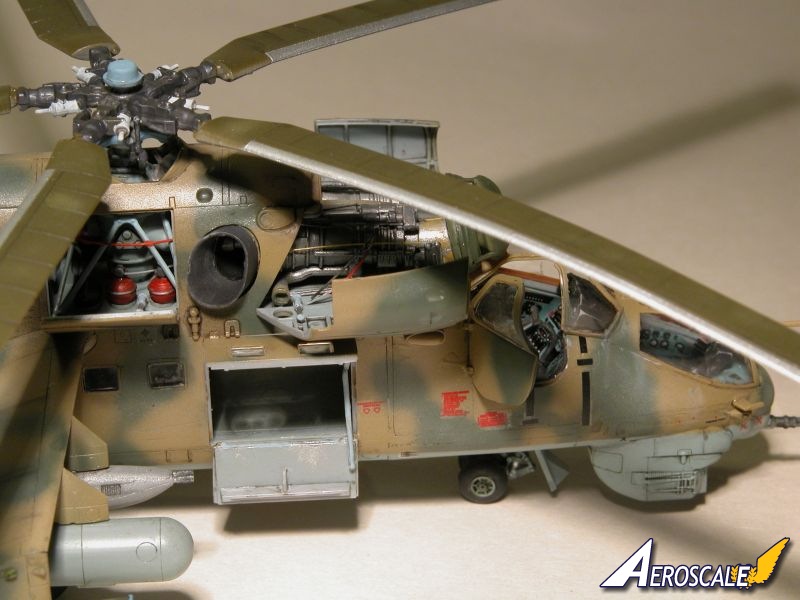
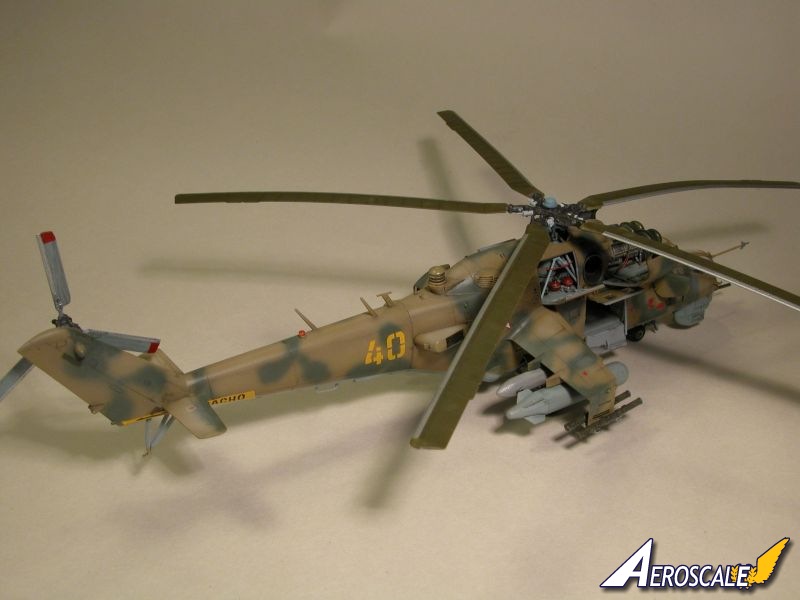
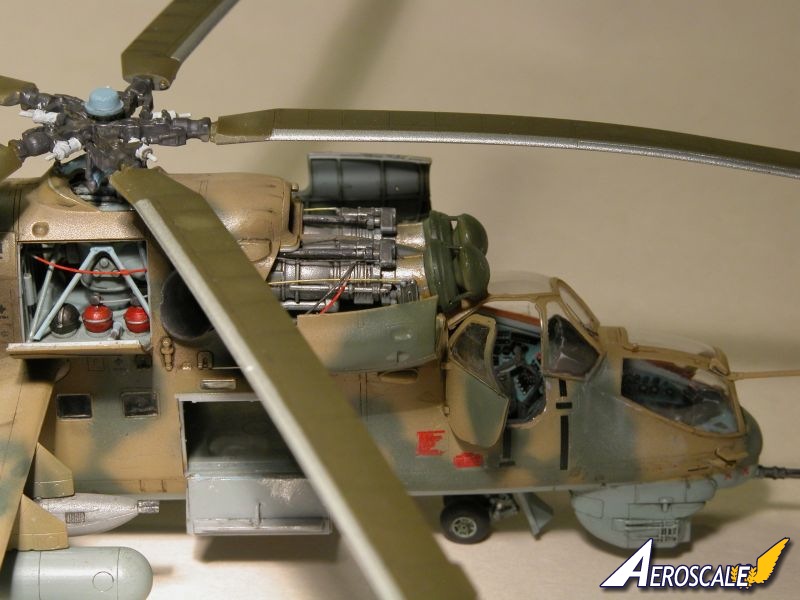
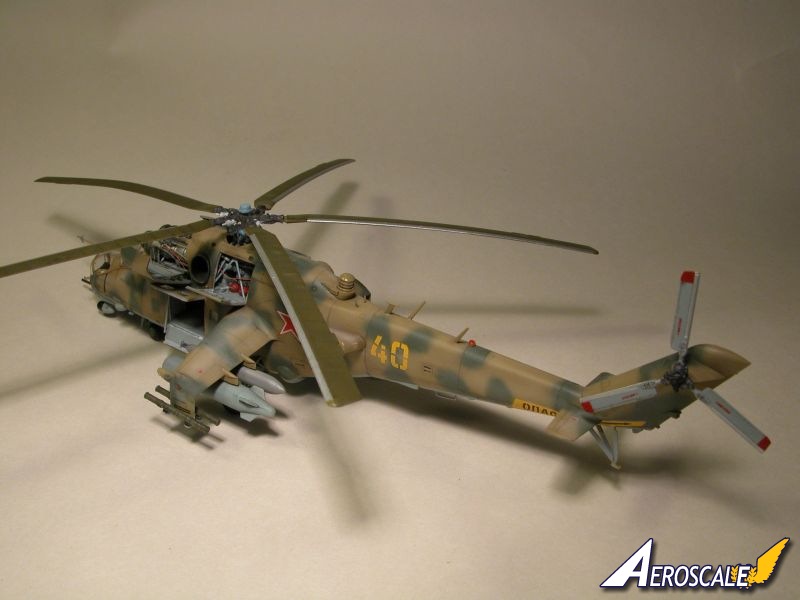
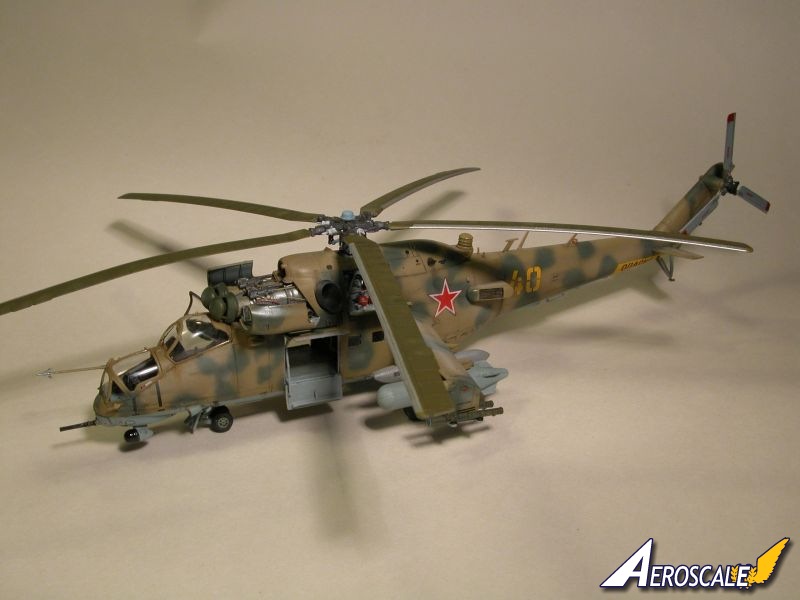
The model is "Revell Mil Mi-24 V Hind E" box no 04839 and was built straight out of the box with some very minor additions, seat belts from strips of foil off tops of wine bottles, some extra plumbing around the engines using stretched sprue and windshield wipers using some old spare photo etch. I am certainly no expert on these machines, though now know a bit more than when it was started, but that's half the fun. As usual the internet supplied lots of photos and info however I did find a link to this Czech firm 4Plus. They have made available for download at no cost an excellent PDF called " Mi 24 d,v,du" which has bilingual text and is stuffed with photos and diagrams. This was invaluable and I made sure to send them a note of thanks for its use. There are probably some inaccuracies on my model but I only wanted a good looking helicopter. As for the kit itself, as noted below it comes together well in general but there are a couple of issues particularly getting the fuselage halves together where the plastic around the rotor shaft exit is too thick and required a fair bit of shaving and sanding to allow the bulkhead between engines and gearbox to fit. The fit of the rear landing gear cover panel (part B7) was also troublesome and needed a bit of patching with filler. I used Tamiya acrylics to paint (XF-59 desert yellow and XF-67 Nato green, haha!) and Humbrol enamels for details. Artists oils were used for some light washes and panel lines. I am an enthusiastic amateur and in no way can be considered a "master modeler" and build just for fun, but do enjoy taking pictures of them and posting stuff and it is a great buzz to get some interest from other people.I Picked this kit up at modelzone's closing down sale. I usually build armour but occasionally try a plane for a bit of variety and this one looked a mean machine.
The kit is a rebox using Zvezda moulds and is a monster of a kit with hundreds of parts including engines and gearbox, the detail for a small scale kit is amazing and really only let down a little by the cockpit which has decals for the instrument panels though there is an etch upgrade available which if I were to build it again would probably use. Assembly starts with the internals and the fit is good with no issues though it is important to make sure alignment is true and the fit is tight for these parts, as getting the two sides of the fuselage along with the two nose sides and nose floor to come together as one is no easy task and took me a lot of tweaking with files, scalpel and sandpaper particularly around the top where the rotor shaft emerges. I got it all together and left it overnight with clamps and lots of tape and then struggled with the horrible stage of trying to make the joins disappear.
I bought this kit as a quick fun build before starting something else and it turned into a bit of an epic and definitely not one to be thrown together in a evening, with a bit of TLC though it turned out well.
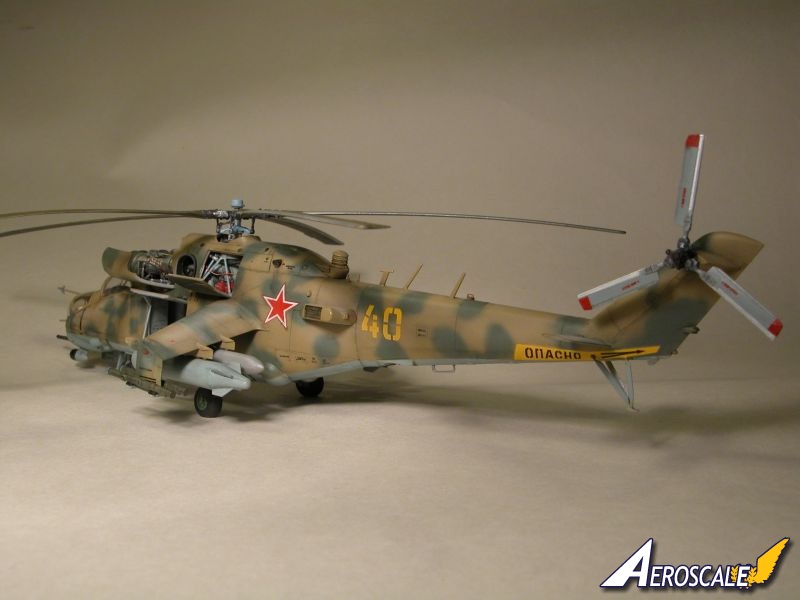
I'm still learning the airbrush and did the painting free hand rather than doing the rolled up bluetack thing. The camo edges are perhaps a bit soft but i can live with that. I had a bit of trouble painting the MG Pods; couldn't get a nice bare aluminium without them looking like they'd been sprinkled with glitter (not a good look) ended up mixing a little silver into light grey, still not 100 percent but they'll need to do. I chose the marking option for an aircraft from the No. 337 Independent Combat Helicopter Regiment at the time the regiment was based in Mahlwinkel, former GDR,1993
I can honestly say I have found this kit one of the most challenging I have ever done, not for any inherent faults with the model rather by pushing my creaky skills to their absolute limit. Revell suggest that this model is suitable for ages 13 to adult, I think it should read suitable for ages 13 to 50! (the old eyes can't take much more of this)
Now that this is done I'm going to skulk back to my tanks, all these fiddly wee bits let alone canopy masking! going for a lie down.......


About the Author


FROM: SCOTLAND, UNITED KINGDOM
Have made models off and on over years now family nearly adult have more time and have recently done a few more, tamiya tiger 1,Tamiya desertised challenger (after taking youngest to see one at careers show "what a effing size !" was his remark....result! Now doing AFV club T34/85. Models have real...
Comments
Paul, extremely well done effort, on a difficult kit. And you're a Armor guy to boot.
From what I can see, your free hand camo scheme looks well done. The only addition that you might consider is a little more weathering.
Joel
OCT 26, 2013 - 03:55 AM

Hiya joel, glad you like it. Yeah I was cautious with the weathering, being a tanky at heart I didn't want to overdo it with loads of rust n mud.
Paul
OCT 26, 2013 - 08:35 AM

That windscreen wiper - excellent! Paul, a really impressive job with a fierce helo. Well done!
NOV 06, 2013 - 05:20 PM
Copyright ©2021 by Paul Carswell. Images also by copyright holder unless otherwise noted. The views and opinions expressed herein are solely the views and opinions of the authors and/or contributors to this Web site and do not necessarily represent the views and/or opinions of AeroScale, KitMaker Network, or Silver Star Enterrpises. Images also by copyright holder unless otherwise noted. Opinions expressed are those of the author(s) and not necessarily those of AeroScale. All rights reserved. Originally published on: 2013-10-26 00:52:52. Unique Reads: 8067

WEB HOSTING BY


Copyright ©2021 AeroScale and Kitmaker Network, a subsidiary of Silver Star Enterprises
All Rights Reserved. Please read our Conditions of Use and Privacy Policy.
All Rights Reserved. Please read our Conditions of Use and Privacy Policy.