

He-219 UHU
1
Comment
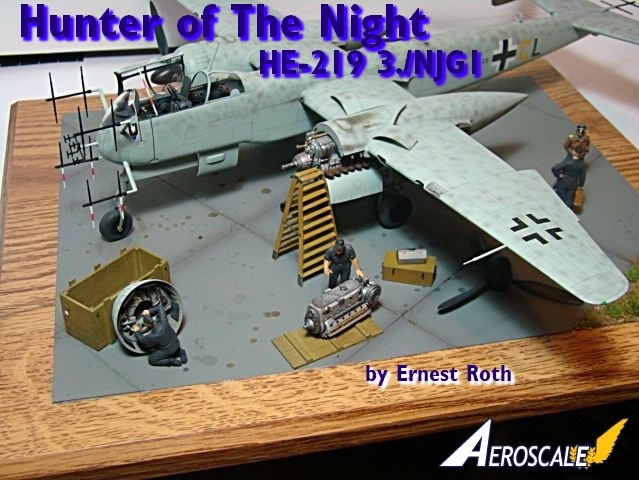
I have always wanted to build Tamiya's excellent kit of the He219 "Uhu", but waited until I found the right subject. Last year, while researching various night engagements over Germany during WWII, I came across the story I was looking for. I wanted my model to depict one of the lesser known aces of the Nachtjagd, and found one in Heinz Strüning who had an interesting career.
History
Heinz Strüning was born on 13 January 1912 at Neviges in the Rheinland; joining the Luftwaffe in 1935 as an NCO pilot. Shortly before the outbreak of WWII, Strüning was posted to 5./ZG 26. Strüning began training as a night fighter pilot on 1 July 1940. On completion of his training he was assigned to 1./NJG 2. He flew 66 intruder missions over England with some success. He recorded his first night victory on the night of 23/24 November 1941 when he shot down a RAF Wellington twin-engine bomber. By the end of 1941 he had nine victories to his credit, one of the highest scoring intruder pilots. On 1 November 1941, Strüning transferred to 7./NJG 2. He recorded 15 victories additional, by mid September 1942 flying with this unit. He was also promoted to the rank of Leutnant durning this time period. On 1 October 1942, 7./NJG 2 was redesignated 4./NJG 2. Leutnant Strüning was awarded the Knights Cross on 29 October 1942 for 24 victories. While 4./NJG 2 was based in Sicily, Strüning flew several missions until May 1943. In May 1943, Strüning was transferred to 2./NJG 1. While assigned to this unit Strüning shot down 11 further aircraft bringing his score to 35. On 1 July 1943, Strüning was transferred to 3./NJG 1, where he was appointed Staffelkapitän on 15 August. On the night of 30/31 August 1943, Strüning claimed three British bombers while flying the new He 219 twin-engine night fighter. From 17 April 1944, Strüning was to fly the He 219 exclusively and obtained his last 14 victories flying the type, including a Mosquito on the night 18/19 July, burning out his port engine in the process. Hauptmann Strüning was awarded the Eichenlaub (Nr 528) for 56 victories on 20 July 1944. On 1 September, Strüning took command of 9./NJG 1. On the night of 24/25 December 1944, Strüning was shot down by a RAF intruder in Bf 110 G-4 (W.Nr. 740 162) G9+CT. He baled out but struck the tail unit of the stricken fighter and fell to his death. His body was not found until two months later. Heinz Strüning was credited with 56 victories in 280 missions, of which 250 missions were flown at night. All his victories were recorded at night.The build
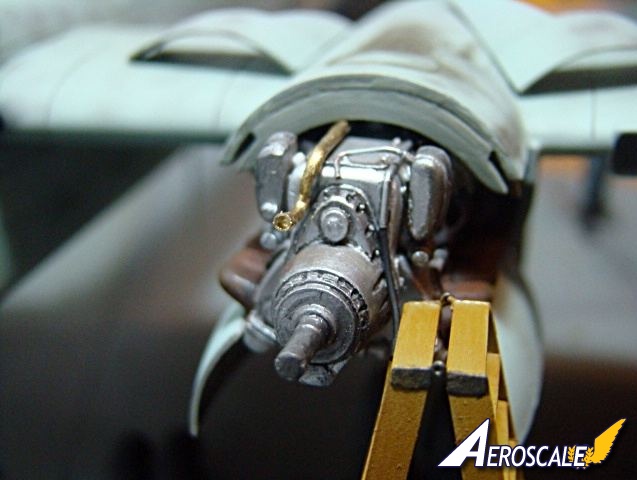
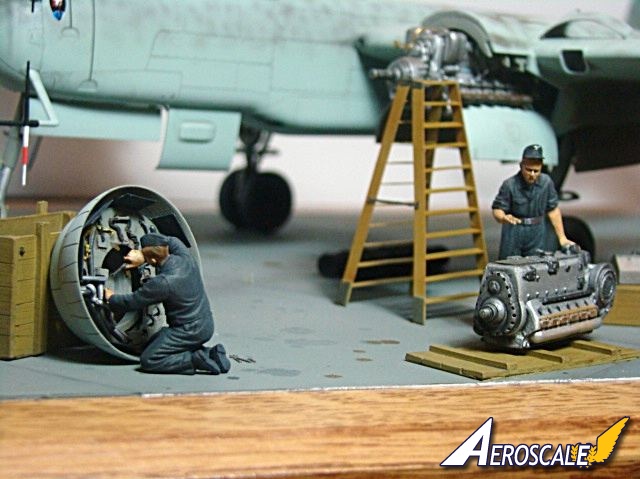
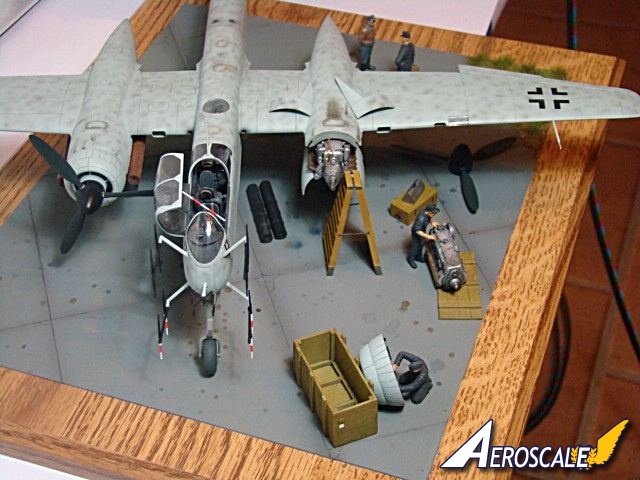
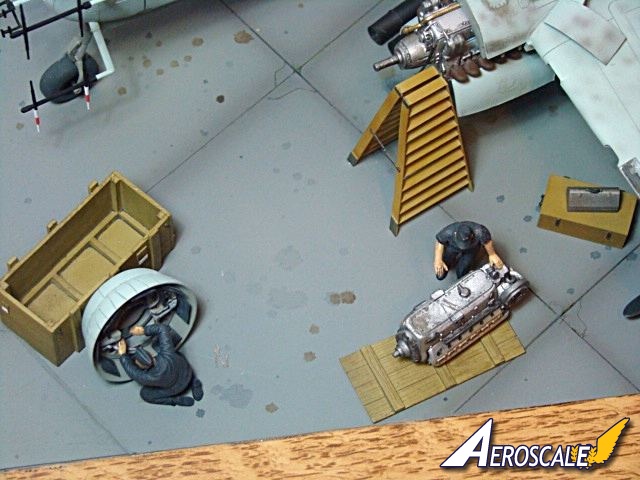
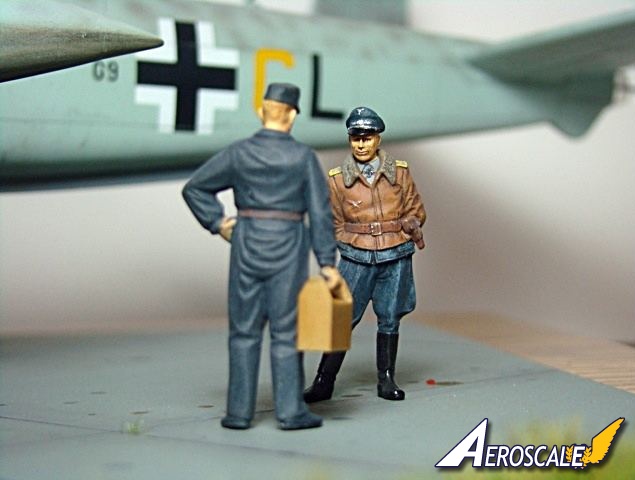
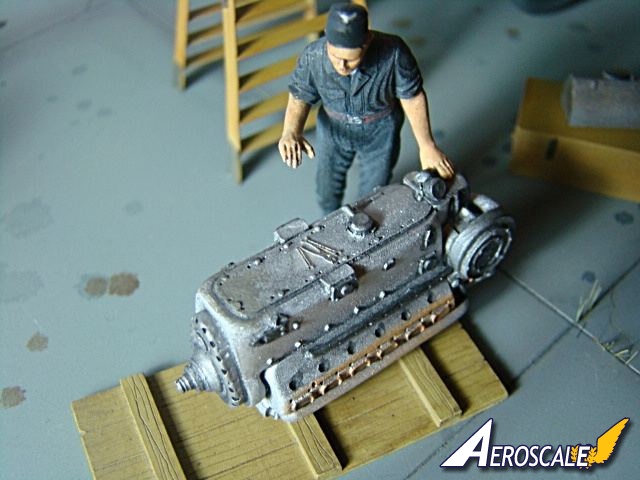
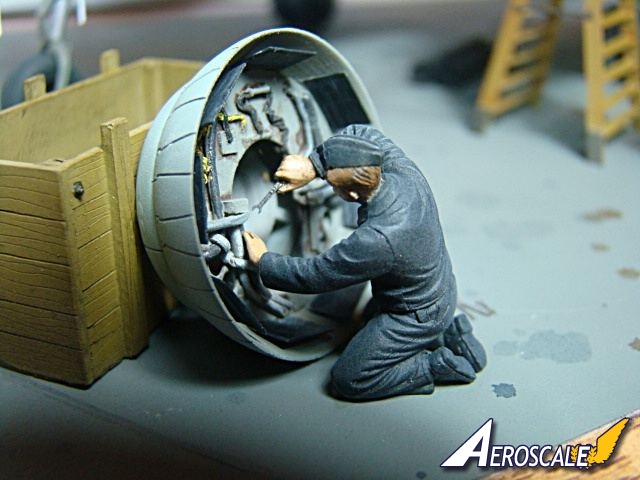
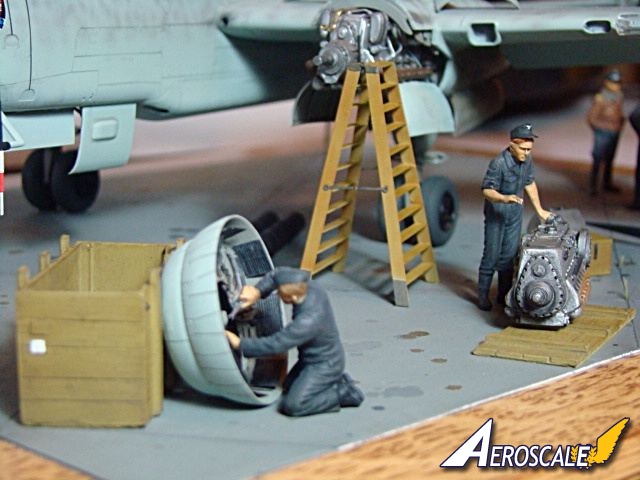
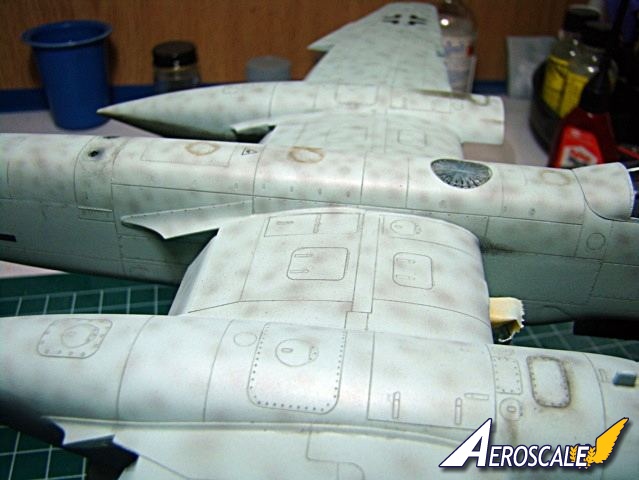
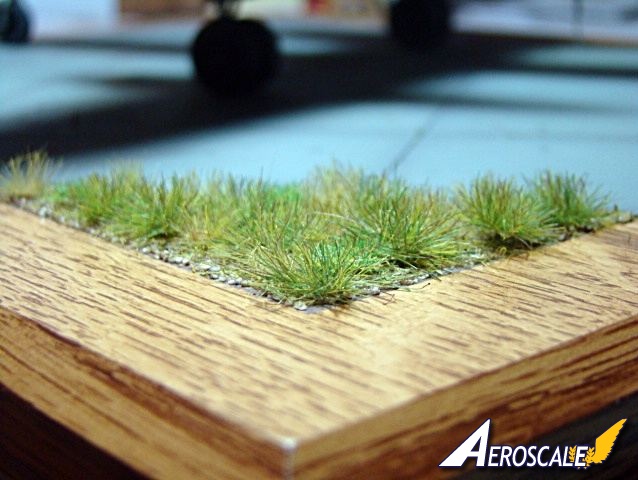
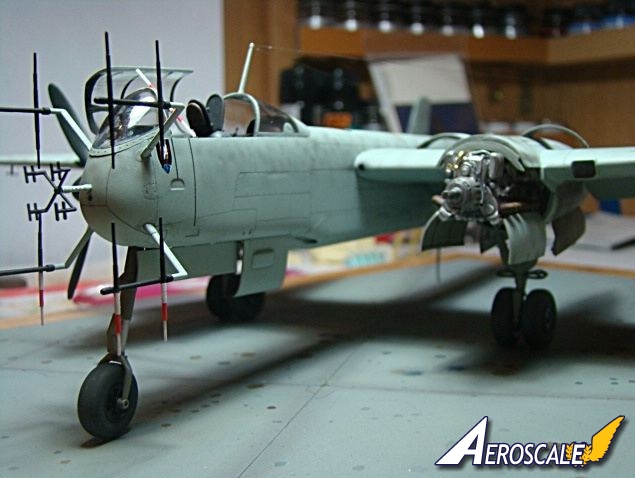
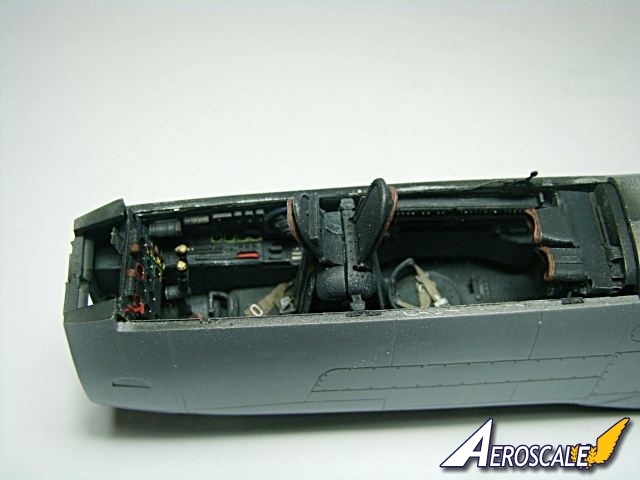
I wanted to depict the He219 that Strüning flew the night of 18/19 August 1944, "G9+CL", scoring his 56th - and last, victory. I thought it would make an interesting diorama showing the aircraft under repair the next day. Fortunately CMK makes a DB605 engine which I purchased. I also decided to buy Aires' excellent aftermarket cockpit and Verlinden's air field accessories. With the material collected I got to work. The build began with the Aires cockpit which went together without any trouble as did fitting it into the fuselage. I cut off and used part of the weight that came with the original kit and added some BB's to the nose to keep the model from being a tail sitter. The cockpit was sprayed Tamiya NATO Black, lightened 25% with white to simulate RLM66. It got a future overcoat and then got a wash of brunt umber afterwhich I sprayed a matt coat and drybrushed to bring out details and give it a worn look. The remainder of the assembly was straight forward and uneventful with the exception of cutting off the port engine nacelle in preperation for installing the CMK engine. As with most Tamiya models, the fit was excellent. I masked the canopy with Eduard masks and airbrushed my RLM66 mix and installed it, leaving the main canopy free so I could pose it open later. Photos of the actual aircraft show it with a base coat of RLM76 with a soft edged blotched pattern of RLM75. It may then have recieved a light overspray of RLM76 to further blend the camo pattern. I decided to airbrush with Life Color RLM76 overall followed by RLM75, very diluted and sprayed at 5 psi from very close range to simulate the camo pattern. Finally, I dusted a fine coat of RLM76 to fade the RLM75. After the paint had cured for two days I sprayed three coats of future and let it sit overnight. Decaling was up next, which I did using micromark's Set and Sol solutions, the decals behaved very well and I had no problems getting them to set correctly. The model then recieved a wash of burnt umber artist oils and was sealed with a top coat future. Finally, I airbrushed Vallejo matt coat which further toned down and blended everthing. With the exception of final weathering, the model was now finished and set aside so I could work on the engine and diorama base and accessories. The CMK engine went together easily. Using reference photos from the National Aerospace Museum I detailed the engine with various gauges of copper and brass wire. It was then painted with Metalizer paints and weathered. I also painted the Verlinden engine at this time. It was painted and weathered to look like the damaged engine that was being replaced. Next, it was time to install the CMK engine, and it was here that the only tricky part of the build occured. The CMK parts supplied to fit the engine to the nacelle did not fit well and I had to fashion some parts out of evergreen plastic. Overall they turned out ok, but could have been better. With the engine installed I moved to final weathering, which I did with a combination of Tamiya weathering pastels and artist oils. The weathering simulates various powder, exhaust, fuel and oil stains. I heavily weathered the port engine area to simulate the staining due to the failure of the port engine. The diorama base is an awards document frame. The hardstand is evergreen plastic roughed up a bit with sandpaper, and scribed to simulate concrete slabs. I scribed a few cracks to further simulate wear and tear. I airbrushed the plastic a grey tone and weathered it using a combination of washes and pastels to give it a used look. Finally, I tapped a fine tipped paint brush which had been dipped into various colored washes on my finger splattering the paint to simulate oil and fuel stains. The ground work in the corner was made with railroad modelling plaster, airbrushed brown, washed with black and drybrushed with lighter browns. The grass is standard aftermarket grass. The figures represent mechanics busily at work finishing the engine replacement. The two figures behind the wing show Strüning in conversation with his chief mechanic. Overall this was a fun build that turned out well, proving that the moon and stars do sometimes align for me.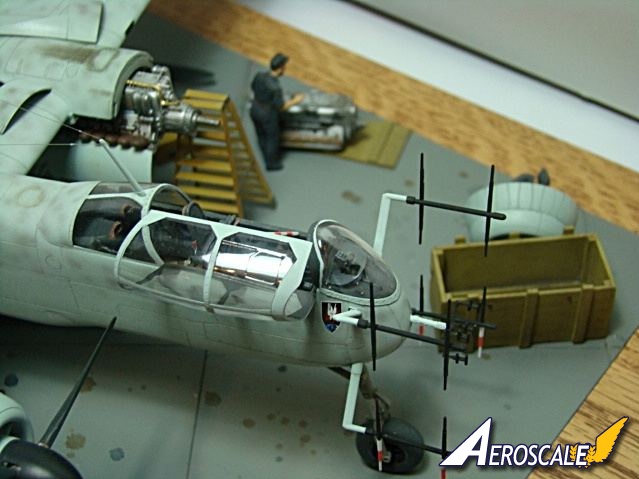


About the Author


Comments

Hi Ernst.
First up a very nicely done topical diorama.
But I have a couple of suggestions..
1. There is no way an engine like the DB605 would be sitting on its rocker covers on the ground. The weight of the engine would destroy the covers.
2. The moveable doors round the outside of the front of the cowling are only thin sheet metal with actuators and hinges. Again, they would be badly damaged if they had the weight of the cowl put on them.
I think you would find that a crane would have been used to remove the damaged engine and a crane used to remove the engine from its special stand in its shipping container.
Again, I am being very picky here but just trying to illustrate that you could make the diorama even better with a few extra items. Still a great diorama.
JAN 06, 2012 - 08:39 PM
Copyright ©2021 by Ernest Roth. Images also by copyright holder unless otherwise noted. The views and opinions expressed herein are solely the views and opinions of the authors and/or contributors to this Web site and do not necessarily represent the views and/or opinions of AeroScale, KitMaker Network, or Silver Star Enterrpises. Images also by copyright holder unless otherwise noted. Opinions expressed are those of the author(s) and not necessarily those of AeroScale. All rights reserved. Originally published on: 2012-01-06 00:00:00. Unique Reads: 9815

WEB HOSTING BY


Copyright ©2021 AeroScale and Kitmaker Network, a subsidiary of Silver Star Enterprises
All Rights Reserved. Please read our Conditions of Use and Privacy Policy.
All Rights Reserved. Please read our Conditions of Use and Privacy Policy.