

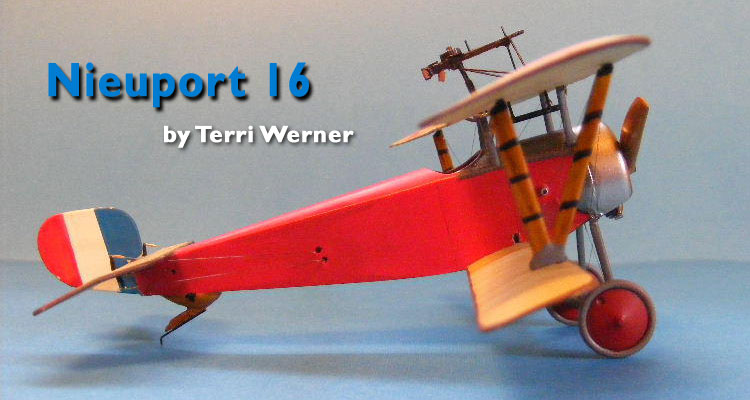
1⁄48Nieuport 16
12
Comments
Hi Guy's. This is the latest to come off the bench and into it's rightful place, The display cabinet!
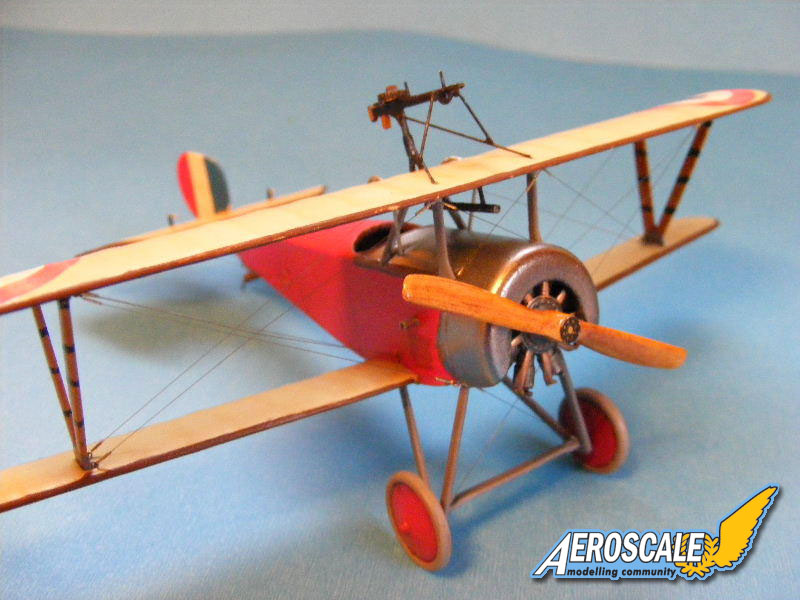
This is Eduard's Weekend Edition of the Nieuport 16. I originally built the kit about two years ago, but do to Blue ( The Cat ) the plane went for a test fight ending in a bad crash and me, the master -chasing the bugger down. In to the bone yard it went. Not one of my best builds. It just needed a face lift and some new parts. The subject is by far for being accurate and I'm not sure on the Squadron markings or who the pilot was. I came across a pic this model done in a red fuselage and figured it would look good sitting next to the red Pfalz. However, it was a great subject to experiment more with Alclads and weathering.
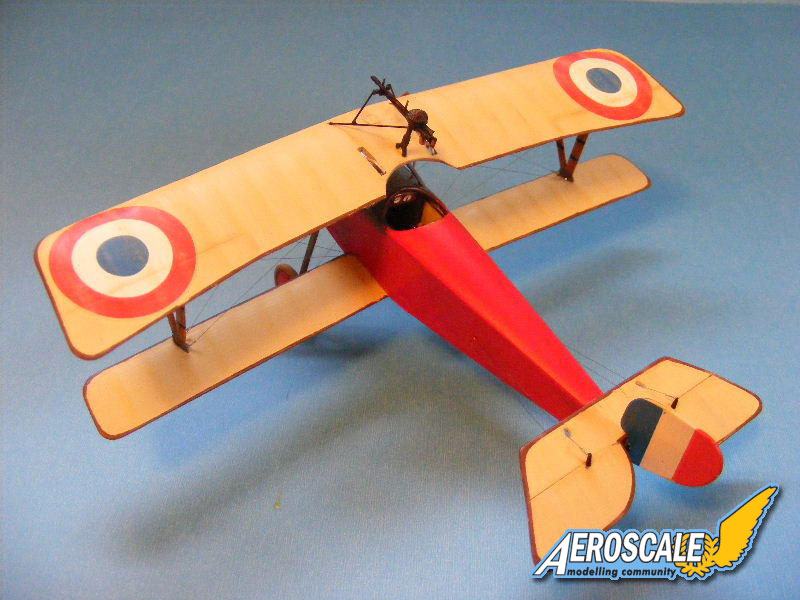
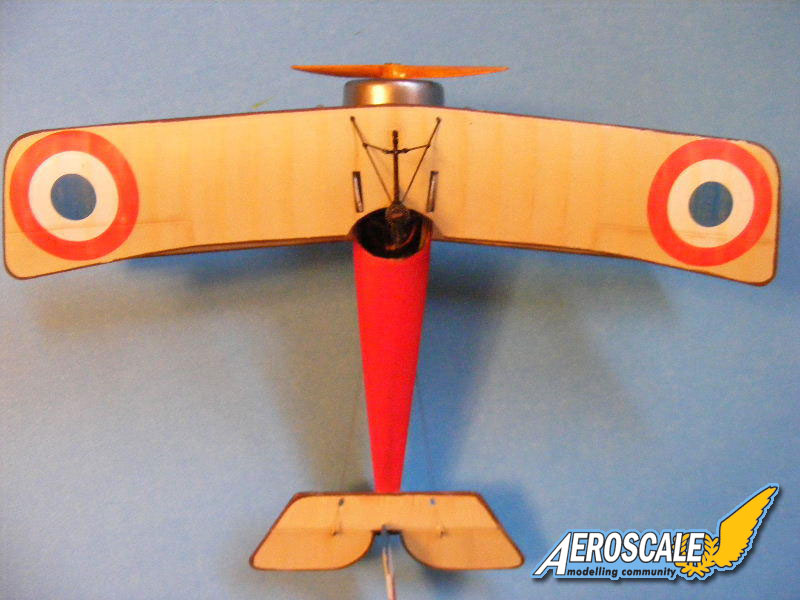
Starting with the wings these reserved a coat of Polly Scale French Beige. Once dried a few coats of future went on by brush. Dried for 24 hours then masked off for the red to be sprayed next. For this Tamiya red was used. When dried future was applied over top. The sides of the fuselage I masked off leaving the metal panels exposed. Tamiya black was sprayed on top and left to dry for a day. Alclad II Polished Alum was then airbrushed over top. I love how fast these dry and take tape very well! No lifting of the paint.
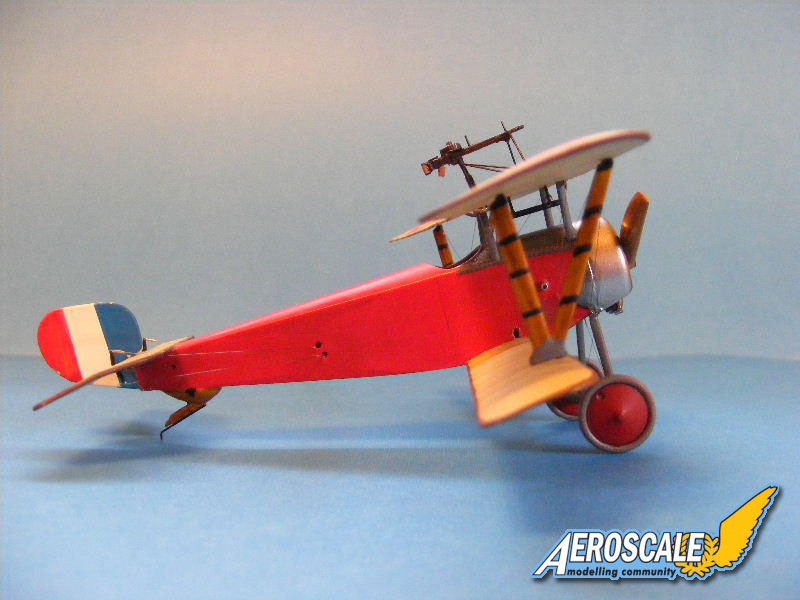
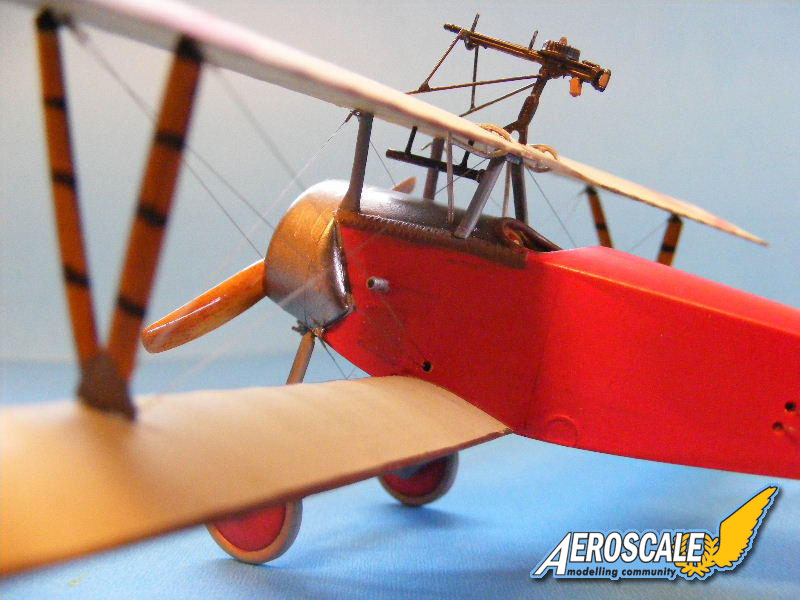
Since I didn't break open the fuselage and remove the cowl ( There's a lot of glue holding them buggers on ) it could have ended in a worst off state. Now with the engine all shiny from the Alclad it need life added to to. Future was brushed on the engine. While this was drying Model Master Brass and Copper were mix together with a little bit of Brunt Iron. The exhaust was painted. Center of the engine was painted using a dark alum mixture. When all was dried fully a black wash went over with a dry brushing of alum. Further weathering was done with pastels to show wear more. The front cab struts found themselves glued back in place, rear one was made from scratch. ( lost in the accident ) Next was the brown taping along the wings edges. I do admit they didn't turn out as well but I do like the appearance of them. Rigging holes need to be filled with my small wire hoops for the rigging later.
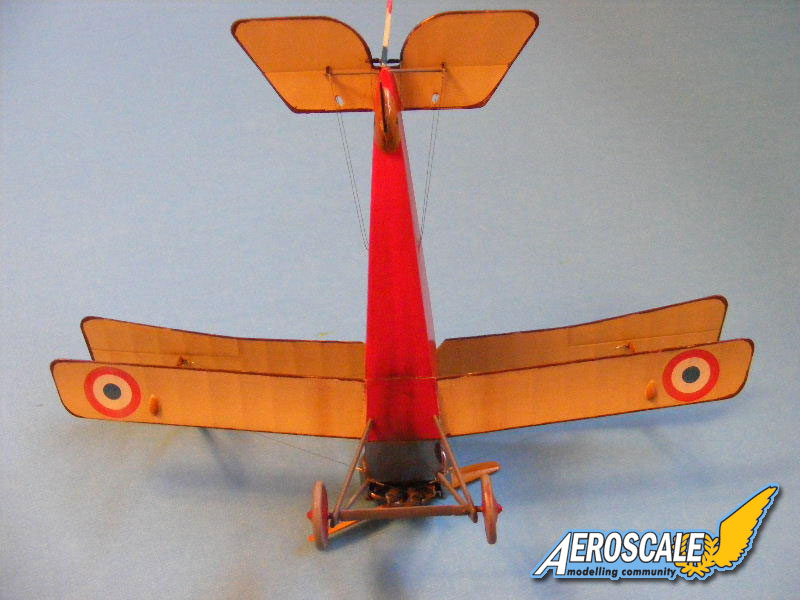
Vallejo paints pick out the wood grain for the struts, reinforcing bands got painted black fixed into place and the top wing mounted. Landing gear got a fresh coat of Tamiya neutral grey when dried every thing was glued in place. Time for the pastels to come out again and high light the wing ribs and other surface weathering.
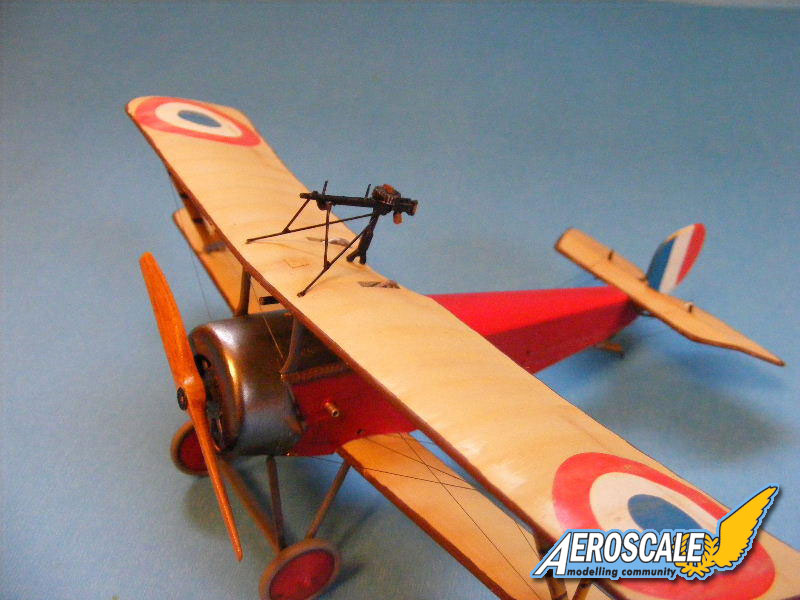
Starting with Tamiya's line Set # A sand was rub over the ribs, some got more then a few passes to break it up a bit. Top and bottom of the wings. From Set # E yellow was rub across the whole surface (Oh yeah! decals where applied before I started this and dull coated as well !) Brown was followed next, but just very lightly on few ribs. Dull coat to seal it all in.
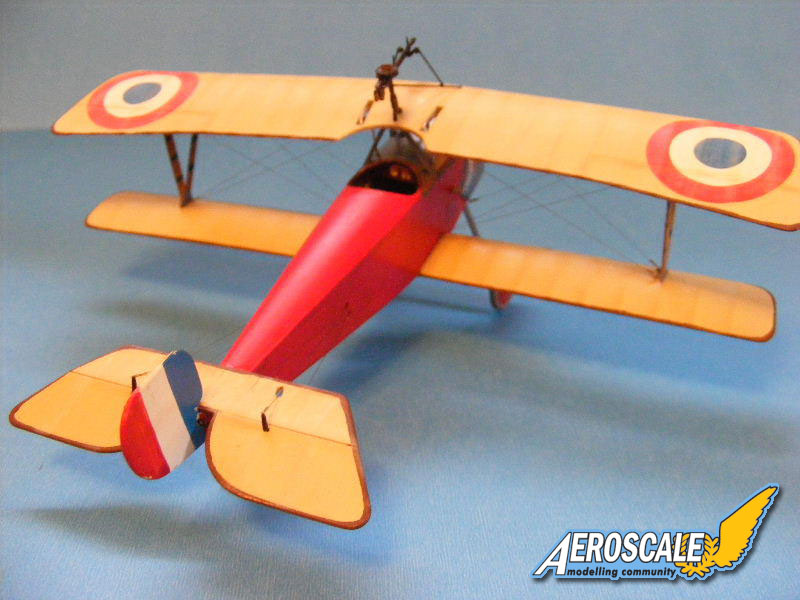
Rigging was done with twist wire and q-tip thingie I do. Sorry guy's I won't get into on this one. Something is line up for the future though.
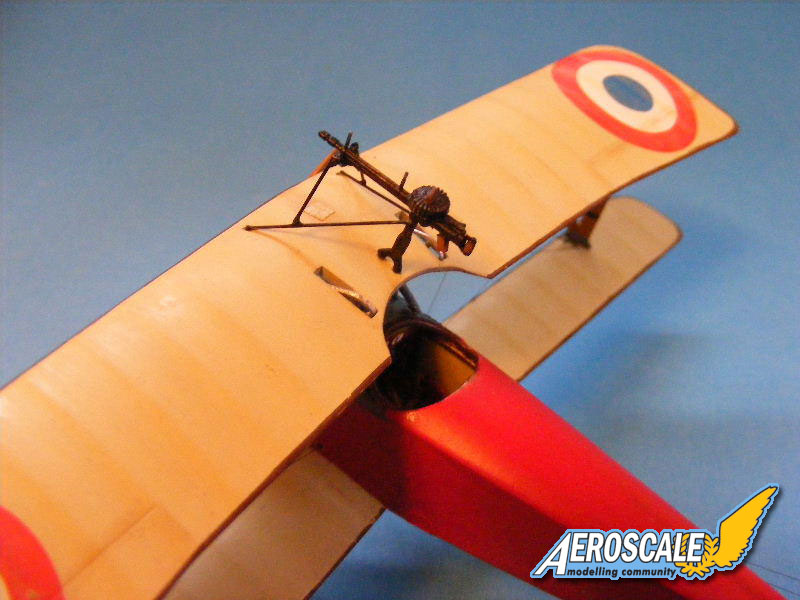
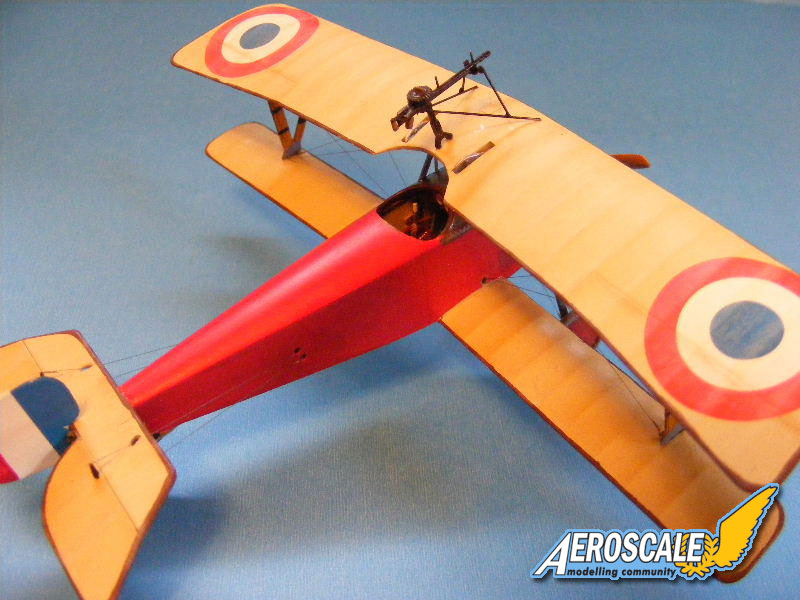
Wheels got glued on and the metal tail skid was made from wire. The gun came out of the spare parts box and the metal support rods made from wire as well. At this stage I'm looking at it and there is no gun sight! I made one out scrap plastic rod and masking tape. The ends were drilled out with the pilot side being bigger. Black paint went on with a drying brushing of silver and Tamiya clear filled the hole on the pilots side. The prop was mounted and there you have it!
This is Eduard's Weekend Edition of the Nieuport 16. I originally built the kit about two years ago, but do to Blue ( The Cat ) the plane went for a test fight ending in a bad crash and me, the master -chasing the bugger down. In to the bone yard it went. Not one of my best builds. It just needed a face lift and some new parts. The subject is by far for being accurate and I'm not sure on the Squadron markings or who the pilot was. I came across a pic this model done in a red fuselage and figured it would look good sitting next to the red Pfalz. However, it was a great subject to experiment more with Alclads and weathering.
The Build
Cockpit is pretty basic , done right out of the box. At the time I didn't have a camera little lone a computer. Seat belts were added with the buckles coming for a Technics set for when I was doing WW2 aircraft. Painting of the cockpit wasn't the greatest compared to the skills I have required from the site so no close-ups of there. With the parts cleaned up of old paint and glue and the odd finger print left by a pinkie finger gone on a tour. Time for some new paint.Starting with the wings these reserved a coat of Polly Scale French Beige. Once dried a few coats of future went on by brush. Dried for 24 hours then masked off for the red to be sprayed next. For this Tamiya red was used. When dried future was applied over top. The sides of the fuselage I masked off leaving the metal panels exposed. Tamiya black was sprayed on top and left to dry for a day. Alclad II Polished Alum was then airbrushed over top. I love how fast these dry and take tape very well! No lifting of the paint.
Since I didn't break open the fuselage and remove the cowl ( There's a lot of glue holding them buggers on ) it could have ended in a worst off state. Now with the engine all shiny from the Alclad it need life added to to. Future was brushed on the engine. While this was drying Model Master Brass and Copper were mix together with a little bit of Brunt Iron. The exhaust was painted. Center of the engine was painted using a dark alum mixture. When all was dried fully a black wash went over with a dry brushing of alum. Further weathering was done with pastels to show wear more. The front cab struts found themselves glued back in place, rear one was made from scratch. ( lost in the accident ) Next was the brown taping along the wings edges. I do admit they didn't turn out as well but I do like the appearance of them. Rigging holes need to be filled with my small wire hoops for the rigging later.
Vallejo paints pick out the wood grain for the struts, reinforcing bands got painted black fixed into place and the top wing mounted. Landing gear got a fresh coat of Tamiya neutral grey when dried every thing was glued in place. Time for the pastels to come out again and high light the wing ribs and other surface weathering.
Starting with Tamiya's line Set # A sand was rub over the ribs, some got more then a few passes to break it up a bit. Top and bottom of the wings. From Set # E yellow was rub across the whole surface (Oh yeah! decals where applied before I started this and dull coated as well !) Brown was followed next, but just very lightly on few ribs. Dull coat to seal it all in.
Rigging was done with twist wire and q-tip thingie I do. Sorry guy's I won't get into on this one. Something is line up for the future though.
Wheels got glued on and the metal tail skid was made from wire. The gun came out of the spare parts box and the metal support rods made from wire as well. At this stage I'm looking at it and there is no gun sight! I made one out scrap plastic rod and masking tape. The ends were drilled out with the pilot side being bigger. Black paint went on with a drying brushing of silver and Tamiya clear filled the hole on the pilots side. The prop was mounted and there you have it!
About the Author


Comments


Super work, Terri. Nice metal effect on the cowl and wood effect on the prop.
Keep 'em flying.
Scott
NOV 30, 2009 - 03:34 PM


Hi Terri:
Nice work, I really like your turnbuckles, I will be trying that soon. I think the pilots name was Navarre. I have the 1976 Aurora Issue of the Nieuport II and those markings are similar to the optional markings in the kit. I have mine posted in the photo section.
It is a neat airplane and you did a great job, especially seeing as it was a redo!
Mark
DEC 04, 2009 - 02:05 AM
Copyright ©2021 by Terri Werner. Images also by copyright holder unless otherwise noted. The views and opinions expressed herein are solely the views and opinions of the authors and/or contributors to this Web site and do not necessarily represent the views and/or opinions of AeroScale, KitMaker Network, or Silver Star Enterrpises. Images also by copyright holder unless otherwise noted. Opinions expressed are those of the author(s) and not necessarily those of AeroScale. All rights reserved. Originally published on: 2009-11-28 00:00:00. Unique Reads: 9213

WEB HOSTING BY


Copyright ©2021 AeroScale and Kitmaker Network, a subsidiary of Silver Star Enterprises
All Rights Reserved. Please read our Conditions of Use and Privacy Policy.
All Rights Reserved. Please read our Conditions of Use and Privacy Policy.