

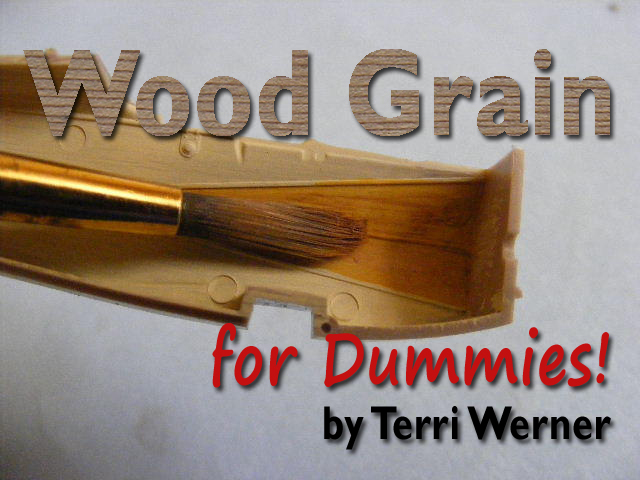
Wood Grain For Dummies!
12
Comments
After getting some feed back on my would grain using acrylic paints it was time for me to sit down and go over a few of the basic steps and materials I use to achieve the wood grain effect .
Not being a fan on using oils and after many tries with sad results I start playing with acrylics one day and came up with this. I get pretty good results and feed back from this method.
This is what I have in the paint stash, which I use for wood. You don't have to have all the colours listed. Just a guide line for some option . Never does hurt to have a good selection to start wit
Tamiya: smoke, clear yellow, clear orange, hull red, red brown and brown. Thinner.
Vallejo: leather belt, new wood, old wood from their Panzer Ace line. Yellow ochre. ochre brown, natural wood, tan yellow. Testors' acrylic thinner works well with the vValljeo paints.
A good selection of brushes from flat to round of different sizes.
A fresh cup of coffee!
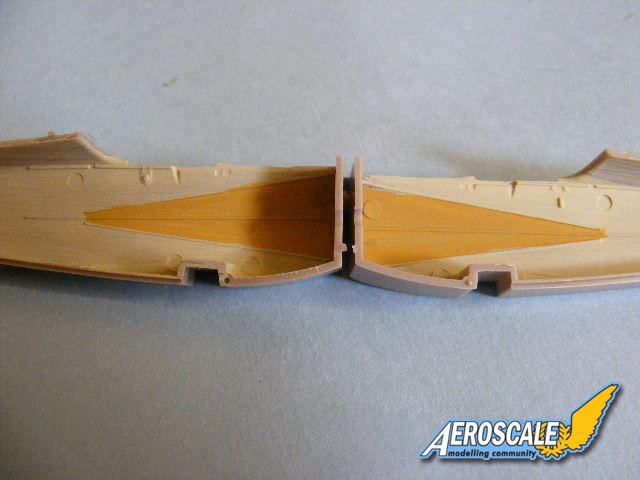
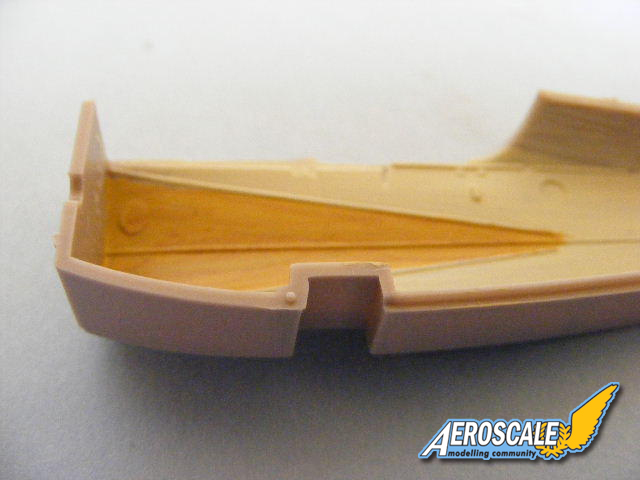
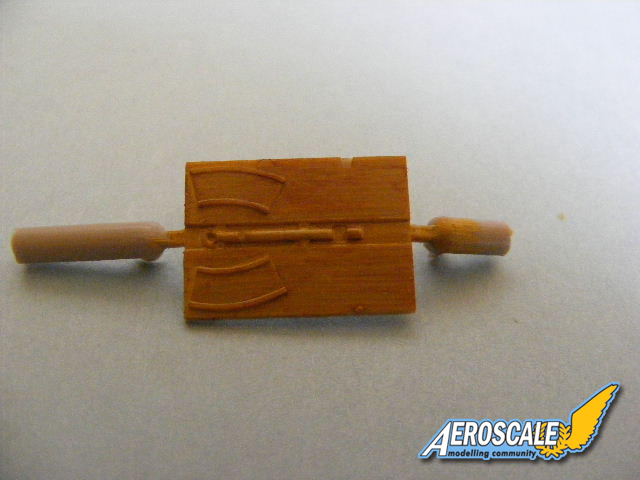
Starting with side walls I will use the Eduard Fokker Dr.1 in 1/48 scale for the Camel vrs Fokker Dr.1 campaign which I'm building right now.
Once the CDL has been applied it time to paint the wood . These panels are varnished plywood and should have a warm honey shade to them.
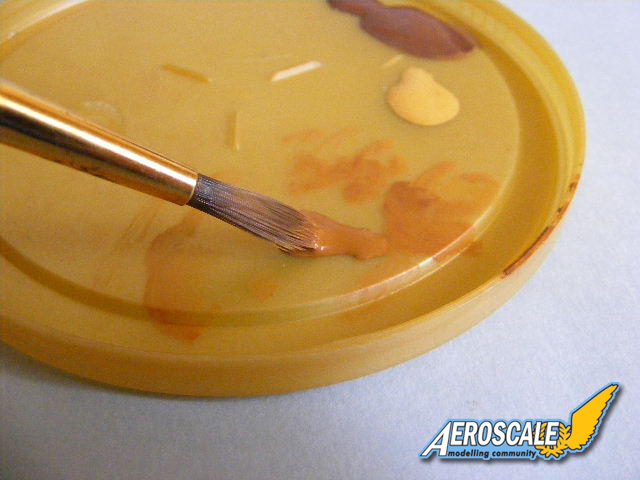
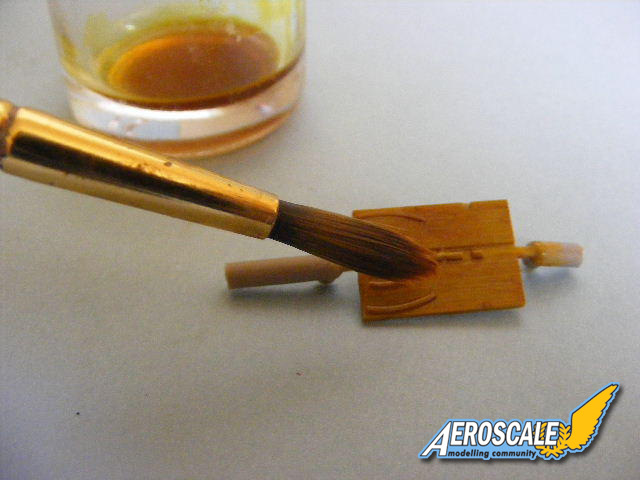
A base coat Vallejo ochre brown was brushed on followed by a coat of Future. (if you don't have future you can use tamiya clear) Once dried on a small dish or what ever you have on hand.
Place a drop or two of Vallejo New wood and a drop of testors acrylic thinner on the dish as well but away from each other.
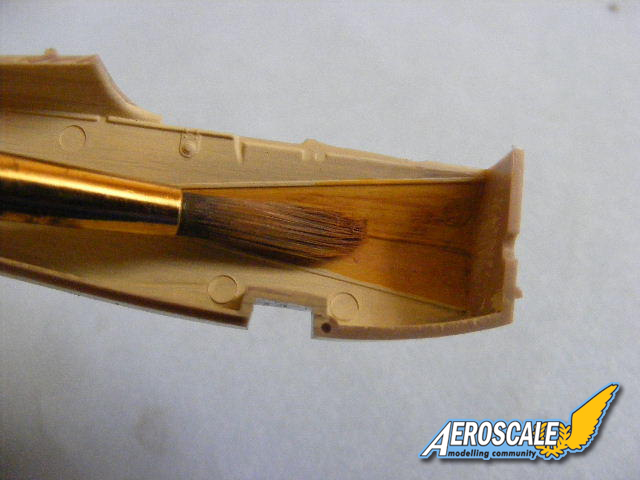
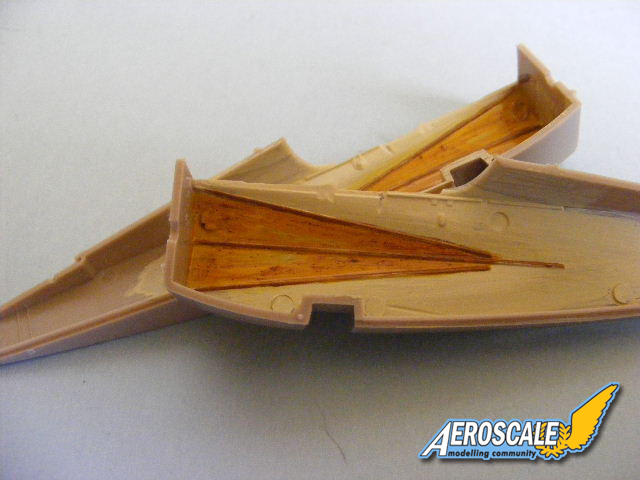
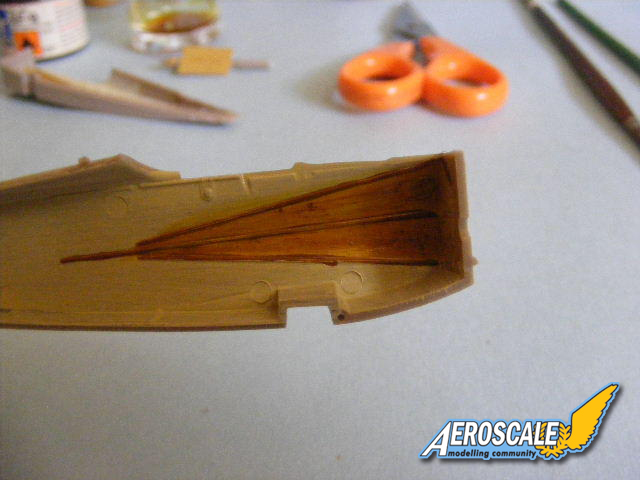
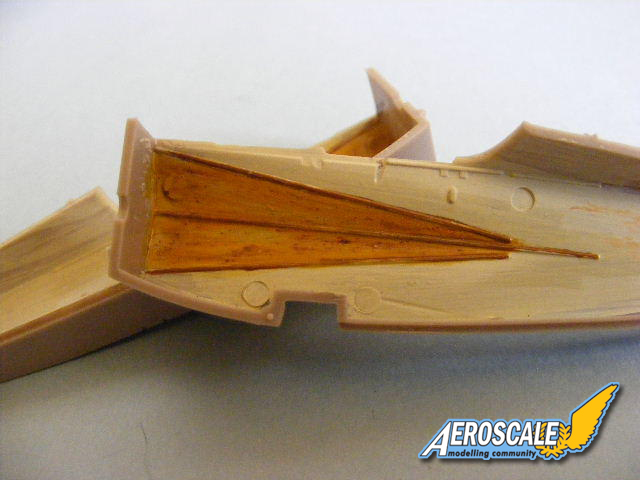
Using a round flat brush dip the tip into the thinner and dab any excess off. Now dip this in the paint wipe off some of the paint. I then drag this across the surface of the panel. If the brush is dry re-dip into thinner and repeat. Once dried re do the same above but use a very light rubbing monition and seal with future. Starting with a fresh brush dip the tip into hull red and wipe the brush clean , go over the surface as if you are dry brushing with a slight rubbing streaking monition. Set a side to dry. In a small jar mix Tamiya clear yellow with a few small drops of smoke and thin down with thinner for easy brushing. Brush this mixture over the wood . let dry. I then go over this with a dry brushing of Vallejo tan yellow and re seal with the clear yellow mixture. The more thin layers you add the richer the honey shade gets giving the grain a deeper effect. This is left up to you on how many you want to do . For a dark varnish replace the clear orange with the yellow.
The floor is from the same kit and was done in the same manner but with different shades to give the cockpit a bit more contrast. Begin paintint the floor yellow ochre. Don't worry about getting a full coverage This will add to the over all effect . When dry it was clear coated with future. Tamiya brown was wipe, rubbed across the surface followed by the yellow mixture. Once this sat for ten minutes the same dry brush effect was used with Valljeo old wood and a final seal of clear yellow . Again the more layers add will give it a better effect.
There you have it . simple and easy and no long drying times!!!
Until next time, bye!
This is what I have in the paint stash, which I use for wood. You don't have to have all the colours listed. Just a guide line for some option . Never does hurt to have a good selection to start wit
Tamiya: smoke, clear yellow, clear orange, hull red, red brown and brown. Thinner.
Vallejo: leather belt, new wood, old wood from their Panzer Ace line. Yellow ochre. ochre brown, natural wood, tan yellow. Testors' acrylic thinner works well with the vValljeo paints.
A good selection of brushes from flat to round of different sizes.
A fresh cup of coffee!
The Technique
We won't cover all of the colours listed above. There are hundreds of variations to use, use your imagination and see what you come up with. I'm buy no means a master at this, still learning and playing with different shades and tones which suit the over all build.Starting with side walls I will use the Eduard Fokker Dr.1 in 1/48 scale for the Camel vrs Fokker Dr.1 campaign which I'm building right now.
Once the CDL has been applied it time to paint the wood . These panels are varnished plywood and should have a warm honey shade to them.
A base coat Vallejo ochre brown was brushed on followed by a coat of Future. (if you don't have future you can use tamiya clear) Once dried on a small dish or what ever you have on hand.
Place a drop or two of Vallejo New wood and a drop of testors acrylic thinner on the dish as well but away from each other.
Using a round flat brush dip the tip into the thinner and dab any excess off. Now dip this in the paint wipe off some of the paint. I then drag this across the surface of the panel. If the brush is dry re-dip into thinner and repeat. Once dried re do the same above but use a very light rubbing monition and seal with future. Starting with a fresh brush dip the tip into hull red and wipe the brush clean , go over the surface as if you are dry brushing with a slight rubbing streaking monition. Set a side to dry. In a small jar mix Tamiya clear yellow with a few small drops of smoke and thin down with thinner for easy brushing. Brush this mixture over the wood . let dry. I then go over this with a dry brushing of Vallejo tan yellow and re seal with the clear yellow mixture. The more thin layers you add the richer the honey shade gets giving the grain a deeper effect. This is left up to you on how many you want to do . For a dark varnish replace the clear orange with the yellow.
The floor is from the same kit and was done in the same manner but with different shades to give the cockpit a bit more contrast. Begin paintint the floor yellow ochre. Don't worry about getting a full coverage This will add to the over all effect . When dry it was clear coated with future. Tamiya brown was wipe, rubbed across the surface followed by the yellow mixture. Once this sat for ten minutes the same dry brush effect was used with Valljeo old wood and a final seal of clear yellow . Again the more layers add will give it a better effect.
There you have it . simple and easy and no long drying times!!!
Until next time, bye!


About the Author


Comments

Many thanks Terri!
though I had expected a bit more (tongue firmly in cheek ) ... sort of a "Wunderwaffe for Wood graining" This is basically a combination of drybrushing and filters .. but perfect for Dummies (like myself)
all the best
Steffen
SEP 19, 2009 - 10:13 PM

Well done
this will help me a lot when I fionally get through my stack of modern fighters and start building WWI
SEP 21, 2009 - 01:24 AM

Thanks guy's , glad that it will help out the people who have a hard time with wood graining .
I keep it simple so any one who wants to try it will have an easy go at it with out it being all complicated and causing discouargment .
It took longer to type it all out and snapping pic's with the up loading then it did to actually do the wood graining !
SEP 21, 2009 - 01:38 AM

Nice write up Terri, use much the same method with one twist worth mentioning. Wood propellors are almost always laminated from planks of wood and often different woods are used in each layer. Once carved these often give stripes along the propellor.
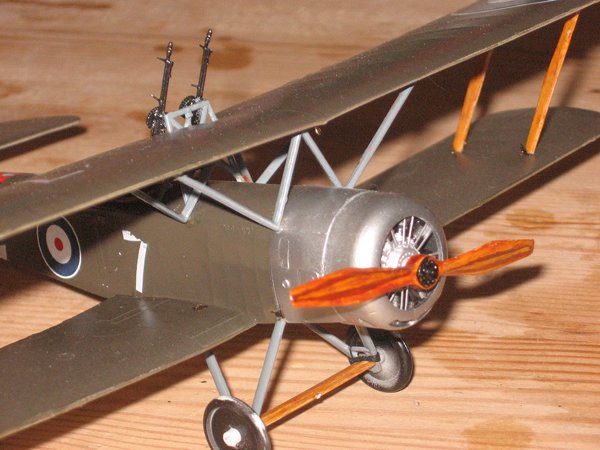 These stripes become wider along the prop as the pitch angle of the blades reduces towards the tip. I used the same technique as Terri before using a fine brush almost dry to add the "laminations". One this prop I used Tamiya paints, buff, dry brushed hull red and flat earth, laminations in NATO brown, dry brush buff, top coat, clear orange.

These stripes become wider along the prop as the pitch angle of the blades reduces towards the tip. I used the same technique as Terri before using a fine brush almost dry to add the "laminations". One this prop I used Tamiya paints, buff, dry brushed hull red and flat earth, laminations in NATO brown, dry brush buff, top coat, clear orange.
SEP 22, 2009 - 09:17 AM
Thanks Andrew . I will be covering prop and sturts in part 2 .
Nice job on your props , but the strutter doesn't have any rigging
SEP 23, 2009 - 02:11 AM
Hi Terri, it didn't when that pic was taken, it does now, I've finally regained some momentum and should finish it in the next few days
SEP 27, 2009 - 11:12 AM

Nice tutorial. I will have to try this ASAP. Thanks for the lesson!!
MAY 15, 2010 - 11:33 AM
Copyright ©2021 by Terri Werner. Images also by copyright holder unless otherwise noted. The views and opinions expressed herein are solely the views and opinions of the authors and/or contributors to this Web site and do not necessarily represent the views and/or opinions of AeroScale, KitMaker Network, or Silver Star Enterrpises. Images also by copyright holder unless otherwise noted. Opinions expressed are those of the author(s) and not necessarily those of AeroScale. All rights reserved. Originally published on: 2009-09-15 00:00:00. Unique Reads: 26502

WEB HOSTING BY


Copyright ©2021 AeroScale and Kitmaker Network, a subsidiary of Silver Star Enterprises
All Rights Reserved. Please read our Conditions of Use and Privacy Policy.
All Rights Reserved. Please read our Conditions of Use and Privacy Policy.