

Paper Masks Technique
1
Comment
Introduction
I was asked to write this up by a member of Armorama after I had painted a Pzh2000 SPG (thats a self-propelled gun to you non-AFV types) in three color NATO camouflage using paper stencils.This is a guide to the use of paper stencils to paint camouflage patterns on anything you like, AFV, ship even aircraft!
Paper masks technique
First step is to determine one dimension of your model, whether it be length, width or depth. This will allow you to scale up or down the drawings in the instructions to the size of the model you are painting. There are numerous ways to do this. Some manufacturers put the size of the completed model somewhere on the outside of the box, some put it on the instructions, some do't give you any information and you need to do some measuring.This kit is the 1/32 Nakajima Ki-43 II by Hasegawa. It has the length of the model on the box, 299mm, and also gives the scaling of the plans on the instructions. This is one method you could use to bring the drawing up to full size. Just adjust your printing preferences so that the 28% drawing comes out at 100%, ie print your picture at 3.57 times the size on the instructions and it will be the correct size. But that is too hard and I have another method!
First up you need the dimension of the model, in this case the fuselage length is 299mm as printed on the front of the box. Then you use the following steps to get true size drawings:
1. Scan your painting guide into your computer.
2. Open up the scan you made using a program such as Photoshop or similar.
3. Crop the image so it shows just one side of the aircraft. Do this for each of the views you need. If probably won't need the bottom view as not many aircraft etc have camouflage on the bottom (excepting some modern stuff of course). But you will need your top view and two sides.
4. Once you have cropped the original image to provide the three seperate images you require crop them again so they conform to the exact size of the fuselage length. Don't have any extra length on the ends of the inages.
5. Resize the image to the dimension shown on the box or wherever, 299mm in this case. This now gives you a 1/1 scale view of the model.
6. Save the new 1/1 image.
7. You then print the image making sure you get the view you want on the print. Adjust the dimension of the printing area until you get the image you want.
8. Print the view out as many times as you need, eg for two color camo print once as the base color is the first color, but for a USAF SEA Camo scheme you will need to print it two times, one fore each of the greens you spray over the Brown base coat.
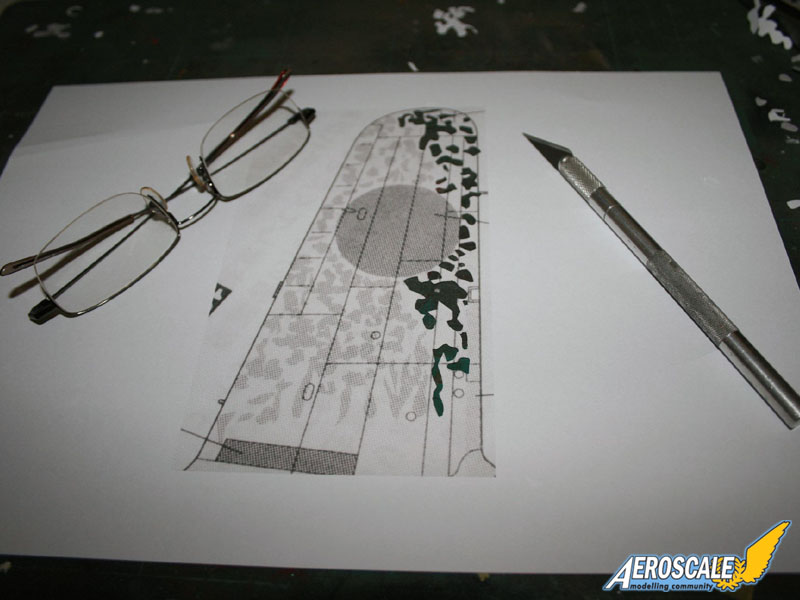
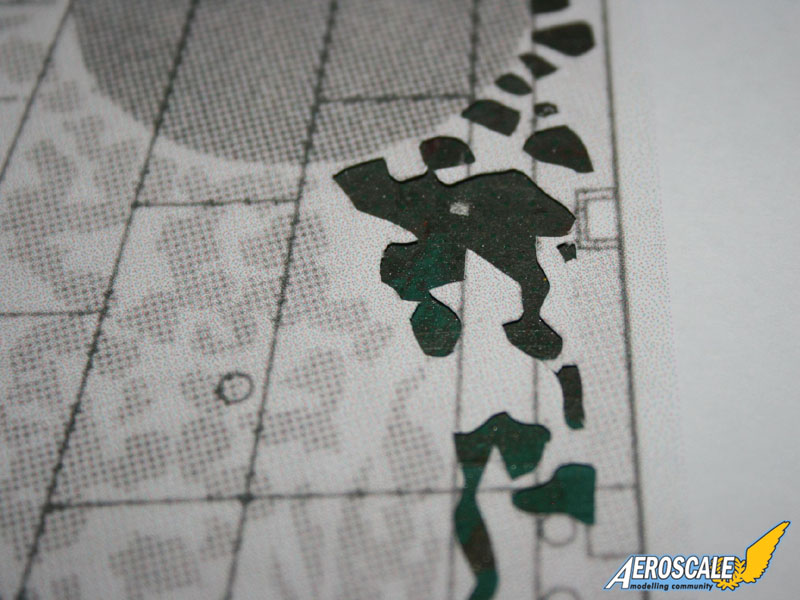
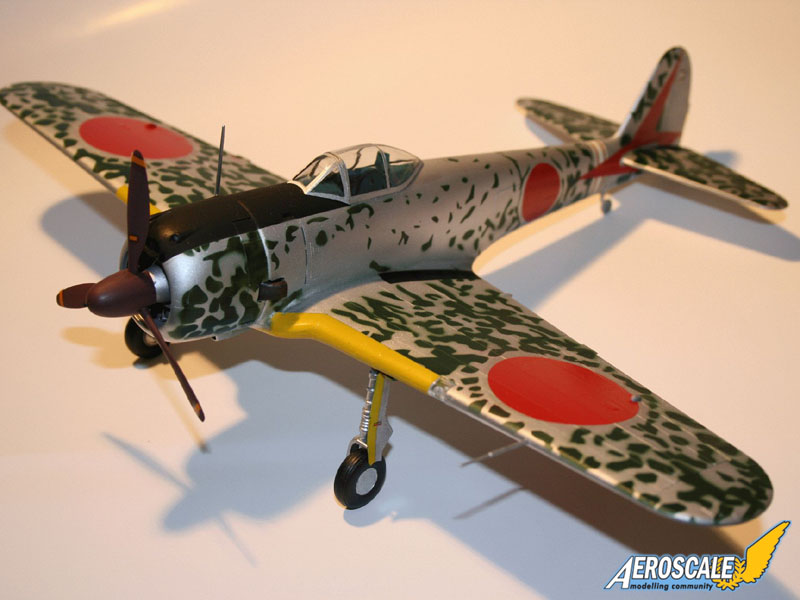
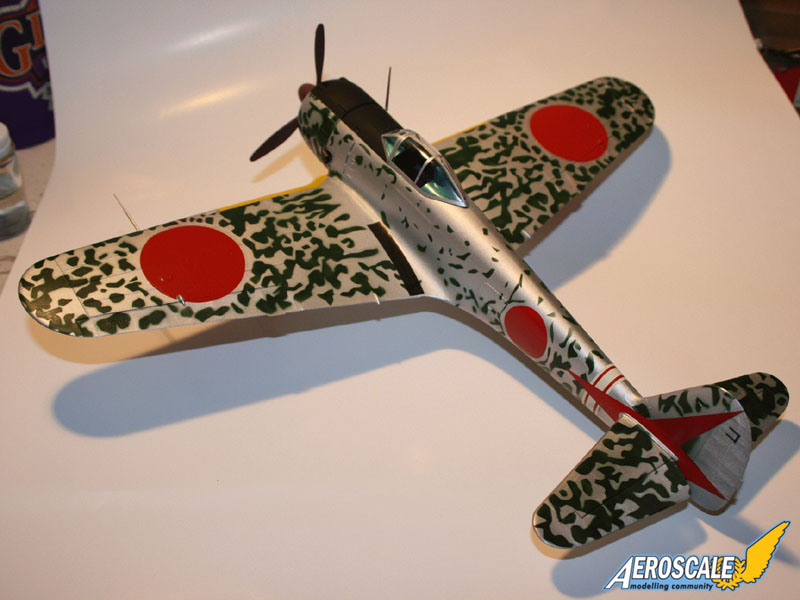
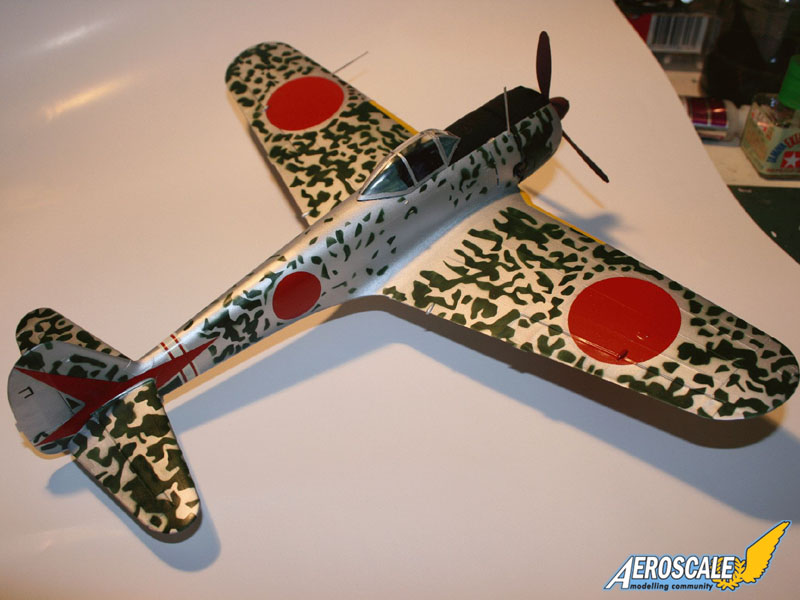
Once you have your prints the real fun begins! Get yourself a nice sharp knife and start cutting out the parts you want to spray. In this case I am cutting out the dark green splotches that go over the silver base coat. This may take a while. It took me 2 days to cut out all the Ki-43's splotches but this is the exception rather than the rule.
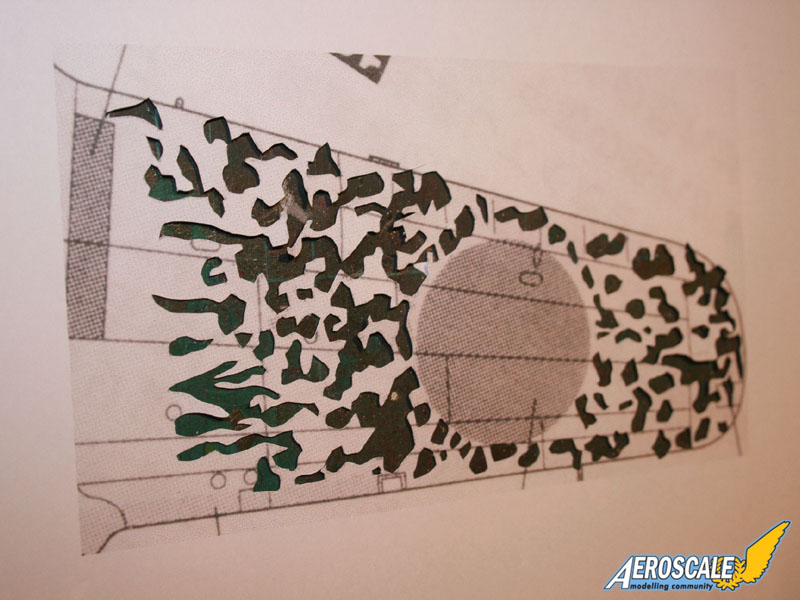
When you have cut out everything for this scheme your paper looks like a piece of swiss cheese with lots of holes. Now for the quick part. Holding your mask in place with your free had, with a glove on to stop you getting paint-covered skin of course, start spraying through the holes in the mask. For a sharp line between colors hold the mask close to the surface, and for a softer line hold the mask a bit away from the surface. Experiment until you get it right. You may find you need to thin your paint a little more than usual and use slightly lower air pressures, but I use my normal thinning ratio with both Gunze and Tamiya acrylics.
Any questions please feel free to PM or email me as I am only too glad to help.
About the Author


FROM: SOUTH AUSTRALIA, AUSTRALIA
Greetings! I have been modeling for about 45 years on and off and have just started learning about weathering my AFVs etc. Started when I was about 3 or 4 and got to a peak of production in the late seventies with a Airfix or Matchbox kit every day or so at times. Most of those have gone but when I ...
Comments

That's the technique that I used on my big airbrushed artwork.
One slight refinement I found useful concerns whether the edges of the mottle or camouflage were soft . If they are very soft, I cut the holes in the pattern smaller than actual size - this is because the further away you hold the mask, the more overspray you get, making blotches too big. The amount undersize depends on the hardness or softness of the edges - practice and experience soon tells you how much to reduce the cutouts in the masking.
Iain Wyllie
SEP 16, 2009 - 04:12 AM
Copyright ©2021 by Warren Inman. Images also by copyright holder unless otherwise noted. The views and opinions expressed herein are solely the views and opinions of the authors and/or contributors to this Web site and do not necessarily represent the views and/or opinions of AeroScale, KitMaker Network, or Silver Star Enterrpises. Images also by copyright holder unless otherwise noted. Opinions expressed are those of the author(s) and not necessarily those of AeroScale. All rights reserved. Originally published on: 2009-09-12 00:00:00. Unique Reads: 11141

WEB HOSTING BY


Copyright ©2021 AeroScale and Kitmaker Network, a subsidiary of Silver Star Enterprises
All Rights Reserved. Please read our Conditions of Use and Privacy Policy.
All Rights Reserved. Please read our Conditions of Use and Privacy Policy.