

1⁄48Pfalz D.IIIa
11
Comments
Construction
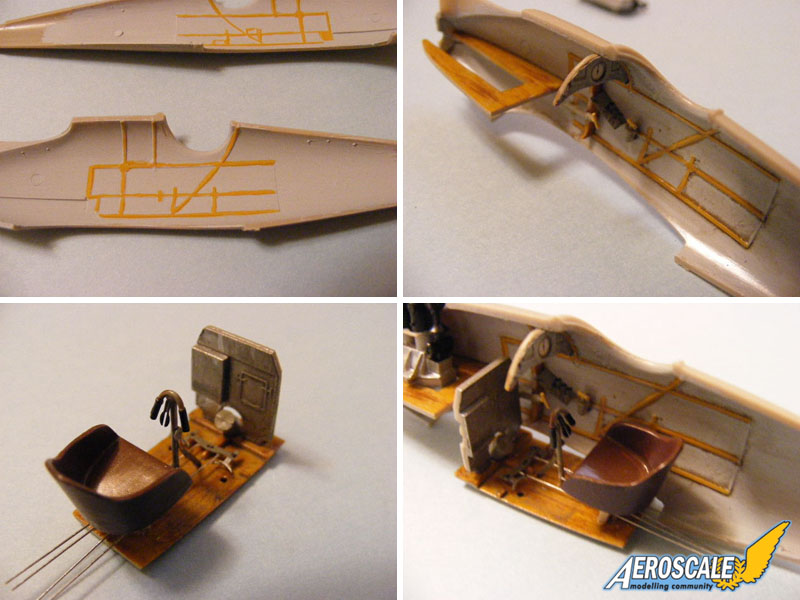
I have started the build by painting the interior halves which, it seems, were not left in it's natural wood state but were painted pale grey/blue. This includes the side walls, frame work, floor and instrument panel. Metal fixings are in a RLM 02 grey colour. No written material is available on this but from looking at photo's and taking other peoples thoughts into consideration, some folks would disagree with this.I meet the subject both ways and painted the side walls pale grey/blue using vallejo. The frame work was picked out in wood (I like the contrast ) as well as the floor. I then added a clear coat and a few washes to bring better life into the parts and add depth to them, followed by a dusting of pastel chalk. The floor with seat, the flight controls and the ammo bin were installed next.
I had to redo the hand grips for the throttle grip because I glued it on the wrong side. It should be on the left hand side and Eduard does have this molded on the kit part. The left side is different from the right. Also there should be a bulk head where the frame work ends in the cockpit and the seat belts attach to, but Eduard didn't included this in the kit .
So far, the kit fell together. The instructions were easy to follow and not too complex. The cockpit has good detail even without the PE set. However, there are a few things in the cockpit area which I think could have been added such as the rear bulk head behind the pilots seat. When you look into it, there is this empty hole there. Better seat support detail and a smaller seat would have been nice as well, because the kit's item is too wide and the floor is to long. I do like how Eduard include the bell crank holes in the floor. The rudder bar is not very accurate, but that is just a small thing and something most modelers wouldn't be aware of. Tom's Modelworks has the correct one on the German interior set. All are easy fixes to do .
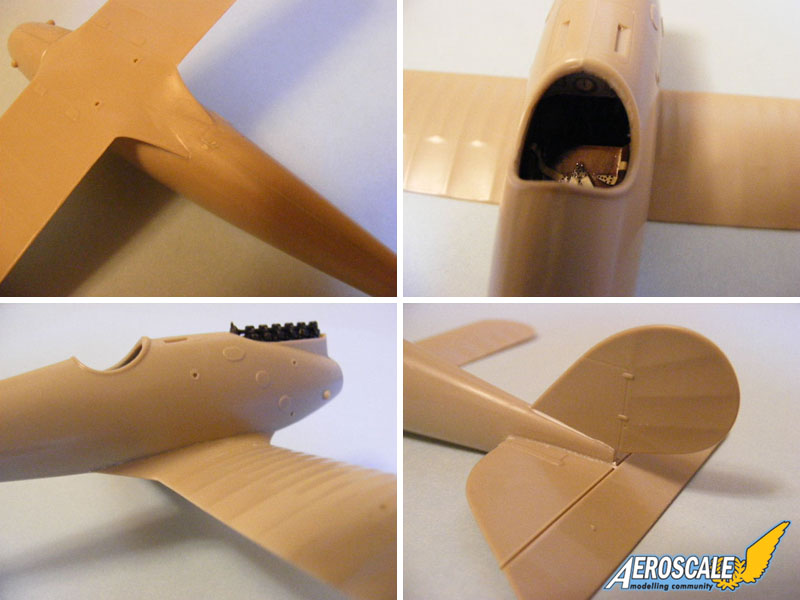
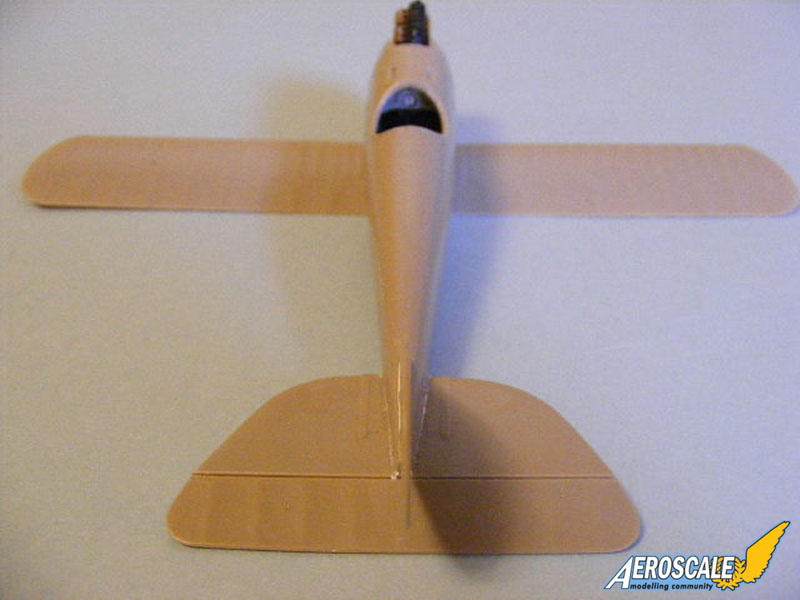
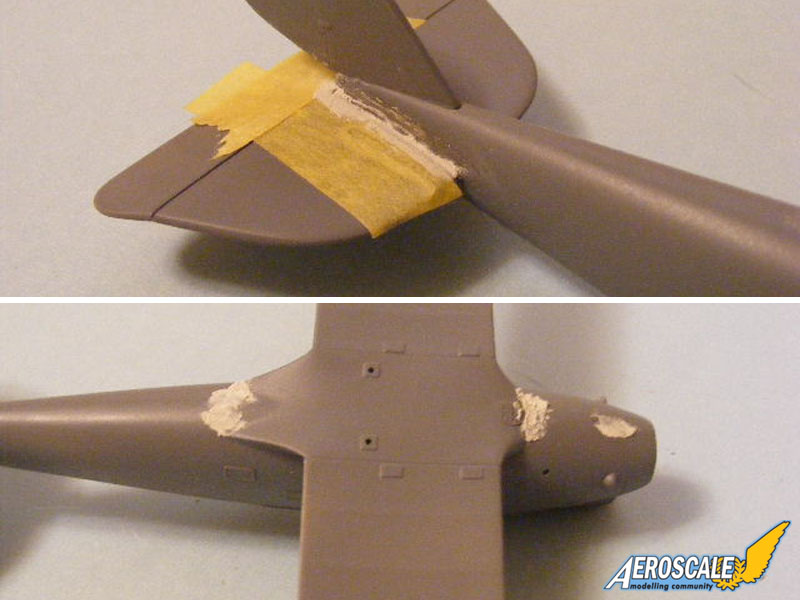
Once the cockpit was finished, I joined the fuselage halves together . For the seam in the wing root area I went with the following method: when the surfaces where mated, I ran touch-n-flow tenax into the seams, pressing hard until the glue had set. Following this, Vallejo plastic putty was applied. When this was dry, I wipped off any excess putty with Tamiya thinner and q-tips. The rudder was flared in as well using the same method. The rear stabilizer control surface was drop down a few degrees. It really pays to get a tight fit with the wing root to the fuselage. this way you will have less to fill and sand. The fuselage seams required no putty at all. They plastic parts got a light sanding and then were re-polished to a shine. Overall I was really impressed about the fit of the parts. The molds are over 10 years old now and still holding up to the test of time.
I primed my model with a mix of Tamiya neutral grey and flat white. Few spots needed some touch up with white putty. I also had to fix a boo-boo on the rear stablizer. I didn't get a tight fit and had a cap with air bubbles! I masked off the detail and gave it a quick sand. Next I mixed squadron white putty and Testors liquid cement and brushed this on. After 24 hours I resanded and polished the area. This was not an issue with the kit, it's my own doing (I was Tenax happy).
Painting
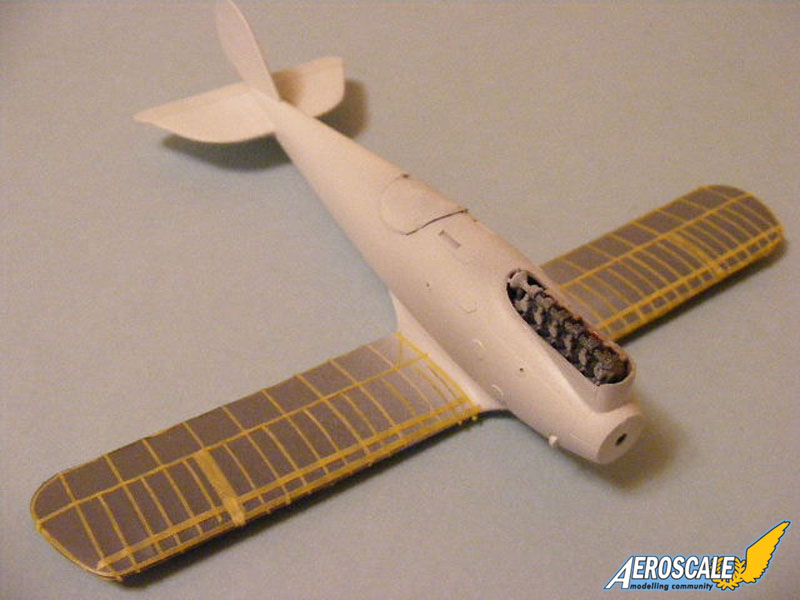
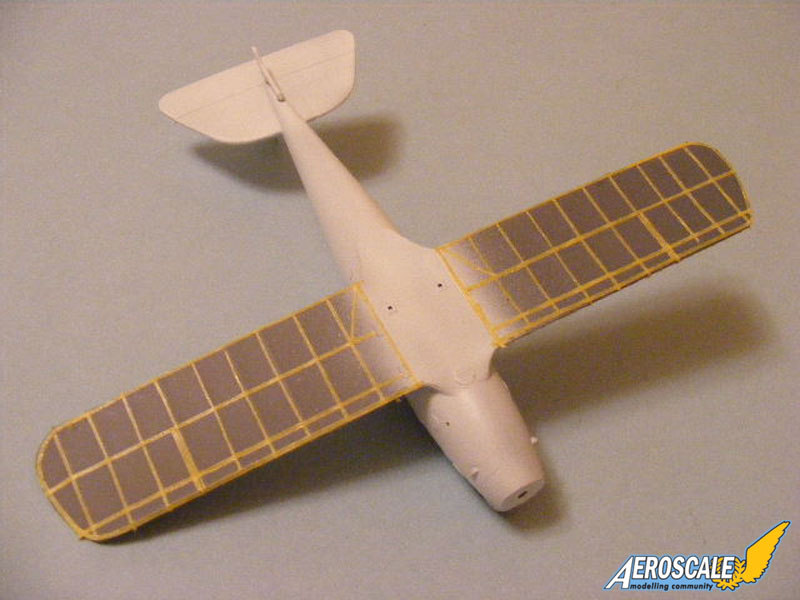
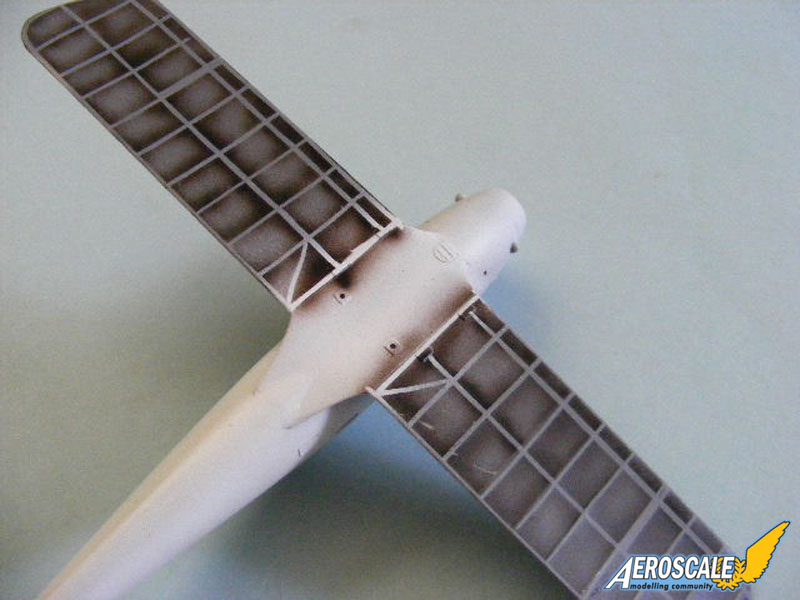
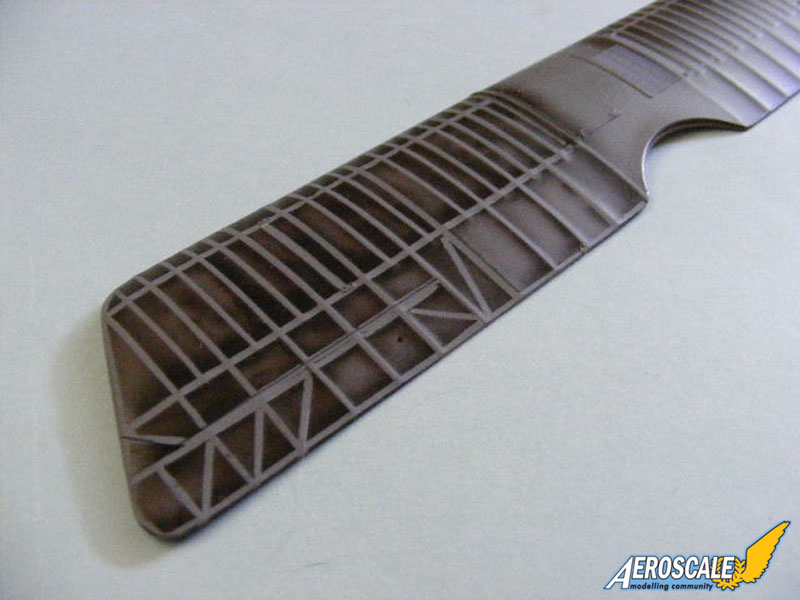
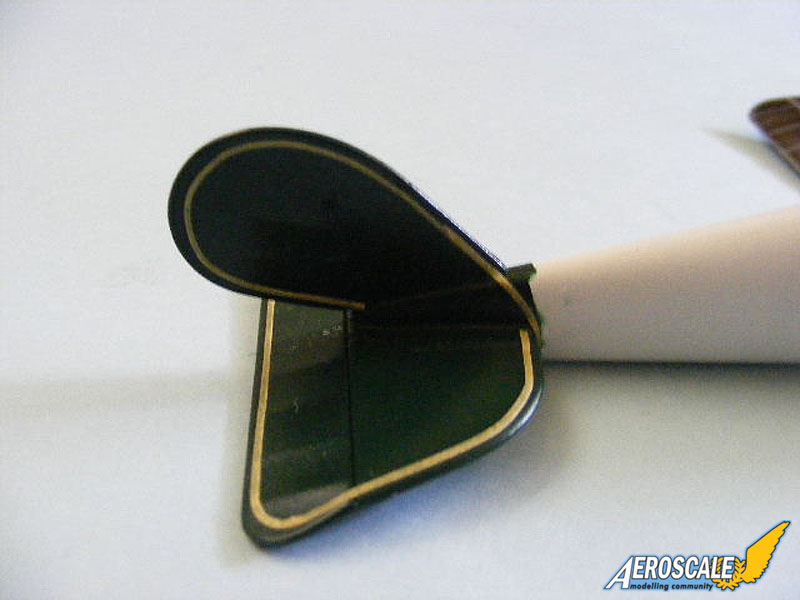
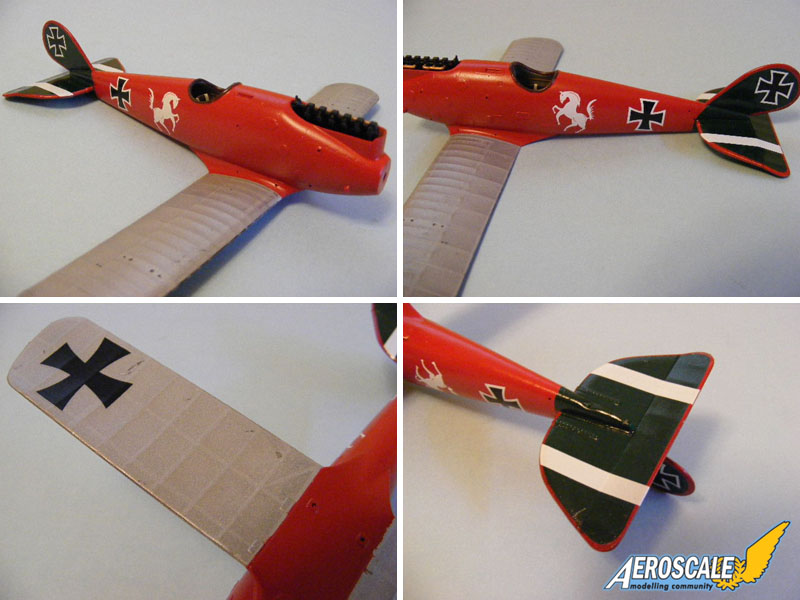
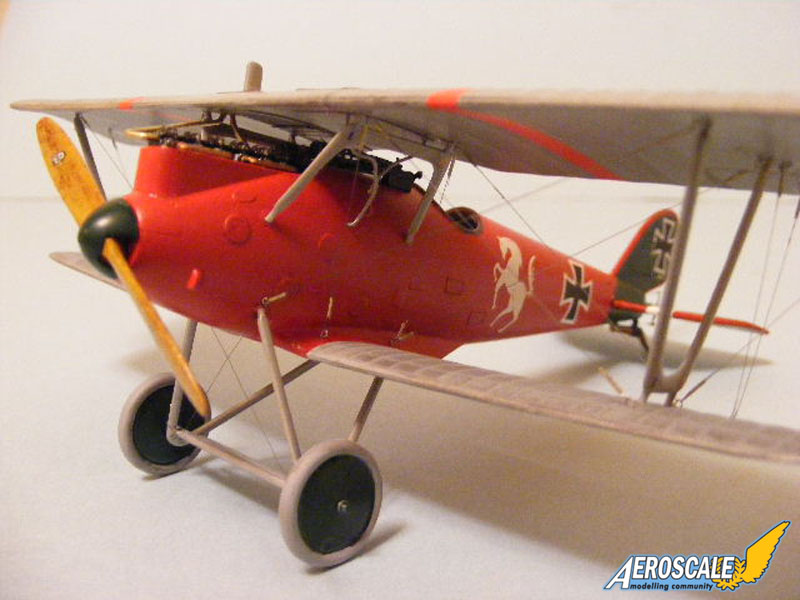
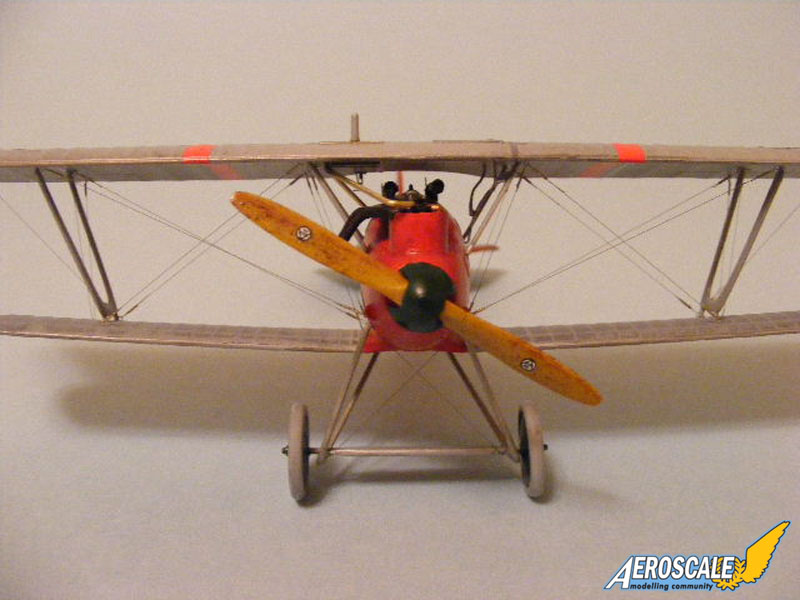
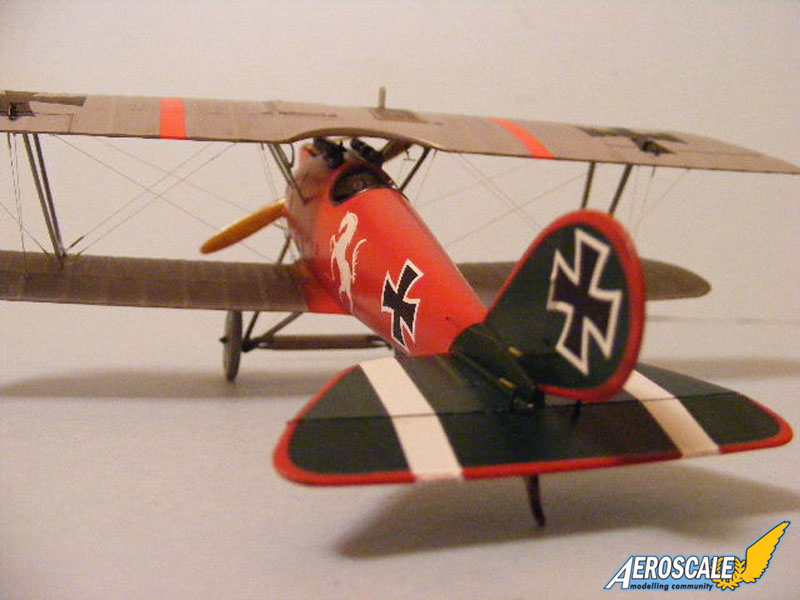
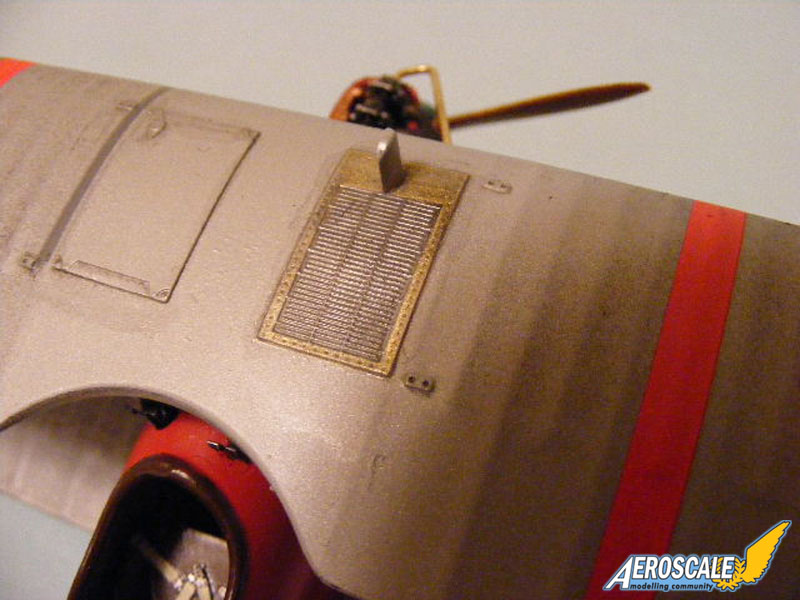
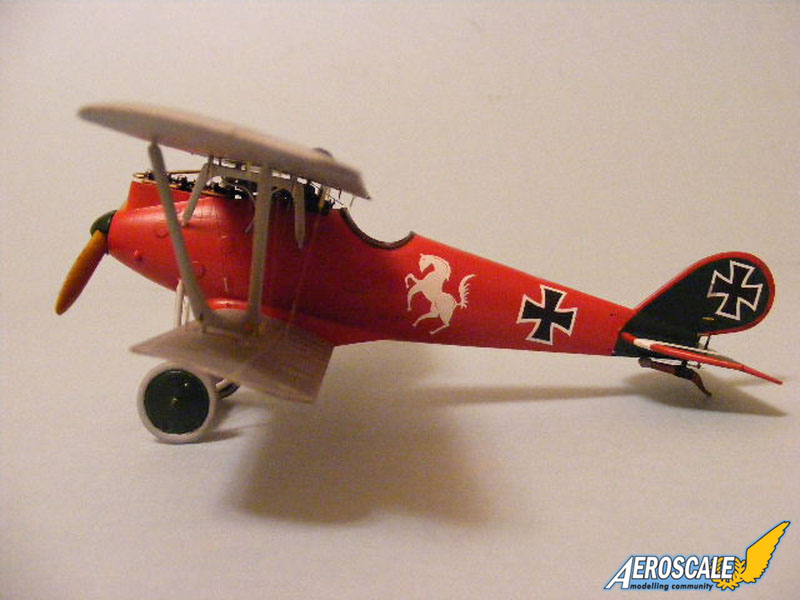
After the resanding, another coat of primer was applied using white this time around. The green and red will show better later (not so many coats of paint). I masked the wing structure on the wings with Tamiya tape. It is time consuming but the end results are worth it. The wings got a light coat of black mixed with brown sprayed along the edges of the tape.The tail has been sprayed in black and masked for the red using self cut masks. The egdes got a quick spray of white before applying the red. The fuselage got it's red paint as well and the wings were sprayed silver/grey. Pre shading turned out really well, but I don't know if the camera pick it out well on the pictures. There is about 7 coats of the silver/grey sparyed on in very light coats, some areas got a little more to break it up a bit. To help the paint dry fast flat laquer base was added to the paint. Wasn't to sure on the red so the airframe was frist sprayed Tamiya flat red, then I added clear red to it and re-sprayed with a coat of future.
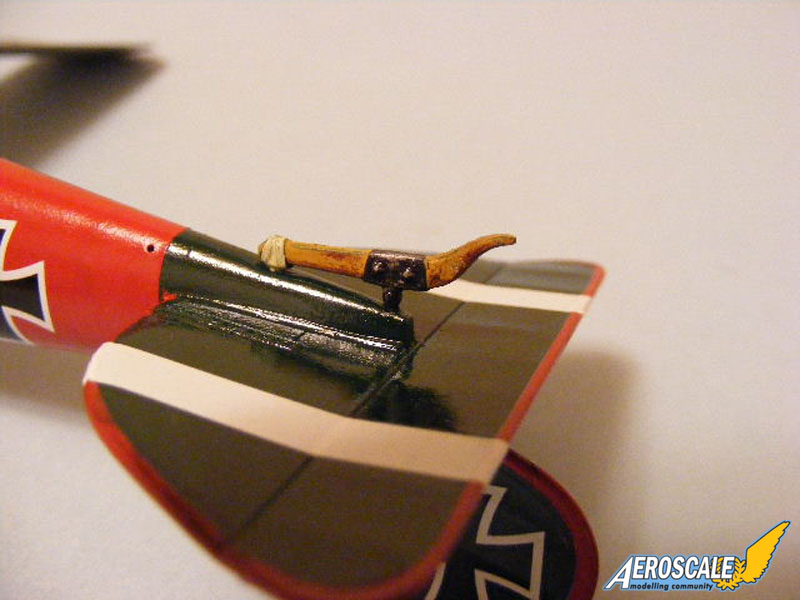
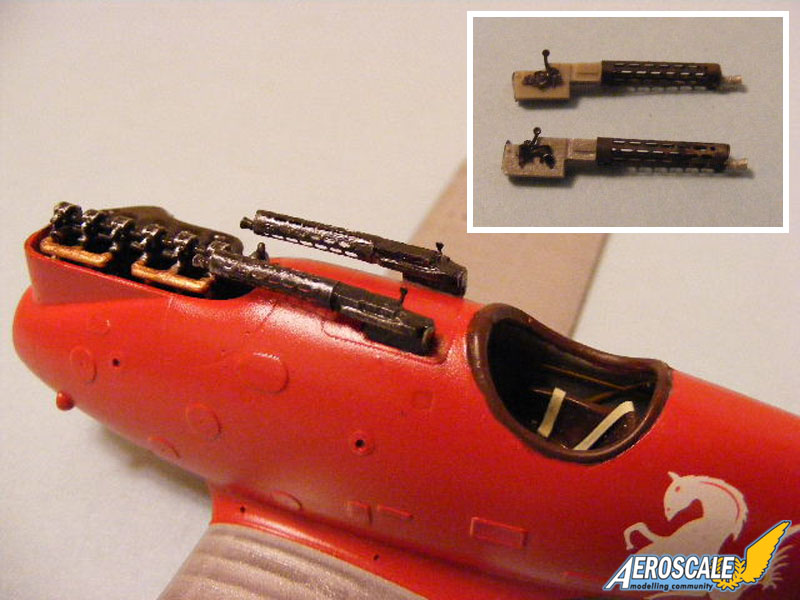
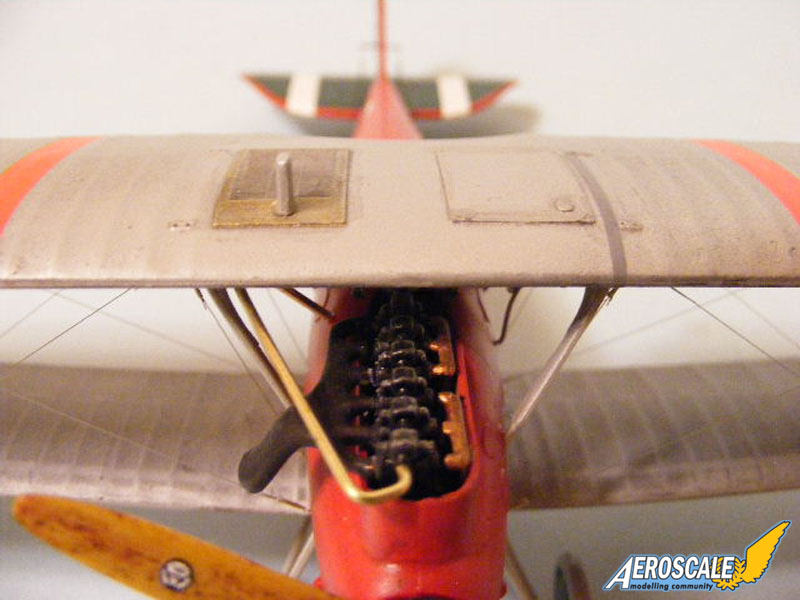
The guns have been put together painted and glued in place. The guns do sit to high on the kit so you have to work on them a little to make them sit lower. The tail skid is painted and glued in place. Exhaust was drilled out and fixed into place as well (no finger tips where lost either in the drilling and clean up with a knife !).
Rigging and final construction
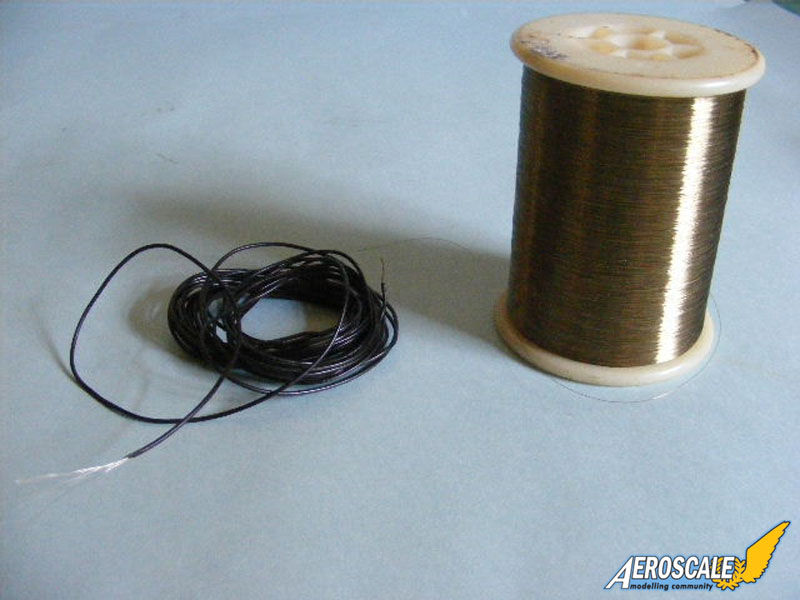
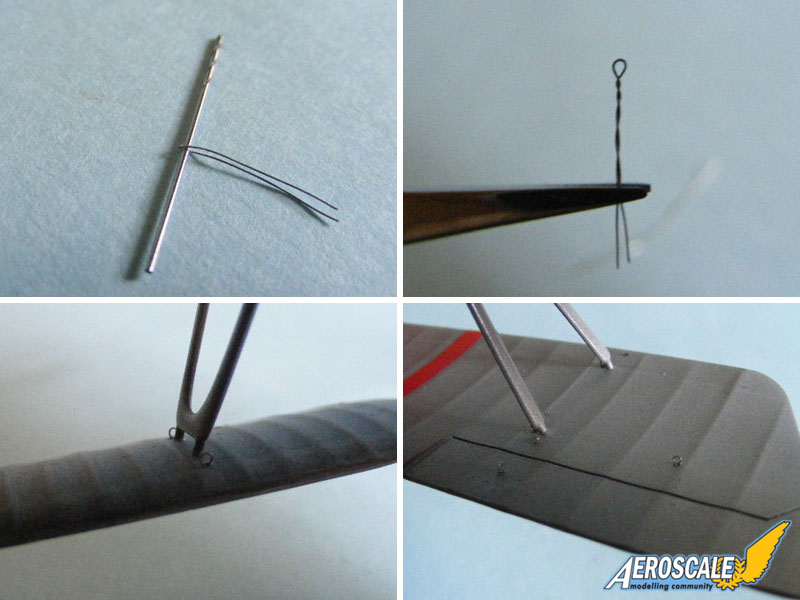
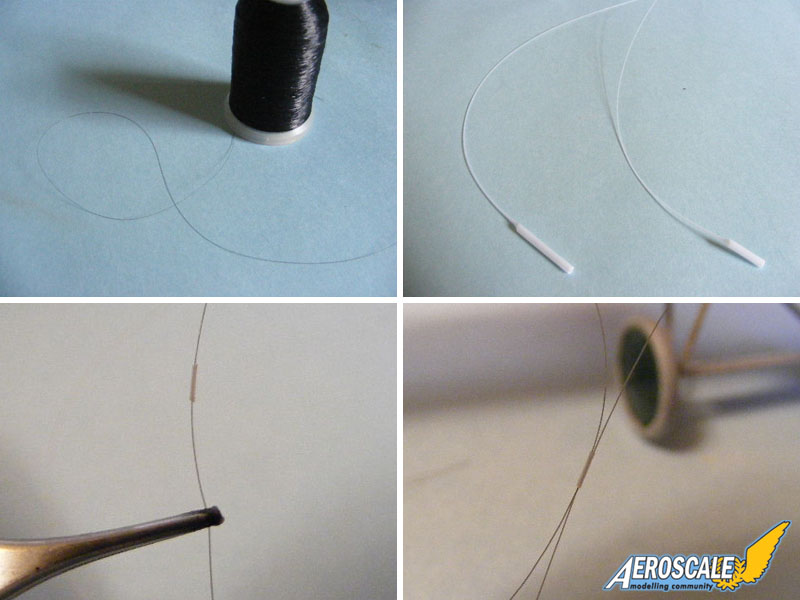
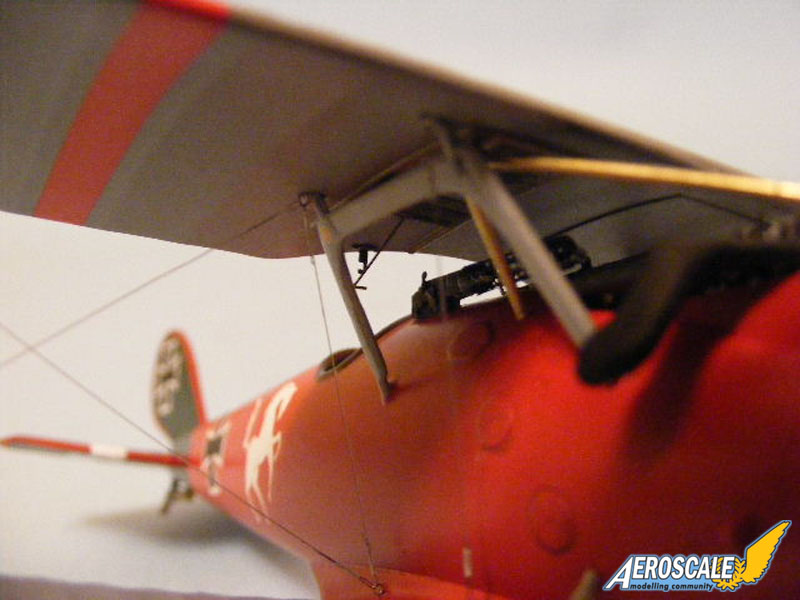
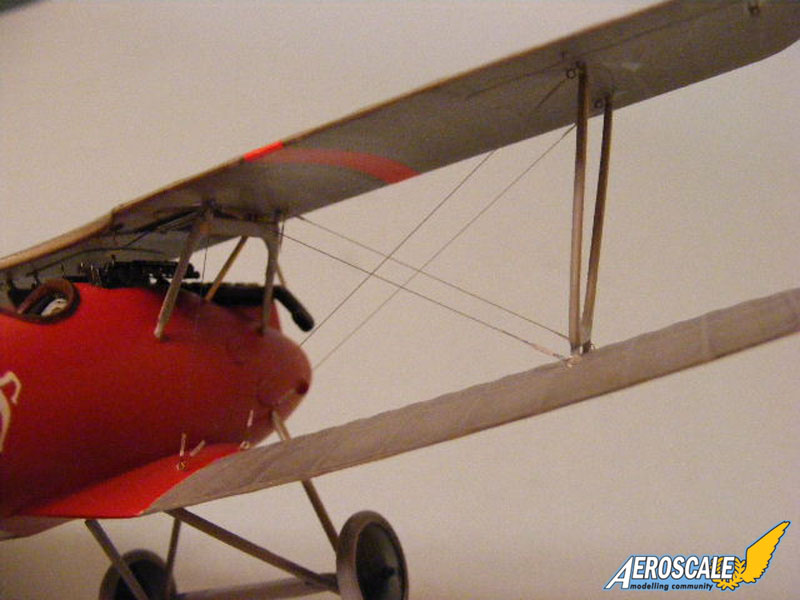
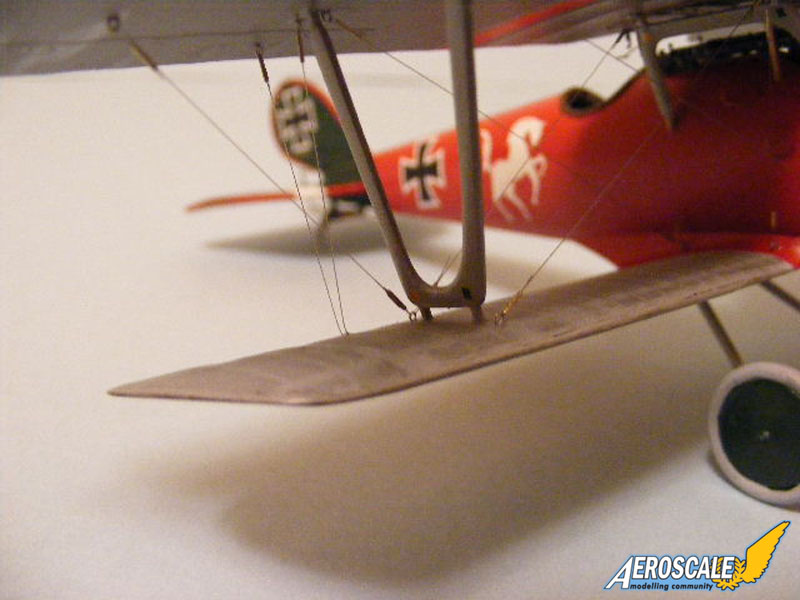
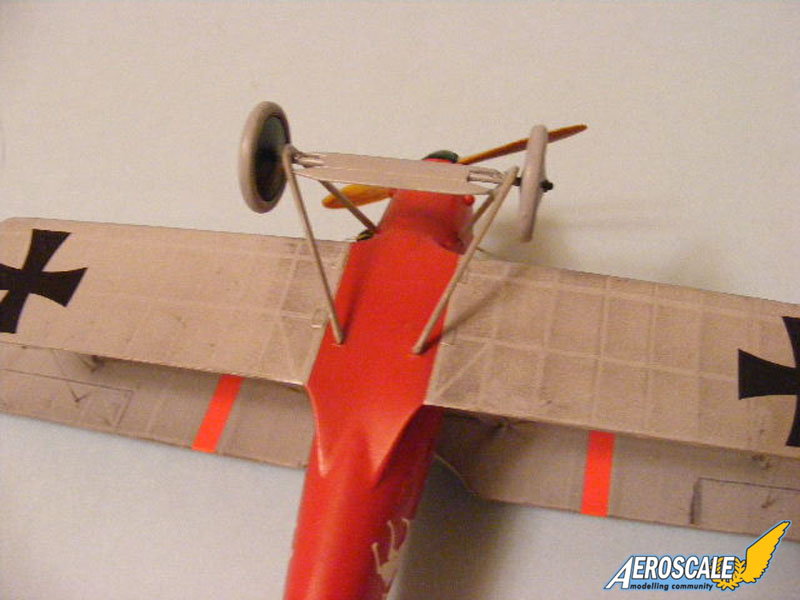
Here is my method for rigging:Before mounting the top wing drill all rigging holes needed. Only drill half way through, don't drill through the wing. Starting with fine steel or brass wire, try and stay away from the copper if you can (it's to soft). Cut small lenghts of wire. Take a small drill bit (I like smaller but my broke!) and fold it over the drill bit and pinch as close as you can, twist the drill bit around a few times (7 will do). You should now have a small hoop. Taking a hoop test fit it in one of the rigging holes and trim to lenght (the bottom of the hoop should be just touching the wing). Place a small drop of medium super glue in the hole and place the hoop stub in, minus the control surface but more on that later. Do this to all of the rigging holes. Let this set and mount the struts and wings...
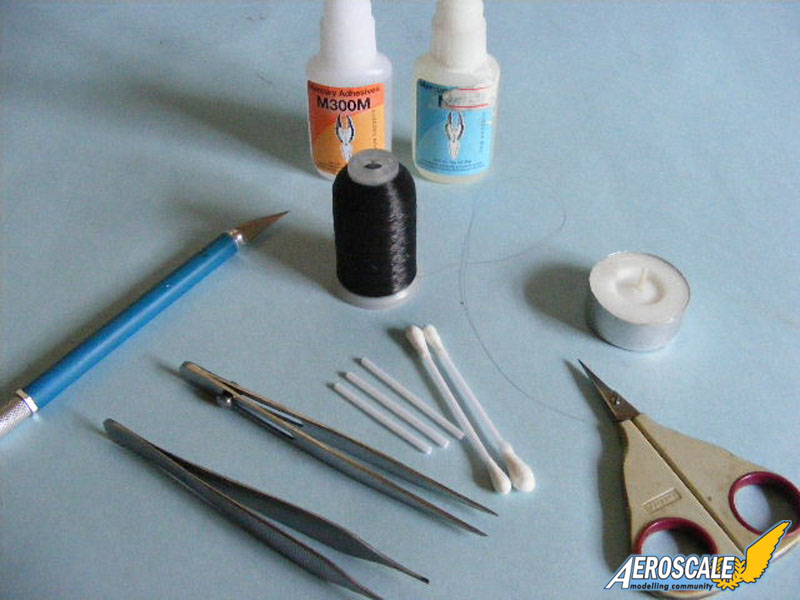
Once this has fully cured, it's time to start the rigging. You will need Q-tips (plastic ones), smoke invisible thread, thin super glue, tweezers, shape knife and a candle.
Cut the ends of the Q-tips off and hold under the candle flame, same as doing stretched sprue. It takes me a few to get the right diameter. Cut the Q-tip in 3mm lenghts (you might have to open the ends with a sewing needle). Slip a strand of smoke thread give your self lots to work with. Now slip one of the q-tip pieces on to the thread and slip it down. Now feed the thread through one of the hoops bring it around and back thread it through again. Holding the one strand pull on the other and this will shinch it down. Just touch the wire in front of the q-tip piece and the glue will flow in (super thin super glue). Let this set for a few seconds and repeat in the corresponding hoop. Repeat for all.
Be very careful when trimming off the excess that you don't cut the wrong wire like I do sometimes!
Conclusion
Eduard's 1/48 scale Pfalz D.IIIa is a very simple kit to build and almost falls together. It's a perfect kit for the first timer but will also please the more advanced builders. I must admit, I was very nervous about this build being done for the site and having it just right. There are some big shoes to fill around here!A special thanks to Rowan Baylis and Eduard for giving me the opportunity to build this kit.
The original Eduard Pfalz D.IIIa Dual Combo Build thread can be found here.
About the Author


Comments

Many thanks my friend !
I pick up the smoke thread at a fabric shop ( Fabric Land ) don't know if you have then down in Ontario but any fabric store should have it . Maybe even walmart ( wally world ) .
twist away !!!!! I learned the method on this site either from Lars or Hugh can't remember off hand .
AUG 22, 2009 - 07:26 AM

You have come so far Terri. Excellent work. maybe its time for one of your portfolios? Model On!
AUG 22, 2009 - 07:31 AM
Congrats, Terri. You're a fine modeller and I really like how open you are with your information on the materials and techniques you use. I look forward to all of your future builds.
Mark
AUG 22, 2009 - 08:10 AM

Terri
I can only echo what everyone has said, and add you are an inspiration and a dynamic forum member....and not a bad builder either
AUG 22, 2009 - 08:57 AM

Hi Terri,
Another great build and article.
I love the paint scheme she sure is pretty.
Chris
AUG 23, 2009 - 06:40 PM

Super Terri! I see that the photography lessons have stood you in good stead==)
A very nice build, and a great feature. You should be proud.
Cheers,
Hugh
AUG 23, 2009 - 11:08 PM
Thanks guy's for all the kind words !
One of my favorite ones on the shelf ...................
AUG 24, 2009 - 01:26 PM

Just a stunning model. You really hit one out of the park, Terri. And, I still say you gave the best explanation of rigging one of these beasts that I've ever read. That alone rates this feature as priceless. Congrats.
Cheers,
Mike
AUG 24, 2009 - 06:16 PM

Nice one Terri, Food for thought on rigging, and one of my favourite German aircraft, and I have one in the stash. Well done
AUG 25, 2009 - 11:57 AM
Great build, Terri. Definitely some good tips on what to look out for and how to go about the rigging.
Thanks for sharing
JAN 31, 2013 - 06:30 PM
Copyright ©2021 by Terri Werner. Images also by copyright holder unless otherwise noted. The views and opinions expressed herein are solely the views and opinions of the authors and/or contributors to this Web site and do not necessarily represent the views and/or opinions of AeroScale, KitMaker Network, or Silver Star Enterrpises. Images also by copyright holder unless otherwise noted. Opinions expressed are those of the author(s) and not necessarily those of AeroScale. All rights reserved. Originally published on: 2009-08-22 00:00:00. Unique Reads: 13807

WEB HOSTING BY


Copyright ©2021 AeroScale and Kitmaker Network, a subsidiary of Silver Star Enterprises
All Rights Reserved. Please read our Conditions of Use and Privacy Policy.
All Rights Reserved. Please read our Conditions of Use and Privacy Policy.