

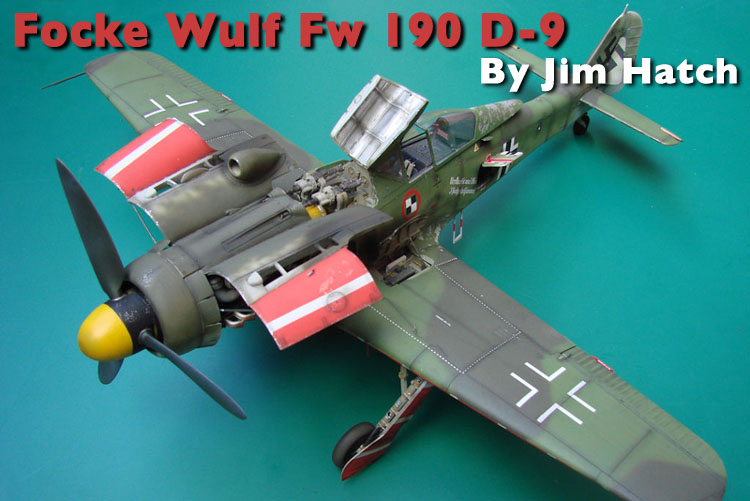
1⁄32Focke Wulf Fw 190 D-9
5
Comments
Introduction
I think the first time I ever saw a model airplane with all of it's cowls and access ports open was in a Verlinden magazine, over 20yrs ago and I always jokingly promised myself I would build one some day. I doubted that I would ever build one though as I had no experience of scratchbuilding, and resin kits seemed to be of another world and way too expensive to risk ruining. It wasn't long after that that I stopped working on plastic models altogether until this last couple of years when my interest was rekindled. I've always had a love of the "Langnasen" Fw 190D and was going to build her "out of box" until I saw all the incredible aftermarket materials available and my online searches showed the "open cowls" models I had wanted to build years earlier. So it just had to be done, or at least "tried" bearing in mind my inexperience.History
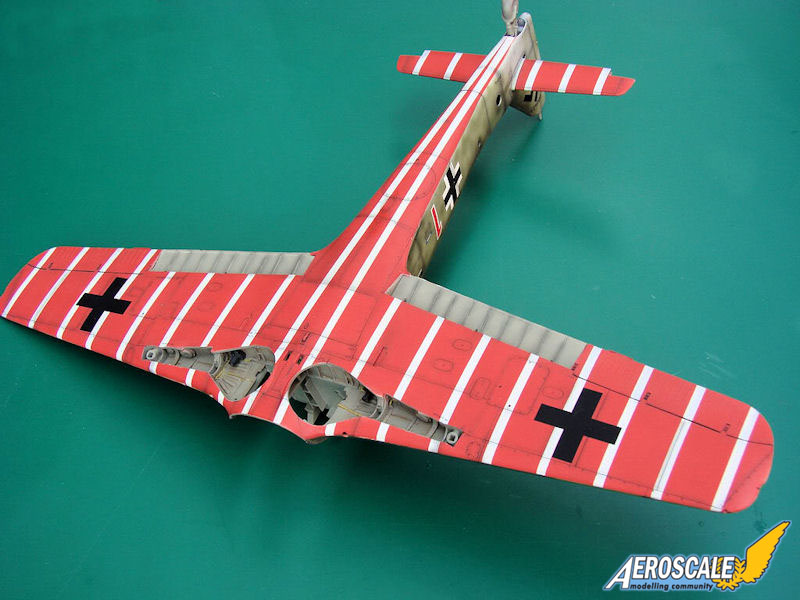
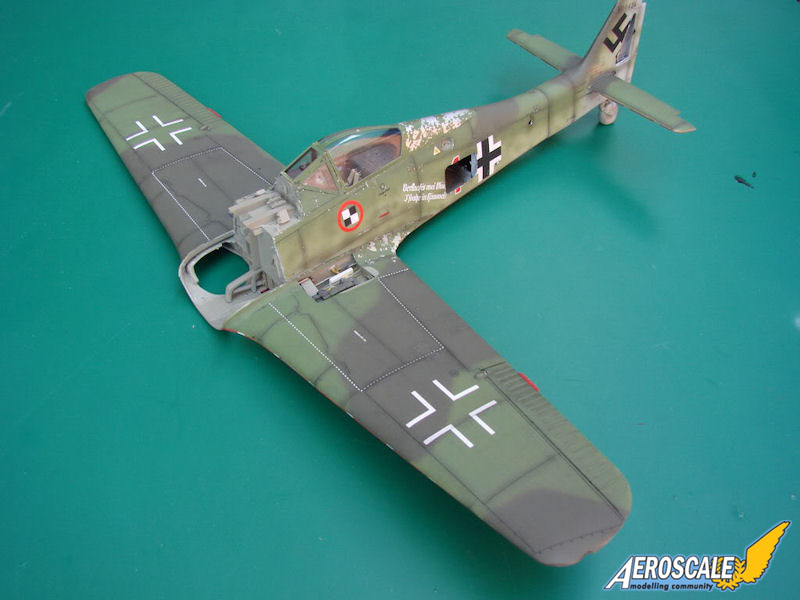
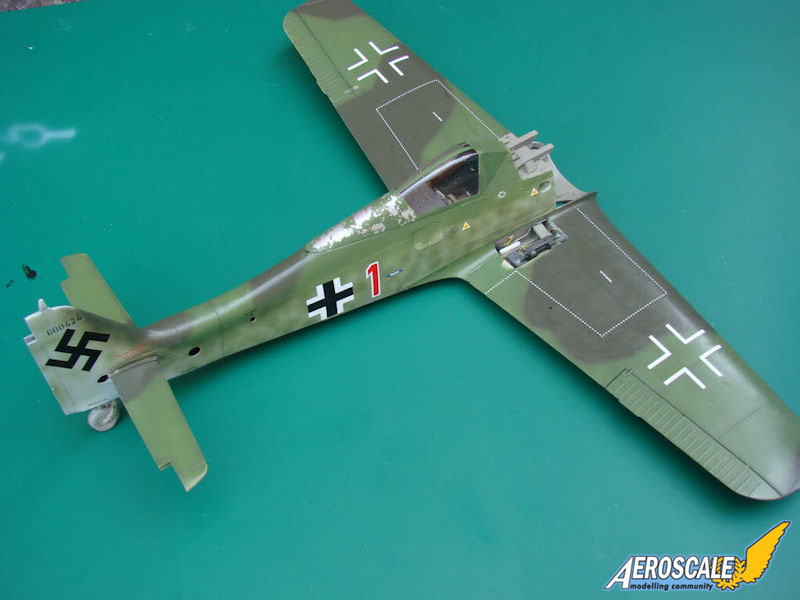
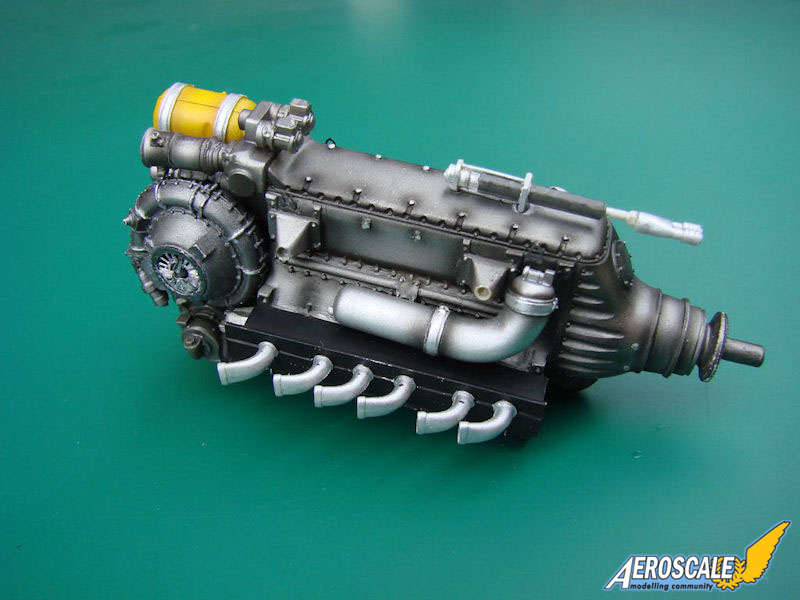
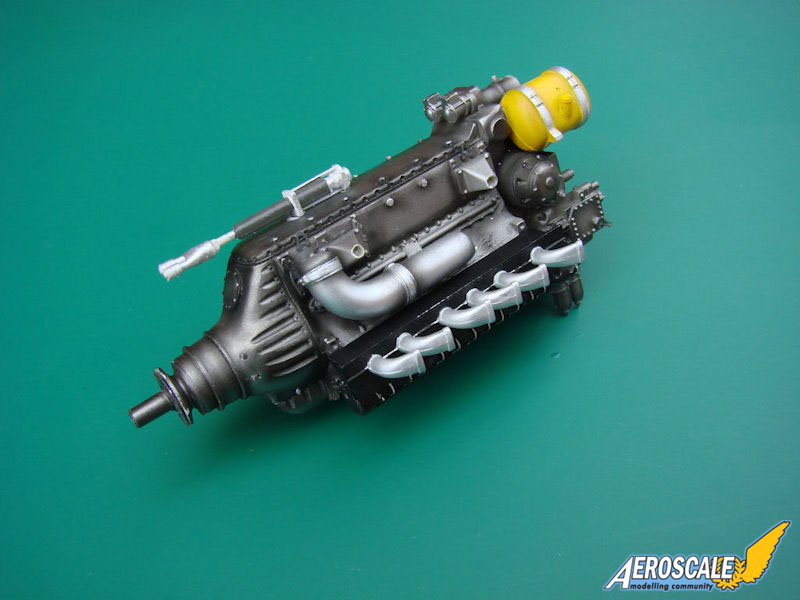
The "D" variant of the Fw 190 was powered by the powerful Jumo 213 inline engine, as opposed to the radial BMW 801. This increased the overall length of the fighter which needed to be offset by the addition of a fuselage lengthening section in order to re-establish the fighters centre of gravity. The result was the sleek looking Dora that is the subject of this build. Despite the pilots initial reservations over flying a machine which basically was a fighter powered by a bomber engine, and being told by the designer Kurt Tank that this was a temporary measure until the Ta 152 production, it wasn't long before the Dora was soon taken to the hearts of those who flew it. It was an incredibly responsive fighter, having it's control linkages made from pushrods instead of the more traditional metal cables which had a tendancy to create "lag" in control as they stretched slightly.The Dora was already becoming a very successful airplane in it's own right before it was to become the machine of choice for the newly formed Jagdverband Jv44 unit. Jv44 was a unit comprised of a number of Dora veterans and pilots with notoriety such as Adolf Galland, it's aim being to protect the newly introduced Me 262 jet fighters on their take-offs and landings. The slow nature of the 262's take off was caused by the Jumo engine being susceptible to catching fire if pushed too hard after it was started. The protection 190D's were assigned to patrol over the airfielf at low level during these vulnerable times in order to stave off attacks by roaming Allied fighters which were already claiming high numbers of the new jet wonder machines. The new protection machines were given a distinctive red and white striped underside which would be so obvious to German antiaircraft gunners as not to make them accidental targets. The unit was given the nickname "Die Würger-Staffel" but this colourful and very unusual scheme gave rise to Jv44's unoffical postwar nickname as the Papagei Staffel (Parrot Squadron)
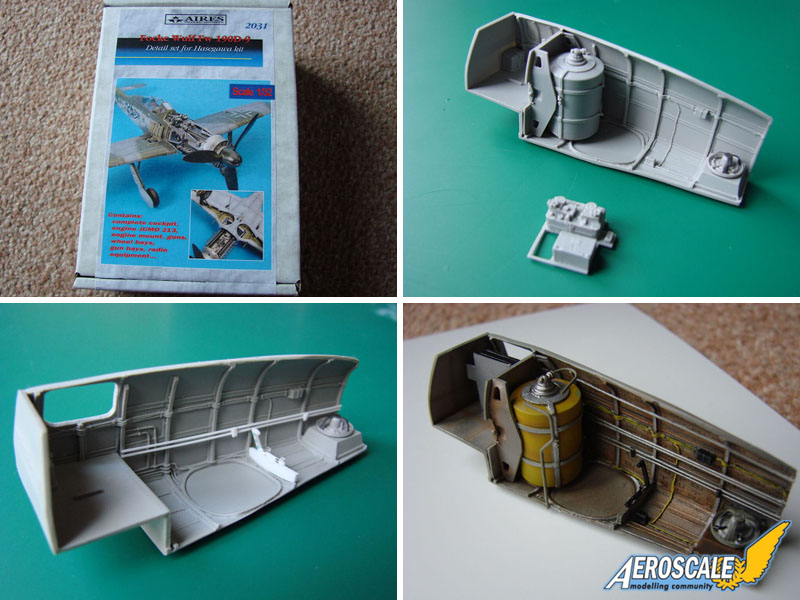
The kit and the Accessories
As I was going to plunge into the deep end with this model and go on a "sink or swim" mission, I spent a lot of time finding as much aftermarket material as I could for this model. I used the Hasegawa 1/32 Fw 190D-9 (new tool) for the basic kit, and also bought the Aires Full Detail set #2031 as the main detailing base too. I managed to source resin sets from relatively unknown companies and some beautiful photoetch from a one-man operation in Hungary. My favourite "extras" company "Model Design Construction" (MDC) was also a big player in items for this kit. A summary of what was bought is here:- Aires Fw190D full detail resin set #2031
- Black Dog Focke Wulf Fw 190 D-9 resin Tail wheel with mechanism access door #A32002
- Black Dog Focke-Wulf FW 190 A,D resin detail set (flaps, rudder and fuel fillers etc) #A32001
- Eduard Fw190D Landing flaps #32101
- MDC Fw 190D9 Wheel Set #CV32028
- MDC MG-151 set with brass barrels
- Master Model MG-131 brass barrels
- Radu Brinzan Late Luftwaffe seatbelts #RB-P32006
- PK Tinyland German service panel set
- MDC German Duralumin Manufacturers Stamps #D32009
- Mike Grant Decals Instruments & Placards set
- HobbyDecal Fw-190 Stencils ver 1 #st32003v1
- Montex Super Mask Set Fw-190D9 (Galland Circus) #K 32048
- EagleCals Fw190 decal set
- G-Factor brass Fw190A/D undercarriage
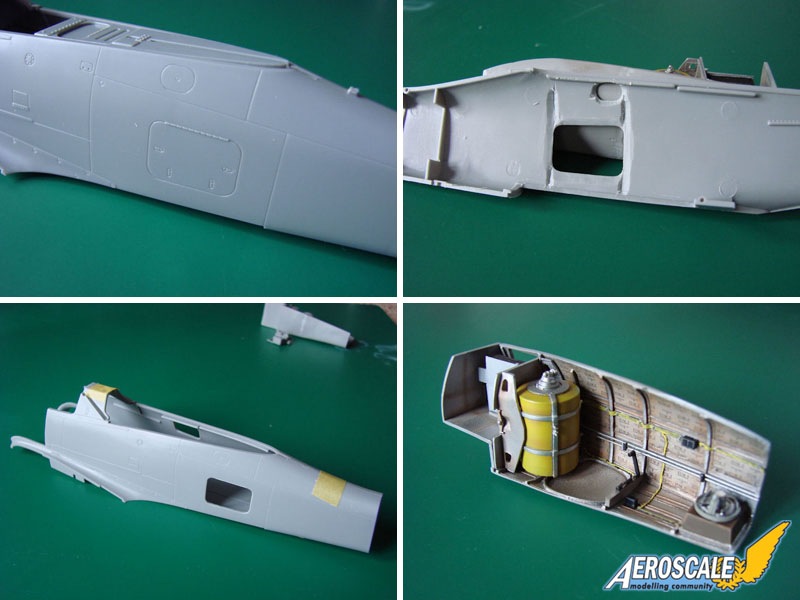
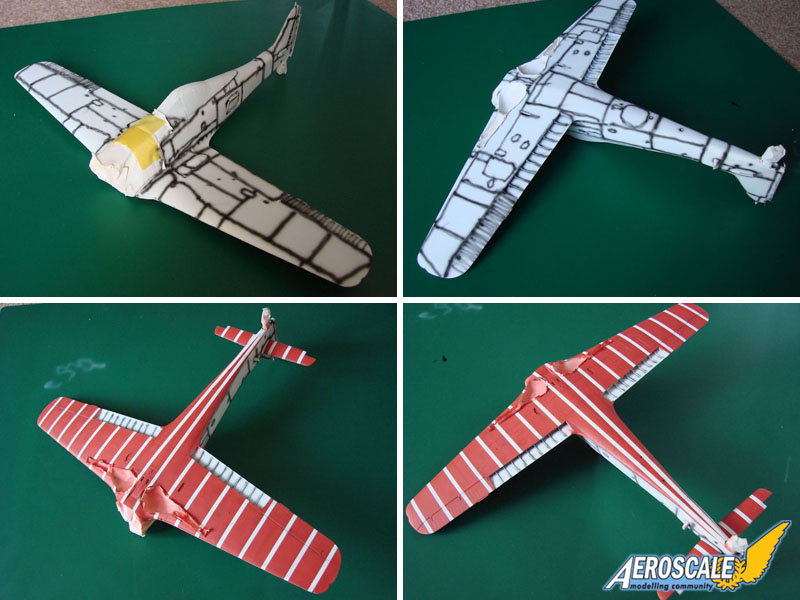
Fuselage construction
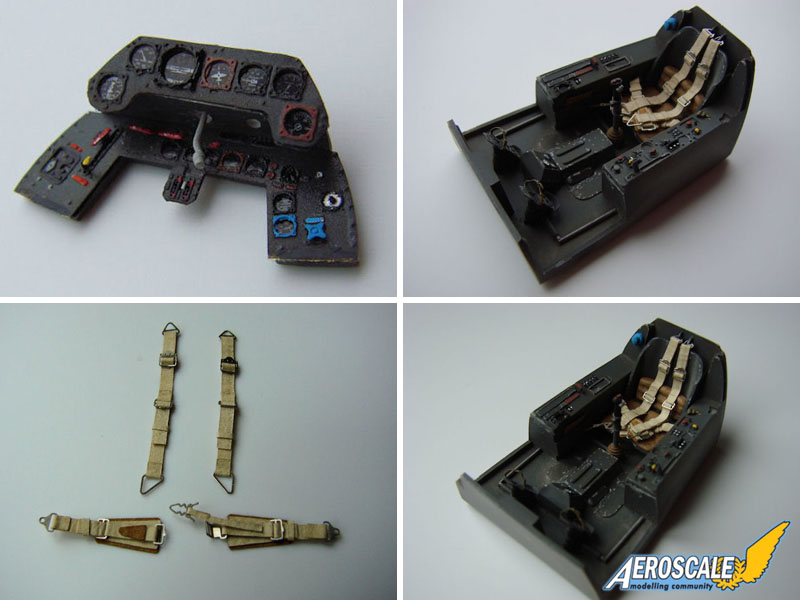
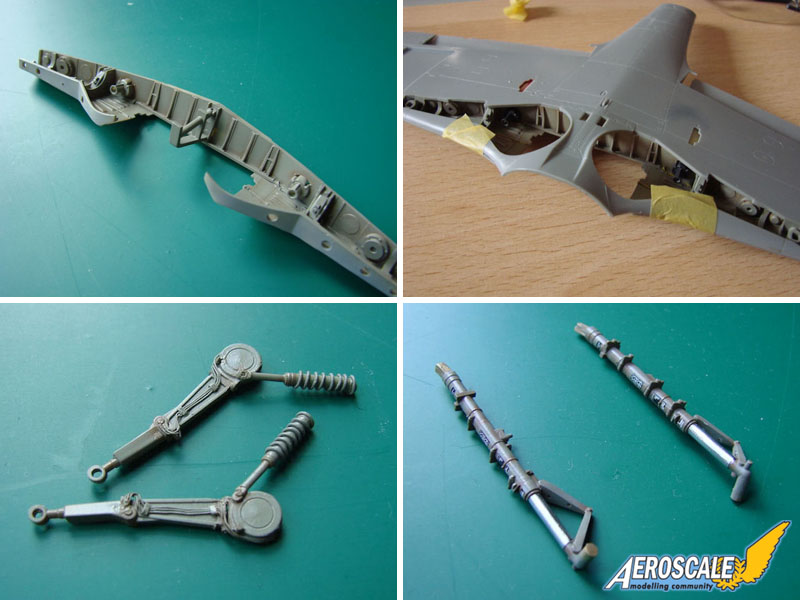
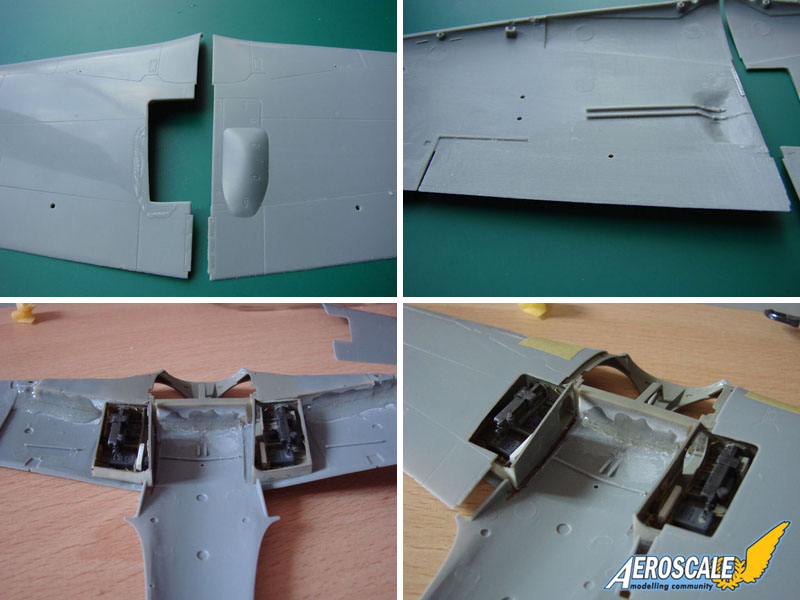
The first thing I felt I had to do before expending any time on the various detail kits was to cut up the Hasegawa Dora kit, according to the various instruction sheets bundled with the detail sets. First off was the nose, forward of the fuselage gun section, and the fuselage and tail access ports; fuel fillers and oxygen tank ports. I kept the fuselage portion of the wing machine-gun doors in situ at this point to as not to weaken the already fragile wing roots, post nose removal. The first piece of resin to be handled was the fuselage rear interior. For this, the main fuselage access port interior was thinned rather crudely as I had no curved blades at that time. The other ports on the fuselage were also thinned. The resin interior was assembled and primed, then sprayed with Alclad Duralumin. German Duralumin manufacturer decals from MDC were applied to the aircraft skin, then sealed with Klear. All shading was done with Tamiya acrylics thinned 90%. To cement the parts, I used Superglue Gel. I added the elevator and rudder push rods to the resin too. Difficult to see why Aires left these off! The engine starter crank was scratchmade from plastirod and tin metal and added to a raised bulkhead I built.The cockpit was stunning and seemed to fit pretty well dry into the fuselage. All the cockpit interior sprayed with Gunze RLM66 paint and detail work was with Vallejo acrylics. Some extra detail was added to the instrument panel, and some bundles of yellow electrical wiring to the foot well. The instrument hood was also replaced with the Aires resin part. I tried some painting techniques from the new FAQ book by JM Villalba interspersed with what I new I was already capable of. I think the resin set by Aires was possibly made for the old tooling of the Hasegawa kit as the resin rear decking behind the pilot was short by just over 3mm. There was no physical way it could have worked with this kit, so I stuck to the plastic part which was no less detailed. The cockpit walls had canopy slide runners added with plasticard also...something else missing from the Aires kit. Overall, I was pretty pleased with the results. I added a set of Luftwaffe seatbelts by Radu Brinzan also. I am absolutely amazed with them. Three hours to assemble for me, but they are exquisite, and totally adjustable to the model being built! MIG's European Dirt pigment was used to dirty up the cockpit tub around the floor area.
All fuselage assembly was done with CA so as to ease any join lines. CA was also used as a filler where appropriate, being finished with small amounts of Mr. Dissolved Putty.
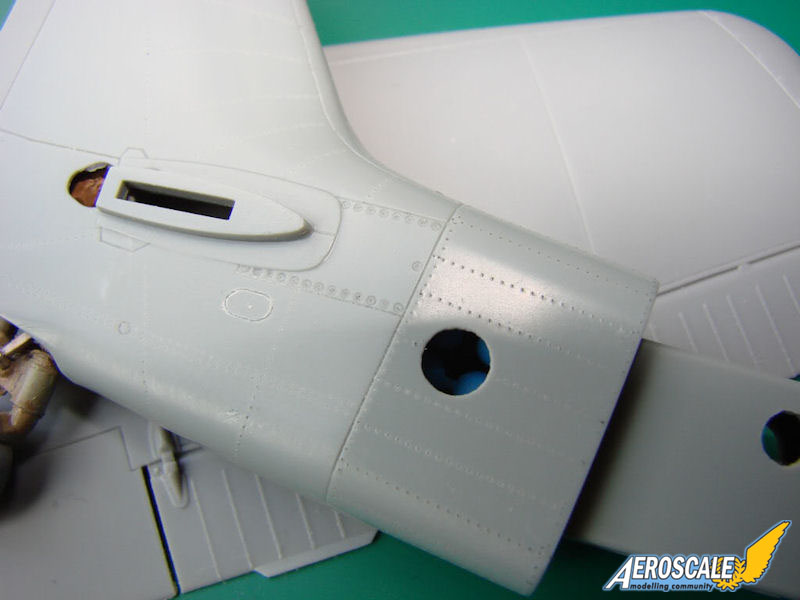
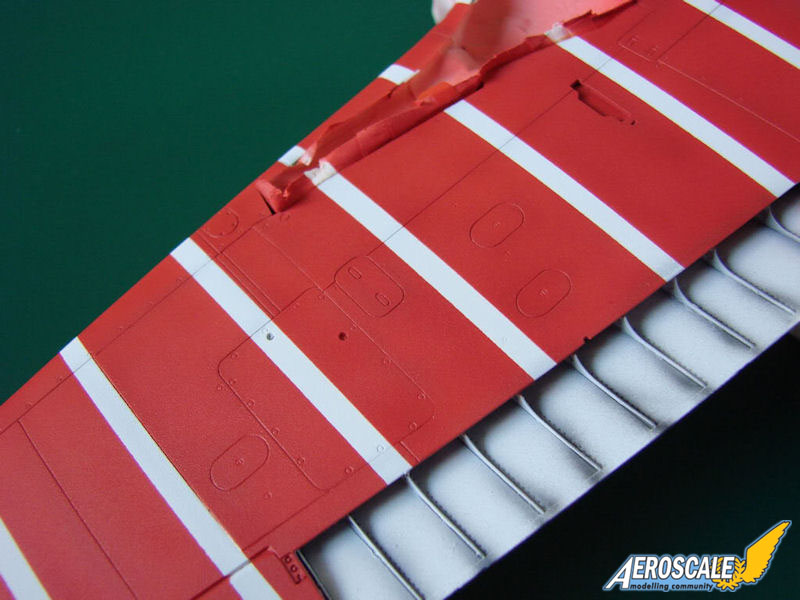
Hasegawa's wonderful kit though, does not contain any rivet detail. I quite like subtle rivet detail, and the Dora's rivets could be quite obvious, so I used a Radu Brinzan Rivet-R tool to create these, using masking tape and Dymo tape as guides. For rivet data, I used Arthur Bentleys excellent series of Fw 190D-9 drawings available to order online.
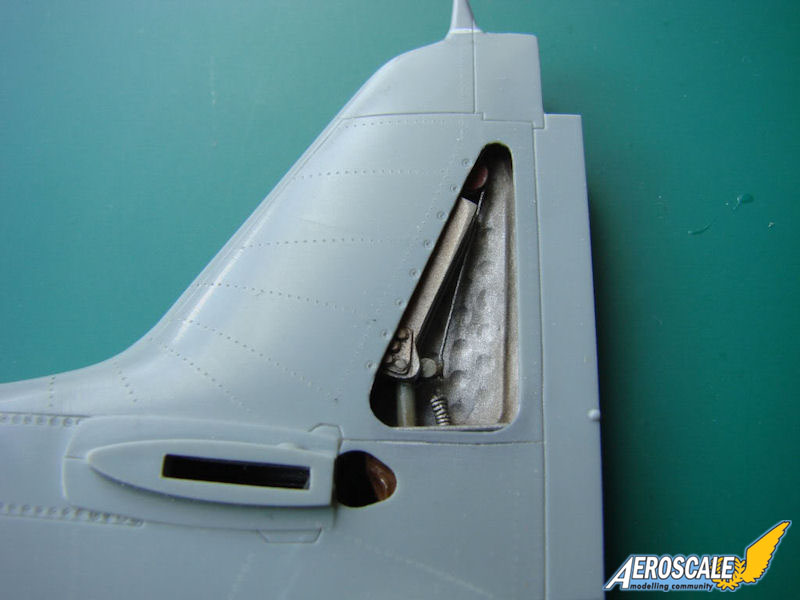
The tail section had it's control surfaces also removed, along with the access hatch and the Black Dog resin sets were used here. A little extra detailing within the tail to produce the dimpled interior, was also made from drilled plasticard and tin foil. The oxygen tanks in the fuselage extension section were made from childrens coloured beads strung onto plastirod and painted the appropriate colour. You can only just about see these when completed. The Horizontal surfaces were only dry fitted until the model had got it's eventual coat of paint.

About the Author


FROM: ENGLAND - NORTH WEST, UNITED KINGDOM
I'm 47 yrs old and started modelling from about 6yrs old, mostly in plastic, but then also designing and flying scale model aircraft for Free Flight. Left the scene in the early 90's and ventured back in 2001 to build wooden period ships. Decided I missed plastic too much. Recently re-aligned my ...
Comments


Brilliant machine and an inspiration to, many of us.
and yes, you do have advanced modellers syndrome, in a very very very heavy state as well
but that is a very good thing if you enjoy it.
well done, i hope that i achieve the same level one day
AUG 07, 2009 - 12:14 AM

Thanks for the comments guys.
One thing this project has made me appreciate is just how good the Hasegawa kit was. I'm currently building the 1/32 Roden DH-2 kit and it's a total pig. The moulding is awful, the flash is dire and the fit is atrocious. This kit, with the gem of the Aires resin kit is a neat and fairly simple project, and with it's completion comes the realisation of the idea I had 20+ years ago. It was either going to make or break me with modelling.
This kit was a dream compared to the Roden kit I'm doing, so if anyone fancies doing a 190D with the Aires set, I say 'go for it'
Jim
AUG 08, 2009 - 10:42 AM

It`s really fascinating!
(If my memory serves me right - this one is from Galland`s circus)
AUG 09, 2009 - 08:08 AM
Excellent work Jim! I love the lower candy stripe scheme; it really came out well.
Speaking of pigs and FW 190s...can you say Airfix 1/24 scale Fw 190?
AUG 10, 2009 - 06:28 AM
Copyright ©2021 by Jim Hatch. Images also by copyright holder unless otherwise noted. The views and opinions expressed herein are solely the views and opinions of the authors and/or contributors to this Web site and do not necessarily represent the views and/or opinions of AeroScale, KitMaker Network, or Silver Star Enterrpises. Images also by copyright holder unless otherwise noted. Opinions expressed are those of the author(s) and not necessarily those of AeroScale. All rights reserved. Originally published on: 2009-08-01 00:00:00. Unique Reads: 20600

WEB HOSTING BY


Copyright ©2021 AeroScale and Kitmaker Network, a subsidiary of Silver Star Enterprises
All Rights Reserved. Please read our Conditions of Use and Privacy Policy.
All Rights Reserved. Please read our Conditions of Use and Privacy Policy.