

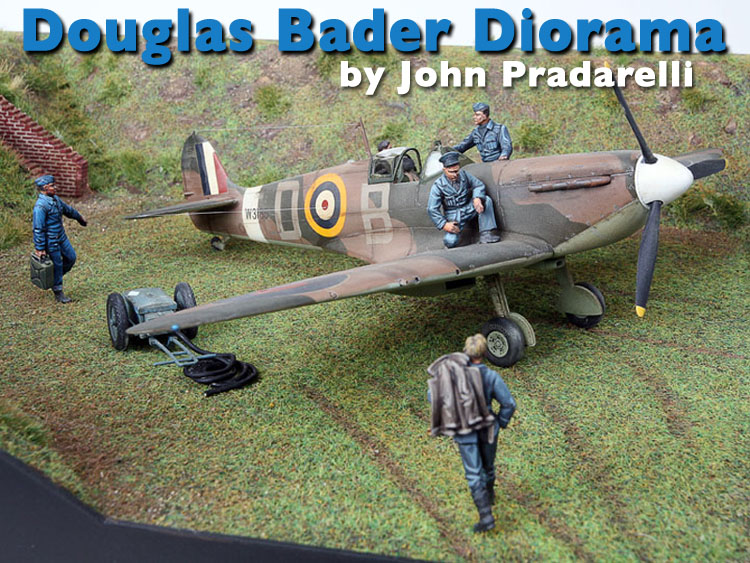
1⁄48Douglas Bader Diorama
2
Comments
BACKGROUND
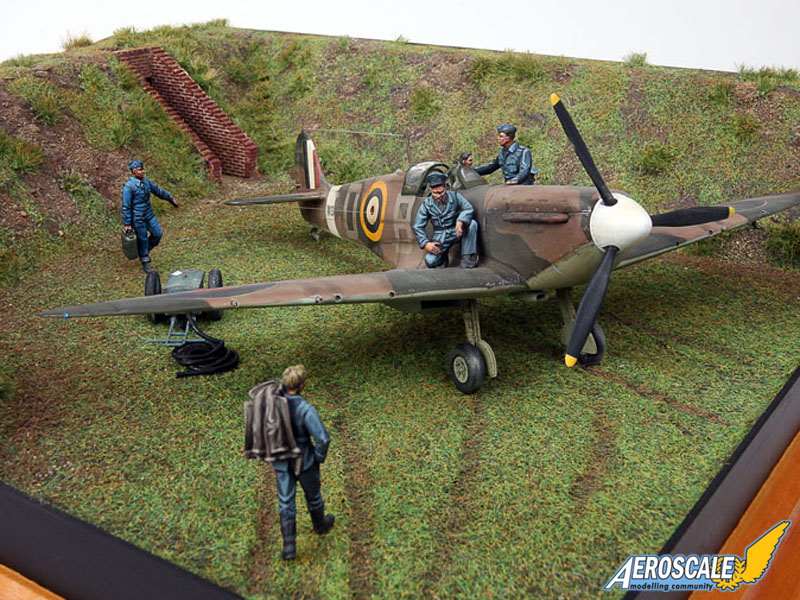
This diorama was created for a coworker who is a retired Lieutenant Colonel from the USAF. He was stationed in England in the 1970s. One of his memories of the airbase where he was stationed includes the revetments left over from WWII. He is also an admirer of the well known RAF pilot, Douglas Bader. He has a Robert Taylor print of the plane represented in the diorama. His desire was to have a diorama of a revetment as he remembers them, with Douglas Baders spitfire parked there. He wasn't very concerned with historical accuracy. He just wanted a nice looking diorama containing two of his loves. This was good for me, because I was under a tight budget and schedule, and wasn't going to be able to make all the necessary modifications to make it 100% accurate. The good news is that when I delivered the diorama to him, he LOVED IT. I was able to produce it for the very reasonable price of $130 US.MATERIALS USED
- Tamiya Supermarine Spitfire Mk.1- Pro-Modeller World War II Ground Equipment
- Legends Douglas Bader Figure
- ICM RAF Pilots and Ground Personnel
- 2" Thick Pink Insulation Foam
- 1-1/2" Wood Moulding
- .060 Sheet Styrene
- Sculptamold
- Sand
- Lightweight Spackle
- Mixtures of Busch and Noch Static Grass and Grass Mat
- O Scale Brick Sheeting
- Mount Board
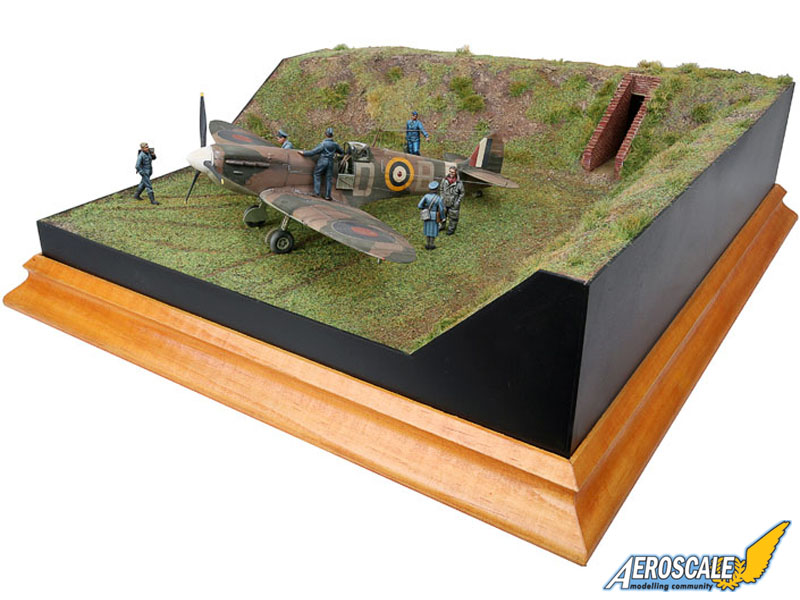
THE BASE
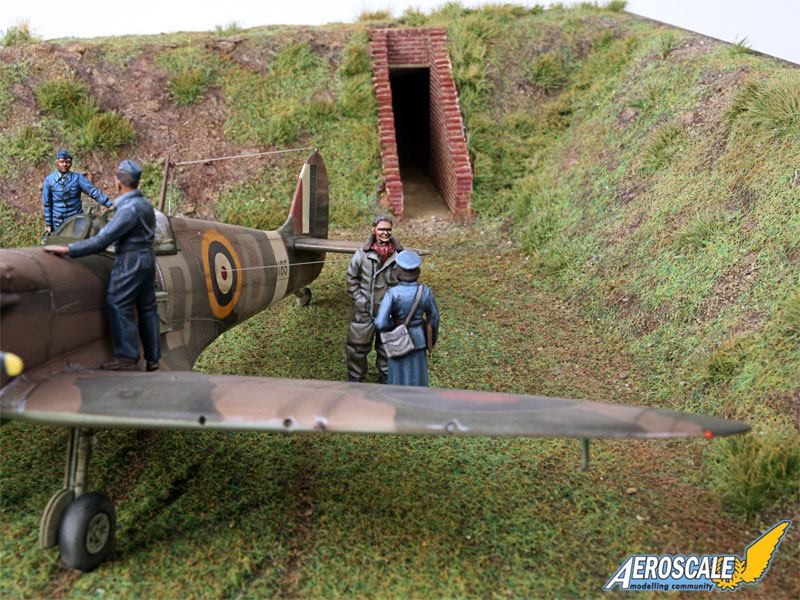
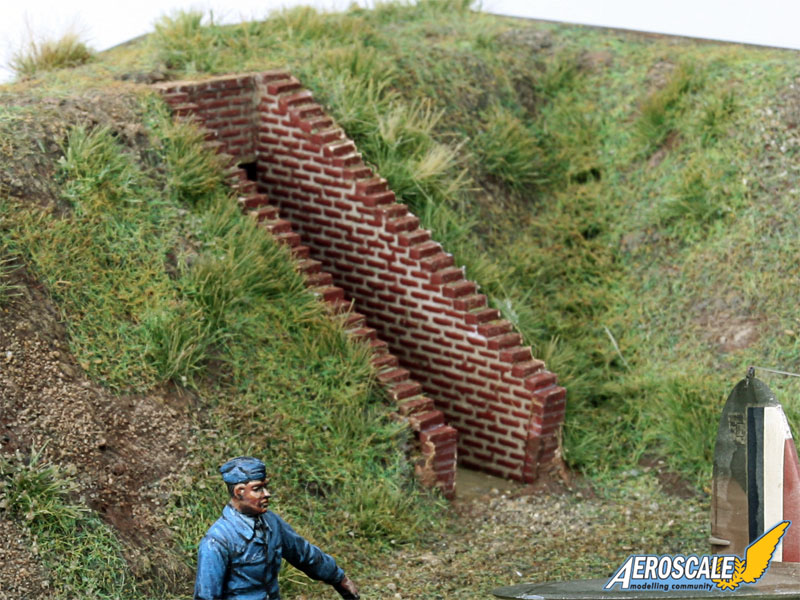
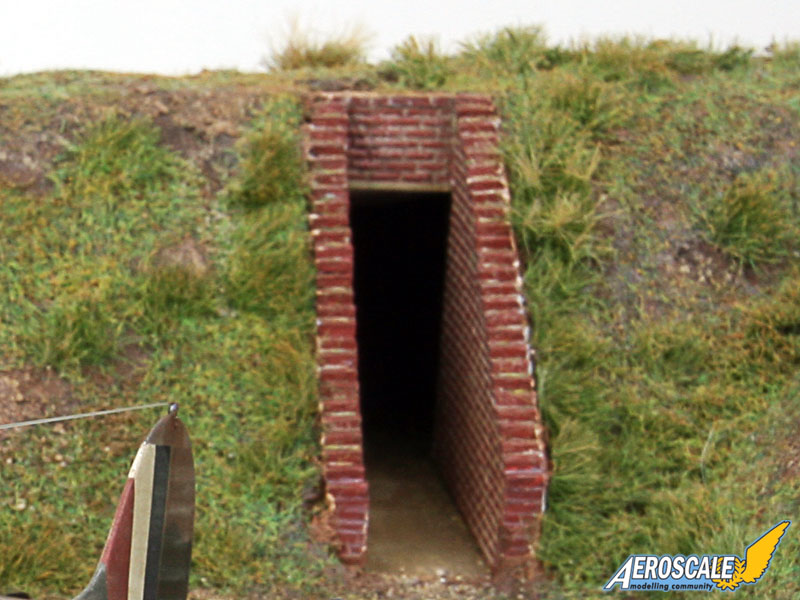
I started by cutting a rectangle of 2" pink insulation foam approximately 13" x 12". I then cut the hills out of the same foam using a diagram I found on the internet for reference. The entrance to the bunker was roughly cut in. I decided to make the plastic edge framing at this point before putting any of the landscaping materials on. This was made with .060 white styrene which I joined together with Tenax, sanded, and spray painted with flat black enamel. I used regular wood glue to join the plastic frame to the foam although it was already a pretty tight fit.Next, I created the bunker entrance as a sub-assembly. For this I used O Scale brick sheeting from which I made two stepped walls. I joined them together with a strip of mount board for the floor, and another strip of brick sheeting for the header. I then cut individual bricks using "The Chopper" and used them to add dimension to the flat walls and header. This assembly was primed and painted brick red. I created the mortar using lightweight spackle which I smeared in with my finger. I let it dry for about a minute and then wiped away the excess with a damp paper towel. I weathered the entrance using water-based oil paints. After it was dry, I glued it into place on the foam.
The next step was to cover the entire hill area with sculptamold. I didn't want to use it on the ground area because I thought it would look to bumpy for an area where planes would taxi. Before the sculptamold dried, I sprinkled and pressed in some sand in random areas to allow for a more interesting texture. After the sculptamold dried, I gave the hills and ground level two coats of a basic brown color using cheap craft paints. The final step for the groundwork was to add grass. I used a custom mixture of static grass colors and some Busch grass mat. The key here was to make it look patchy and sparse to help break up the monotony of just a solid green hill. First I brushed on a watered down coat of white glue, and then ripped off small pieces of the grass matt which has taller scrub grass, and placed them randomly over the hill. I then sprinkled on static grass. The important hint here is to tip the diorama and apply the grass from different angles so that you can make sure it gets next to, and under, the patches of scrub grass. This makes for a better transition from short to tall grass.
I created the tire tracks on the ground by lightly draggin a strip of plastic through the grass while it was wet. This revealed the brown paint below. After the glue was dry, I liberally added a good soaking of matte medium using a pipette. This assures that the ground material is attached very well. Hint: before applying the matte medium, I mist the entire diorama with window cleaner to help break the surface tension. This helps the matte medium to soak in rather than form droplets or pools on the surface. I left this to dry for two days. To finish up the groundwork, I used some old brushes and added some contrast and color variations to the grass and dirt using craft paints. I primarily used various shades of green and yellow on the grass, and lighter shades of brown on the dirt.
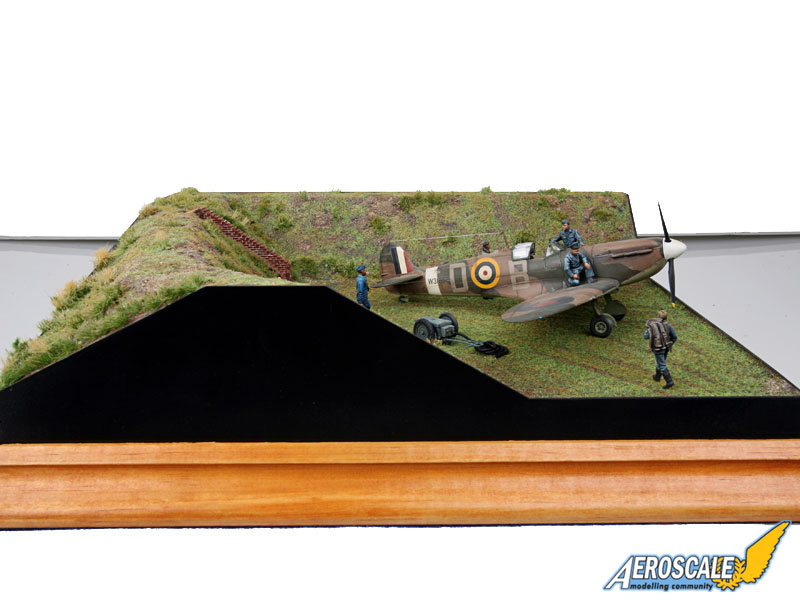
The wooden frame was built from some old moulding I had laying around the house. It was cut on my miter saw, glued together, and stained using oil paints. I finished it off by giving it a coat of satin varnish, and adding a piece of dark blue felt to the bottom which covered up the pink foam.
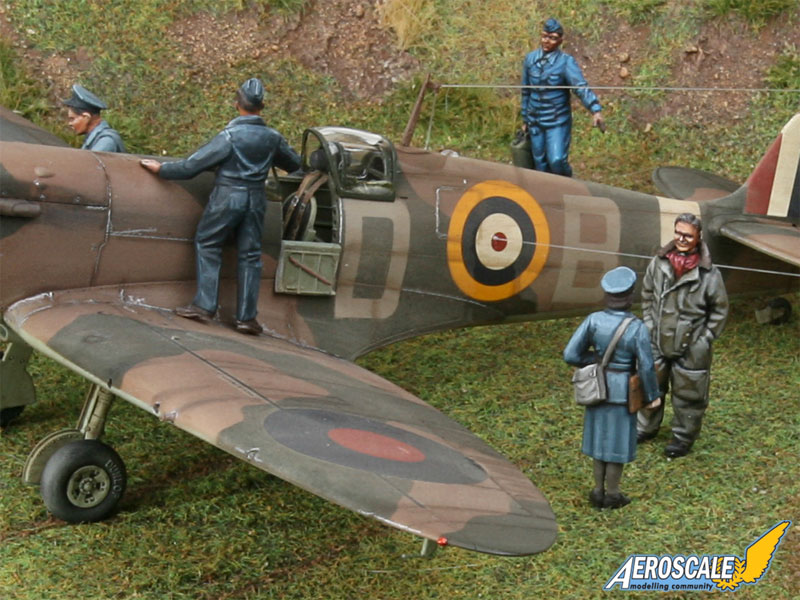
THE AIRPLANE & ACCESSORIES
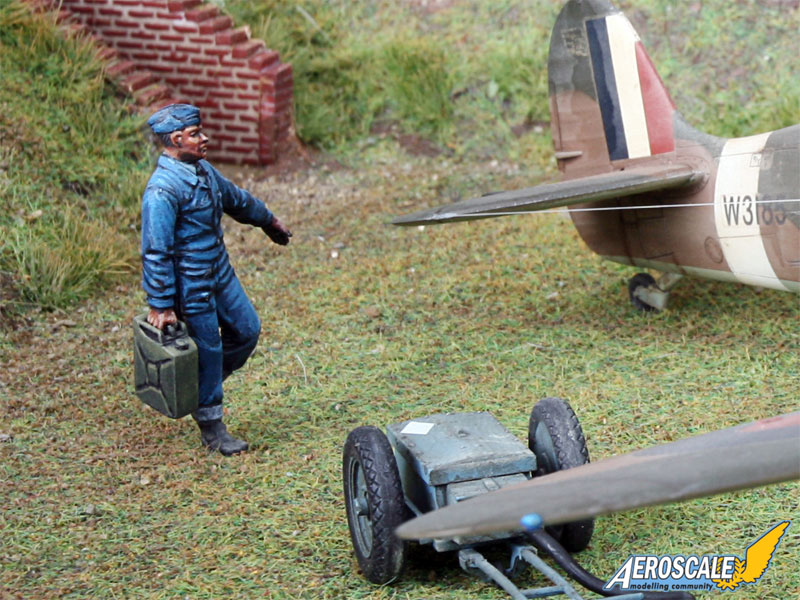
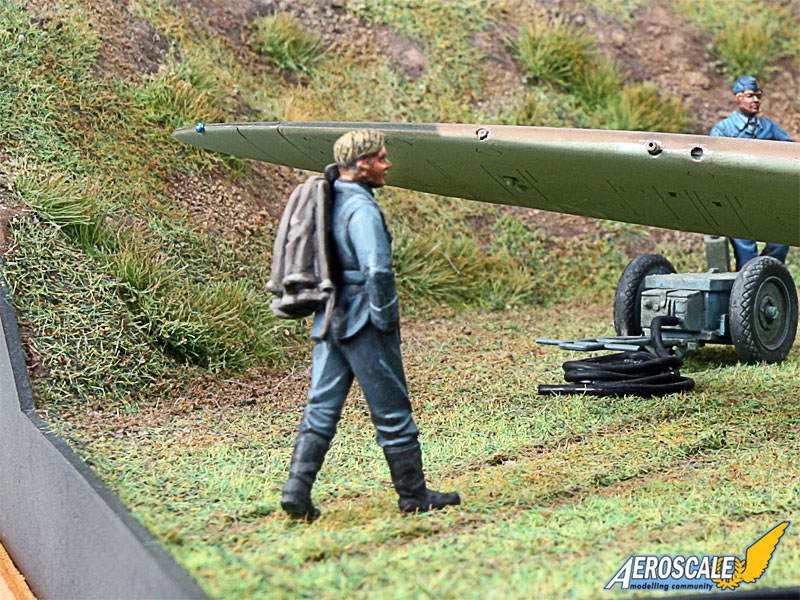
Airplanes are my weakpoint, and the part of the diorama I worried about the most. I've only built a couple in my time, so it is definitely an area I'm still experimenting with and learning about. The nice thing is, the Tamiya Supermarine Spitfire Mk.1 goes together like a dream. I'd highly recommend this kit to someone just starting out with model planes. The only modifications I made to this kit was to create some masking tape seatbelts, and to make my own decals for the Tangmere Wing emblem and the numbers in the white cigar band. The plane was painted using Tamiya acrylics, given two coats of Future, decaled and weathered using oil paints, another coat of Future, a coat of Dullcote, and then finished off with some Tamiya weathering pigments. I added some paint chips on the wings and fuselage using a silver pencil. The antenna was made from clear stretched sprue.I wanted to have some other elements in the scene besides the plane and figures, but because the diorama is pretty compact I wasn't sure what to use. Luckily, I remembered the old Pro Modeller WWII Ground Equipment Set. Even more lucky for me, I had another coworker who had this set in his basement and sold it to me for a very reasonable price. The starter cart proved to be just the perfect accessory. Interesting, easy to build, and small enough to fit. It was primed, painted using Polly Scale paints, decaled, and weathered with oil paints. The vinyl hose they provide in the kit is difficult to bend to a desired shape, so I decided to thread a thin piece of brass wire through it. This was the perfect solution and allowed me to coil it around a dowel before placing it on the diorama.
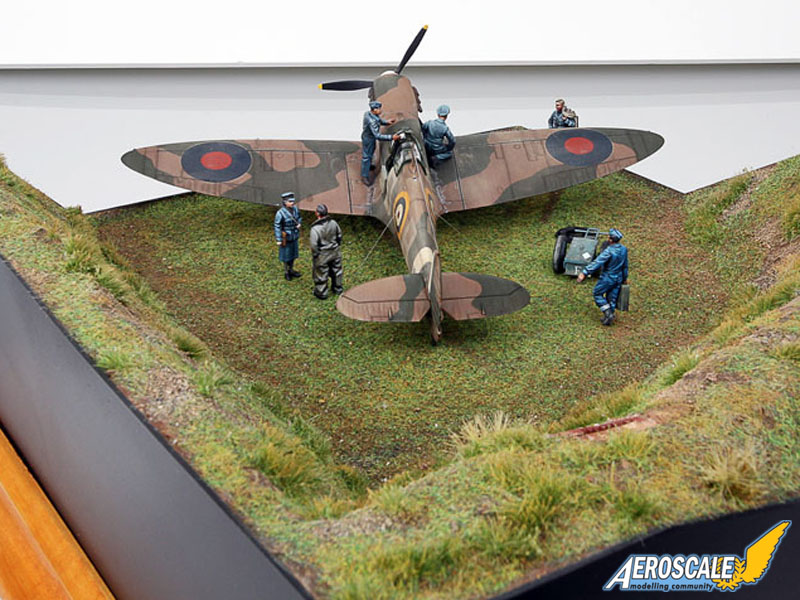
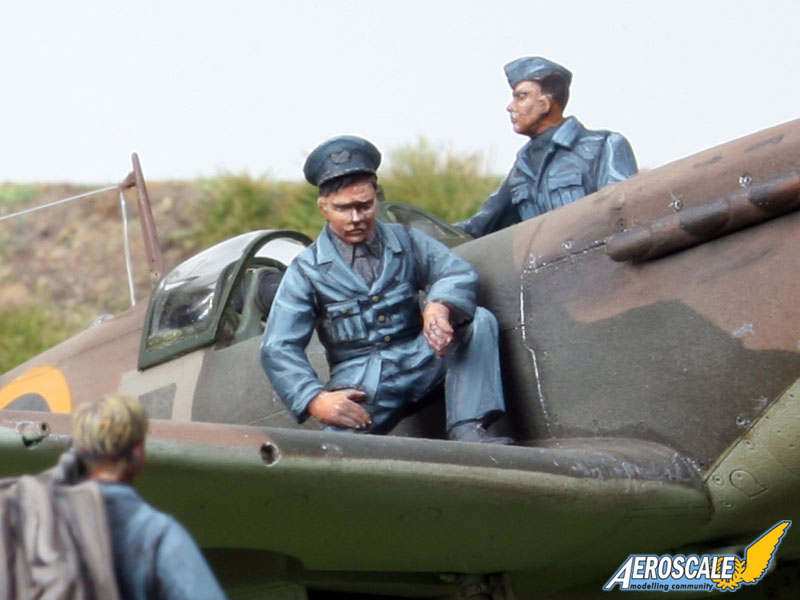
THE FIGURES
Figures is the area I consider myself the most confident in. The ICM figures are an absolute treat and have great detail for 1/48 scale. I really enjoyed putting them together. As luck would have it, I was quite pleased to find that Legends of Korea made a resin Douglas Bader figure. This really personalized the diorama.Knowing that the diorama was going to be dominated by a lot of brown and green (both the groundwork and the plane) I thought the figures should really pop out with some exciting color to add life to the scene. With that in mind, I decided to use a painting technique with much more contrast than I would normally employ. This helped to really add excitement to the figures. All figures were primed gray, and then painted using Vallejo acrylic paints. They were attached to the base using a single pin in one leg. The figures mounted on the plane were attached with Tenax.


About the Author


FROM: WISCONSIN, UNITED STATES
A modeler off and on (as time permits) for over 20 years. By day I work for a Model Railroading company in Milwaukee, WI. By night you'll find me spending time with my wife and two boys...until they go to bed. Then it's off to the basement where I will work on figure painting, armor, planes, diorama...
Comments


Copyright ©2021 by John Pradarelli. Images also by copyright holder unless otherwise noted. The views and opinions expressed herein are solely the views and opinions of the authors and/or contributors to this Web site and do not necessarily represent the views and/or opinions of AeroScale, KitMaker Network, or Silver Star Enterrpises. Images also by copyright holder unless otherwise noted. Opinions expressed are those of the author(s) and not necessarily those of AeroScale. All rights reserved. Originally published on: 2008-11-01 00:00:00. Unique Reads: 17446

WEB HOSTING BY


Copyright ©2021 AeroScale and Kitmaker Network, a subsidiary of Silver Star Enterprises
All Rights Reserved. Please read our Conditions of Use and Privacy Policy.
All Rights Reserved. Please read our Conditions of Use and Privacy Policy.