

1⁄48Hanriot H.D.2 Floatplane
8
Comments
Introduction
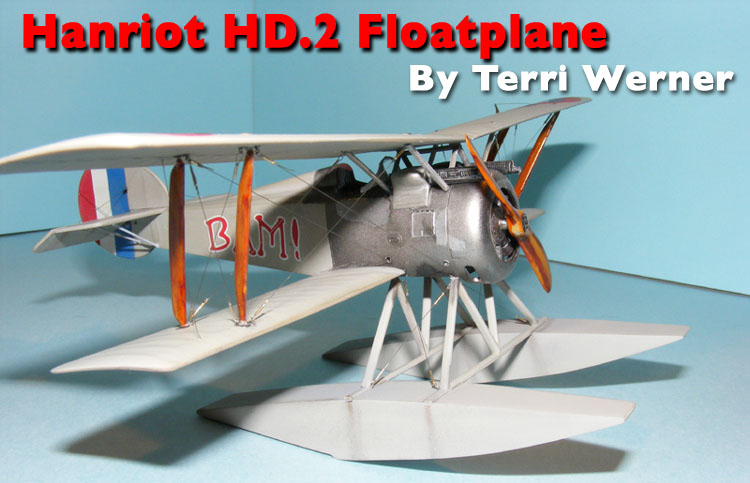
It was back in 1999 when Eduard came out with this beauty of a kit. It was "just have to have it!". But I missed out until a few weeks ago when two of them came in the mail. Well one was calling out ...............build me! build me now! So I did and here is how it went.Assembly
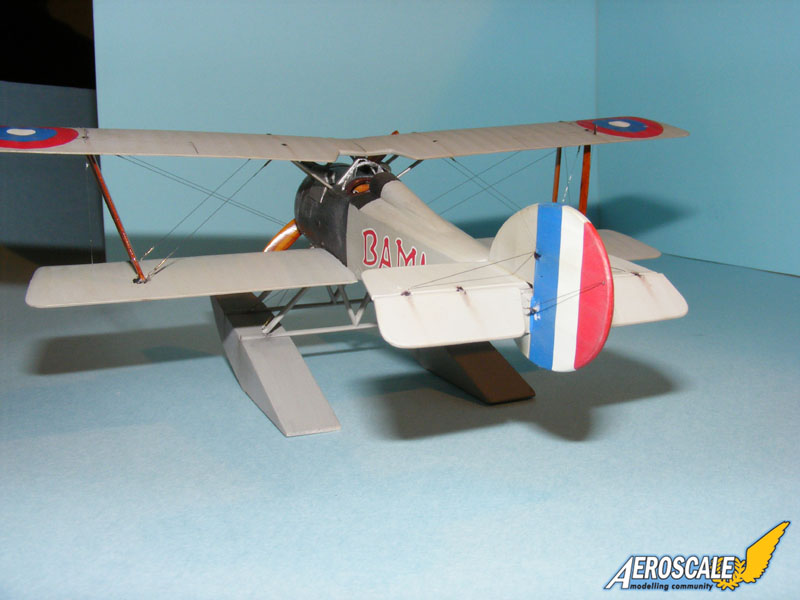
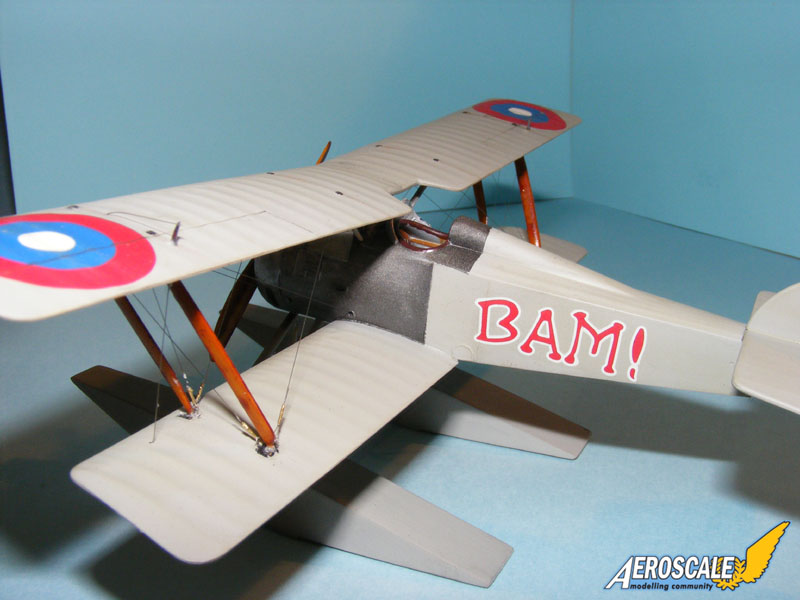
Starting with the fuselage the inside was painted with a mix of steel and alumina, just a little steel was added to give it more of a old worn look. The floor was done in the same manner. Frame work was pick out with Vallejo wood and lightly dry brushed with Tamiya red brown. Once dried Tamiya clear orange was brushed on thinned 50/50 with thinner. Instrument panel was done the same way and I used the kit decals to go a long with it. Wire bracing was added to the cockpit side walls and floor, for this I used 0.3mm plastic rod coloured with a black felt pen. The floor was glued in place and rest of the parts where painted. Control lines where added with smoked thread.I didn't use the kit supplied PE parts, saving these for a HD-1. I did use a replacement seat for Eduards PE line of parts, but do to the cat and his fine four paws lost that one. So I used another one which was over sized so it hides most of the detail. Eduards seat belts where added as well.
Fuselage was then closed up and the lower wings add and set a side to dry. The tail plane was next, cutting away the control surface. I fled out the hinge locations and replaced them with stock plastic and glued the flaps back in place at an angle and fixed this to the airframe. This was set a side to dry really well and the floats where next. These are simple, just glue the halves together. As these dried, putty had to be added to the underside and on the float sides to hide the seems. After the sanding was out of the way, all rigging hole locations where drilled out before primer was added.
Painting
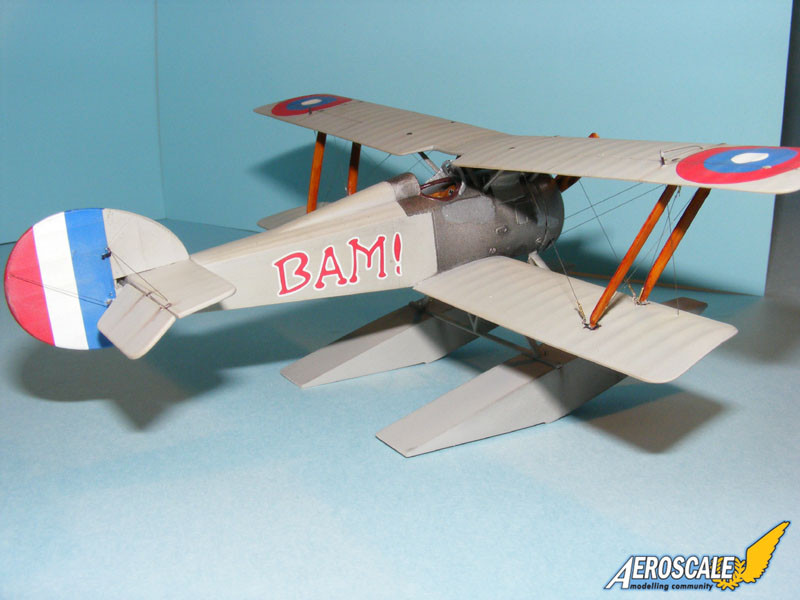
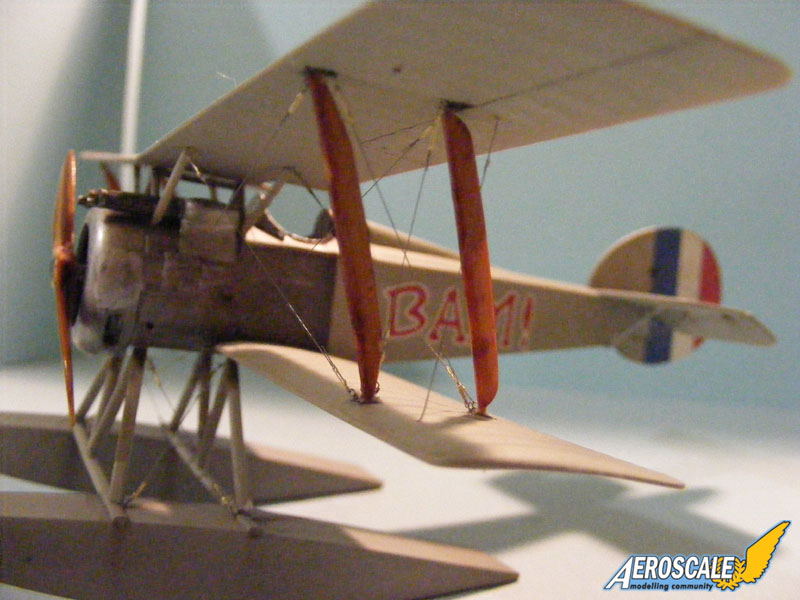
I used Testors Model Master Acrylic primer. I then mixed Vallejo light grey and a little Polly scale French beige. Well it didn't turn out as a pale grey, but I ended up liking the colour! For the float assembly I just used light grey lighten with white. The metal panels were masked off and sprayed Tamiya gloss black. Allcad II was then sprayed. I can get over on how fast this stuff dries! I made the mistake on not masking this off before I sprayed the gloss coat for the decals. The end results was the gloss re acted with the allclad giving it a tarnished look! I sealed this with future brushed on. Decals where added and I was not overly happy with these. They where really thick and took three to five times on applying Micro-sol.Final construction
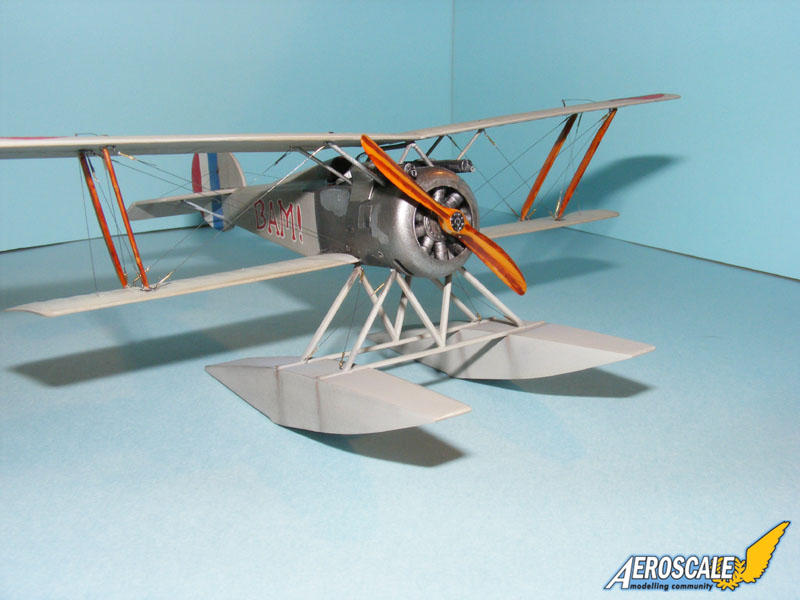
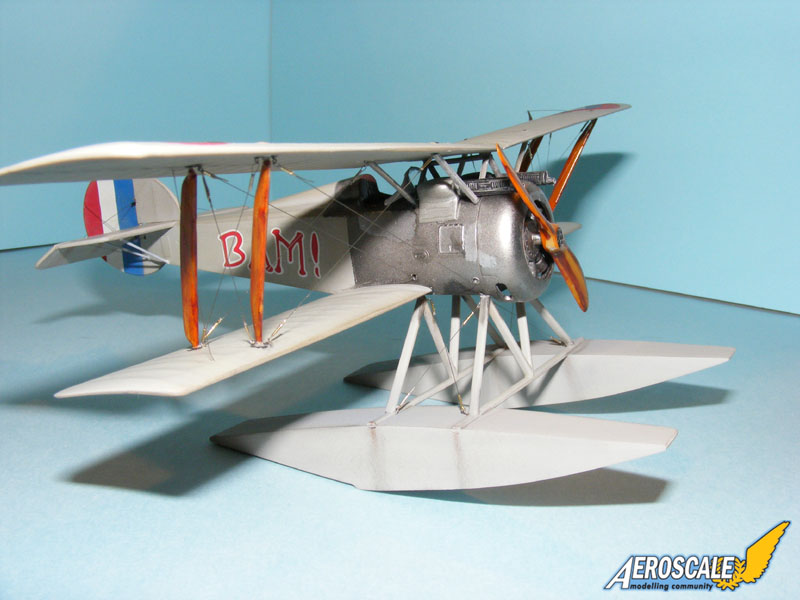
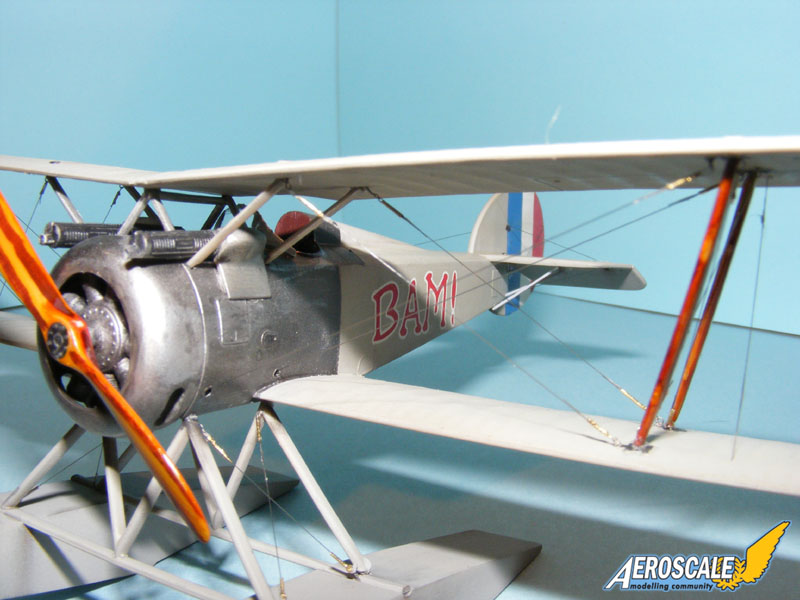
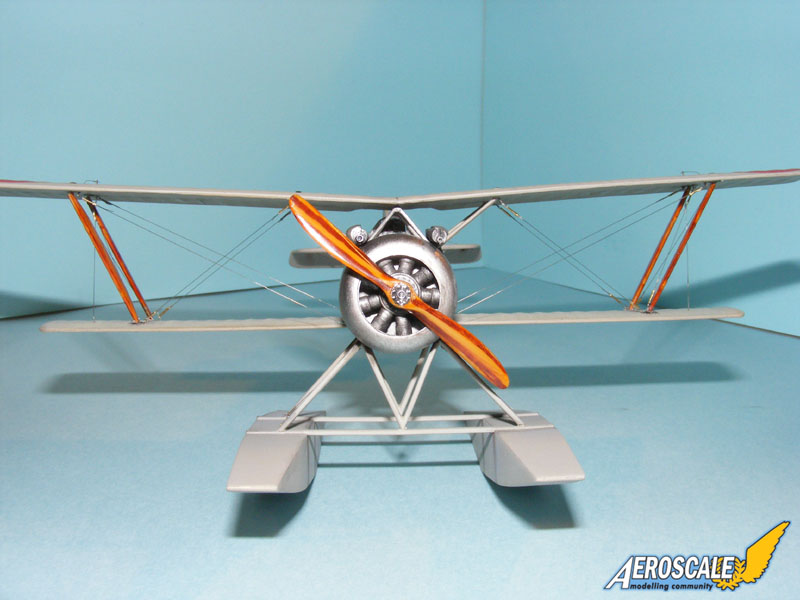
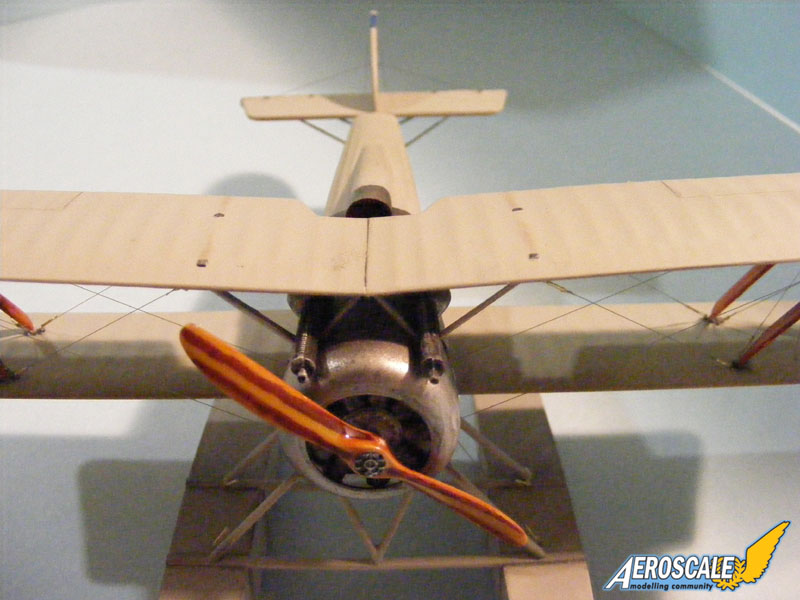
The model was given a fine wash of black. Once this was dried every thing was sealed with Testors dull coat. Further weathering was done with pastel chalk using black, light grey and raw serreria. I premade my wire hoops earlier in the build. These where glued in the predrilled holes earlier in the build using thick super glue.The outer struts I painted the same as the cockpit framing. The top wing was added and I had no trouble with ant of the struts, every thing lined up great. I did the rigging using smoked thread and heat stretched Q-tip with pieces cut into 3 mm in length. Slipping two of the cut pieces on the thread was feed through one of the hoops and then feed back through the turnbuckle and pulled down and a fixed with super glue. This was repeated to all locations for the rigging. The turn buckles I pick out with brass paint. The float assembly was added and the rigging done the same way as well as the tail plane. Final wreathing was done using Tamiyas set of sand, light sand and mud .
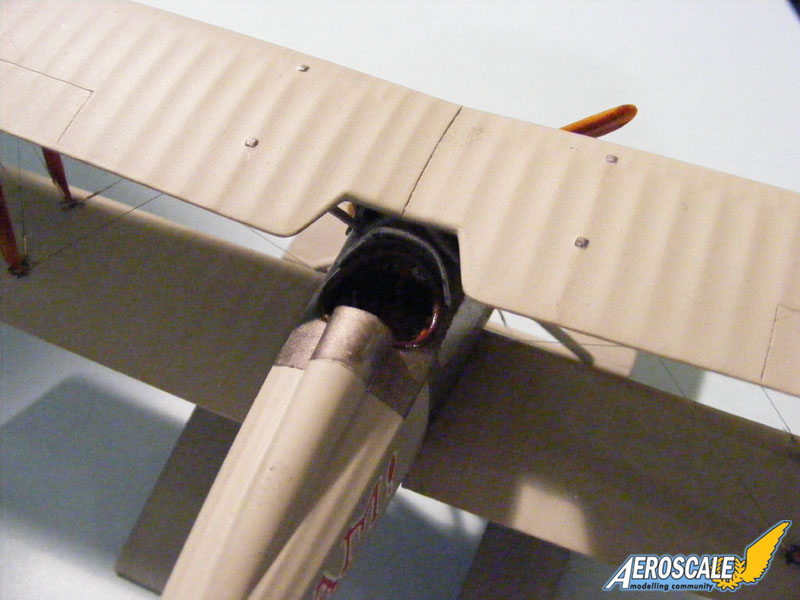
The prop was the last to be added and I paint this the same way as the rest of the wood in the kit. Once dried it was glued in place. I did forget to mention the engine, it was painted flat black first then dried brushed with aluminium, with washes of black and brown.
About the Author


Comments

Areal nice peice off work there Terri, I´ll never got this still missing in my stash.
Wonderful.
Cheers
Larsa Q
OCT 31, 2008 - 11:49 PM

Excellent work there Terri! Most impressive. Congrats on the Feature and the images are a vast improvement. You are really coming along! U.S.N. HD.2 Lt. Branberry, Dunkerque 1918. One of the American Naval Hanriot types flown by a Lt. Branberry (evidently a U.S. Marine Aviator not Naval) used the acronym BAM in U.S. Marine colours of Red & Yellow. This term was used to describe Marines of the female gender.
NOV 01, 2008 - 01:58 AM

Thanks Lars It was a fun project to do . Now that I Know the flaws in the kit and what I would do better on next one in the stash ( you really have to get one ) along with more ref as well .
Stephen , thank-you I'm glad you guy's like my builds so far and giving me tips and help when needed pointing me in the right direction . I don't think I could have done things with out all of the great aid from here . Sure has helped with improving my skills and with the photo's !
NOV 01, 2008 - 12:44 PM

Teri,
Congrats on the feature, excellent work all around. I especially like the rigging.
Dwayne
NOV 02, 2008 - 04:16 AM
Hey Terri,
Great build. Congrats on the "Freature Presentation".
Regards
Steve
NOV 02, 2008 - 04:24 AM

Wow!
Well Done Terri!
Your very own feature... And only the first of many I am sure...
Cheers,
Hugh
NOV 02, 2008 - 12:59 PM

That is one beautiful looking bird. Thanks for sharing her with us.
Cheers,
Mike
NOV 02, 2008 - 04:04 PM
wow , thanks guy's for all the kind words it helps with the encouragement to improve on my skills to be able to produce eye pleasing models .
NOV 07, 2008 - 02:41 PM
Copyright ©2021 by Terri Werner. Images also by copyright holder unless otherwise noted. The views and opinions expressed herein are solely the views and opinions of the authors and/or contributors to this Web site and do not necessarily represent the views and/or opinions of AeroScale, KitMaker Network, or Silver Star Enterrpises. Images also by copyright holder unless otherwise noted. Opinions expressed are those of the author(s) and not necessarily those of AeroScale. All rights reserved. Originally published on: 2008-11-01 00:00:00. Unique Reads: 10309

WEB HOSTING BY


Copyright ©2021 AeroScale and Kitmaker Network, a subsidiary of Silver Star Enterprises
All Rights Reserved. Please read our Conditions of Use and Privacy Policy.
All Rights Reserved. Please read our Conditions of Use and Privacy Policy.