

1⁄35Westland Wyvern
20
Comments
Introduction
I have been a life-long aviation buff but I still discover that there are so many aircrafts I know nothing about. The Westland Wyvern is such an intriguing aircraft. These precious (and all too rare) moments are what make modelling such an interesting hobby. Ever since I laid my eyes on the Classic Airframes version of this machine, I'm in love with it. It falls in all three of my "categories": weird, ugly and beautiful! In the same way as the F-4 Phantom, A-10 Warthog or the JA-37 Viggen does. The Wyvern has that sinister "no-nonsense, we mean business" purposeful look, simply put: an aircraft with an attitude!The kit
This kit comes in a medium-seized cardboard box in Trumpeter's (now) usual sturdy lid/tray type. All parts are securely packaged with all sprues and decals in their separate plastic bags. Everything is crisply moulded in the "standard" light grey plastic, all surface details are recessed and not as overdone as on earlier kits. The clear parts come in their own little bag and they are very well moulded. All clear parts in my kit were extremely clear and flaw free. I only wish Trumpeter could have supplied the windshield wiper as a separate (etched) part. Having it moulded in the part makes it harder to mask around it later. All control surfaces are moulded in place (no more pins and hinges), the wheels are moulded in plastic with separate hubs (not weighted), the instrument panel is a etched part with acetate backing, propeller(s) only consists of 17 parts and can be built contra-rotating. Wings can be built folded or extended, flaps down or up and there's lots of things to hang under the wings (Rockets x8, 90Gal. wing tanks x2, 1000lbs bombs x2, torpedo, 150Gal. centre line tank and two RATOG bottles).Decals are provided for three aircrafts, all in the same scheme of Dark Sea Grey over Sky. One option is J, WN325 830Sqn, HMS Eagle 1956, Suez (During Operation Musketeer), complete with all the black and yellow Suez-stripes. The other two aircrafts are 388 "Flook", WN335, 831Sqn, HMS Ark Royal 1957 and 278 "Dennis the Menace", WL879 813Sqn, HMS Eagle 1958. A first look at the decals gives a good impression being printed in register with good colours. Instructions are in the usual clear Trumpeter style with colour callouts for Gunze Sangyo only.
For pics of the contents in the box, please take a look at the in box review.
Interior
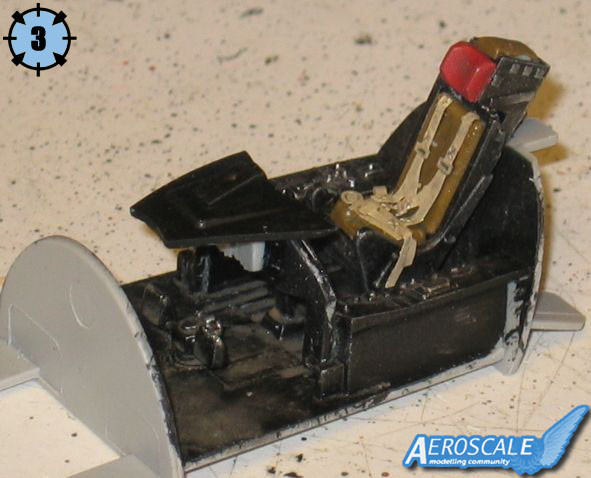
Interior I will take the build step by step here as my usual "building-sequence" is to jump around all over the kits in a rather disorderly manner.So here we go, starting with step 1: Trumpeter suggests the cockpit to be painted in Dark Gull Grey with black panels, but it is not correct. According to the 4+ book, the Wyvern had a "traditional" British cockpit, that's all black! Late Spits, Meteors and Sea Hawks all had entirely black pits, so this seems more accurate. The seat consists of 10 plastic and five etched parts (the seat belts). It goes together very well, but the seat belts are quite thick and stiff. I painted the seat in matt black (Humbrol33), pads with Khaki (H26), head rest with Insignia Red (H153) and the seat belts with a light Tan (H148 Radome Tan). A quite heavy dry brushing with silver (H11) to bring out the details finished the seat (picture 1). I picked out the belt buckles with aluminium and added some small details.
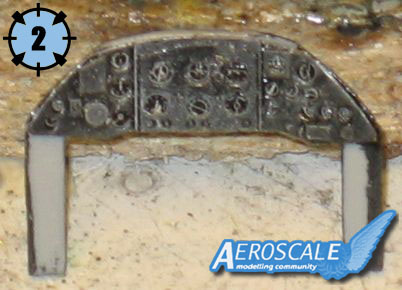
n step 2 I assembled the cockpit, all parts fitted perfectly so it went rapidly. The instrument panel consists of an etched face with all instruments on an acetate backing, and a plastic "clean" panel. I painted the back of the acetate sheet white and glued it to the back of the panel face with white glue, and then I glued these parts to the plastic panel with super-glue. The effect is very good and much more realistic then those pesky all-clear panels Trumpeter have used in other kits (picture 2). I treated the cockpit in the same way as the seat; matt black all over, dry brushed with silver and "washed" with black/brown (pictures 3, 4 and 5). I left the seat until the very end of the build, making masking the cockpit easier.
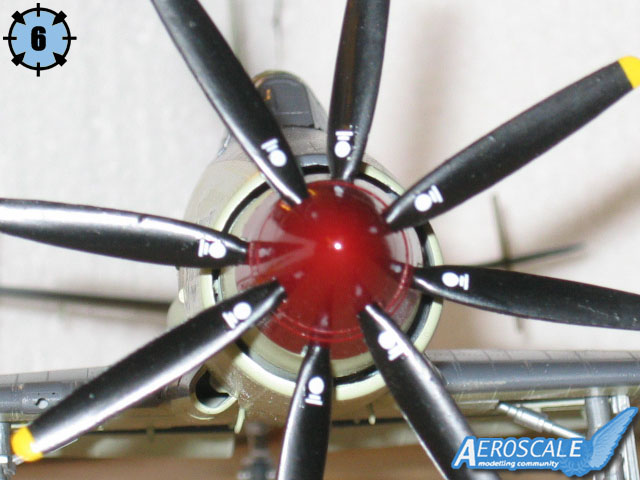
In the next steps (3-4) we come to one of the most intriguing features in this kit: the contra-rotating prop! Assembly is very easy and straight forward, but be sure of what to glue or not as there are many moving parts here. All parts in step 3 are glued together. In step 4 Parts C25, C9 and C15 is glued together. Parts G1, G2 and G3 (the gears) are NOT glued together! G4 is placed over G2 and then the whole assembly is located (NOT GLUED) in C5! Then C4 is glued to C5 sandwiching the gears between those parts, take care to not gluing the wrong parts! Actually it was very easy although a bit fiddly to get everything in place! To anyone who wants to motorize the prop; don't forget to add a little grease to the gears as they are a bit rough. Trumpeter provides a plastic part if you don't care about the working feature, good thought! I painted the prop (and the finlets) in a Maroon/Crimson red (H20), the blades in satin black (H85) and the tips in insignia yellow (H154) and set it aside (picture 6).
Step 5 and 6 is the torpedo and rocket assembly. Note that only early versions of the Wyvern could carry a torpedo, the S.4 could, but very rarely did.
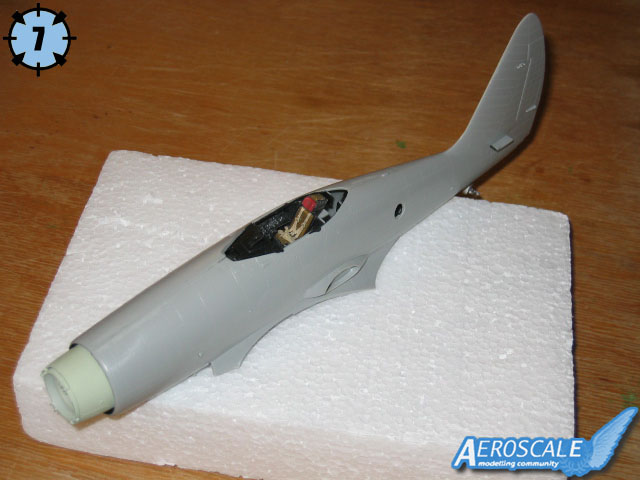
n step 7 everything comes together in the fuselage. The little camera is assembled and mounted on the rack. I mounted the camera between the brackets, but didn't glue it yet. Note the direction and that the long rod on the rack is forward. Propeller, Cockpit and tail wheel assemblies were glued to the right fuselage half. Part C32 is a very clever little part that ensures the tail planes get the correct dihedral. The fuselage halves fitted together perfectly! I had to poke around a bit with my tweezers to get the camera assembly lined up. Go easy and there are no problems! (picture 7)
wings
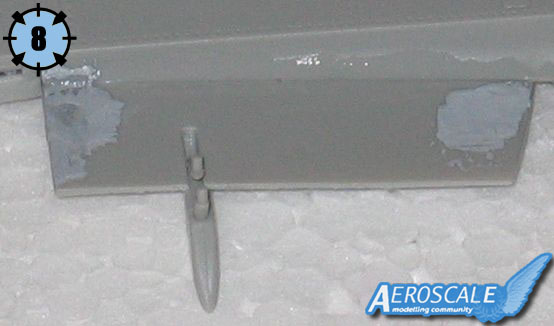
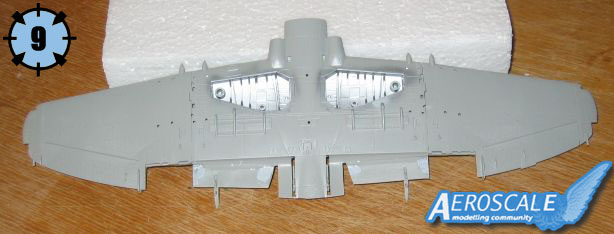
In Steps 8, 9, 11, 16 and 17 the RATOGs (Rocket Assisted Take Off Gears) and bombs are assembled.n step 10 we come to the main wing, now it's time to decide about the load out configuration. I Settled for Rockets and a centreline fuel tank. Be careful to open up the correct holes in the centre part of the wing. All holes are flashed over, BUT the holes for the rockets are already there. Not so good if you don't want to use the rockets, but easily rectified. Use a plastic rod of correct diameter, insert and glue in the holes and cut off. If this is done carefully there's almost no need for filler or sanding. On the upper wing panels (parts D18 and D5) I found the only ejector pin marks that had to be deal with. Luckily, they are easily filled and sanded, and not very visible on the assembled model (picture 8). As I wanted my wings spread, I continued with the outer wing parts, assembling the whole wing in one go (picture 9).
The landing gear assembly are step 12, 13 and 14. Trumpeter has moulded the wheels in plastic with separate hubs, making painting much easier. The wheels are not bulged, though. I painted the struts Alclad aluminium and the tyres a dark grey colour that I mixed myself from matt black and dark grey (H33 and H112). Wheel wells should be Sky, not Aluminium as Trumpeter suggests. I painted the wells Alclad Aluminium and when I got the 4+ book, it was too late to change (picture 10).
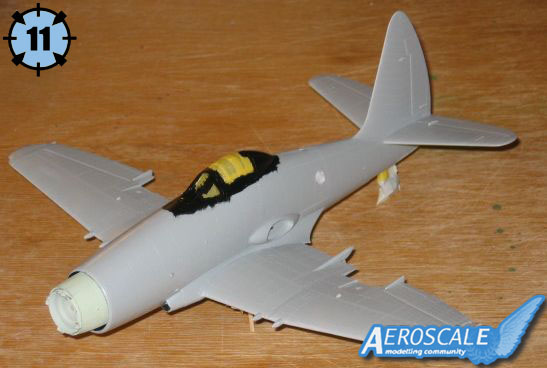
In step 15 I married the fuselage and the complete wing. It was a perfect "snap-fit" with no gaps anywhere. Very impressive indeed! The tail planes fitted very well even if the fit was a bit loose. Now I glued the rear cockpit decking (part B10) and canopy parts (pt. F1, F2) in place, once again a perfect fit. After masking it was time for the model to get into the paint shop (picture 11).


About the Author


Comments

Hi again!
Maybe I don't get it... don't forget I'm French! :-)
I made a copy/paste of the Wyvern text in my TextEdit program but it appears fine with no squares or the like...
Could someone send me a copy of the text with squares via e-mail? That would be nice. I just can't spot these damn "things".
Jean-Luc
OCT 28, 2006 - 07:49 PM

Nice article and a nice build.
As for the text problem, I use Opea, and it appears fine, I then checked with IE and again it appears fine, but when I use Firefox, that's when the little boxes for spaces show up. Maybe it's a browser thing?
I copied and pasted from Firefox to a PM,and all the little boxes disappeared when it was pasted.
OK hopefully you got the PM with the little boxes, seems to only be on Firefox.
OCT 28, 2006 - 09:24 PM

Hi All!
Sorry If I have caused any trouble to anyone who wanted to read my feature!
Yes, I wrote this feature in Word, as I did with the SM79 Feature wich worked as it was intended to do.
I can´t understand why this one doesn´t work?
It works fine on my screen though.
In the submissions help you state that features can be written in MS word OR in another simpler format?
Why not say "use (this format) period" to avoid any confusions in the future?
Jean-Luc, Please excuse me if I forgot to number the pics correctly!
Not my intention to give you more work then I understand you already must have with this site.
I find it very rewarding to write these features, and it´s also a way for me to give some "pay-back" for all the help I´ve got myself from modellers all over the world on forums like this.
I love this site and all the wonderful, helpful people here, but the submission process could be a lot easier as on other sites.
It´s a bit too complicated for a "computer-challenged" modeller like me! :-)
Cheers!
Stefan E
OCT 28, 2006 - 10:16 PM

Hello Stefan
my comment was not meant to cause you any trouble. Normally Word should not be a problem. Sadly the stuff sometimes produces strange signs ...
BTW great Model
cheers
Steffen
OCT 28, 2006 - 10:42 PM
Hi Steffen, and thanks!
No troubles here!
Guess we have to blame it on the computers, that sometimes don´t act as we would want them to! :-) :-) :-)
Cheers!
Stefan
OCT 29, 2006 - 12:43 AM
Hi all... and Stefan!
No need to apologize! The first time I sent my submissions to Rowan I think I gave him even more work...
This is a file standard problem and something must have gone wrong in the editing process. You have a PC, I have a Mac and those who experienced the problems have PCs... this was likely to happen one day! :-)
This is why I asked you (the members who submit features and reviews, not only you Stefan ) to use the simpliest text editing program as it will avoid any issues like these. As for the name of the pictures, we should set some standard yourself so editing is less complicated. Believe me, you can save an hour or two of editing with such things. Maybe I should write a "how to submit an article to aeroscale" feature...
By the way, I edited the Wyvern feature with the text you sent me guys... is it working now?
Jean-Luc
OCT 29, 2006 - 01:48 AM
Hi Jean-Luc
many thanks ..much easier reading now!
You might have noticed that I optimized my posts to mak this whole thread more model related and to praise Stafans craftsmenship
cheers
Steffen
P.S. bist du eigentlich Elsäßer ... wie auch immer herzlichen Glückwunsch zum WRC Titel von Super Seb
OCT 29, 2006 - 02:10 AM
Hi Steffen!
Yes, that's kind of you! It's to bad this thread was hijacked with technical problems. But let's see it in a positive way. It's been a long time since a "What's New" thread didn't generate that much replies! :-)
Nicht ganz, mehr Lothringer und ein wenig Saarländer (Vater). Aber ich freue mich trotzdem! :-)
Jean-Luc
OCT 29, 2006 - 02:30 AM
By the way, thanks to Jean-Bernard (French), Steffen (German), Dave (American) and Eetu (Finnish) for helping me out with the text. And of course thanks to Stefan (Swedish) for submitting the feature!
Jean-Luc
OCT 29, 2006 - 02:35 AM
Hi all!
I also want to say a big: Merci, Viele Danke, Thanks, Kiitos and "Tack för hjälpen" (Thanks for all the help!).
Cheers!
Stefan E
OCT 29, 2006 - 10:58 PM
Copyright ©2021 by Stefan Ericsson. Images also by copyright holder unless otherwise noted. The views and opinions expressed herein are solely the views and opinions of the authors and/or contributors to this Web site and do not necessarily represent the views and/or opinions of AeroScale, KitMaker Network, or Silver Star Enterrpises. Images also by copyright holder unless otherwise noted. Opinions expressed are those of the author(s) and not necessarily those of AeroScale. All rights reserved. Originally published on: 2006-10-28 00:00:00. Unique Reads: 16899

WEB HOSTING BY


Copyright ©2021 AeroScale and Kitmaker Network, a subsidiary of Silver Star Enterprises
All Rights Reserved. Please read our Conditions of Use and Privacy Policy.
All Rights Reserved. Please read our Conditions of Use and Privacy Policy.