

1⁄35Savoia - Marchetti SM79 Sparviero
5
Comments
What's in the box?
This is the Eduard Flashback re-issue of the Classic Airframes SM79 kit. Originally Classic Airframes issued two versions, one early bomber and the late torpedo-bomber version. In this boxing you get all parts from both earlier issues, including a torpedo! There are a lot of resin detail parts supplied in two bags and a large etched fret, all topped-off by a very nice decal sheet and painting masks. The instruction booklet is in the usual Eduard style, and there is also a sheet showing the three camouflage schemes in full colour. Unfortunately there is no torpedo version among the marking options even though all parts are supplied. All in all a very complete kit!Starting the build
First task was to remove the casting blocks and clean up all resin parts. These parts are beautifully moulded with crisp and sharp details. Some of the smaller parts had broken off in transit, so I had to repair them.Cockpit
As in most kits, the first assembly step is the cockpit.I painted all interior parts, and fuselage interior with Humbrol #120 Matt Light Green and picked out details in Matt Black. The (resin) instrument panel (pt.RP6) was sanded flat, while the etched panel was painted Matt Black and the acetate instrument film was painted Matt White on the rear. When the acetate is sandwiched between the panels, the effect of the instruments are very convincing! (Picture 1)
I painted the seats in a red-brown leather colour (H62), the seatbelts in Matt Linen (H74) and various levers in matt black and silver. A careful dry brushing with silver and a matt black wash gave some highlights and contrasts. All parts fitted perfectly and gave a very well detailed cockpit (Picture 2).
Fuselage
Now it was time to fit all the glazing on the fuselage sides, and decide if I wanted to open up the fuselage door or the hump. In the beginning I didn't intend to open up anything, but after assembling the cockpit I changed my mind. I used my trusty Dremel to cut open the hump, being very careful not to take off too much material off or melt the plastic by running the motor tool at too high a speed. Final finishing was done with knife and sanding sticks. As the fuselage is totally empty, and I didn't wanted to scratch build the whole interior, I left the fuselage door closed.All windows were a tad too big but with just a couple of swipes with the sanding stick they could be (carefully!) press-fitted. I secured all fuselage windows with super-glue and masked them off with Tamiya-tape.
Tail intermission
The tailplanes are a butt joint and will be quite weak, so I wanted to reinforce them with a spar. First, I drilled a hole (1,5mm) in the fuselage where the joint was as thick as possible. I tacked the tail planes on the fuselage halves with a very small amount of superglue (just enough to get them to stick in place), placing them carefully in their exact location.Then, from inside the fuselage halves, I continued to drill into the tail planes, about 3-5mm. Finally, with great care(!!!), I broke the tail planes away from the fuselage and sanded the mating surfaces. I made two spars out of a 1,5mm plastic rod, each 10-15mm long and glued them into the holes in the tailplanes (Picture 3).
Fuselage continued...
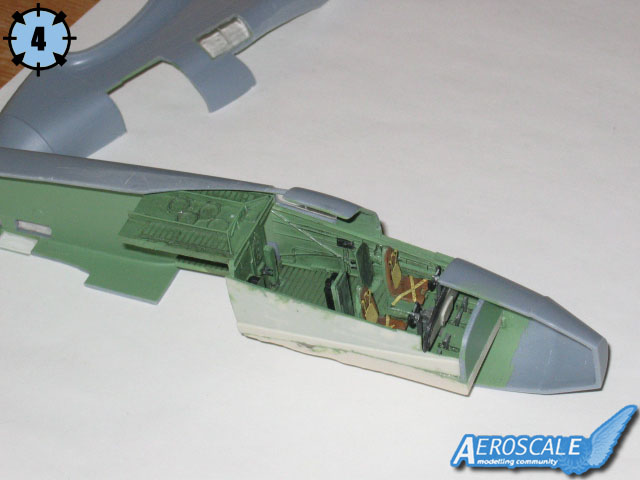
I glued the cockpit assembly to the left fuselage side, aligning the step on the top edge on both parts (Picture 4). I also made some small tabs from 1mm plasticard to help aligning the fuselage halves. Now I could close the fuselage, trapping the cockpit assembly between, and the fit was quite good!Don't forget the tail wheel strut! (Don't ask me!!!) I left the tail wheel, fork and etched parts off until later.
Tail again
Now it's a breeze to install the tail planes, and the spars gives a positive and strong joint! I attached the tail struts now, but it would have been better to do this after the painting was done!Wings
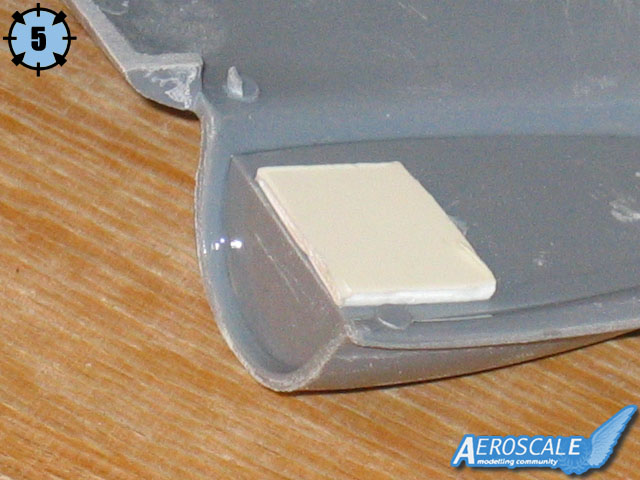
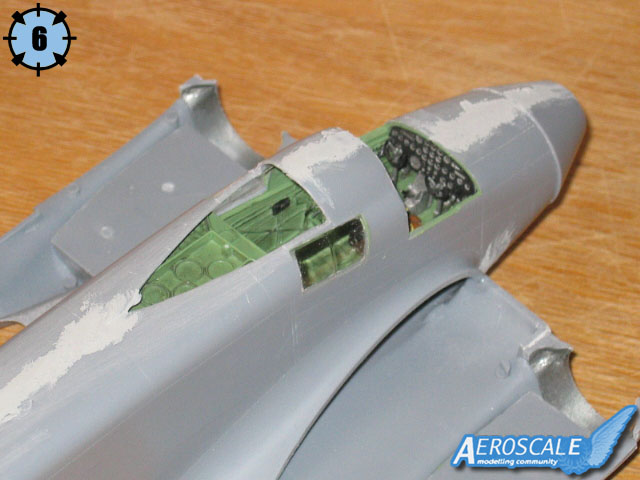
First of all: DO NOT FOLLOW THE INSTRUCTIONS and assemble the wing as a separate subsection. If you do this you will have a MAJOR problem fitting the wing to the fuselage!I started with the centre section of the wing (Pt.B1) and glued the landing gear inserts in place. They fitted fine after some sanding. To give the landing gear struts a more positive locating help I drilled out the holes and glued a piece of 1mm plasticard on the (top) inside (Picture 5). Do not install parts D12/13 yet! Now I could glue the centre wing section to the fuselage. It took a great deal of sanding to get it straight and square to the fuselage (picture 6). All seams were sanded and filled as needed.
Ventral Gondola
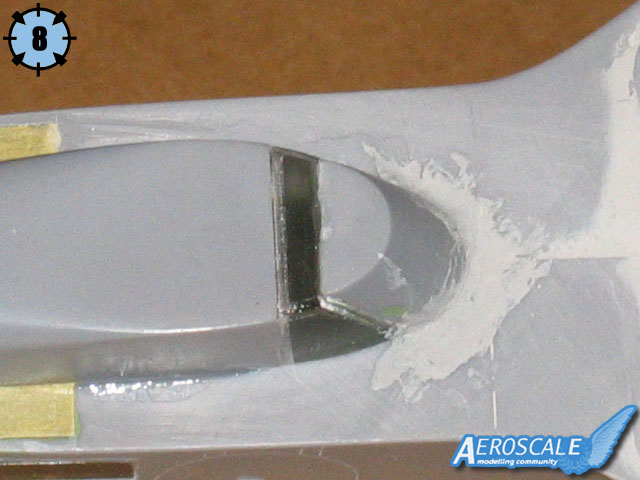
The ventral gondola consists of three parts, none of which will fit any of the others! It was a lousy fit to say the least, it fitted where it touched! I glued the big part (Pt.E5) to the fuselage, and when dry I glued the window part and the front part together as good as I could (Picture 7). It took a lot of filling and sanding here (picture 8), but eventually it looked ok... well barely! (Picture 9) I left the gun off as it would be sufficient just to have the barrel sticking out. Usually I always manage to break those sticky-out parts off anyway!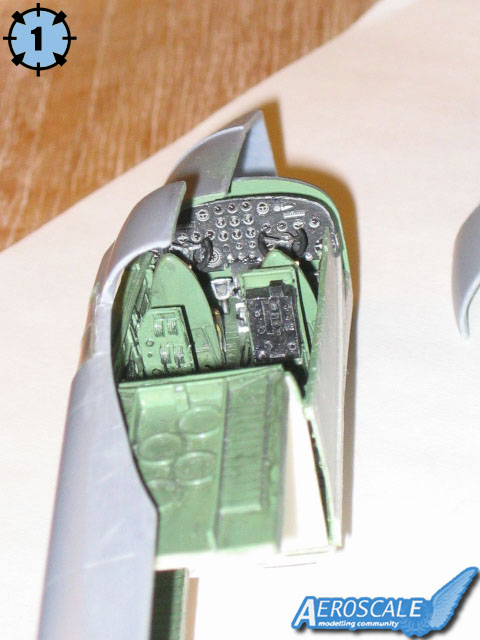


About the Author


Comments
Stefan, wonderful stuff, particularly, as I note, that this is your first feature article, the first of many I hope.
I have the original Classic Airframes kit and your article points out what can be expected and will actually bring the building of my kit forward, so thanks for that too I like the colour sceme and now I'm torn between it and the scheme I have been planning on doing
I am now going to spend 1/2 an hour going over my kit contents, again.
Thanks Stefan
Mal
AUG 26, 2006 - 05:37 PM

Hi Mal!
I have published a review of the Flashback kit. Could you check it out and tell us what is different from the Classic Airframe boxing?
I didn't found a review on the net wich cleary showed the content of a C.A. SM 79 kit.
Jean-Luc
AUG 26, 2006 - 11:43 PM
Yes Jean-Luc I'll take a look, but remind me please, I'm bretty busy right now and I'm likely to forget I f I get the work done to the house, that I am doing this bank holiday week end I'll take a look later today
Mal
AUG 27, 2006 - 01:09 PM

[quote]Stefan, wonderful stuff, particularly, as I note, that this is your first feature article, the first of many I hope.
Hi Mal!
Thanks, it was quite fun to write and if it´s well recieved, i have some ideas for following features!
I have the original Classic Airframes kit and your article points out what can be expected and will actually bring the building of my kit forward, so thanks for that too
Well, no need to to the same mistakes as i did!
Now You´ll have to make up some of your own!
This is not a difficult kit, it only recures a LOT of patience and TLC!
Jean-Luc, thanks for promting me to do the rewiew, and helping me trough!
Greetings!
Stefan E
AUG 27, 2006 - 01:23 PM

Copyright ©2021 by Stefan Ericsson. Images also by copyright holder unless otherwise noted. The views and opinions expressed herein are solely the views and opinions of the authors and/or contributors to this Web site and do not necessarily represent the views and/or opinions of AeroScale, KitMaker Network, or Silver Star Enterrpises. Images also by copyright holder unless otherwise noted. Opinions expressed are those of the author(s) and not necessarily those of AeroScale. All rights reserved. Originally published on: 2006-08-26 00:00:00. Unique Reads: 11652

WEB HOSTING BY


Copyright ©2021 AeroScale and Kitmaker Network, a subsidiary of Silver Star Enterprises
All Rights Reserved. Please read our Conditions of Use and Privacy Policy.
All Rights Reserved. Please read our Conditions of Use and Privacy Policy.