_GOTOBOTTOM
Start Here (for Beginners)
This forum is for younger modelers or people just starting out in the hobby.
Hobby King Fokker Dr1
kpnuts
_VISITCOMMUNITY
United Kingdom
Joined: December 20, 2013
KitMaker: 1,179 posts
AeroScale: 25 posts
Posted: Thursday, October 31, 2019 - 09:13 AM UTC
Hi all I bought this kit with money I got for my birthday, I've only ever built one balsa aircraft kit when I was still a lad in my teens (ahh how well I remember

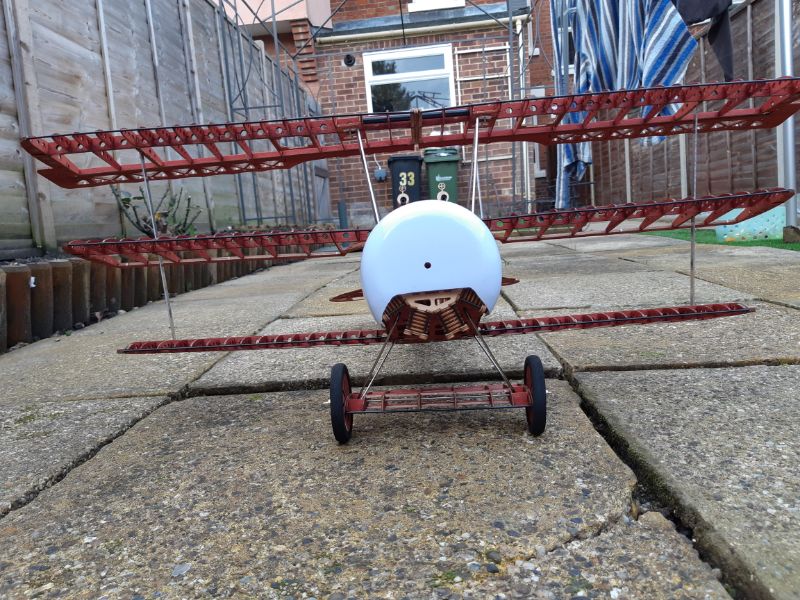
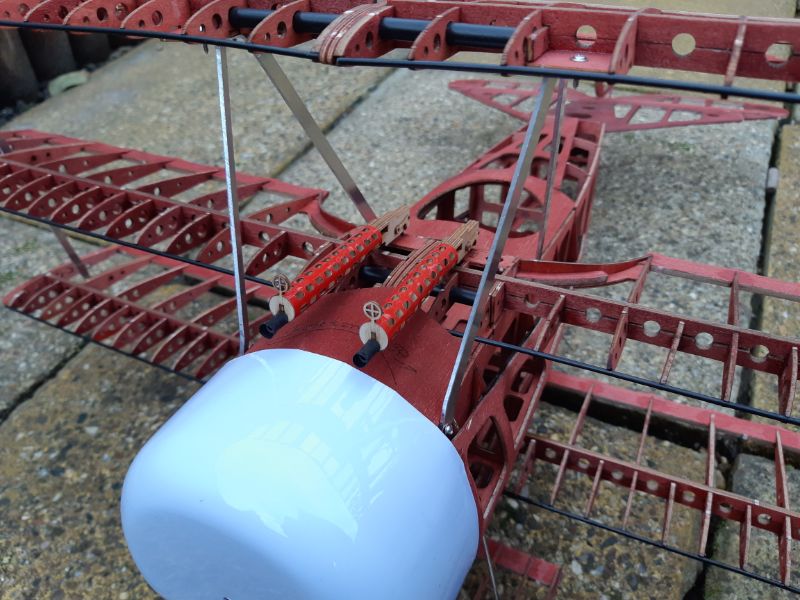
the smell of dope and the lovely twist in the wing where I over zealously applied the dope to the tissue (think that's why it always seemed to crash land ) .

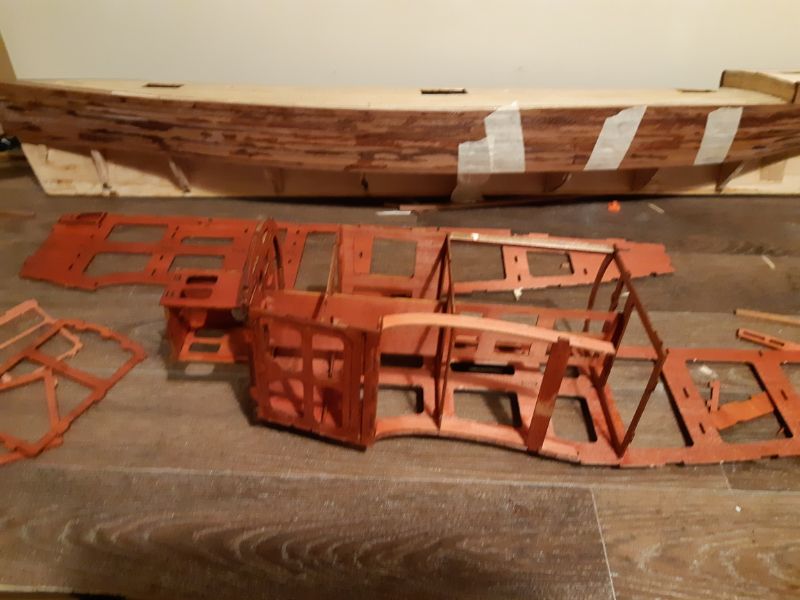
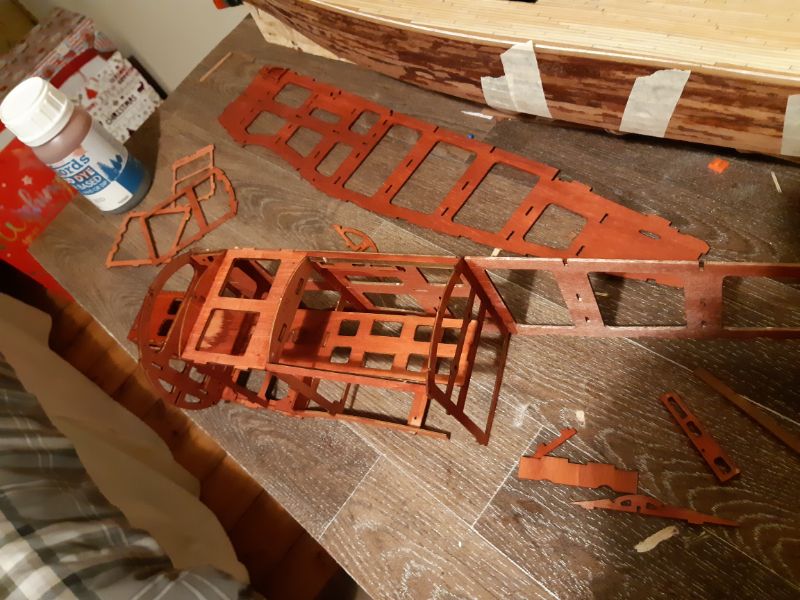
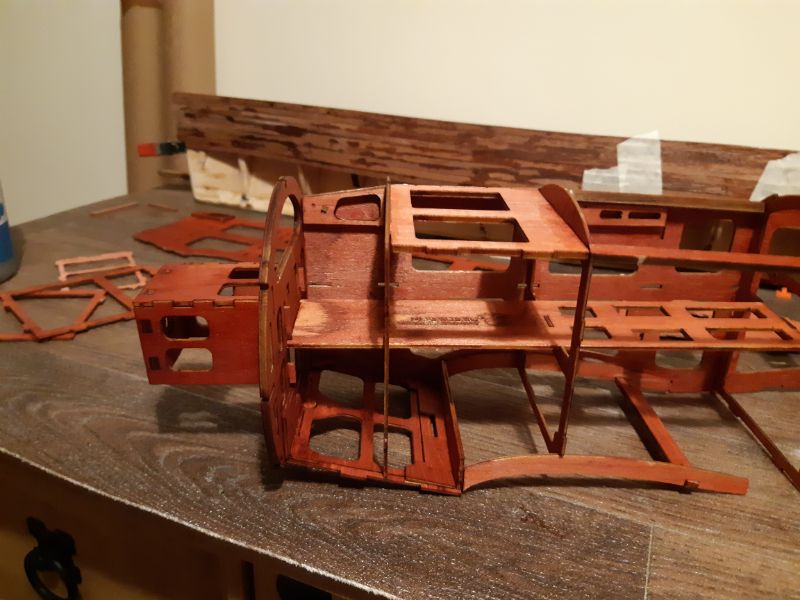
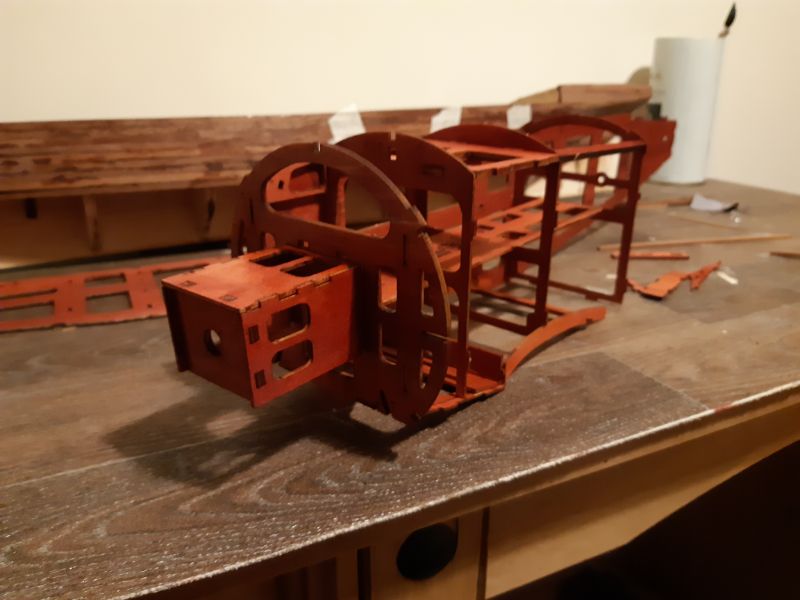
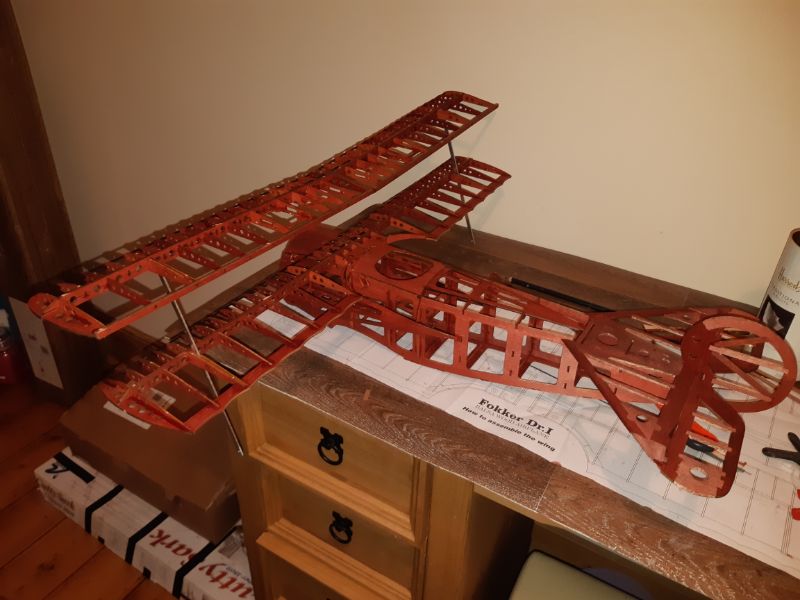
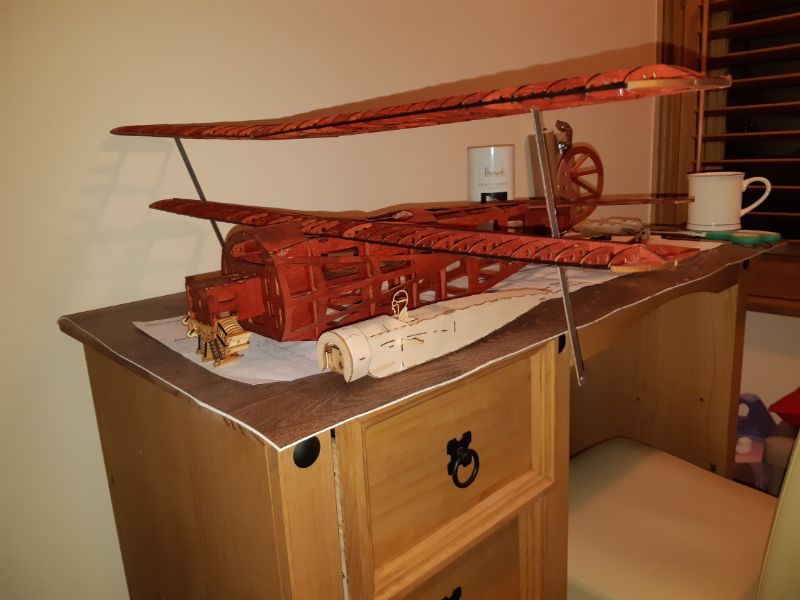
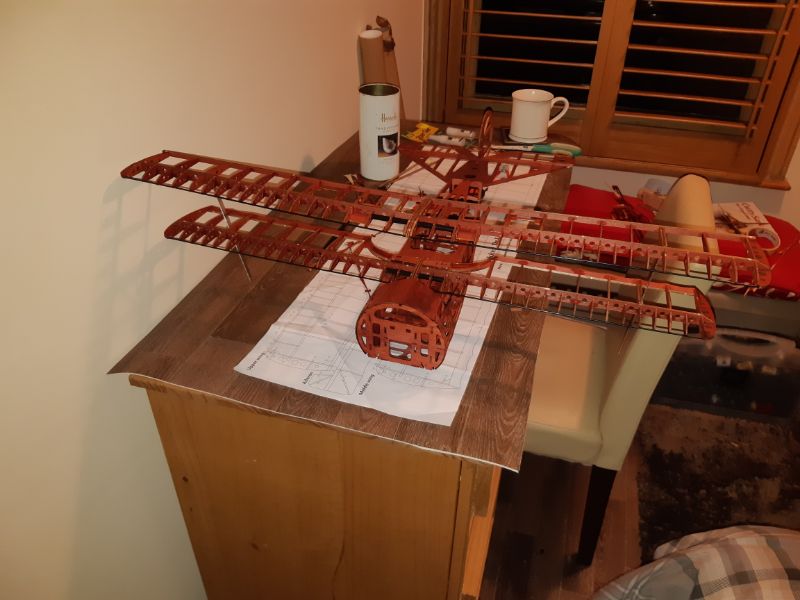
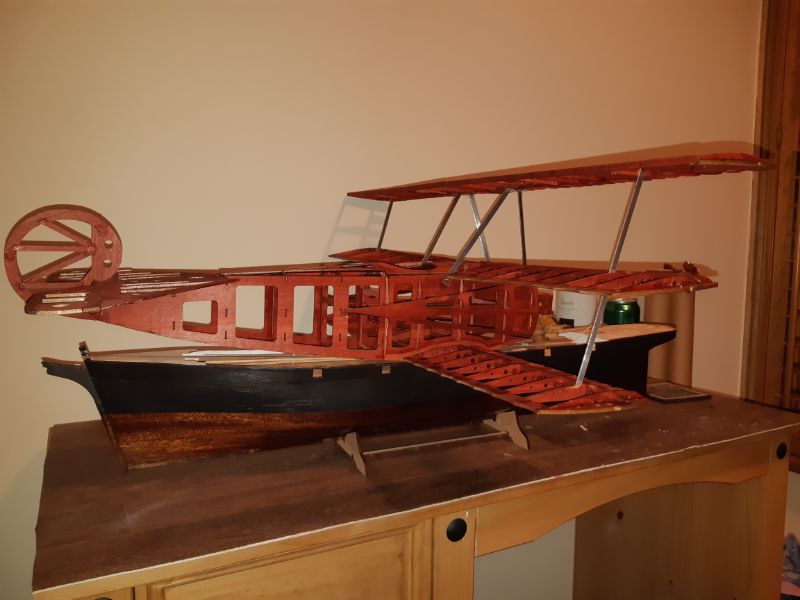
Well the kit arrived and it is an impressive kit.

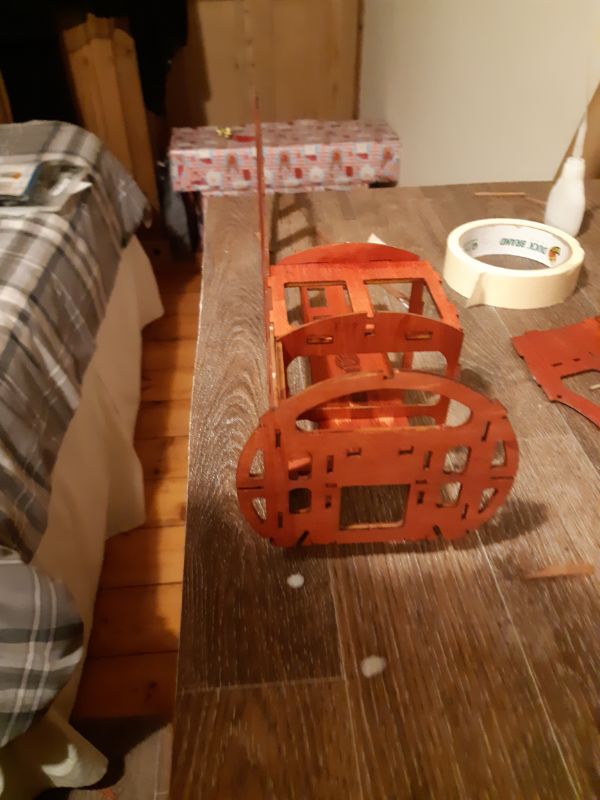
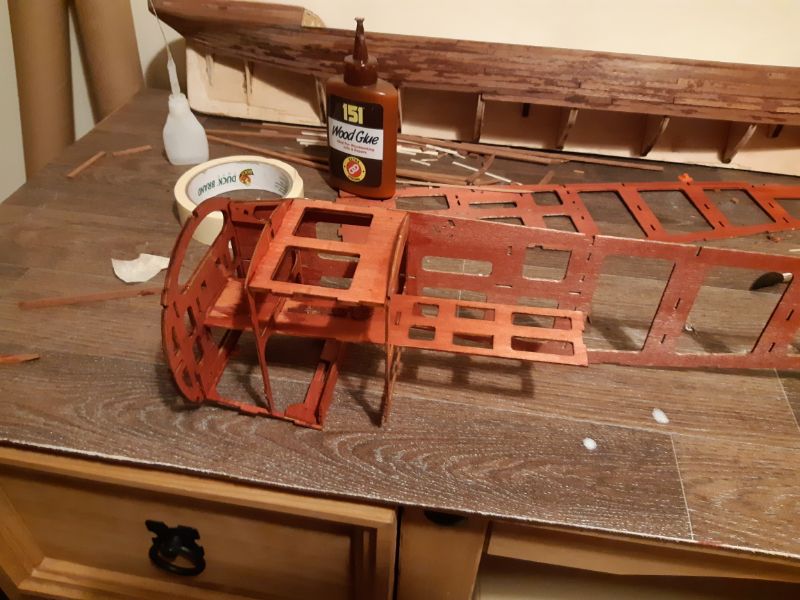
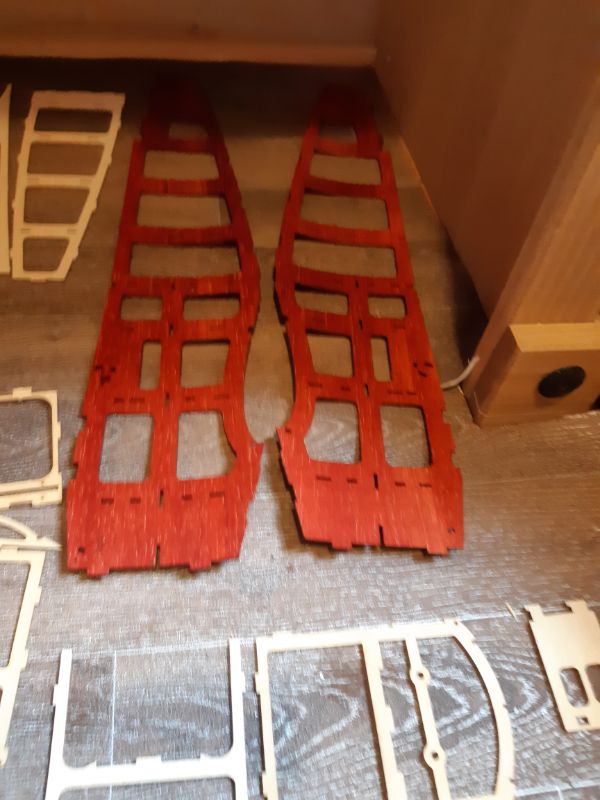
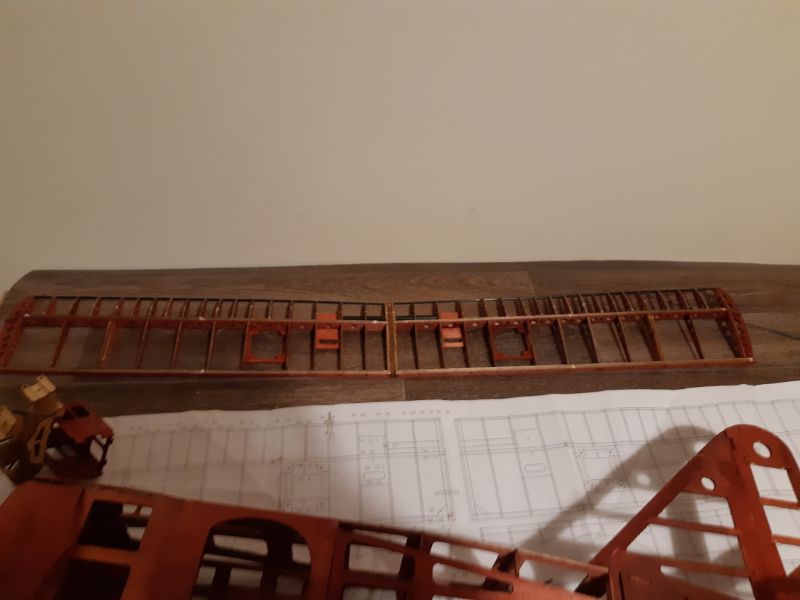
The balsa and ply look to be good quality and the laser cutting is also very good.


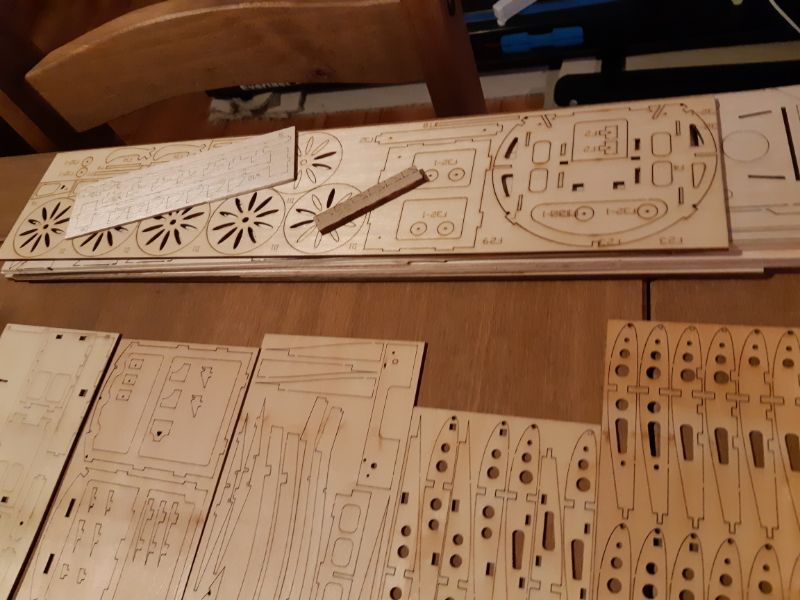
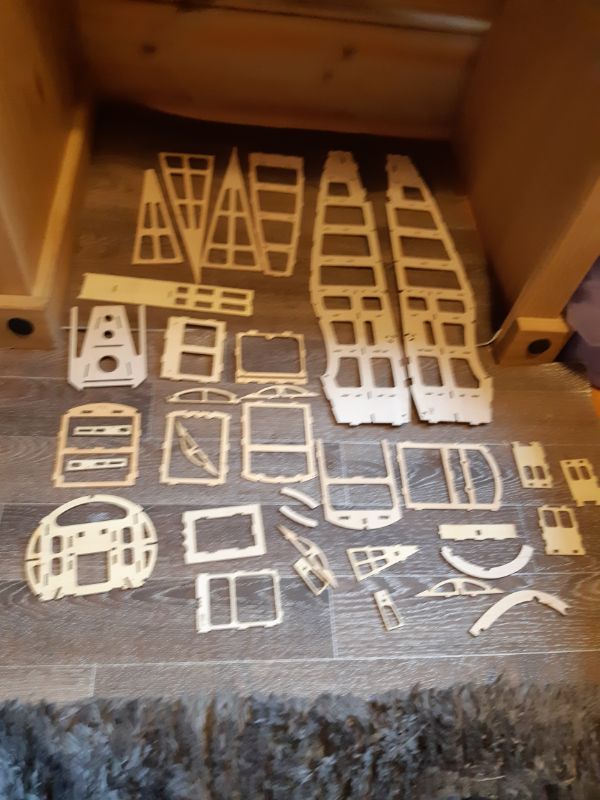
There is a lot of balsa too.


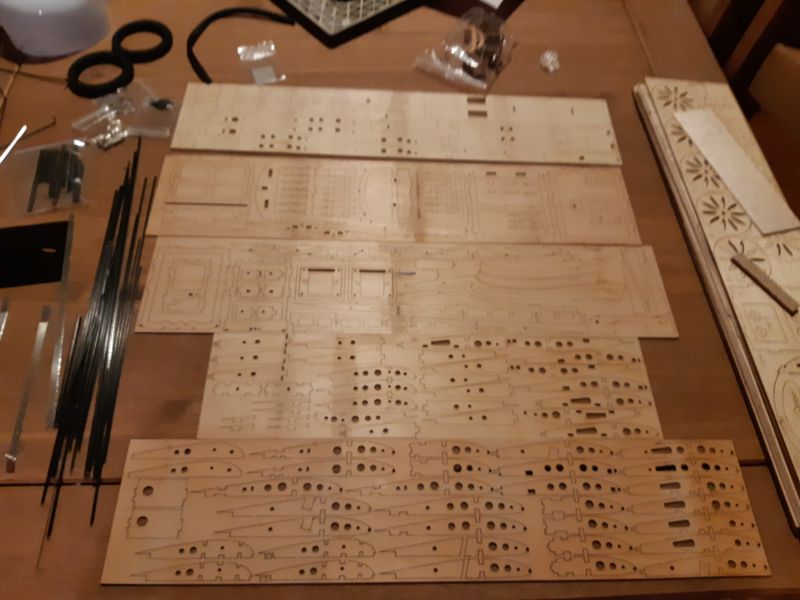
I've no idea what the carbon rod is for (or a lot of the other stuff for that matter)

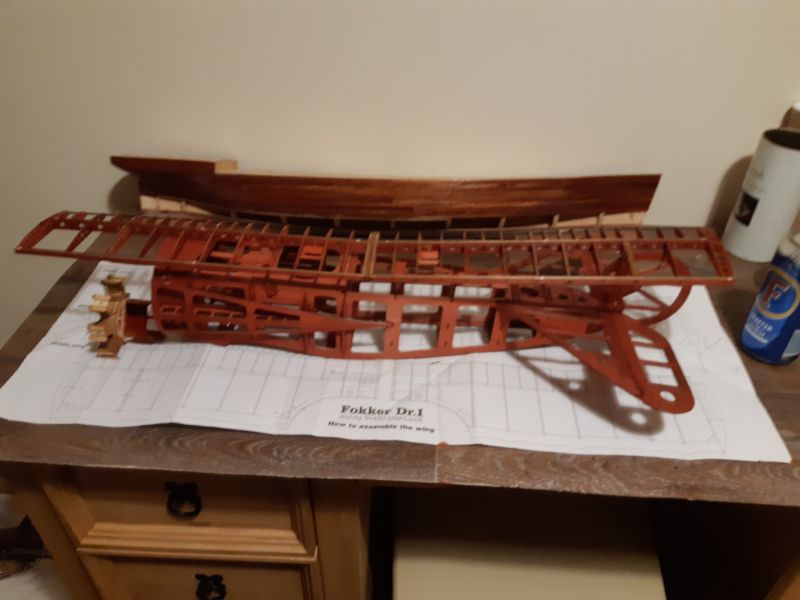
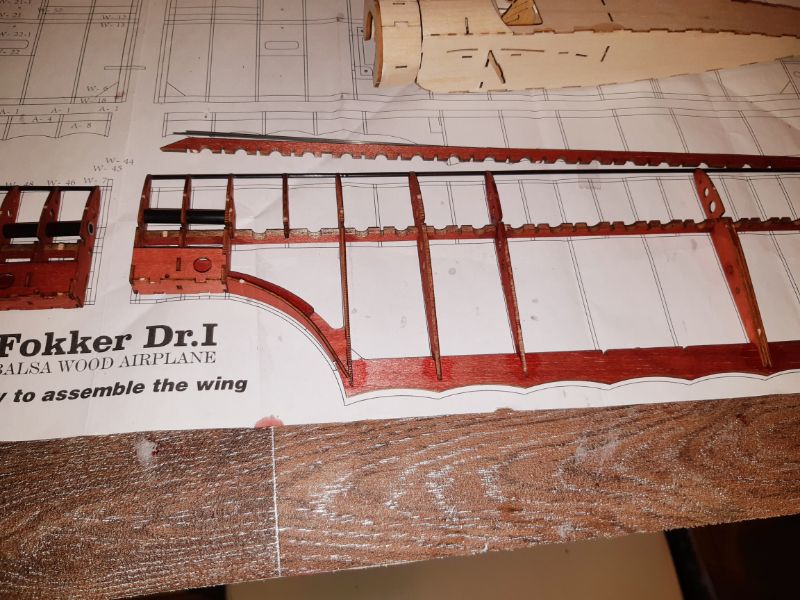
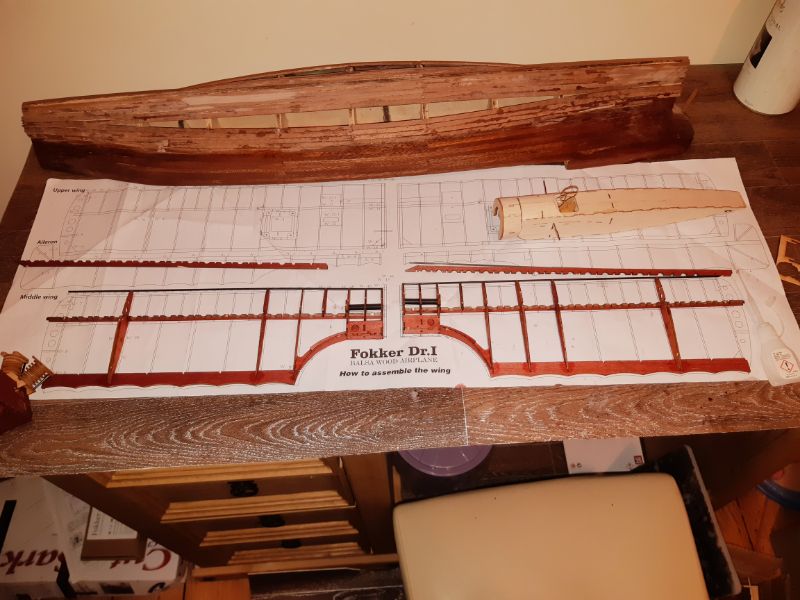
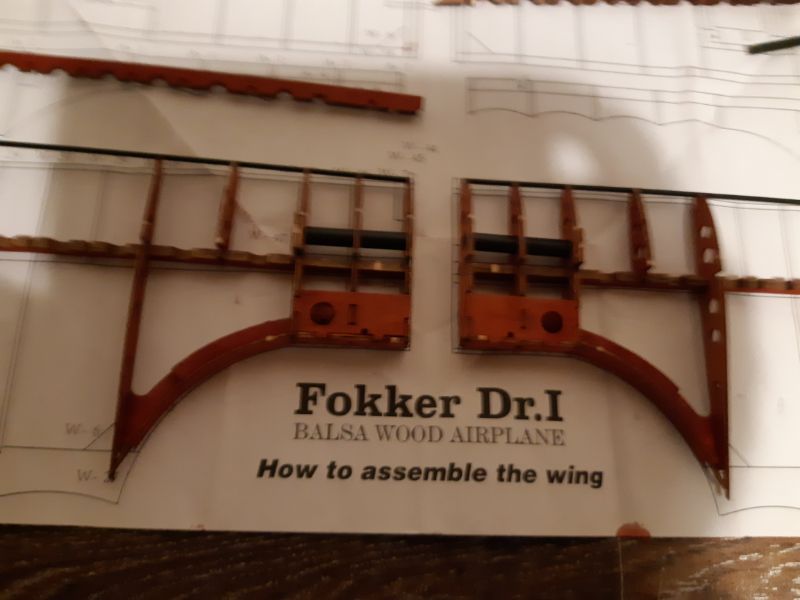
This is the instructions that come with the kit


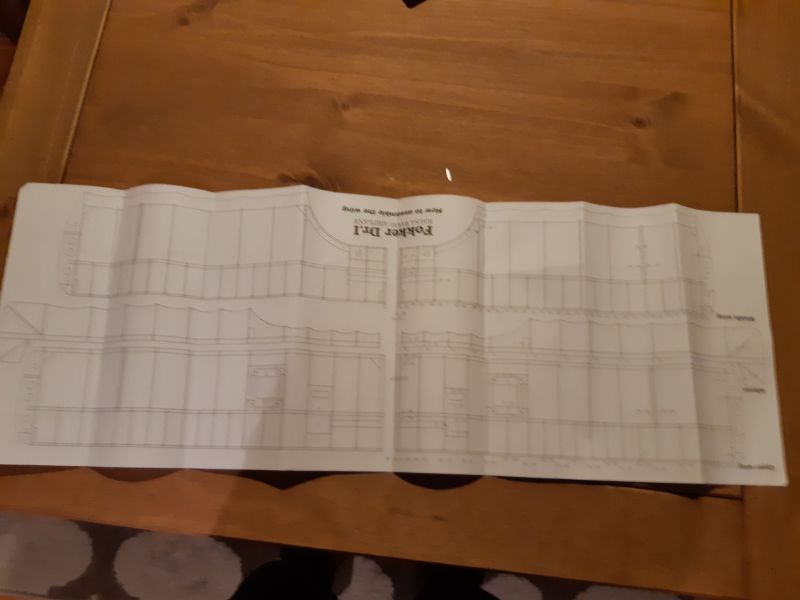
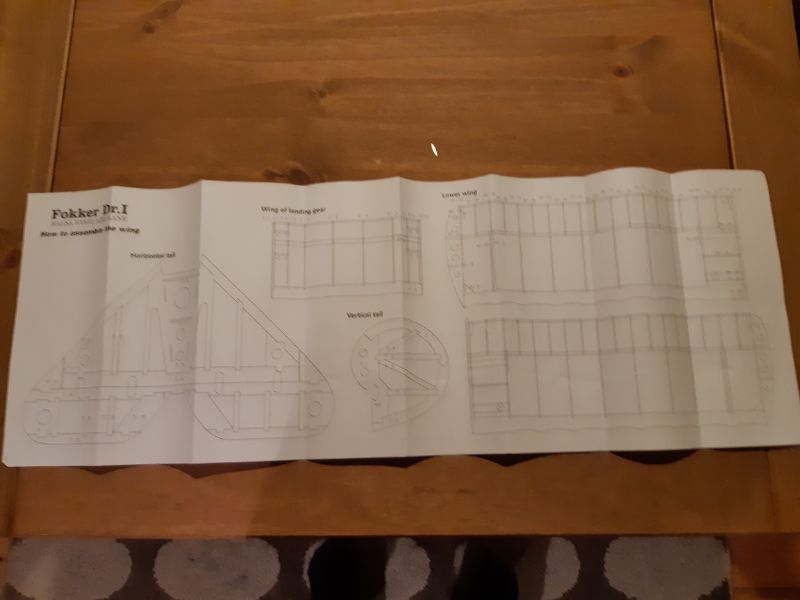
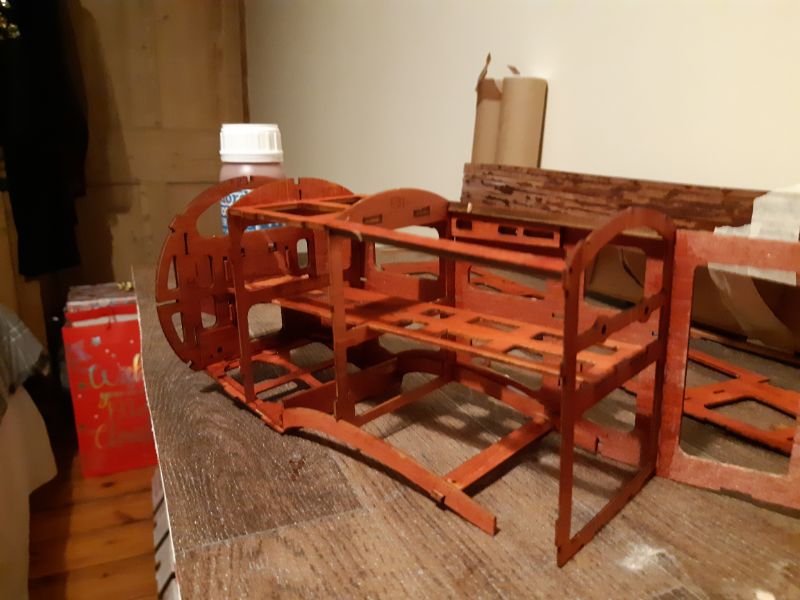
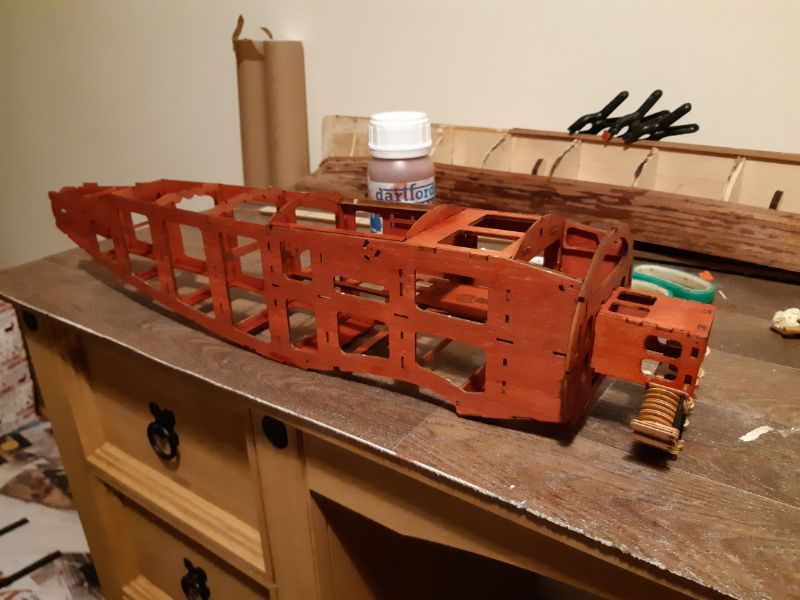
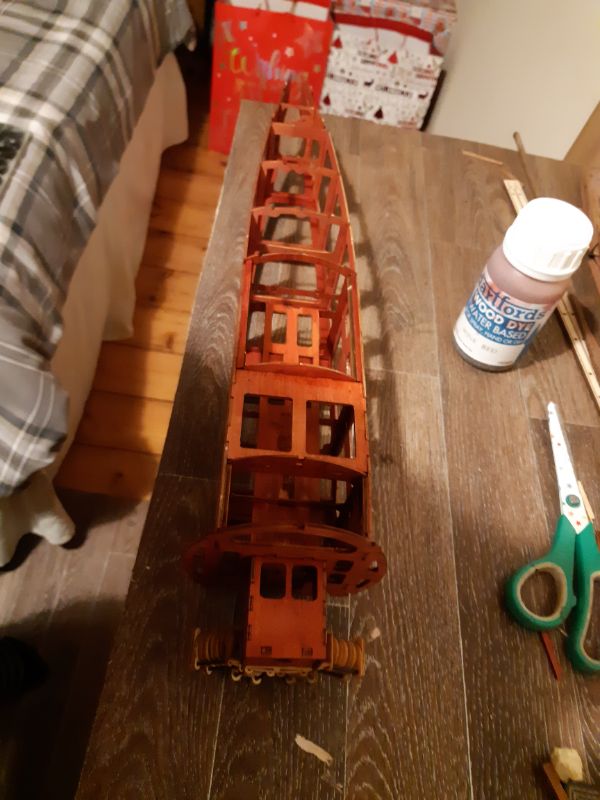
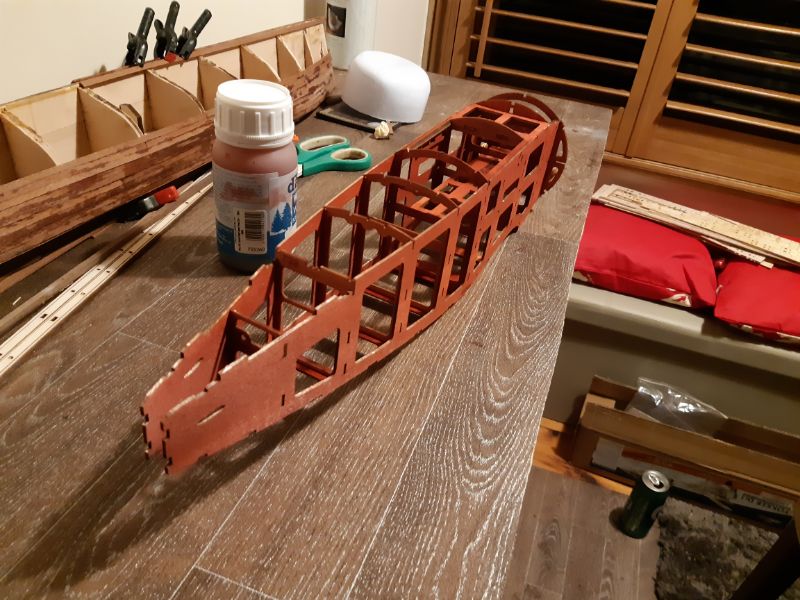
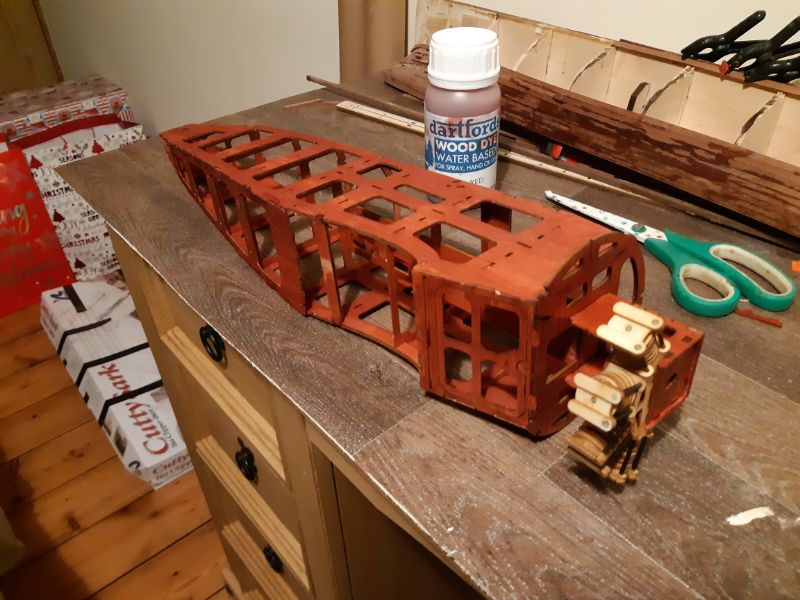
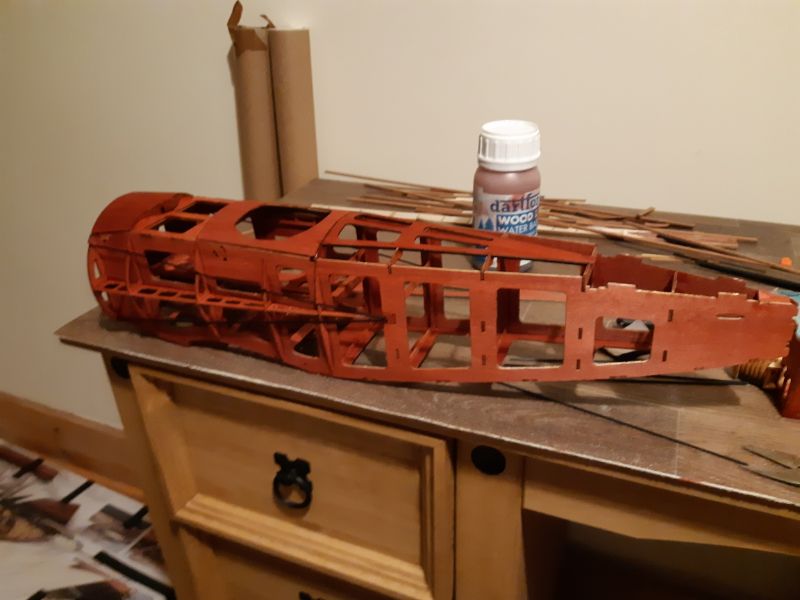
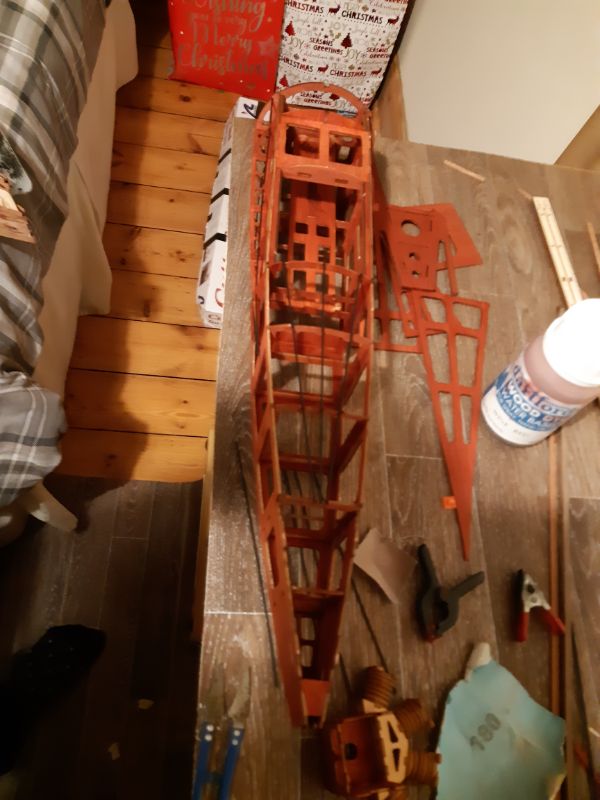
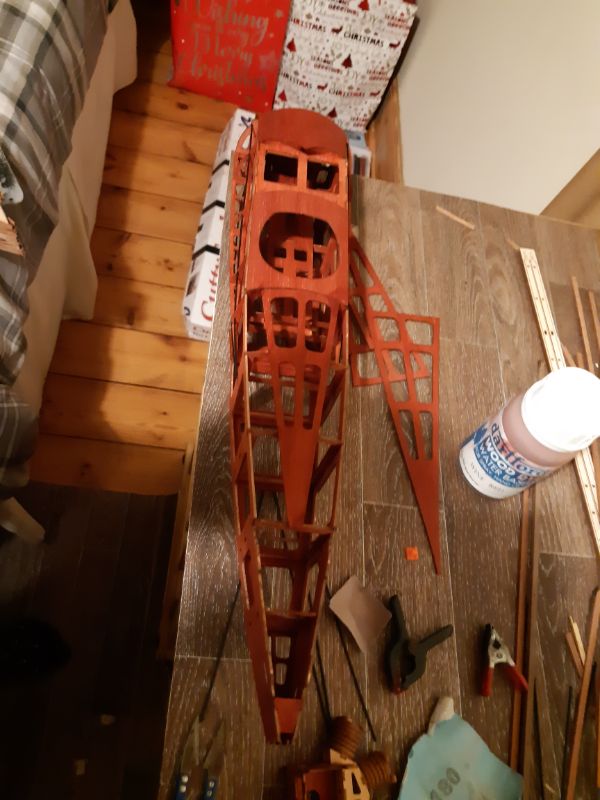
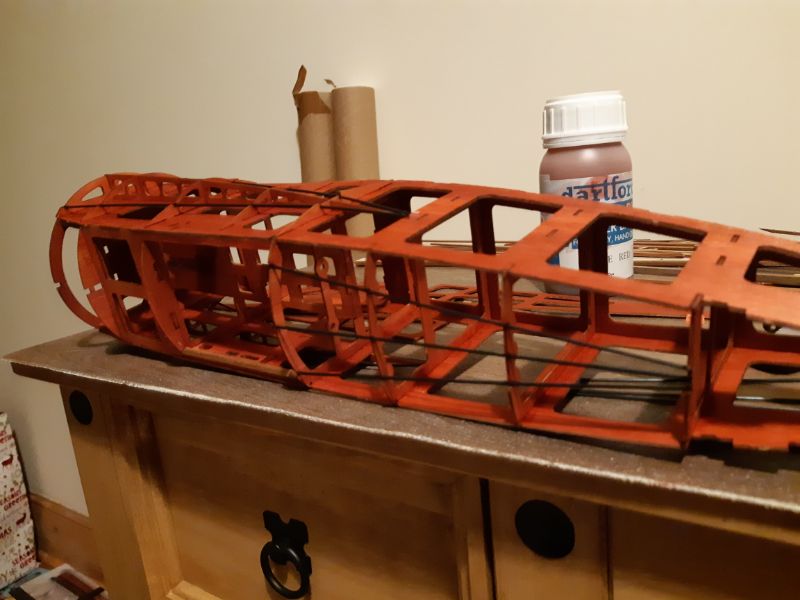
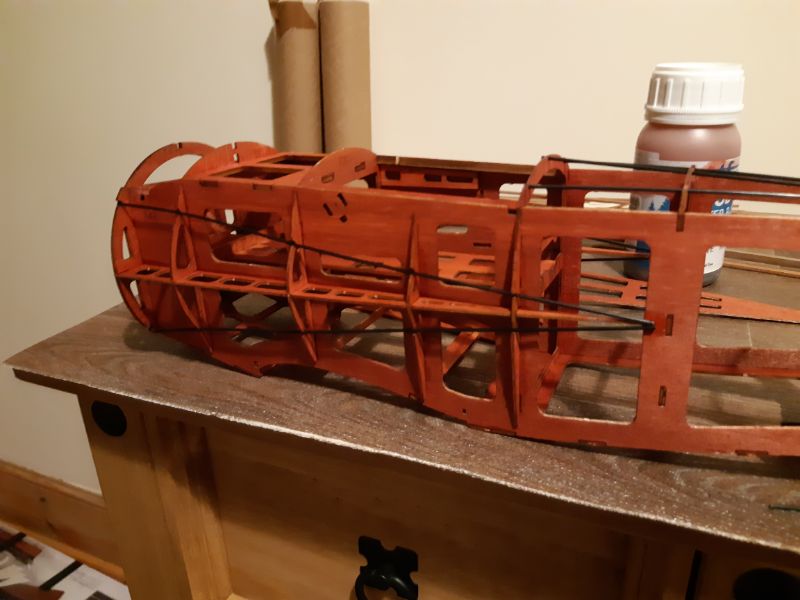
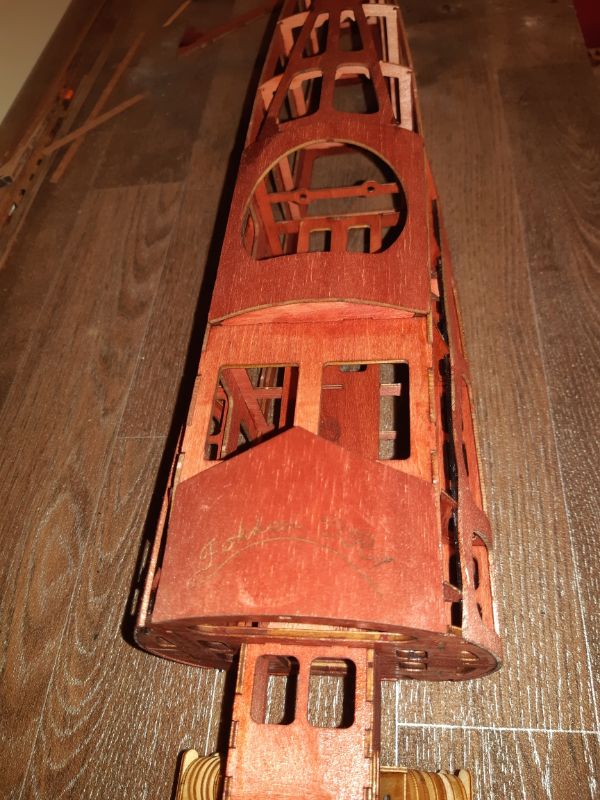
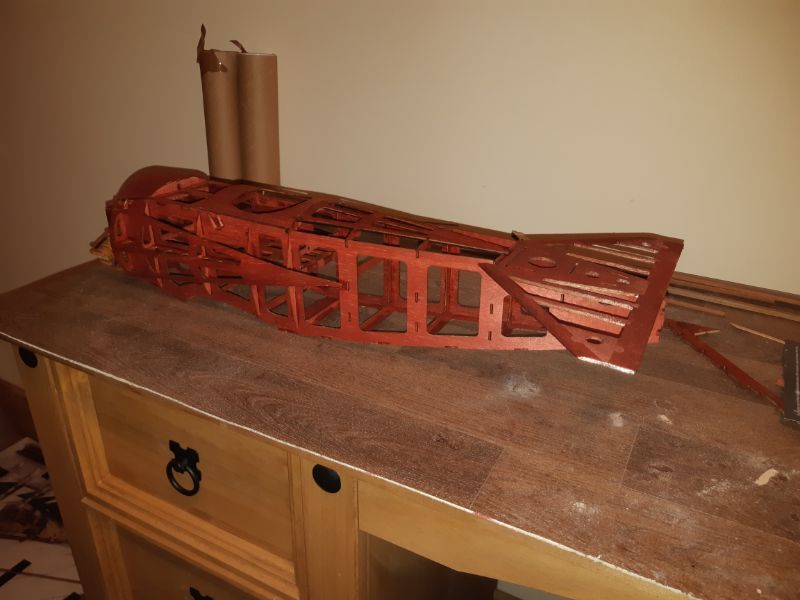
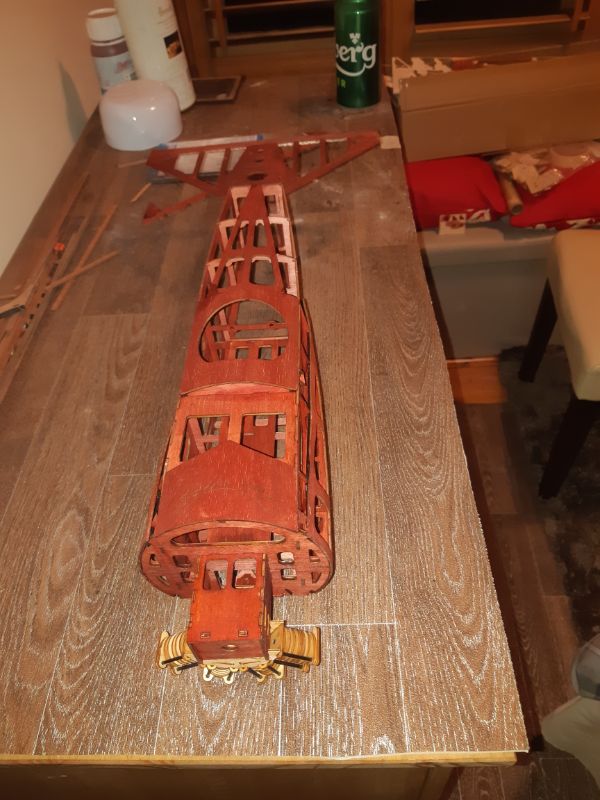
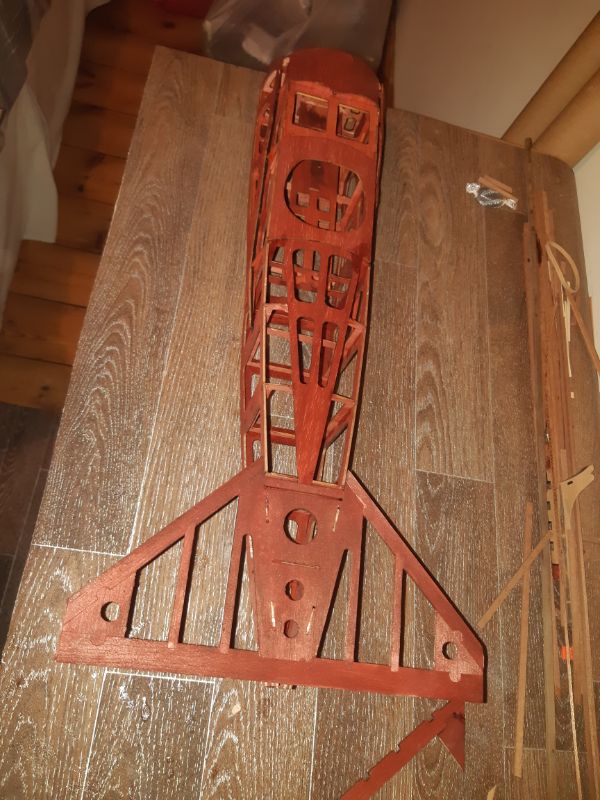
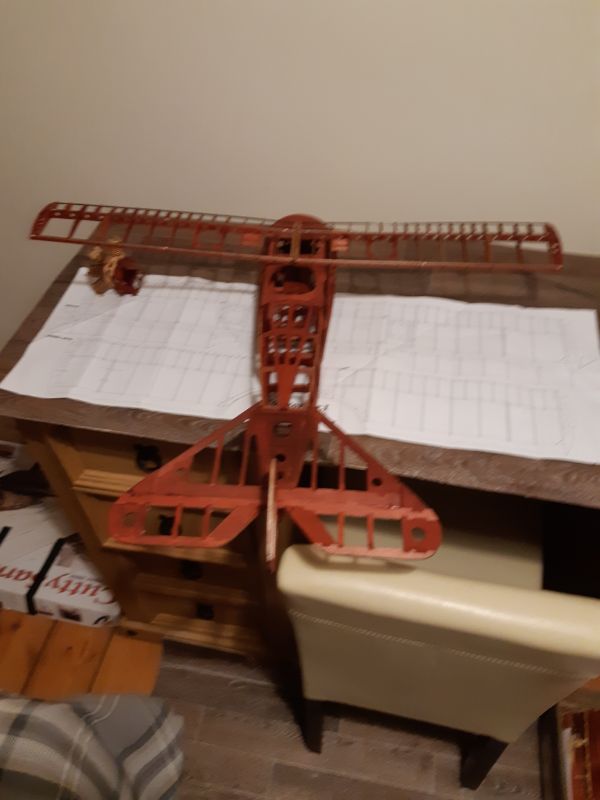
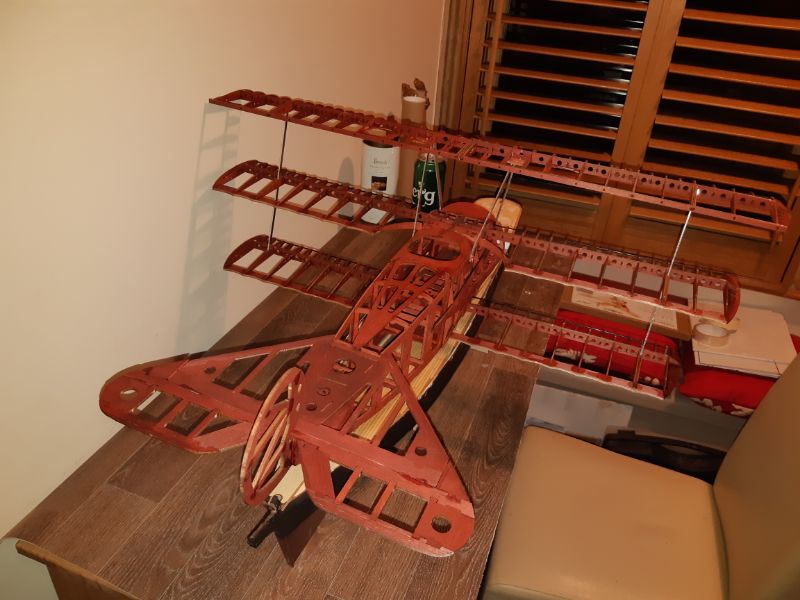
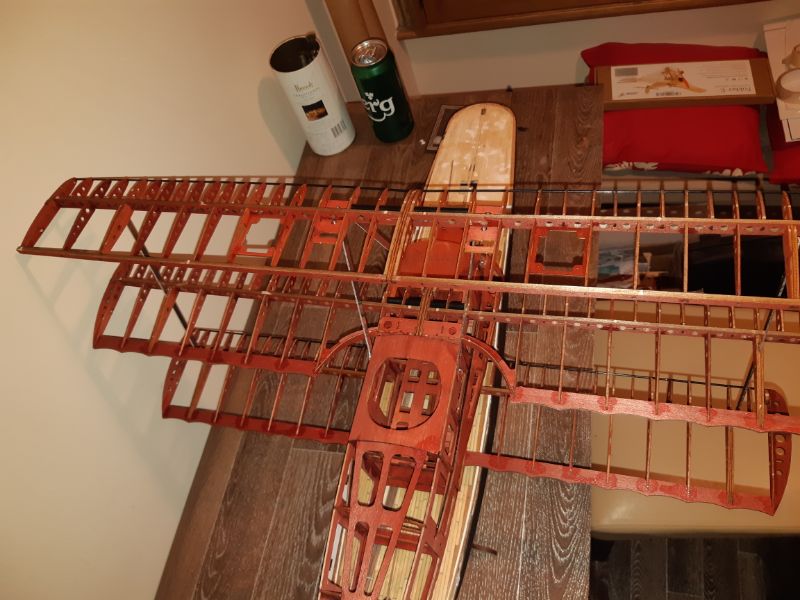
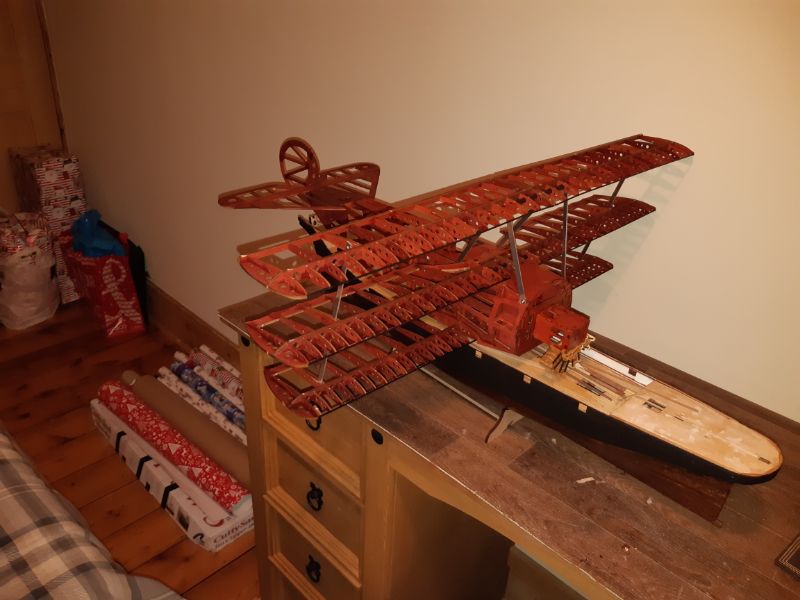
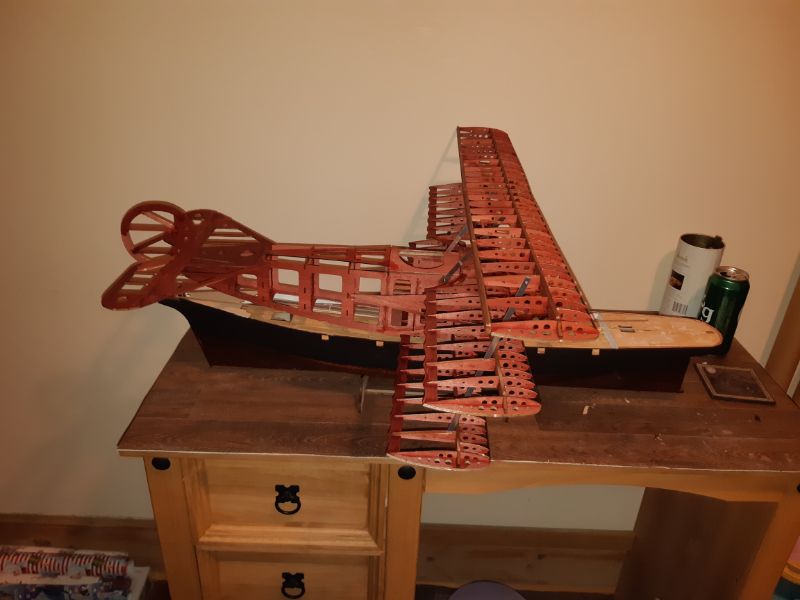
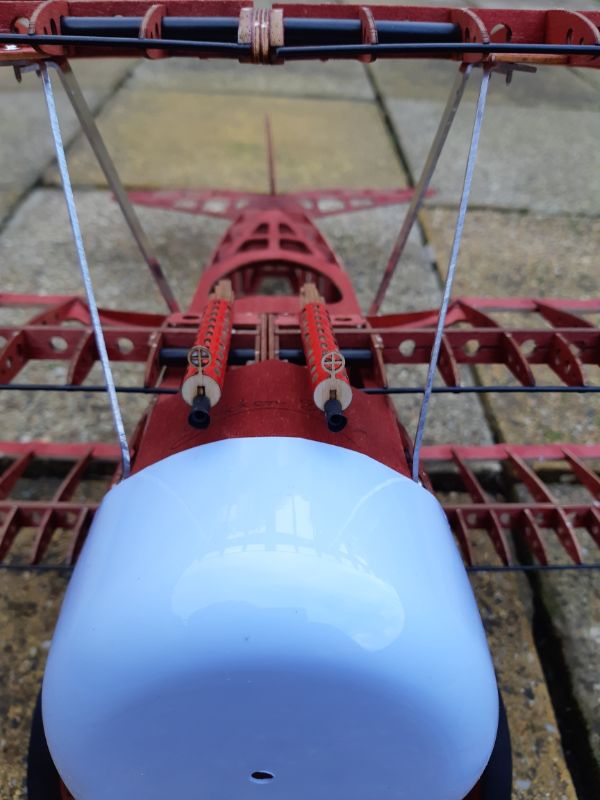
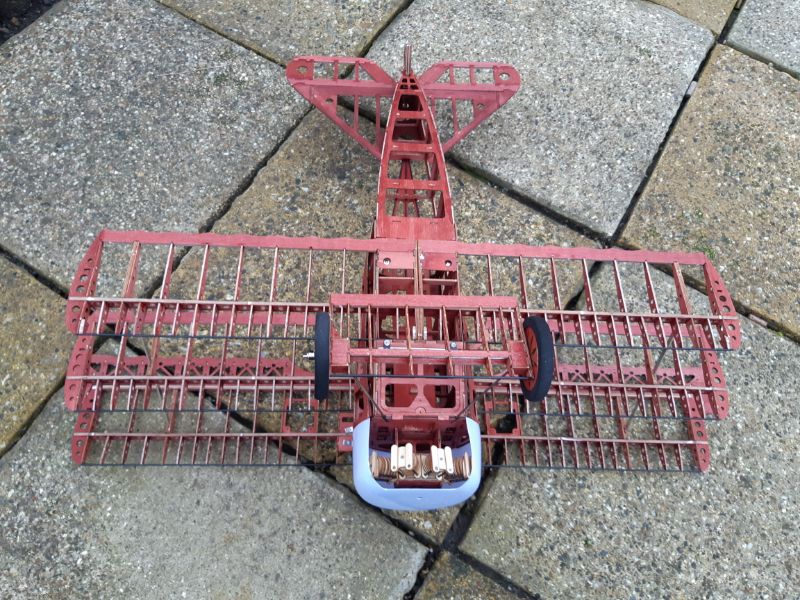
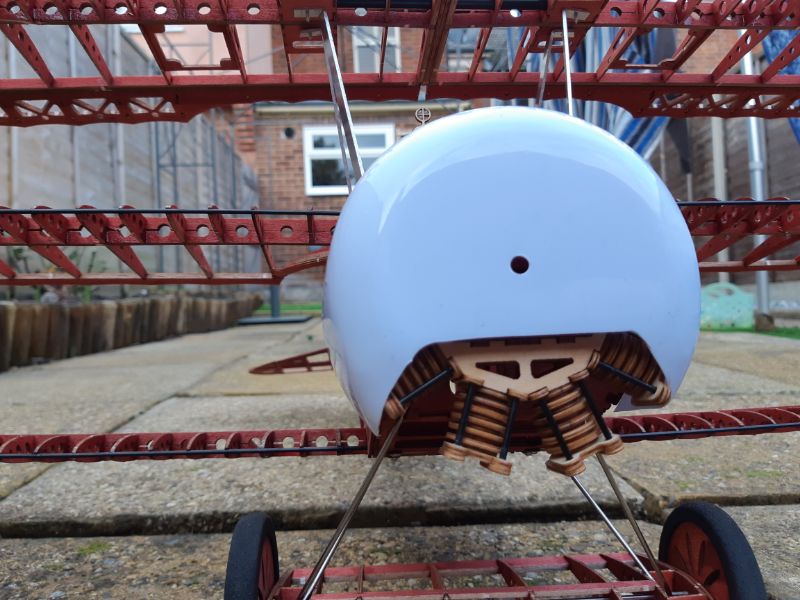
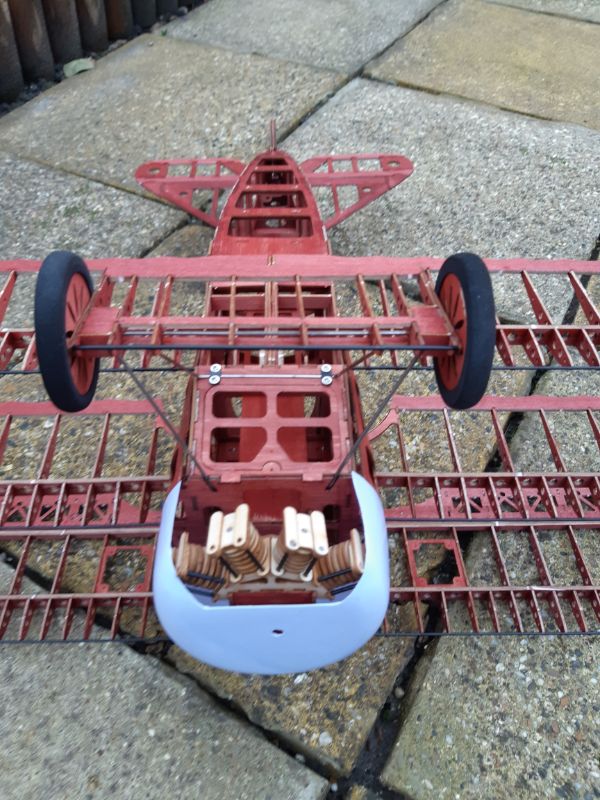
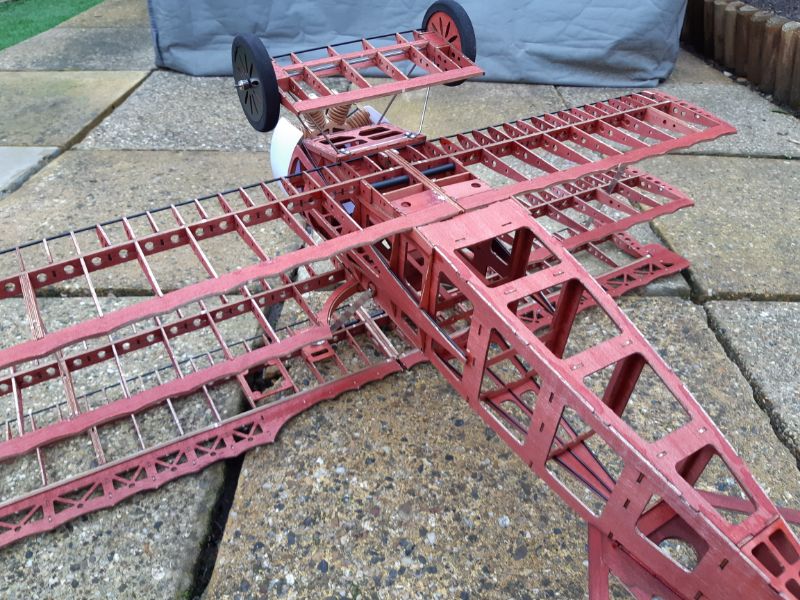
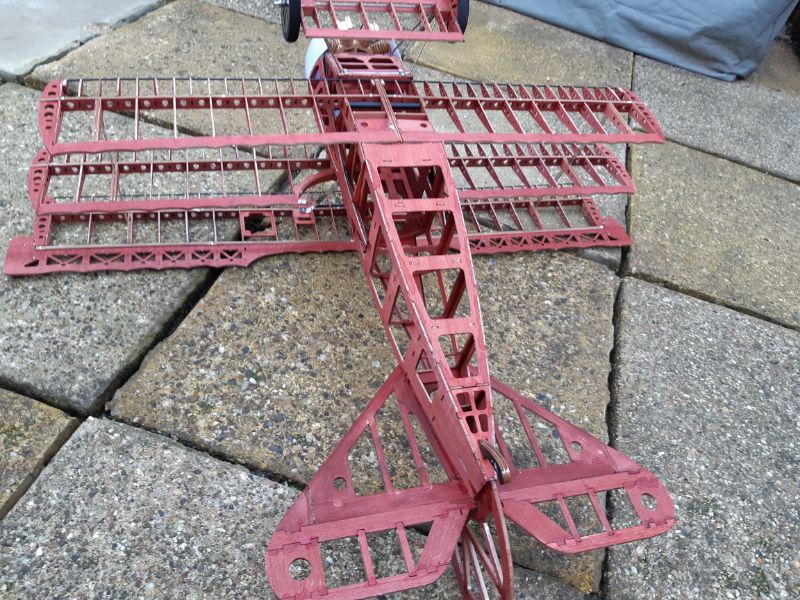
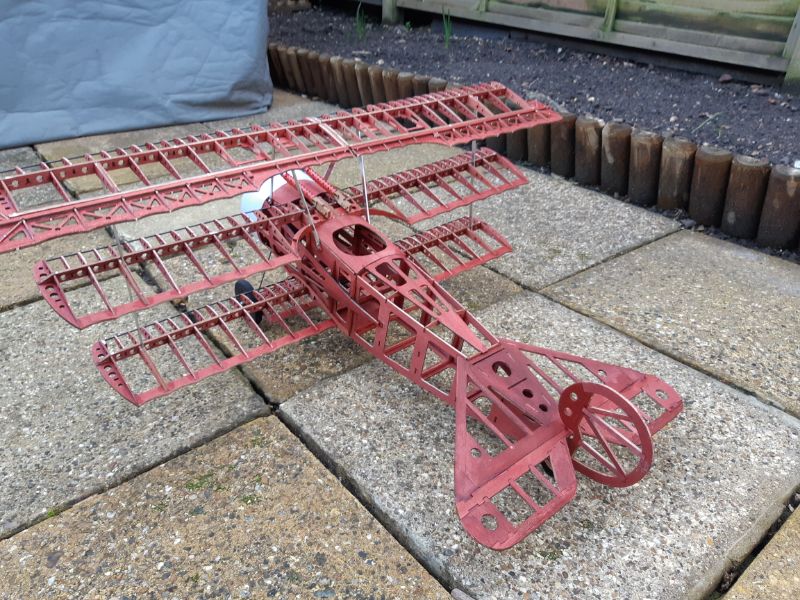
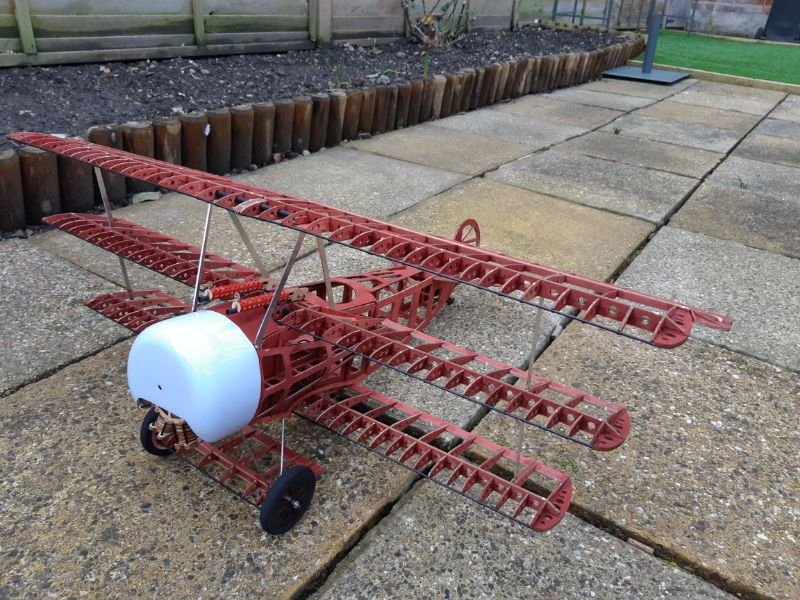
That's it, no written instructions, nothing about how the fuselage goes together(there are hundreds of parts) since this is supposed to be an rc plane I'm assuming it's meant for experienced builders (of which I'm not) I dont intend to rc it I intend to build it with no skin on it and am going to stain the framework with red wood stain ( that's always assuming I can figure out how to assemble it)
kpnuts
_VISITCOMMUNITY
United Kingdom
Joined: December 20, 2013
KitMaker: 1,179 posts
AeroScale: 25 posts
Posted: Saturday, November 02, 2019 - 06:43 AM UTC
Hi all well thanks to Ron I have some pdf instructions.

I thought I'd made my first error I was going to stain all the wood before gluing it all together as I thought the glue would stop the stain and wouldn't then look so good.

I started with the sides of the fuselage, as I was painting it on the balsa started to curve, i wasn't too worried as i thought when i do the other side as it dries it would straighten up again but it seemed as though it wouldn't so i started gluing some bits together hoping when i come to attaching the sides i could straighten them up then.

Luckily they leveled out by themselves, unluckily the glue does affect the stain. Not sure if it shows on the pics but anyway once the other side is on I dont think it will notice, so I've spent the rest of the afternoon staining all the rest of the parts for the fuselage.


It's going to be a fair size when done (at least as a static display model anyway)
kpnuts
_VISITCOMMUNITY
United Kingdom
Joined: December 20, 2013
KitMaker: 1,179 posts
AeroScale: 25 posts
Posted: Sunday, November 03, 2019 - 07:55 AM UTC
Hi all more progress, once you've figured out how things go together the fit is great (even with the pdf files it's still confusing) I think the model has been updated since the pdf instructions as the numbers are different and a lot of the parts dont look like the pdf says they should, anyhow here's more progress pics.


kpnuts
_VISITCOMMUNITY
United Kingdom
Joined: December 20, 2013
KitMaker: 1,179 posts
AeroScale: 25 posts
Posted: Monday, November 04, 2019 - 08:58 AM UTC
Hi all more progress, some of the parts bare no resemblance to what the instructions say they should look like, it makes things very confusing.
Not sure what I'm going to do with the engine painting wise.


kpnuts
_VISITCOMMUNITY
United Kingdom
Joined: December 20, 2013
KitMaker: 1,179 posts
AeroScale: 25 posts
Posted: Wednesday, November 06, 2019 - 09:01 AM UTC
Hi all more progress on this, I'm really enjoying this, I'm considering adding the serves and control cables just to add more interest to the finished plane.


JPTRR
Staff MemberManaging Editor
RAILROAD MODELING
#051
_VISITCOMMUNITY
Tennessee, United States
Joined: December 21, 2002
KitMaker: 7,772 posts
AeroScale: 3,175 posts
Posted: Friday, November 08, 2019 - 04:38 PM UTC
Very interesting model. I will keep an eye on this build.
ColinEdm
Staff MemberAssociate Editor
ARMORAMA
_VISITCOMMUNITY
Alberta, Canada
Joined: October 15, 2013
KitMaker: 1,355 posts
AeroScale: 107 posts
Posted: Saturday, November 09, 2019 - 07:04 AM UTC
Very cool!
kpnuts
_VISITCOMMUNITY
United Kingdom
Joined: December 20, 2013
KitMaker: 1,179 posts
AeroScale: 25 posts
Posted: Tuesday, November 12, 2019 - 08:33 AM UTC
Hi all more progress on this


kpnuts
_VISITCOMMUNITY
United Kingdom
Joined: December 20, 2013
KitMaker: 1,179 posts
AeroScale: 25 posts
Posted: Monday, November 18, 2019 - 09:22 AM UTC
Well got the upper wing structure done (shes going to be a fair size)


kpnuts
_VISITCOMMUNITY
United Kingdom
Joined: December 20, 2013
KitMaker: 1,179 posts
AeroScale: 25 posts
Posted: Thursday, November 21, 2019 - 08:56 AM UTC
Got some work done on the middle wing


kpnuts
_VISITCOMMUNITY
United Kingdom
Joined: December 20, 2013
KitMaker: 1,179 posts
AeroScale: 25 posts
Posted: Sunday, November 24, 2019 - 08:38 AM UTC
First 2 wings complete and a mockup of them on the plane (this thing will be huge)


kpnuts
_VISITCOMMUNITY
United Kingdom
Joined: December 20, 2013
KitMaker: 1,179 posts
AeroScale: 25 posts
Posted: Tuesday, December 03, 2019 - 09:19 AM UTC
Hi all, more progress it's a good kit as regards fit the instructions on the other hand.


kpnuts
_VISITCOMMUNITY
United Kingdom
Joined: December 20, 2013
KitMaker: 1,179 posts
AeroScale: 25 posts
Posted: Saturday, January 11, 2020 - 05:43 AM UTC
Hi all well I'm calling this done, I intended to leave the woodwork showing and obviously never intend to fly it so i see no point in buying a prop for it.

Now it's done I have no idea what I'm going to do with it as it is huge so it will probably end its days in the shed hanging from the roof.


SGTJKJ
#041
_VISITCOMMUNITY
Kobenhavn, Denmark
Joined: July 20, 2006
KitMaker: 10,069 posts
AeroScale: 3,788 posts
Posted: Wednesday, April 15, 2020 - 06:27 PM UTC
Really impressive work!

Thanks for sharing
 _GOTOTOP