Air Campaigns
Want to start or join a group build? This is where to start.
OFFICIAL: MiGs Campaign 2019
betheyn
Staff MemberSenior Editor
AEROSCALE
#019
_VISITCOMMUNITY
England - South East, United Kingdom
Joined: October 14, 2004
KitMaker: 4,560 posts
AeroScale: 2,225 posts
Posted: Sunday, January 26, 2020 - 05:36 AM UTC
Well late again, as I have only just dug this out of the cupboard.
My entry will be Trumpeters 1/48th MiG-21F-13, with a DN Models mask set.

Hoping to start this next weekend.
Andy
BlackWidow
_VISITCOMMUNITY
European Union
Joined: August 09, 2009
KitMaker: 1,732 posts
AeroScale: 1,336 posts
Posted: Sunday, February 02, 2020 - 07:28 AM UTC
I came a bit further with my MiG and this is my progress. The ejection seat consists of 17 plastic parts ....

.... and 14 PE parts ....

the small hole in the head rest is covered with a decal in the meantime. I painted the seat with Medium Grey, Light Grey and Stone Grey ....

.... this afternoon I have masked the canopy and closed the cockpit. The pilot is now preparing for blind flight training ....

I hope to throw some paint on the MiG next week. Friday evening I was searching the internet for my MG-129 and found this wonderful photo of the early camo but I can't remember where it was. I hope to come close to this in the end ....


Have a nice week!
Torsten
b17-peter
#392
_VISITCOMMUNITY
Hessen, Germany
Joined: January 09, 2013
KitMaker: 696 posts
AeroScale: 608 posts
Posted: Wednesday, February 05, 2020 - 04:53 AM UTC
Wow, Torsten, die wird bestimmt toll! Ich bin gespannt!
Looking forward to the finished build.

Last night I cut and glued the first plastic of my MiG A-144-1.
The kit parts look decent enough, although they will need some work here and then...

TimReynaga
Staff MemberAssociate Editor
MODEL SHIPWRIGHTS
_VISITCOMMUNITY
California, United States
Joined: May 03, 2006
KitMaker: 2,500 posts
AeroScale: 318 posts
Posted: Thursday, February 06, 2020 - 02:07 AM UTC

After adding the weight came painting the 1/144 MiG-15s’ plain gray cockpits.

A highlight here is the Eduard instrument decals. The unbelievably tiny yet perfectly sharp dial detail is absolutely phenomenal!


The panel even includes the vertical white line down the center used to aid MiG pilots in spin recovery maneuvers.


The only changes I made to the kit cockpits were simple replacement wire control columns and seatbelts made from strips of Tamiya tape.


It is almost a shame to install them into the fuselages which obscure much of the minute detail. Almost none of it will be discernable once the canopies are in place – but at least I’ll know it is in there!
b17-peter
#392
_VISITCOMMUNITY
Hessen, Germany
Joined: January 09, 2013
KitMaker: 696 posts
AeroScale: 608 posts
Posted: Thursday, February 06, 2020 - 07:28 AM UTC
TimReynaga
Staff MemberAssociate Editor
MODEL SHIPWRIGHTS
_VISITCOMMUNITY
California, United States
Joined: May 03, 2006
KitMaker: 2,500 posts
AeroScale: 318 posts
Posted: Saturday, February 08, 2020 - 05:09 AM UTC
Eduard’s fuselage assemblies are an unconventional top/bottom arrangement. Fit is precise.

Gentle, low-pressure scrapbooking clamps borrowed from the wife assure a tight fit to minimize seams as the cement dries.

The tail nozzles fit neatly into the assembled fuselage.


A measure of Eduard’s commitment to excellence is the detailed engine backs molded about 1/4 inch inside the one-piece tailpipes. They can barely be seen, but they’re in there. Outstanding!
BlackWidow
_VISITCOMMUNITY
European Union
Joined: August 09, 2009
KitMaker: 1,732 posts
AeroScale: 1,336 posts
Posted: Saturday, February 08, 2020 - 10:14 AM UTC
Quite some action in this thread now. Wonderful!


Quoted Text

....Looking forward to the finished build ....


Thanks Peter! But I guess you mean finnished build .... I also wonder how it will look like in the end.
There has been some progress on MG-129 this week. First paint is on! After white primer I have sprayed Chromegreen RAL 6020 (Revell Aqua No. 363) on the radome and other parts which comes very close to the real tone. Engine parts are painted with Revell Aqua No. 91 in 2 different shades. First with some drops of black in it ....

.... and after masking the rear part with the original Steel 91. The difference is visible ever here under my paint bench lamp ....

.... followed this evening by more time consumpting high precision masking ....

.... while the radome is covered with Parafilm and kitchen tissue ....

.... the rest is masked with Tamiya Tape and the Eduard Mask ....

Tomorrow I'll paint some more white primer over the over spray and next week will come the underside with Light Gull Grey FS36440, followed by some more masking fun.

Now, you guys out there better stay at home the next 2 days if you can while storm "Sabine" is rolling over Europe. It's perfect model building weather ....

Have fun!
Torsten
john41492
#442
_VISITCOMMUNITY
Malacca, Malaysia
Joined: July 20, 2015
KitMaker: 363 posts
AeroScale: 335 posts
Posted: Tuesday, February 11, 2020 - 03:49 PM UTC
Hi Everybody,

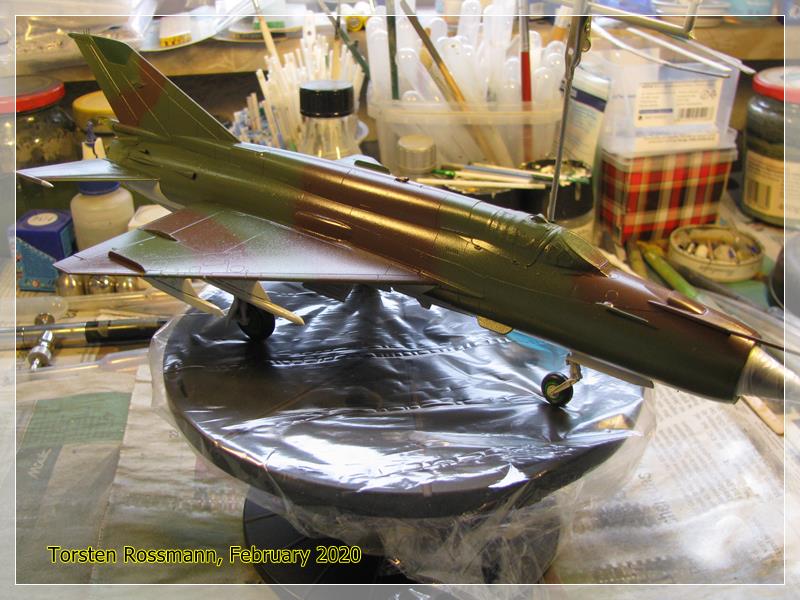
Great stuff happening all over the site these days! Tim, I always like your little gems. Torsten, I'm watching your build with great interest.

Having never built an Eduard kit before, my first impression is "Wow!". The engineering and fit are something else. This is really a fun filled build for me.

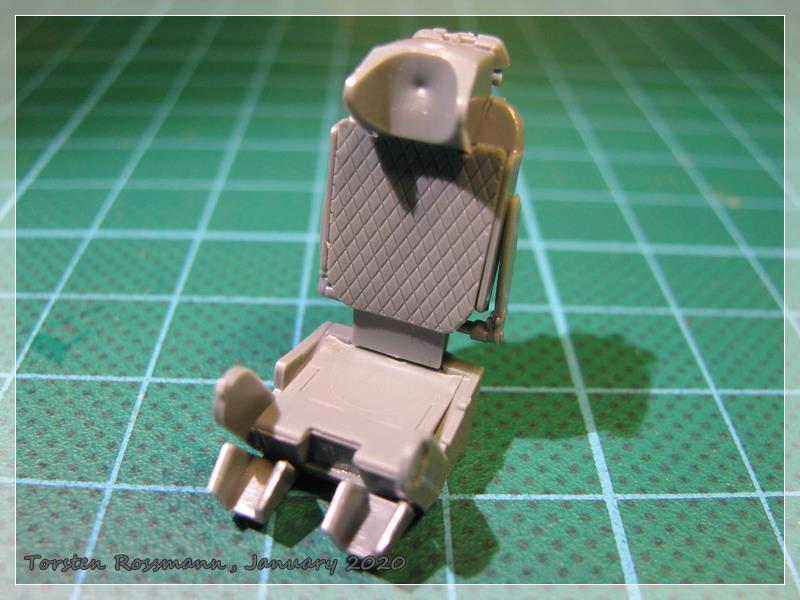
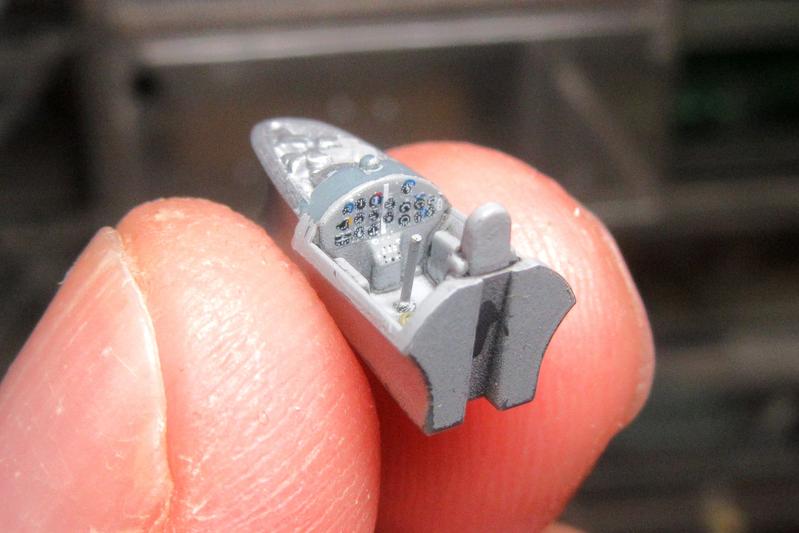
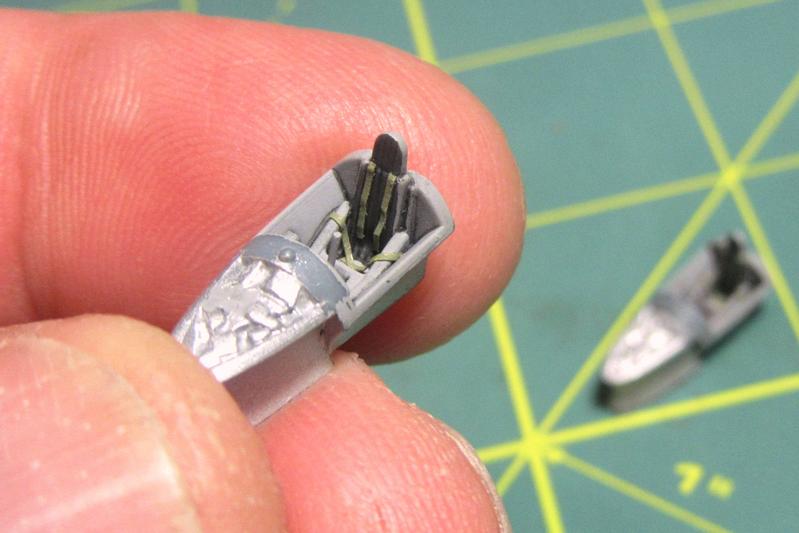
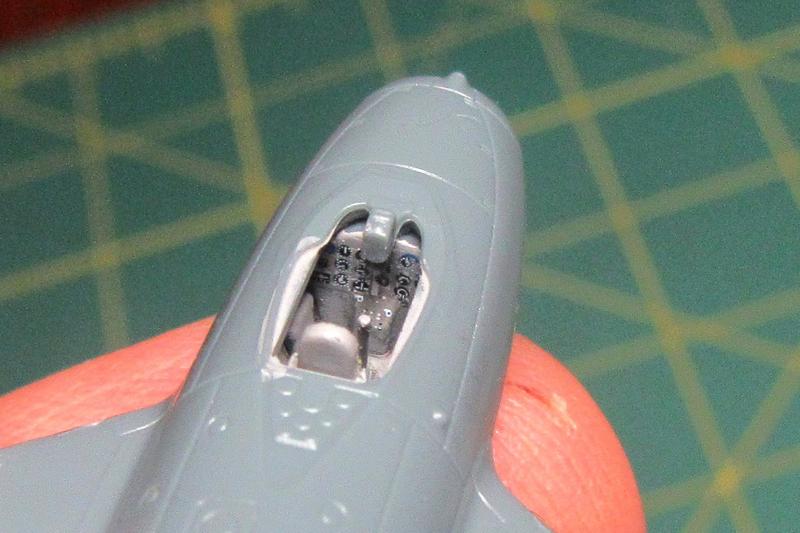
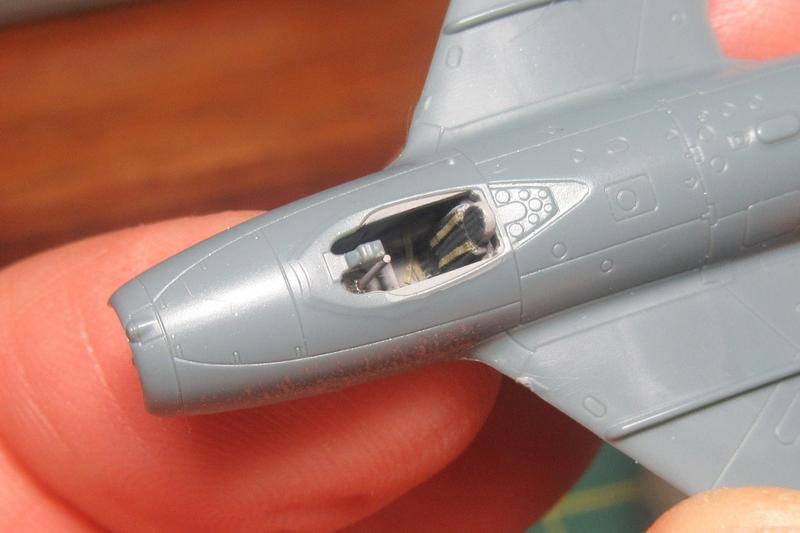
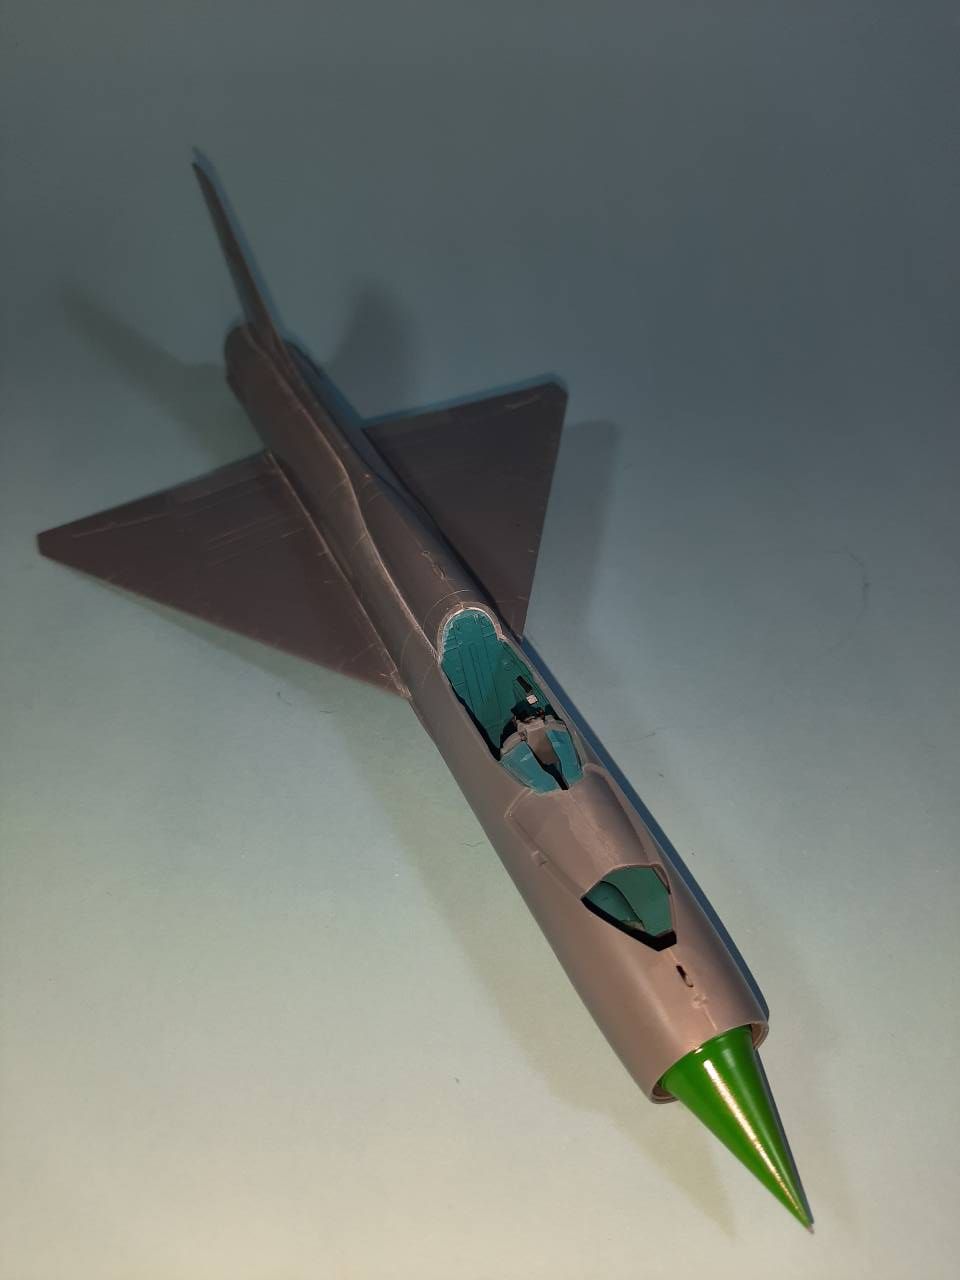
The cockpit went together per the instructions without incident. Not real sure of the turquois interior color, playing with Tamiya paints I came up with something I thought was close enough for me.


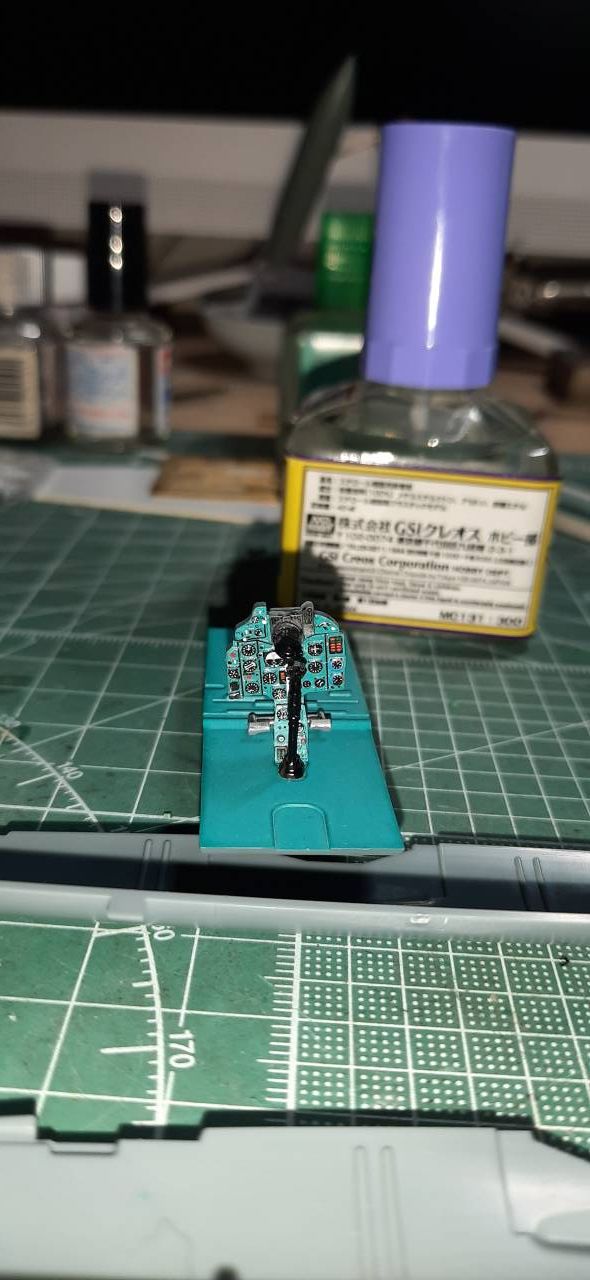
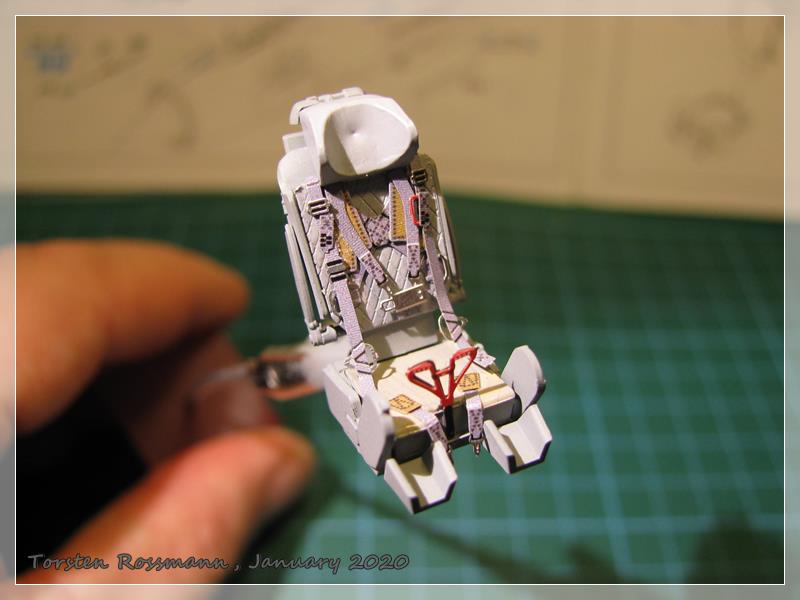
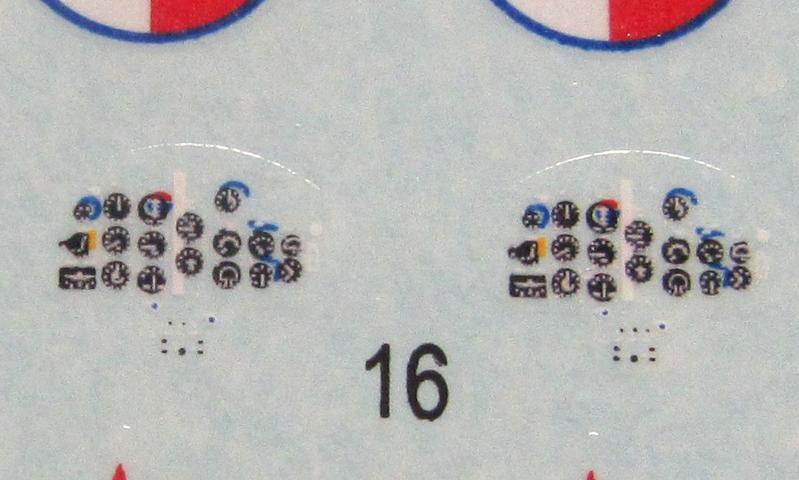
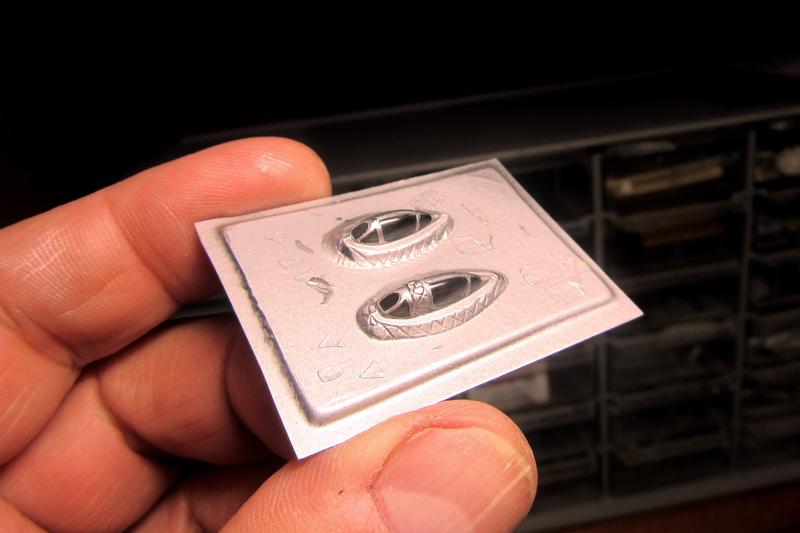
The instrument panel and side decals worked great, and really make the interior pop. Another benefit is that they will be visible once inside!


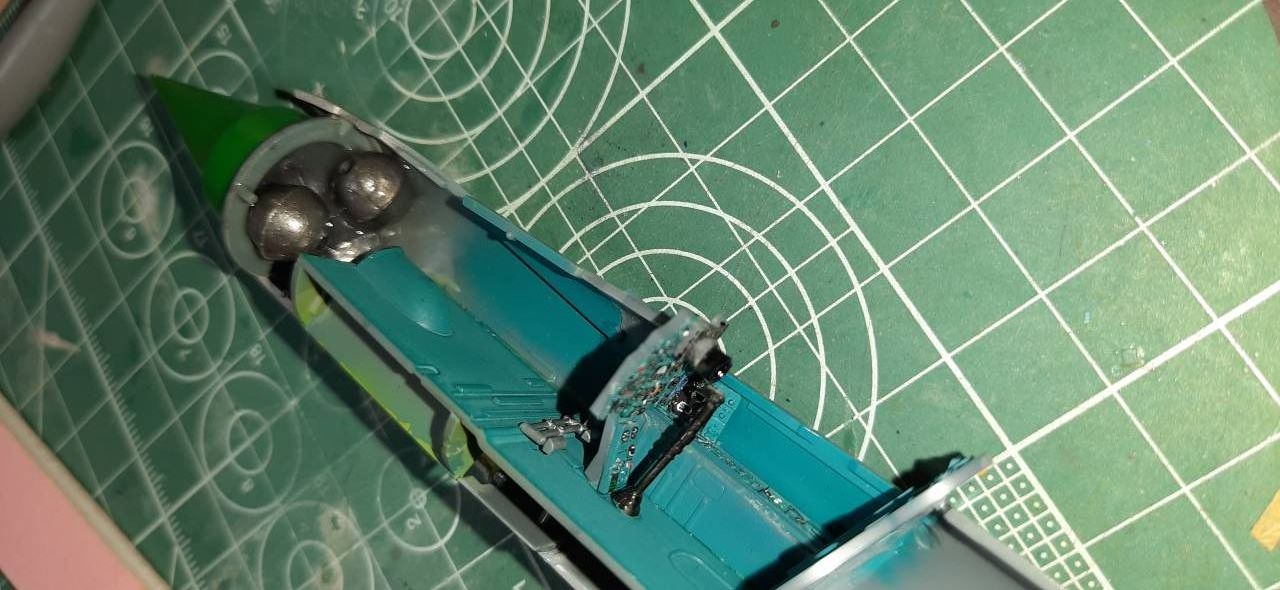
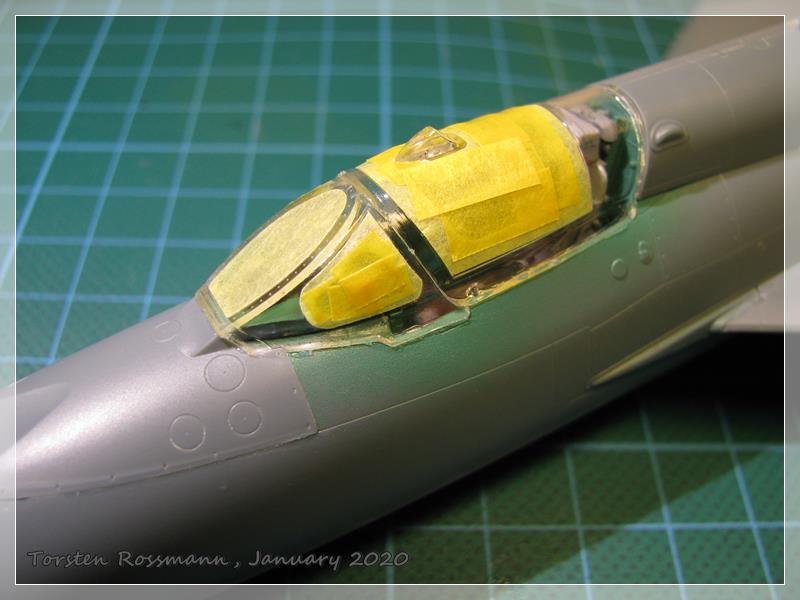
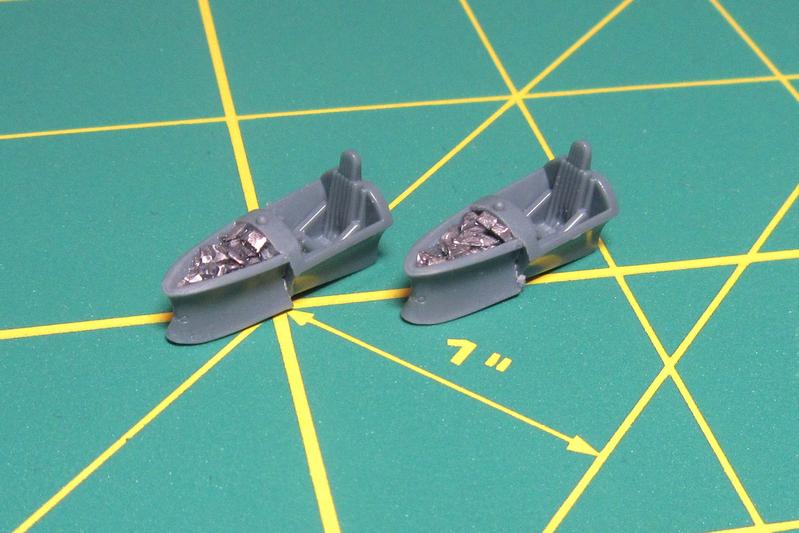
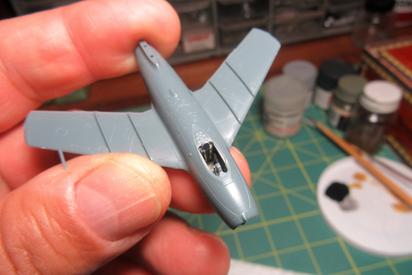
While the instructions indicate that weight should be added, they don't tell you how much. I added around 17 grams of fishing weights using some 5 minute epoxy, more than enough I think.


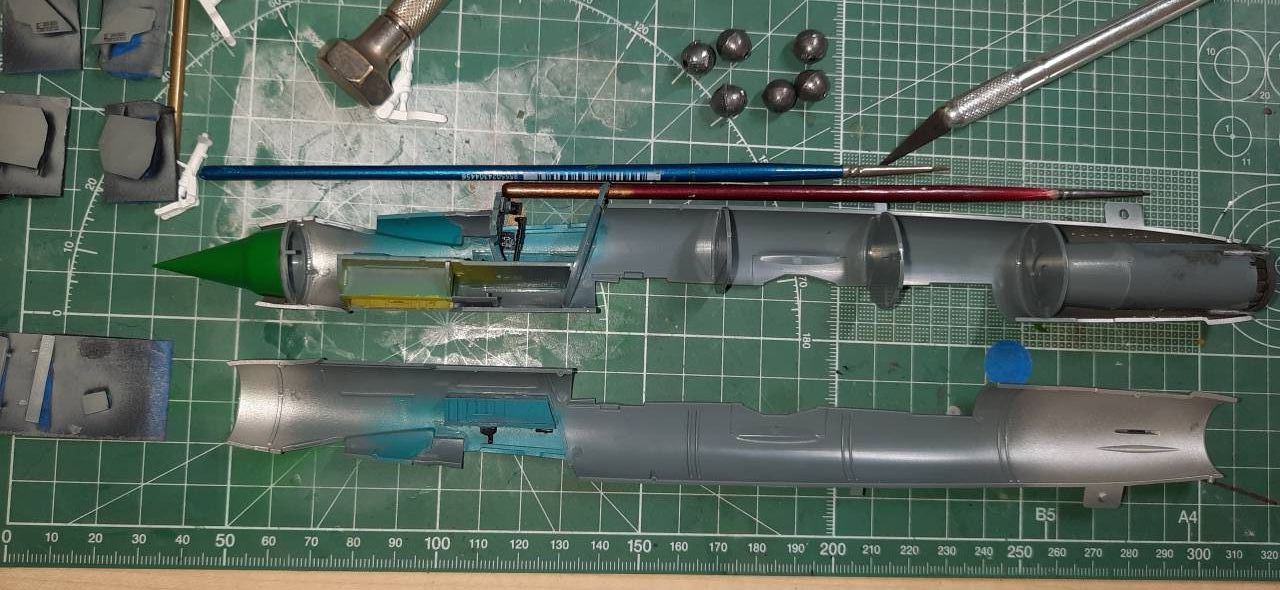
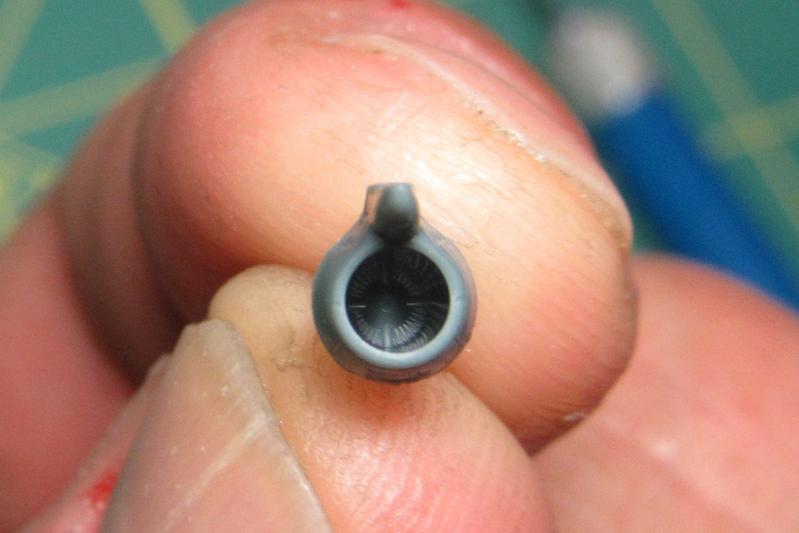
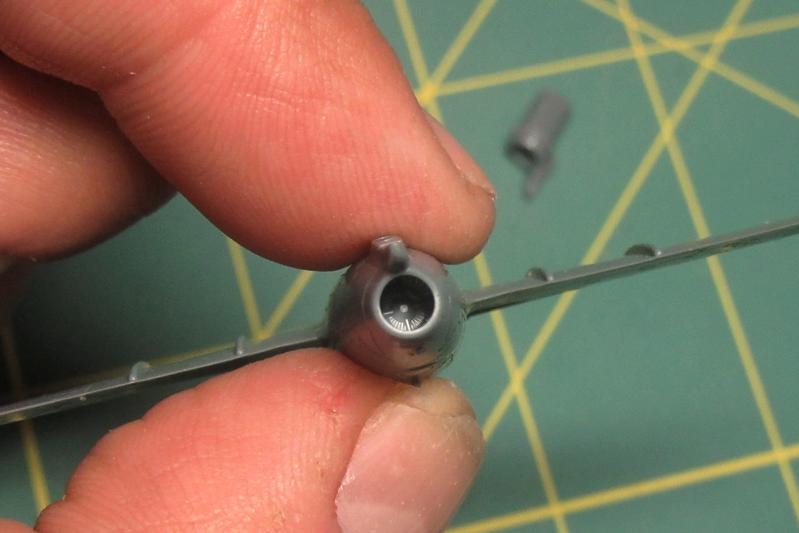
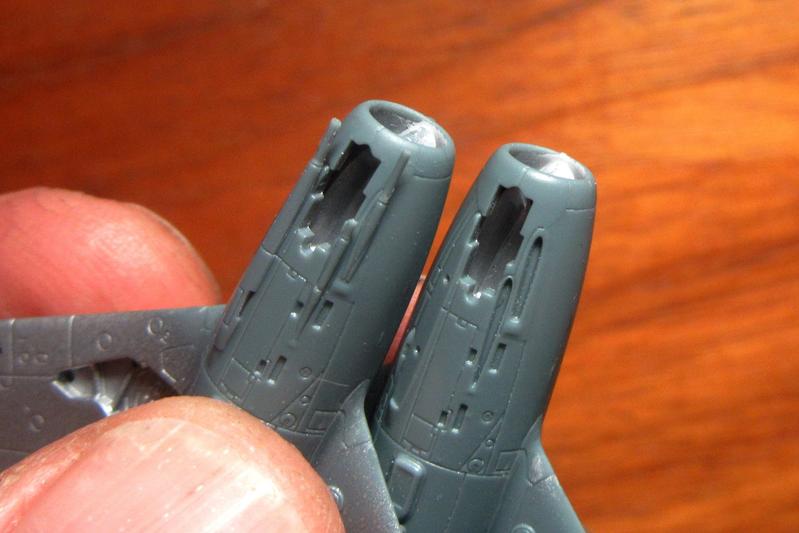
The engine built up nicely, and I was able to get all the interior components in place so the fuselage could be closed up.


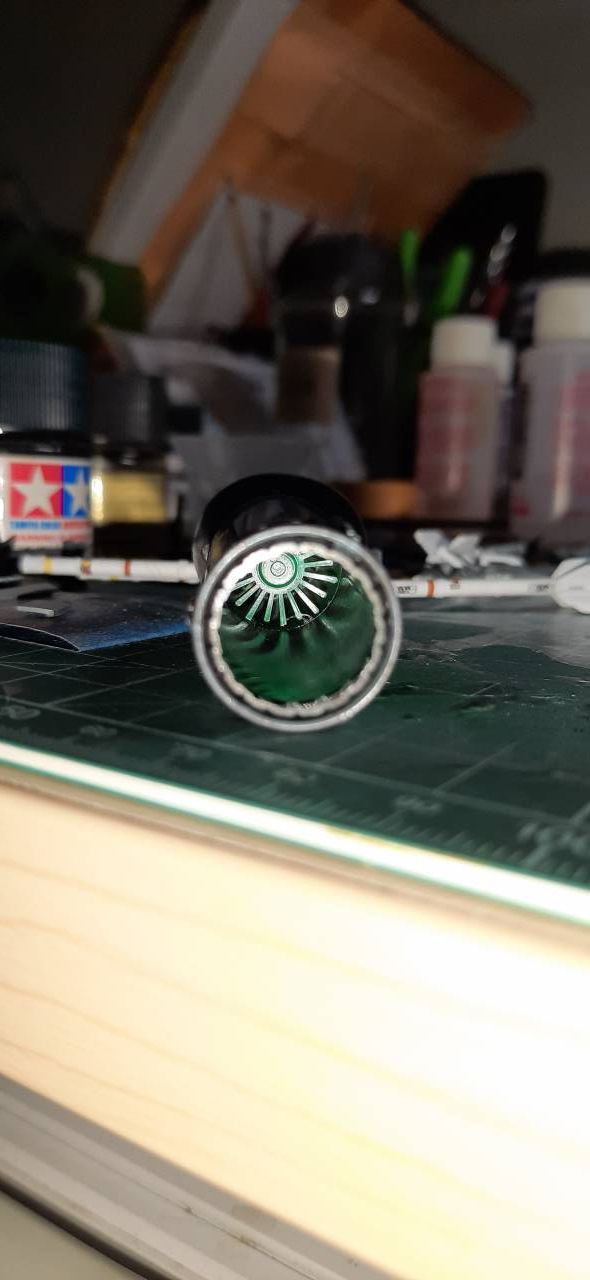
Once closed, I was impressed with the simple yet elegant look of the engine through the exhaust area.


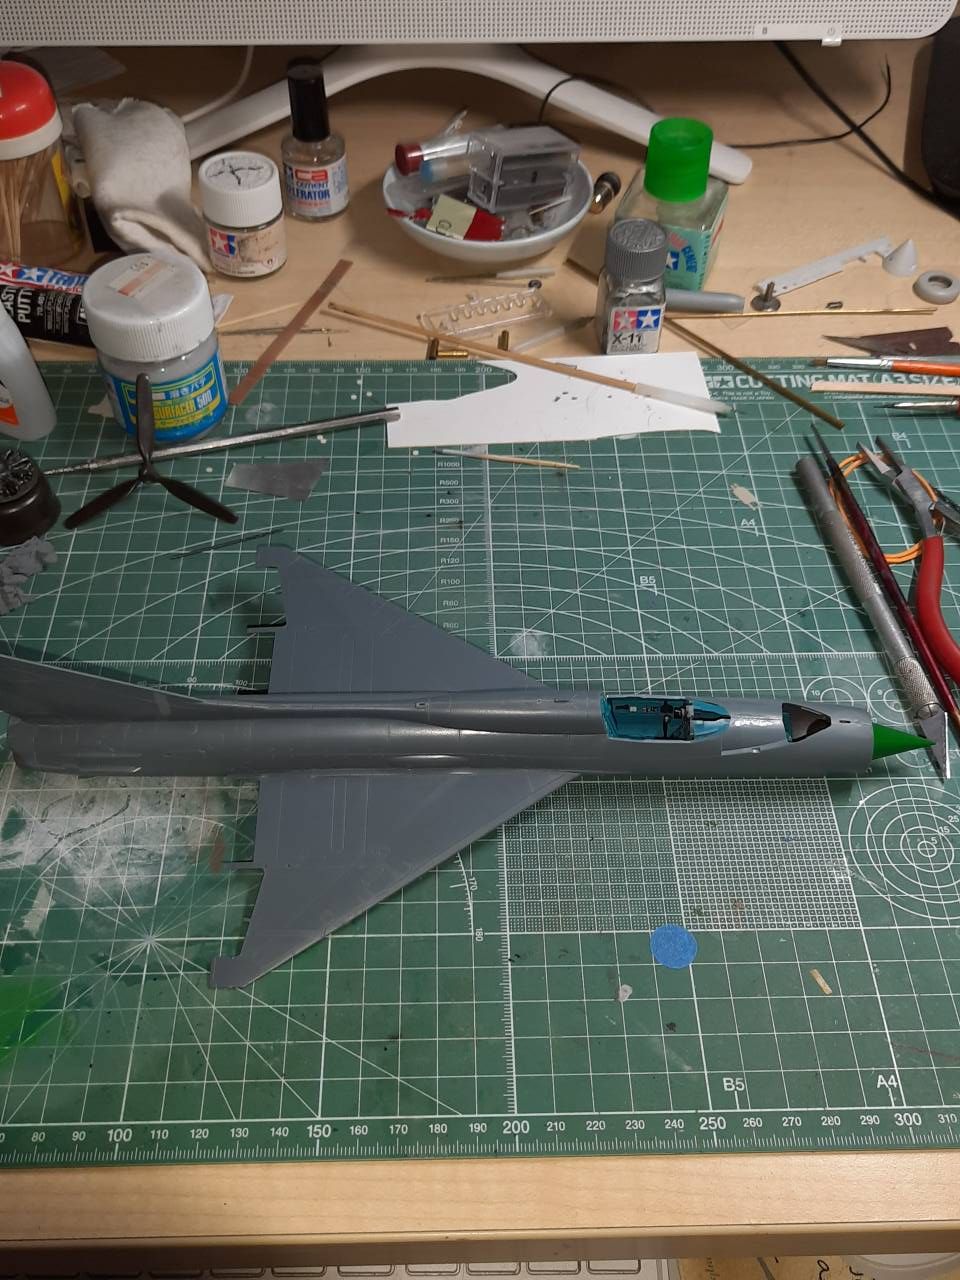
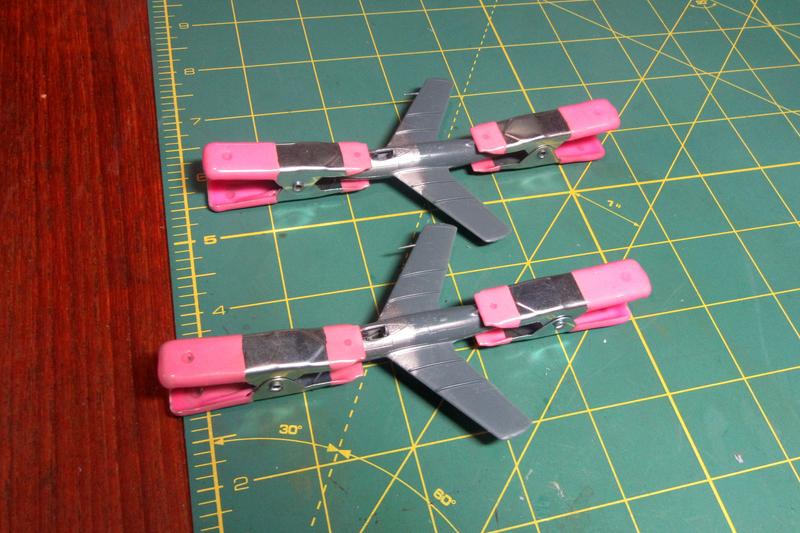
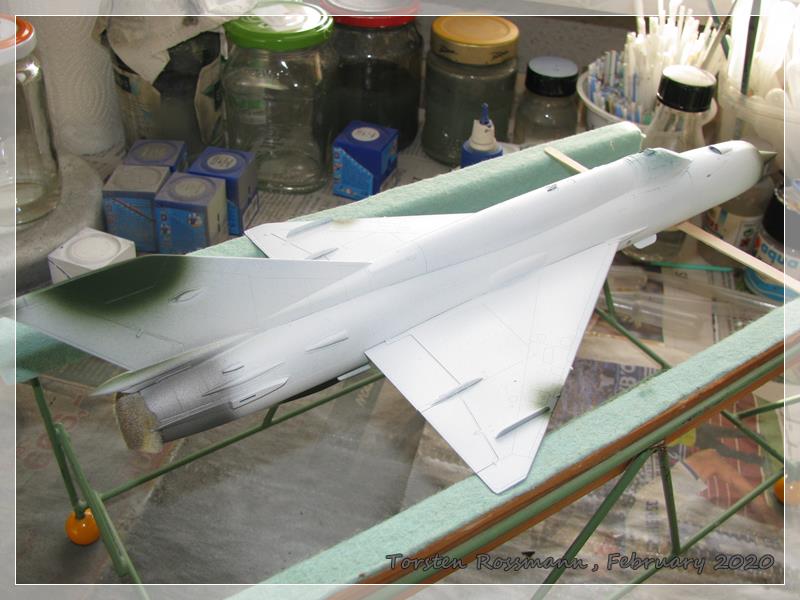
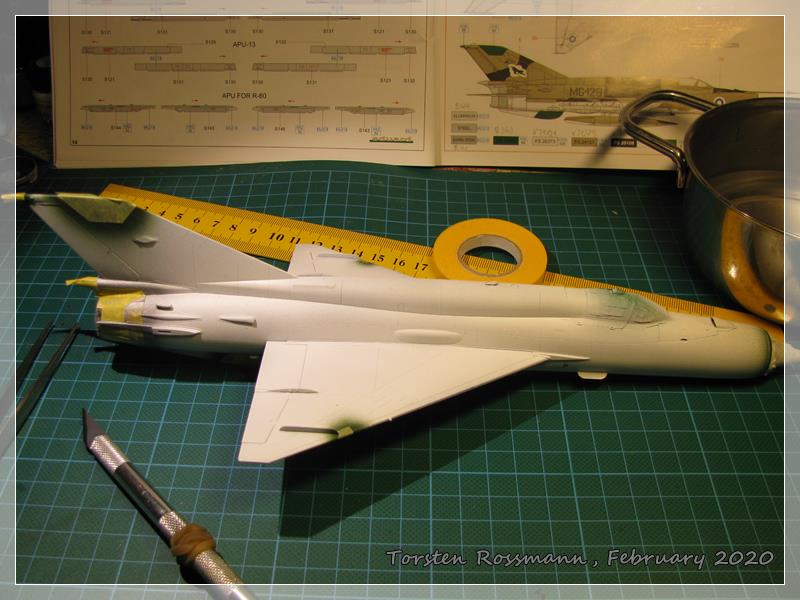
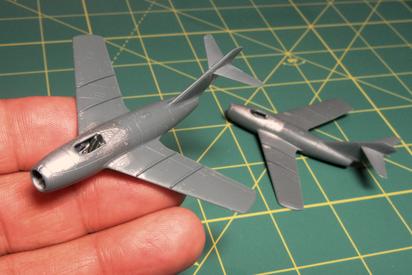
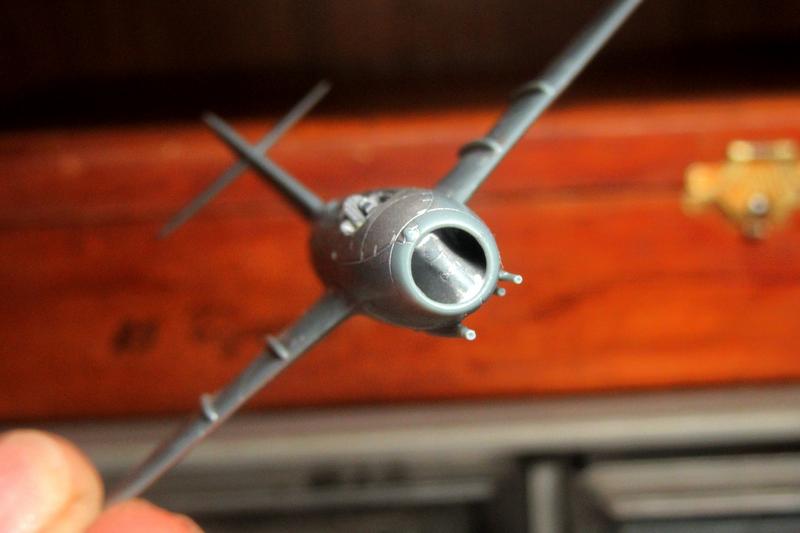
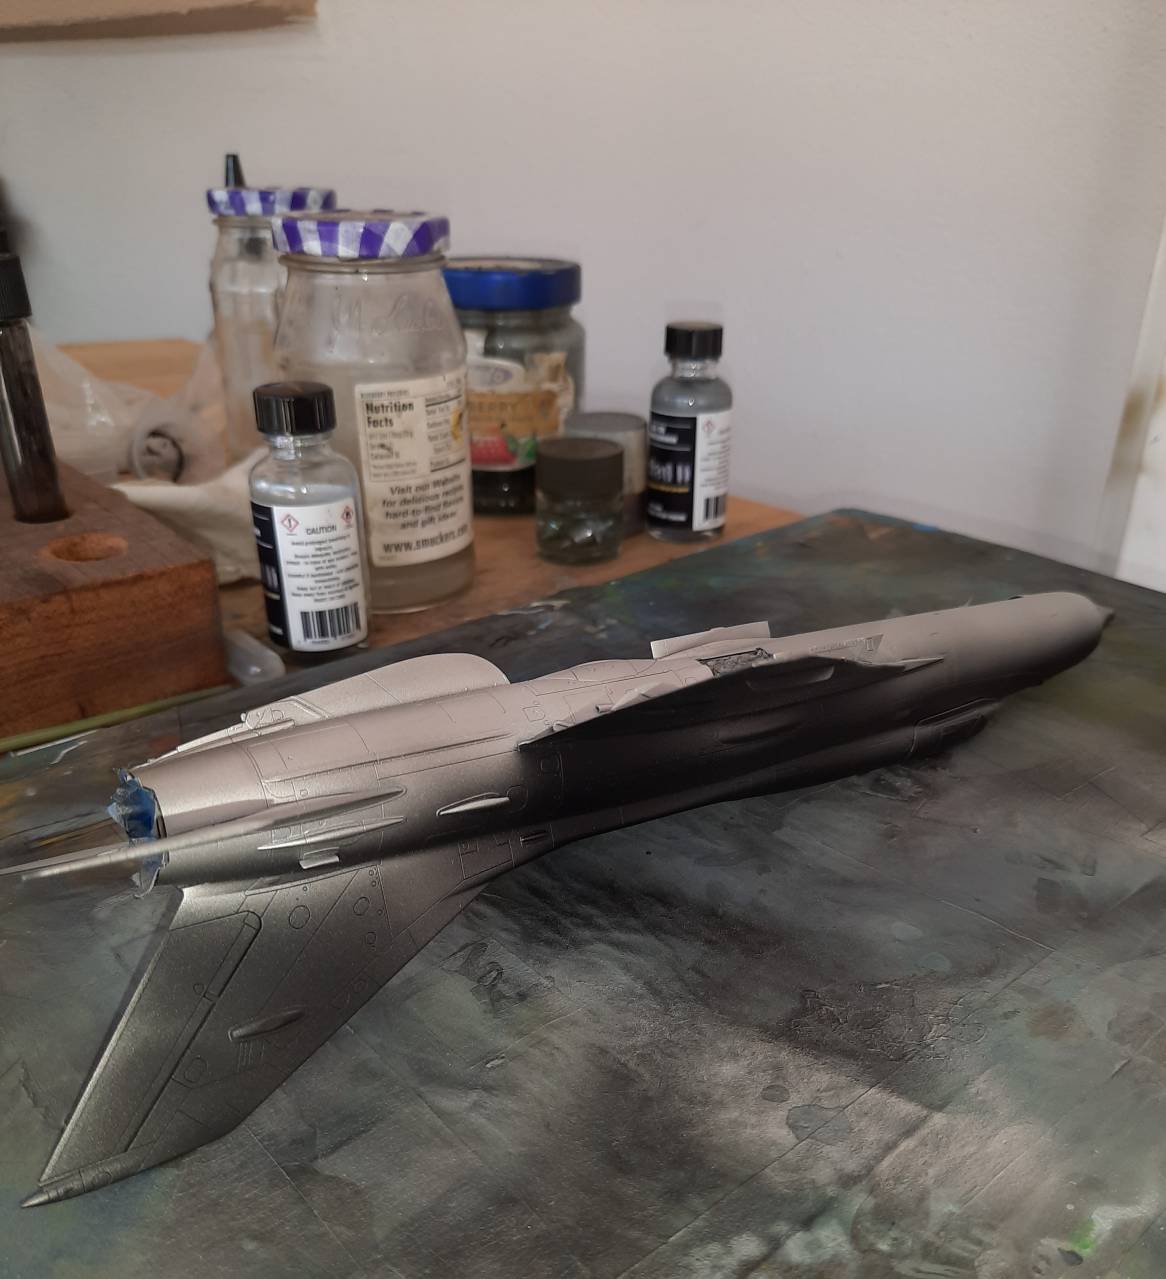
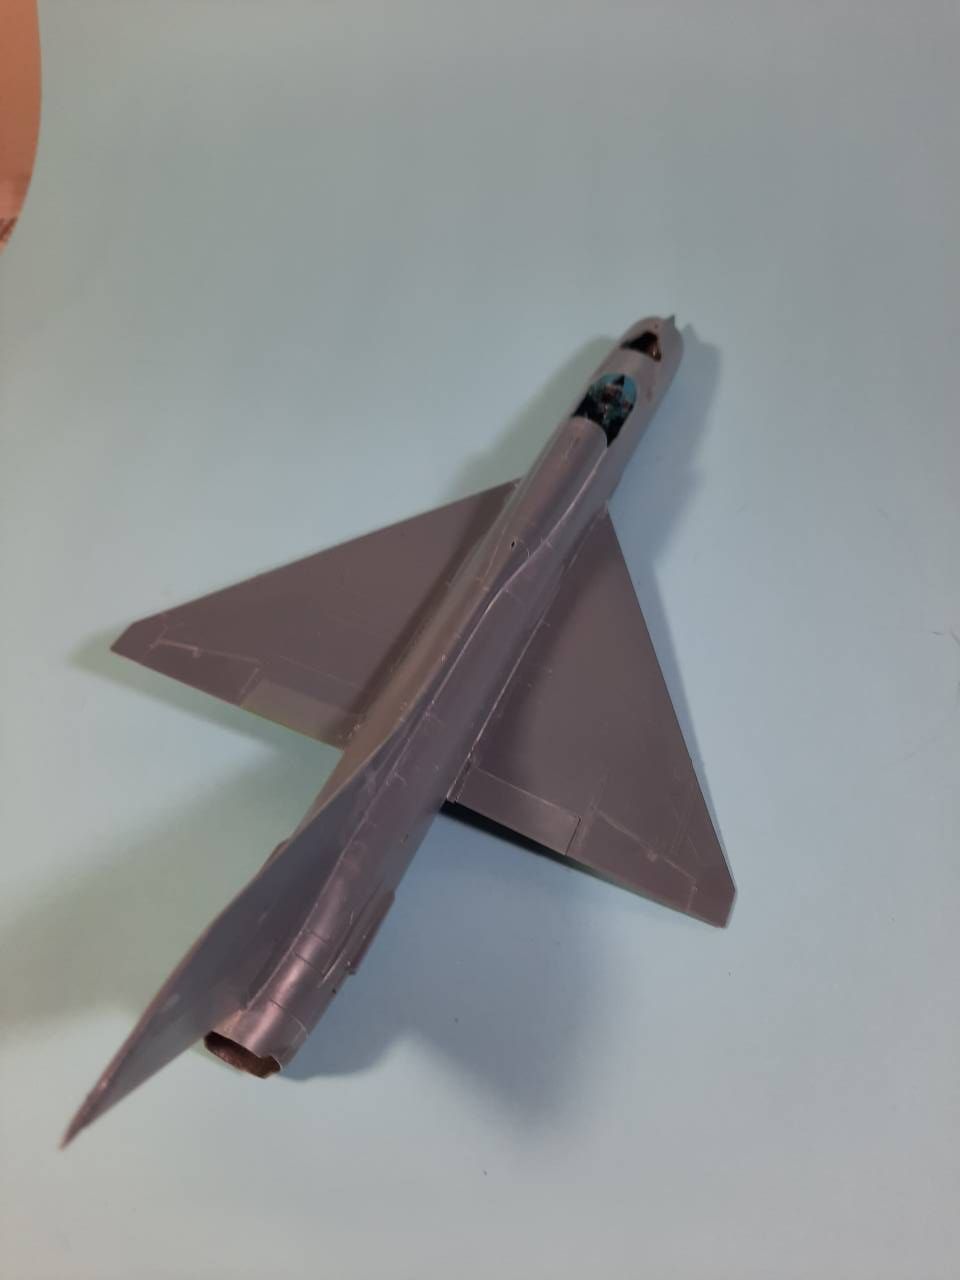
After closing things up, construction moved very quickly!


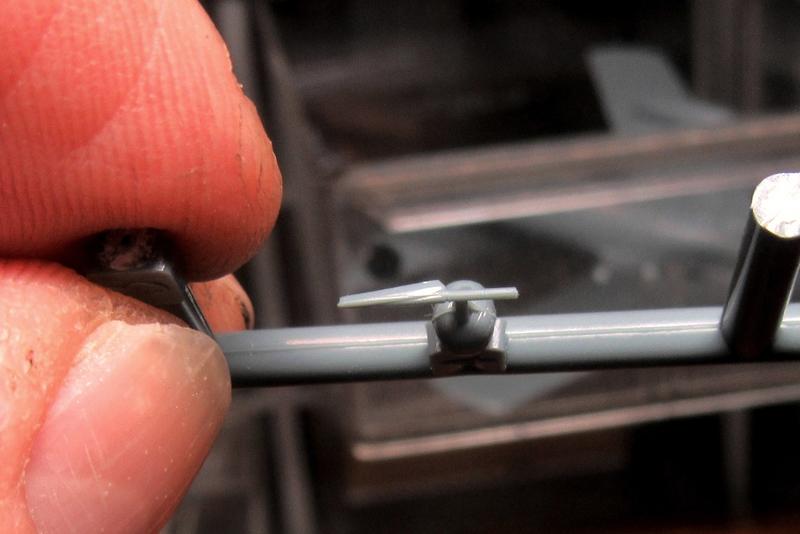
Adding the flaps and ailerons were straight forward, though I did manage to get a finger print on one. Easily sanded off! The nice thing here is that if one wishes, with a little work, they can get the flaps down. Maybe in the future.


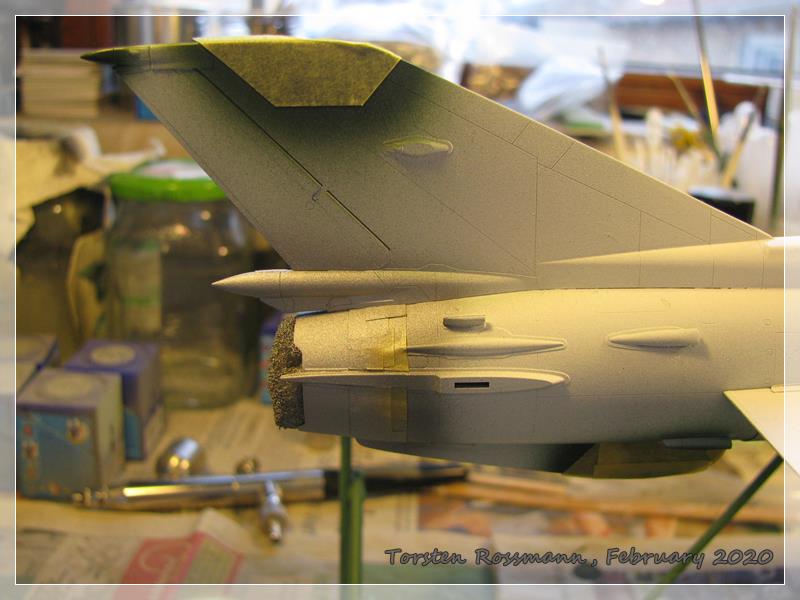
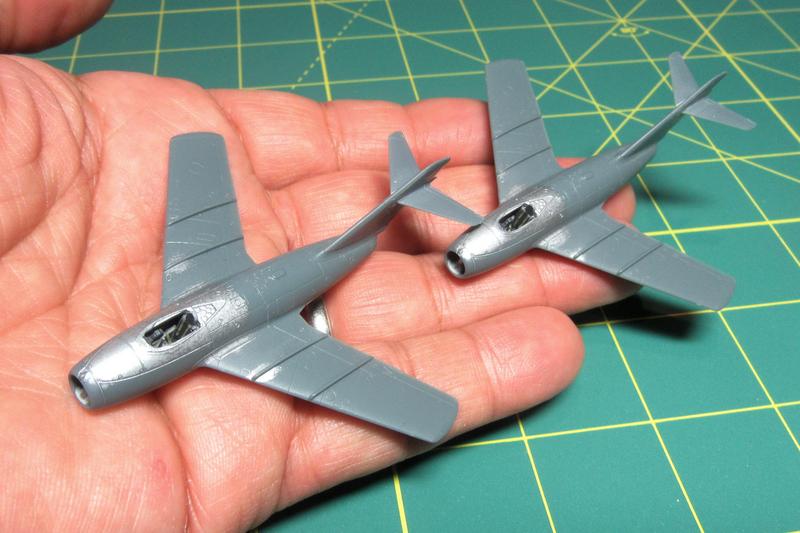
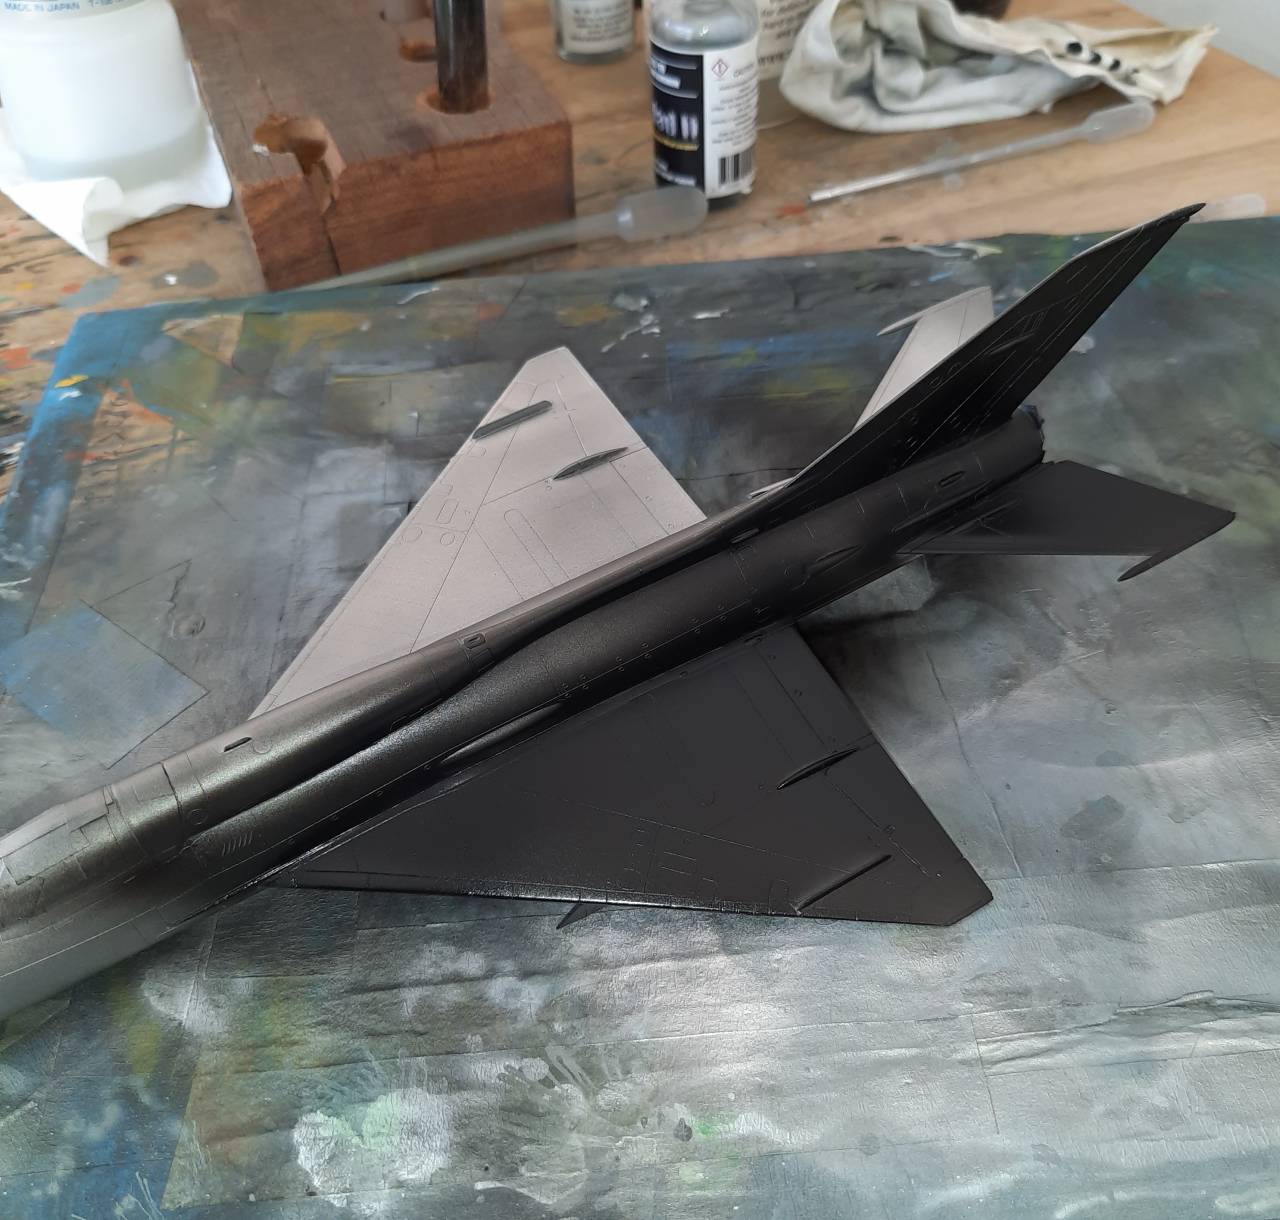
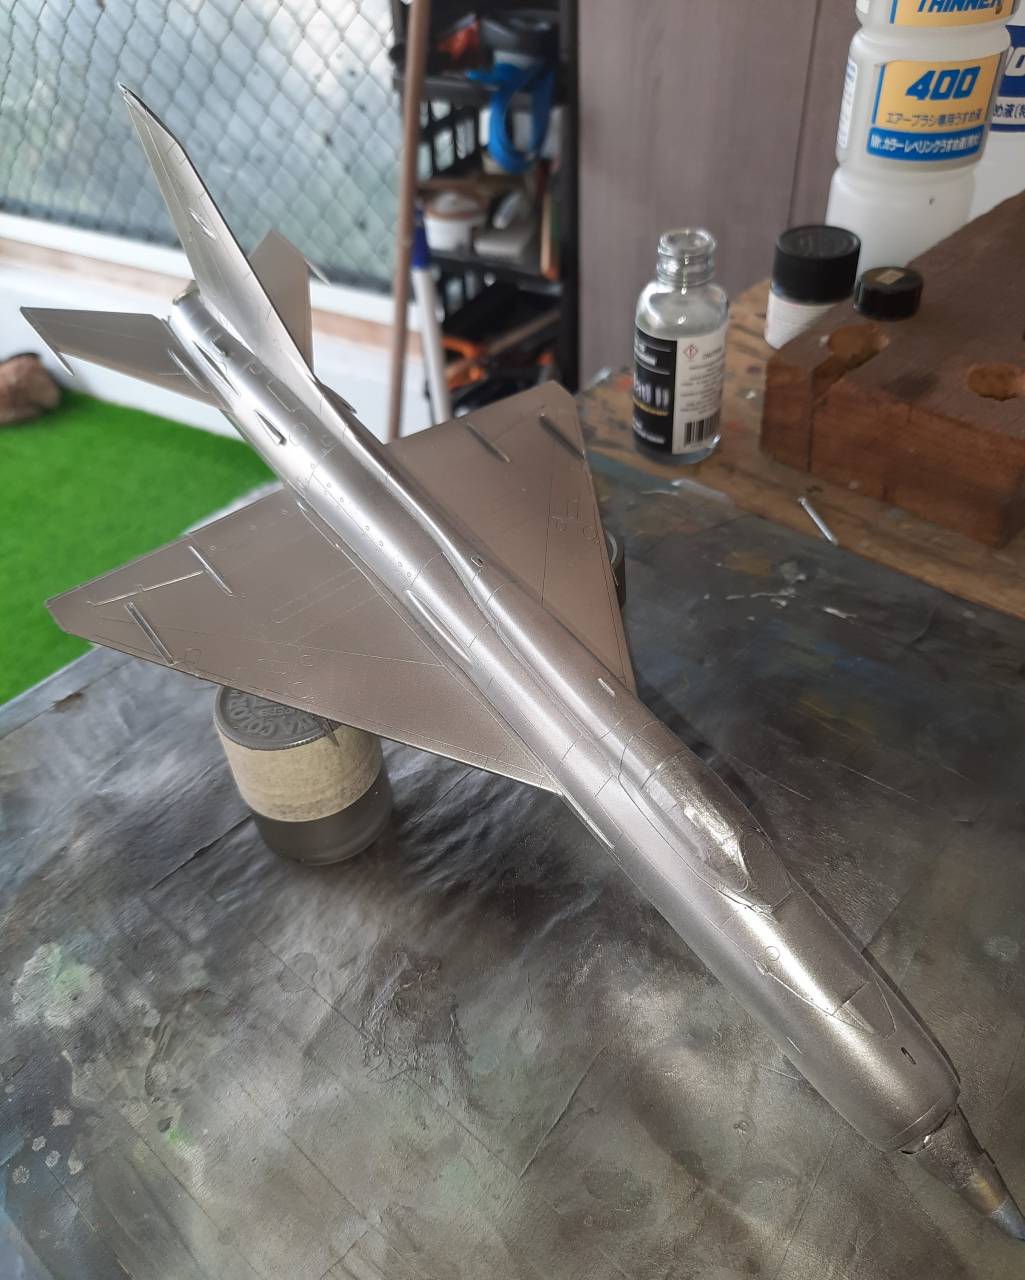
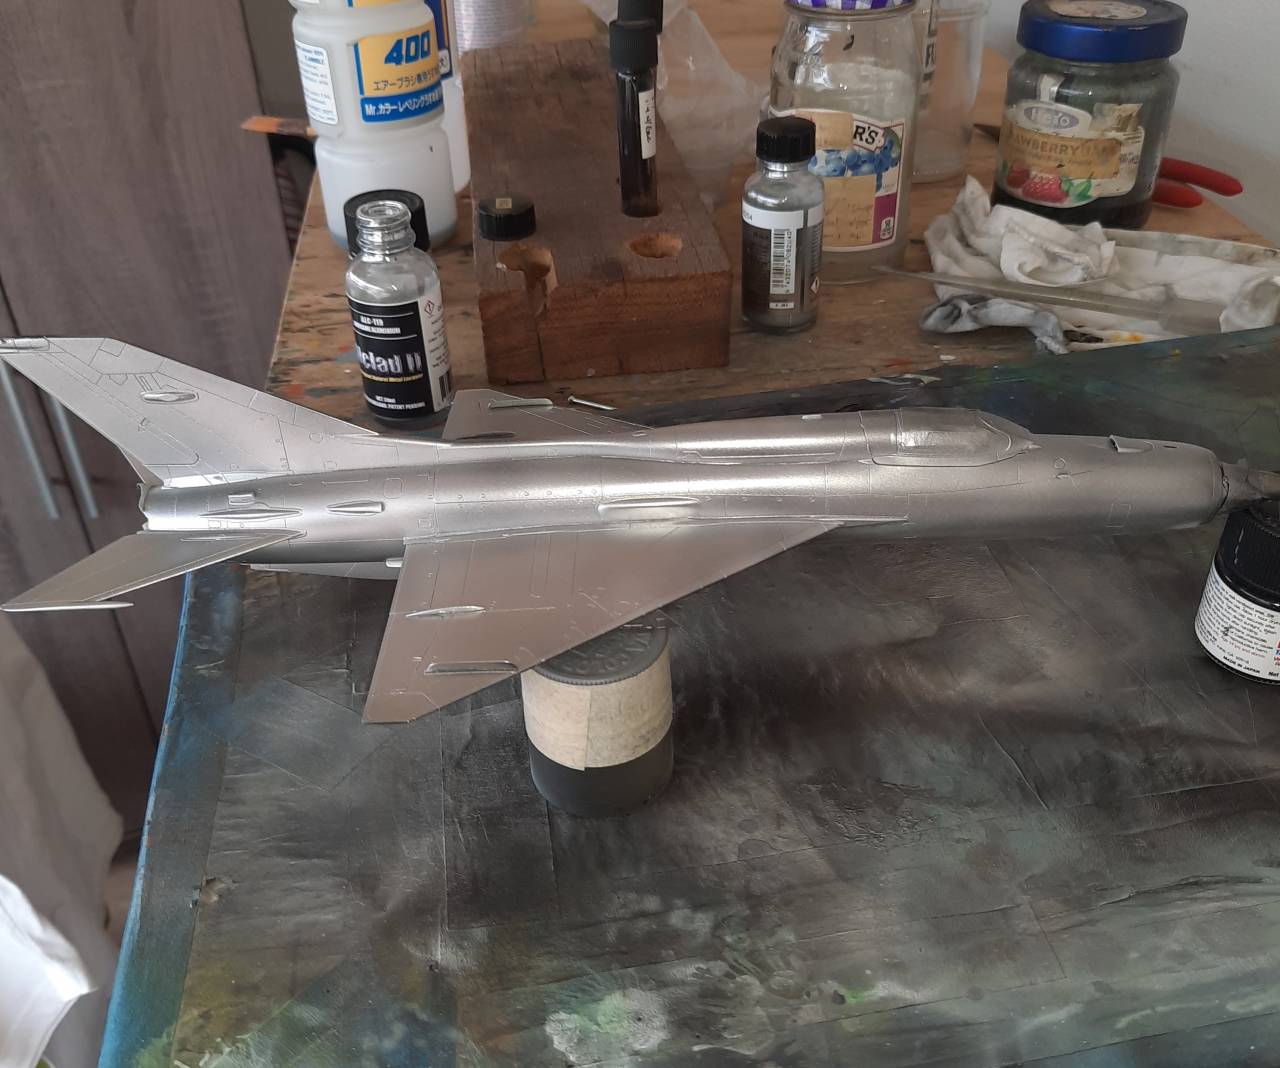
I'm currently going though a little seam cleaning (not much) and prepping the airframe for a NMF. This is a great kit so far, and I'm looking forward to playing with some metallic colors!

Till next time, keep having fun!
BlackWidow
_VISITCOMMUNITY
European Union
Joined: August 09, 2009
KitMaker: 1,732 posts
AeroScale: 1,336 posts
Posted: Tuesday, February 11, 2020 - 08:18 PM UTC
John, good progress on your MiG so far. Your Interior Green looks far better than mine.

Have airbrushed FS 36440 on Monday and am currently masking the underside with Tamiya Tape. I hope to paint Green on Friday or Saturday. At the moment I really have a flow, unfortunatly interrupted by work every day ...
BlackWidow
_VISITCOMMUNITY
European Union
Joined: August 09, 2009
KitMaker: 1,732 posts
AeroScale: 1,336 posts
Posted: Friday, February 14, 2020 - 08:23 AM UTC
Made some good progress on MG-129 this week ....
Monday was time for spraying the underside ....

.... from Tueday to Thursday I had some masking joy in the evenings with Tamiya Tape and Kip Tape. This is the result ....

.... first thing I did when I came home from work today was firing up the airbrush for some Green ....

.... and this are the main colours on my MiG. I hope to come close enough to the real thing with them ....


I leave everything now to dry throroughly and hope to start with Brown FS 30051 on Sunday.

Have all a nice weekend!
Torsten
BlackWidow
_VISITCOMMUNITY
European Union
Joined: August 09, 2009
KitMaker: 1,732 posts
AeroScale: 1,336 posts
Posted: Sunday, February 16, 2020 - 07:41 AM UTC
Just want to show you the progress on MG-129 from this afternoon. Though I hoped Brown would come out a bit darker I'm really happy with the result. I thought I would need 2 sessions for the 2. camo colour but everything went so smooth that all was done in 1 1/2 hours ....


My compromise here is that this bird will get the late camo, of which Pasi spoke but the early markings with the bigger insignias and the unit enblem from the kits decal sheet. That's because I couldn't get the early camo paints ....
Next step will be demasking most parts and getting the landing gear and weapons done. On the 21./22. March is my first expo this year and MG-129 should be fin(n)ished by then and on the table there. I'm really happy that everything goes so troublefree now. It's a big motivation!

Have a nice week!
Torsten
john41492
#442
_VISITCOMMUNITY
Malacca, Malaysia
Joined: July 20, 2015
KitMaker: 363 posts
AeroScale: 335 posts
Posted: Sunday, February 16, 2020 - 01:17 PM UTC
Torsten,

Nice job! Nothing like a good brushing session to get a spring in your step!
BlackWidow
_VISITCOMMUNITY
European Union
Joined: August 09, 2009
KitMaker: 1,732 posts
AeroScale: 1,336 posts
Posted: Monday, February 17, 2020 - 08:13 AM UTC
Thanks John! Today I have painted the parts for the landing gear and hope that most things are done by next weekend. I try to spend 1-2 hours every evening on the kit. As I said before, at the moment I really have a flow ....

What about your 21? Anything new worth showing?
Hudson29
#460
_VISITCOMMUNITY
California, United States
Joined: September 16, 2014
KitMaker: 1,156 posts
AeroScale: 92 posts
Posted: Wednesday, February 19, 2020 - 12:28 PM UTC
Lots of neat progress going on here! My kits tools & supplies are all packed for a long distance move buts its still fun to watch the fun.
BlackWidow
_VISITCOMMUNITY
European Union
Joined: August 09, 2009
KitMaker: 1,732 posts
AeroScale: 1,336 posts
Posted: Wednesday, February 19, 2020 - 06:45 PM UTC
Just to let you know: MG-129 is standing on her wheels since yesterday evening and she's no tailsitter ....
Photos follow soon, so stay tuned!
TimReynaga
Staff MemberAssociate Editor
MODEL SHIPWRIGHTS
_VISITCOMMUNITY
California, United States
Joined: May 03, 2006
KitMaker: 2,500 posts
AeroScale: 318 posts
Posted: Thursday, February 20, 2020 - 02:04 PM UTC

Added to the assembled fuselages, the tailfins and high-mounted stabilizers complete the distinctive MiG-15 airframes.

These kits are great to work with. Outlines are dead accurate, and the design and fit tolerances of the parts are so consistently tight that, so far, the models have required no filler at all.

PasiAhopelto
_VISITCOMMUNITY
Uusimaa, Finland
Joined: October 01, 2016
KitMaker: 514 posts
AeroScale: 239 posts
Posted: Saturday, February 22, 2020 - 05:35 AM UTC
Nice work with the MiGs, looking forward to seeing finished models.

Meanwhile I've painted basic colours:


Lot's of weathering to do, the 25s seem to have different shades of grays, for example on sides or air intakes. I assume these are the same paint applied over old faded colour, which then shows as darker area. I'm aiming towards similar effect as on leading edge of left fin. Should be done by the end of month.
TimReynaga
Staff MemberAssociate Editor
MODEL SHIPWRIGHTS
_VISITCOMMUNITY
California, United States
Joined: May 03, 2006
KitMaker: 2,500 posts
AeroScale: 318 posts
Posted: Saturday, February 22, 2020 - 01:06 PM UTC
Eduard’s MiG-15 kits also come with a choice of nicely molded underwing fuel tanks.

These include the early PTB-260 260 liter (69 gallon) slipper tanks and the later PTB-400 400 liter (105 gallon) underwing tanks with fins. There is even the option of PTB-400 underwing tanks mounted to BD3-53 bomb racks – a unique Czechoslovak modification on the fighter-bomber variant of the later MiG-15bis (Fagot-B). Cool.
BlackWidow
_VISITCOMMUNITY
European Union
Joined: August 09, 2009
KitMaker: 1,732 posts
AeroScale: 1,336 posts
Posted: Sunday, February 23, 2020 - 12:11 AM UTC
Wonderful to see all the progress on your builds, guys!
Pasi, that's quite a big bird, but there's a silver lining to see now with finishing your MiG.

I also made some big steps this week. Most parts are attached to MG-129, except for the external fuel tank and the missiles. Yesterday I've done some touch ups. And I'm really happy, that I have put enough weight in the front so she's no tailsitter!


.... and fresh from the paint shop this morning with some layers of Bodenglänzer, the german equivalent to Future ....

I will leave it now to dry and next week it's decal time. It looks as if there are 1000 stnecils or more but I won't use them all. I also believe there were finnish stencils on finnish MiGs and not russian stencils ....? There are none on the decal sheet.
In the meantime I'll paint the missiles. I'll leave the radom and the engine exhaust covered to the very end.

Have a nice Sunday!
Torsten
TimReynaga
Staff MemberAssociate Editor
MODEL SHIPWRIGHTS
_VISITCOMMUNITY
California, United States
Joined: May 03, 2006
KitMaker: 2,500 posts
AeroScale: 318 posts
Posted: Monday, February 24, 2020 - 01:04 AM UTC
Designed to destroy enemy bombers, the MiG-15 was well armed with two 23mm and one 37mm cannon. Eduard’s renditions of these in 1/144 are impressively petite.

Molded together with their fairings, the guns are sharp and in-scale.


They fit neatly into slots under the fuselage nose.


The only change I made was to drill out the muzzle ends.
BlackWidow
_VISITCOMMUNITY
European Union
Joined: August 09, 2009
KitMaker: 1,732 posts
AeroScale: 1,336 posts
Posted: Wednesday, February 26, 2020 - 08:27 AM UTC
Great detailing on such a small kit, Tim!

Just want to show you some progress on MG-129. The main decals to make this a Suomen Ilmavoimat MiG are on. I find it interesting that in the painting- and decal intructions Eduard don't mention some decals at all (see yellow arrows) but they are on the decal sheet with numbers. That's no good from Eduard, they can do better. I checked the photos I have, especially of MG-116 in that little shelter museum on former WW 2 Kymi Airfield (near Kotka) and found where the decals belong to ....


.... in the next days I will apply some stencils, only if they are useful and necessary. On my reference photos I was surprised to find russian language stencils on the weapon pylons on MG-116. Was that standard?

Have fun!
Torsten
john41492
#442
_VISITCOMMUNITY
Malacca, Malaysia
Joined: July 20, 2015
KitMaker: 363 posts
AeroScale: 335 posts
Posted: Wednesday, February 26, 2020 - 08:26 PM UTC
Hi all!

Torsten, I'm impressed!

A bit of an update for me. Went and finished getting the surface all pretty for a NMF, with this kit, it's pretty easy! I then followed with a primer coat of MS 1500, black. A black jet looks pretty cool, though for me, it did point out a missed area along the leading edge of the wing. Another easy fix.


I then started using Alclad II Airframe aluminum. While it went down nice, it didn't have the shine that I recall this color to have.


Not sure what I was dealing with, I opted to reprime with Tamiya gloss black, and then start again with Alclad II polished aluminum.


This turned out to be a much nicer base coat!


Onward and upward! Sadly, looking at the calendar, I've got 2 days to wrap this one up. Without an extension, she'll be heading over to the Hangar Queen campaign.

Anyone else looking for an extension?
BlackWidow
_VISITCOMMUNITY
European Union
Joined: August 09, 2009
KitMaker: 1,732 posts
AeroScale: 1,336 posts
Posted: Wednesday, February 26, 2020 - 11:31 PM UTC
Ooops! I thought it would be end of March and not the 1. Yes, I also need an extension. 2 weeks would be okay for me, but probably not for others.
TimReynaga
Staff MemberAssociate Editor
MODEL SHIPWRIGHTS
_VISITCOMMUNITY
California, United States
Joined: May 03, 2006
KitMaker: 2,500 posts
AeroScale: 318 posts
Posted: Thursday, February 27, 2020 - 02:44 AM UTC

Quoted Text

Ooops! I thought it would be end of March and not the 1. Yes, I also need an extension. 2 weeks would be okay for me, but probably not for others.


Yes, a short extension please!

My little MiG-15s are moving along, but my day job is raising hell with my ability to get the important stuff (i.e., modeling) done!

MichaelSatin
Staff MemberCampaigns Administrator
AEROSCALE
_VISITCOMMUNITY
Colorado, United States
Joined: January 19, 2008
KitMaker: 3,909 posts
AeroScale: 2,904 posts
Posted: Thursday, February 27, 2020 - 06:58 AM UTC
After discussions with Paul, the campaign leader. this campaign is hereby extended until 1 April. But that's it, so step on it!

Michael