Air Campaigns
Want to start or join a group build? This is where to start.
OFFICIAL: Eastern Front Campaign
BlackWidow
_VISITCOMMUNITY
European Union
Joined: August 09, 2009
KitMaker: 1,732 posts
AeroScale: 1,336 posts
Posted: Saturday, June 01, 2019 - 02:31 AM UTC
Some great progress going on her, folks! Carry on!

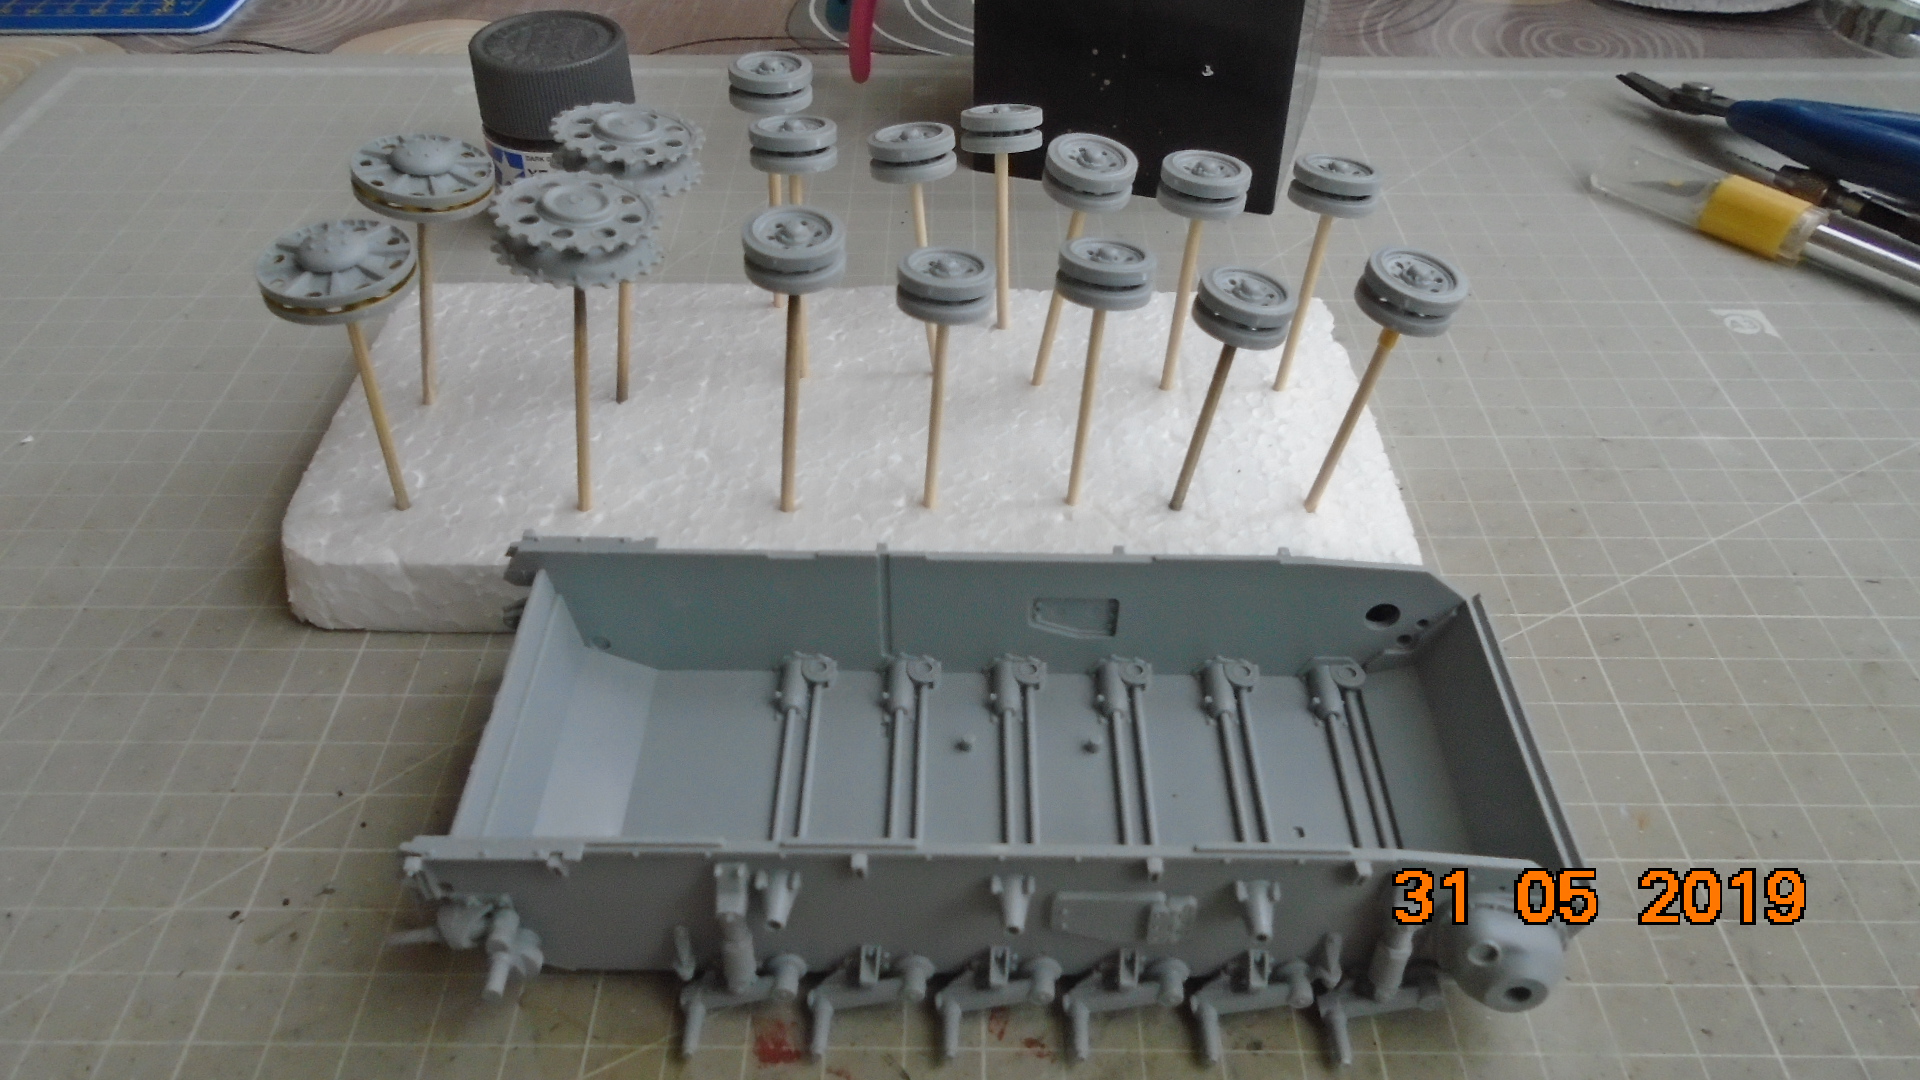
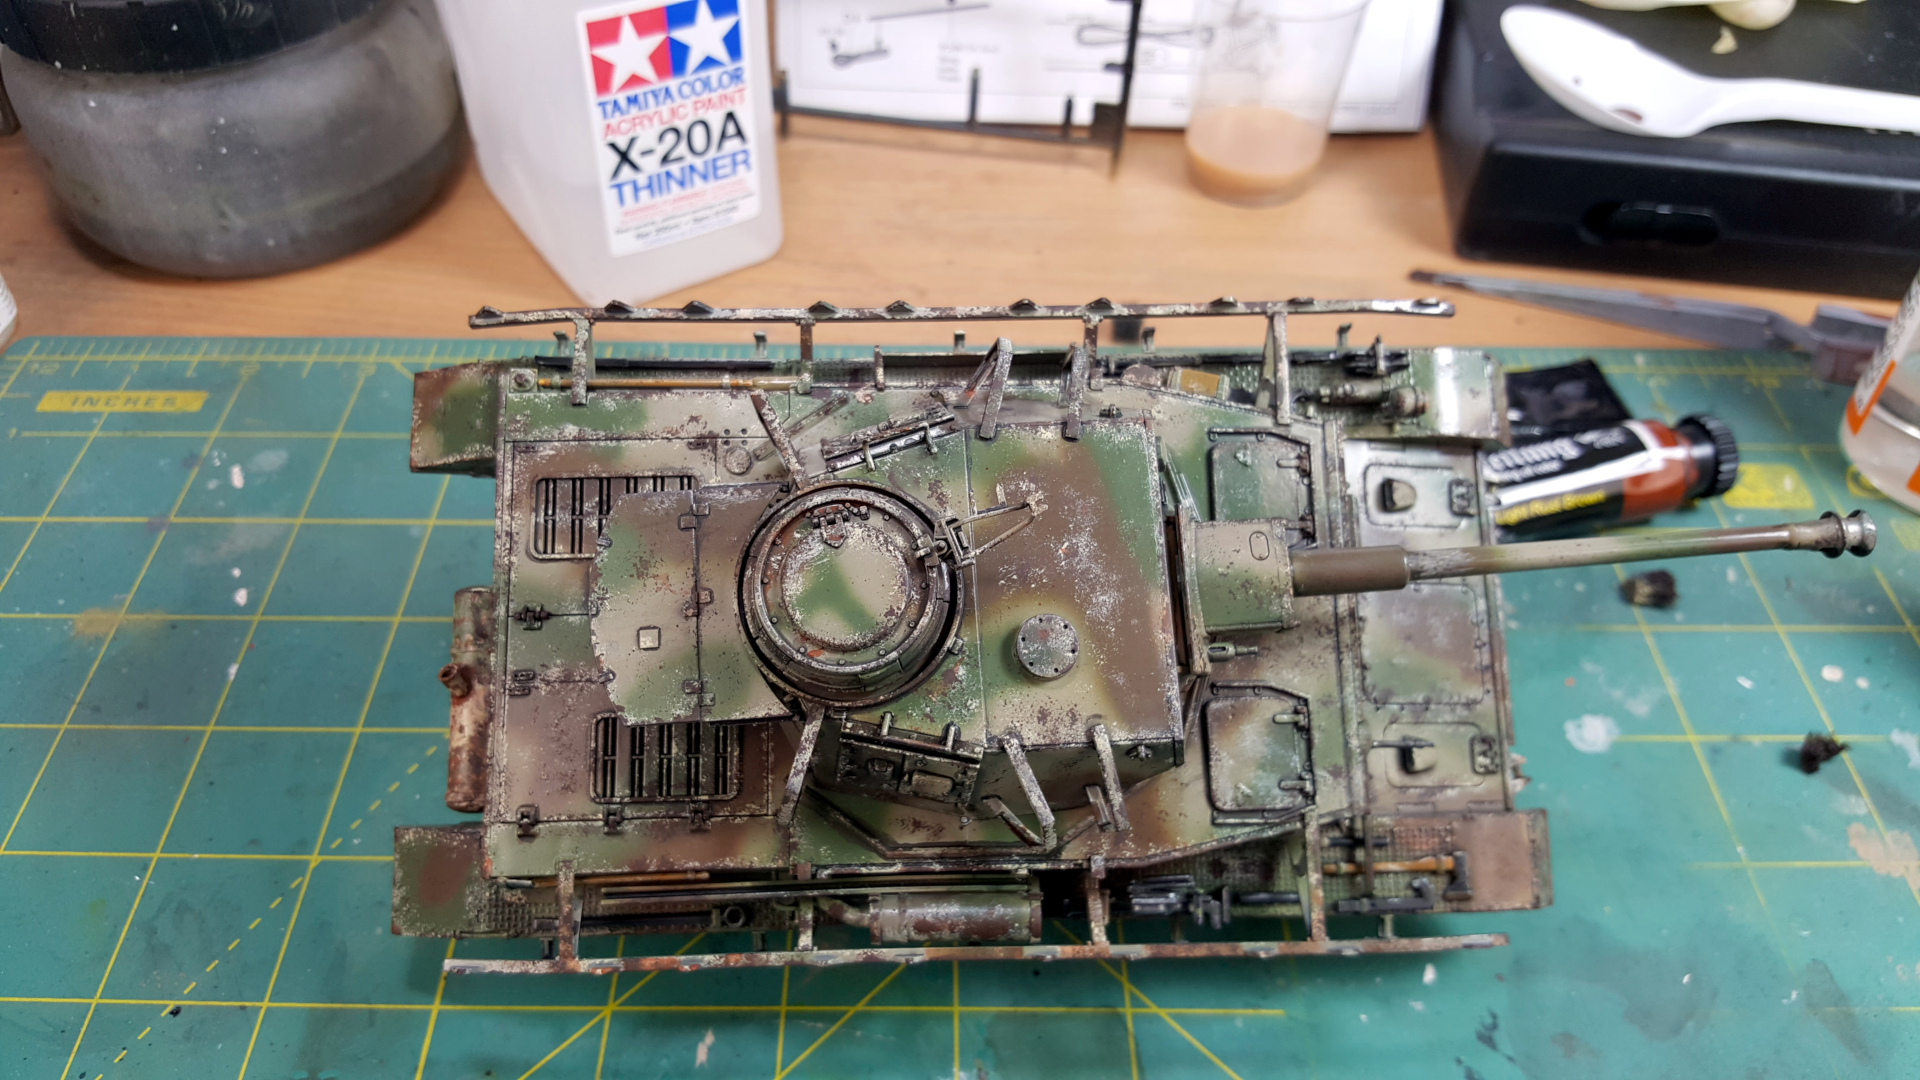
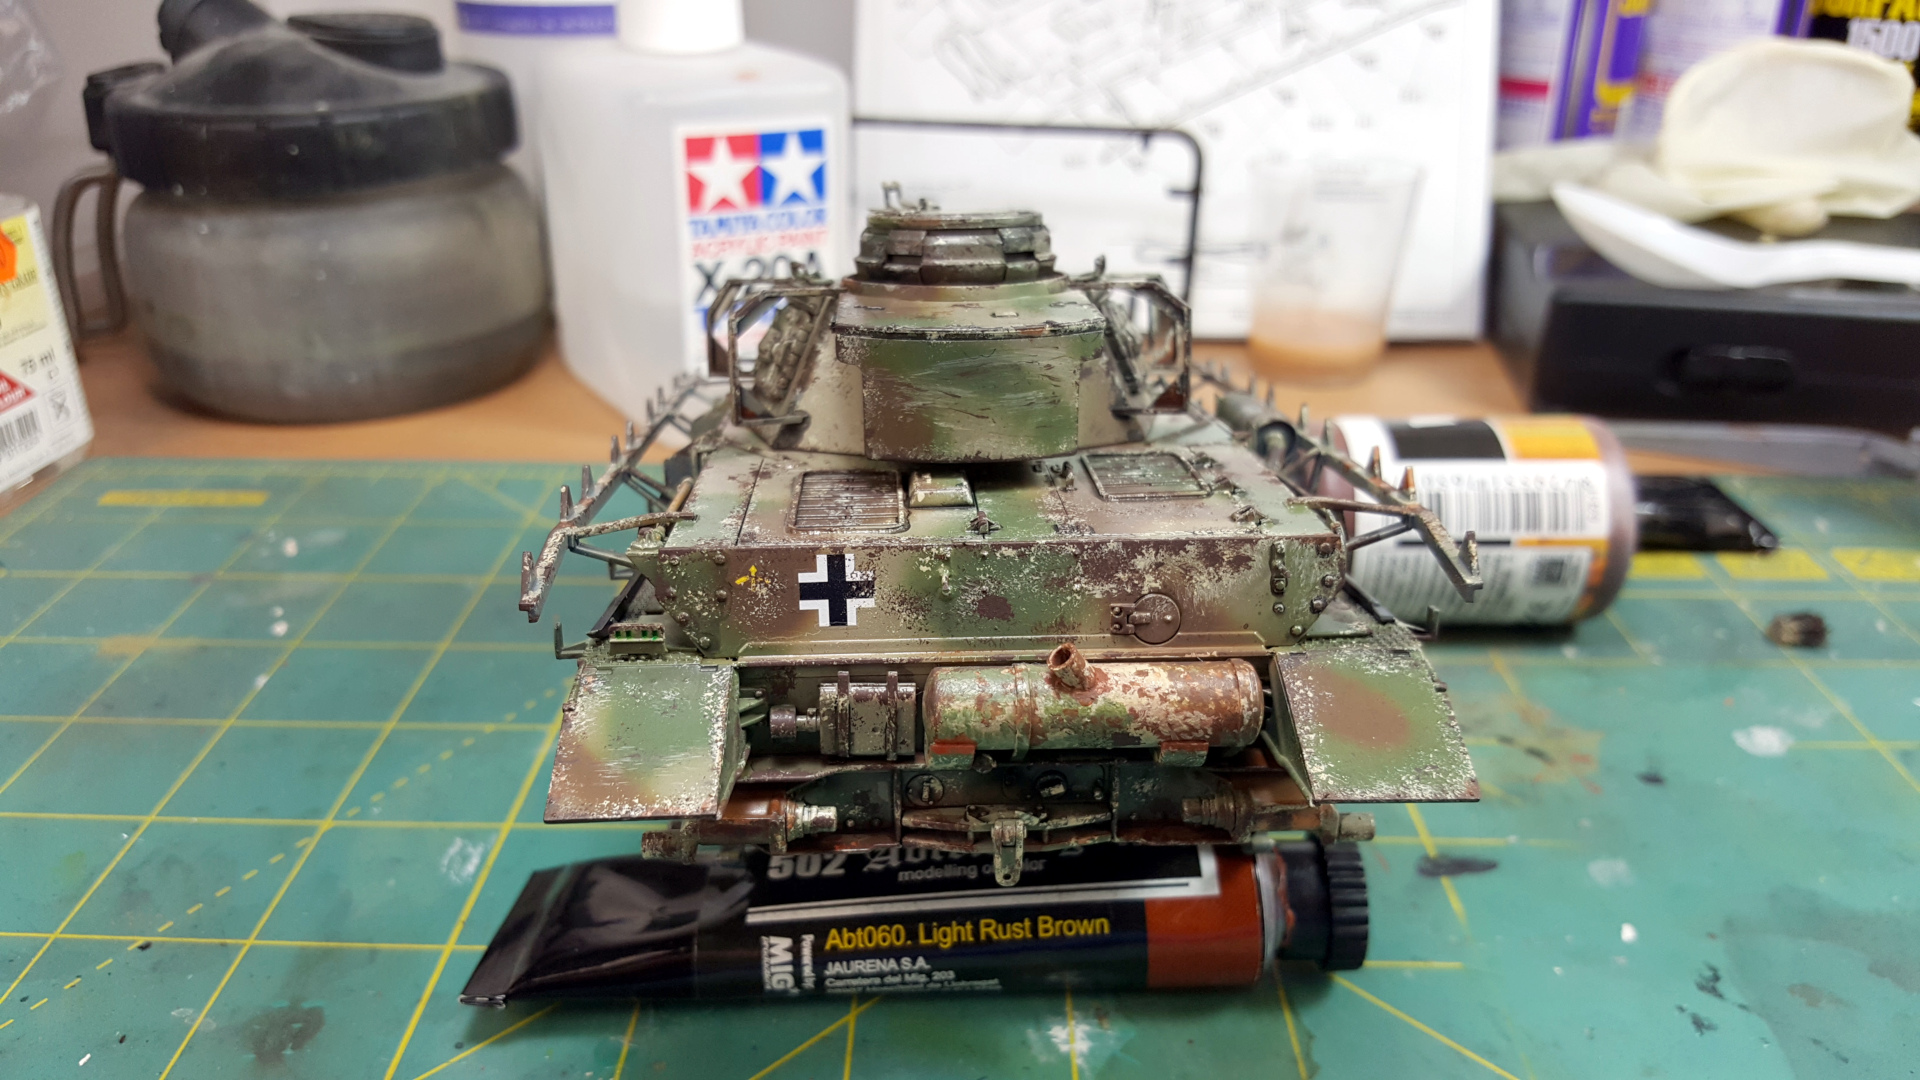
Bob, I'm really sorry to hear that and I hope you can come back to our hobby sooner than later. I know what you mean, I also had to make a full stop to building model kits in the month of May because of family affairs and preparing the model show of my club, which took place in Mannheim last weekend. That always grabs a lot of time ....

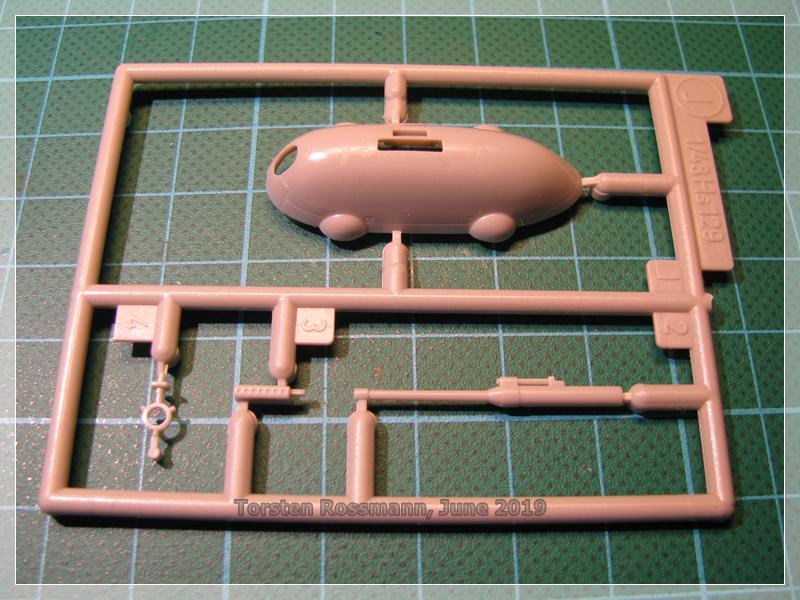
Anyway, now that the expo is over I finally got back to the Hs 129 and did a bit of surgery for that MK 103 Cannon. Here is Sprue J with the original plastik parts ....

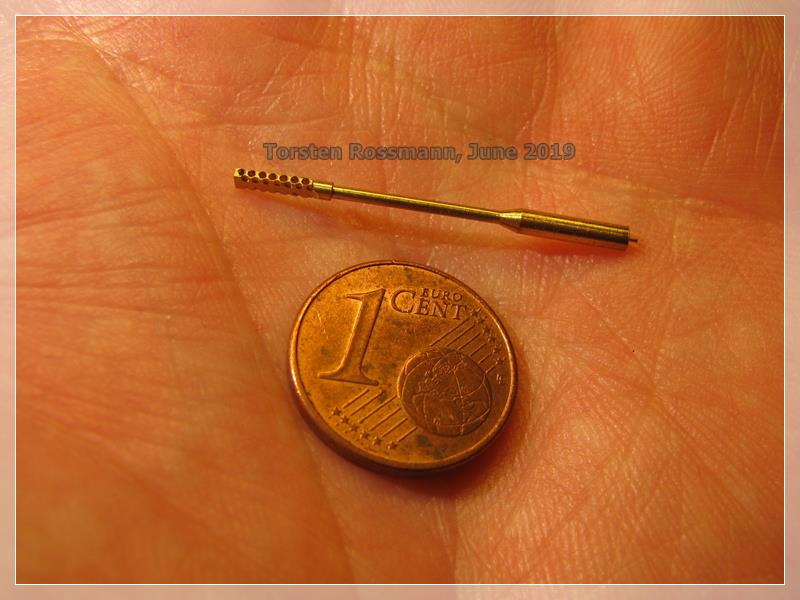
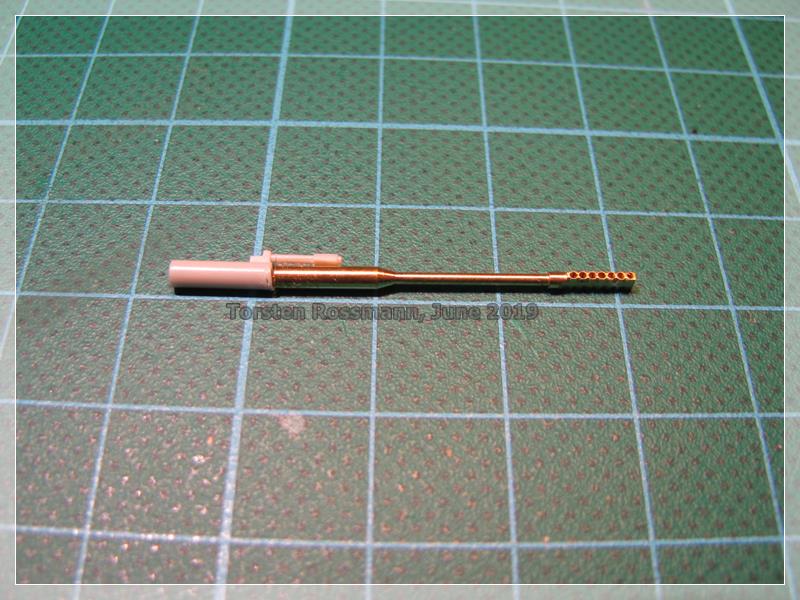
.... and this is the brass made Mk 103 from Modellbau Schatton in my hand. Size is compared with a 1 Euro Cent coin. For all Non-Euro folks, the coin has a diameter of 17 mm ...

.... I used a saw to shorten the gun and drilled a small hole in the middle ....

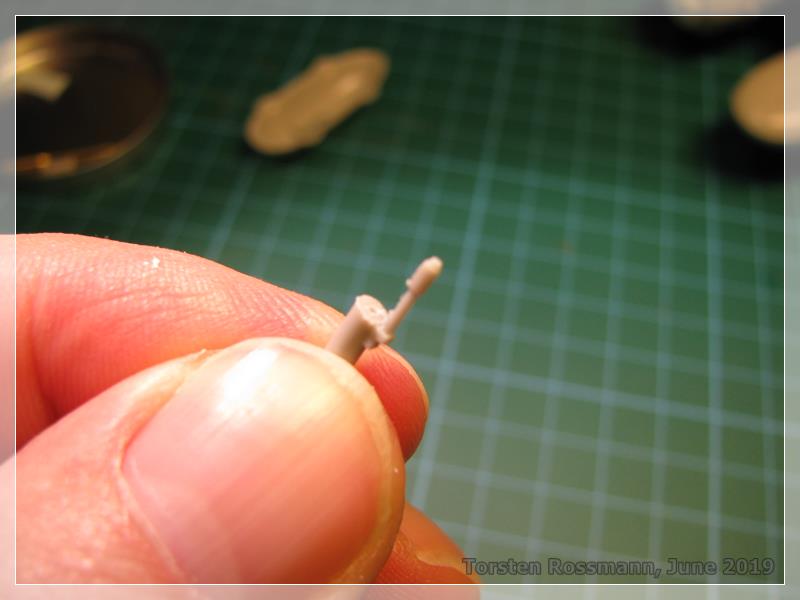
.... this is how the gun should look like later ....

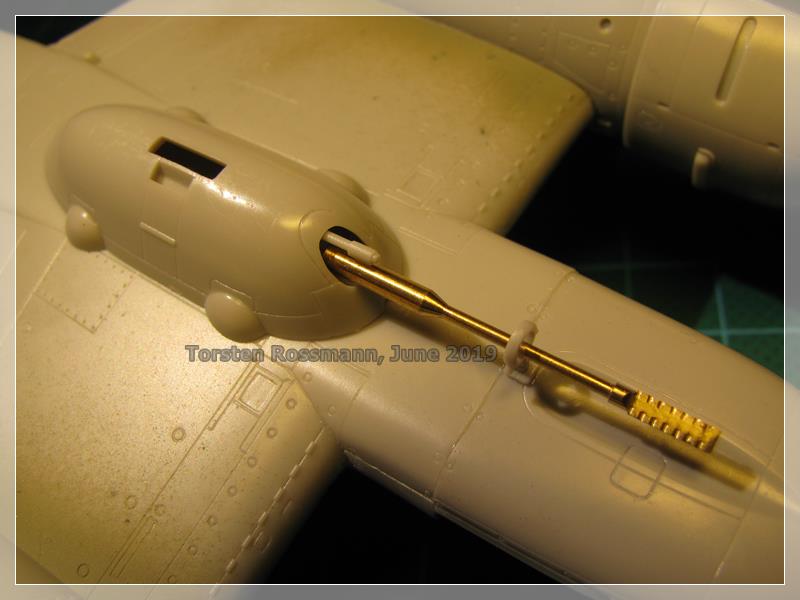
.... this is how the rest of the plastic sits inside the gondola ....

.... and some test fitting. Most of the plastic will not be seen in the end ....

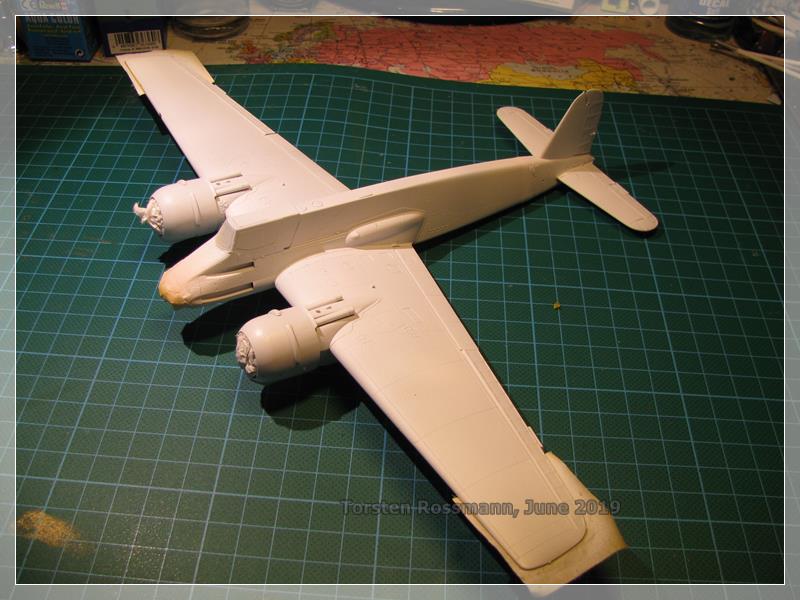
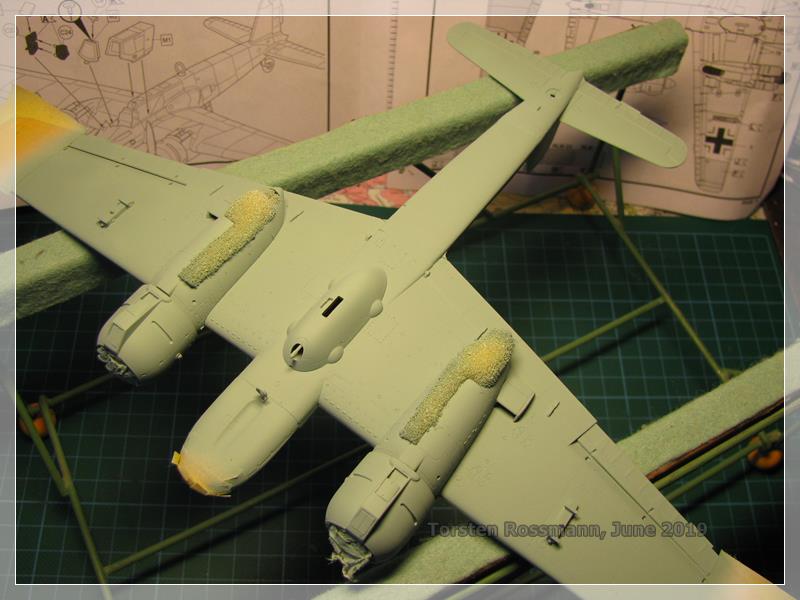
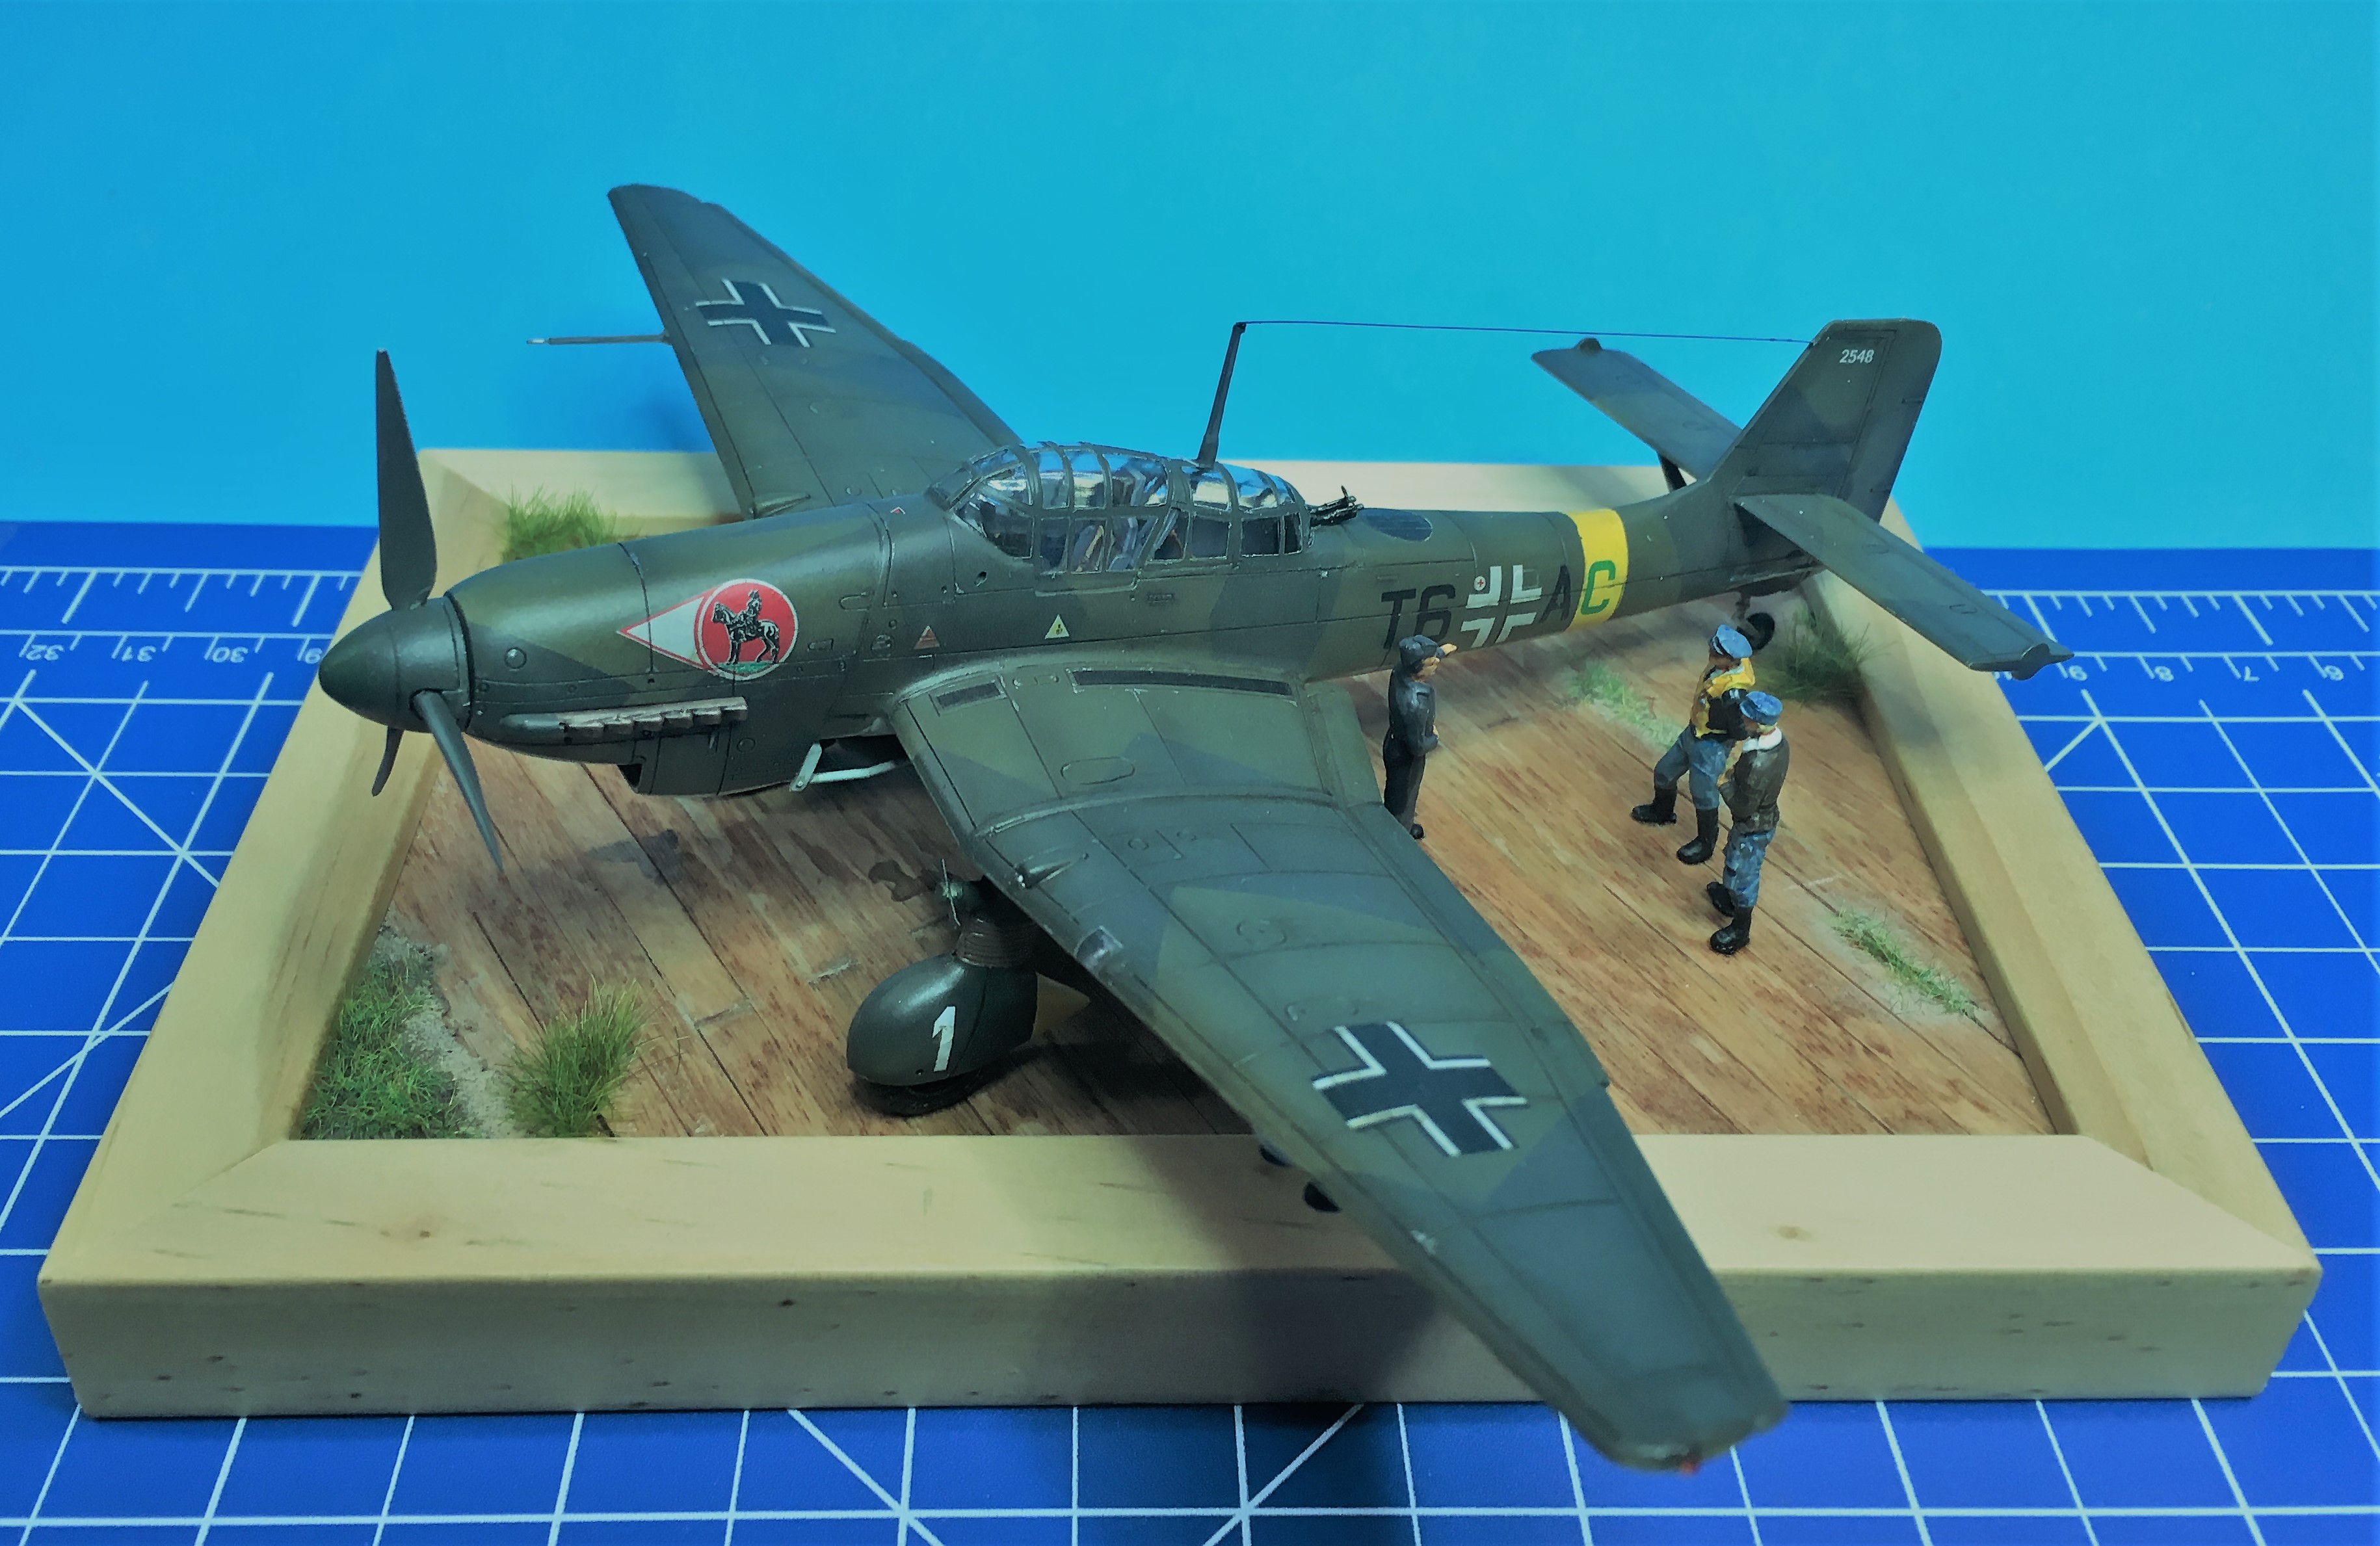
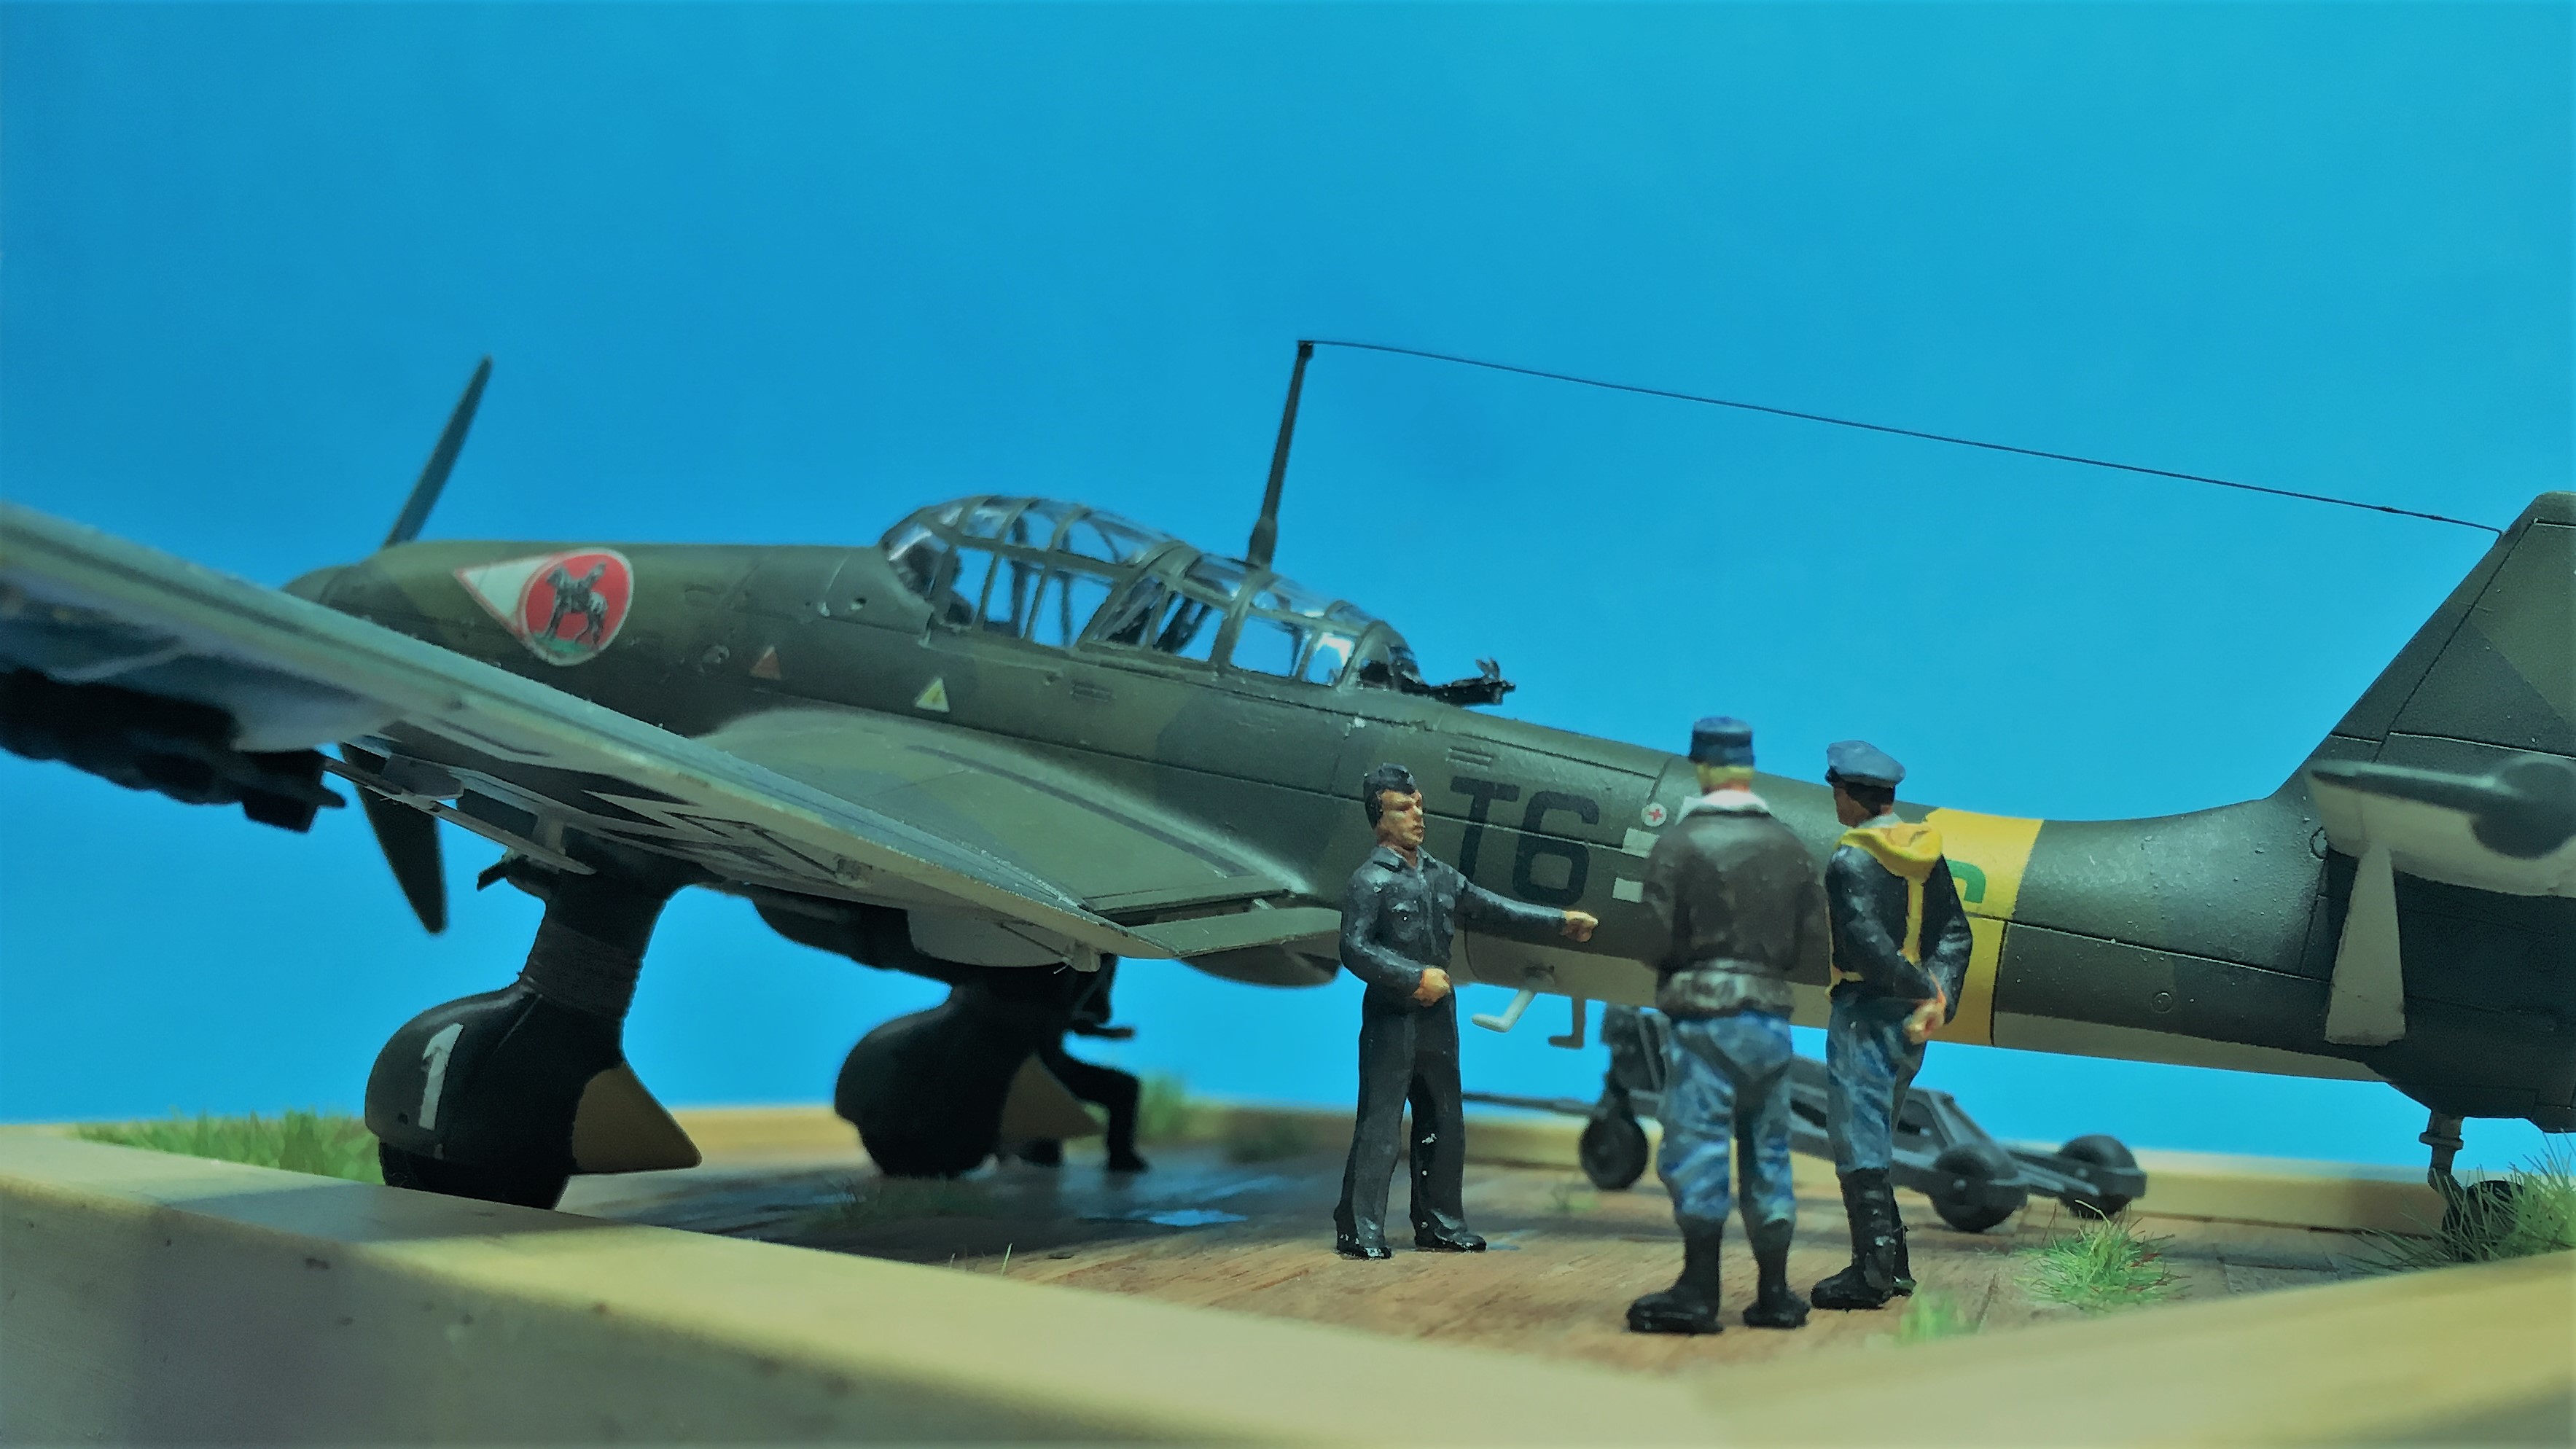
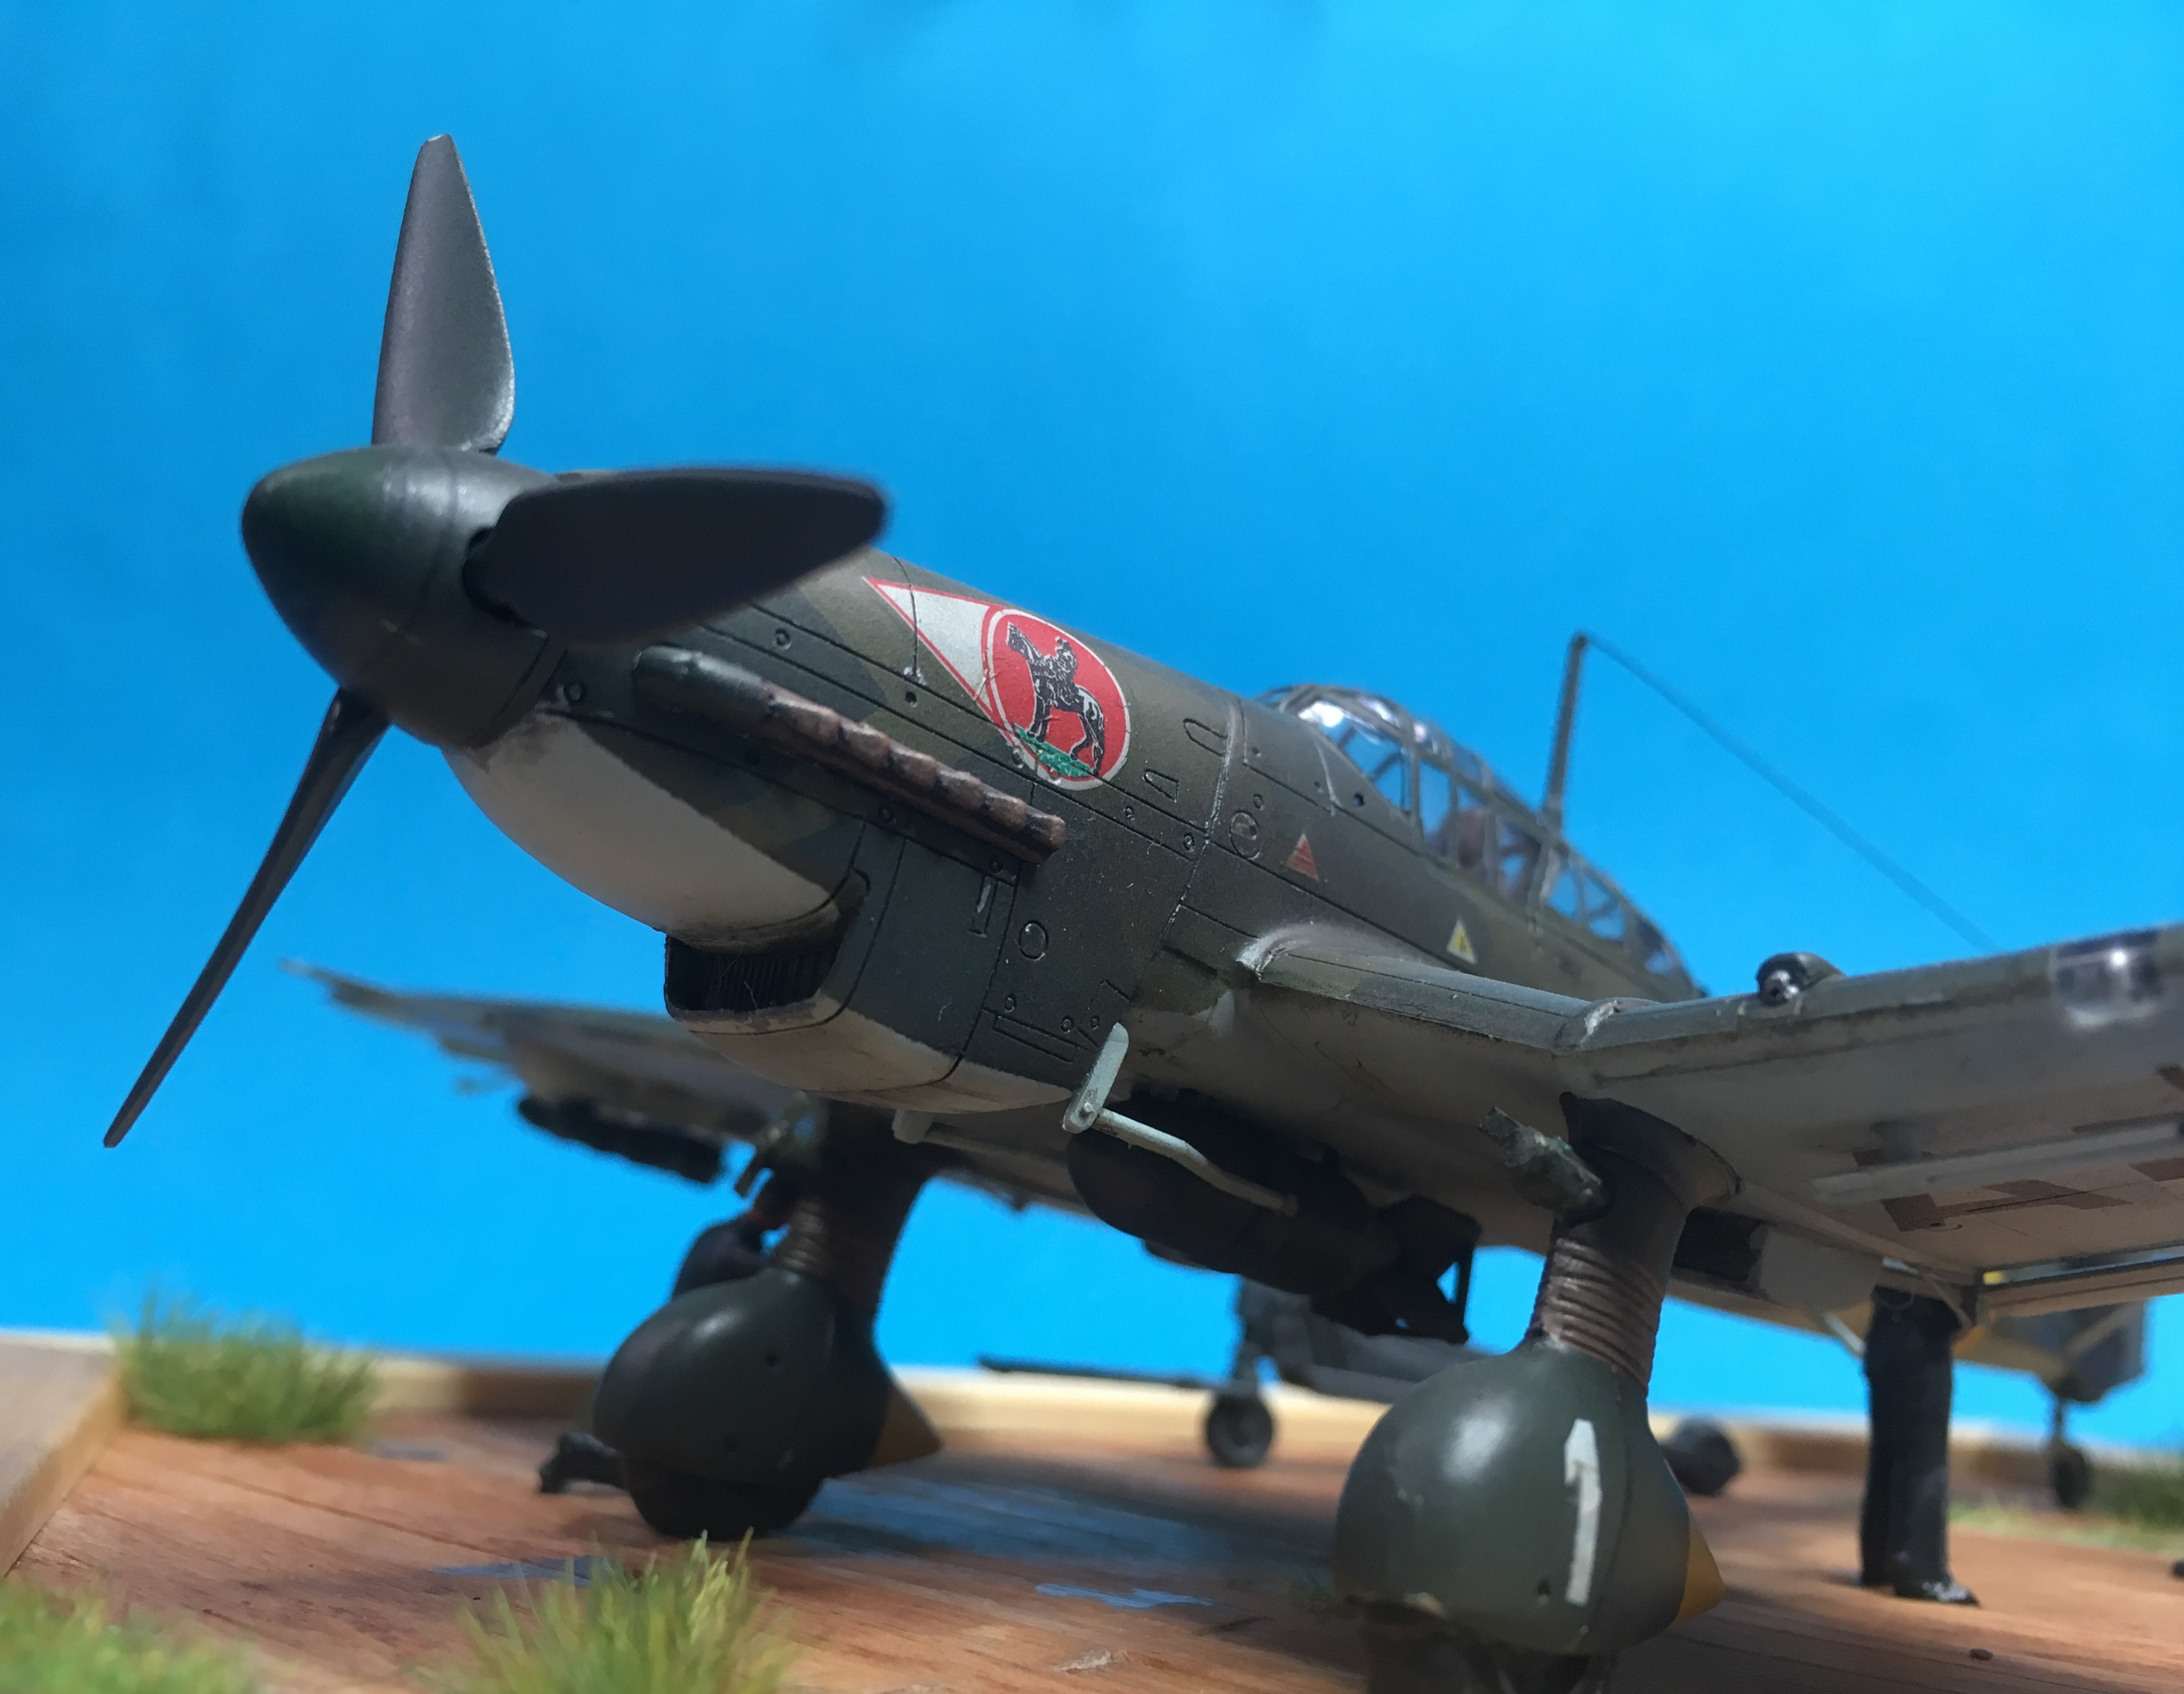
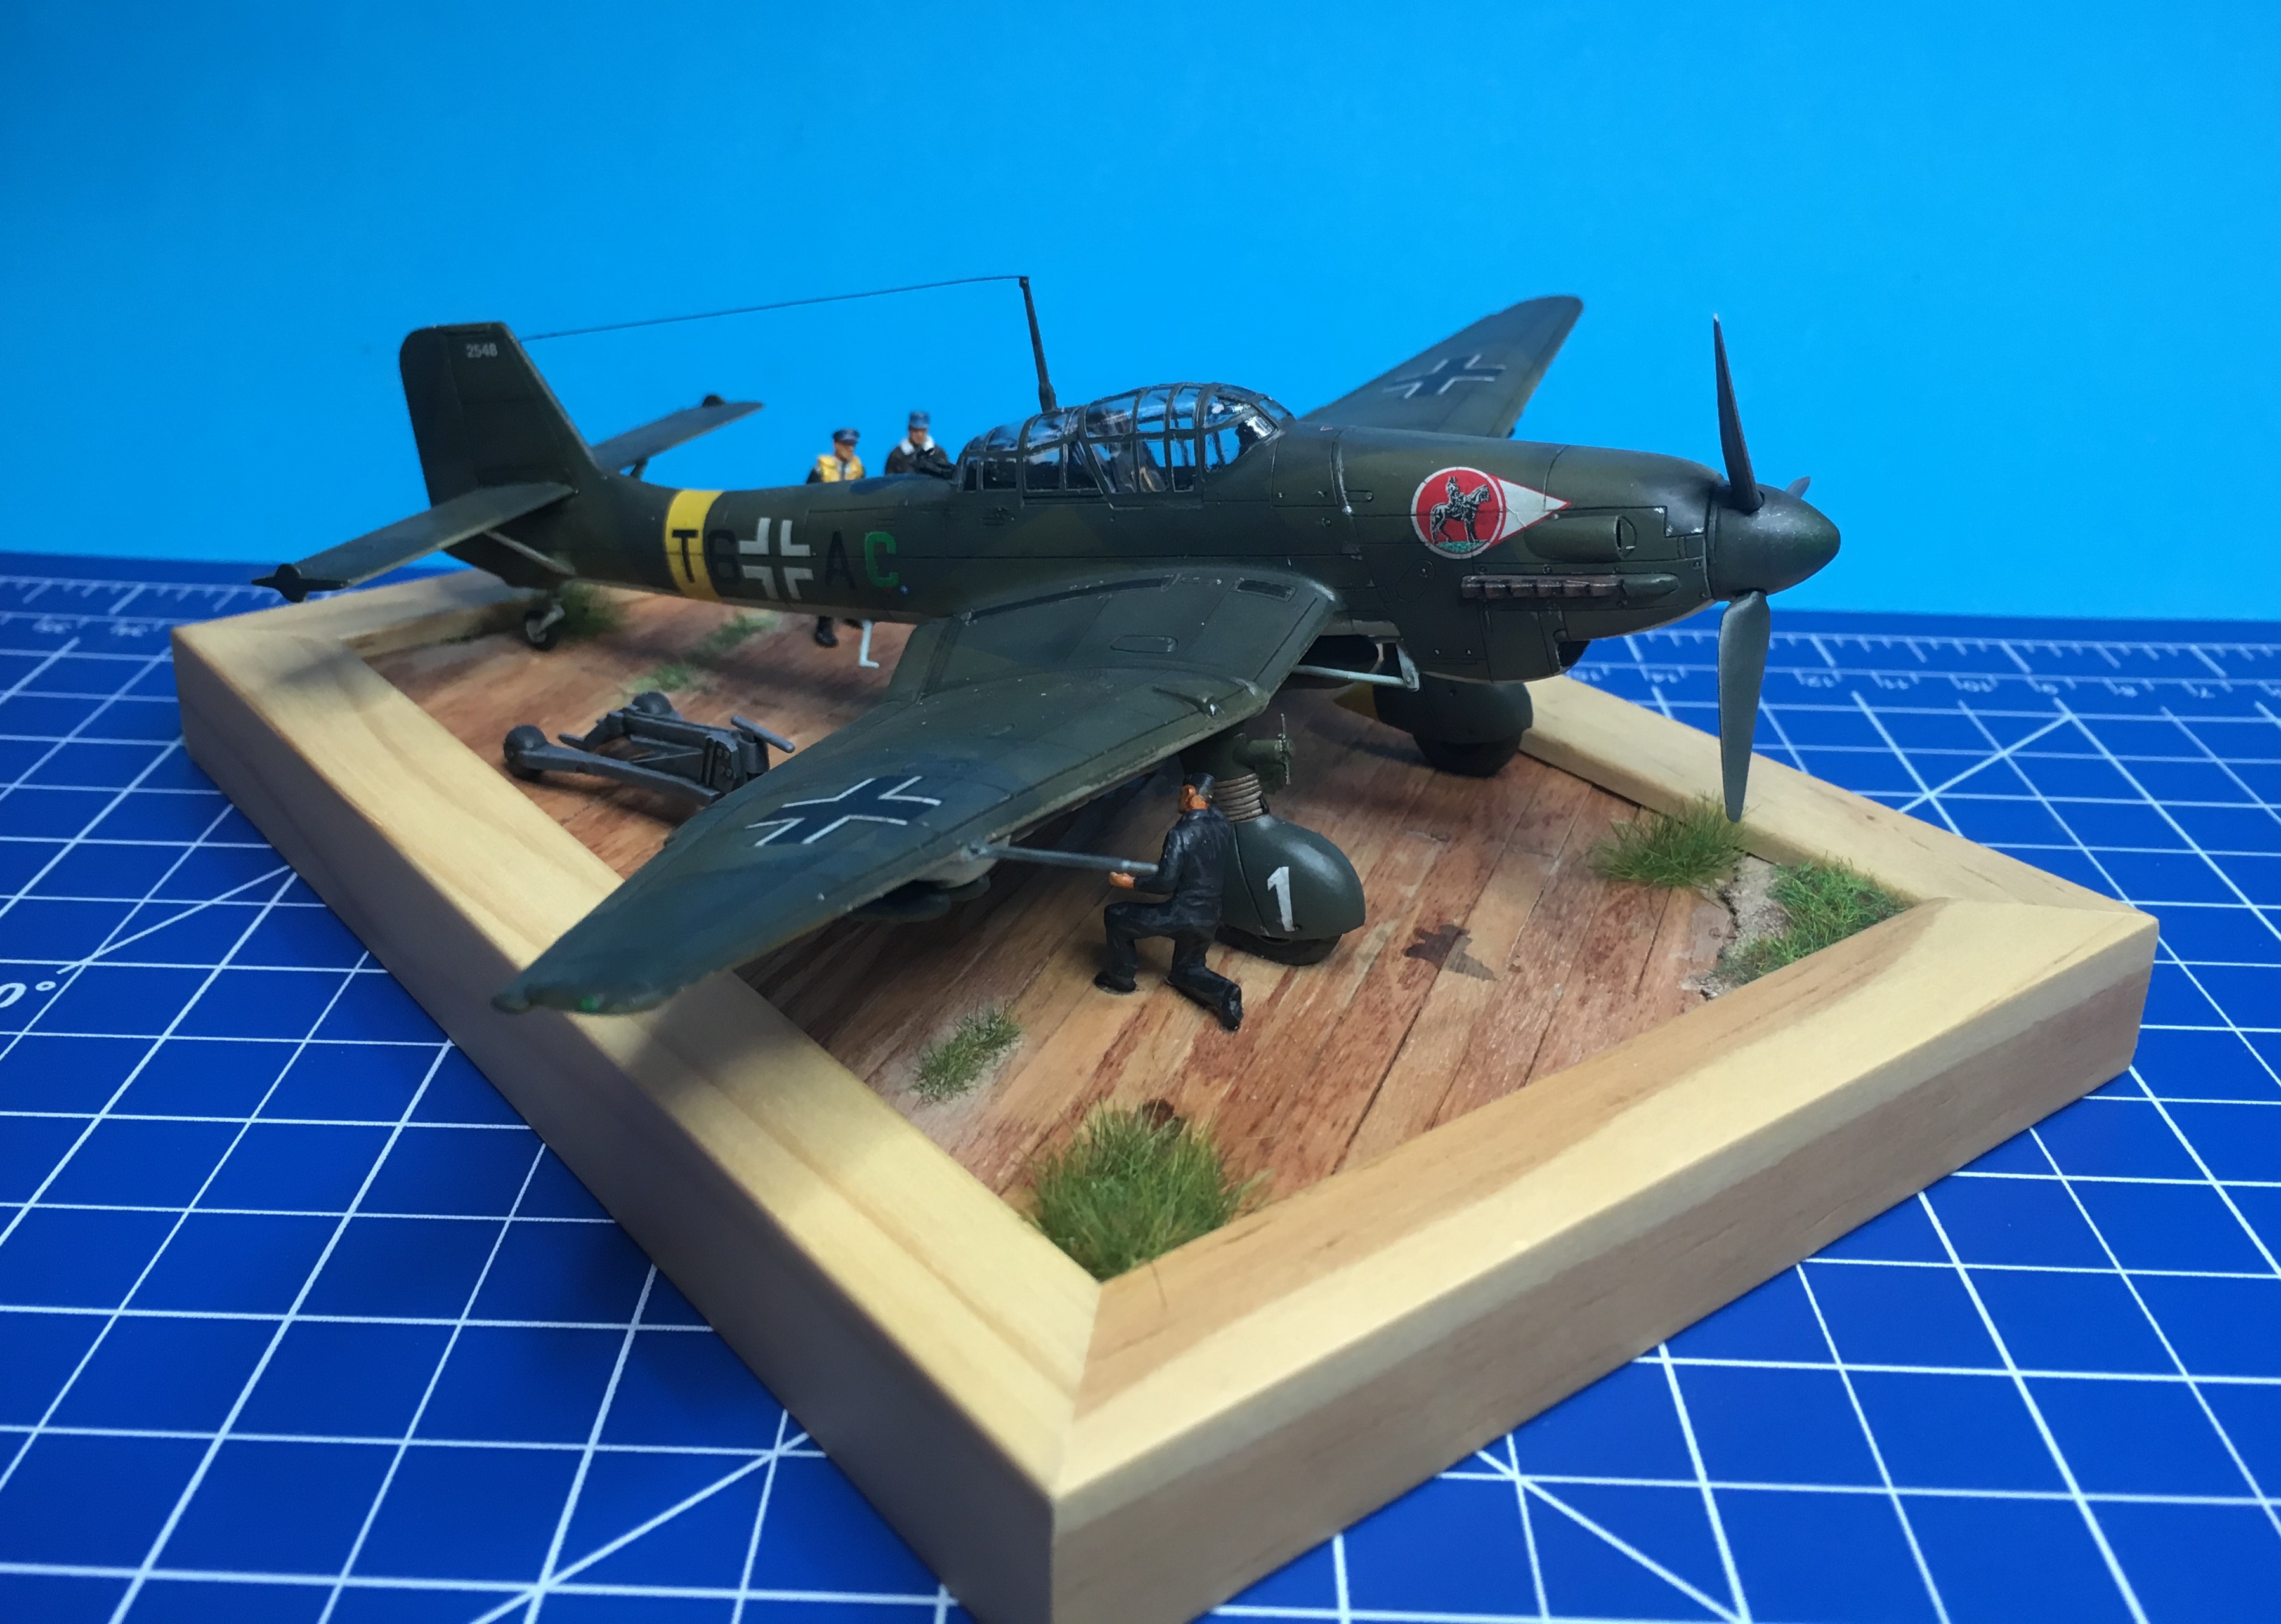
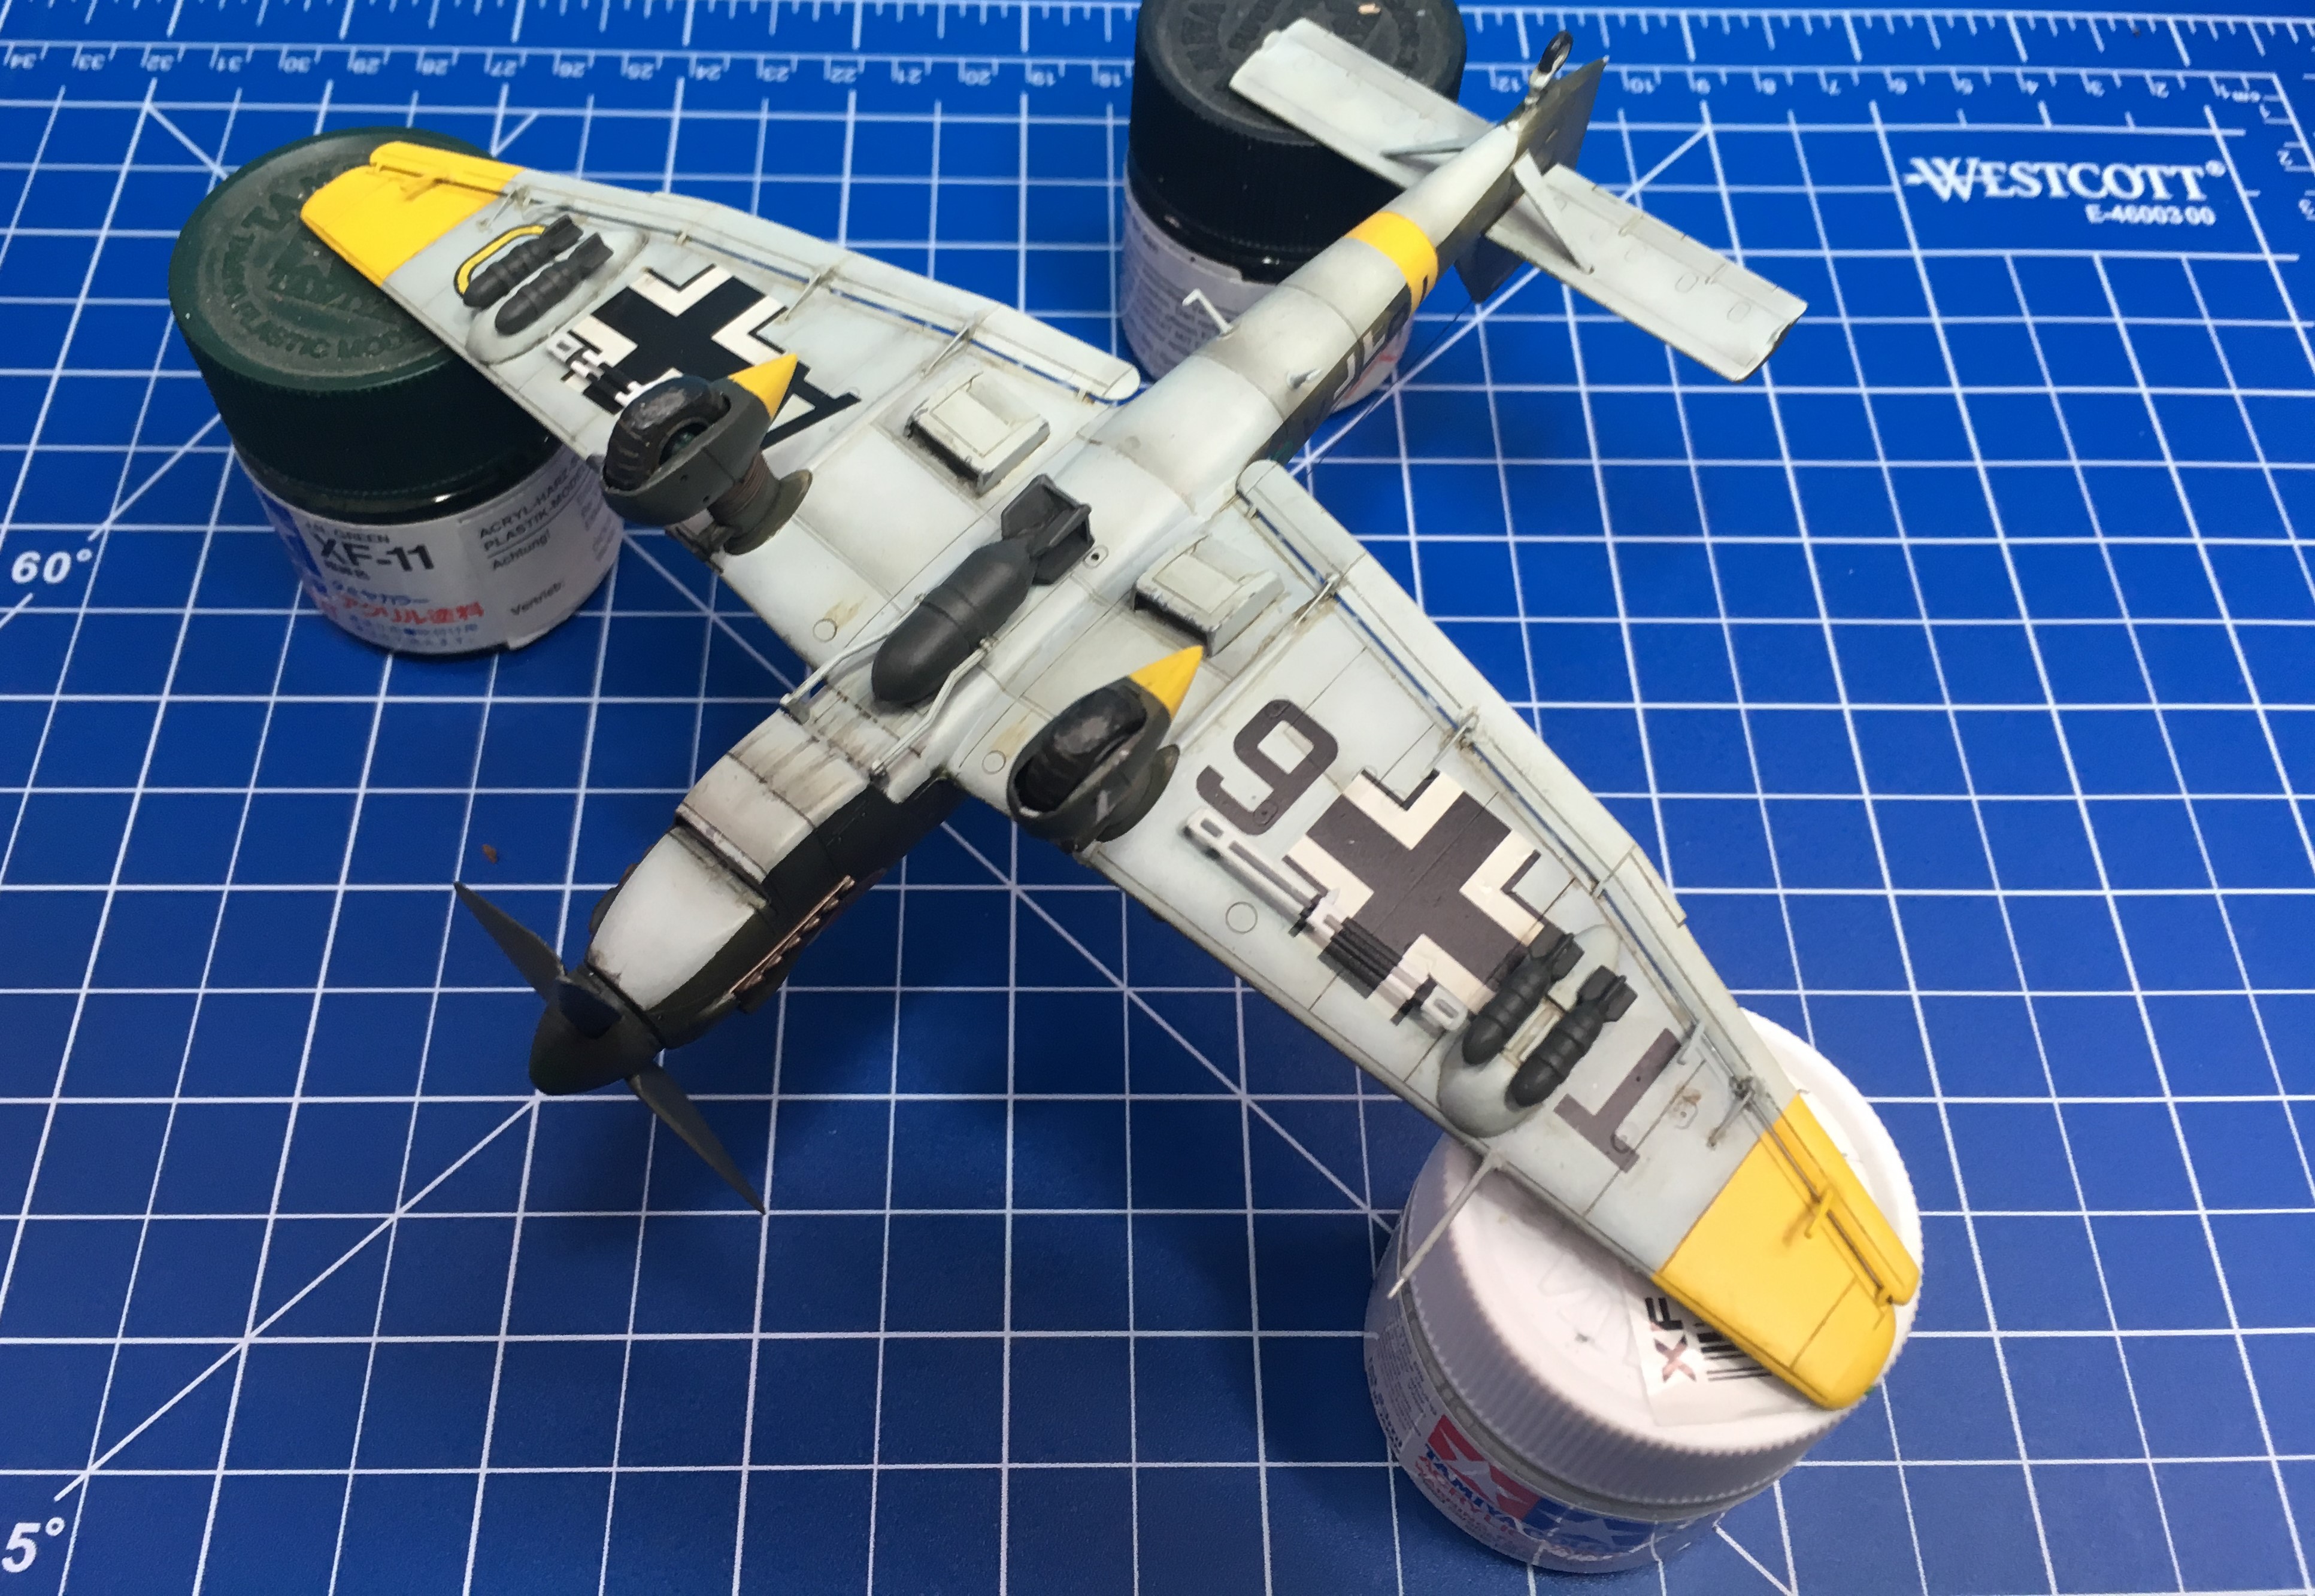
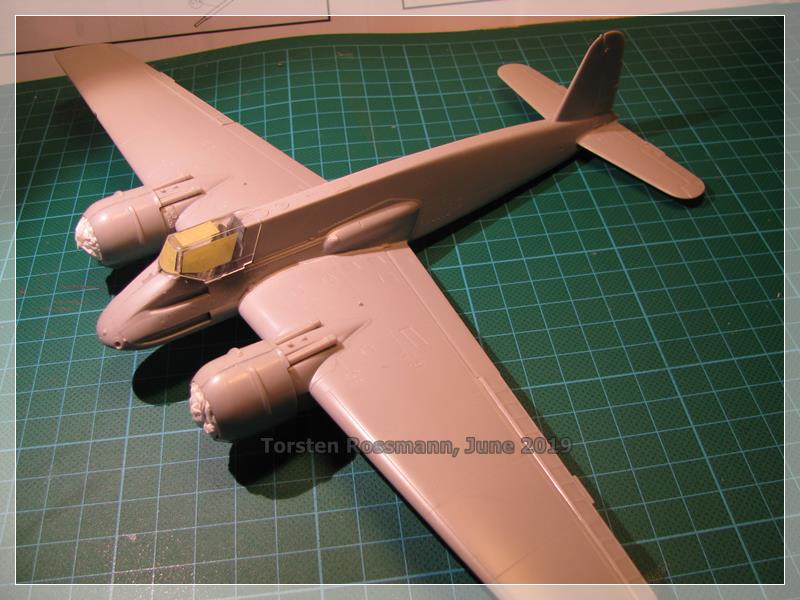
.... I also did some work on the aircraft itself. Engine nacelles are done and covered with kitchen paper, exhausts are on and the canopy is masked with Eduard EX043 ....


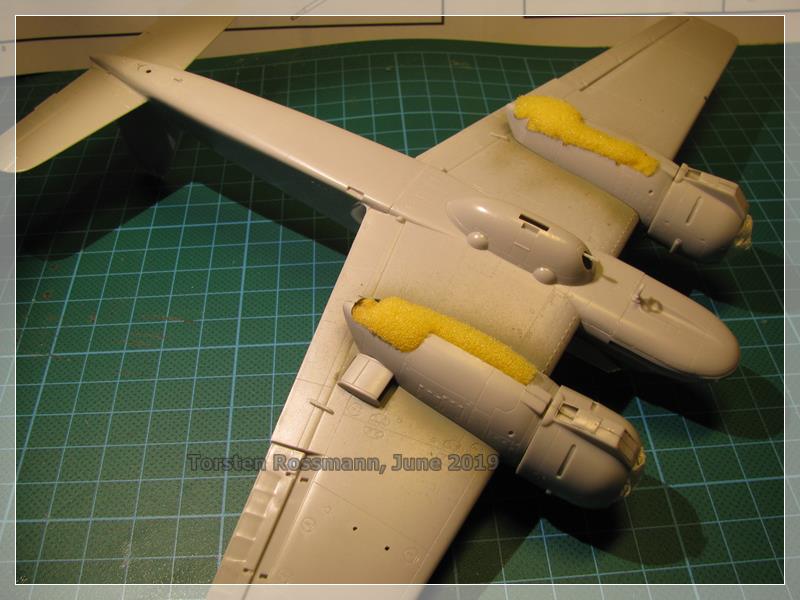
.... after some white primer yesterday, this morning I sprayed the yellow Eastern Front markings with Revell No. 310 ....

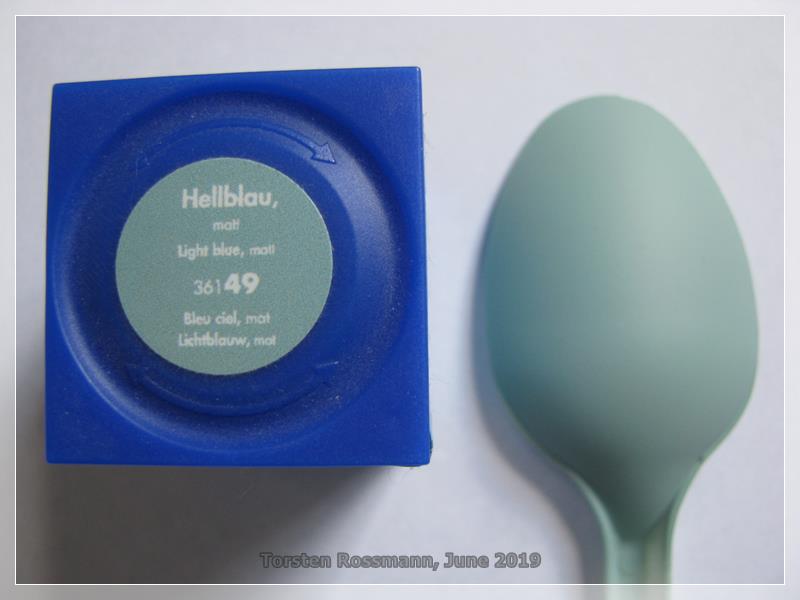
.... in the next days I'll mask the markings. Next step then will be primer on the rest of the aircraft and spraying RLM 65, for which I'll use Revell No. 49. So stay tuned!

Torsten
k_mero4
_VISITCOMMUNITY
Sofiya, Bulgaria
Joined: November 26, 2017
KitMaker: 393 posts
AeroScale: 24 posts
Posted: Saturday, June 01, 2019 - 07:15 AM UTC
Hello.
My first work progress.


Kalin
rtvmodeler
#136
_VISITCOMMUNITY
Distrito Federal, Mexico
Joined: April 06, 2002
KitMaker: 437 posts
AeroScale: 29 posts
Posted: Saturday, June 01, 2019 - 07:40 PM UTC
Finished the build work!. (the sides are not glued yet, first I will treat the tracks). Next step: I will apply a coat of Primer before to paint.


Regards!
Rodolfo
rtvmodeler
#136
_VISITCOMMUNITY
Distrito Federal, Mexico
Joined: April 06, 2002
KitMaker: 437 posts
AeroScale: 29 posts
Posted: Sunday, June 02, 2019 - 04:27 PM UTC
I applied the Tamiya Fine Surface Primer, now I will wait some hours before to start the painting!


Regards!
Rodolfo
ayovtshev
#490
_VISITCOMMUNITY
Sofiya, Bulgaria
Joined: September 22, 2016
KitMaker: 1,432 posts
AeroScale: 13 posts
Posted: Sunday, June 02, 2019 - 06:29 PM UTC
Nice job on your PzKpfw.III's Kalin and Rodolfo!

Paint and light weathering were applied to my Bulgarian StuG III:


It came out I cannot use the original reg.number(В 60512)-I've used some of the required letters for other projects.
So I'll use reg.number В 60504 instead-it belonged to another MIAG's vehicle(second delivery batch) from the same Assault Gun unit.

I'm also waiting for Eduards PE Schuerzen set(swap with a friend of mine) as Tamiya's Schuerzen are quite thick.

Happy modellbuilding,

k_mero4
_VISITCOMMUNITY
Sofiya, Bulgaria
Joined: November 26, 2017
KitMaker: 393 posts
AeroScale: 24 posts
Posted: Tuesday, June 04, 2019 - 06:24 AM UTC
Angel, obviously the job is going. I look forward to seeing him with the Schuerzen. Congratulations.
Rodolfo, great work. It's interesting to track the painting. If you think of him an early camo......
Good luck.
Kalin
rtvmodeler
#136
_VISITCOMMUNITY
Distrito Federal, Mexico
Joined: April 06, 2002
KitMaker: 437 posts
AeroScale: 29 posts
Posted: Tuesday, June 04, 2019 - 09:14 AM UTC
Thaks for your comments friends!

@ Angel, your stug looks excellent, yes, the best choice is the Eduard PE.

@Kalin, I am thinking in the curved strip camo

More updates:

Before to airbrush the tracks and wheels I used Parafilm for cover the sides. Paint used: Vallejo #71056, black-grey.


Now, airbrushed the rest of the armor with no protection on the tracks and wheel, the effect will be natural when I start the weathering, (only a small retouch in the wheels and track sides). Paint used: Vallejo #71028, sand-yellow; and the interior of hatches were painted with: AMMO MIG Interior Color, #A.MIG017, cremeweiss.


Next step: Camo. Add the decals. Paint the tools and treat the tracks continuing the weathering assambling the side plates.

Regards!
Rodolfo
rtvmodeler
#136
_VISITCOMMUNITY
Distrito Federal, Mexico
Joined: April 06, 2002
KitMaker: 437 posts
AeroScale: 29 posts
Posted: Tuesday, June 04, 2019 - 07:08 PM UTC
More updates!

Camouflage and decals are ready!. For the camo I used: Vallejo / Model Air #71012, dark-green.


Regards!
Rodolfo
ayovtshev
#490
_VISITCOMMUNITY
Sofiya, Bulgaria
Joined: September 22, 2016
KitMaker: 1,432 posts
AeroScale: 13 posts
Posted: Wednesday, June 05, 2019 - 07:25 AM UTC
Thanks Kalin!
Good looking camo, Rodolfo!

I declare my Bulgarian StuG III Ausf.G ready:


Happy modellbuilding,


FirstSergeant
_VISITCOMMUNITY
Michigan, United States
Joined: January 02, 2012
KitMaker: 139 posts
AeroScale: 70 posts
Posted: Wednesday, June 05, 2019 - 10:03 AM UTC
Greetings,
I've some progress to report,


Assembly nearly complete, markings were applied, oils were used on panel lines. Canopy next.
I had reported last time that I would paint and use markings depicting Marcel Lefevre of Normandie-Niemen. The markings didn't cooperate. I did some research and found a source for a Plan B. The paint and markings depict M. V. Avdyeyev during operations over Sevastopol in May 1944. I had the markings in my stash, I had to re-shoot the camo scheme.

Cheers,
Firstsergeant

Panzerace
_VISITCOMMUNITY
Ankara, Turkey / Türkçe
Joined: November 30, 2004
KitMaker: 459 posts
AeroScale: 2 posts
Posted: Thursday, June 06, 2019 - 03:15 AM UTC
Hi, everyone. I want to join this campaign with a 1/72 Dragon Sd.Kfz. 251 Ausf. D, which had been partly started a few years ago. I don't know how to measure it, I think, it is under 25 % and you accept it.

Sd.Kfz. 251D by Burak Cinar
MichaelSatin
Staff MemberCampaigns Administrator
AEROSCALE
_VISITCOMMUNITY
Colorado, United States
Joined: January 19, 2008
KitMaker: 3,909 posts
AeroScale: 2,904 posts
Posted: Thursday, June 06, 2019 - 03:37 AM UTC
Given how far we are into the campaign, I'd say go for it Burak!

Michael
Panzerace
_VISITCOMMUNITY
Ankara, Turkey / Türkçe
Joined: November 30, 2004
KitMaker: 459 posts
AeroScale: 2 posts
Posted: Thursday, June 06, 2019 - 03:59 AM UTC
Thanks, Michael!


Quoted Text

Given how far we are into the campaign, I'd say go for it Burak!

Michael

rtvmodeler
#136
_VISITCOMMUNITY
Distrito Federal, Mexico
Joined: April 06, 2002
KitMaker: 437 posts
AeroScale: 29 posts
Posted: Thursday, June 06, 2019 - 05:50 PM UTC

Quoted Text

Thanks Kalin!
Good looking camo, Rodolfo!

I declare my Bulgarian StuG III Ausf.G ready:

Happy modellbuilding,


Angel, thanks for your kind comment. Your Stug looks great!, to which Division Panzer it belonged?

More updates!

Tools are ready!. Paints used Vallejo and Humbrl: cleaning rods, V-Model Color- #984, flat-brown, V-MC#70912,tan-yellow and H- #56, metallic. Cutting pliers, V-Model Color #70818 red-leather mixed with V-MC#981 orange- brown (50-50), and the rest with V-MC#984, flat-brown and H-#56 metallic.


Mud on the tracks using: Vallejo, acrylic-resin (paste), brown-earth


Retouching the tracks with Humbrol #27002, Metalcote polished Aluminium.


Regards!
Rodolfo
ayovtshev
#490
_VISITCOMMUNITY
Sofiya, Bulgaria
Joined: September 22, 2016
KitMaker: 1,432 posts
AeroScale: 13 posts
Posted: Thursday, June 06, 2019 - 08:56 PM UTC

Quoted Text


Angel, thanks for your kind comment. Your Stug looks great!, to which Division Panzer it belonged? ...


Thanks Rodolfo- your StuG is also shaping up nicely!

To your question:
My StuG III belongs to First Assault Gun Battery of First Assault Gun Detachment of Bulgarian Royal Army/1944.

First Assault Gun Detachment took part in the fighting in todays Northern Macedonia and Serbia during September-October 1944 as part of Second Bulgarian Army/Soviet Third Ukrainian Front.
It participated the December 2nd 1944 Parade in Sofia.

rtvmodeler
#136
_VISITCOMMUNITY
Distrito Federal, Mexico
Joined: April 06, 2002
KitMaker: 437 posts
AeroScale: 29 posts
Posted: Friday, June 07, 2019 - 08:20 AM UTC
Angel, thanks for your kind comment and information, it is interesting

More updates:

Mud on the wheels and more on tracks using: Vallejo, acrylic-resin (paste), brown-earth mixed with Humbrol #10 Gloss, Dark-earth.


Regards!
Rodolfo
b17-peter
#392
_VISITCOMMUNITY
Hessen, Germany
Joined: January 09, 2013
KitMaker: 696 posts
AeroScale: 608 posts
Posted: Friday, June 07, 2019 - 08:36 AM UTC
@Torsten - Deine HS-129 wird ja ein Hammerteil! Die Kanone ist super, der Schatton macht schon gute Sachen!

Well mates,
finally I decided which kit from my stash will make it to the bench for another impressive campaign!
Here it is:


Don't know what version I will choose yet, but probably the one with more guns
BTW, many fine models here in the making
rtvmodeler
#136
_VISITCOMMUNITY
Distrito Federal, Mexico
Joined: April 06, 2002
KitMaker: 437 posts
AeroScale: 29 posts
Posted: Friday, June 07, 2019 - 06:32 PM UTC
Hello friends!

Finished work!. StuG. Abteilung 191, Eastern Front 1942


More pics in Gallery at: https://gallery3.kitmaker.net/showphoto.php/photo/471008

Thanks for see my work!

Regards!
Rodolfo
BlackWidow
_VISITCOMMUNITY
European Union
Joined: August 09, 2009
KitMaker: 1,732 posts
AeroScale: 1,336 posts
Posted: Saturday, June 08, 2019 - 06:38 AM UTC
Rodolfo & Angel, you've built some really nice "Sturmi". Well done! That bulgarian flag as a "Fliegersichtzeichen" is truely unsual.

Thanks, Peter! The brass part of the cannon looks really fantastic. Robert Schatton has mostly 1/35 parts (I use his Bundeswehr antennas for my Leopards etc.) but also some aircraft parts in 1/48 and 1/72. Haven't done much yet on the Hs 129 though. But I hope to finish this build for the expo in Strasbourg in the end of June. I like your choice of the IAR 80. That Mickey Mouse emblem on the fuselage remembers me of the Bf 109 of Horst Carganico, who had Mickey somewhere on all his 109's. Have build this kit in 2009 out of the old Academy kit. Today my choice would be the Eduard kit ....


Here's my work on the 129 in the last few days. After masking the yellow markings white primer over all ....


.... today fresh from the paint shop I airbrushed RLM 65 on the underside ....


.... using Revell Aqua No. 49 ....


Next work is again masking, now the underside and afterwards painting RLM 71 Dunkelgrün, using Revell No. 39.

Torsten
MichaelSatin
Staff MemberCampaigns Administrator
AEROSCALE
_VISITCOMMUNITY
Colorado, United States
Joined: January 19, 2008
KitMaker: 3,909 posts
AeroScale: 2,904 posts
Posted: Saturday, June 08, 2019 - 09:00 AM UTC
Really nice work going on here! Very impressive!

Time is moving on and I don't seem to be any closer to starting on the Buffalo. Just can't seem to get motivated. Then, a couple of days ago, it suddenly dawned on me that the end date of our final WWII 75th anniversary campaign just happens to coincide with the 80th anniversary of the first day of the war!

Seriously, this just occurred to me. I think I need to lie down for awhile.

So, I thinks to myself, what better way to commemorate that coincidence than...


This bad boy has been in my stash for awhile (as witness the condition of the box.) But the plastic, etc. are just fine:


As you can see, I've made a very small start with some painting, but that's it. The only real problem is that the version of the kit I have doesn't include markings I'm especially enamored of. But fear not! I also have the much less detailed Ltd. kit of the P.11c, and it has markings for Wladislaw Gnys, at least generally considered to have scored the first Allied air-to-air kills of the war! And those decals look to be in great shape:


So, for the moment at least, this is my new plan. We'll see how this one goes!

Michael
ayovtshev
#490
_VISITCOMMUNITY
Sofiya, Bulgaria
Joined: September 22, 2016
KitMaker: 1,432 posts
AeroScale: 13 posts
Posted: Sunday, June 09, 2019 - 06:10 AM UTC
You're welcome, Rodolfo!
BTW, your StuG really looks the part!!!Well done!

Thanks also Torsten!
With regard to the flag- the air recognition marking for Bulgarian vehicles in September-December 1944 was a white square, painted on the upper surfaces(roof of tank cupola or truck's engine hood), like in these examples:


The picture I used for my model was taken during December 2nd 1944 parade in Sofia.
All participating tanks had names of cities and vilages,where heavy battles were fought, written on their glacis or turrets.The StuG had the Bulgarian flag- held in place with the scissors on one side and the tracks on the other.

The funny fact about that particular flag is-for all visitors of the parade the Bulgarian flag was inverted(white should be on top, while red-at the bottom).
Inverting the flag is considered casus belli, or a sign of being at war.
What was exactly the case at this moment-for Bulgaria was at war not only with Nazi Germany, but also with the Western Allies(United Kingdom and USA), and had just signed an armistice with the Soviet Union(who declared war on Bulgaria on September 5th 1944)...

I am sure there were no allusions with inverting the flag- obviously the flag was laid by some member of the crew and when looked from the hatches of the StuG it was laid correctly

RadekZ
_VISITCOMMUNITY
Warszawa, Poland
Joined: March 12, 2013
KitMaker: 125 posts
AeroScale: 85 posts
Posted: Tuesday, June 11, 2019 - 08:34 AM UTC
Wow, I see we almost have a full platoon of StuGs already – great job Angel & Rodolfo!

@Torsten – great update on Duck. This gun replacement was a must! Sometimes kit barrel part looks kind of okay-ish to keep building without replacement, but definitely not this time – it was a must.

@Peter – nice choice, recently I peeked into IAR 80 box from Hobby Boss and … this is one of these odd planes you feel some strange feeling you ought to have one on the shelf.

@Michael – good luck with this old junk .

@Burak – welcome aboard and good luck.


Okay enough of these pleasantries

Time to get messy on my Pz IV … Of course if it comes to chipping I just can’t stop or my brain just melted due to this heatstorm over central Europe … 35-38C for several days and forecast called we can expect cold snap tomorrow … down by 1-2 degrees… cold snap my a** ...
Ok, back to the pint...point, two colour chipping was applied , first with lightened dunkelgelb and followed by dark brown colour (from Vallejo). Next I modulated colour a little bit with rust pigments and rusty oil / acrylic washes. And now the tank looks like it was in intensive combat for several years with climate changes on daily basis. I’ll get it toned down a little bit with dust & mud pigments and other “ointments” , but I definitely have to snap myself hard next time I’ll go for chipping.
Here are the pics after all of this:


Cheers,
Radek
69mudbone
_VISITCOMMUNITY
California, United States
Joined: April 26, 2016
KitMaker: 362 posts
AeroScale: 42 posts
Posted: Wednesday, June 12, 2019 - 04:57 AM UTC
Hi Guys, finally able to jump into the campaign. I have not built a airplane kit in a very long time. This should be great time. Have not decided on markings .

Antilles
_VISITCOMMUNITY
Nordrhein-Westfalen, Germany
Joined: March 22, 2015
KitMaker: 671 posts
AeroScale: 614 posts
Posted: Saturday, June 15, 2019 - 10:16 AM UTC
Torsten:
Wow, great upgrade of the cannon! It was worth every cent!

Angel:
Great work on that StuG. Congratulation!

FirstSergeant:
Wow, that is enthusiasm. Overpainting a good Job to fit the original. Kudos for this one . Looks nice from here!

Rodolfo:
Outstanding work on that StuG. I really like the weathering You have applied. Congrats!

Peter:
Nice kit You have chosen there, but I will always like the shape of a Spitfire like the one in Your background!

Radoslaw:
This truly is a heavy worn Panzer IV. Great weathering on this one. Really fine! How did You do this chipping?

Ken:
Nice choice. I will follow with interest.


My Stuka is now finished with some decent weathering and a little base.

Fujimi Junkers Ju 87 D-1 in 1/72 scale


Oliver
69mudbone
_VISITCOMMUNITY
California, United States
Joined: April 26, 2016
KitMaker: 362 posts
AeroScale: 42 posts
Posted: Sunday, June 16, 2019 - 12:09 AM UTC
Hi Oliver, a really nice looking build, your figures add a lot to your presentation