1/72 Fokker E.V from Arma Hobby
Stockholm, Sweden
Joined: May 02, 2006
KitMaker: 1,953 posts
AeroScale: 1,902 posts
Posted: Sunday, January 27, 2019 - 06:20 AM UTC
I'm bingeing on Arma Hobby kits now! This one wasn't even on my wish list, it just happend to sneak along when I ordered the
Hurricane before Christmas... When it got here, I realised that this was another little gem so let's get going!
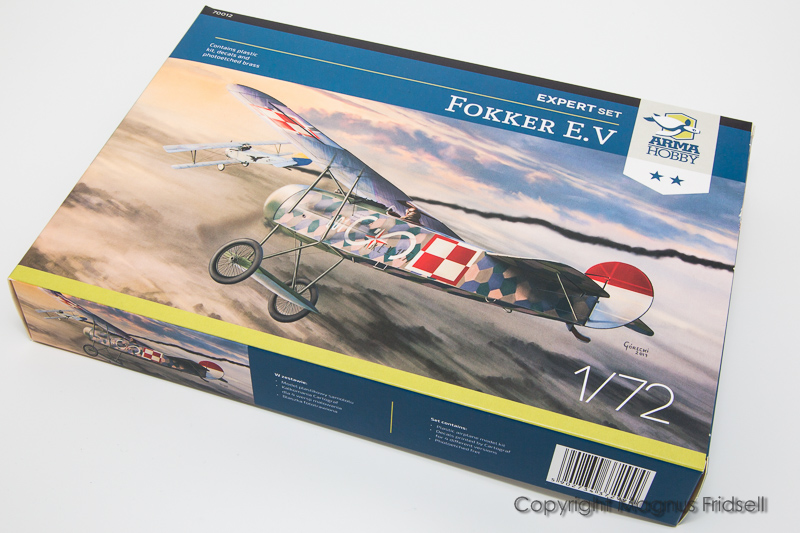
Once again some very attractive box art, I'll actually do this one even if there are three others to choose from. Love those Polish chessboards...
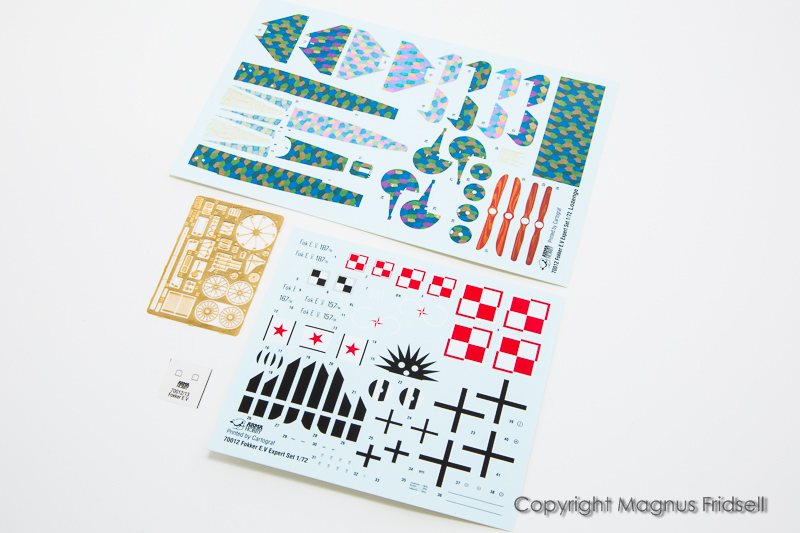
An interesting adventure for Mr. Dislikeallkindsofdecals... I've never done lozenge before

!
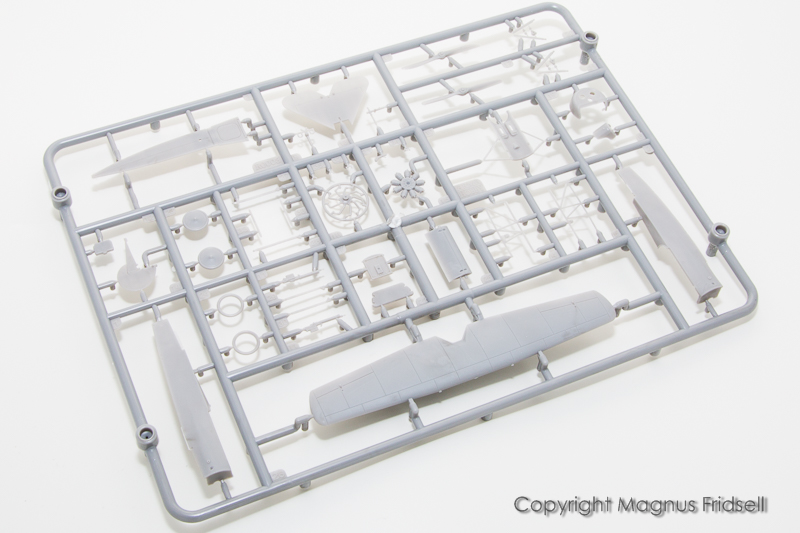
And the plastic. Once again kept to one densely packed sprue!

Magnus
Press banner to the right to follow my trail to the new forums!
JPTRR
 Managing Editor
#051
Tennessee, United States
Joined: December 21, 2002
KitMaker: 7,772 posts
AeroScale: 3,175 posts
Posted: Sunday, January 27, 2019 - 07:07 AM UTC
Magnus,
This looks like a promising little model. And little I bet it is!
I'll be watching and waiting for your story about how well it goes together.
If they demand your loyalty, give them integrity; if they demand integrity, give them your loyalty.--Col John Boyd, USAF
Any plan where you lose your hat is a bad plan.
Berlin, Germany
Joined: October 12, 2008
KitMaker: 709 posts
AeroScale: 651 posts
Posted: Tuesday, January 29, 2019 - 04:49 AM UTC
What the Fokk..! Already the next build, really?
Nice little cutie with a beautiful tiny PE fret - O.K. Mr. Dislikeallkindsofdecals, let's see what you can dig out of that Cameo-Plotter with that Camo-Pattern...
I'm aboard, Th
mas
Sometimes you need to distance yourself to see things clearly - Lao Tzu -
... in scale and in real life -T.
Stockholm, Sweden
Joined: May 02, 2006
KitMaker: 1,953 posts
AeroScale: 1,902 posts
Posted: Tuesday, January 29, 2019 - 07:57 AM UTC
Frederick! Yes, it's a fairly "compact" aircraft but since I venture into 144-scale every now and then, this isn't the smallest I've built
!
Thomas! I'll have to bite the bullet and use the decals! I'm actually kind of looking forward to it since I haven't tried anything like it before!
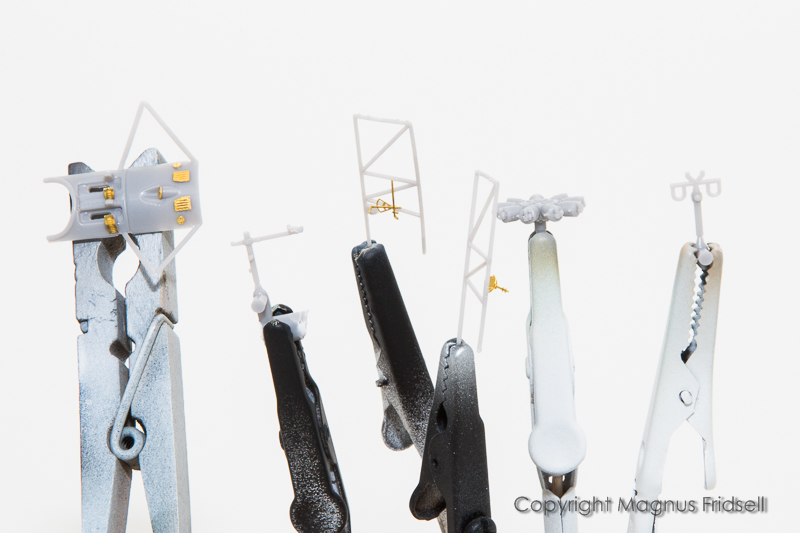
Parts on sticks... Doing most of the photo etch detail work at this stage.
Magnus
Press banner to the right to follow my trail to the new forums!
#306
Victoria, Australia
Joined: June 27, 2010
KitMaker: 3,959 posts
AeroScale: 598 posts
Posted: Wednesday, January 30, 2019 - 08:49 PM UTC
Well, I'm on board
Stay home and build models!
In 1/72
Gloster Gladiator MkII for the Bi-planes Campaign
In 1/350
Airfix 1:350 Type 45 Destroyer
Stockholm, Sweden
Joined: May 02, 2006
KitMaker: 1,953 posts
AeroScale: 1,902 posts
Posted: Friday, February 01, 2019 - 10:30 PM UTC
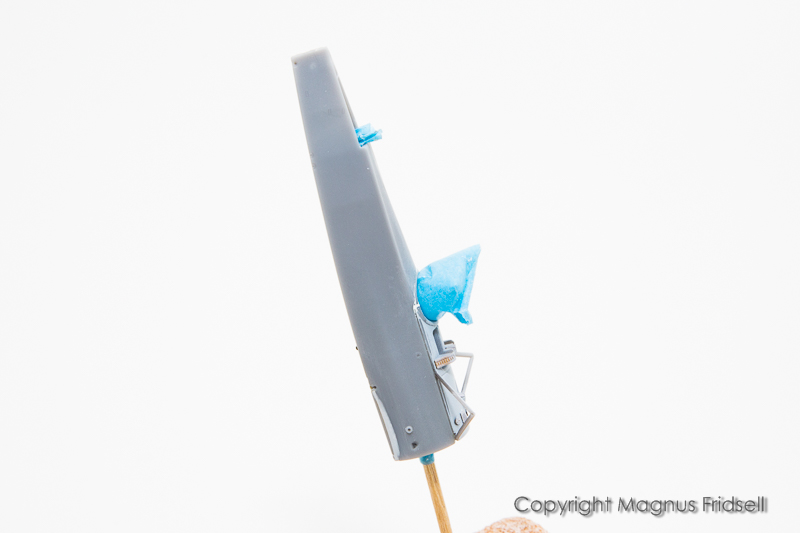
Friends! It has been a quiet week, mostly preparing parts for primer and also doing lots of rather fiddly photo etch.
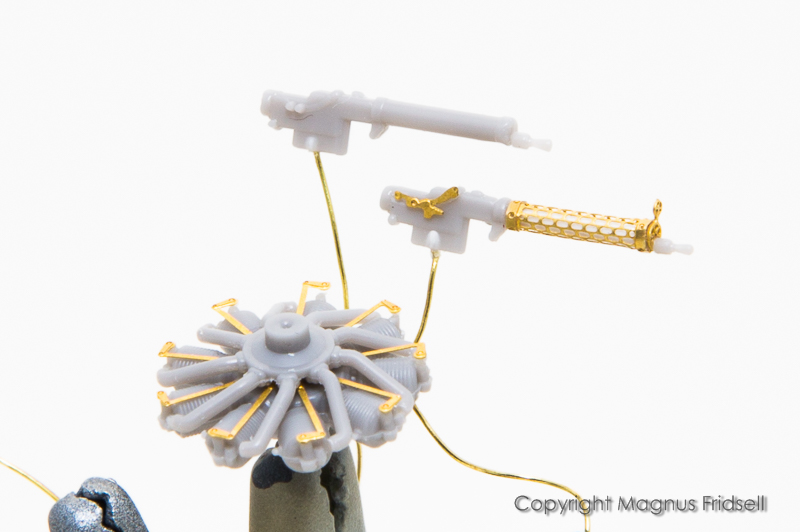
The etched cooling jackets certainly improves the plastic machine guns, it won't fit around the original plastic jacket though. The machine gun has to be carefully cut into pieces, put the tiny pipe part away for later use, cut a piece of round stock (I used 1 mm since that was what I had, slightly larger would have been better) and glue your pre-formed etched jacket around it. Then glue it all together again...
I pre-formed the jacket by rolling a drill over it with a piece of eraser as an anvil, many things can be carefully shaped this way!
Magnus
Press banner to the right to follow my trail to the new forums!
Nordrhein-Westfalen, Germany
Joined: March 22, 2015
KitMaker: 671 posts
AeroScale: 614 posts
Posted: Saturday, February 02, 2019 - 04:20 AM UTC
Magnus,
what a nice bird. I am fascinated by Your different use of erasers in your modeling blogs

. My chair is ready to watch this new build!
Oliver
On the desk: Probably a Panzer III.
Stockholm, Sweden
Joined: May 02, 2006
KitMaker: 1,953 posts
AeroScale: 1,902 posts
Posted: Saturday, February 02, 2019 - 09:03 PM UTC
Oliver! The erasers have lots of things going for them, not least their price
!
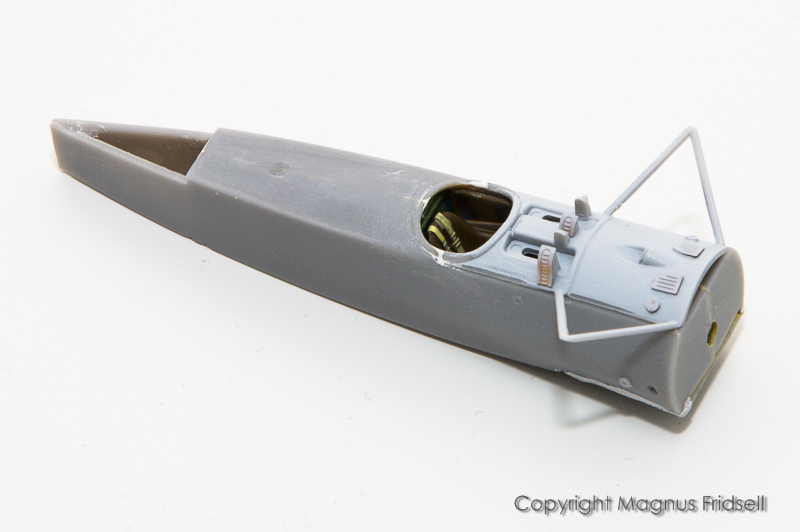
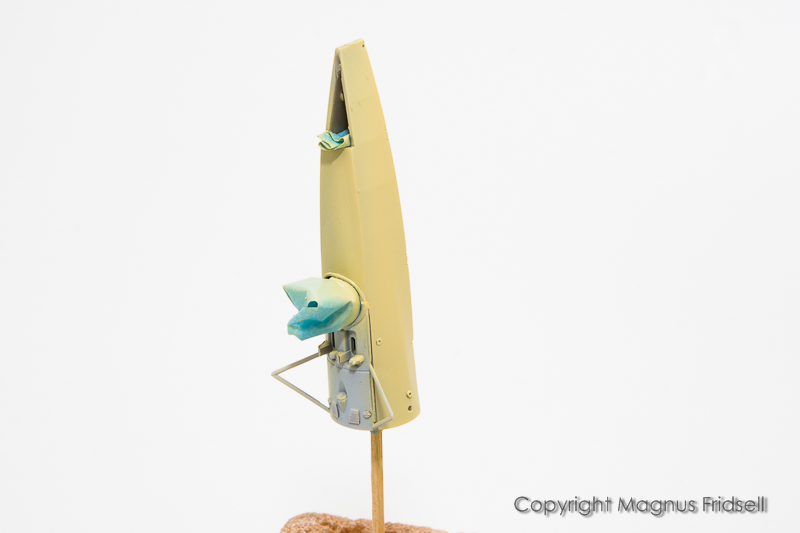
The real wing was made of plywood with coarsely brush painted camouflage in happy colours, I wanted a birch-like colour as a base and ended up with a mix of MRP Mid Stone with a drop or two of yellow, I used this one for the interior as well where most of it will be covered by lozenge decals (yes, there are decals for the interior of the fuselage!). The prop was base coated with MRP Dark Earth with a drop of red in it.
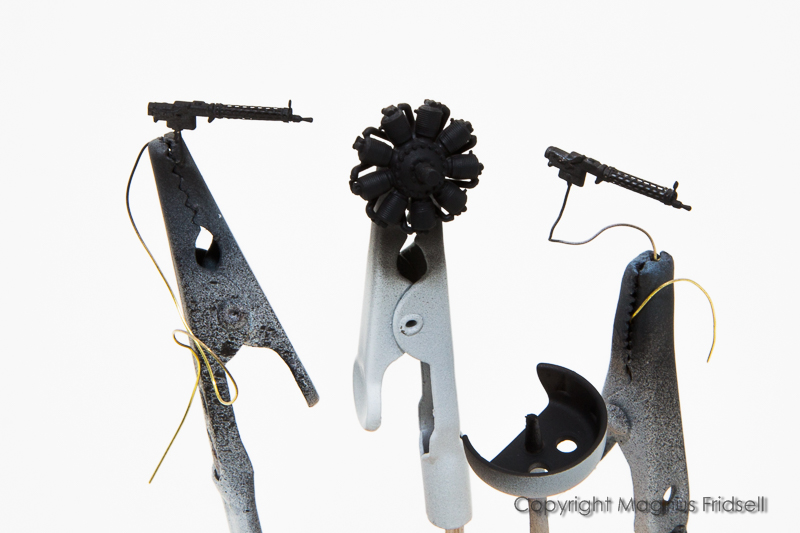
Armament, engine and cowling primed using Gunze Tire Black, a favourite "off-black" colour.
Magnus
Press banner to the right to follow my trail to the new forums!
Stockholm, Sweden
Joined: May 02, 2006
KitMaker: 1,953 posts
AeroScale: 1,902 posts
Posted: Sunday, February 03, 2019 - 09:41 AM UTC
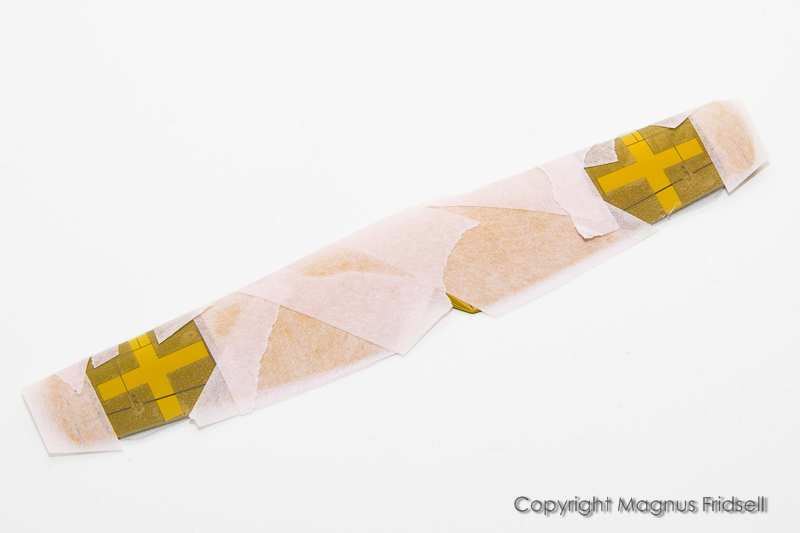
Dipping my toes into the decal sewer...
Could have been worse, I actually almost enjoyed it
! And very considerate of Arma to start with lozenge on the inside of the fuselage halves so that I can do the transition to covering the whole fuselage gradually!
Magnus
Press banner to the right to follow my trail to the new forums!
Stockholm, Sweden
Joined: May 02, 2006
KitMaker: 1,953 posts
AeroScale: 1,902 posts
Posted: Tuesday, February 05, 2019 - 07:30 AM UTC
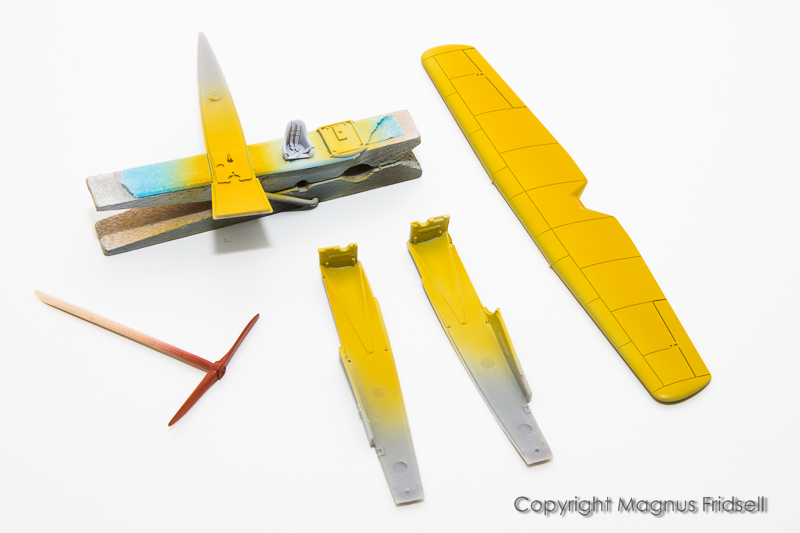
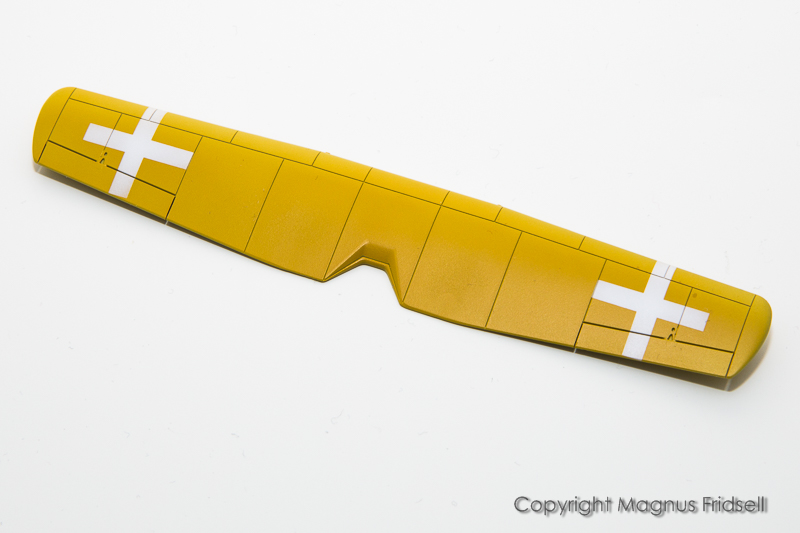
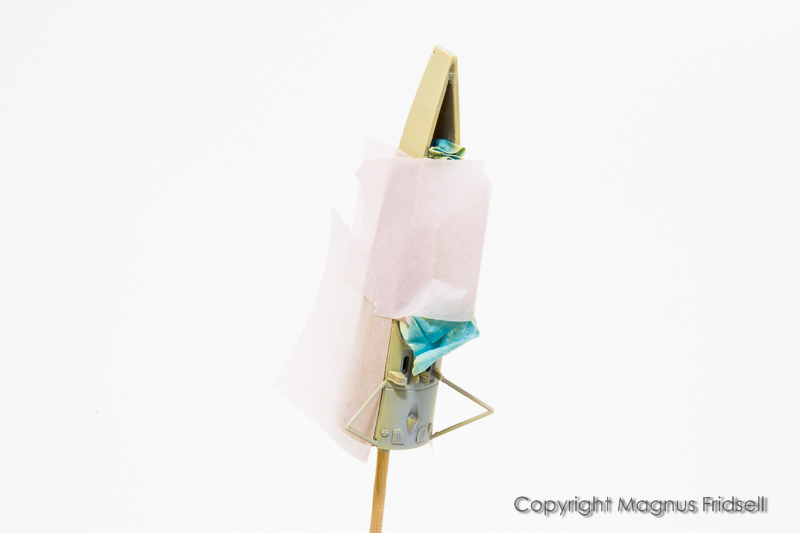
Further work on the wings!
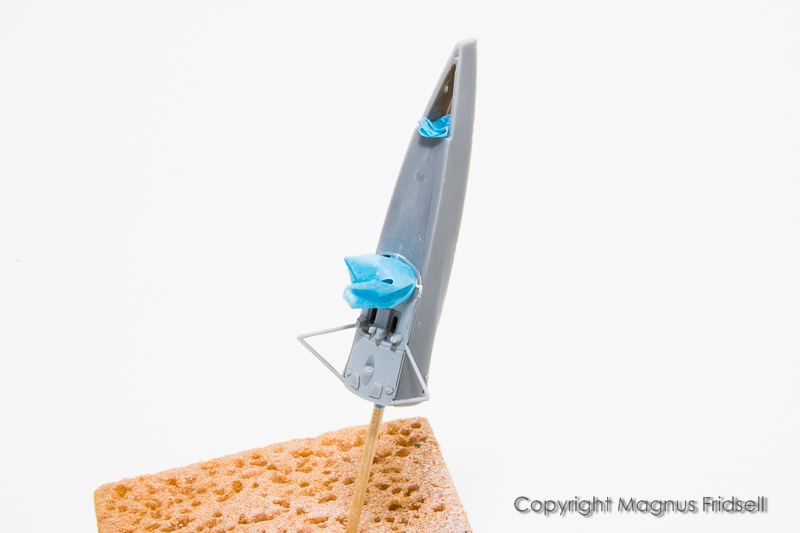
Since the aircraft changed ownership, there were still traces of the former owner's markings below the new Polish ones. I've prepared for this by painting on the German crosses using my own masks
Masking...
...painted white...
...we start over...
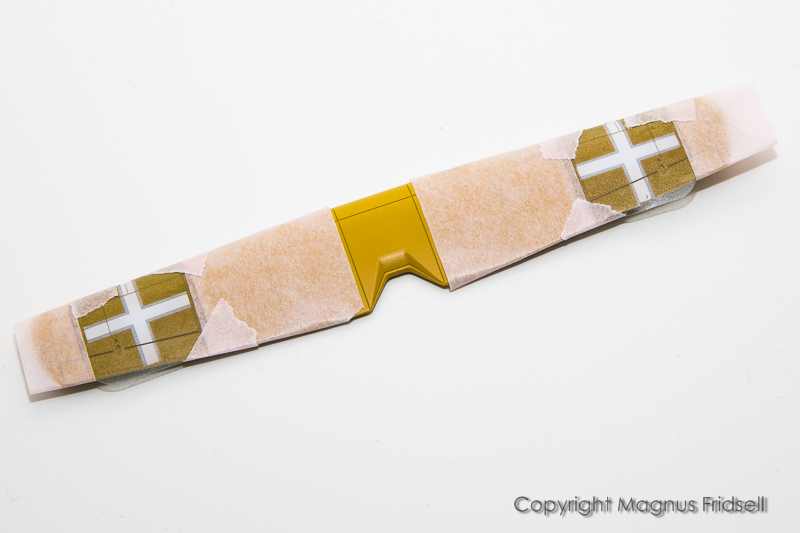
...with new masks...
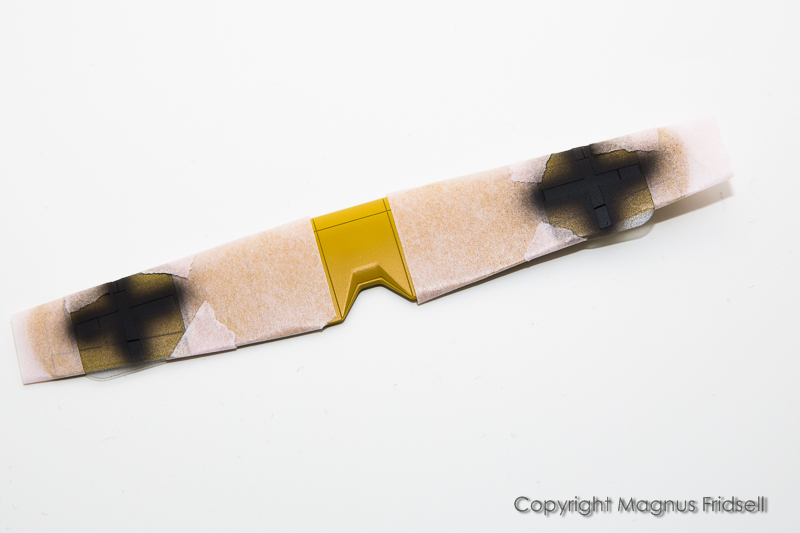
...and paint it black...
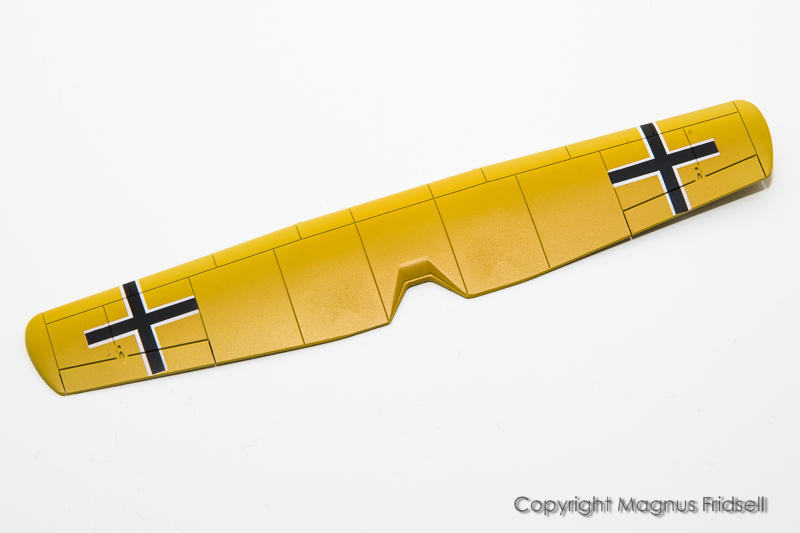
...not bad!
Let's see if I get around to do some camo painting tonight!
Magnus
Press banner to the right to follow my trail to the new forums!
#306
Victoria, Australia
Joined: June 27, 2010
KitMaker: 3,959 posts
AeroScale: 598 posts
Posted: Tuesday, February 05, 2019 - 12:24 PM UTC
very nice Magnus!
That masking looks very precise!

Stay home and build models!
In 1/72
Gloster Gladiator MkII for the Bi-planes Campaign
In 1/350
Airfix 1:350 Type 45 Destroyer
JPTRR
Managing Editor #051
Tennessee, United States
Joined: December 21, 2002
KitMaker: 7,772 posts
AeroScale: 3,175 posts
Posted: Friday, February 08, 2019 - 10:20 AM UTC
Magnus,
Great thread. She's looking beautiful. How was the decal sewer??
The guns and engine and cockpit detail are amazing. For a moment I thought I was looking at 1/48!
If they demand your loyalty, give them integrity; if they demand integrity, give them your loyalty.--Col John Boyd, USAF
Any plan where you lose your hat is a bad plan.
Stockholm, Sweden
Joined: May 02, 2006
KitMaker: 1,953 posts
AeroScale: 1,902 posts
Posted: Friday, February 08, 2019 - 11:05 PM UTC
Russell! Thanks
!
Frederick! I might get used to them
! And there is lots more to be handled before seeing the end of this! I'll put in some detail work on the tiny parts later on today, stay tuned.
Using Vallejo acrylics and a sorry old paintbrush that has been suffering a lot under drybrushing, I bit the bullet and did the rough brush painting on the wing. It came out better than I anticipated.
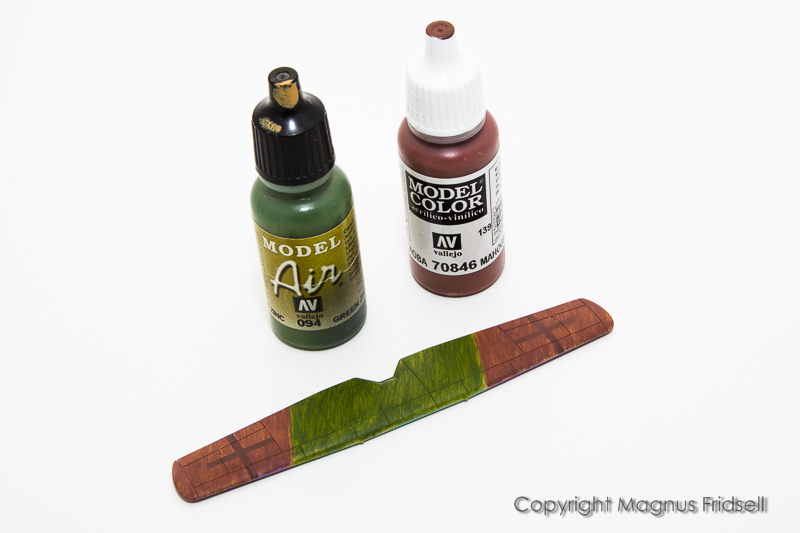
I'll let this harden for a day or two, I'll carefully polish out the brush roughness and then I'll give it a coat of gloss in preparation for the decals.
Magnus
Press banner to the right to follow my trail to the new forums!
Berlin, Germany
Joined: October 12, 2008
KitMaker: 709 posts
AeroScale: 651 posts
Posted: Saturday, February 09, 2019 - 08:18 PM UTC
Pretty fine job on the fiddling parts as well as on the pre- painting and additional masking.
The shade of the base color works nice under the coats. Even more under the interior decals

.
Looking foreward to the wing`s outcome and to your upcoming progress, Th

mas
Sometimes you need to distance yourself to see things clearly - Lao Tzu -
... in scale and in real life -T.
Stockholm, Sweden
Joined: May 02, 2006
KitMaker: 1,953 posts
AeroScale: 1,902 posts
Posted: Tuesday, February 12, 2019 - 09:14 AM UTC
Thomas! Thanks! This is another fun build and I enjoy the fact that it is a bit different from what I usually do.
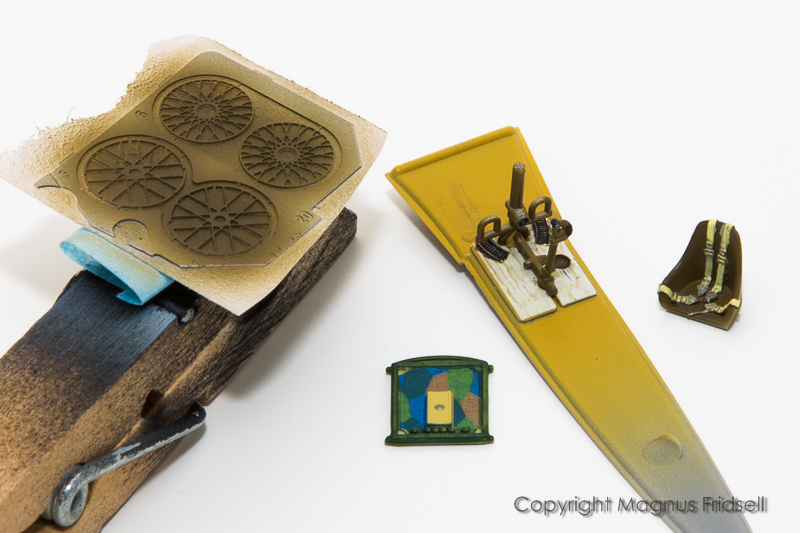
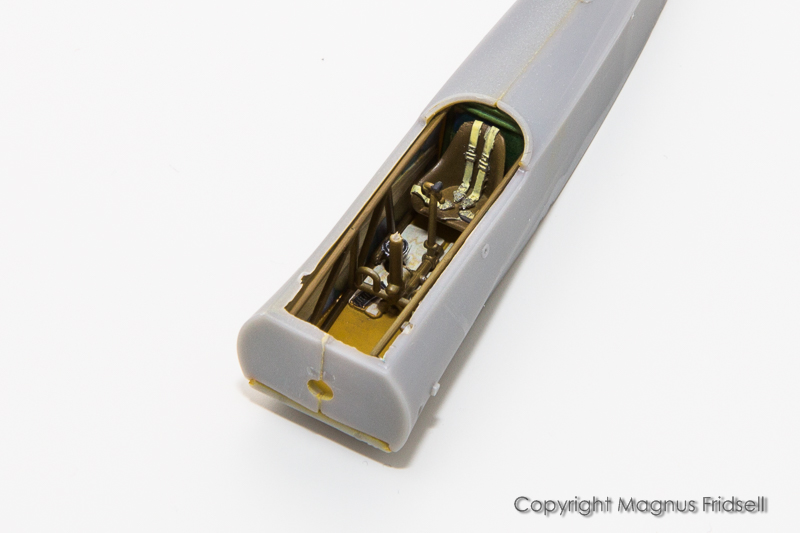
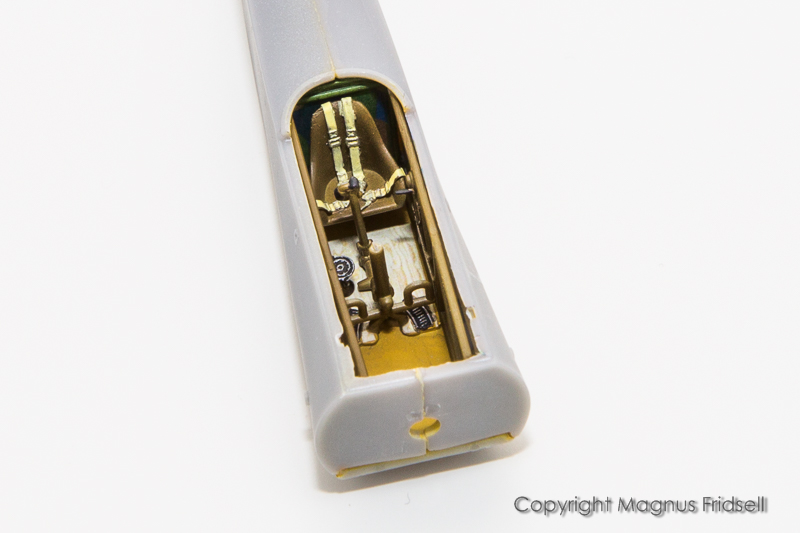
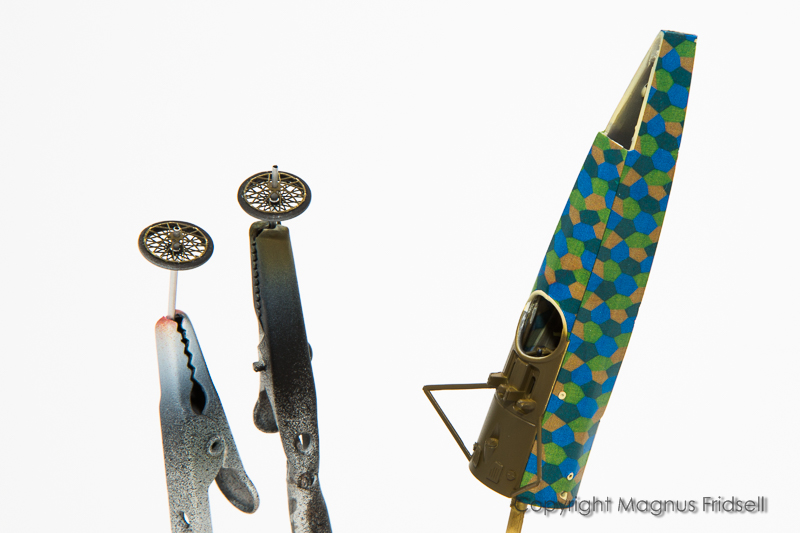
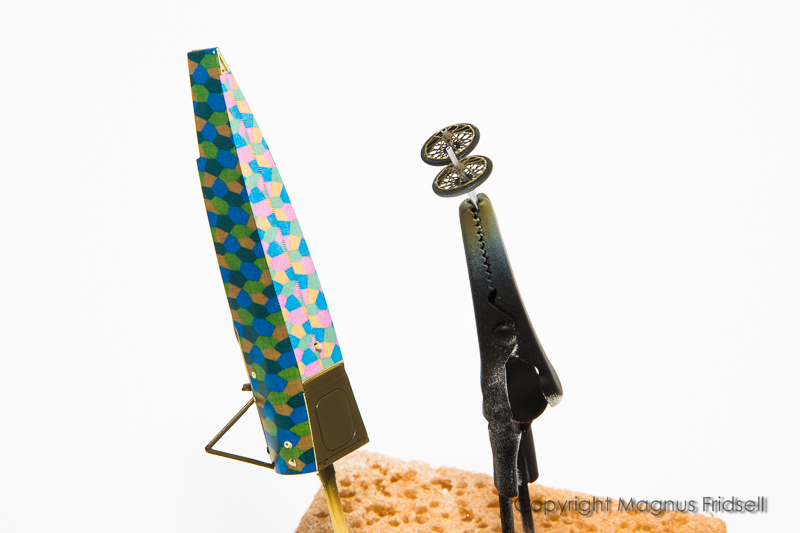
Soon ready to button up the fuselage! The etch parts to the left is my main worry for the time being, they are spokes for the wheels...
Magnus
Press banner to the right to follow my trail to the new forums!
#306
Victoria, Australia
Joined: June 27, 2010
KitMaker: 3,959 posts
AeroScale: 598 posts
Posted: Tuesday, February 12, 2019 - 09:47 PM UTC
Those wheels look like
fun Magnus!
Stay home and build models!
In 1/72
Gloster Gladiator MkII for the Bi-planes Campaign
In 1/350
Airfix 1:350 Type 45 Destroyer
Stockholm, Sweden
Joined: May 02, 2006
KitMaker: 1,953 posts
AeroScale: 1,902 posts
Posted: Friday, February 15, 2019 - 09:32 PM UTC
Press banner to the right to follow my trail to the new forums!
Stockholm, Sweden
Joined: May 02, 2006
KitMaker: 1,953 posts
AeroScale: 1,902 posts
Posted: Thursday, February 21, 2019 - 06:50 AM UTC
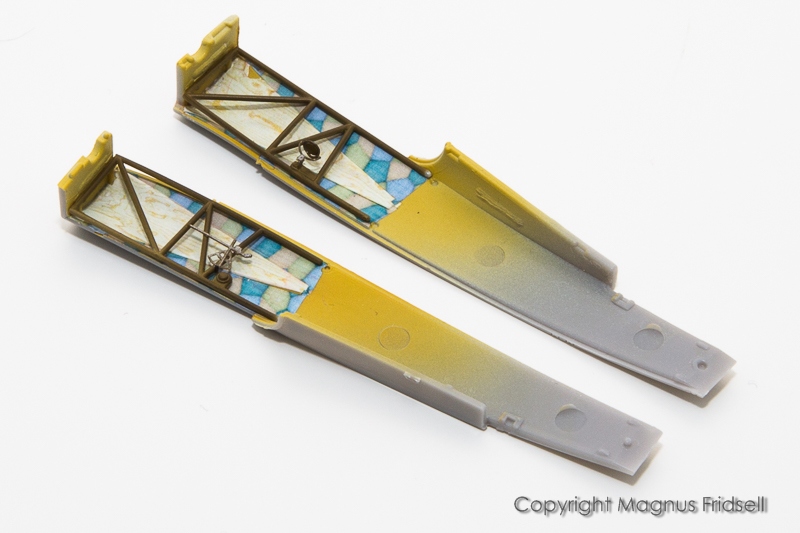
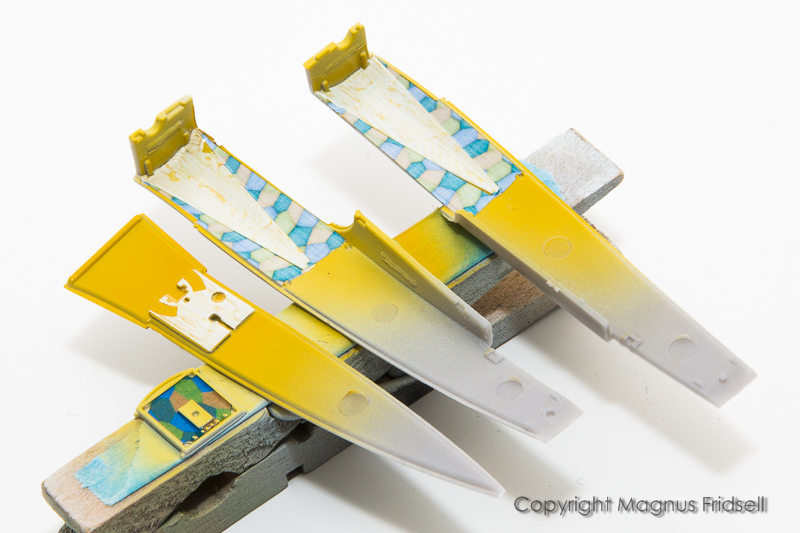
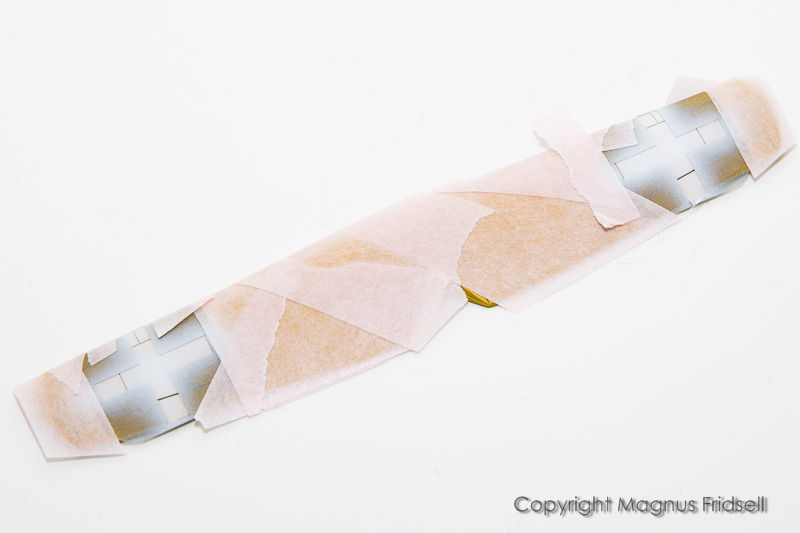
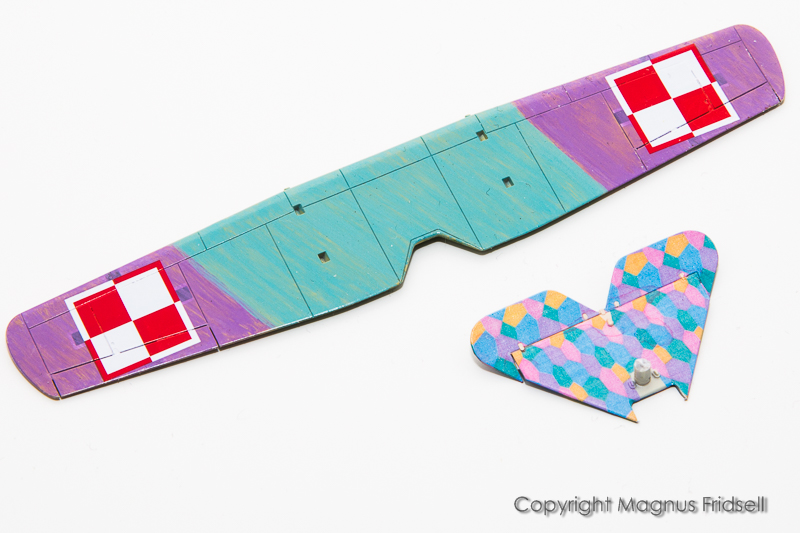
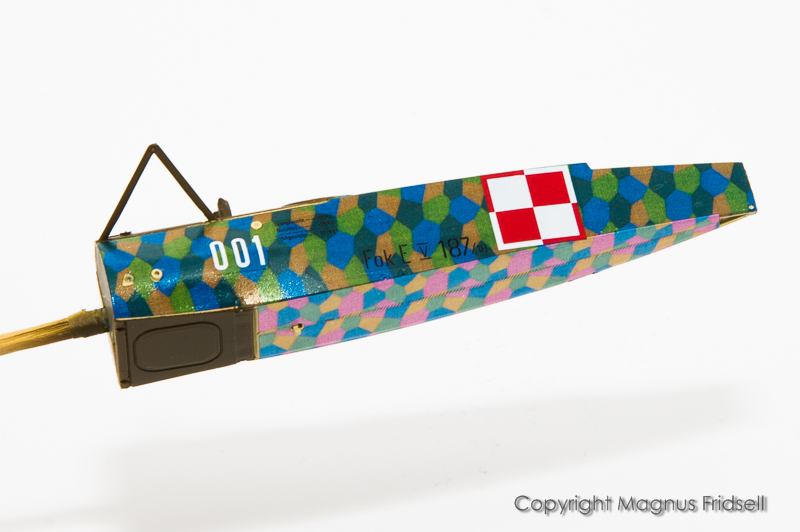
Lozenge! I did the tailplanes as a warm-up with good results, starting to build confidence for the fuselage later!
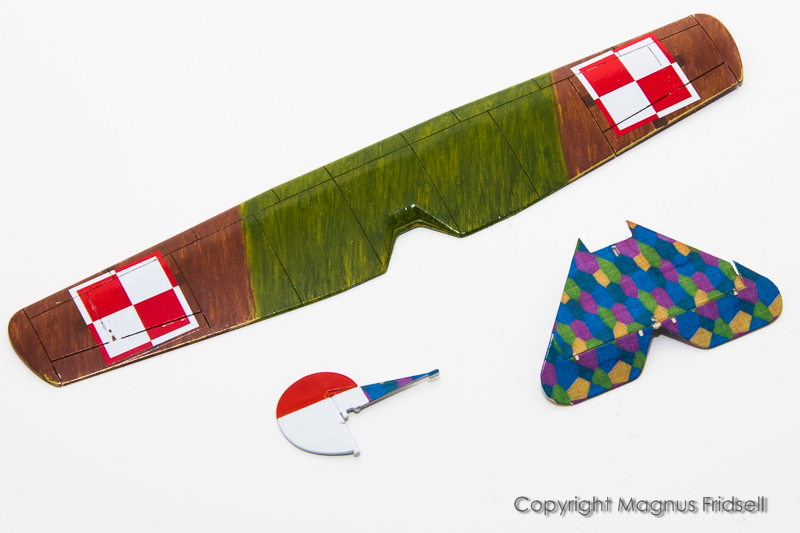
I've applied several doses of Micro Sol on the chess boards, I'll cut through them with a scalpel tonight to fix the last part that hasn't sunk into the aileron line.
My wife thought the tail was a butterfly
!
Magnus
Press banner to the right to follow my trail to the new forums!
#306
Victoria, Australia
Joined: June 27, 2010
KitMaker: 3,959 posts
AeroScale: 598 posts
Posted: Thursday, February 21, 2019 - 11:07 PM UTC
That's no butterfly!

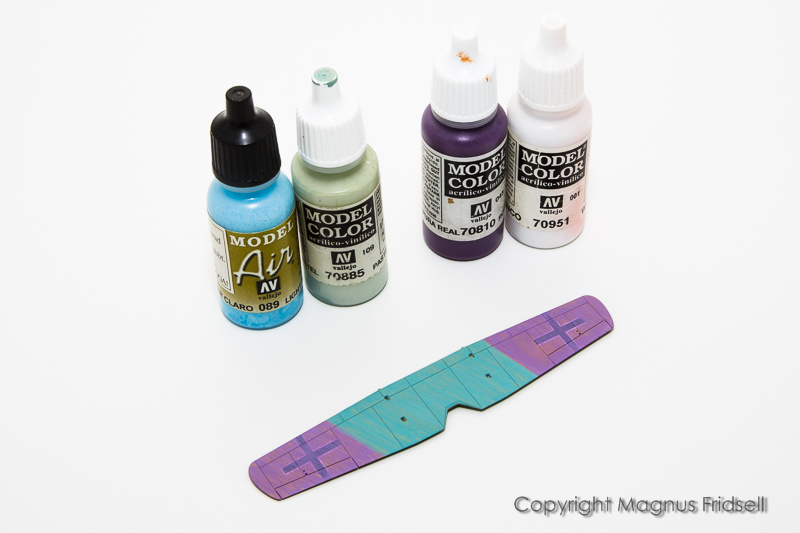
Can I ask Magnus, what's the intention with the painting strategy on the top of the wings?

Stay home and build models!
In 1/72
Gloster Gladiator MkII for the Bi-planes Campaign
In 1/350
Airfix 1:350 Type 45 Destroyer
Stockholm, Sweden
Joined: May 02, 2006
KitMaker: 1,953 posts
AeroScale: 1,902 posts
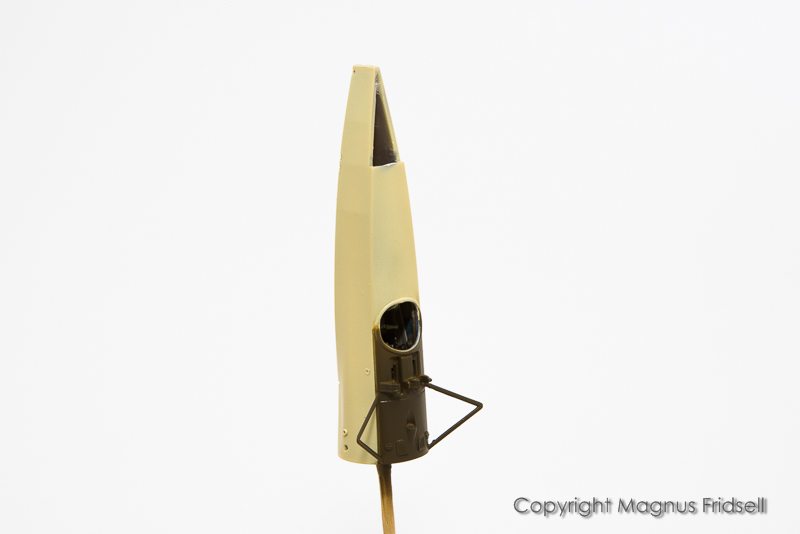
Posted: Saturday, February 23, 2019 - 08:48 AM UTC
Russell! Do you mean the rather rough brush painting? Simply because they look a bit like this in real life
! There are many examples, it is a common pattern for the Fokker Dr.I among others.
Filling in the cockpit coaming using Milliput.
Masking the cockpit before painting.
The only place yet where I have needed putty!
"Linen" colour!
Some more masking...
...and a final coat of paint for tonight!
I'll be away skiing next week so no more updates for some time!
Magnus
Press banner to the right to follow my trail to the new forums!
#306
Victoria, Australia
Joined: June 27, 2010
KitMaker: 3,959 posts
AeroScale: 598 posts
Posted: Tuesday, February 26, 2019 - 09:24 PM UTC
Quoted Text
Russell! Do you mean the rather rough brush painting? Simply because they look a bit like this in real life ! There are many examples, it is a common pattern for the Fokker Dr.I among others.
Hi Magnus!
Yup! That's exactly what I was asking about-These older planes having so much hand made details call for techniques outside of the usual box of tricks us modellers use and I reckon you've got the look spot on.
Quoted Text
I'll be away skiing next week so no more updates for some time!
Magnus
That's made me just a bit envious... We're having a week of high 30degrees temperatures here

Stay home and build models!
In 1/72
Gloster Gladiator MkII for the Bi-planes Campaign
In 1/350
Airfix 1:350 Type 45 Destroyer
Stockholm, Sweden
Joined: May 02, 2006
KitMaker: 1,953 posts
AeroScale: 1,902 posts
Posted: Thursday, March 07, 2019 - 07:37 AM UTC
Russell! Not much skiing then I assume
?
On to the fuselage, I'm really getting the hang of decals now
!
Another angle. I love the colours!
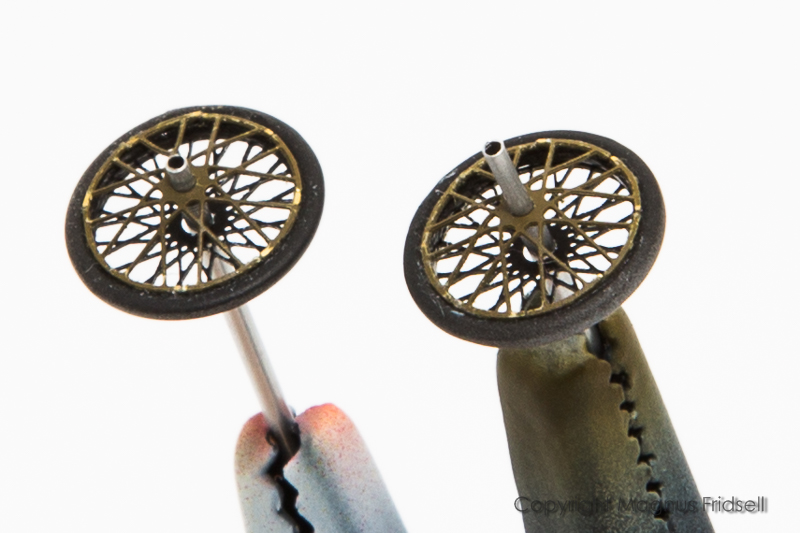
I guess that you have already seen that I finally got around to those dreaded wheels... This was actually as difficult as I had expected, if not worse! To start with, I wish the etch had fitted a bit better against the plastic (they are likely designed from the same CAD-model so I don't really see a reason why they shouldn't fit). Also, the outward facing side of the wheel has spokes that are "domed", the etch is cleverly made but difficult to shape evenly. I wish there was a plastic part that could be used for shaping, now I tried to use the "solid" wheels as moulds but it didn't work out all that well. Anyway, after some sanding and cleanup they should be OK!
Magnus
Press banner to the right to follow my trail to the new forums!
Stockholm, Sweden
Joined: May 02, 2006
KitMaker: 1,953 posts
AeroScale: 1,902 posts
Posted: Thursday, March 07, 2019 - 09:27 AM UTC
Second update for tonight...
Some more decals...
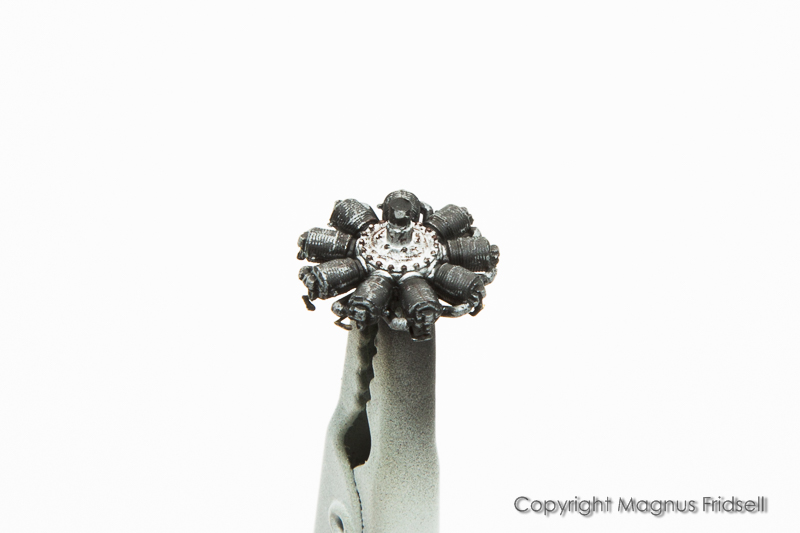
...and painting the engine...
Magnus
Press banner to the right to follow my trail to the new forums!
Berlin, Germany
Joined: October 12, 2008
KitMaker: 709 posts
AeroScale: 651 posts
Posted: Friday, March 08, 2019 - 03:17 AM UTC
This really comes along nicely, Magnus!
Very good decal work, I like them
. Did they went on and fit without issues aside using some softener? The spoked wheels are definetely an eye catcher and a big improvement - well done, Sir! Beautiful pit and engine too.
I'm still along...
Th

mas
Sometimes you need to distance yourself to see things clearly - Lao Tzu -
... in scale and in real life -T.
Stockholm, Sweden
Joined: May 02, 2006
KitMaker: 1,953 posts
AeroScale: 1,902 posts
Posted: Friday, March 08, 2019 - 09:35 PM UTC
Thomas! Setting solutions: just the ordinary, Micro Set and Micro Sol. I seldom need anything else and combined with Cartograf decals they work very well!
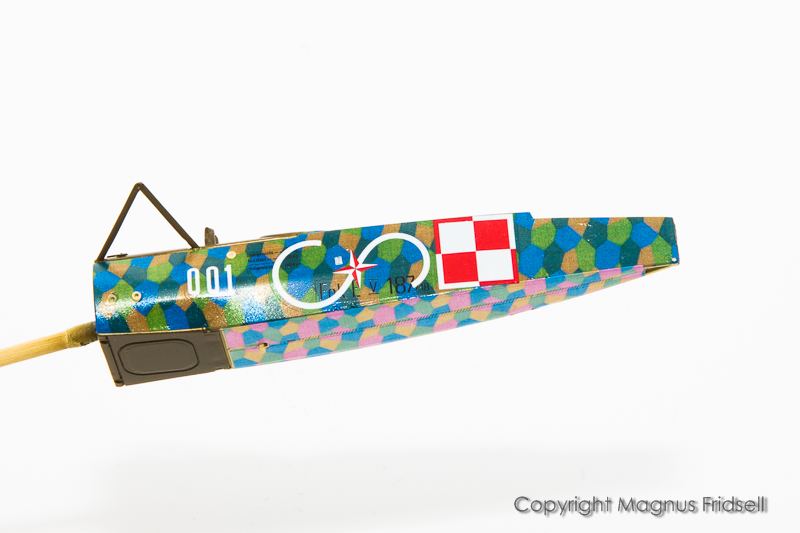
Layer upon layer of decals... Now I'm finally finished, I'll let it dry and then it will get a coat of semi-gloss tonight.
Magnus
Press banner to the right to follow my trail to the new forums!