Air Campaigns
Want to start or join a group build? This is where to start.
OFFICAL: RAF 100 Campaign
PasiAhopelto
_VISITCOMMUNITY
Uusimaa, Finland
Joined: October 01, 2016
KitMaker: 514 posts
AeroScale: 239 posts
Posted: Sunday, September 23, 2018 - 01:03 AM UTC
Decals on:


Light weathering next...
McRunty
#491
_VISITCOMMUNITY
Missouri, United States
Joined: April 06, 2016
KitMaker: 602 posts
AeroScale: 43 posts
Posted: Monday, September 24, 2018 - 12:13 PM UTC
I am usually an armour and ship guy but I picked this up at a show for a steal so this is as good a time as any to build it. I will be doing the Eduard Spitfire Mk22/24 Limited edition kit. I will be doing it almost 100% OOB since it comes with resin/PE etc. They only aftermarket I have bought is a Squadron canopy since every review I have read says the kit canopy doesn't fit properly in the open position.

TacFireGuru
_VISITCOMMUNITY
Colorado, United States
Joined: December 25, 2004
KitMaker: 3,770 posts
AeroScale: 201 posts
Posted: Saturday, September 29, 2018 - 09:35 AM UTC
I've never had a catastrophic paint session before, but this "Gloss Varnish" did me in. Almost binned the kit.

But, I'm not through yet!


What the happened? Went on looking like milk and dried like this - washed out the camo. I shook the container good, real good. Just glad I didn't shoot the second model awaiting the gloss coat.

Not pleased. I've used plenty of Mig before...

Mike
TacFireGuru
_VISITCOMMUNITY
Colorado, United States
Joined: December 25, 2004
KitMaker: 3,770 posts
AeroScale: 201 posts
Posted: Thursday, October 04, 2018 - 05:51 AM UTC
Stripped. Couple coats of Fume-Free Oven Cleaner. Needs a light sanding in some spots, a good wipe down, and primer.


Mike
BlackWidow
_VISITCOMMUNITY
European Union
Joined: August 09, 2009
KitMaker: 1,732 posts
AeroScale: 1,336 posts
Posted: Thursday, October 04, 2018 - 06:07 AM UTC
Holy sh...t, Mike! That's the model builder's nightmare! Never experienced something like that. Only with Revell Matt Varnish but not this heavy. I went against it with some Gloss Varnish and could save the model.

But if you want some glossy surface for the decals why don't you use Future? I use "Bodenglänzer", which is the german equivalent to Future or the british Klear. Never had bad results with it. It's a lot cheaper than that overpriced MIG stuff. And there's a lot more in the bottle, enough for the entire modellers life ....

Good luck with your rescue operations!
Torsten

PS, I'll probably start with my campaign's build (the Night Defiant from Airfix) in November. Building some armor right now ....
TacFireGuru
_VISITCOMMUNITY
Colorado, United States
Joined: December 25, 2004
KitMaker: 3,770 posts
AeroScale: 201 posts
Posted: Saturday, October 06, 2018 - 01:08 PM UTC
Underside Medium Sea Gray painted. Tomorrow the top's Ocean Gray. Couple days later the Dark Green camouflage. Then detail painting (again) and finally assembly.

Torsten, I have Future, but wanted to try the Mig stuff. Never again.....


Mike
TacFireGuru
_VISITCOMMUNITY
Colorado, United States
Joined: December 25, 2004
KitMaker: 3,770 posts
AeroScale: 201 posts
Posted: Sunday, October 07, 2018 - 10:43 AM UTC
Round two of Ocean Gray.


Mike
TacFireGuru
_VISITCOMMUNITY
Colorado, United States
Joined: December 25, 2004
KitMaker: 3,770 posts
AeroScale: 201 posts
Posted: Friday, October 19, 2018 - 05:42 AM UTC
Dark Green on. Some small touch ups to do.


Mike
TacFireGuru
_VISITCOMMUNITY
Colorado, United States
Joined: December 25, 2004
KitMaker: 3,770 posts
AeroScale: 201 posts
Posted: Monday, October 22, 2018 - 07:01 AM UTC
Updated paint:


Mike
Dangeroo
#023
_VISITCOMMUNITY
Zurich, Switzerland
Joined: March 13, 2009
KitMaker: 2,058 posts
AeroScale: 67 posts
Posted: Monday, October 22, 2018 - 08:29 AM UTC
Some really nice Progress in this Campaign guys!

Mind if I join the fun? Just a Little side Project, an Academy Hurricane. I know, not the most accurate of kits. And needed a bit of filler here and there. Gotta be practicing my planes!

Start pic:

Progress so far:


Cheers!
Stefan
TacFireGuru
_VISITCOMMUNITY
Colorado, United States
Joined: December 25, 2004
KitMaker: 3,770 posts
AeroScale: 201 posts
Posted: Friday, October 26, 2018 - 02:55 AM UTC
Adjusted the Dark Green paint some (wings) and added the "tan" tail band. Used the Mr. Hobby Gloss Clear this time. Picked it up at Hobby Town some time back - I think it was a one-off, but it goes on nice and clear. Pretty pleased.


Mike
john41492
#442
_VISITCOMMUNITY
Malacca, Malaysia
Joined: July 20, 2015
KitMaker: 363 posts
AeroScale: 335 posts
Posted: Sunday, October 28, 2018 - 04:43 AM UTC
Hi All,

Mike, nice recovery! Your issue isn't the worst I've seen (clear coat shattering post decals) , though close to it! Looks like no hangar queen for you on this one.

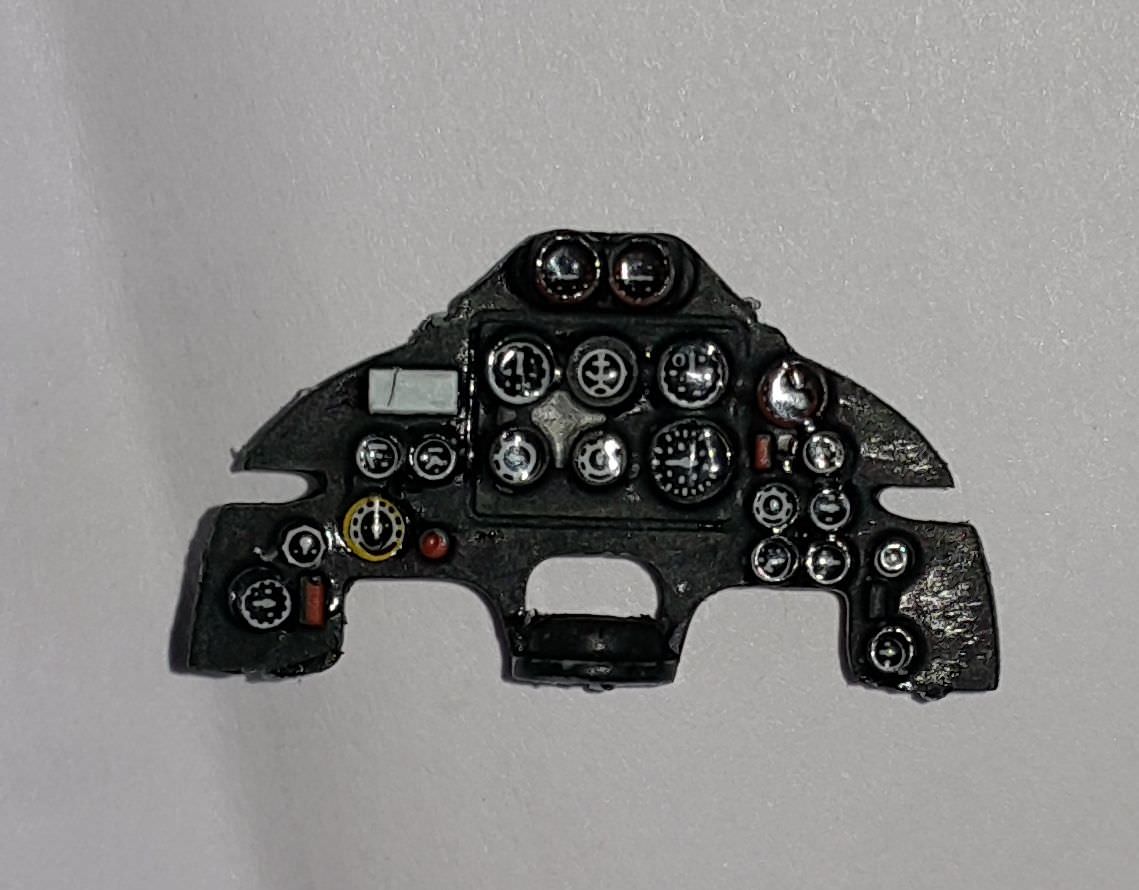
While my build has been a back burner, I decided to add Eduard's PE Sutton harness for this build. A good exercise in patience, though it turned out nice I think.


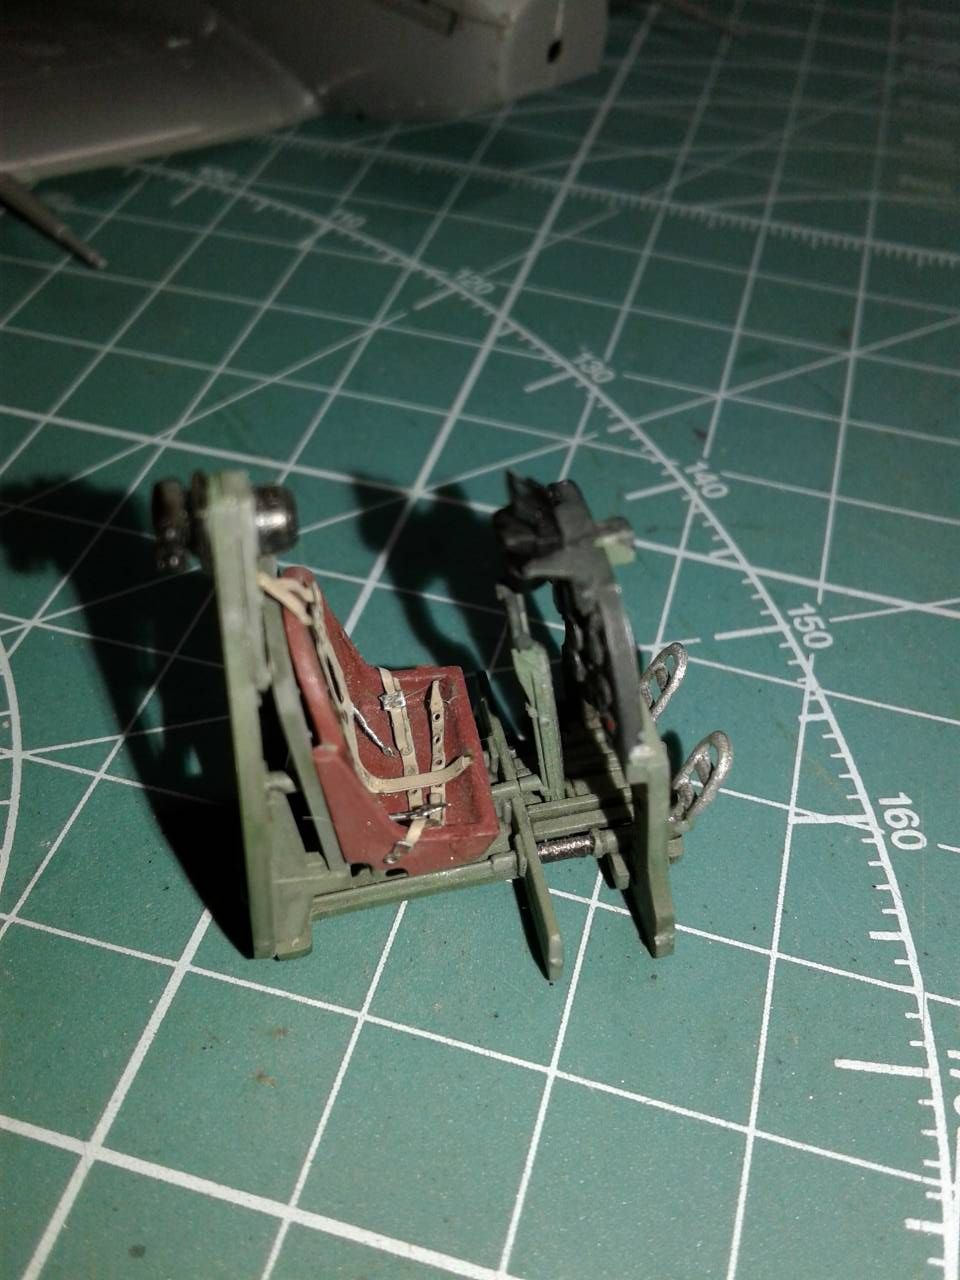
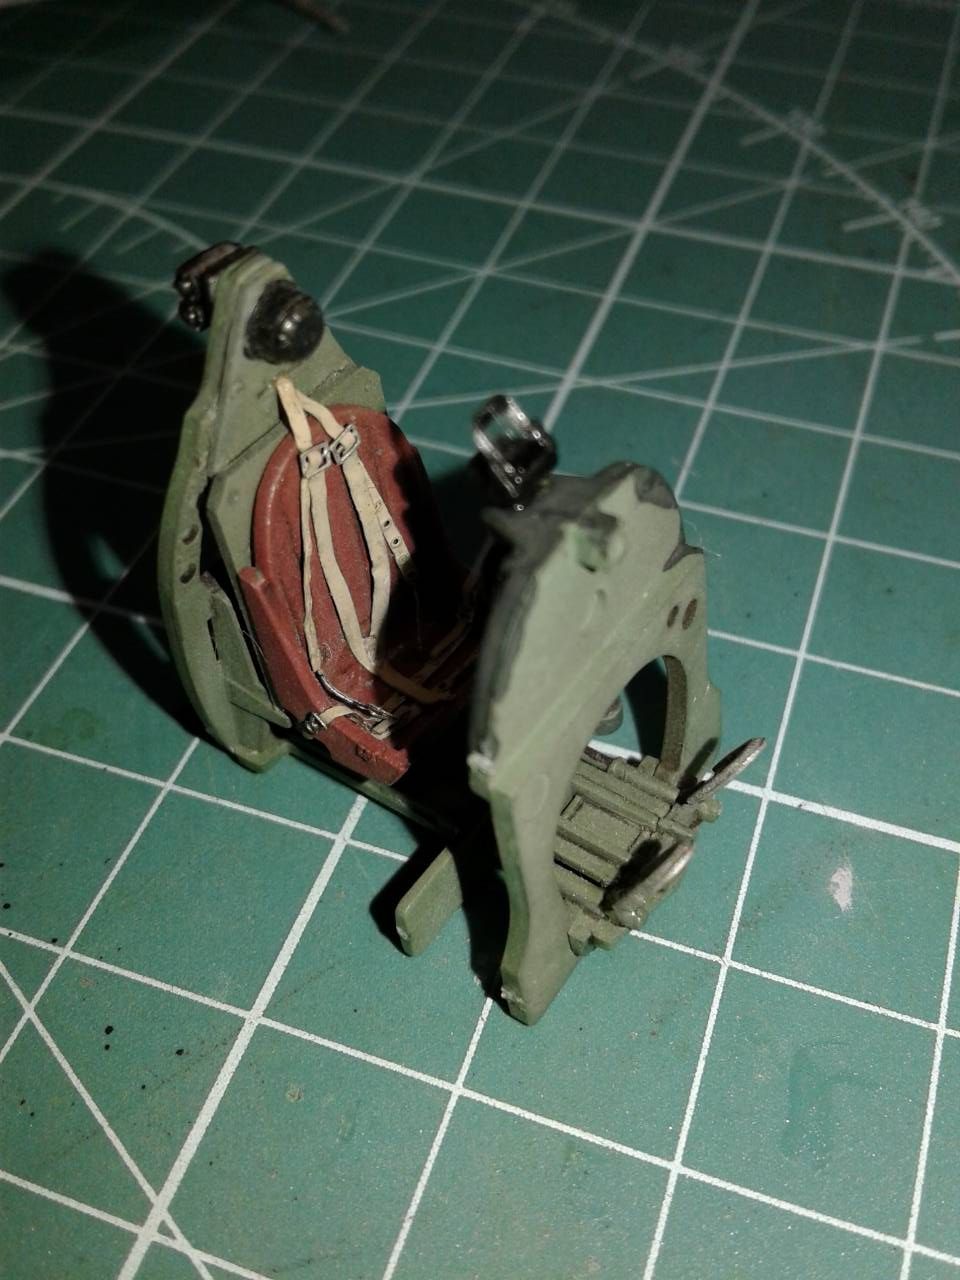
Until these pictures were done, I didn't notice I missed the lever that raises the seat. Fortunately, with things closed up, you don't really notice.

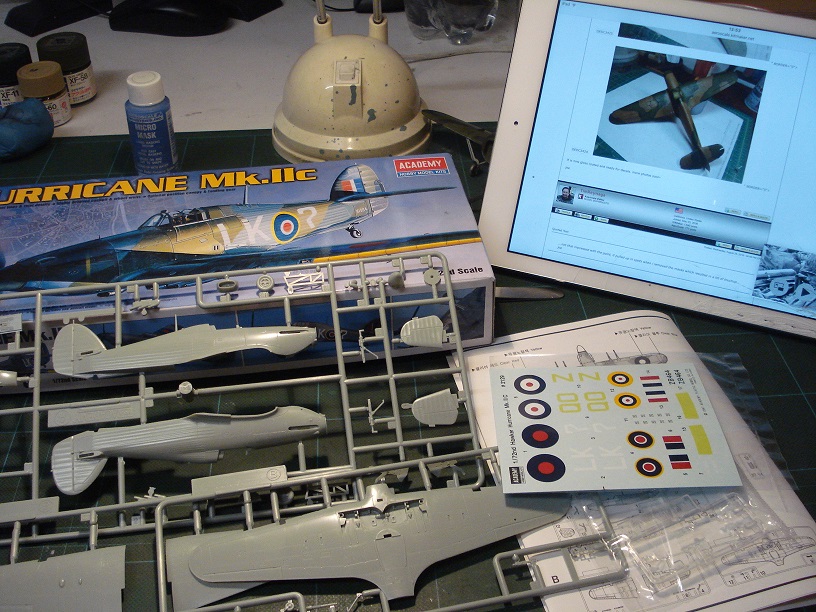
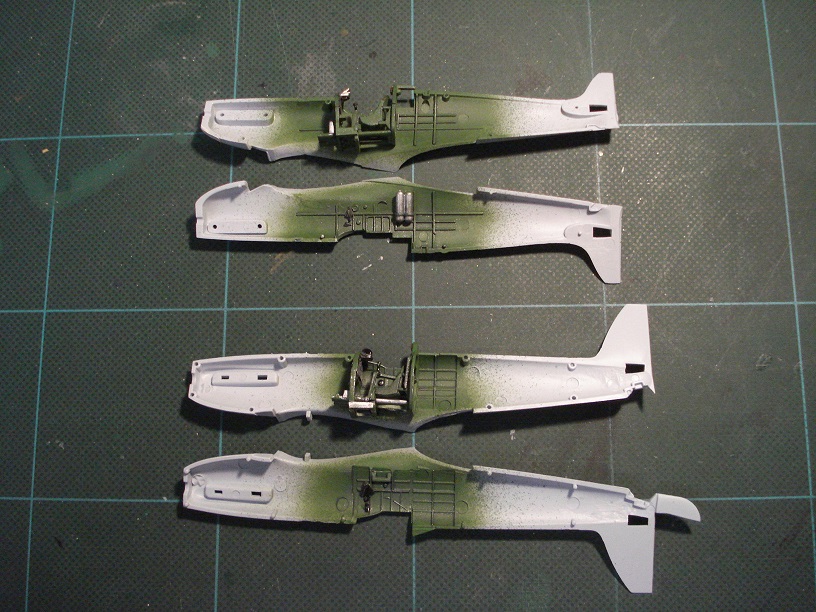
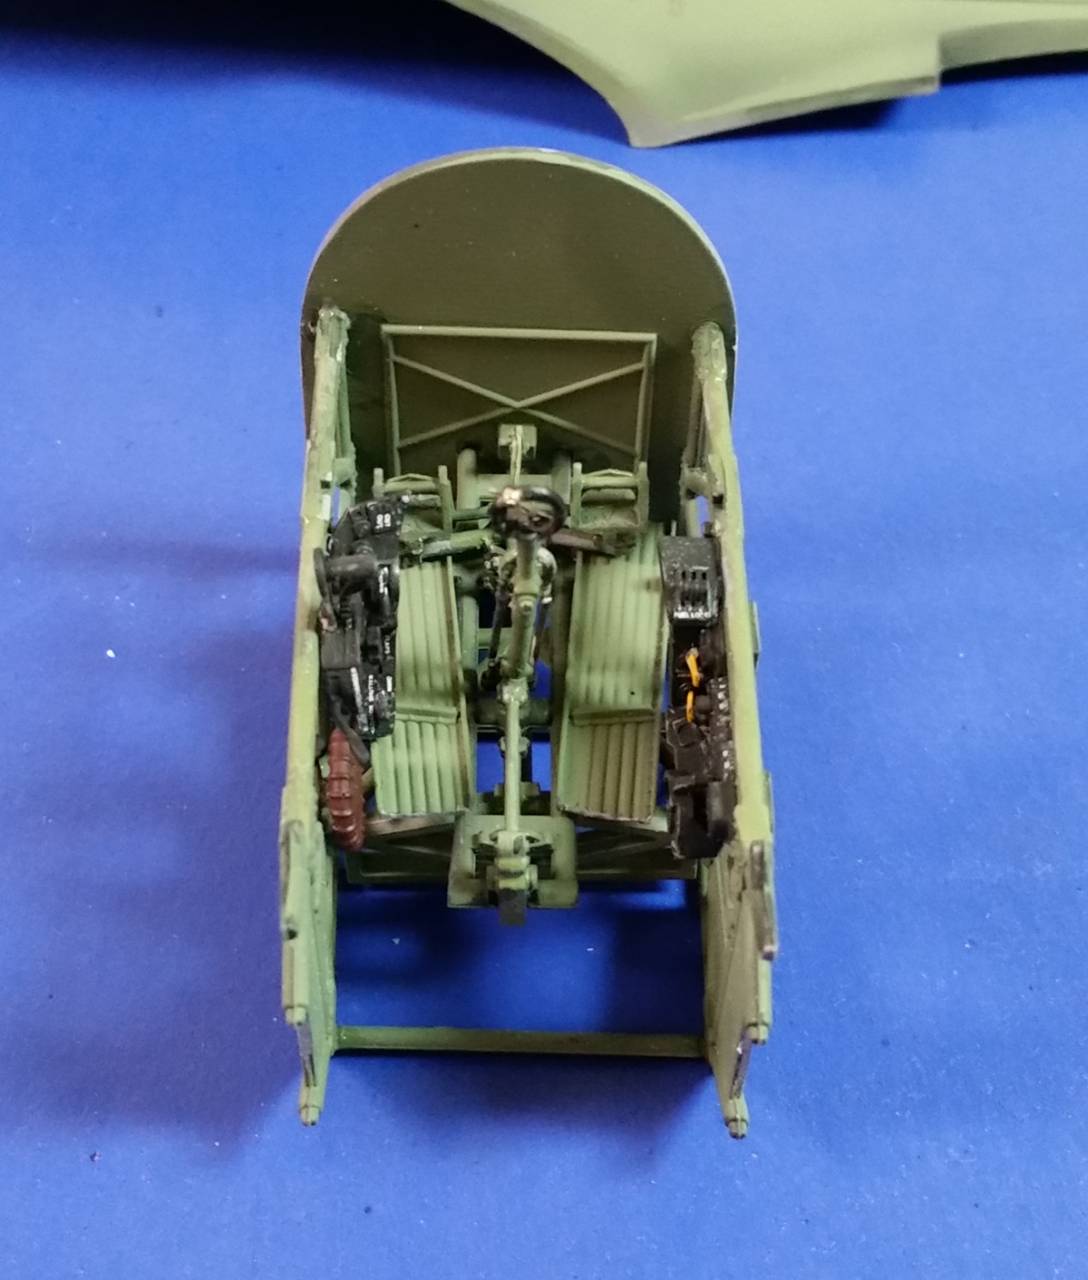
I proceeded to clean the fuselage, not much needed. Following the instructions, I removed the two raised things on each upper wing. I'm not a Spitfire person, so I'm sorry I don't know what they are called, or what they were used for! An easy job, and from the reference pictures they are not on the plane I'm doing. So far, so good. This is going really fast!

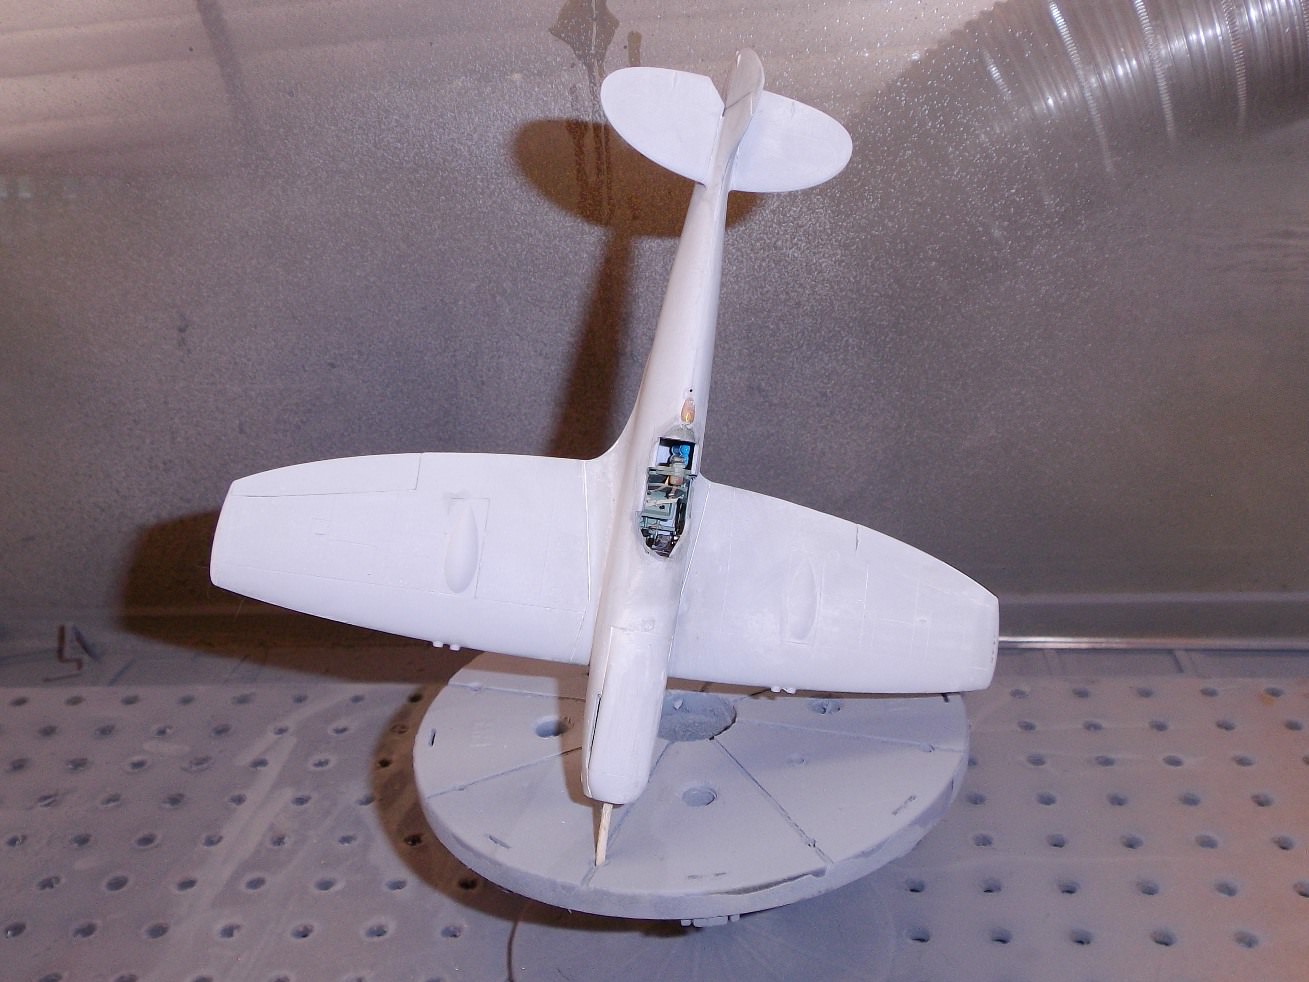
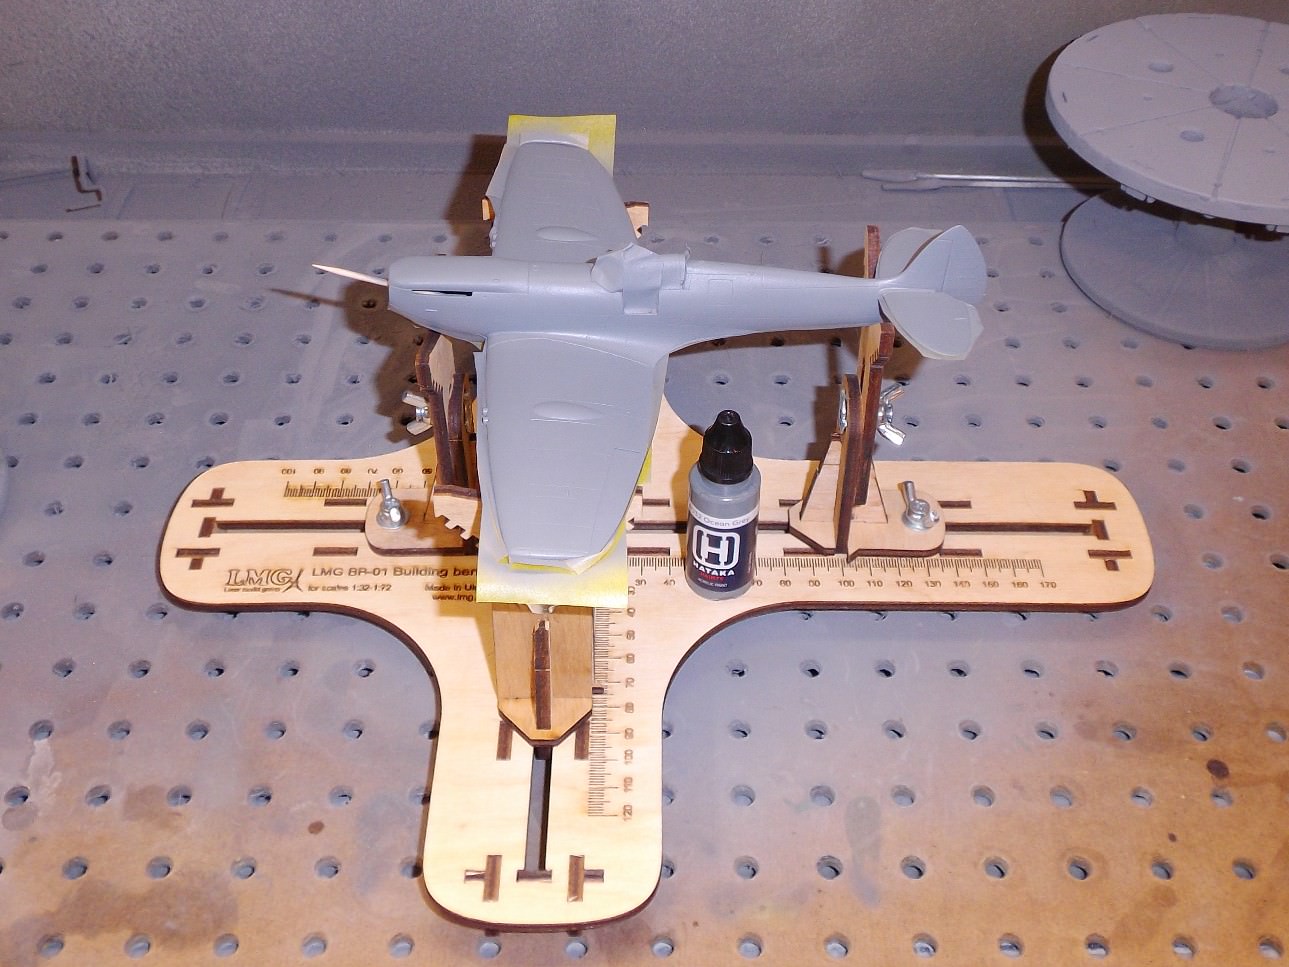
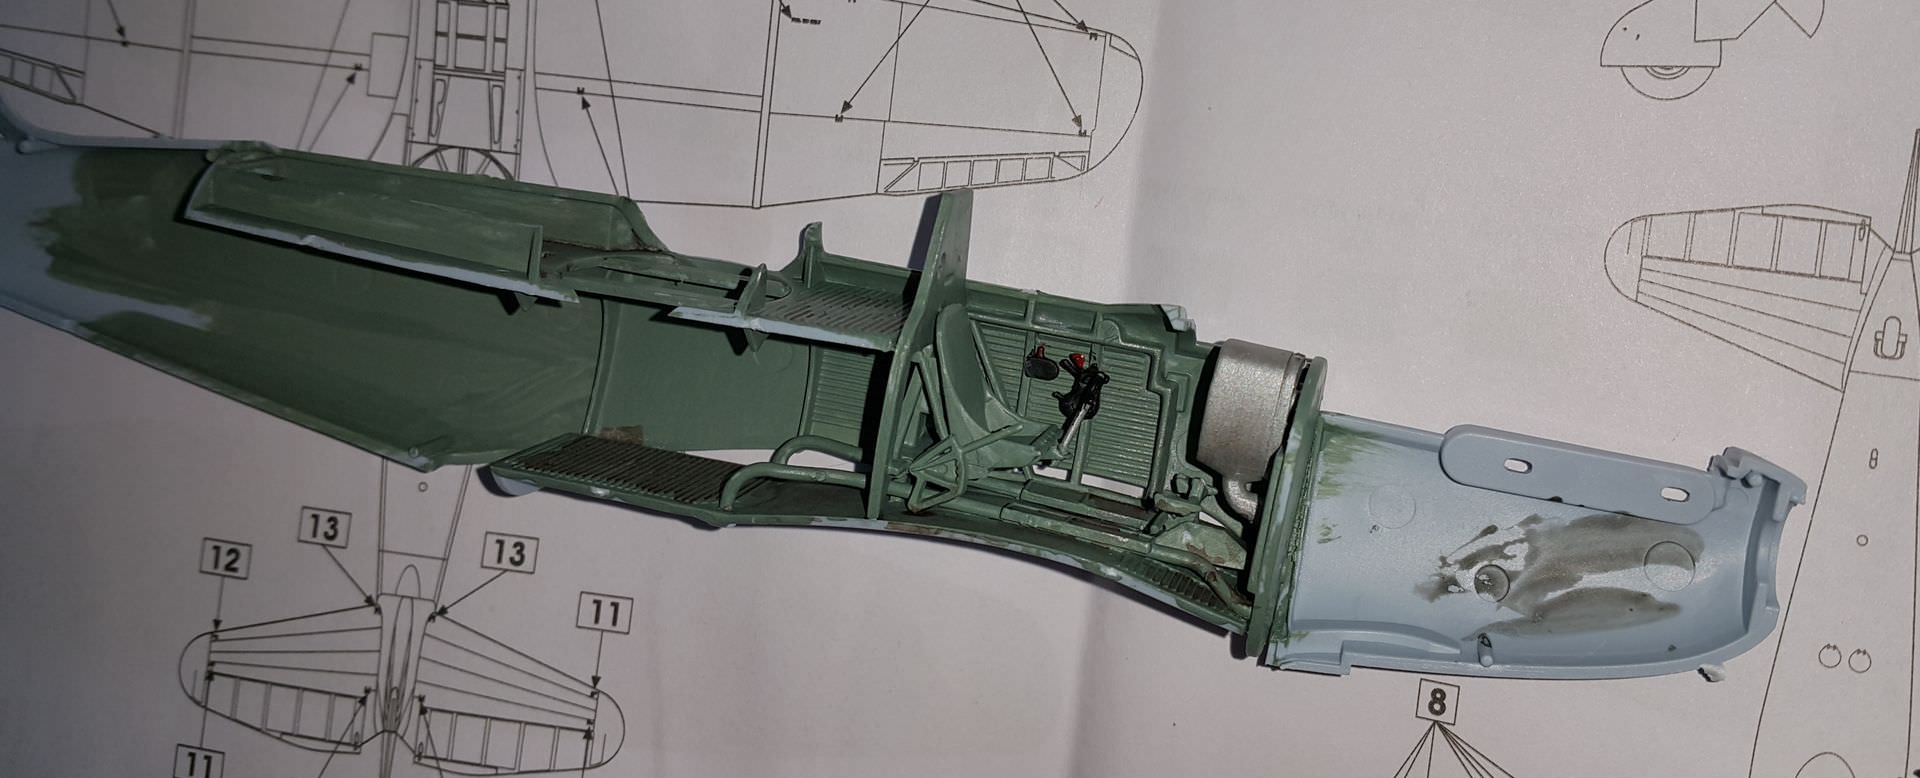
I broke from the instructions and opted to glue the top wings to the fuselage prior to adding the main underwing.

I tend to go out of my way to avoid doing filler, and this method usually works to avoid fit issues for wing roots. This was no exception. There's a little wiggle room at the root fuselage join, but nothing to complain about.

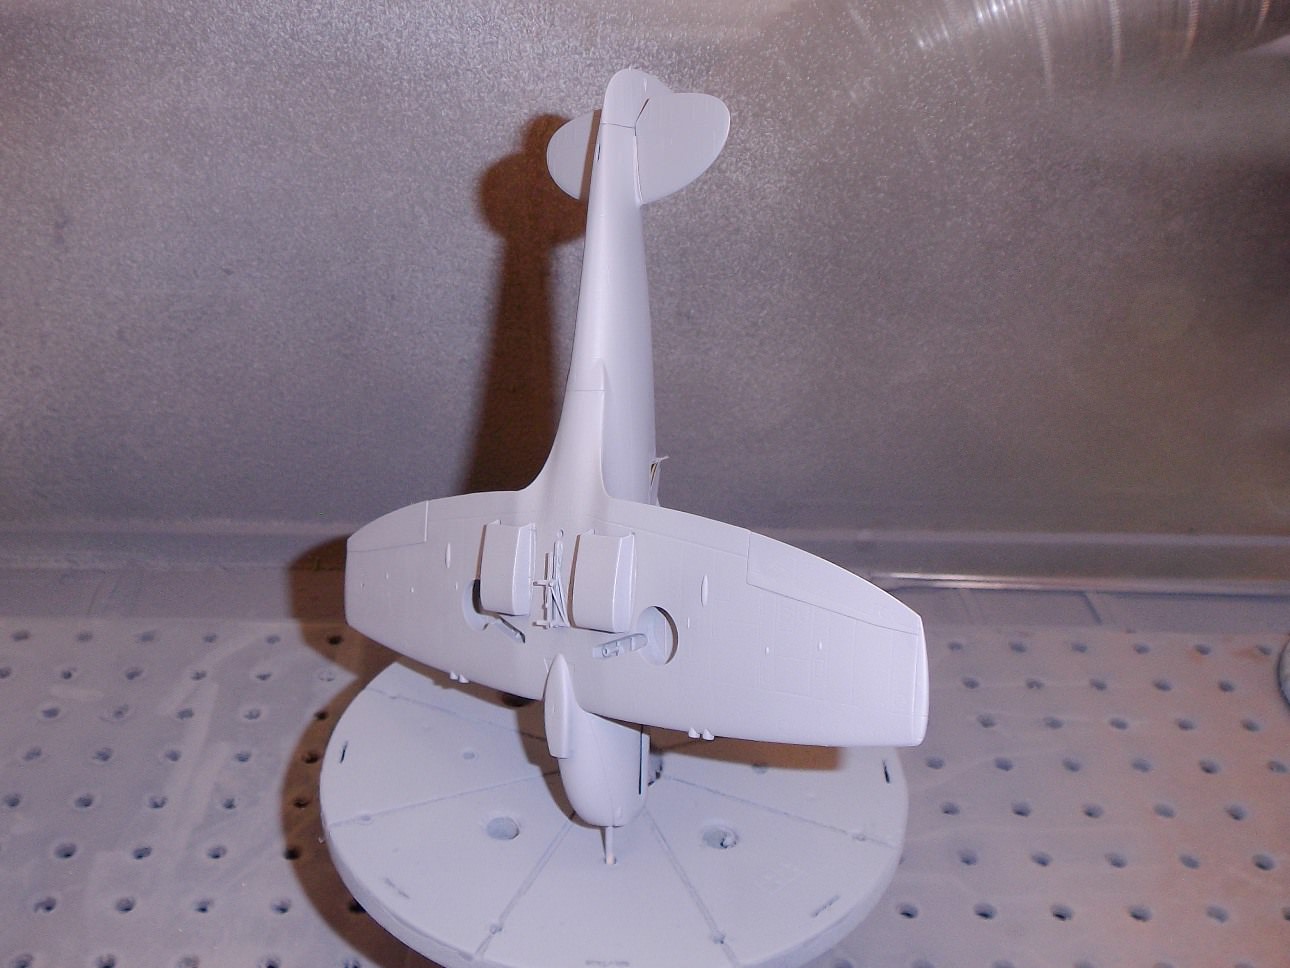
I added the lower wing, complete with all the stuff that goes on, starting at the leading edge and working to the tips.

I then started to gently wick the glue onto the trailing edge. This edge is so thin, my concern was the glue would mare the trailing edge, so I went slow and easy. No marring.

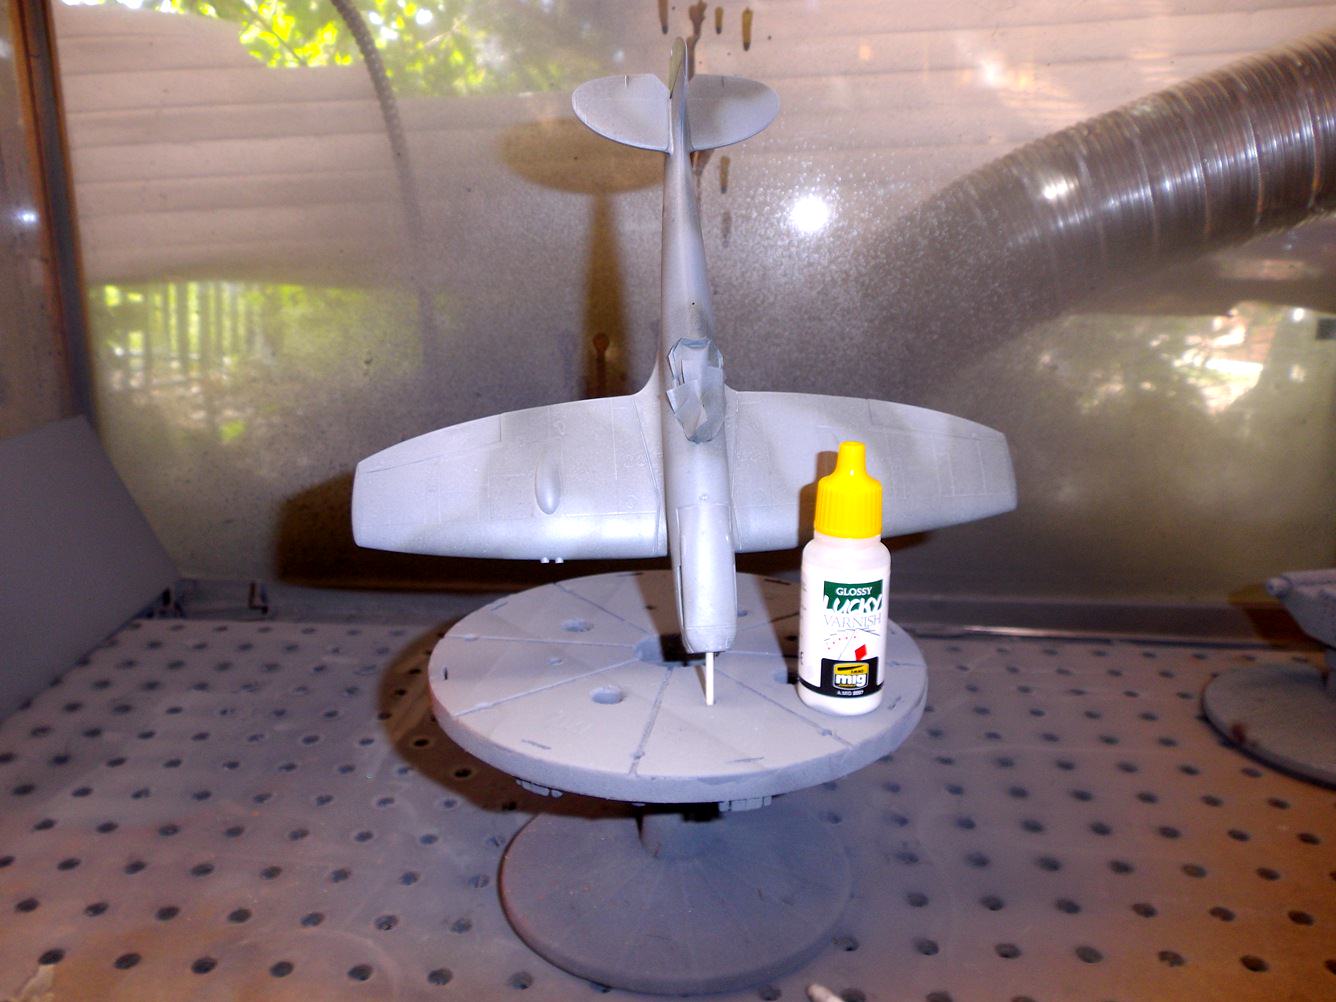
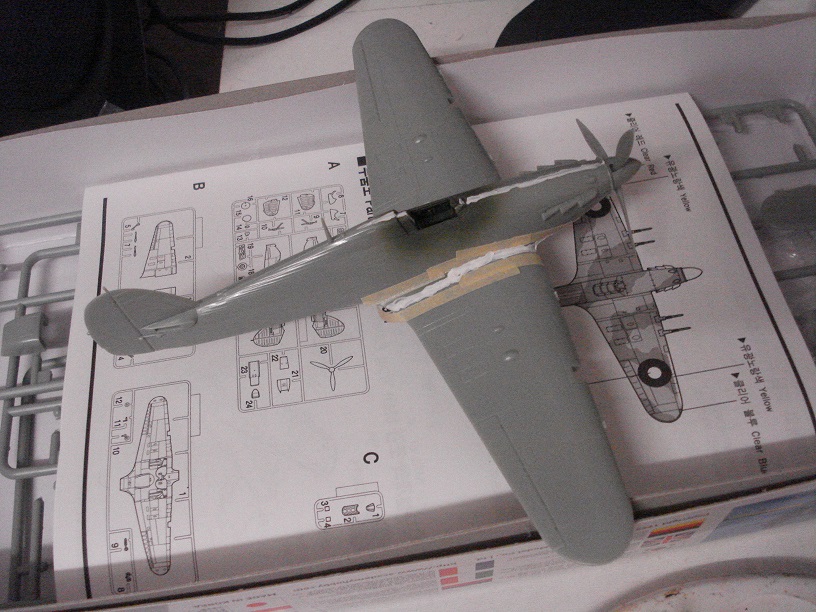
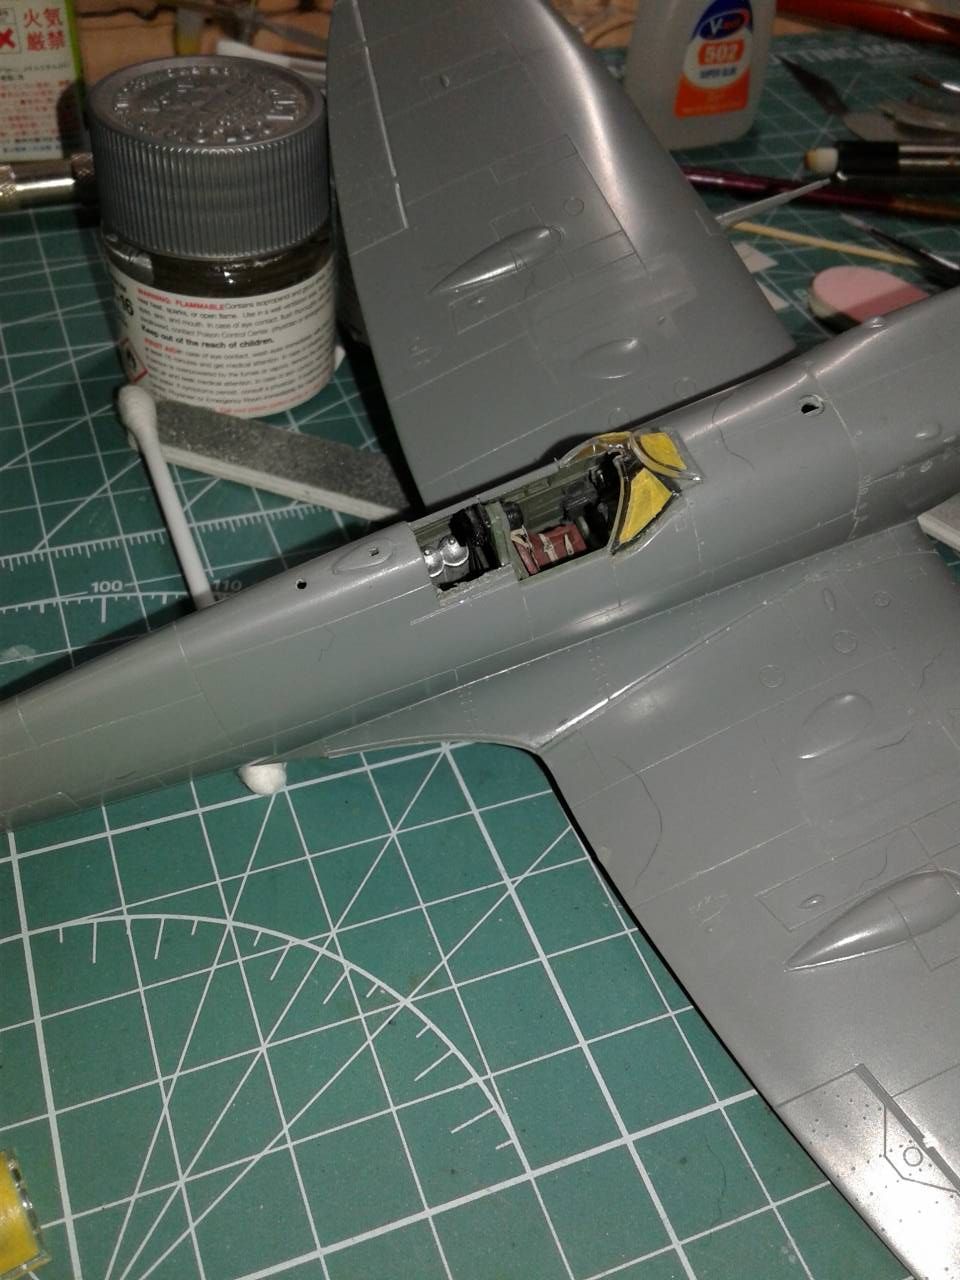
This was going so fast, that I realized I had to mask the canopy, thinking "Well this will slow things down...", two hours! I'm still grinning on that! I put the front and rear canopies on with some Crystal Clear and it looked great!


Of course, something going this smooth will have a bump.

While sanding the leading edges of the wing, my thumb decided to crash the party and put just a little too pressure on the rear windshield. It cracked. Still taped, I think it'll be fine with some Crystal Clear and little green paint on a raised detail I missed on the inside.

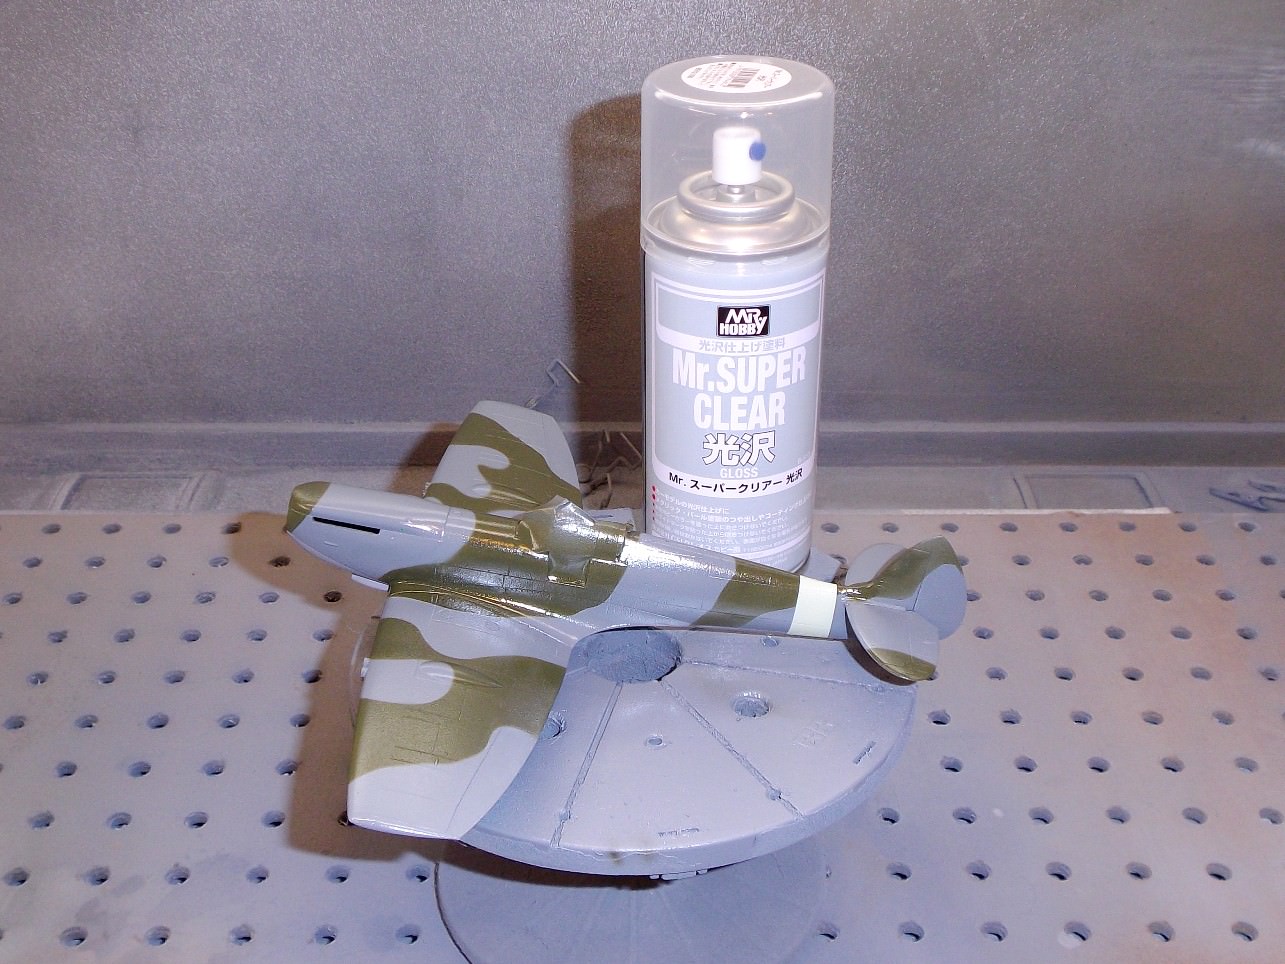
All in all, this kit is definitely holding up to one of the first of the "Shake and bake" kits. Total time from finishing the cockpit to here is three days, at best an hour a day? Most likely less, though I am letting the glue cure a bit! Ha!

Till next time enjoy!
TacFireGuru
_VISITCOMMUNITY
Colorado, United States
Joined: December 25, 2004
KitMaker: 3,770 posts
AeroScale: 201 posts
Posted: Wednesday, November 07, 2018 - 06:16 AM UTC
Kit decals destroyed for the Spit. Broke apart when putting the large Roundels on. A kind Gentleman from a FB page was kind to send me a replacement AeroMaster set. I hope to get some on by this weekend.

Mike
Torpon
_VISITCOMMUNITY
Spain / España
Joined: February 28, 2012
KitMaker: 103 posts
AeroScale: 102 posts
Posted: Saturday, November 17, 2018 - 02:35 AM UTC
Disaster!!!!

I broke the canopy of my Harrier!!!

I have been a few weeks waiting for a replacement part from Airfix but no luck.


Torpon
_VISITCOMMUNITY
Spain / España
Joined: February 28, 2012
KitMaker: 103 posts
AeroScale: 102 posts
Posted: Saturday, November 17, 2018 - 02:40 AM UTC
I have glued all very quickly and I am calling it a day.


See you around!!!
MichaelSatin
Staff MemberCampaigns Administrator
AEROSCALE
_VISITCOMMUNITY
Colorado, United States
Joined: January 19, 2008
KitMaker: 3,909 posts
AeroScale: 2,904 posts
Posted: Saturday, November 17, 2018 - 06:59 AM UTC
Nice work Carlos! Hope you get the replacement canopy someday.

Sorry about the decals Mike but I'm sure you'll pull it out.

Welcome Stefan!

You've got it on the run John.

Looking good Pasi!

I haven't given up on the 1/32 Tempest, just have to finish a couple of others to a deadline.

Keep it up everyone!

Michael
TacFireGuru
_VISITCOMMUNITY
Colorado, United States
Joined: December 25, 2004
KitMaker: 3,770 posts
AeroScale: 201 posts
Posted: Monday, November 26, 2018 - 03:13 AM UTC
Unfortunately, I'll be dropping from the campaign. My shop is being emptied and renovated. Maybe next time.

Mike
MichaelSatin
Staff MemberCampaigns Administrator
AEROSCALE
_VISITCOMMUNITY
Colorado, United States
Joined: January 19, 2008
KitMaker: 3,909 posts
AeroScale: 2,904 posts
Posted: Monday, November 26, 2018 - 03:26 AM UTC
Sorry to hear that Mike. Good luck with the renovation and hope to see you around when it's done!

Michael
bomber14
_VISITCOMMUNITY
New Jersey, United States
Joined: February 02, 2015
KitMaker: 330 posts
AeroScale: 286 posts
Posted: Monday, November 26, 2018 - 02:35 PM UTC

Quoted Text

Round two of Ocean Gray.


Mike


mike what paint are you using there? hataka?

joe
Dangeroo
#023
_VISITCOMMUNITY
Zurich, Switzerland
Joined: March 13, 2009
KitMaker: 2,058 posts
AeroScale: 67 posts
Posted: Saturday, December 01, 2018 - 09:31 PM UTC
REally nice Looking Harrier there, Coarlos!

I called it quits with the Hurricane, hit a Murphy moment and finally put it on the kids pile…

Now I'm back with a vengeance, a double Spitfire build: one of the first and one of the last Spitfires, both by Airfix, built in parallel, the Mk. I and the Mk. 22.


Here are the starting pix and the way Things stand now.


Cheers!
Stefan
Pave-Hawk
_VISITCOMMUNITY
Western Australia, Australia
Joined: May 05, 2006
KitMaker: 900 posts
AeroScale: 200 posts
Posted: Tuesday, December 04, 2018 - 08:45 PM UTC
Finally made a start on my Airfix Defiant.
The Instrument panel decal is nice, and fits over the part quite well with a bit of decal solvent.


Cockpit is pretty much done and ready for the fuselage to be closed up.
TacFireGuru
_VISITCOMMUNITY
Colorado, United States
Joined: December 25, 2004
KitMaker: 3,770 posts
AeroScale: 201 posts
Posted: Tuesday, December 11, 2018 - 12:19 AM UTC

Quoted Text


Quoted Text

Round two of Ocean Gray.


Mike


mike what paint are you using there? hataka?

joe


Yes, I used a Hataka set of paints for the Spit.

Mike
MichaelSatin
Staff MemberCampaigns Administrator
AEROSCALE
_VISITCOMMUNITY
Colorado, United States
Joined: January 19, 2008
KitMaker: 3,909 posts
AeroScale: 2,904 posts
Posted: Friday, December 14, 2018 - 05:32 AM UTC
Going well here!

Progress on the Special Hobby 1/32 Tempest V:


Not a kit for the faint of heart, but slow and steady wins the race!

Michael
PasiAhopelto
_VISITCOMMUNITY
Uusimaa, Finland
Joined: October 01, 2016
KitMaker: 514 posts
AeroScale: 239 posts
Posted: Tuesday, December 18, 2018 - 04:51 AM UTC
And done:


Two more photos in the gallery.

Thanks for the campaign.

Makes me want to build more NMF planes...
eMan
#298
_VISITCOMMUNITY
Hong Kong S.A.R. / 繁體
Joined: August 08, 2002
KitMaker: 1,182 posts
AeroScale: 351 posts
Posted: Tuesday, December 18, 2018 - 08:48 PM UTC
Here is my entry, Classic Airframes 1/48 Westland Whirlwind.