

Done and done. Photos will be coming on shortly.
Could you outline just how I might "sand down the gloss and then polish out"?
I have heard of it done but have no idea how I might accomplish same.
Hosted by Rowan Baylis
Monogram F3F-3 from many moons ago

165thspc

#521

Joined: April 13, 2011
KitMaker: 9,465 posts
AeroScale: 375 posts
Posted: Thursday, March 01, 2018 - 09:11 PM UTC


Kevlar06
Joined: March 15, 2009
KitMaker: 3,670 posts
AeroScale: 833 posts
Posted: Friday, March 02, 2018 - 12:51 AM UTC
I'm not sure how Joel does it, but I use oooo fine steel wool to do my paint and decal finish sanding. You need to be careful not to over sand though--and buff in one direction (usually from leading edge to trailing edge). After getting the finish where I want it, I then go over it with 8000 and 12000 grade Micro-Mesh sandpaper to finish. Sometimes I'll give it a light coat of MM Sealer for Metalizer or Alclad Gloss, depending on the finish I'm trying to achieve.
VR, Russ
VR, Russ
Joel_W
Joined: December 04, 2010
KitMaker: 11,666 posts
AeroScale: 7,410 posts
Posted: Friday, March 02, 2018 - 04:00 AM UTC
Depends on just how much gloss you used, and the type of gloss. I like lacquer based clearcoats and apply 3 wet coats. I'd also spray a piece of scrap plastic to test/practice with.
If you have a lot of clearcoat to level, gently sand with wet 2000 sponge sand paper, then I switch to the Micro mesh system of 4,000, 6,000, 8,000, & finally 12,000. Next comes Mequiar's Scratch X2.0 rubbed in a circle pattern, and finally a liquid Carnuda wax.
If you're not comfortable with the 2,000 sponge, you can 3,000 grit as well, and work with that.
I'm no pro at it, and do screw up every so often. Just use water, and go slow and easy. Feel the lip often to make sure you're not going any further then you have to.
One thing to keep in mind is to stay away from lips or any sharp edges as they have the least amount of clear on them, and even less paint.
Joel

165thspc
#521
Joined: April 13, 2011
KitMaker: 9,465 posts
AeroScale: 375 posts
Posted: Friday, March 02, 2018 - 05:31 AM UTC
Perhaps a foolish question:
Where do you get these polishing materials?
I have a little jeweler's rouge that came with some Dremel tools I bought a while back and plenty of 600 grit sand paper but that is about as far as my polishing experience goes.
Waiting now for the second coat of gloss to dry on the wing.
Where do you get these polishing materials?
I have a little jeweler's rouge that came with some Dremel tools I bought a while back and plenty of 600 grit sand paper but that is about as far as my polishing experience goes.
Waiting now for the second coat of gloss to dry on the wing.
Kevlar06
Joined: March 15, 2009
KitMaker: 3,670 posts
AeroScale: 833 posts
Posted: Friday, March 02, 2018 - 05:43 AM UTC
Quoted Text
Perhaps a foolish question:
Where do you get these polishing materials?
I have a little jeweler's rouge that came with some Dremel tools I bought a while back and plenty of 600 grit sand paper but that is about as far as my polishing experience goes.
Waiting now for the second coat of gloss to dry on the wing.
First-- DO NOT use the Dremel polishing rouge! Or the 600 grit sandpaper-- too rough! The Dremel rouge is designed for metal and glass polishing, and will screw up a paint finish in a heartbeat (don't ask how I know)! 600 sandpaper looks smooth, but its too rough for paint/decal work. I get my Micro Mesh from Micro-Mark. But as I said, you can use oooo fine steel wool--I get mine in the paint department at Home Depot. Same method as Joel's-- I just don't work as hard with the steel wool, and don't use water while sanding (best to work over a trash can, so the steel wool fibers don't get everywhere) By using the steel wool, I can see what I'm doing to the finish without the interference of the water. I do wash the parts after use to get the steel wool "dust and fiber" completely off, then blast it dry with my airbrush set at about 60 psi. Then I can start with 8000 or 12000 Micro Mesh. The Micro Mesh is actually a polishing cloth at 8000 or 12000 grit. It's also useful for polishing out canopies. If you don't want to use Micro-Mesh, you can go to any good Auto Parts store and ask for 4000, 6000, 8000, and 12000 sanding pads/polishing cloth or fabric, but the lower grits are more like sandpaper.
VR, Russ
Kevlar06
Joined: March 15, 2009
KitMaker: 3,670 posts
AeroScale: 833 posts
Posted: Friday, March 02, 2018 - 05:52 AM UTC
P.S. Micro Mark (see above) --is the go too place for hobby tools, they have everything you'd ever need. And I'd give the gloss coats plenty of time to harden before using any sanding materials. I like to wait a week before touching the surface of a floss coat with sanding materials, but depending on what you use, you can usually start sanding in 48 hours.
VR, Russ
VR, Russ
165thspc
#521
Joined: April 13, 2011
KitMaker: 9,465 posts
AeroScale: 375 posts
Posted: Friday, March 02, 2018 - 05:53 AM UTC
Not to worry - I knew not to use the rouge or the 600 grit sandpaper on the paint finish. I just mentioned those because that is what I have on hand that I use most everyday.
Anything finer I have no experience with. As I say I am normally an armor modeler so not much use for anything finer than the 600 grit in most cases.
By the way; Thanks guys.
Anything finer I have no experience with. As I say I am normally an armor modeler so not much use for anything finer than the 600 grit in most cases.
By the way; Thanks guys.
Kevlar06
Joined: March 15, 2009
KitMaker: 3,670 posts
AeroScale: 833 posts
Posted: Friday, March 02, 2018 - 05:56 AM UTC
Michael-- see PS above-- I'd wait to sand until the gloss coat has plenty of time to harden. just another note-- I used Dremel rouge on some yellow paint a few years ago, ended up with orange paint (Dremel is brick red)!
VR, Russ
VR, Russ
Joel_W
Joined: December 04, 2010
KitMaker: 11,666 posts
AeroScale: 7,410 posts
Posted: Friday, March 02, 2018 - 06:31 AM UTC
Michael,
I completely agree with Russ about how long to wait. I give it a good week as I really build up the layers when needed.
We must be talking about a different puffing wheel. The one I'm familiar with is white and layered.
Joel
I completely agree with Russ about how long to wait. I give it a good week as I really build up the layers when needed.
We must be talking about a different puffing wheel. The one I'm familiar with is white and layered.
Joel
Kevlar06
Joined: March 15, 2009
KitMaker: 3,670 posts
AeroScale: 833 posts
Posted: Friday, March 02, 2018 - 06:47 AM UTC
Joel, He's talking about the rouge, which is a kind of paste that you can use with the felt buffing wheels or the white cloth wheel you mention. The rouge comes in one of those containers the cut-off wheels come in. It's good for polishing really hard materials with the felt pads, but its red, which leaves a red residue on any other surfaces, especially plastic or wood. At too high a speed on plastic, it just digs in.
VR, Russ
VR, Russ
Joel_W
Joined: December 04, 2010
KitMaker: 11,666 posts
AeroScale: 7,410 posts
Posted: Friday, March 02, 2018 - 06:52 AM UTC
Quoted Text
Joel, He's talking about the rouge, which is a kind of paste that you can use with the felt buffing wheels or the white cloth wheel you mention. The rouge comes in one of those containers the cut-off wheels come in. It's good for polishing really hard materials with the felt pads, but its red, which leaves a red residue on any other surfaces, especially plastic or wood. At too high a speed on plastic, it just digs in.
VR, Russ
Russ,
Thanks for the clarification. I'll just continue to use my car polishes.
Joel
Kevlar06
Joined: March 15, 2009
KitMaker: 3,670 posts
AeroScale: 833 posts
Posted: Friday, March 02, 2018 - 07:09 AM UTC
Quoted Text
Russ,
Thanks for the clarification. I'll just continue to use my car polishes.
Joel
Joel,
Not to hi-jack Michael's post, I see you use Marquiers liquid and carnuba wax. I build classic open wheel racers, and an occasional Hydroplane in plastic and resin. I've always been leery of using car waxes on model paint finishes, for fear it will affect the paint beneath. Have you been using these waxes for long, and do you notice any after effects? I have a can of Johnson's clear paste wax that I polish my Shopsmith saw/lathe stainless surfaces with, and I've always wondered if it will work on model car surfaces.
VR, Russ
Joel_W
Joined: December 04, 2010
KitMaker: 11,666 posts
AeroScale: 7,410 posts
Posted: Friday, March 02, 2018 - 07:54 AM UTC
Quoted Text
Quoted Text
Russ,
Thanks for the clarification. I'll just continue to use my car polishes.
Joel
Joel,
Not to hi-jack Michael's post, I see you use Marquiers liquid and carnuba wax. I build classic open wheel racers, and an occasional Hydroplane in plastic and resin. I've always been leery of using car waxes on model paint finishes, for fear it will affect the paint beneath. Have you been using these waxes for long, and do you notice any after effects? I have a can of Johnson's clear paste wax that I polish my Shopsmith saw/lathe stainless surfaces with, and I've always wondered if it will work on model car surfaces.
VR, Russ
Russ,
I haven't built a race car in years, but I'm getting back into it rotating with aircraft. but I do use the Meguiar's Scratch X2.0 to even polish canopies, and like I said clearcoats. Never had any issues. As for waxing, the only wax I've used is their liquid Carnauba wax, not the paste. Never had any issues with it either of yellowing over time. then again, my models are never in direct sunlight which can cause Carnauba waxes to yellow.
Joel
165thspc
#521
Joined: April 13, 2011
KitMaker: 9,465 posts
AeroScale: 375 posts
Posted: Friday, March 02, 2018 - 08:13 AM UTC
Well guys I know about letting the clear coat have several days (or weeks) to cure. (Again experience carried over from my Dad and painting cars.)
165thspc
#521
Joined: April 13, 2011
KitMaker: 9,465 posts
AeroScale: 375 posts
Posted: Saturday, March 03, 2018 - 11:55 AM UTC
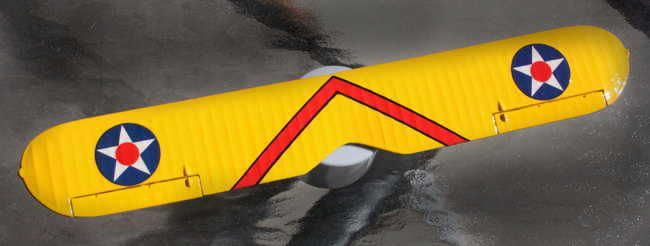
The latest version of the redone top wing:
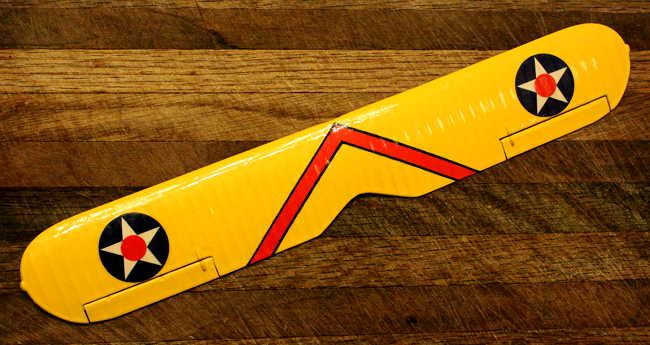
It still doesn't pop the way I wish but the white is whiter!
Below is the before photo:
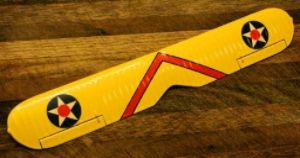

It still doesn't pop the way I wish but the white is whiter!
Below is the before photo:

165thspc
#521
Joined: April 13, 2011
KitMaker: 9,465 posts
AeroScale: 375 posts
Posted: Saturday, March 03, 2018 - 11:59 AM UTC
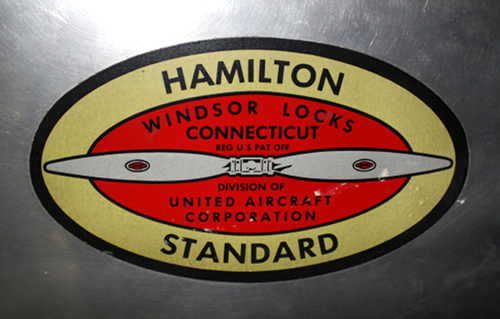
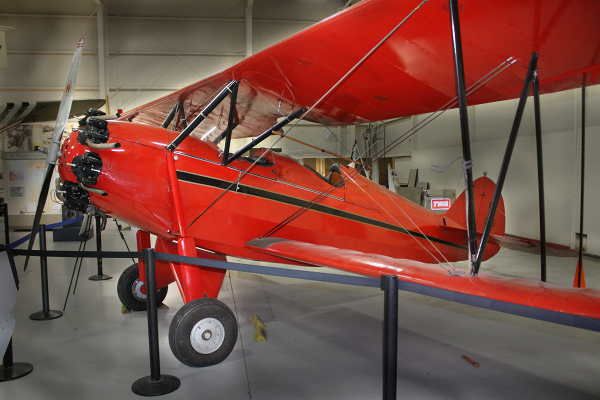
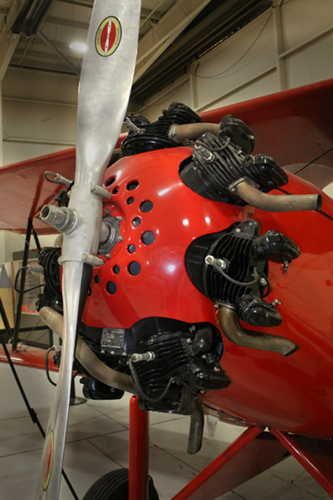
Made a trip to the local Avaition Museum today and came across something that is now becoming very fimilar:


Joel_W
Joined: December 04, 2010
KitMaker: 11,666 posts
AeroScale: 7,410 posts
Posted: Saturday, March 03, 2018 - 10:24 PM UTC
Michael,
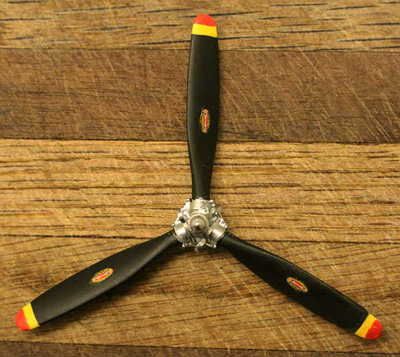
Your prop came out perfectly.
Joel
Your prop came out perfectly.
Joel
Kevlar06
Joined: March 15, 2009
KitMaker: 3,670 posts
AeroScale: 833 posts
Posted: Saturday, March 03, 2018 - 10:40 PM UTC
Quoted Text
The latest version of the redone top wing:
It still doesn't pop the way I wish but the white is whiter!
Below is the before photo:
Michael, I think I know why it doesn't "pop" for you-- go back and take a look at the Yellow Wings decals, and note the red dot in the center does not touch the edges of the stars-- correct for 1930s USN markings, but the kit decals do. The kit decals look a little strange with the oversized red dot. Yellow Wings also makes a set of just star-in-circle decals. I think it looks good as is, but if you're really not happy, I'd go back and look and see what Yellow Wings offers.
VR, Russ
165thspc
#521
Joined: April 13, 2011
KitMaker: 9,465 posts
AeroScale: 375 posts
Posted: Saturday, March 03, 2018 - 11:06 PM UTC
I guess you would say "I'm happy enough".
Joel_W
Joined: December 04, 2010
KitMaker: 11,666 posts
AeroScale: 7,410 posts
Posted: Saturday, March 03, 2018 - 11:12 PM UTC
Michael,
Just checked the top wing before picture and you latest one. The white is whiter, but not to point of popping. Still, I'd say it's more then good enough
Joel
Just checked the top wing before picture and you latest one. The white is whiter, but not to point of popping. Still, I'd say it's more then good enough
Joel
165thspc
#521
Joined: April 13, 2011
KitMaker: 9,465 posts
AeroScale: 375 posts
Posted: Saturday, March 03, 2018 - 11:17 PM UTC
A Waco RNF with Hamilton Propeller - Kentucky Aviation Museum


165thspc
#521
Joined: April 13, 2011
KitMaker: 9,465 posts
AeroScale: 375 posts
Posted: Sunday, March 04, 2018 - 12:02 AM UTC
Hey, just discovered, the white pops a whole lot more in true daylight rather than in the more yellow incandescent lights in my "studio". I do adjust the white balance of my camera to take the incandescents into account but it is still just not the same thing!

 |

WEB HOSTING BY


Copyright ©2021 AeroScale and Kitmaker Network, a subsidiary of Silver Star Enterprises
All Rights Reserved. Please read our Conditions of Use and Privacy Policy.
All Rights Reserved. Please read our Conditions of Use and Privacy Policy.