

You are all very kind. I am honored.
As for the glue. For this mock up I use my stand by of White School Glue. It holds the parts in place and allows me to separate for painting. To join permanently I use Tamiya Extra Thin, MEK, Plastruct White Label, Tamiya Orange Lid, Super Glue Gel and/or Liquid.
Joe
Hosted by Rowan Baylis
1/48 Revell B-24D
fightnjoe

Joined: August 16, 2004
KitMaker: 603 posts
AeroScale: 565 posts
Posted: Wednesday, March 14, 2018 - 07:26 AM UTC
fightnjoe
Joined: August 16, 2004
KitMaker: 603 posts
AeroScale: 565 posts
Posted: Monday, March 26, 2018 - 07:18 AM UTC
And an update on the 1/48 Revell B-24D.
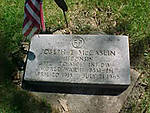
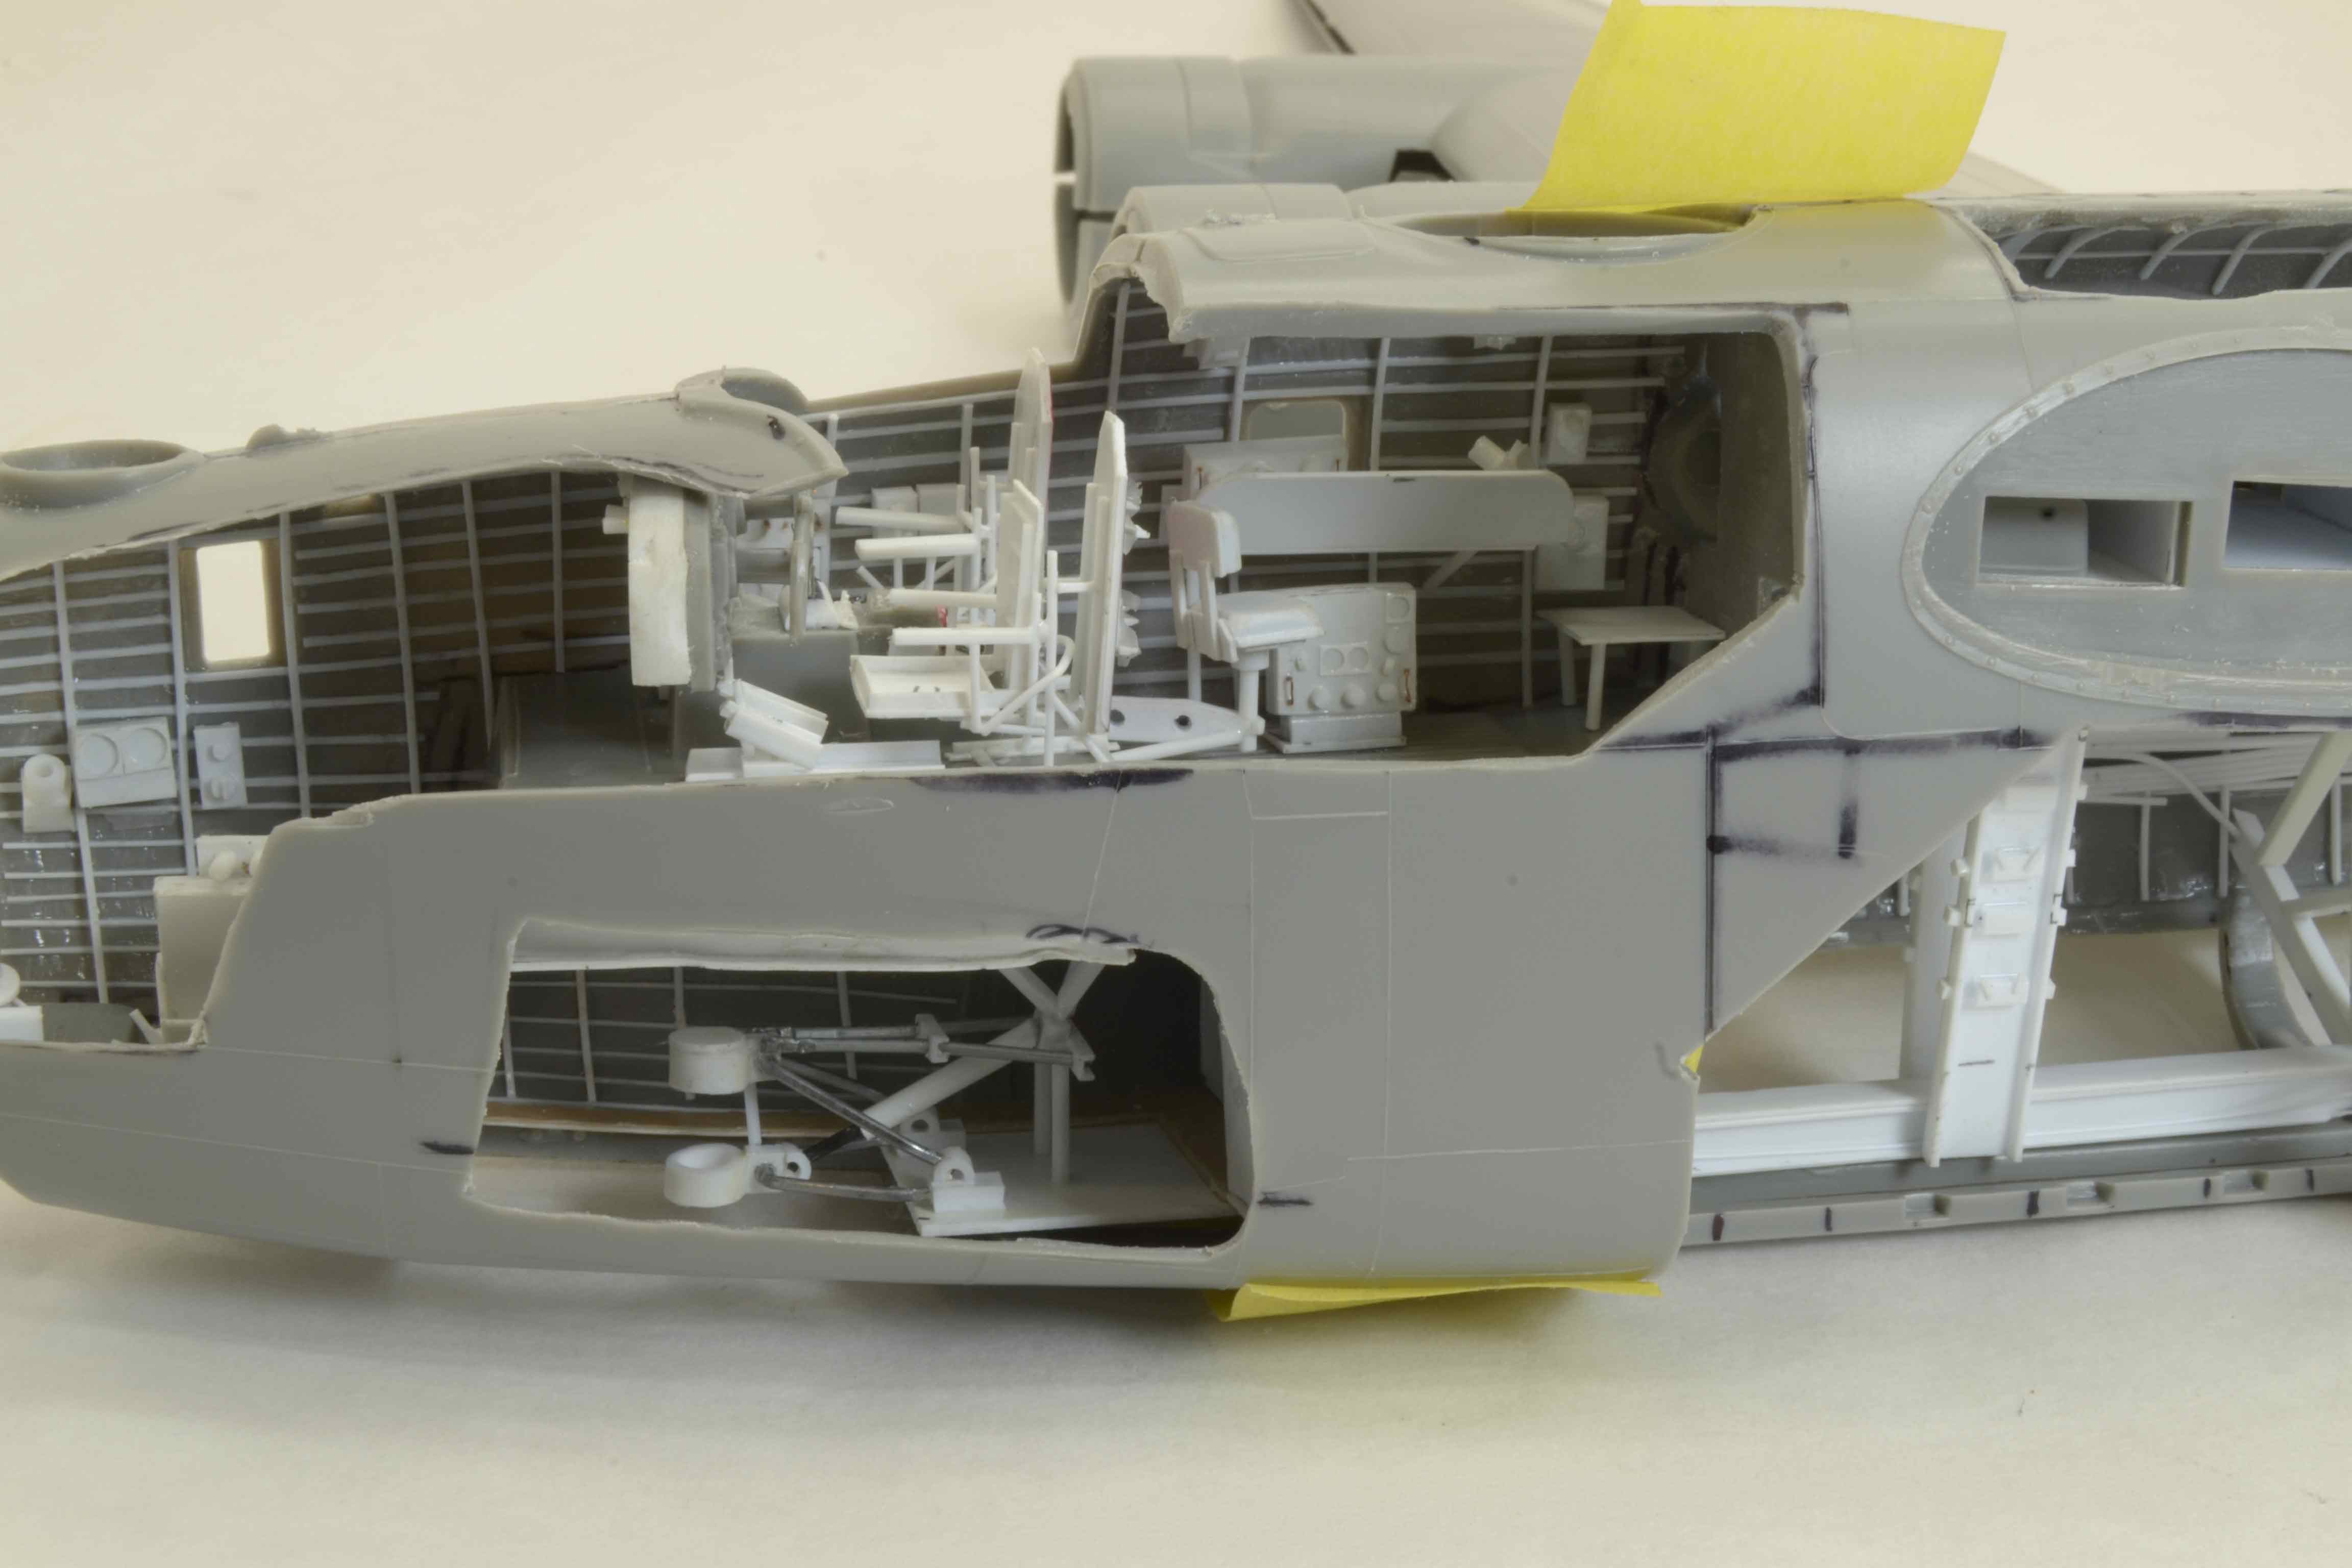
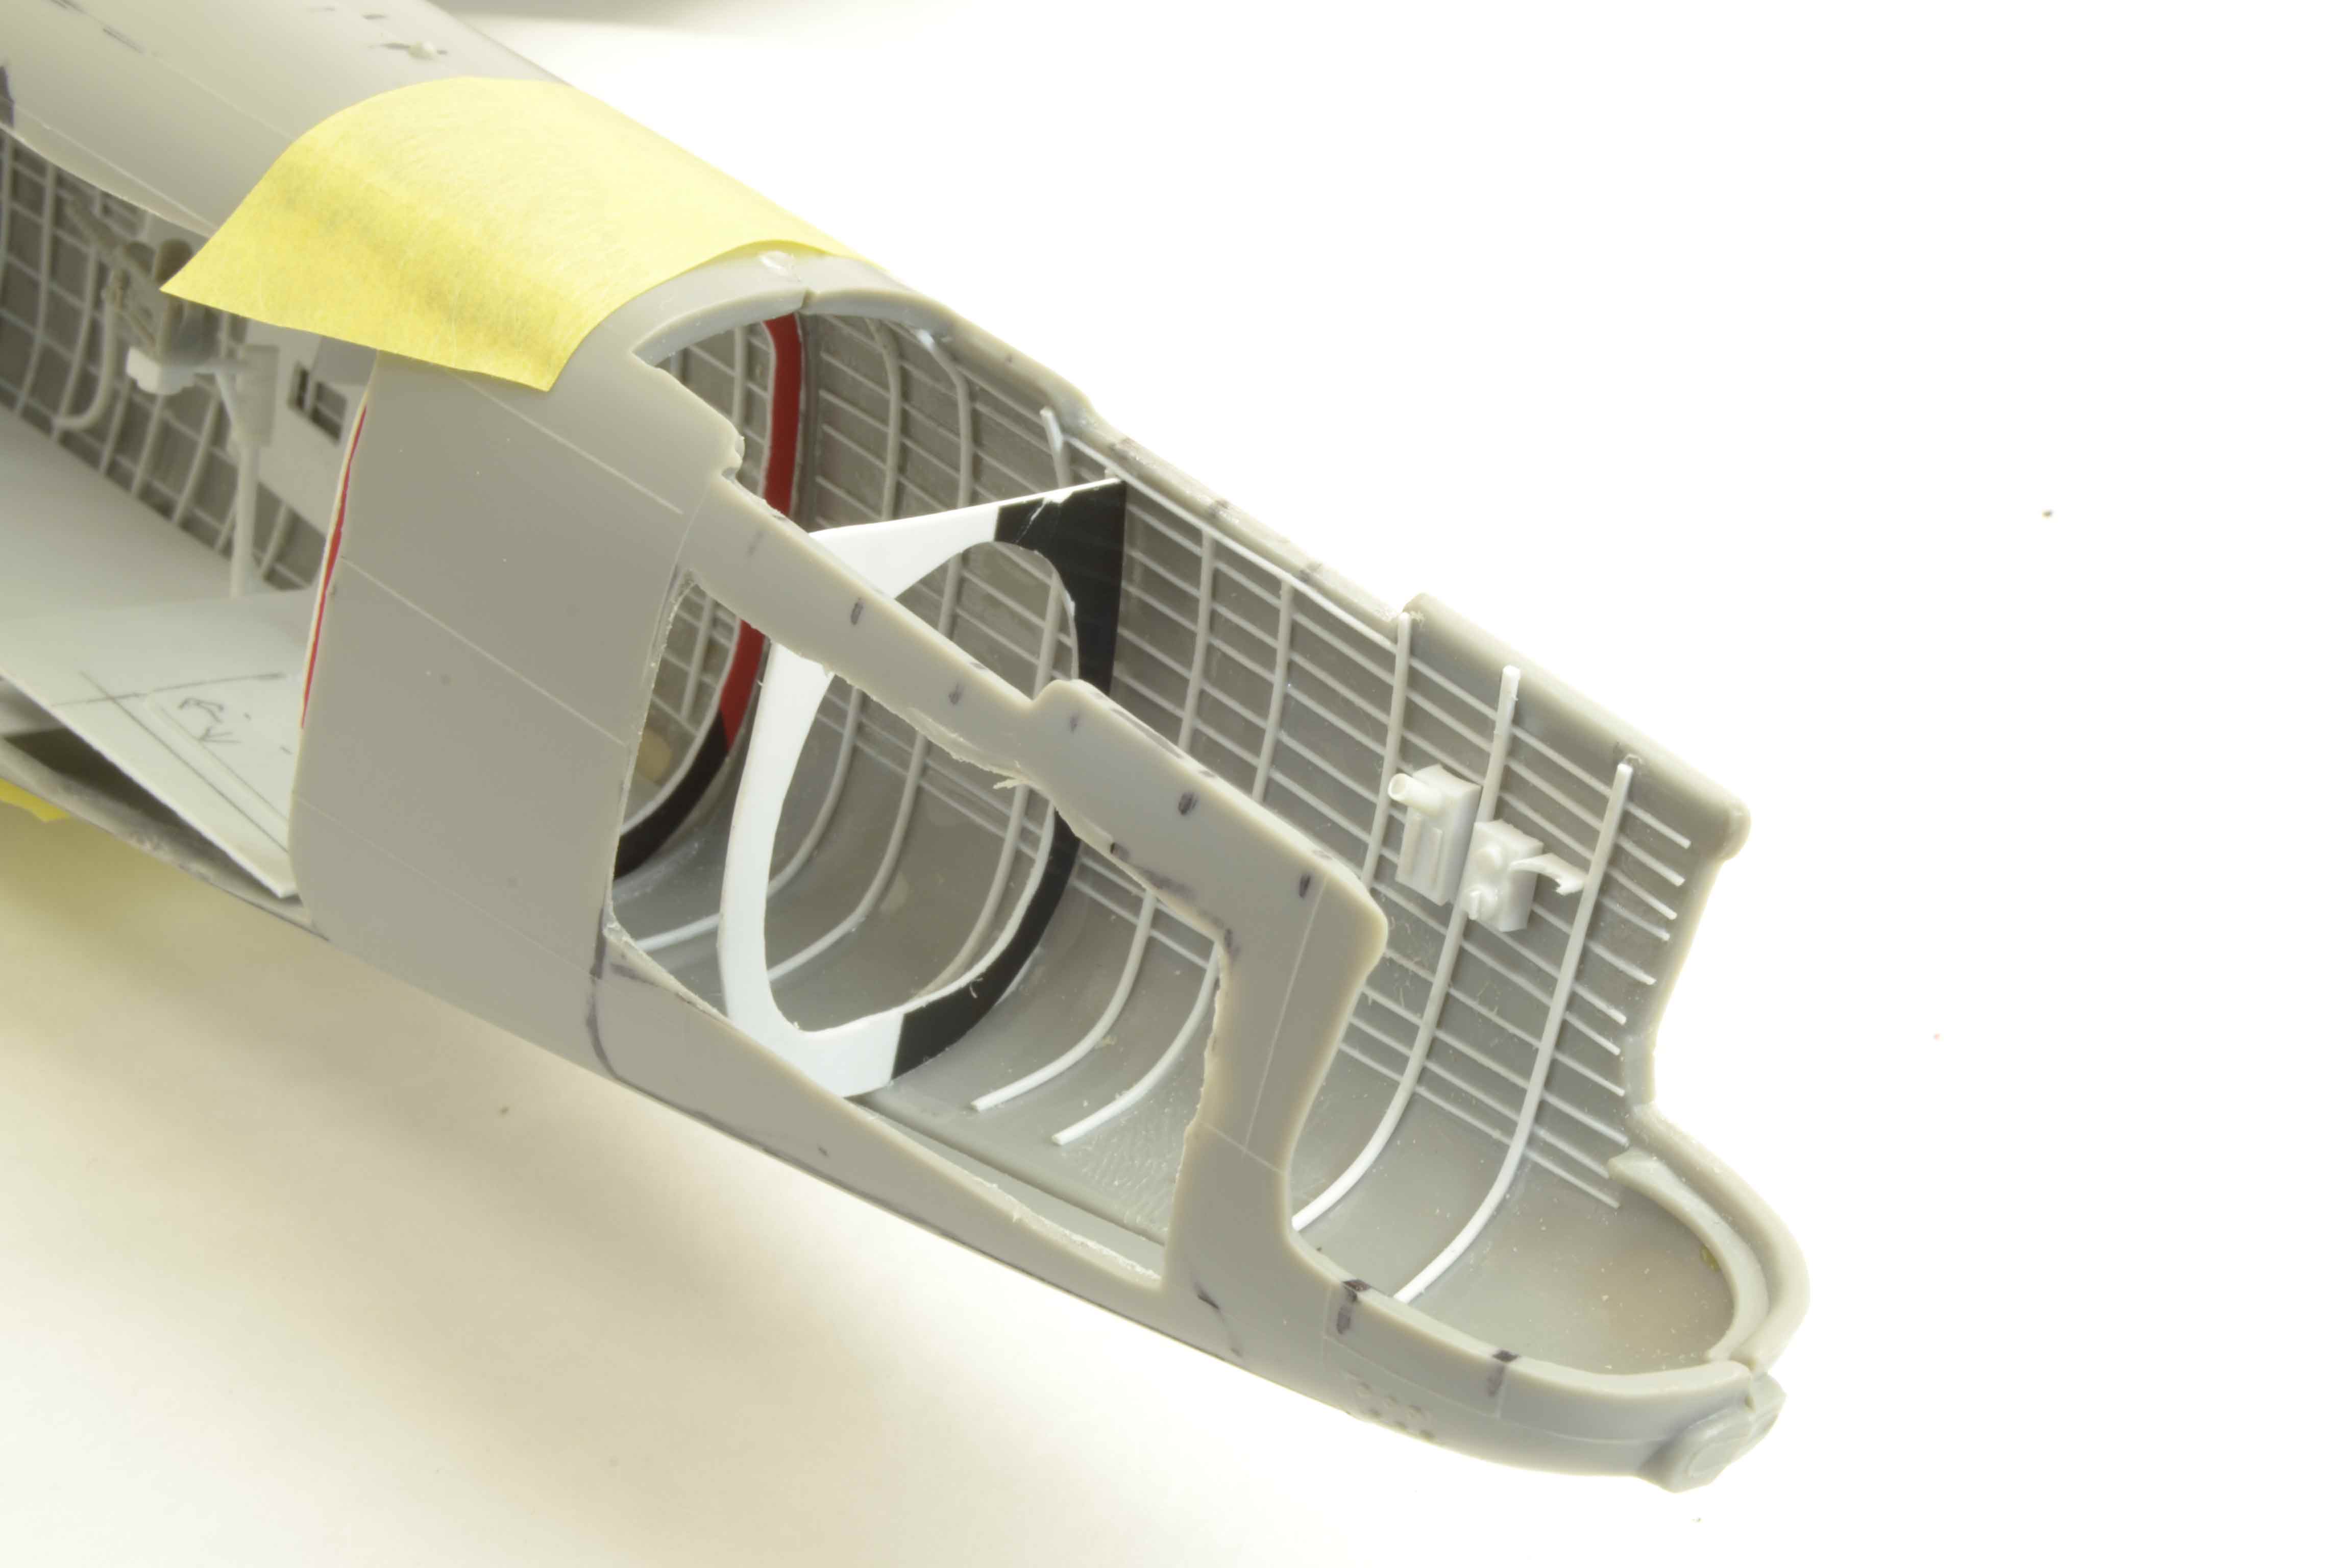
I had to make a decision about the nose gear assembly. The kit part looked more like a blob of plastic that held the actual gear. It just didnt look right compared to the pictures and drawings that I have found. Out came the spare stuff and this is the result.

Also the time has come to bring out the Dremmel and begin to make some rather large holes.
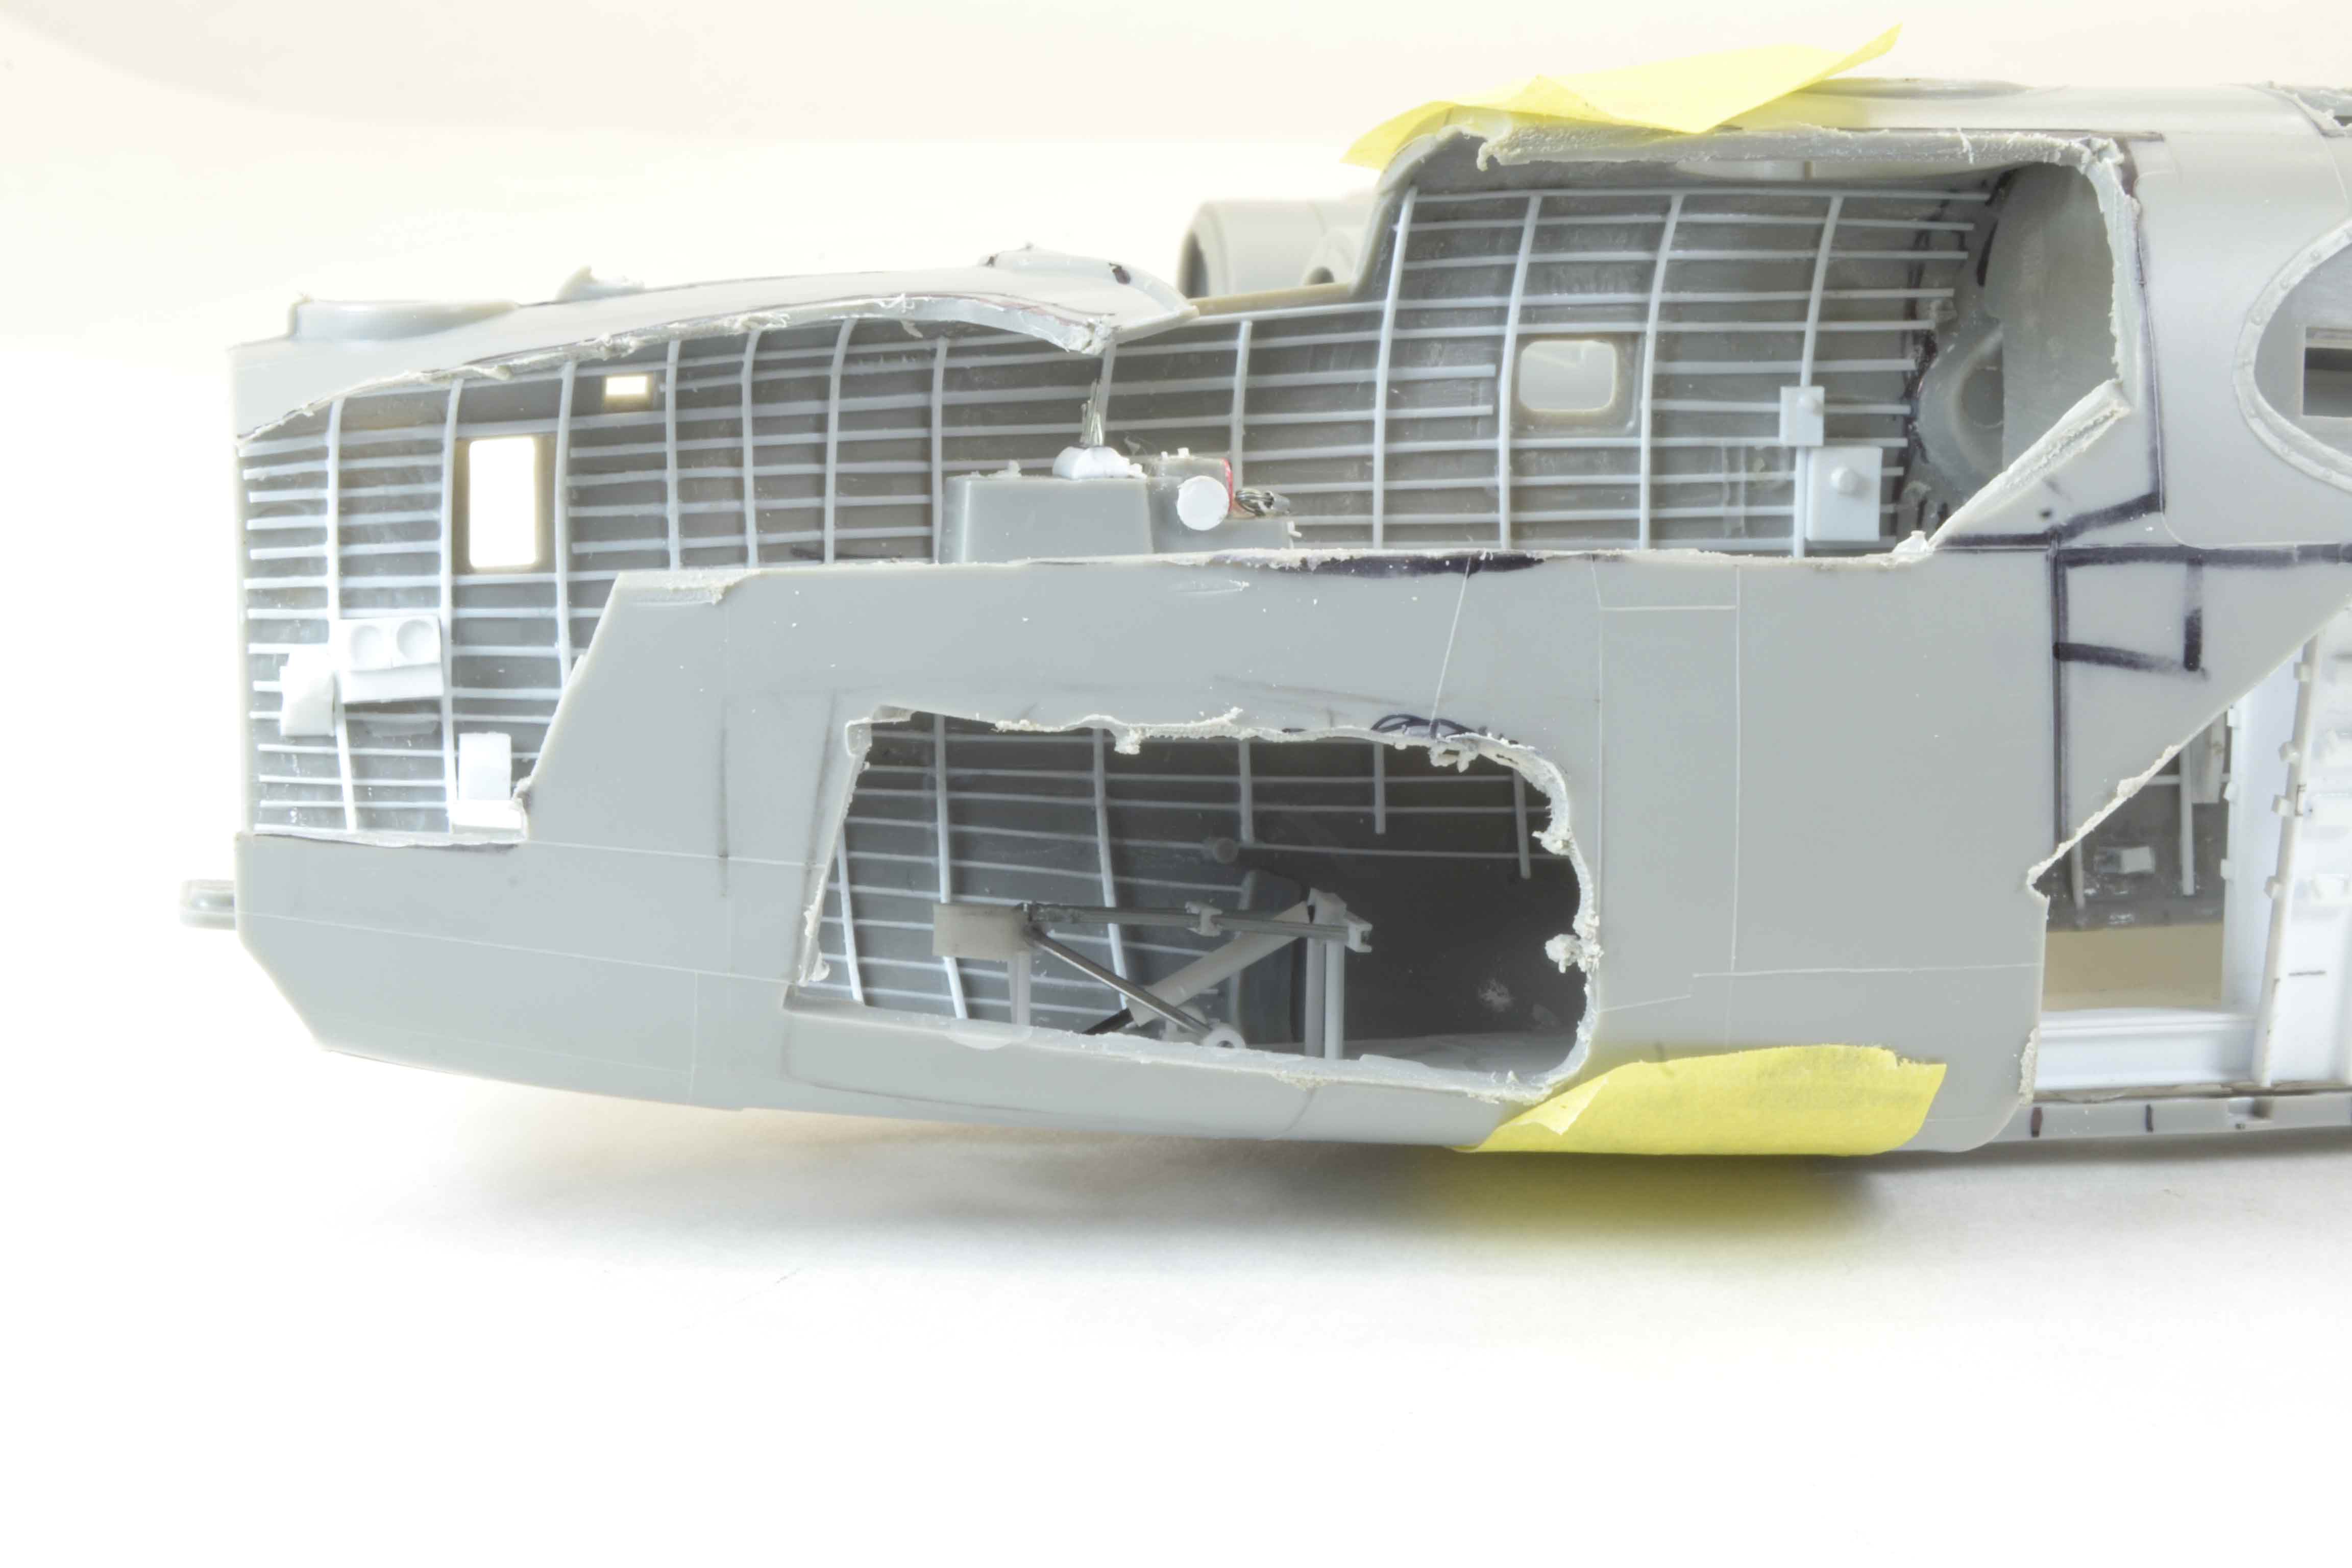
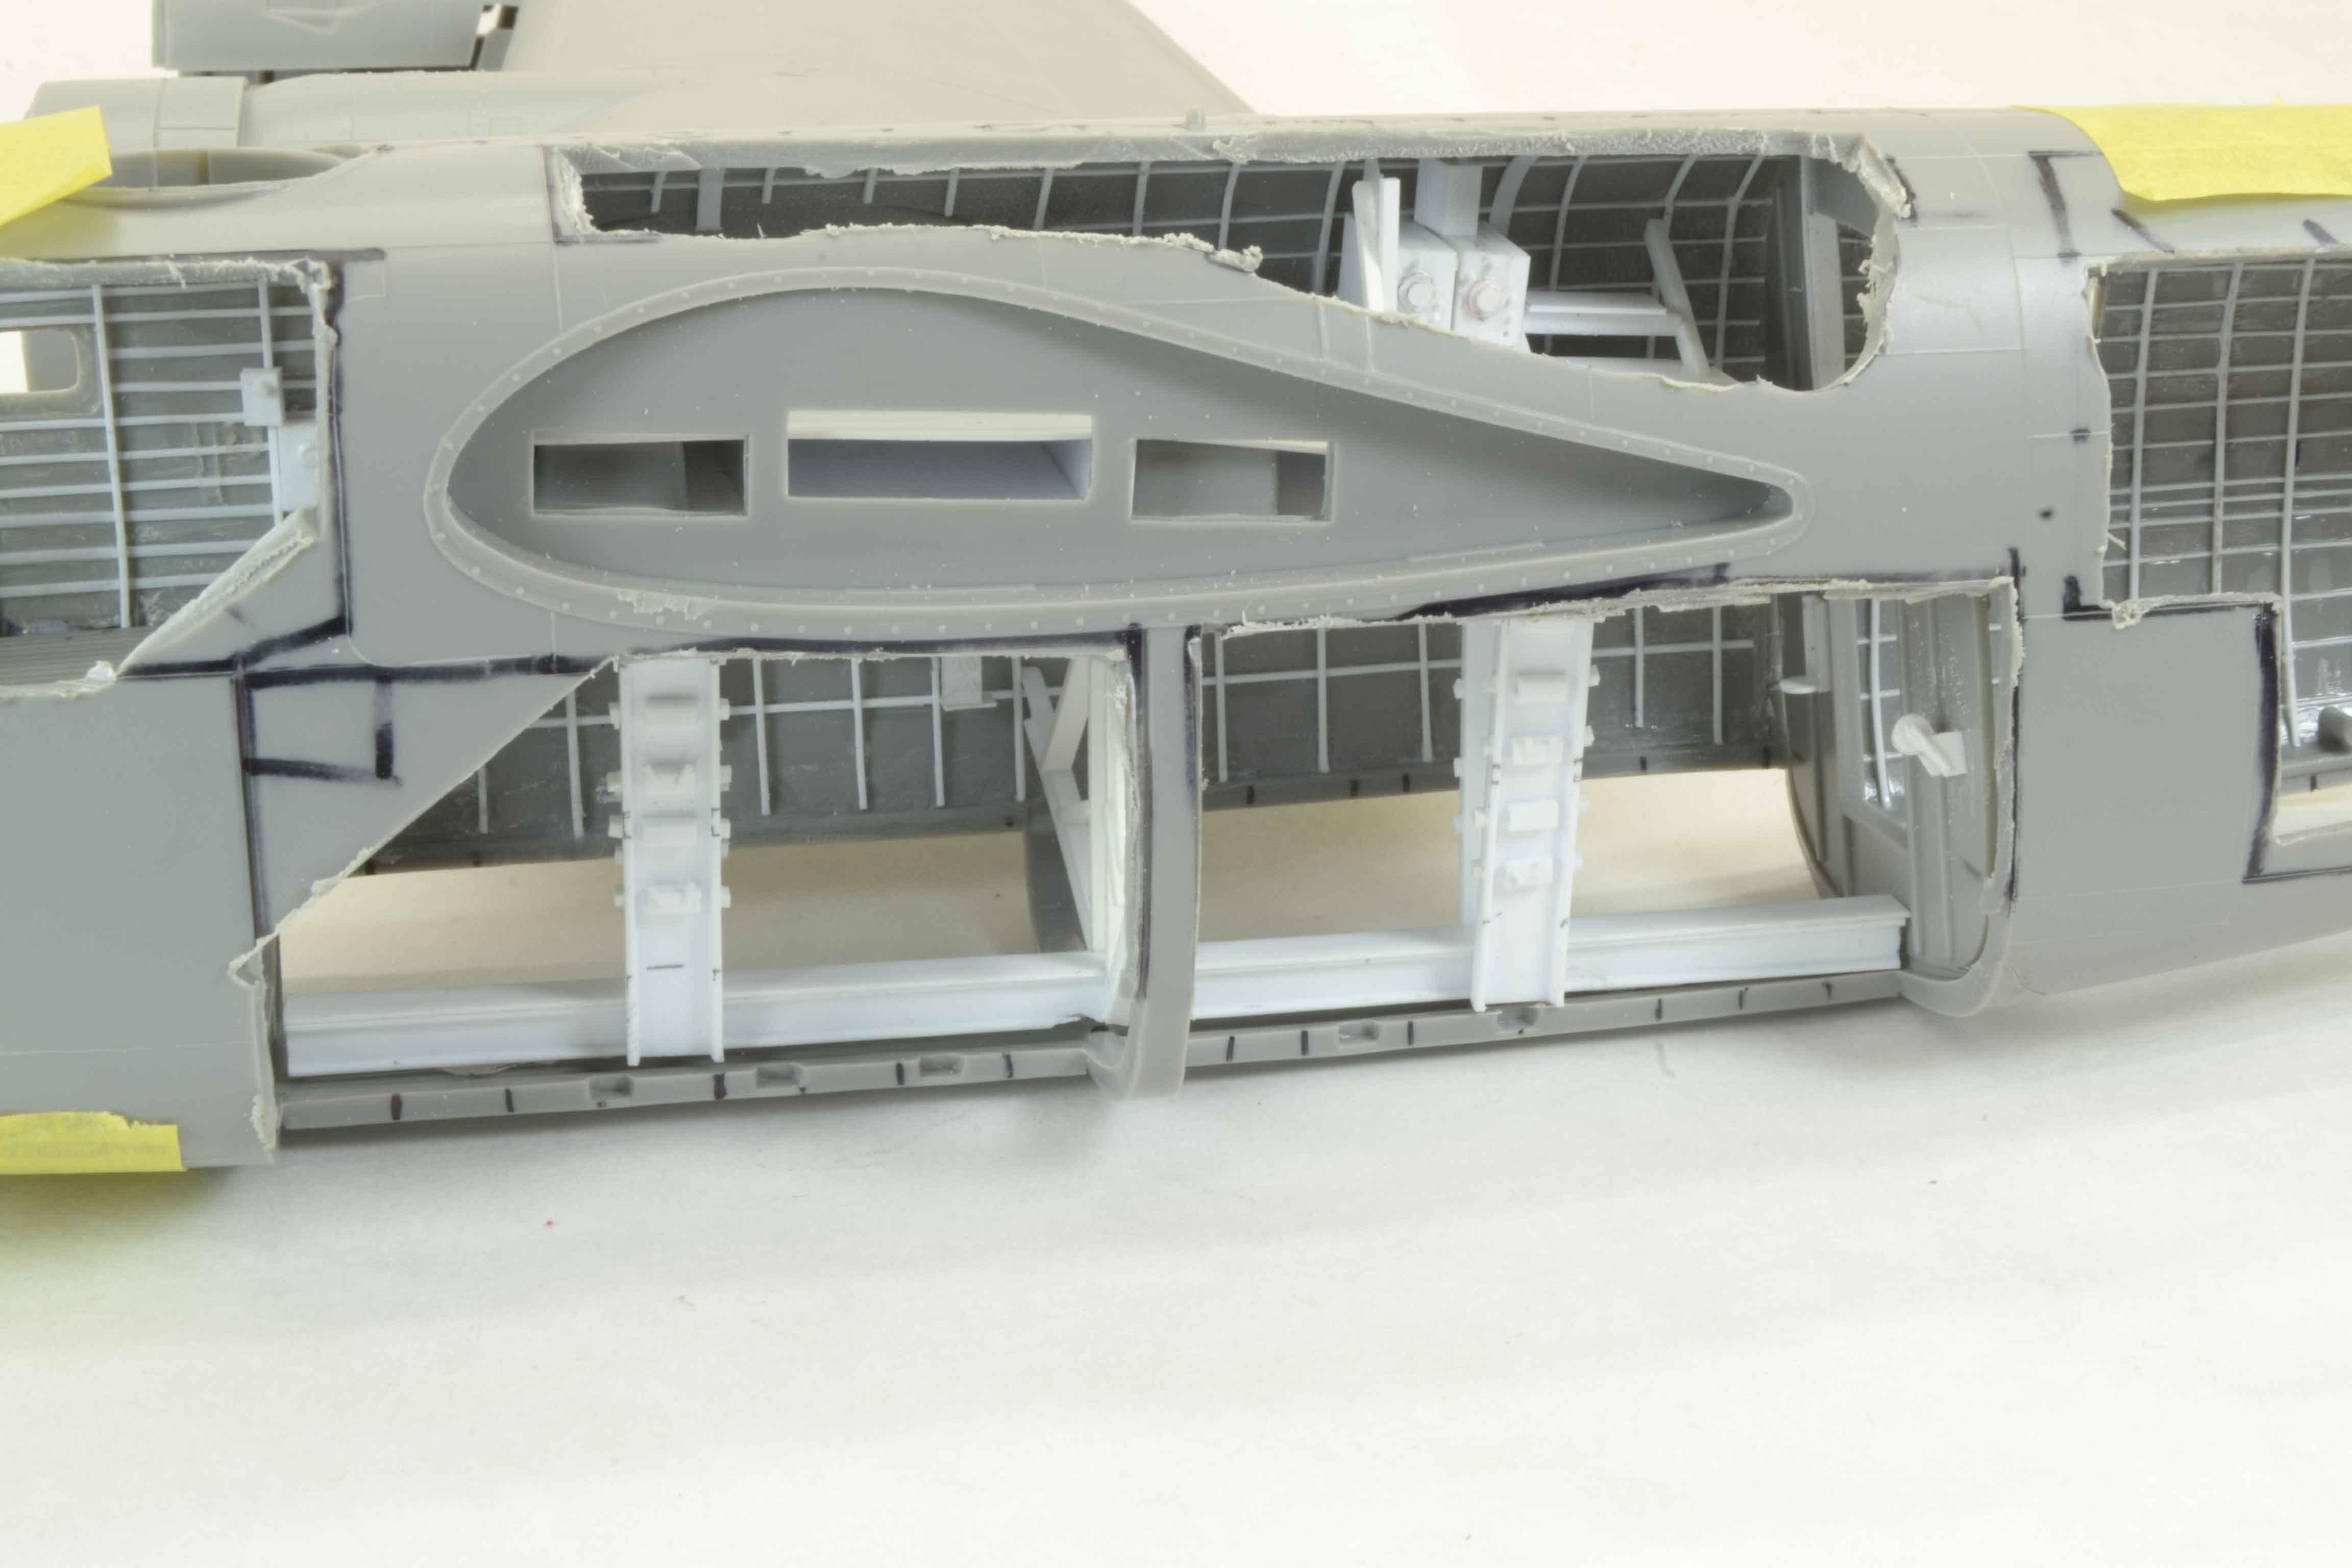
Most has been cleaned up and you can see just what the holes show now. Pretty satisfied for sure. Next is to try to get myself to focus on working on the details. To be honest this has been a struggle as of late.
All comments, critique, and criticism is encouraged.
Joe
I had to make a decision about the nose gear assembly. The kit part looked more like a blob of plastic that held the actual gear. It just didnt look right compared to the pictures and drawings that I have found. Out came the spare stuff and this is the result.
Also the time has come to bring out the Dremmel and begin to make some rather large holes.
Most has been cleaned up and you can see just what the holes show now. Pretty satisfied for sure. Next is to try to get myself to focus on working on the details. To be honest this has been a struggle as of late.
All comments, critique, and criticism is encouraged.
Joe

TimReynaga
Joined: May 03, 2006
KitMaker: 2,500 posts
AeroScale: 318 posts
Posted: Monday, March 26, 2018 - 07:45 AM UTC
Joe,
What can I say, this is absolutely AWESOME work! Making the cutaways is the right decision - all that super detailing deserves to be seen and appreciated.
I understand losing your modeling mojo for a while... but keep at it; this is a really special build!
What can I say, this is absolutely AWESOME work! Making the cutaways is the right decision - all that super detailing deserves to be seen and appreciated.
I understand losing your modeling mojo for a while... but keep at it; this is a really special build!


greif8

Joined: January 17, 2006
KitMaker: 673 posts
AeroScale: 492 posts

Posted: Monday, March 26, 2018 - 11:40 AM UTC
Joe I missed the start of your build. You have some awesome scratch building skill my friend; the interior is looking outstanding thus far.
Ernest
Ernest

RussellE

#306

Joined: June 27, 2010
KitMaker: 3,959 posts
AeroScale: 598 posts
Posted: Monday, March 26, 2018 - 02:04 PM UTC
Quoted Text
Joe,
What can I say, this is absolutely AWESOME work! Making the cutaways is the right decision - all that super detailing deserves to be seen and appreciated.
I understand losing your modeling mojo for a while... but keep at it; this is a really special build!
what Tim said


Joel_W
Joined: December 04, 2010
KitMaker: 11,666 posts
AeroScale: 7,410 posts
Posted: Monday, March 26, 2018 - 07:30 PM UTC
Quoted Text
Quoted TextJoe,
What can I say, this is absolutely AWESOME work! Making the cutaways is the right decision - all that super detailing deserves to be seen and appreciated.
I understand losing your modeling mojo for a while... but keep at it; this is a really special build!
what Tim said
I'll 2nd that as well.
Joel


thegirl

Joined: January 19, 2008
KitMaker: 6,743 posts
AeroScale: 6,151 posts
Posted: Tuesday, March 27, 2018 - 04:59 AM UTC
You have excelled in your scratch building skills , well done Joe . This is shaping up wonderful so far . 
Terri
Terri
fightnjoe
Joined: August 16, 2004
KitMaker: 603 posts
AeroScale: 565 posts
Posted: Wednesday, March 28, 2018 - 07:20 AM UTC
You are all very kind. Many thanks.
Joe
Joe
fightnjoe
Joined: August 16, 2004
KitMaker: 603 posts
AeroScale: 565 posts
Posted: Saturday, April 07, 2018 - 08:20 AM UTC
Ok just a brief update to show some of what has been occupying my time.
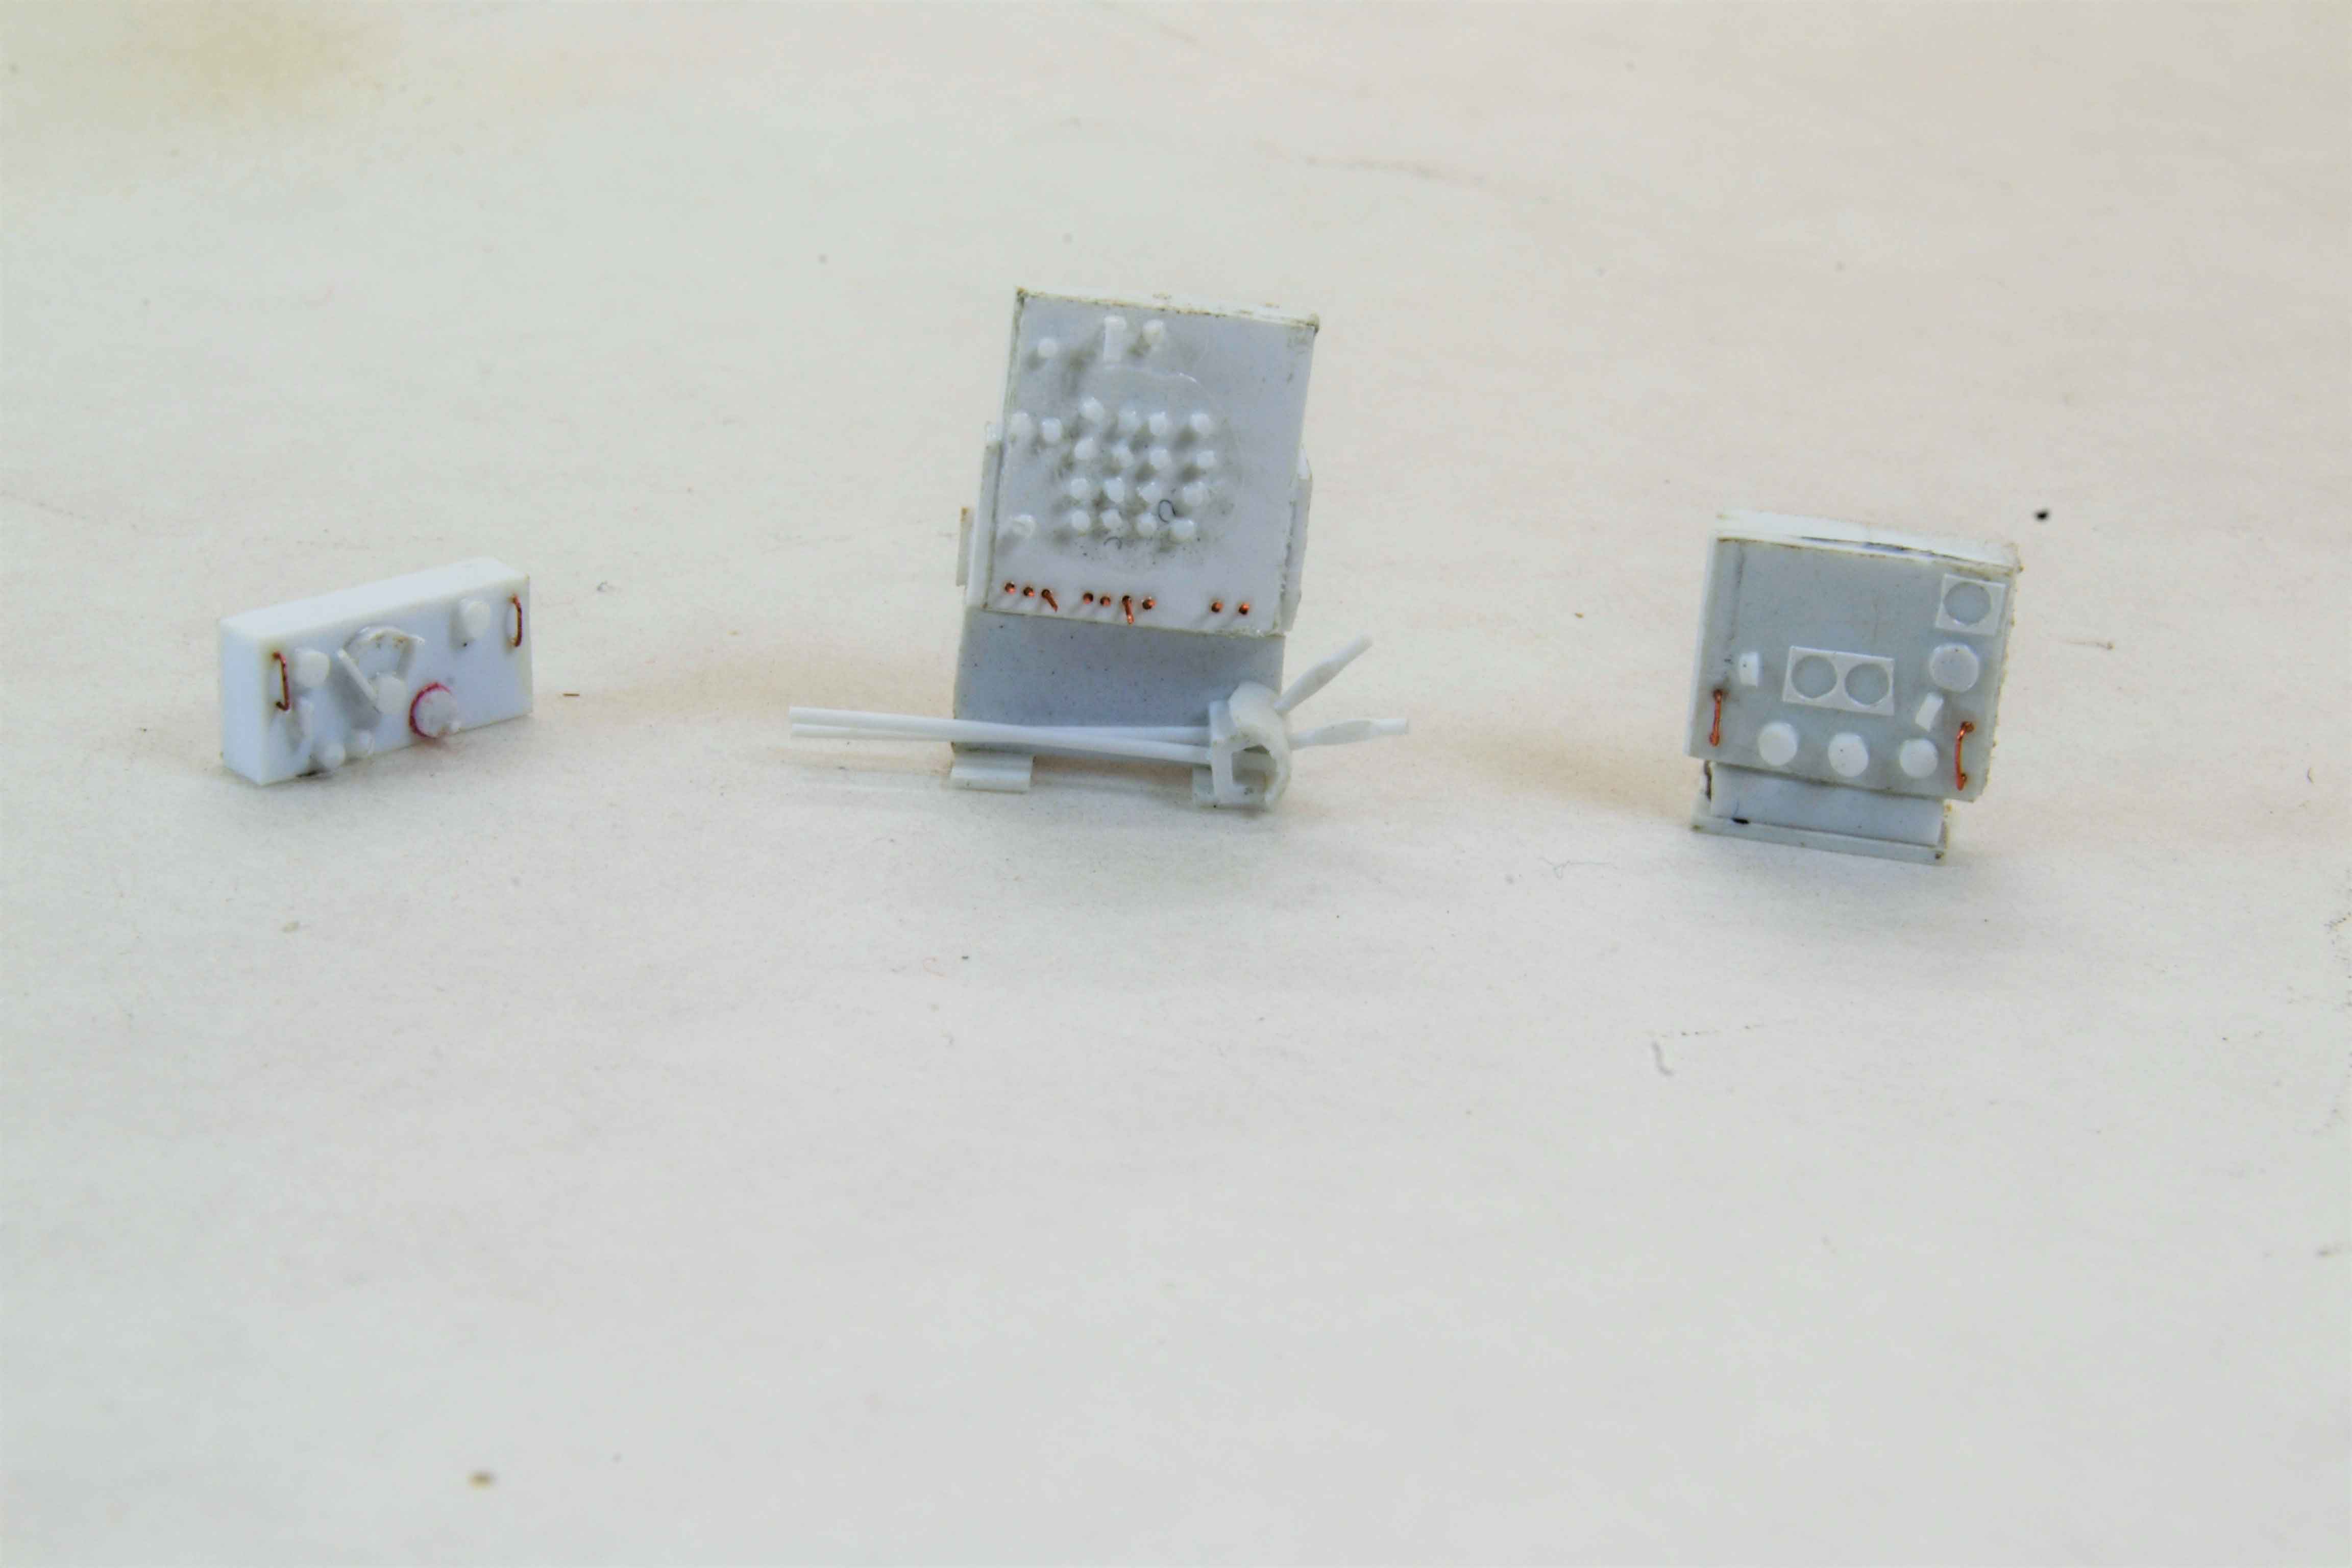
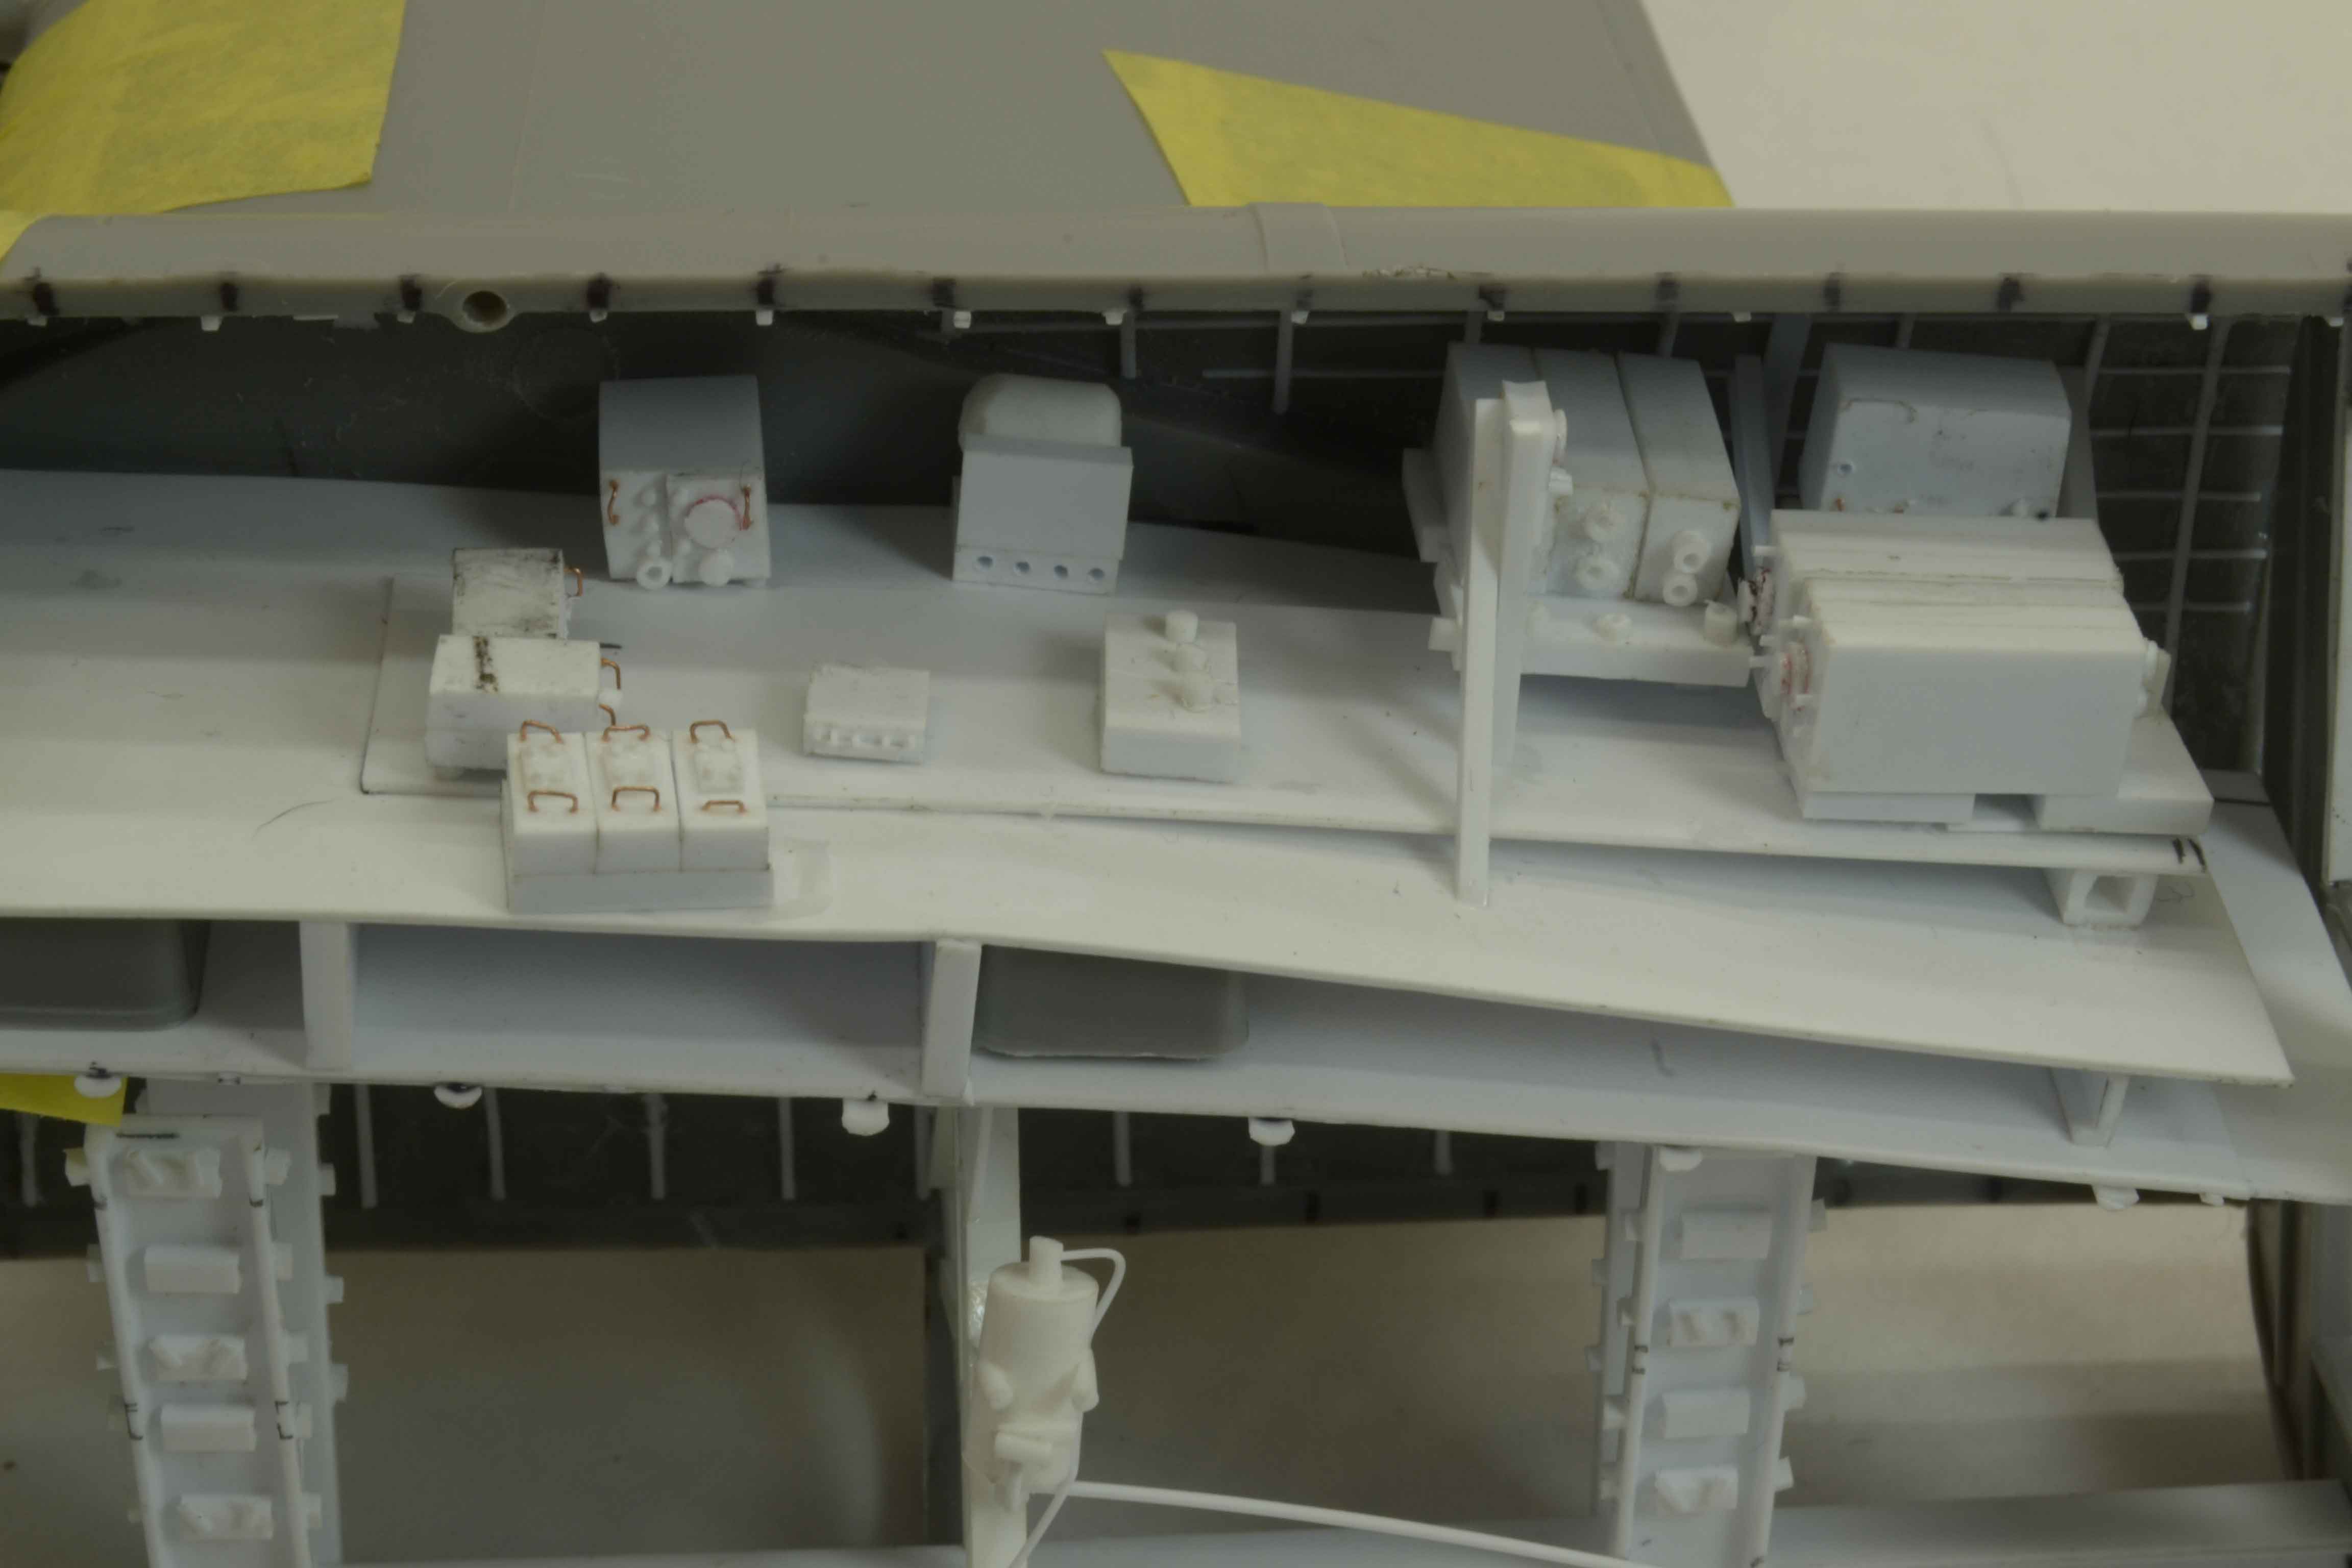
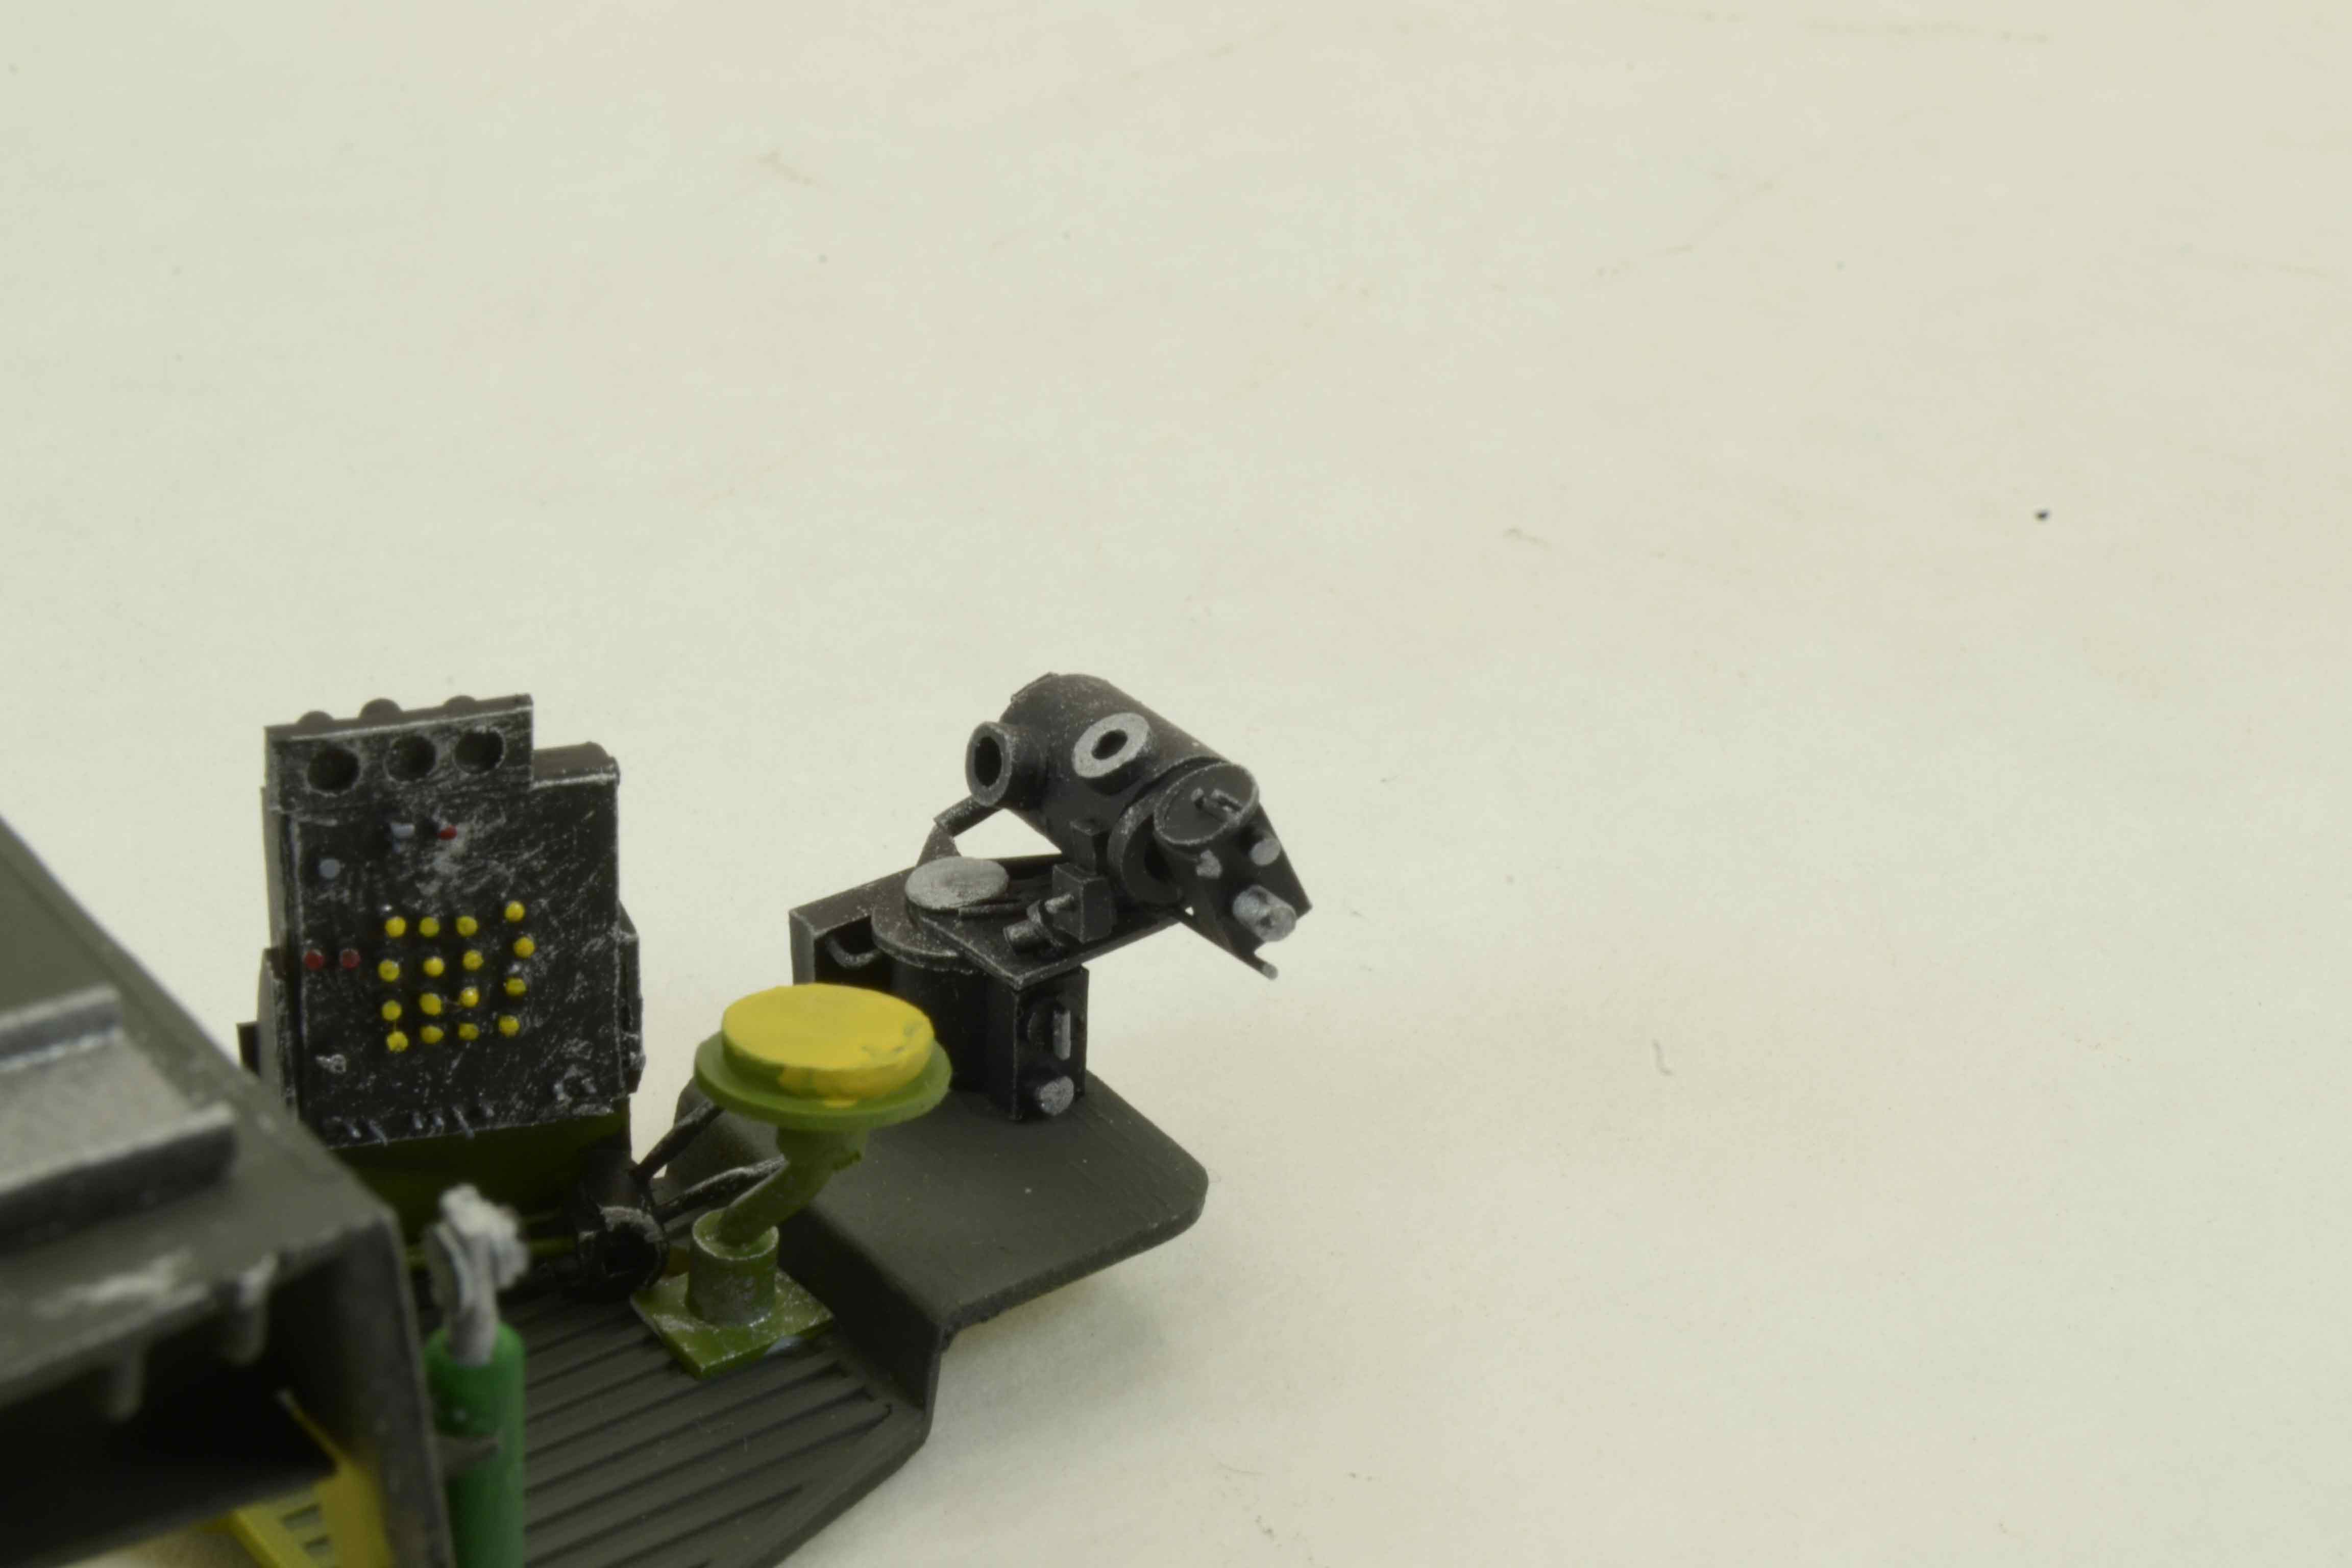
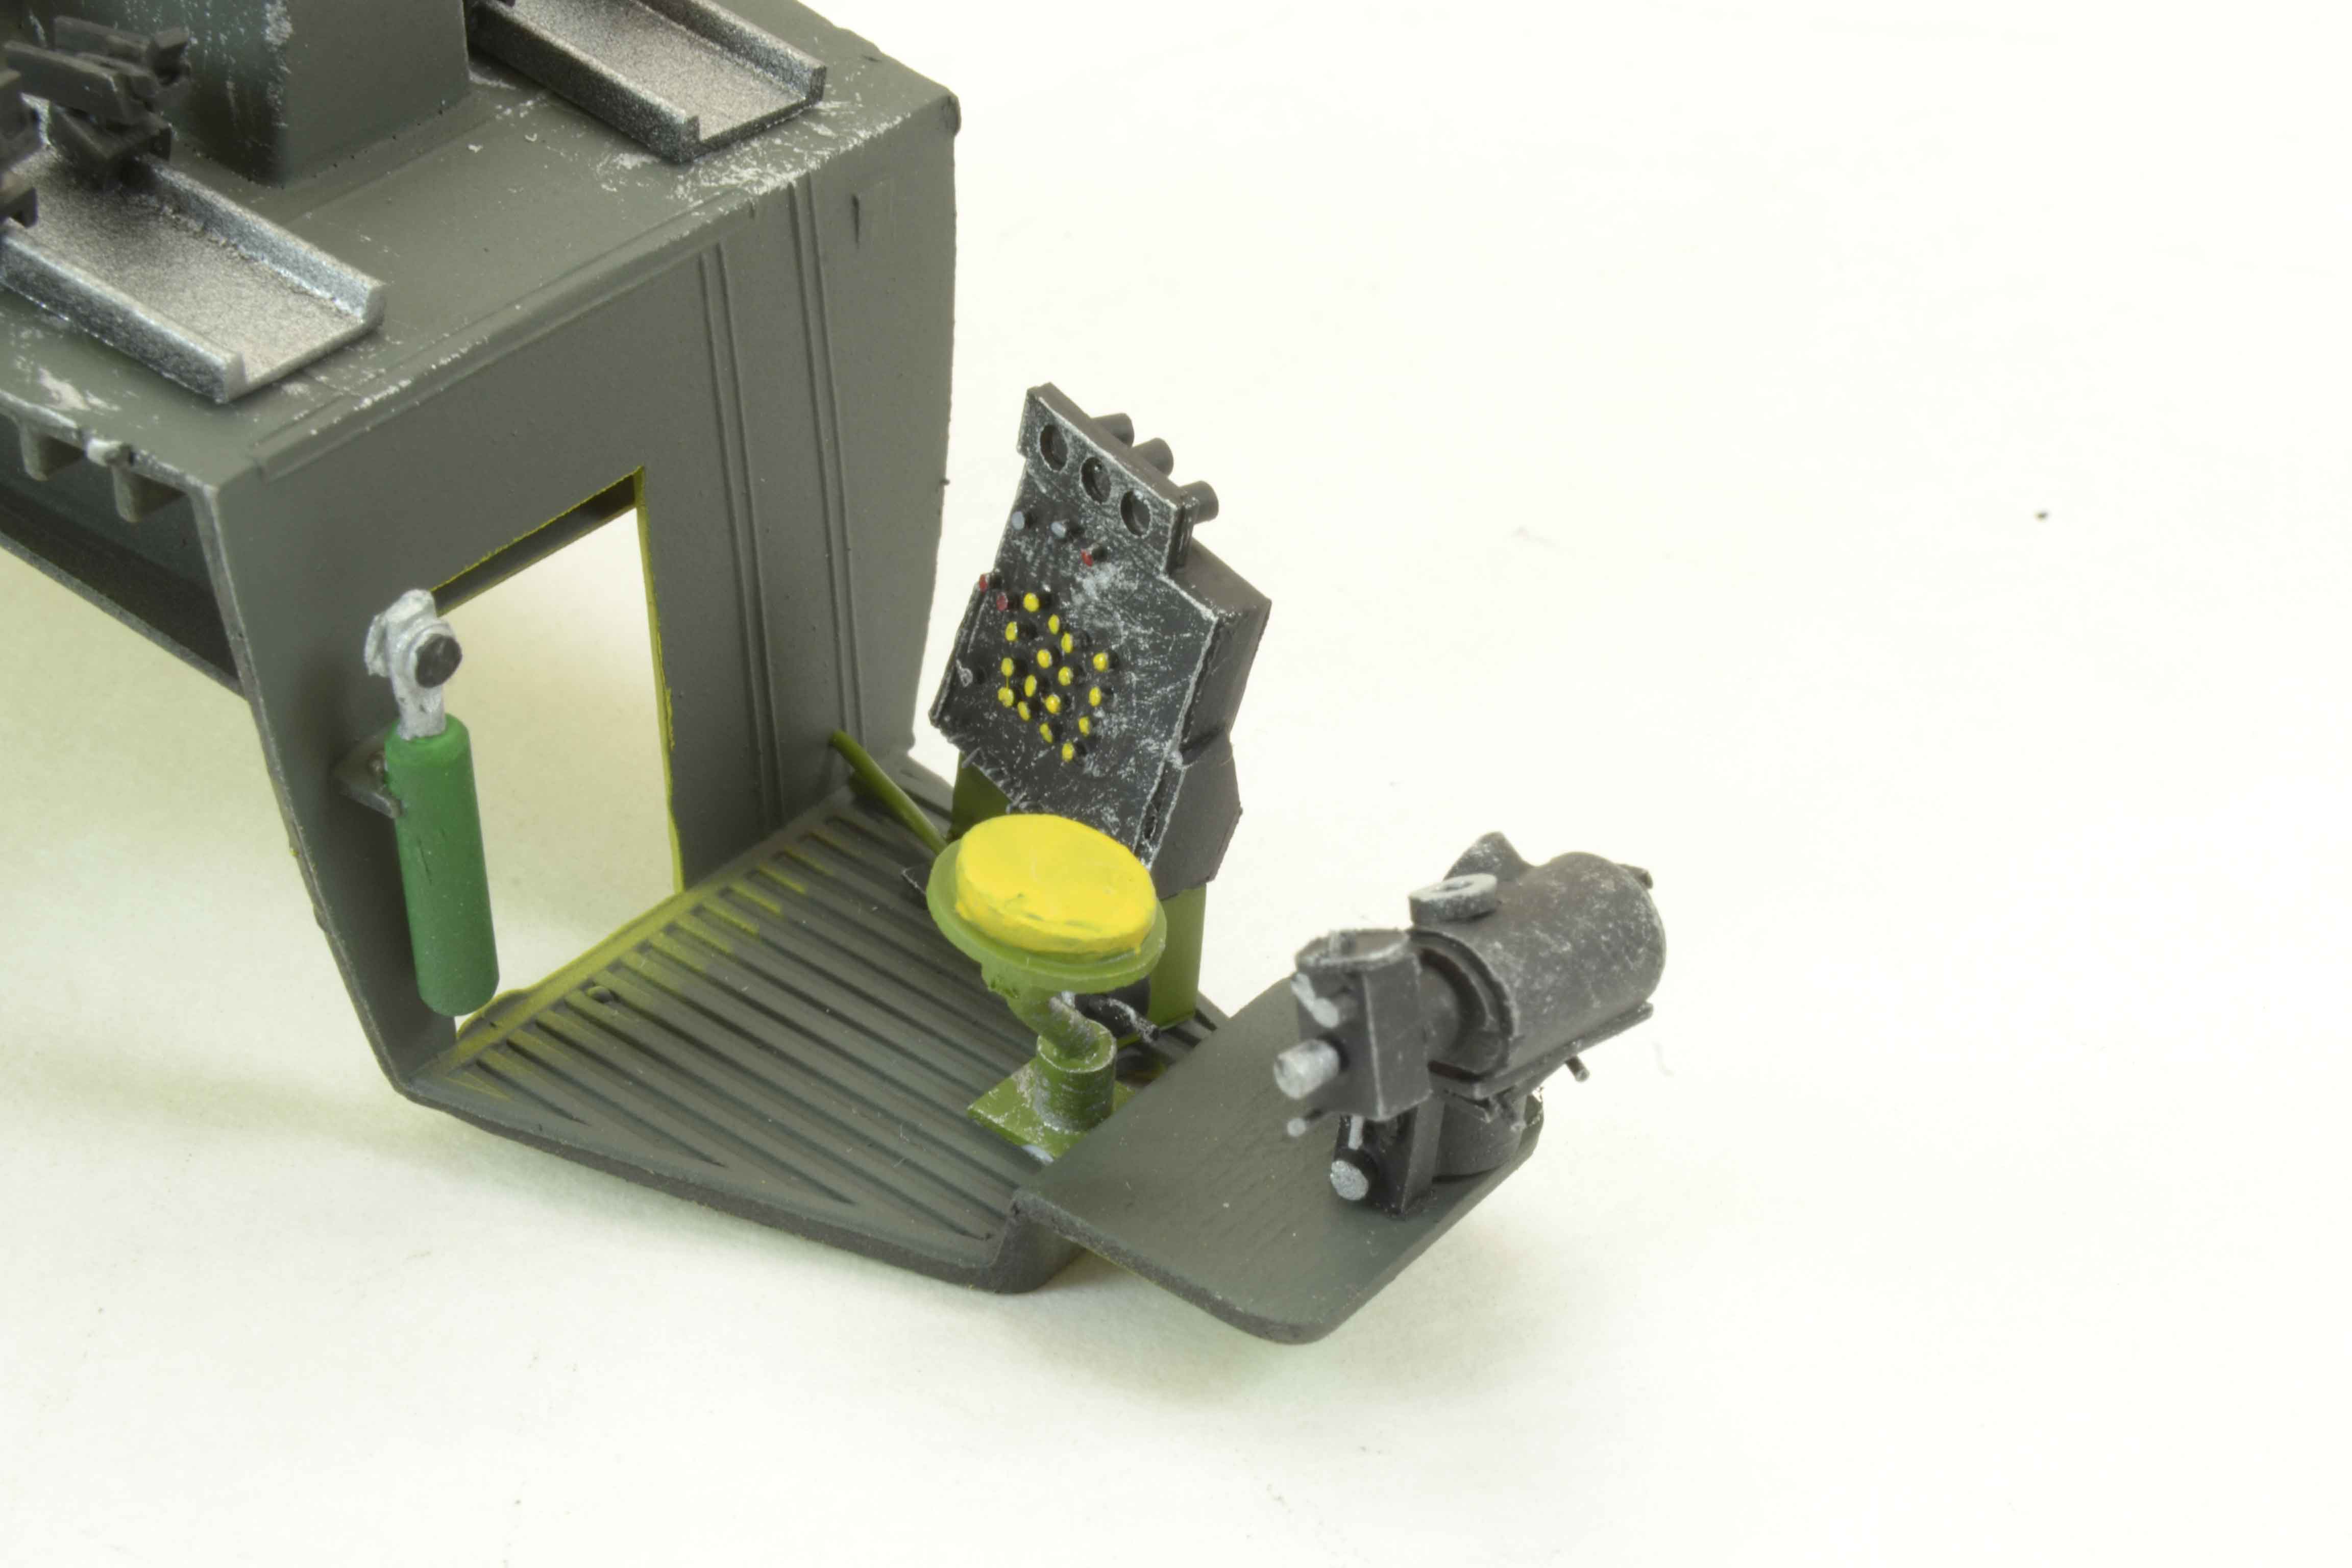
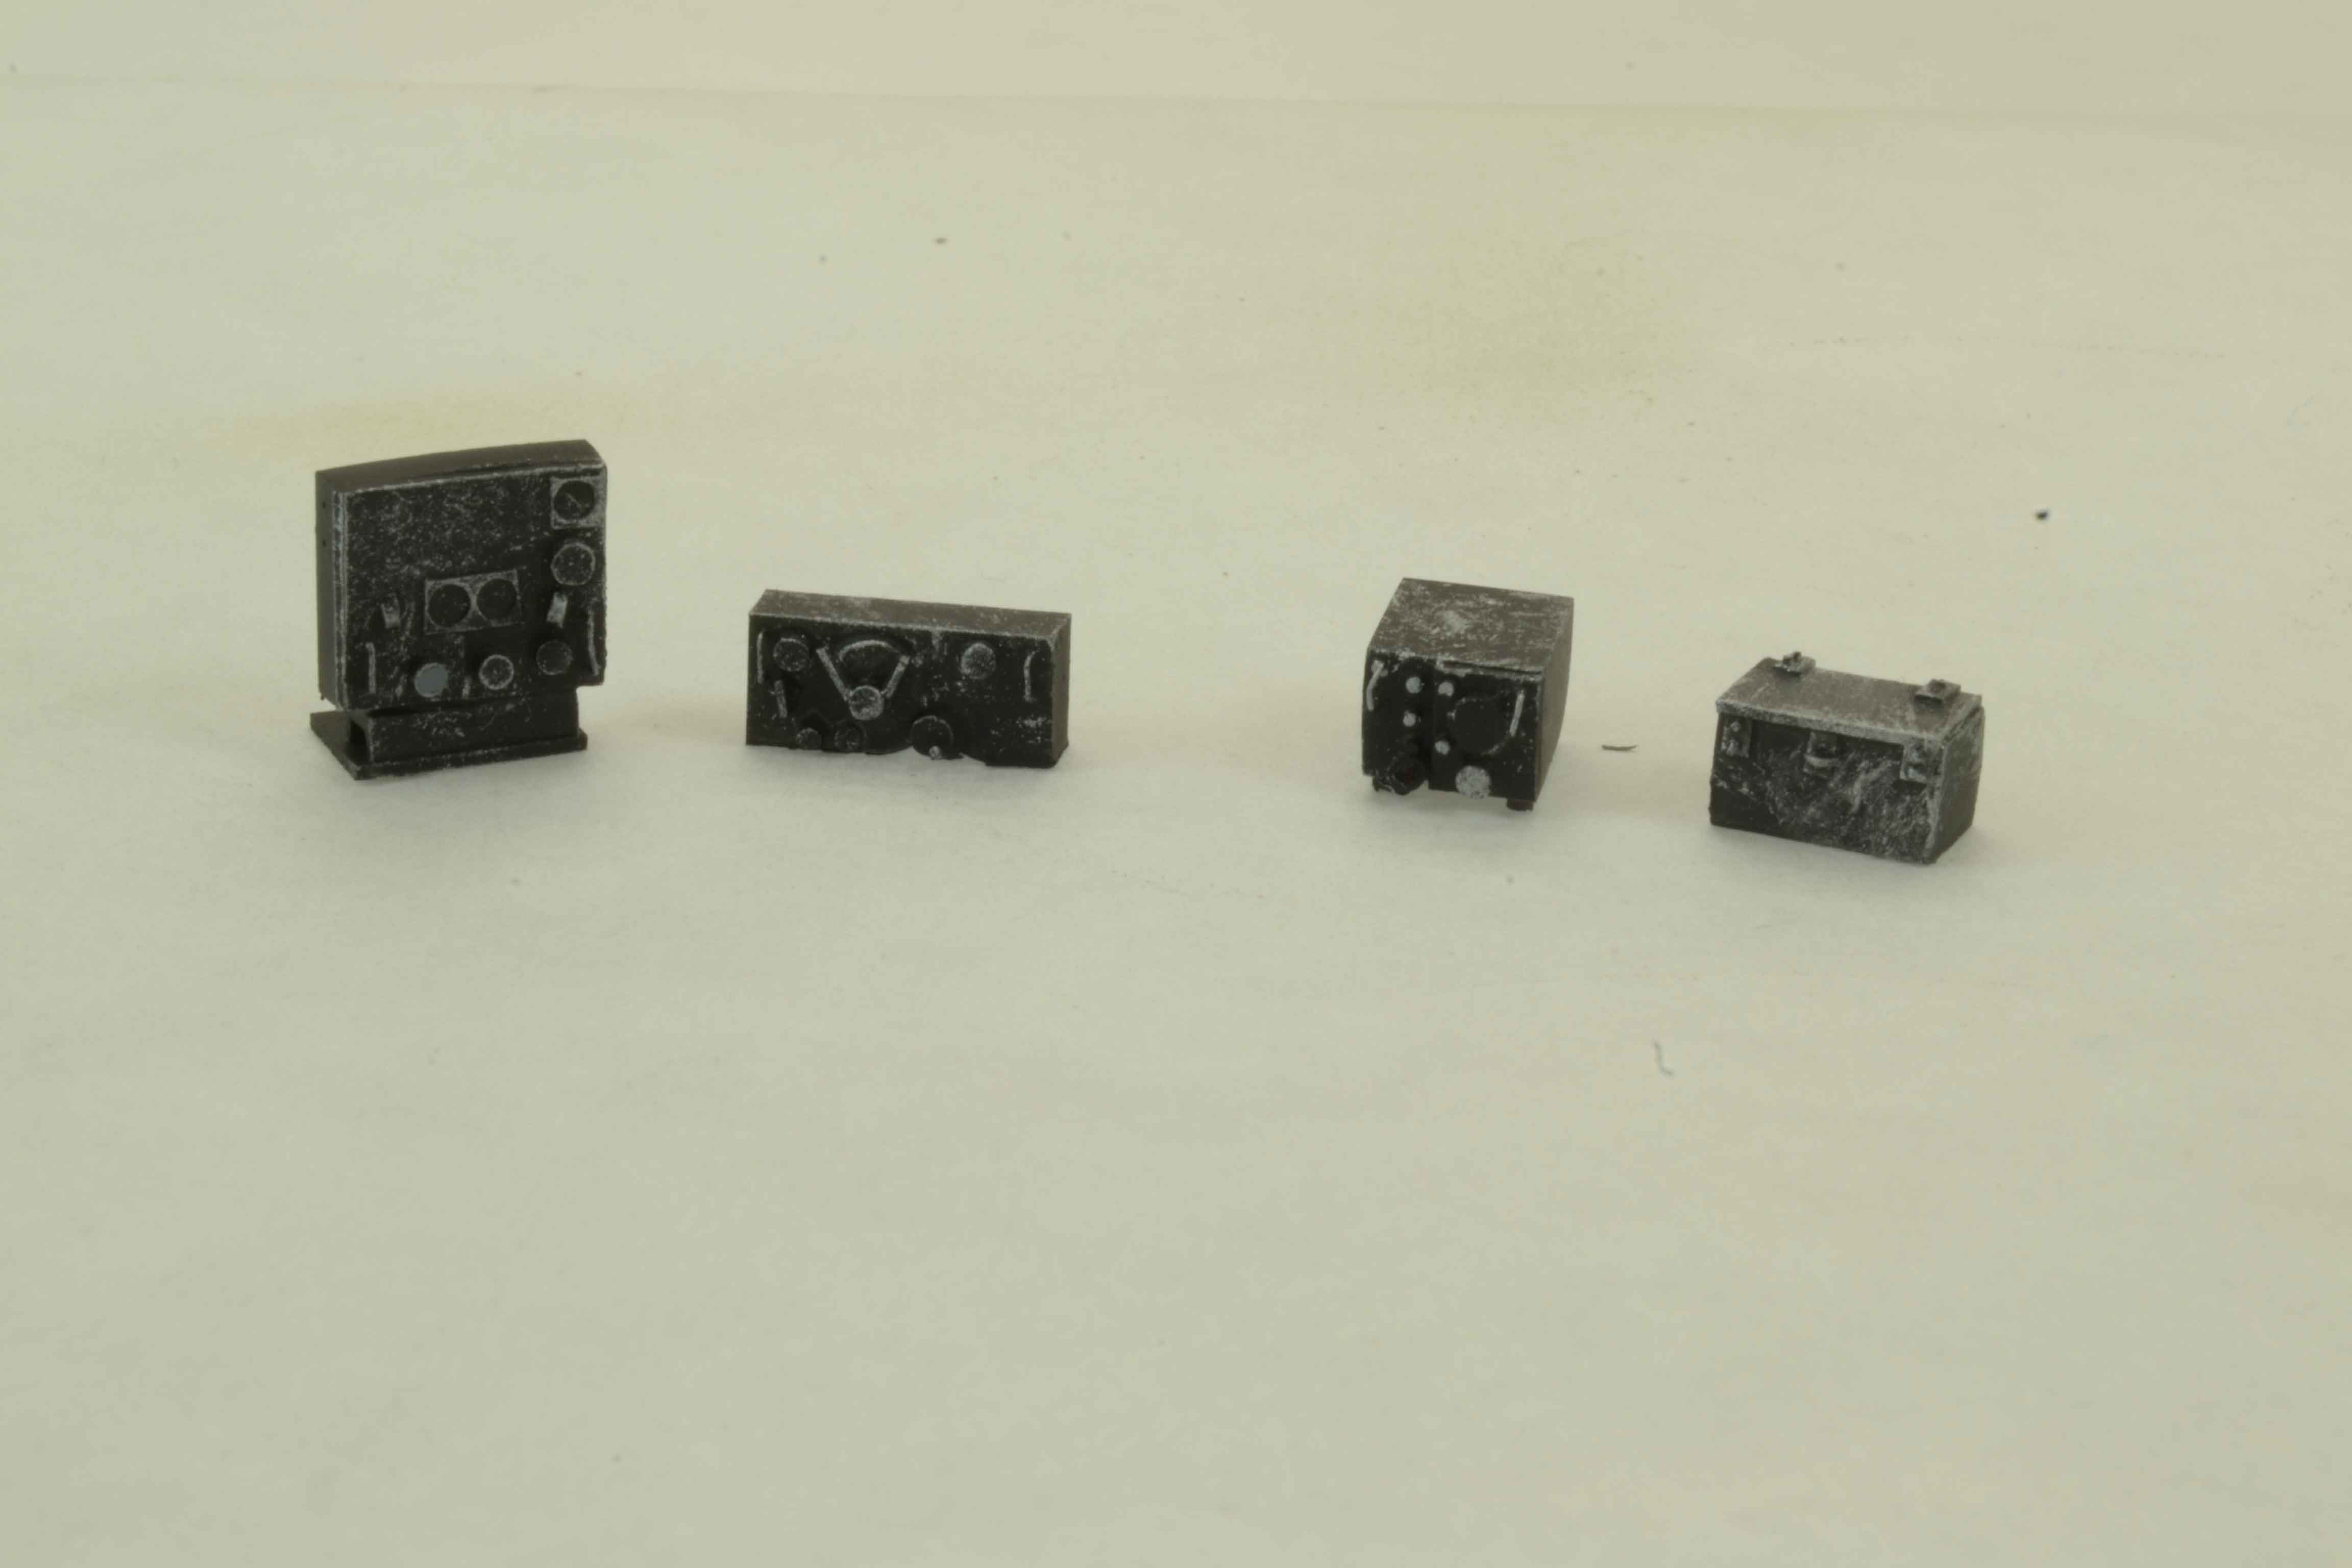
A great deal of time seems to have been spent trying to get the SCR 274 as close as I can to what I have found in pictures. To that end it has been worked and reworked a number of times.
Lets take a look at what may be the final layout of the equipment. Now remember there is still the wiring to add as well as painting and permanent installation.
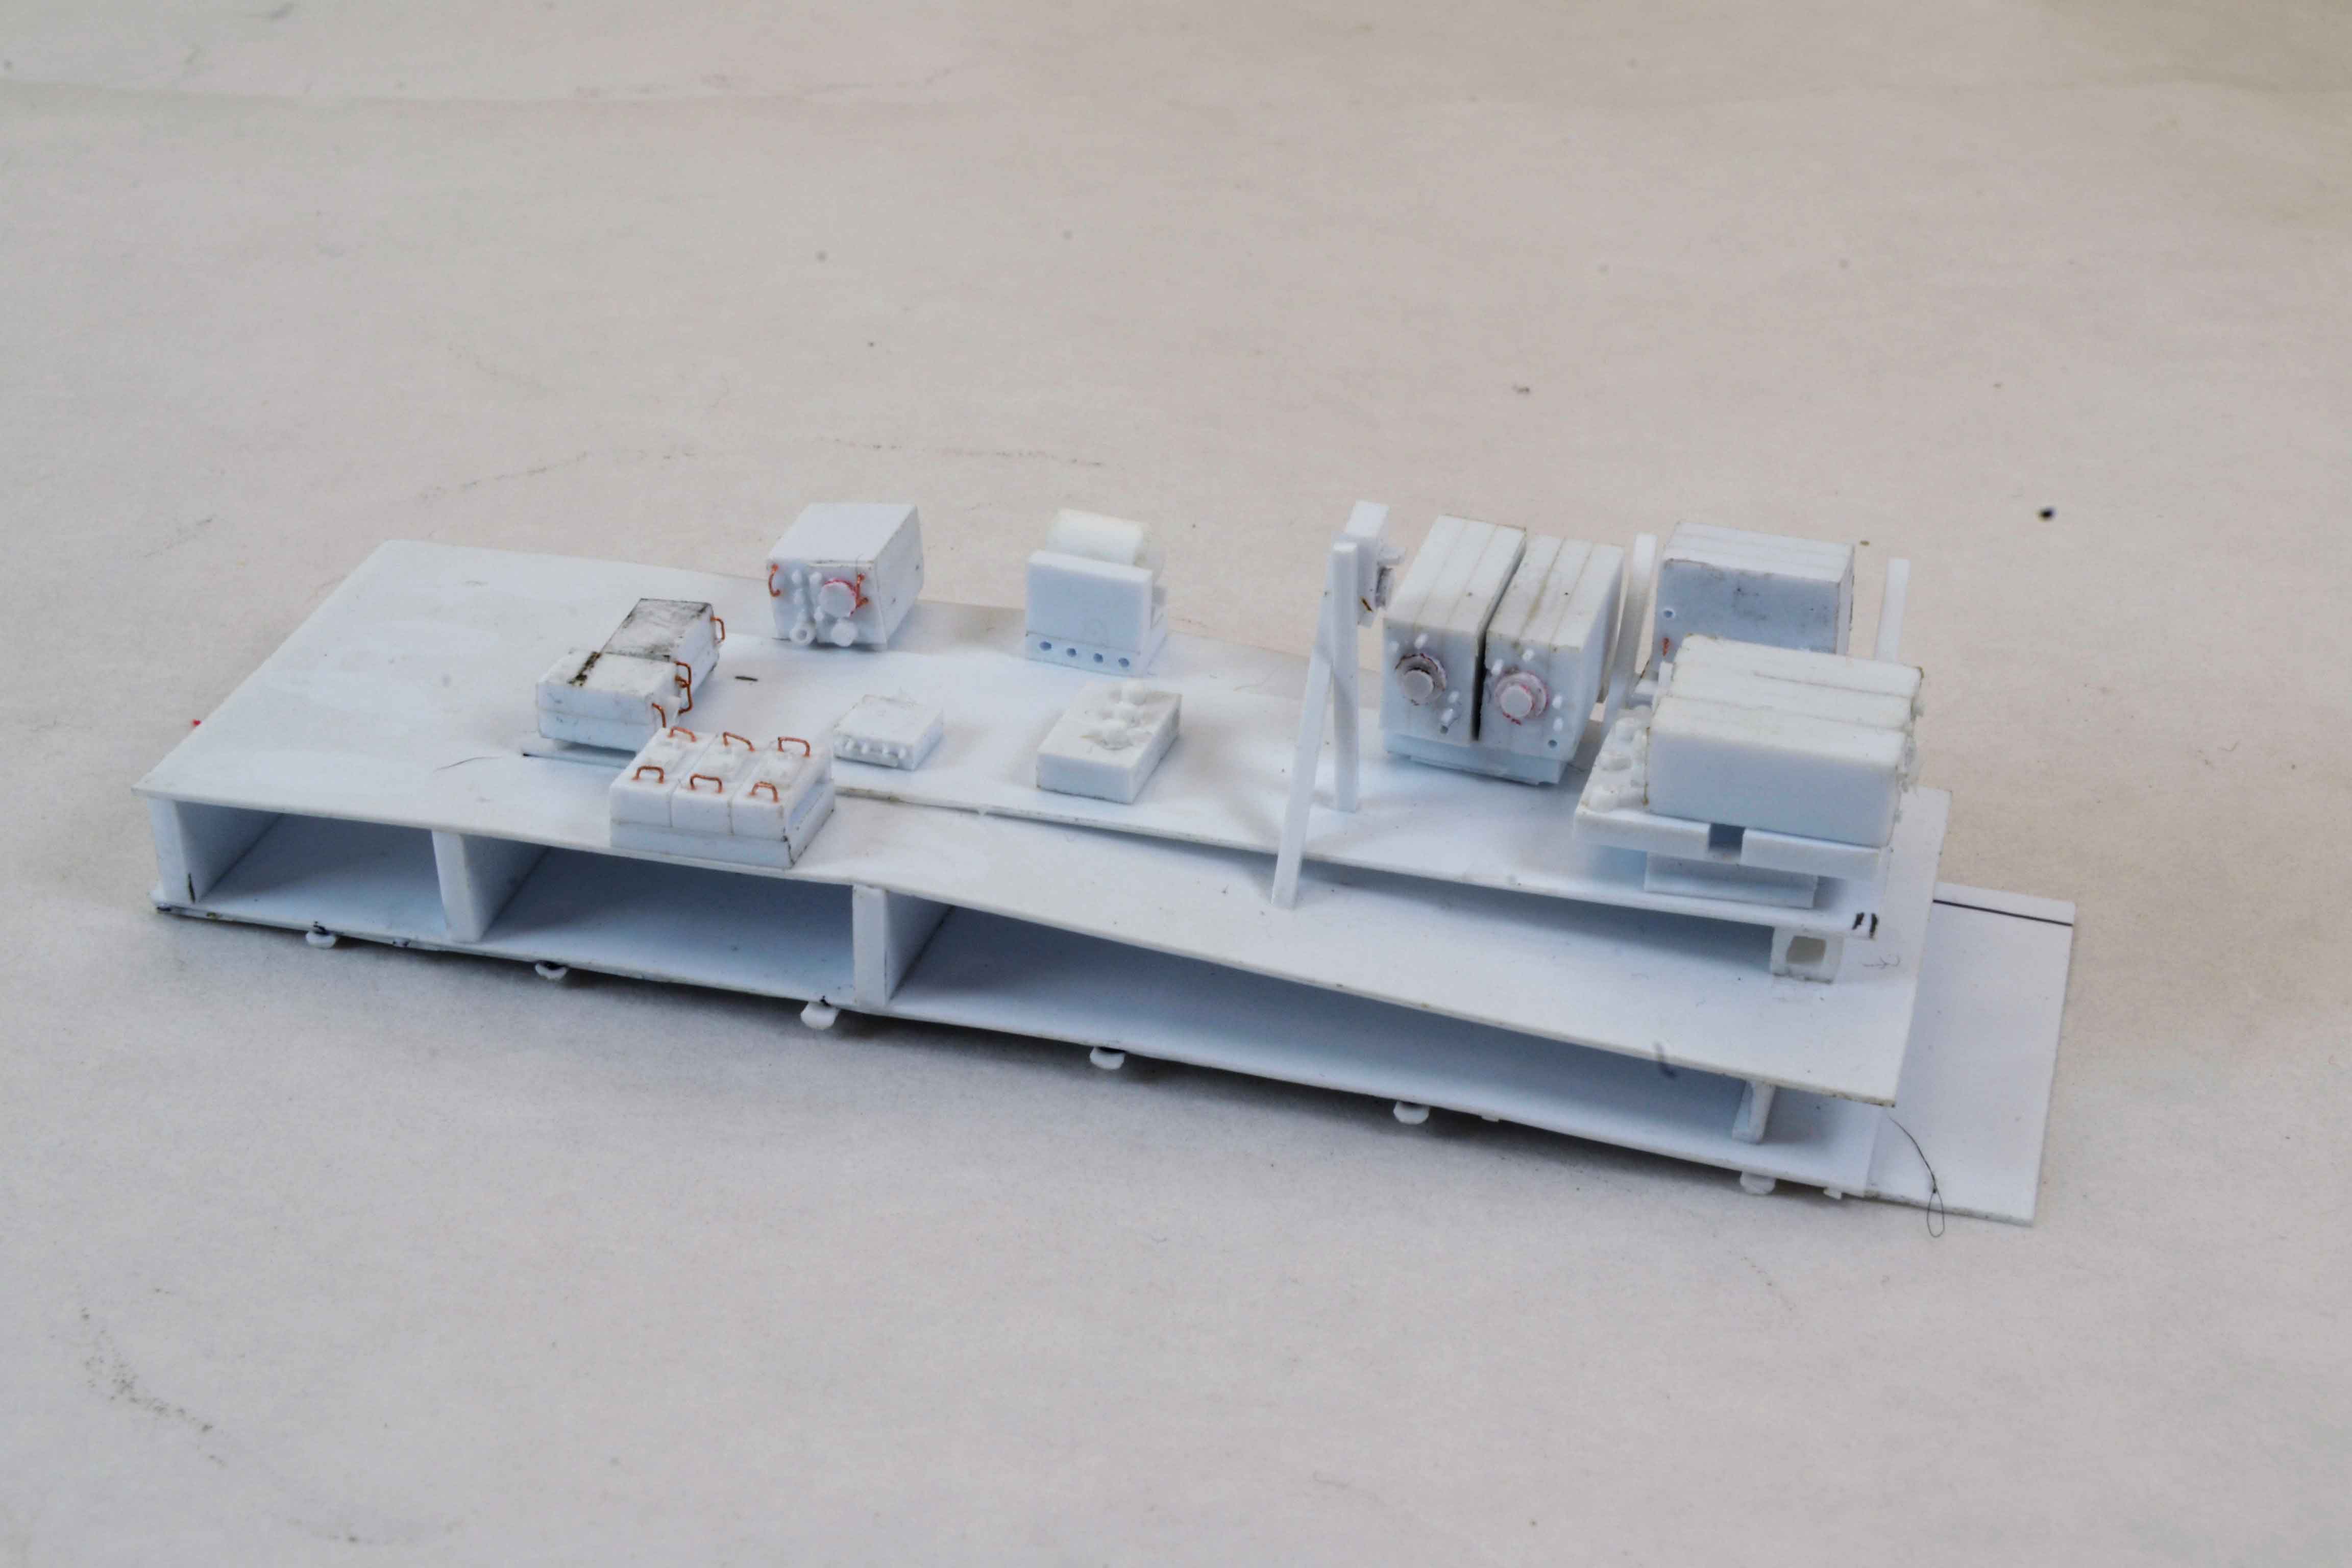
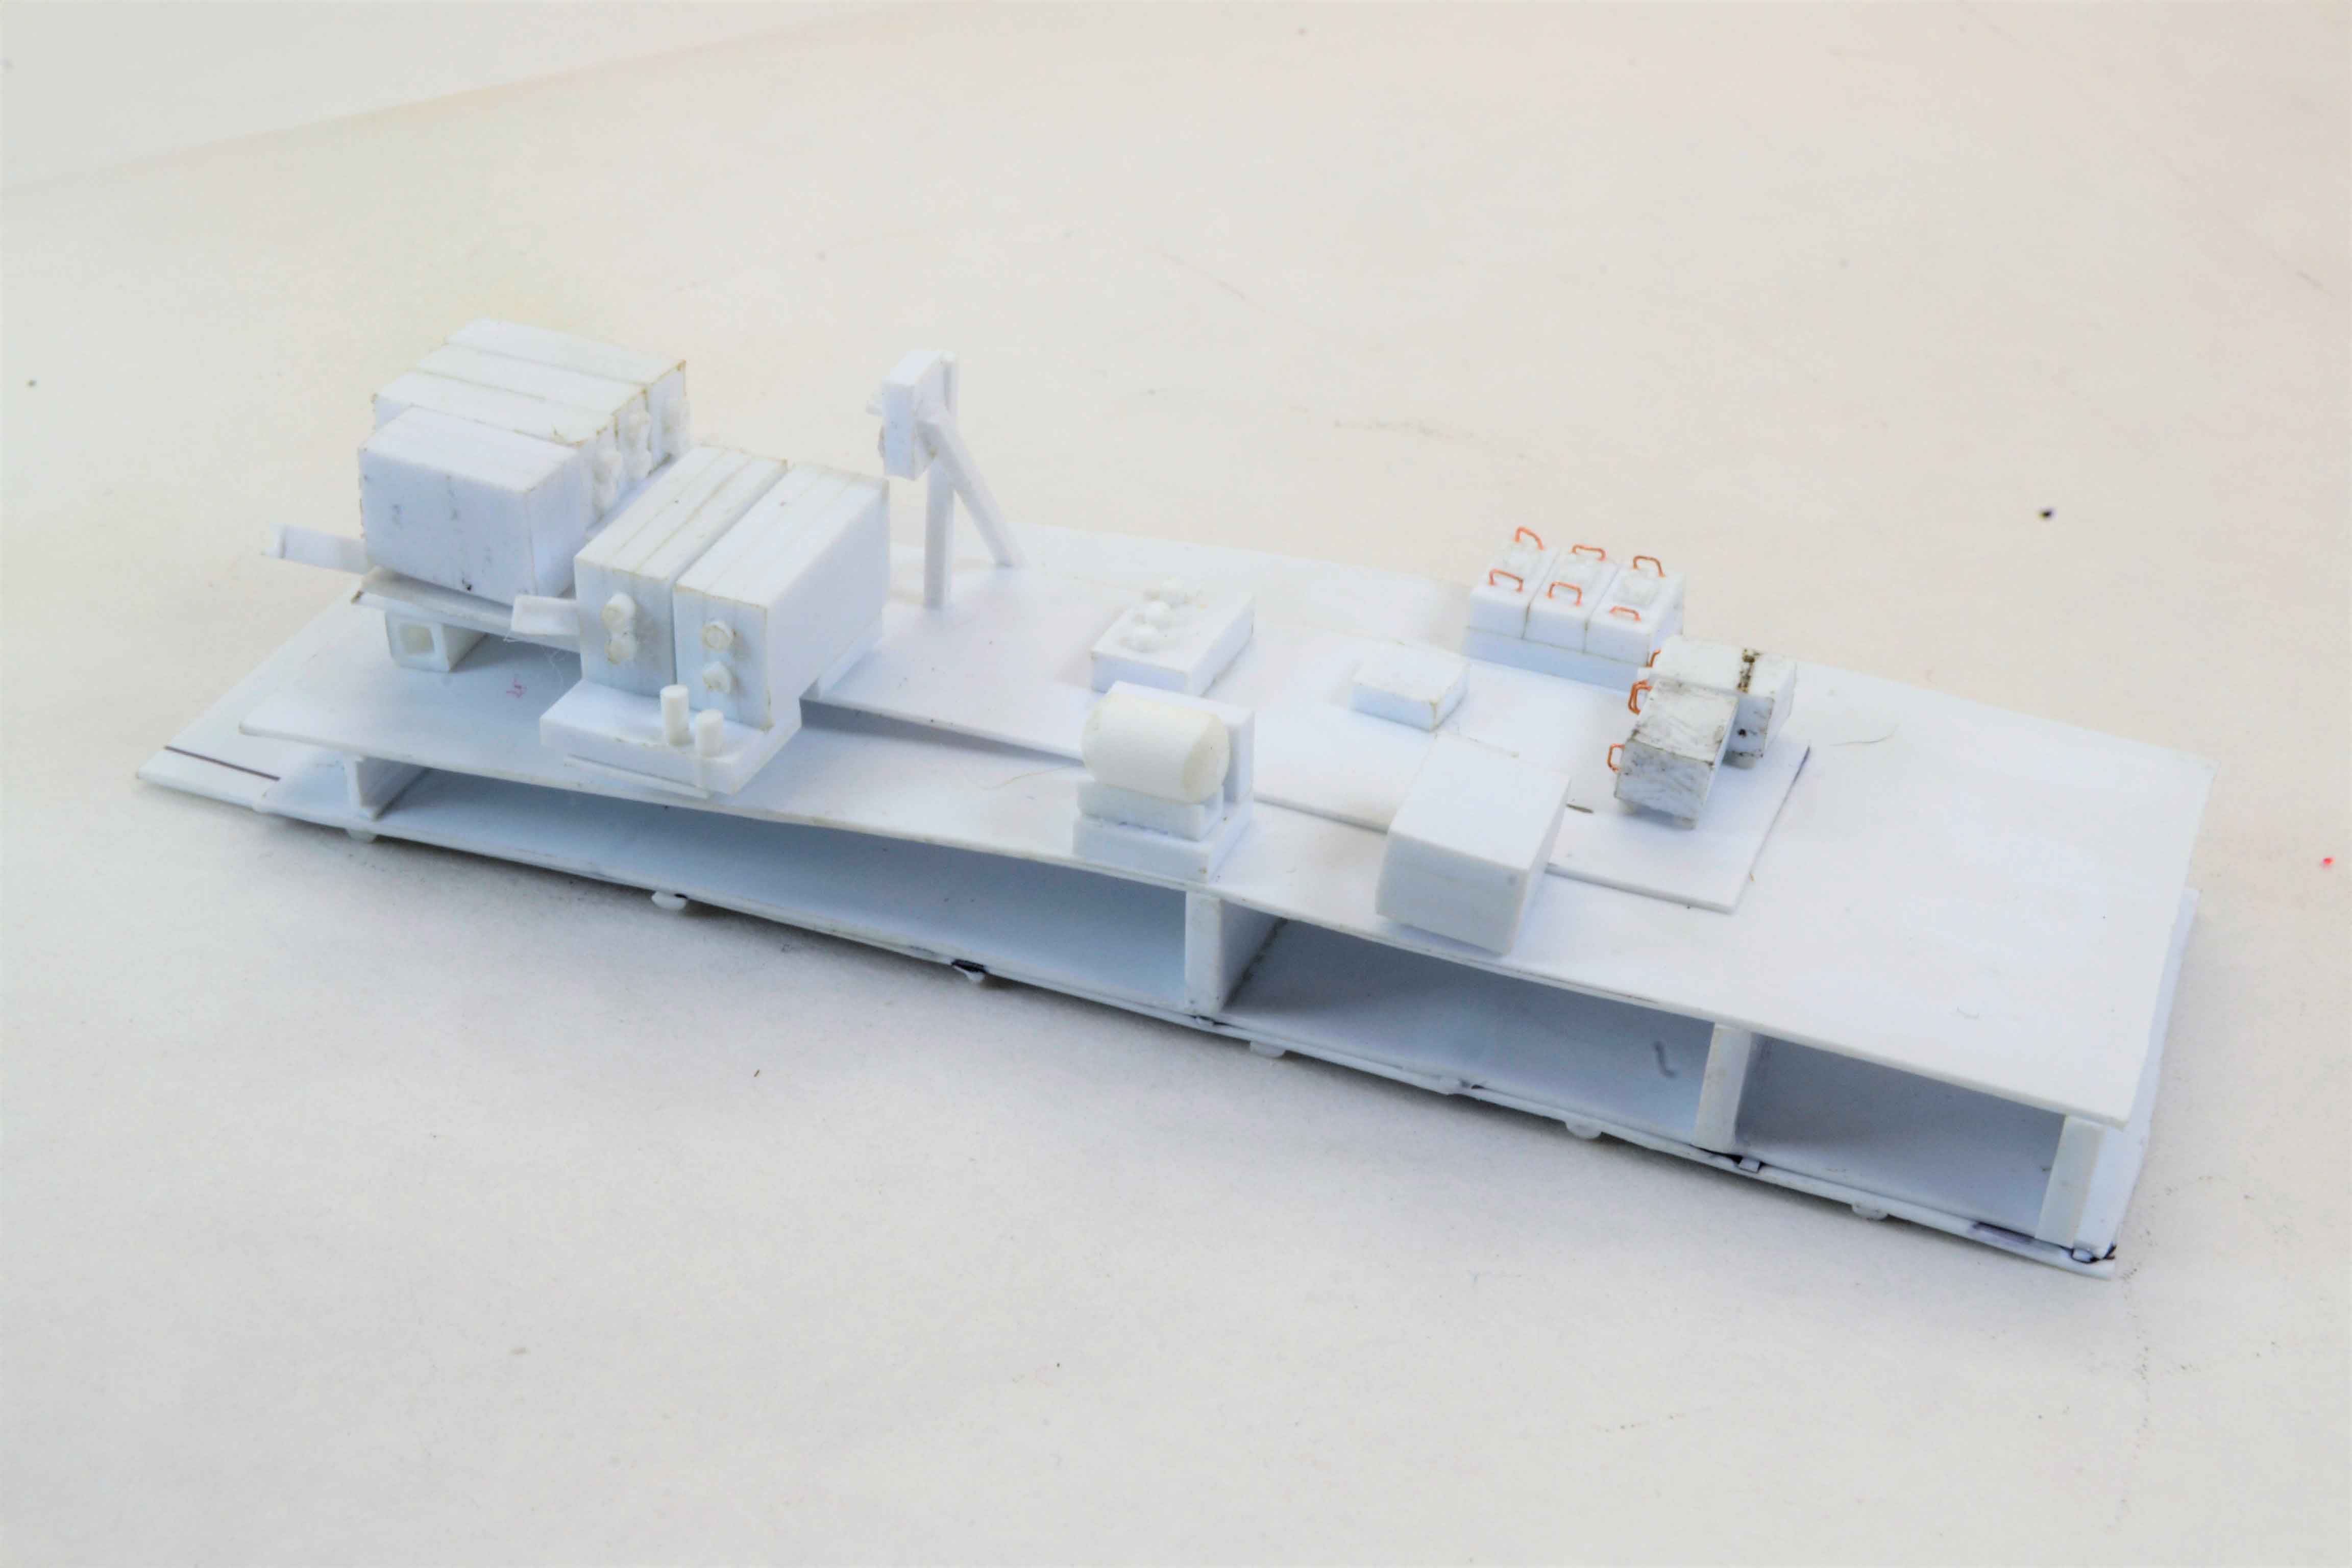
And a quick glimpse of the main radio for the aircraft, the Bomb release panel from the Bombardier station, and finally part of the IFF system that sits under the Navigator station. (Left to right)
For now that is it.
All comments, critiques, and criticism are encouraged.
Joe
A great deal of time seems to have been spent trying to get the SCR 274 as close as I can to what I have found in pictures. To that end it has been worked and reworked a number of times.
Lets take a look at what may be the final layout of the equipment. Now remember there is still the wiring to add as well as painting and permanent installation.
And a quick glimpse of the main radio for the aircraft, the Bomb release panel from the Bombardier station, and finally part of the IFF system that sits under the Navigator station. (Left to right)
For now that is it.
All comments, critiques, and criticism are encouraged.
Joe
Joel_W
Joined: December 04, 2010
KitMaker: 11,666 posts
AeroScale: 7,410 posts
Posted: Saturday, April 07, 2018 - 06:57 PM UTC
Joe,
Now that's some mighty impressive detailing. Your attention to the smallest of details shows in all of those assemblies.
Joel
Now that's some mighty impressive detailing. Your attention to the smallest of details shows in all of those assemblies.
Joel
thegirl
Joined: January 19, 2008
KitMaker: 6,743 posts
AeroScale: 6,151 posts
Posted: Sunday, April 08, 2018 - 01:53 AM UTC
Quoted Text
Joe,
Now that's some mighty impressive detailing. Your attention to the smallest of details shows in all of those assemblies.
Joel
Will second this , outstanding
Terri
fightnjoe
Joined: August 16, 2004
KitMaker: 603 posts
AeroScale: 565 posts
Posted: Tuesday, April 10, 2018 - 09:05 AM UTC
You are both very kind. Many thanks.
Joe
Joe
greif8
Joined: January 17, 2006
KitMaker: 673 posts
AeroScale: 492 posts
Posted: Tuesday, April 10, 2018 - 09:28 PM UTC
Exceptional scratchbuilding Joe. Do you use mostly Evergreen products for the type of work show in your photos?
Ernest
Ernest
fightnjoe
Joined: August 16, 2004
KitMaker: 603 posts
AeroScale: 565 posts
Posted: Sunday, April 15, 2018 - 08:27 PM UTC
Many thanks. I use both Evergreen and Plastruct. Just depends on what I have on hand at the moment.
Joe
Joe
RussellE
#306
Joined: June 27, 2010
KitMaker: 3,959 posts
AeroScale: 598 posts
Posted: Monday, April 16, 2018 - 02:25 AM UTC
Amazing scratch building Joe, your eye for detail is excellent! 
fightnjoe
Joined: August 16, 2004
KitMaker: 603 posts
AeroScale: 565 posts
Posted: Monday, April 16, 2018 - 10:20 AM UTC
You are very kind. Thank you.
Joe
Joe
fightnjoe
Joined: August 16, 2004
KitMaker: 603 posts
AeroScale: 565 posts
Posted: Wednesday, April 18, 2018 - 06:49 AM UTC
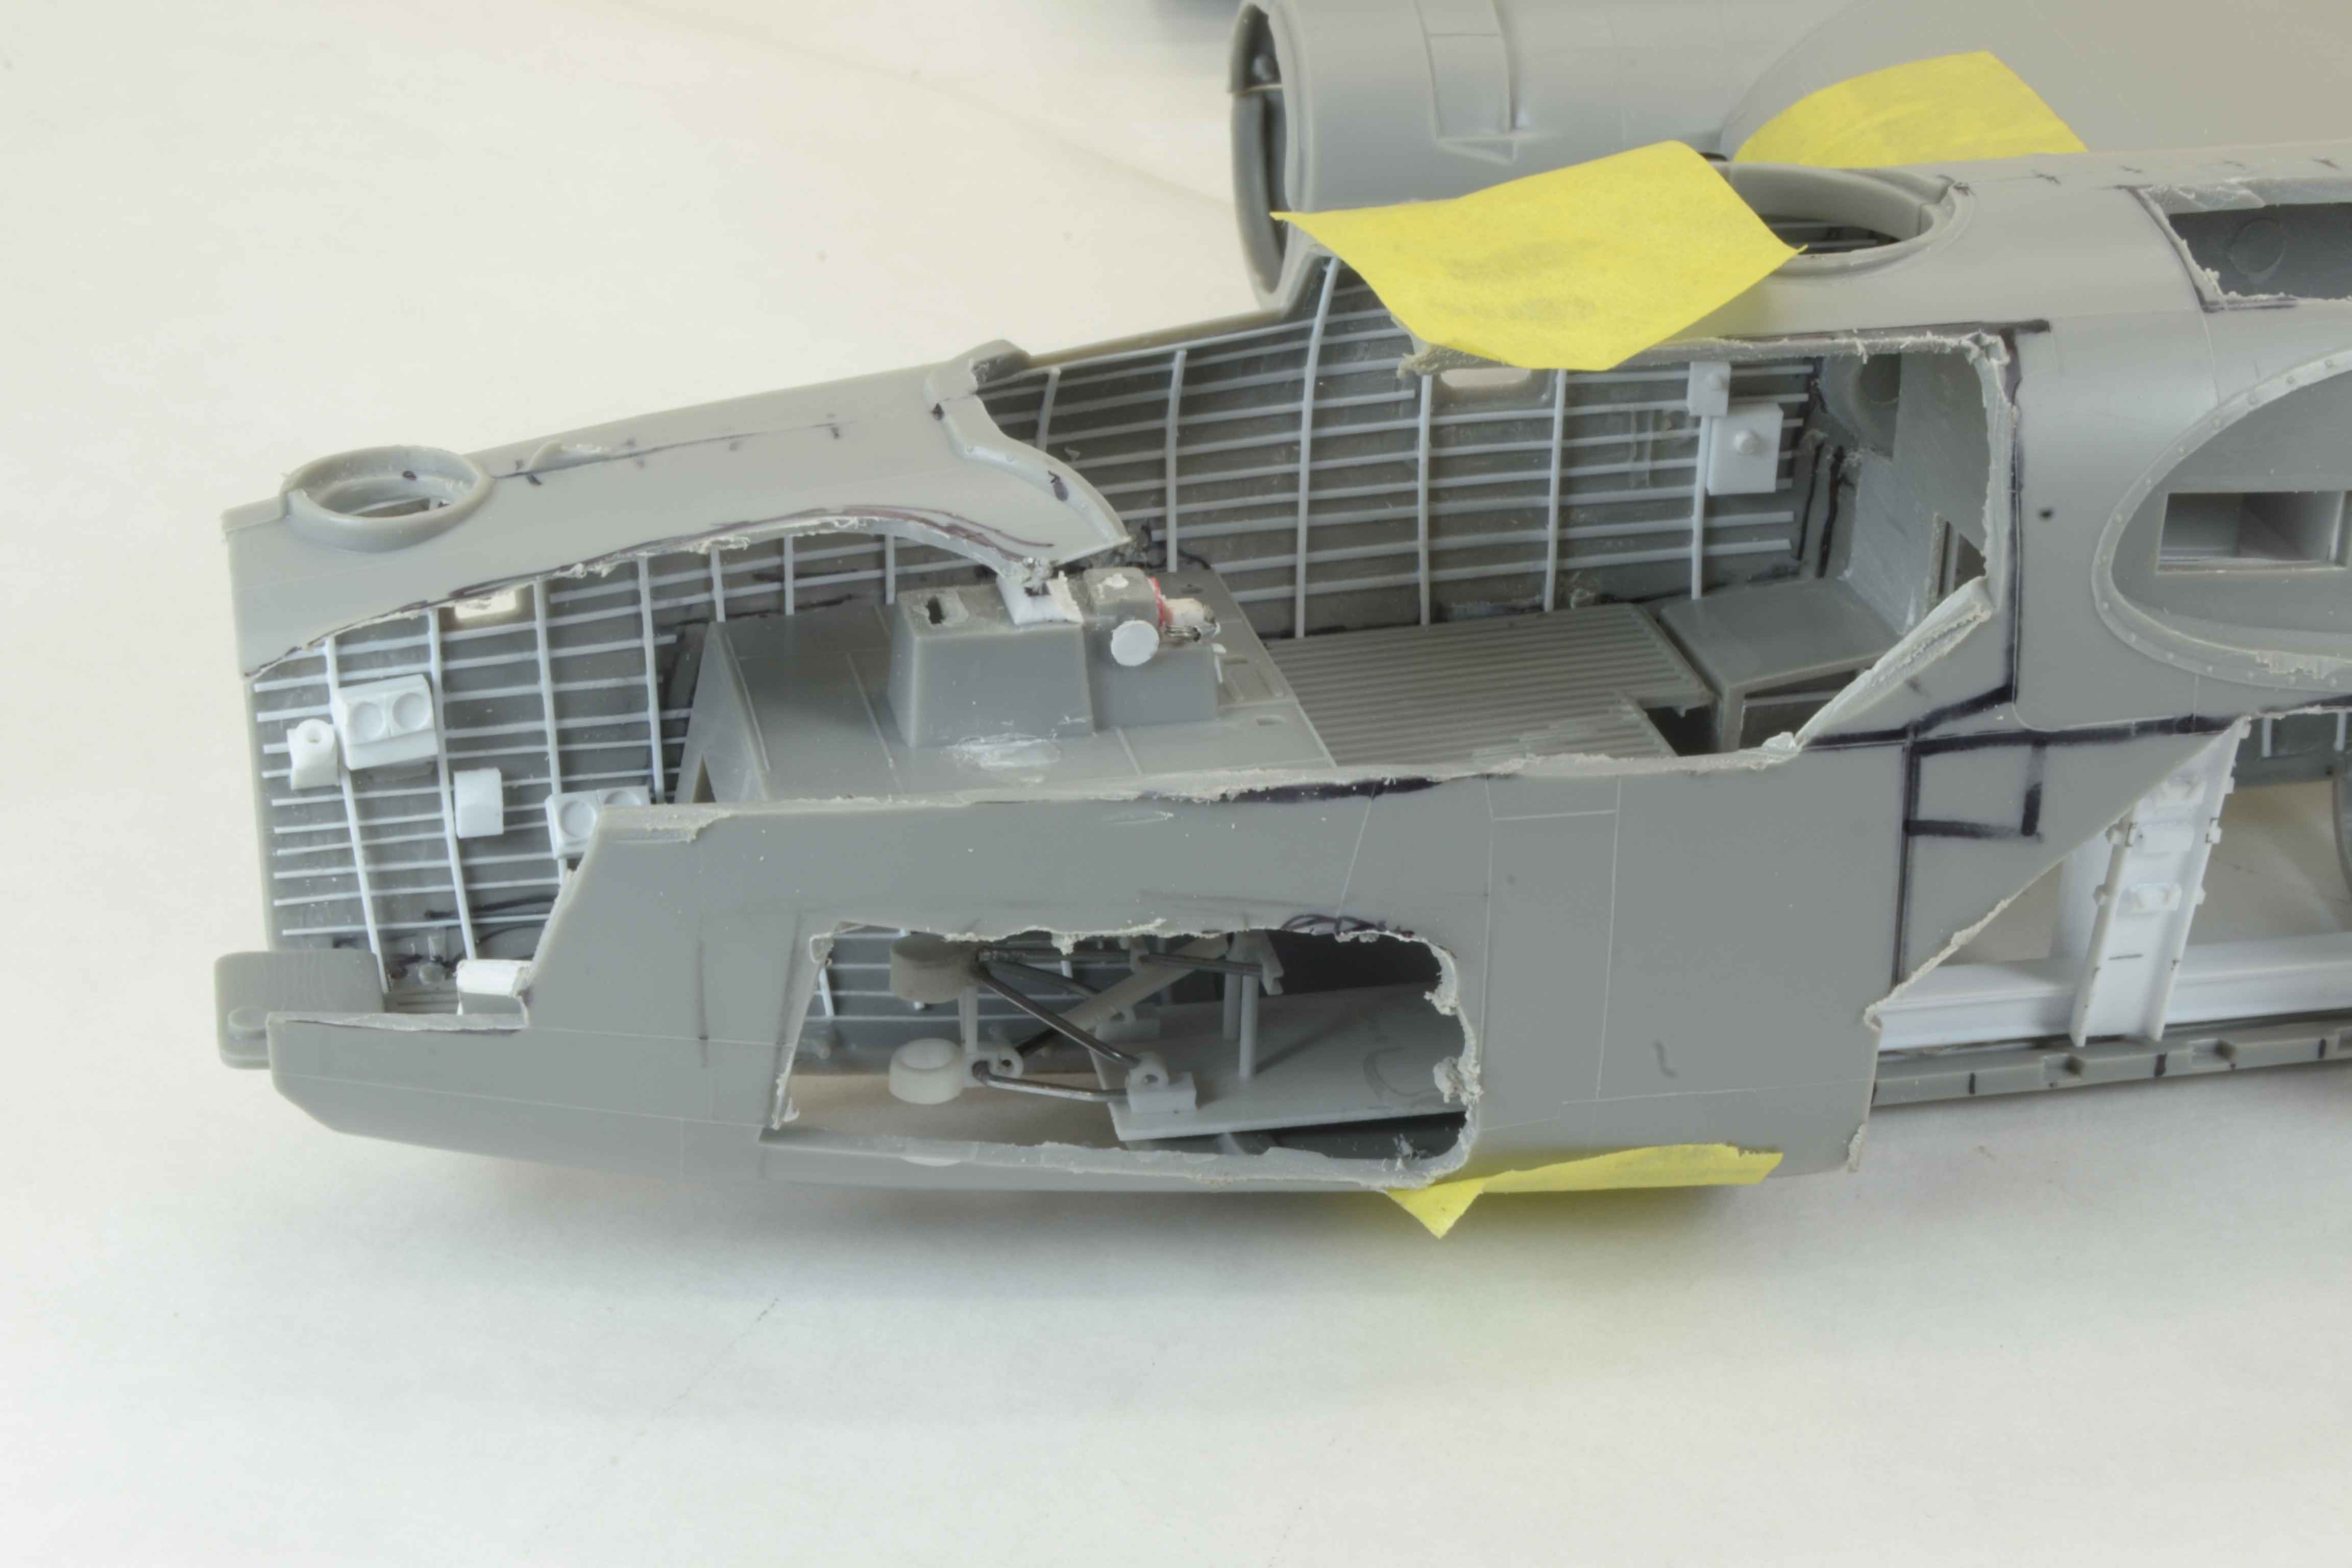
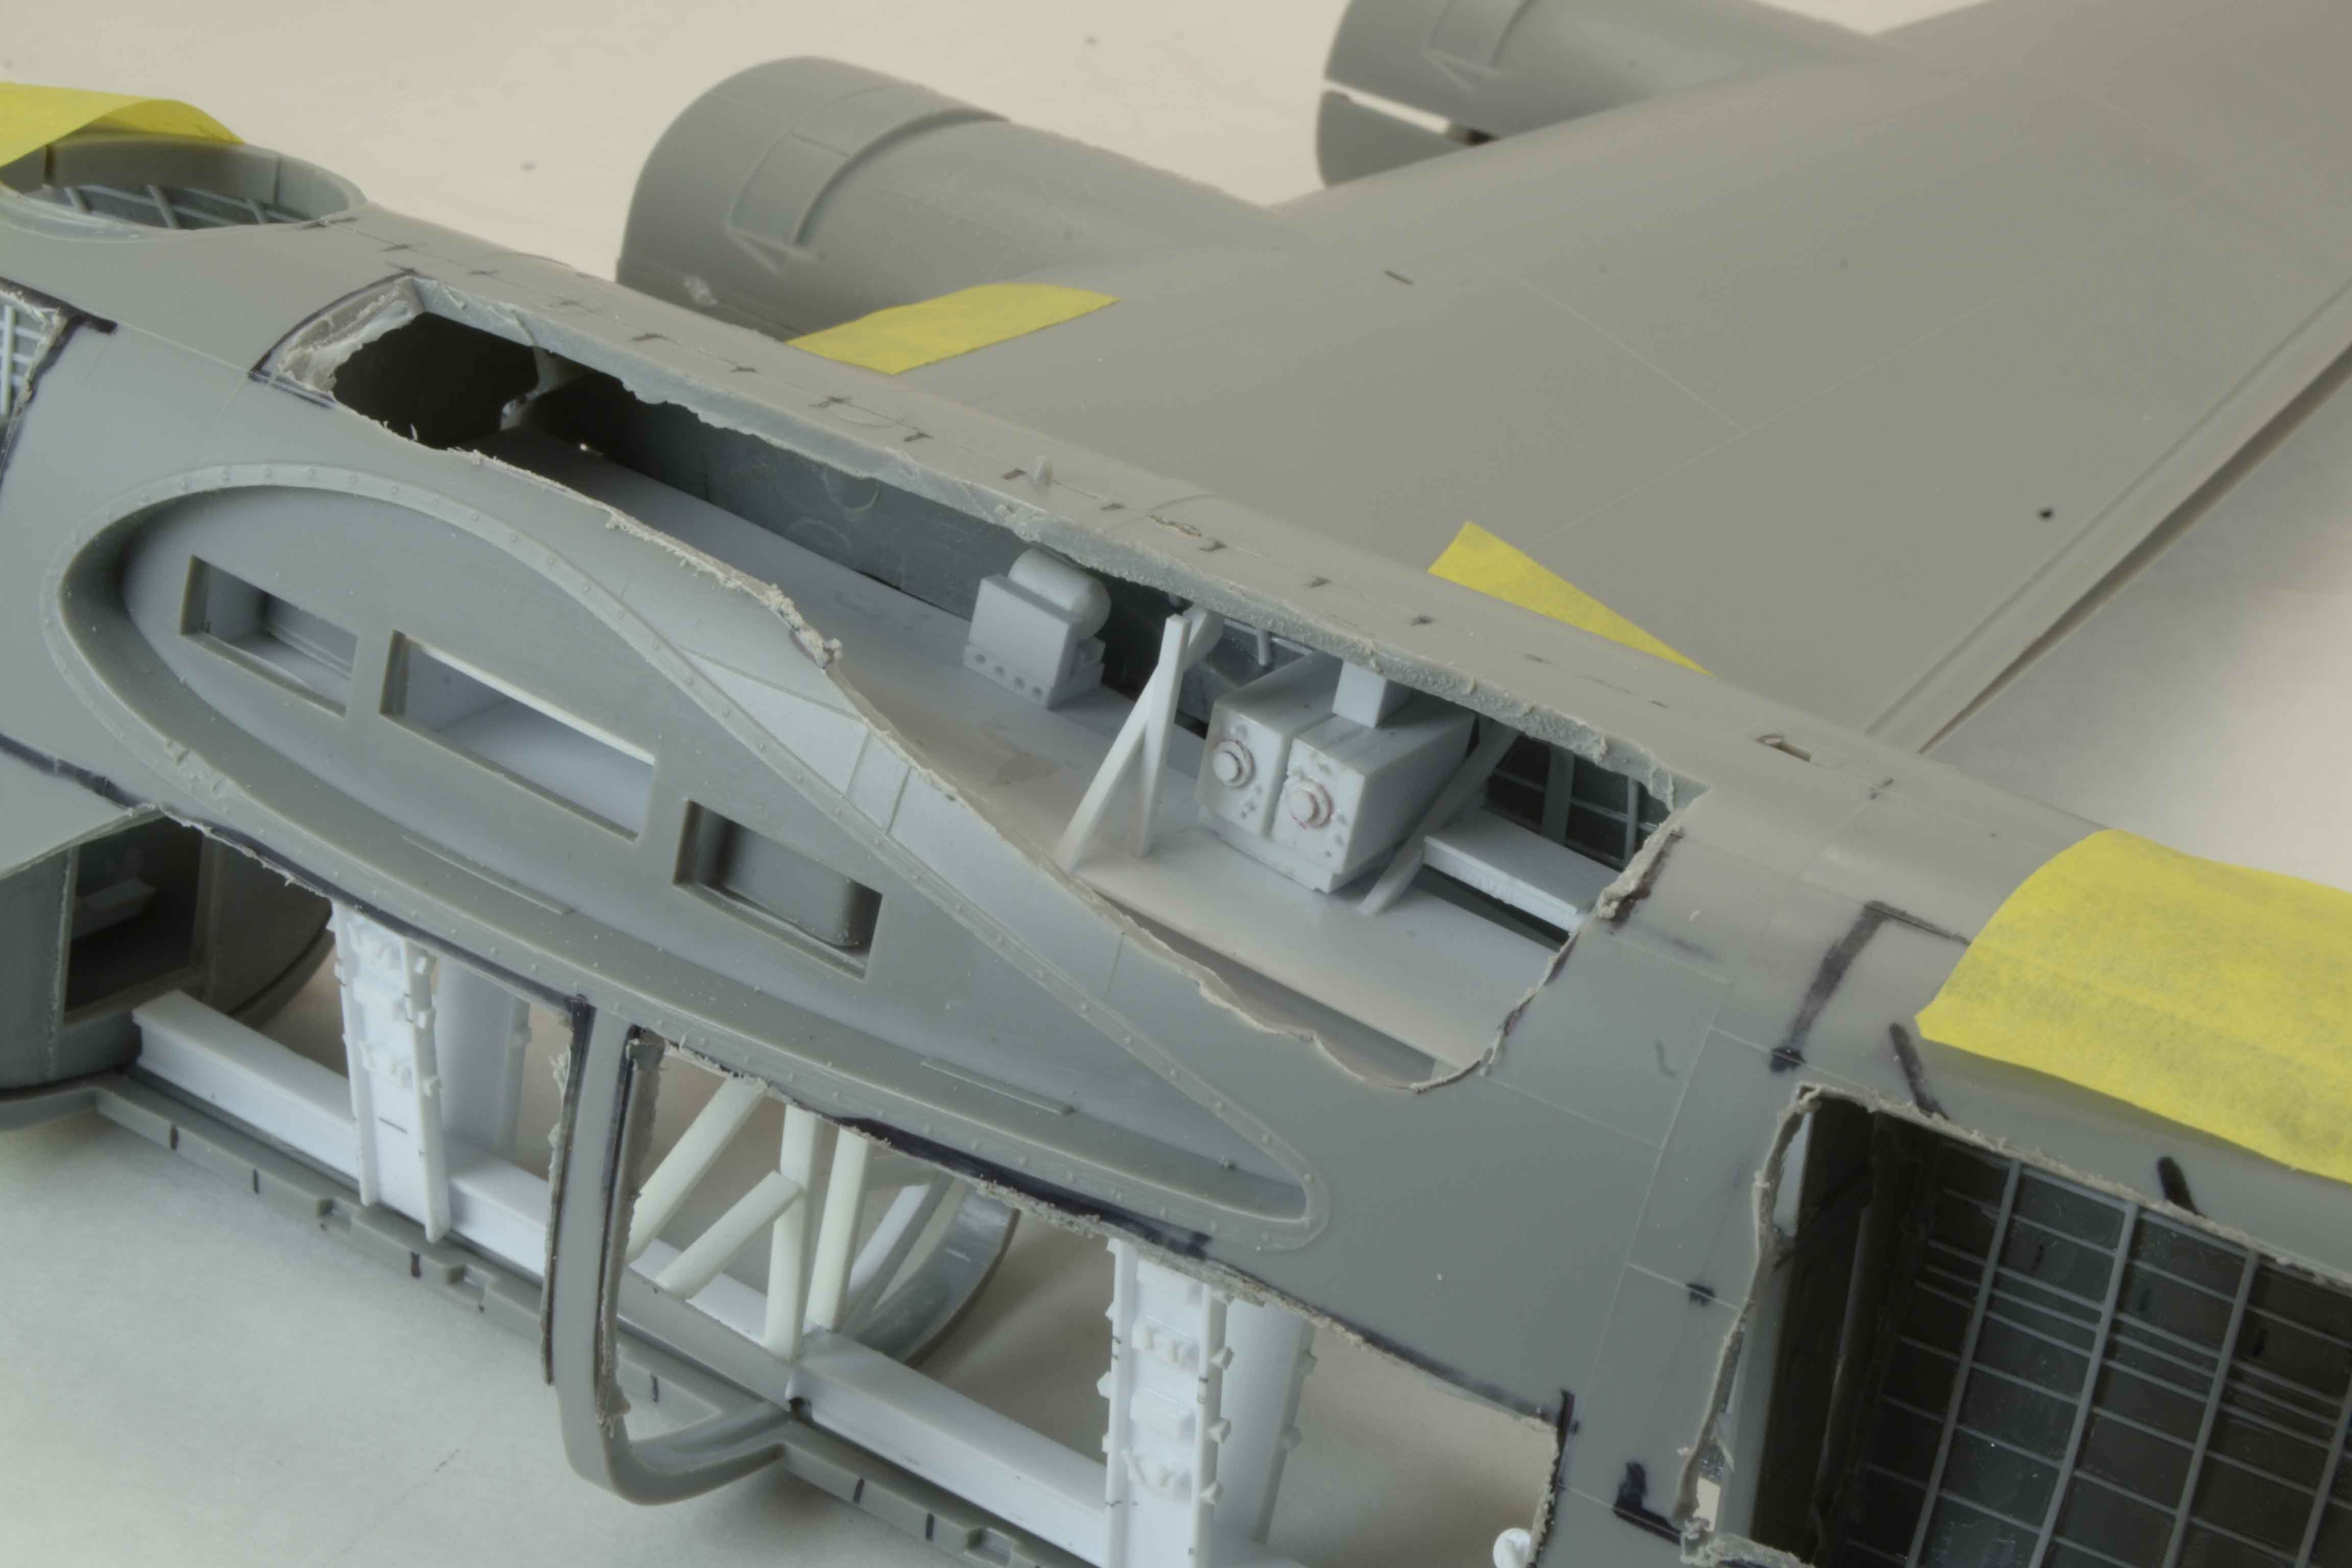
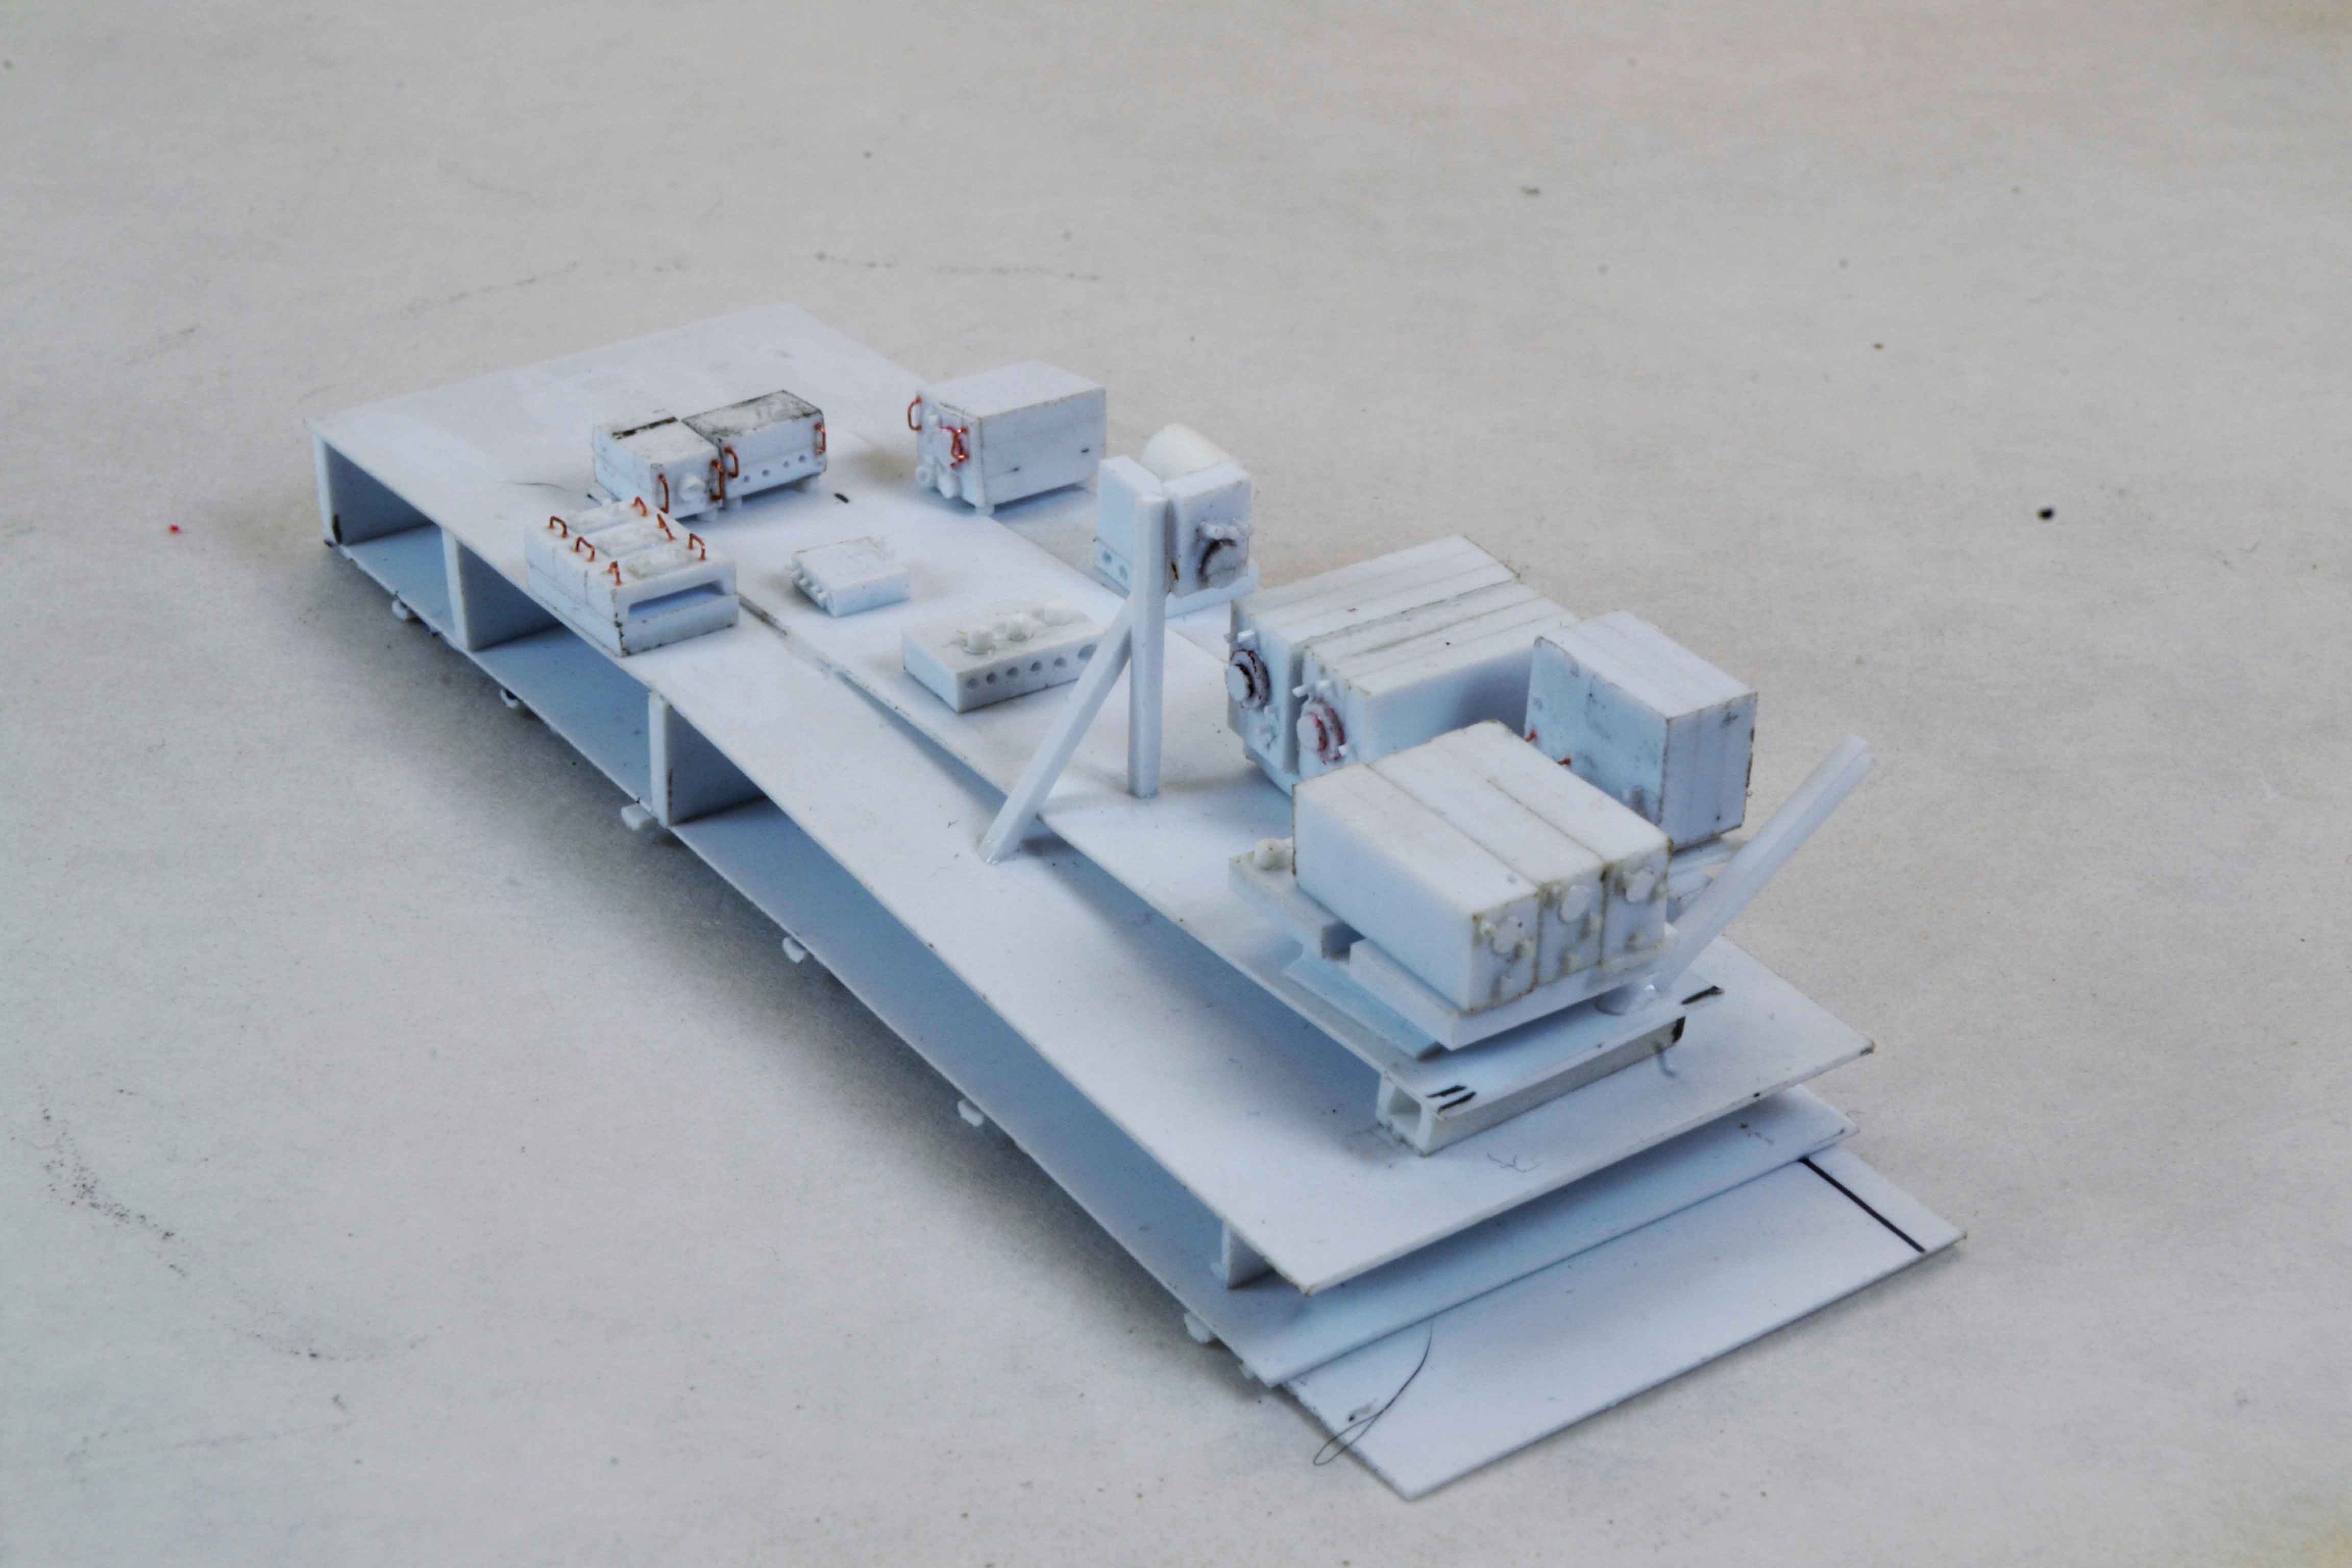
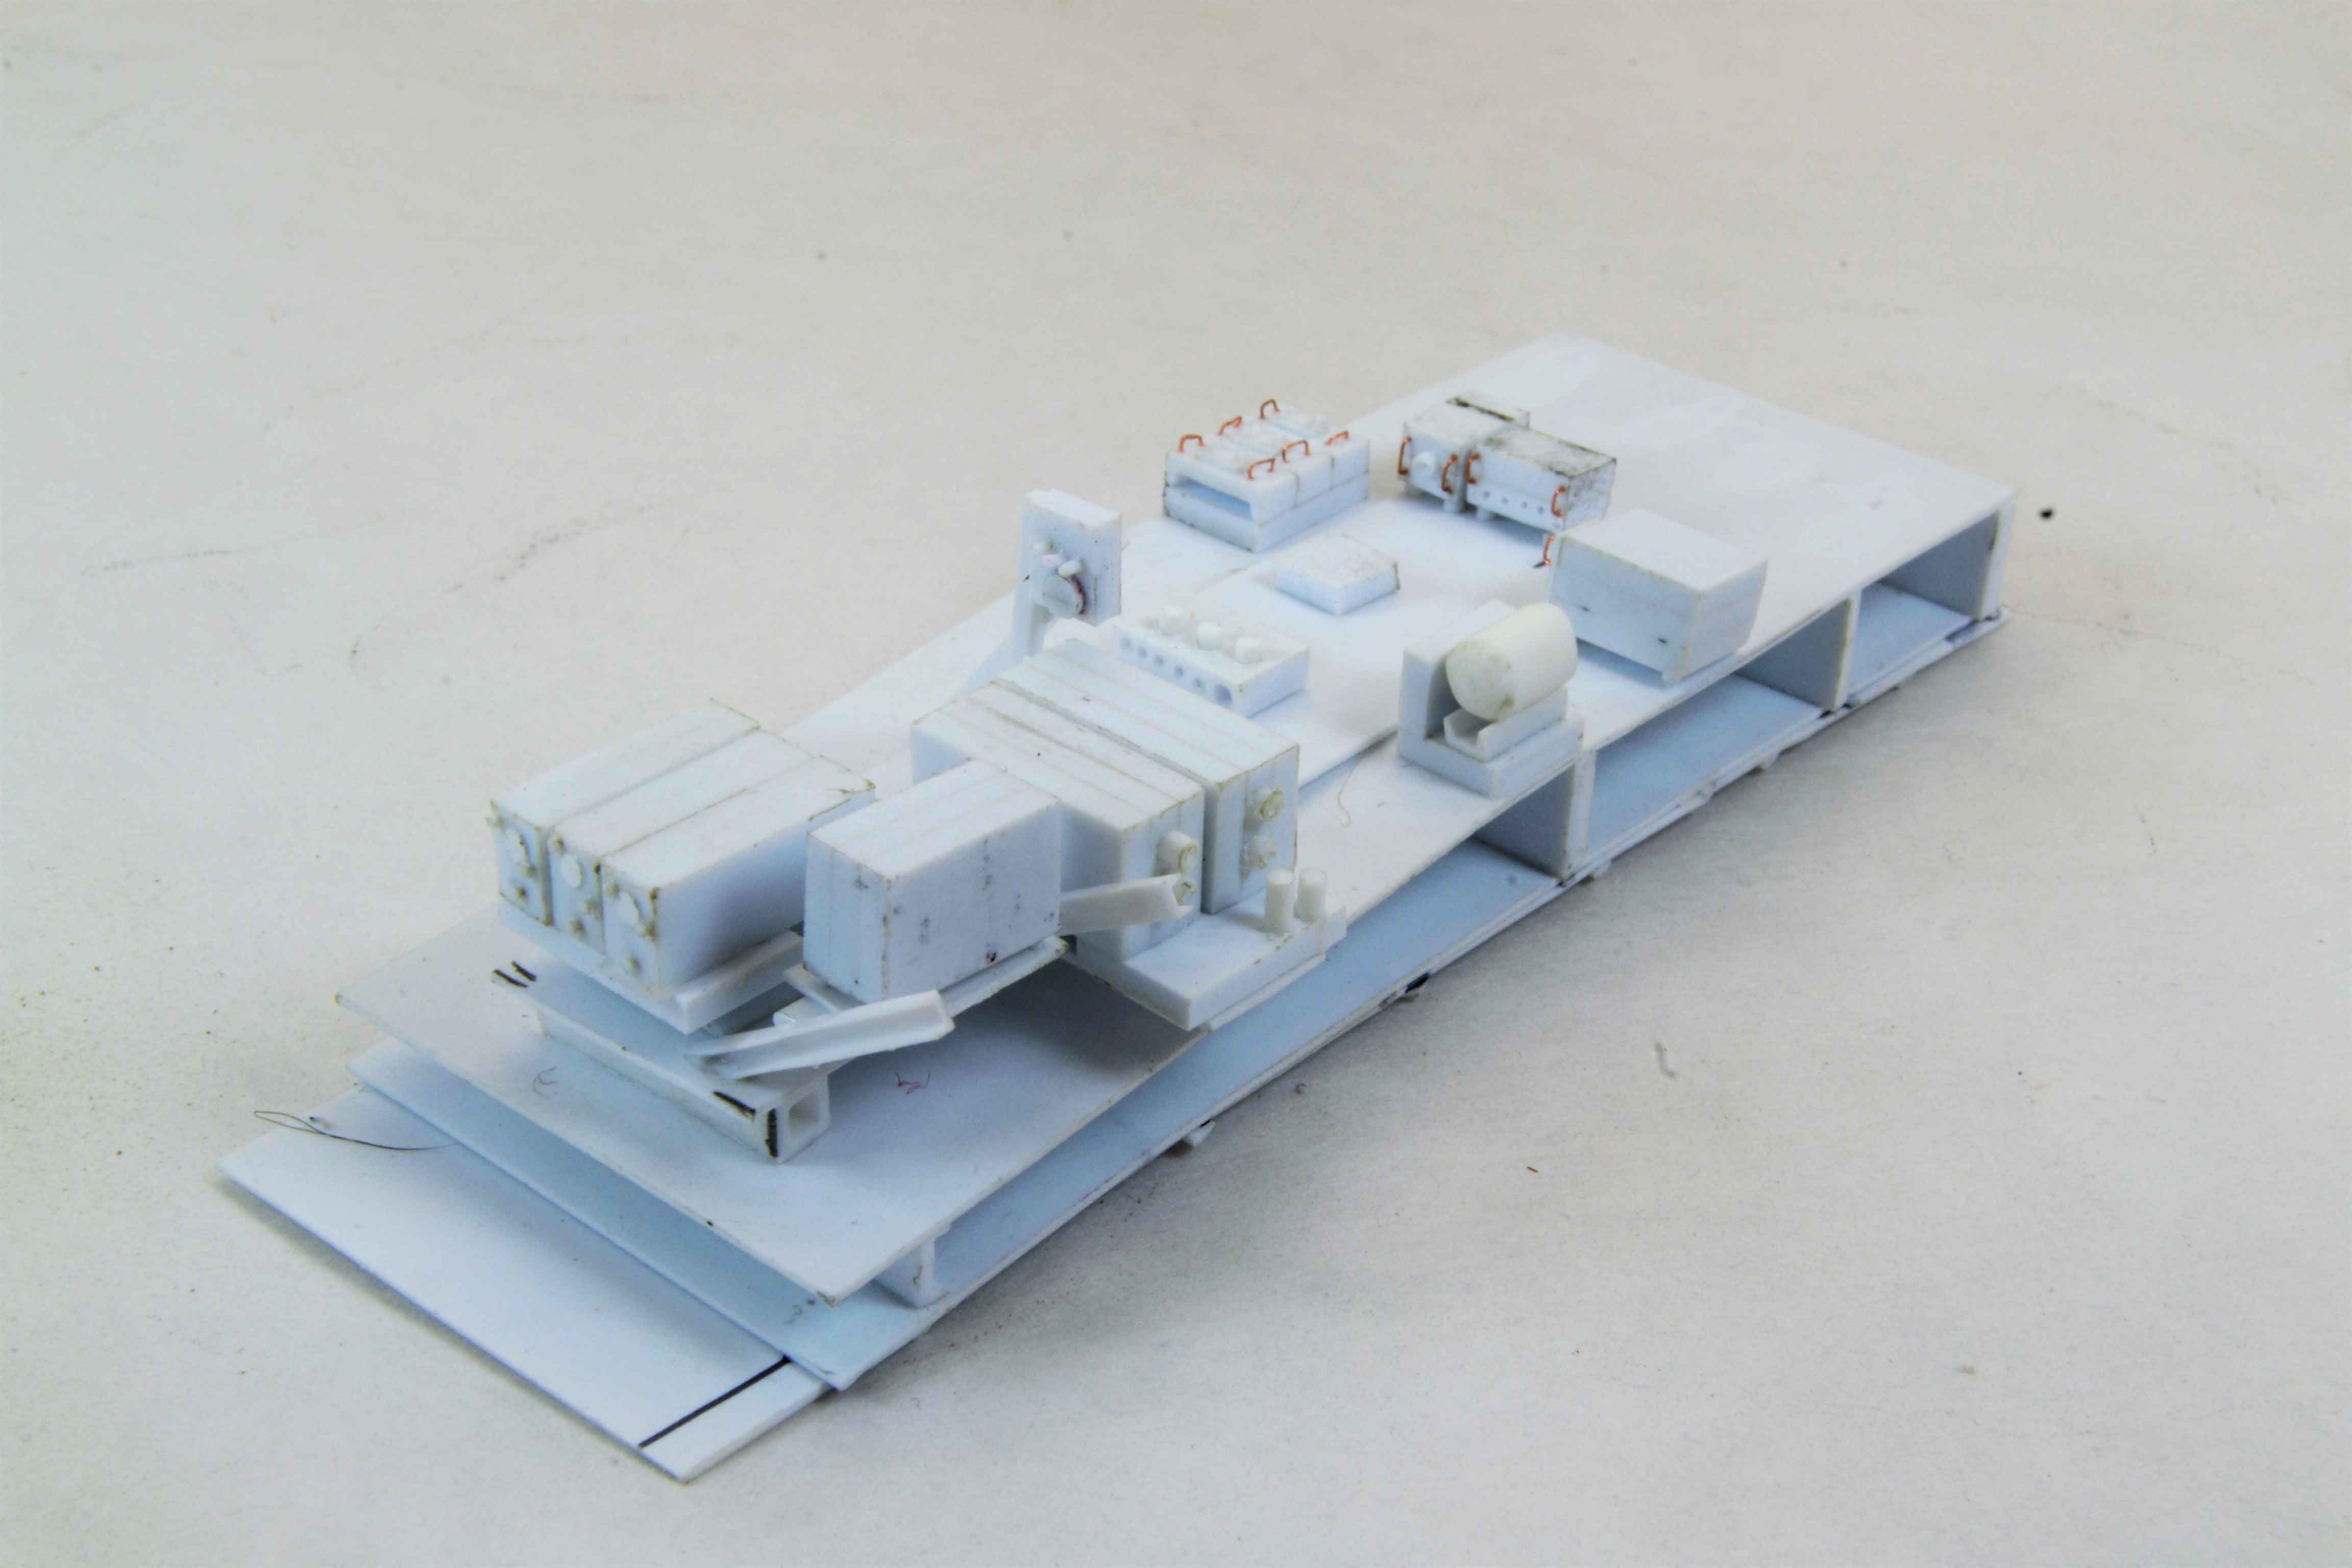
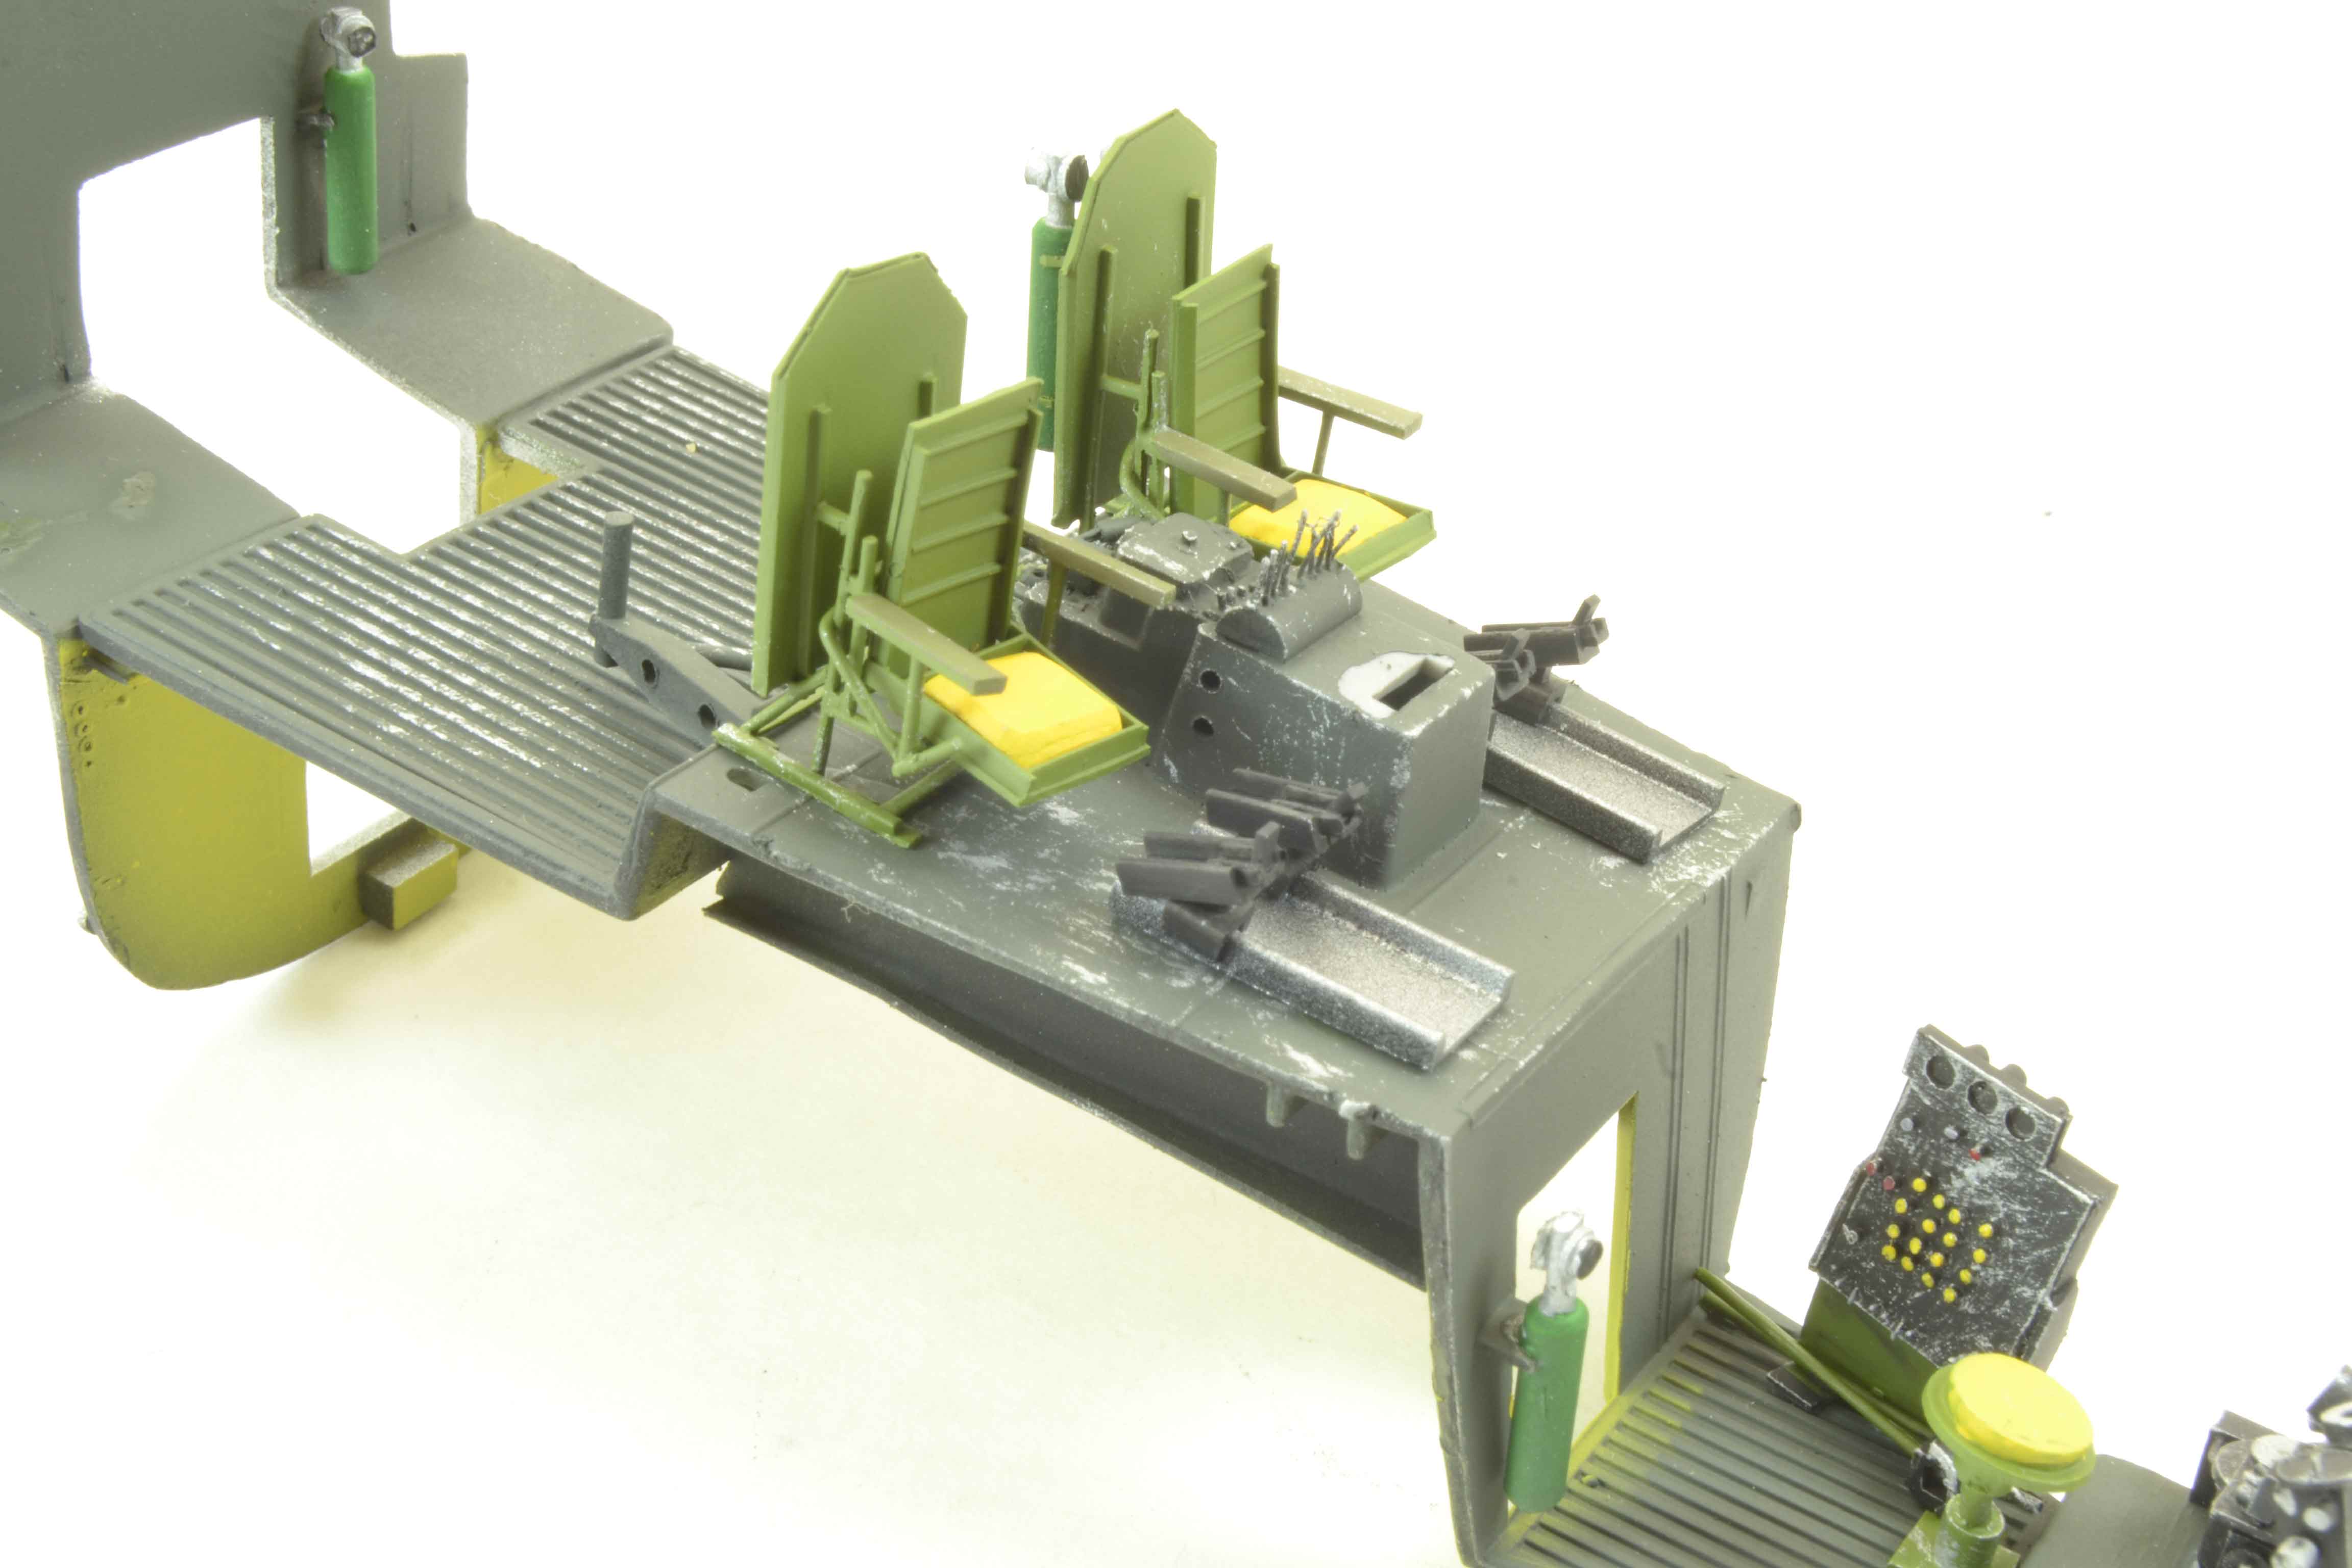
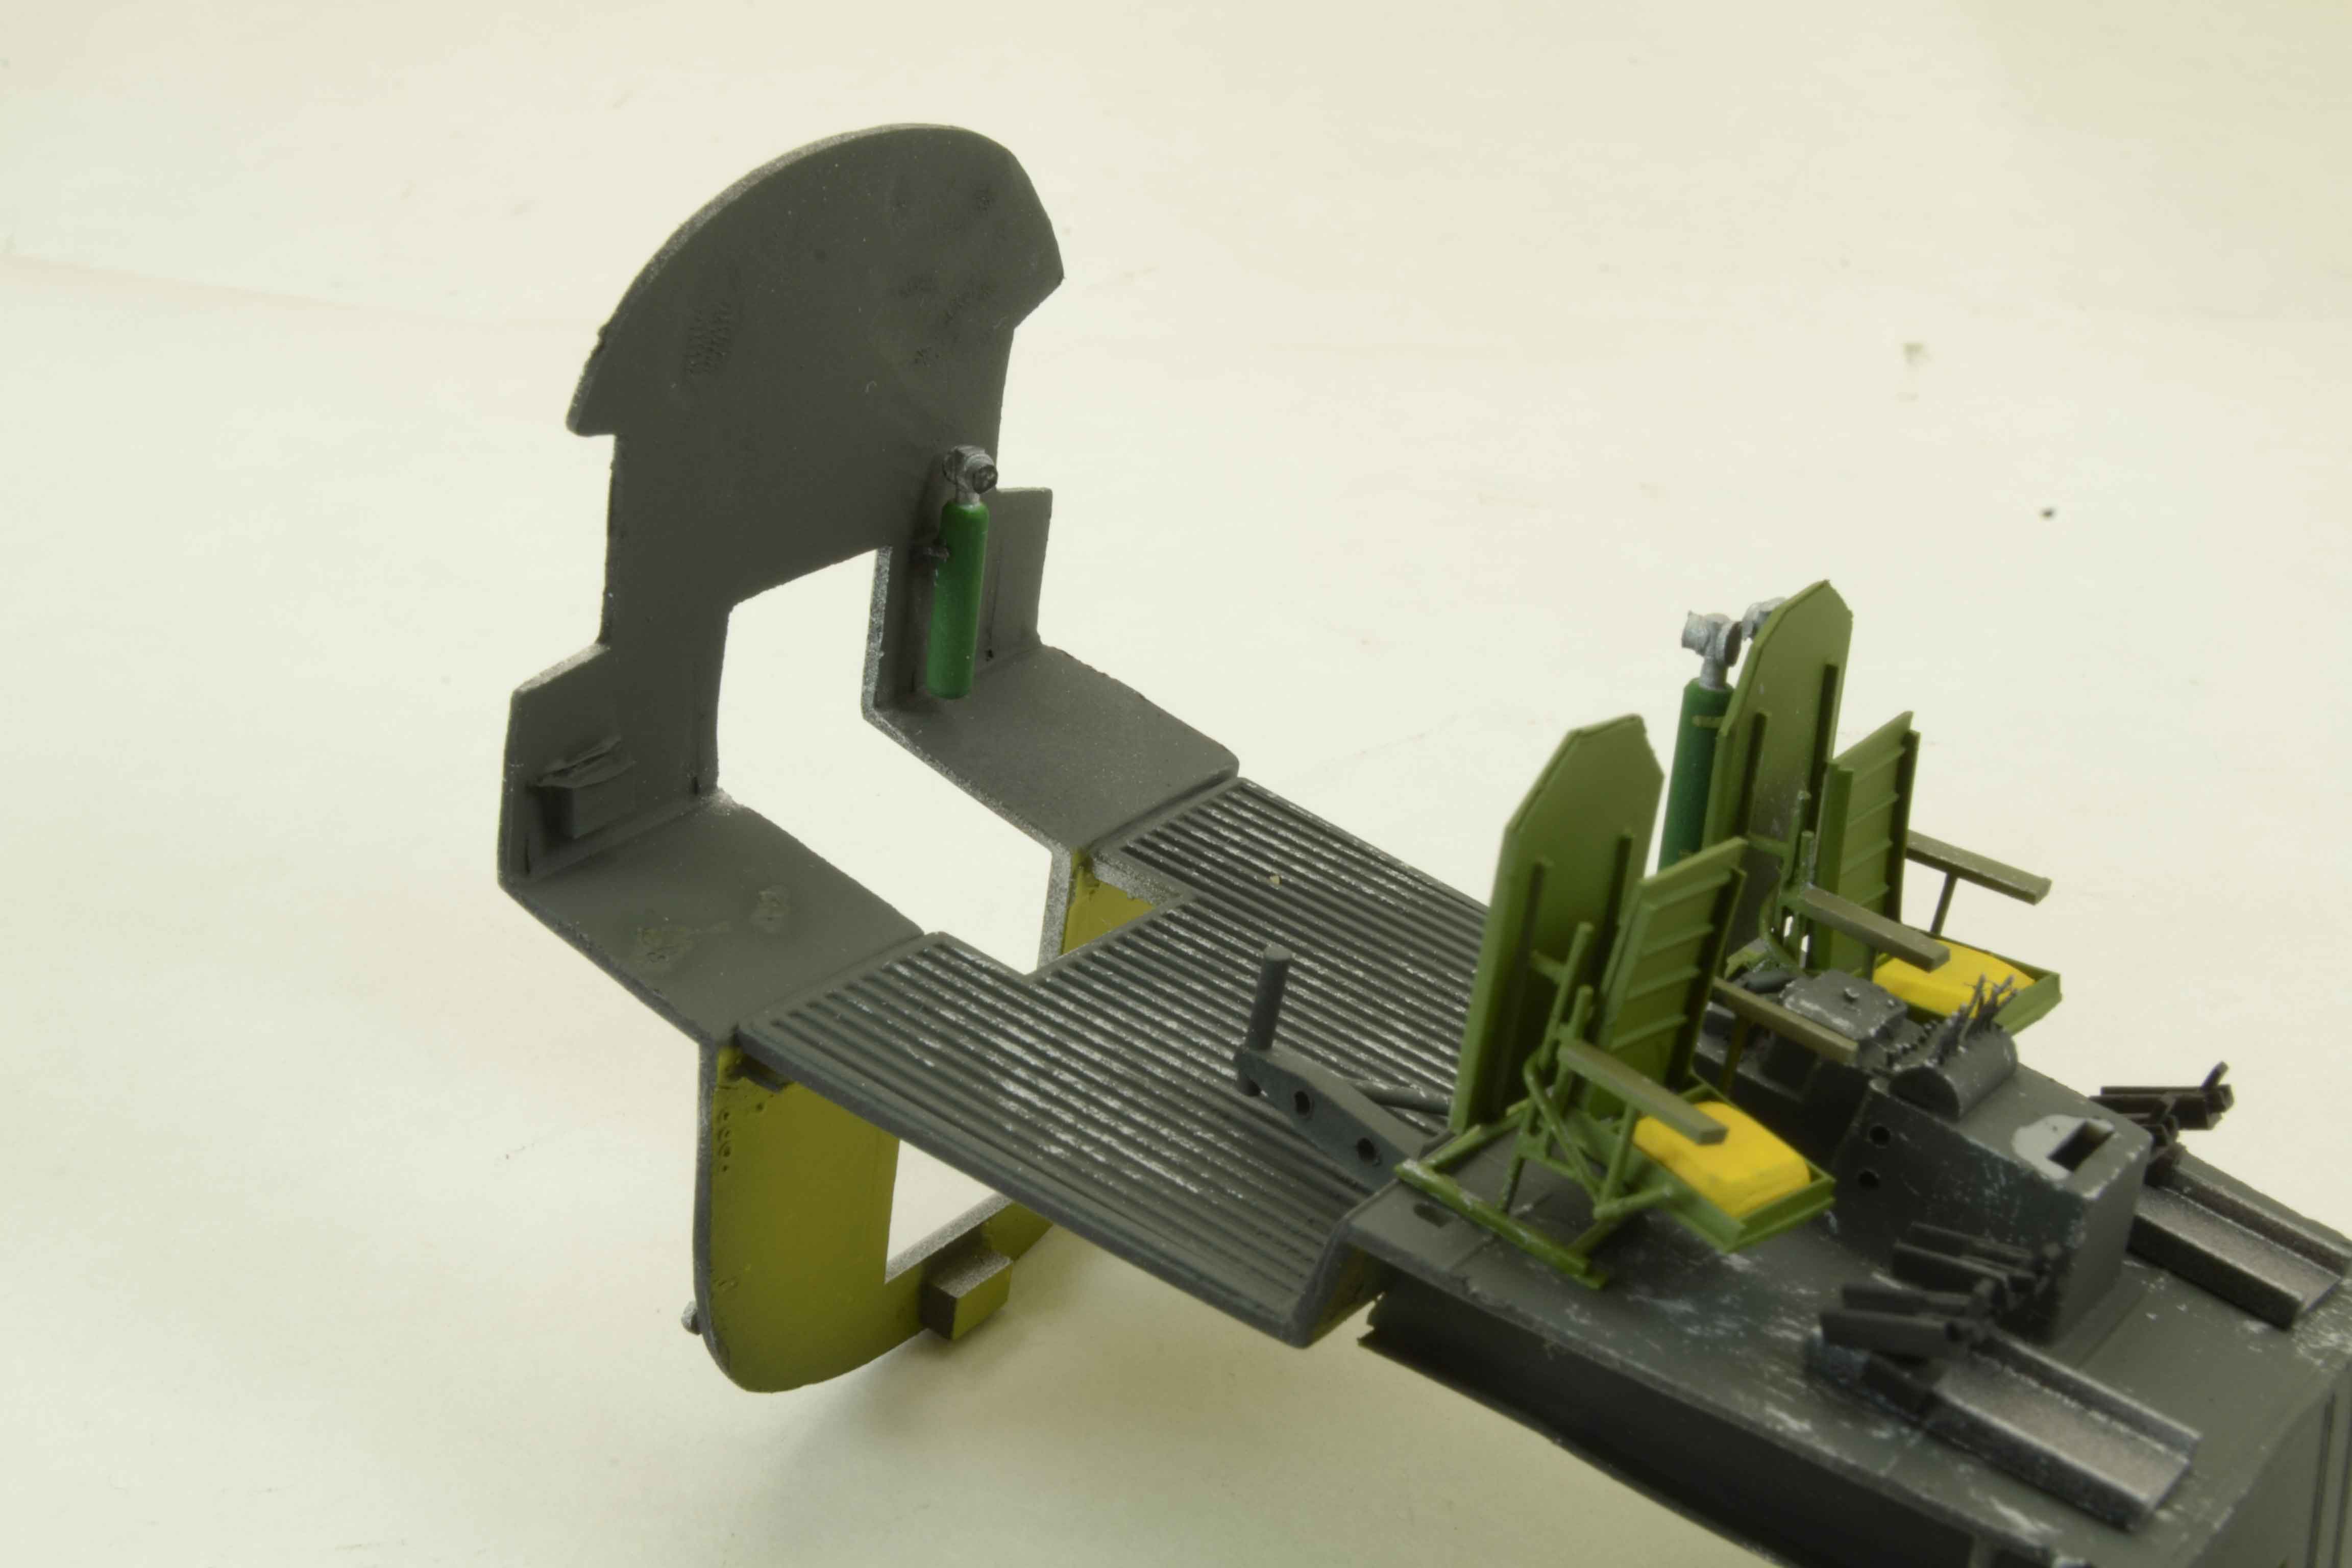
Ok how about another overview as the work continues for the B-24D by Revell. Again remembering that the kit parts are in gray and the rest are my additions from styrene bits and bobs.
As I move forward on this something that has really caught me is how it seems to be coming together. For this update some small parts such as the inter plane communication boxes and the heaters to larger things like the plumbing and wiring. For this update I again mocked up much of what I have minus the O2 bottles, some of the walkway, and some of the plumbing.
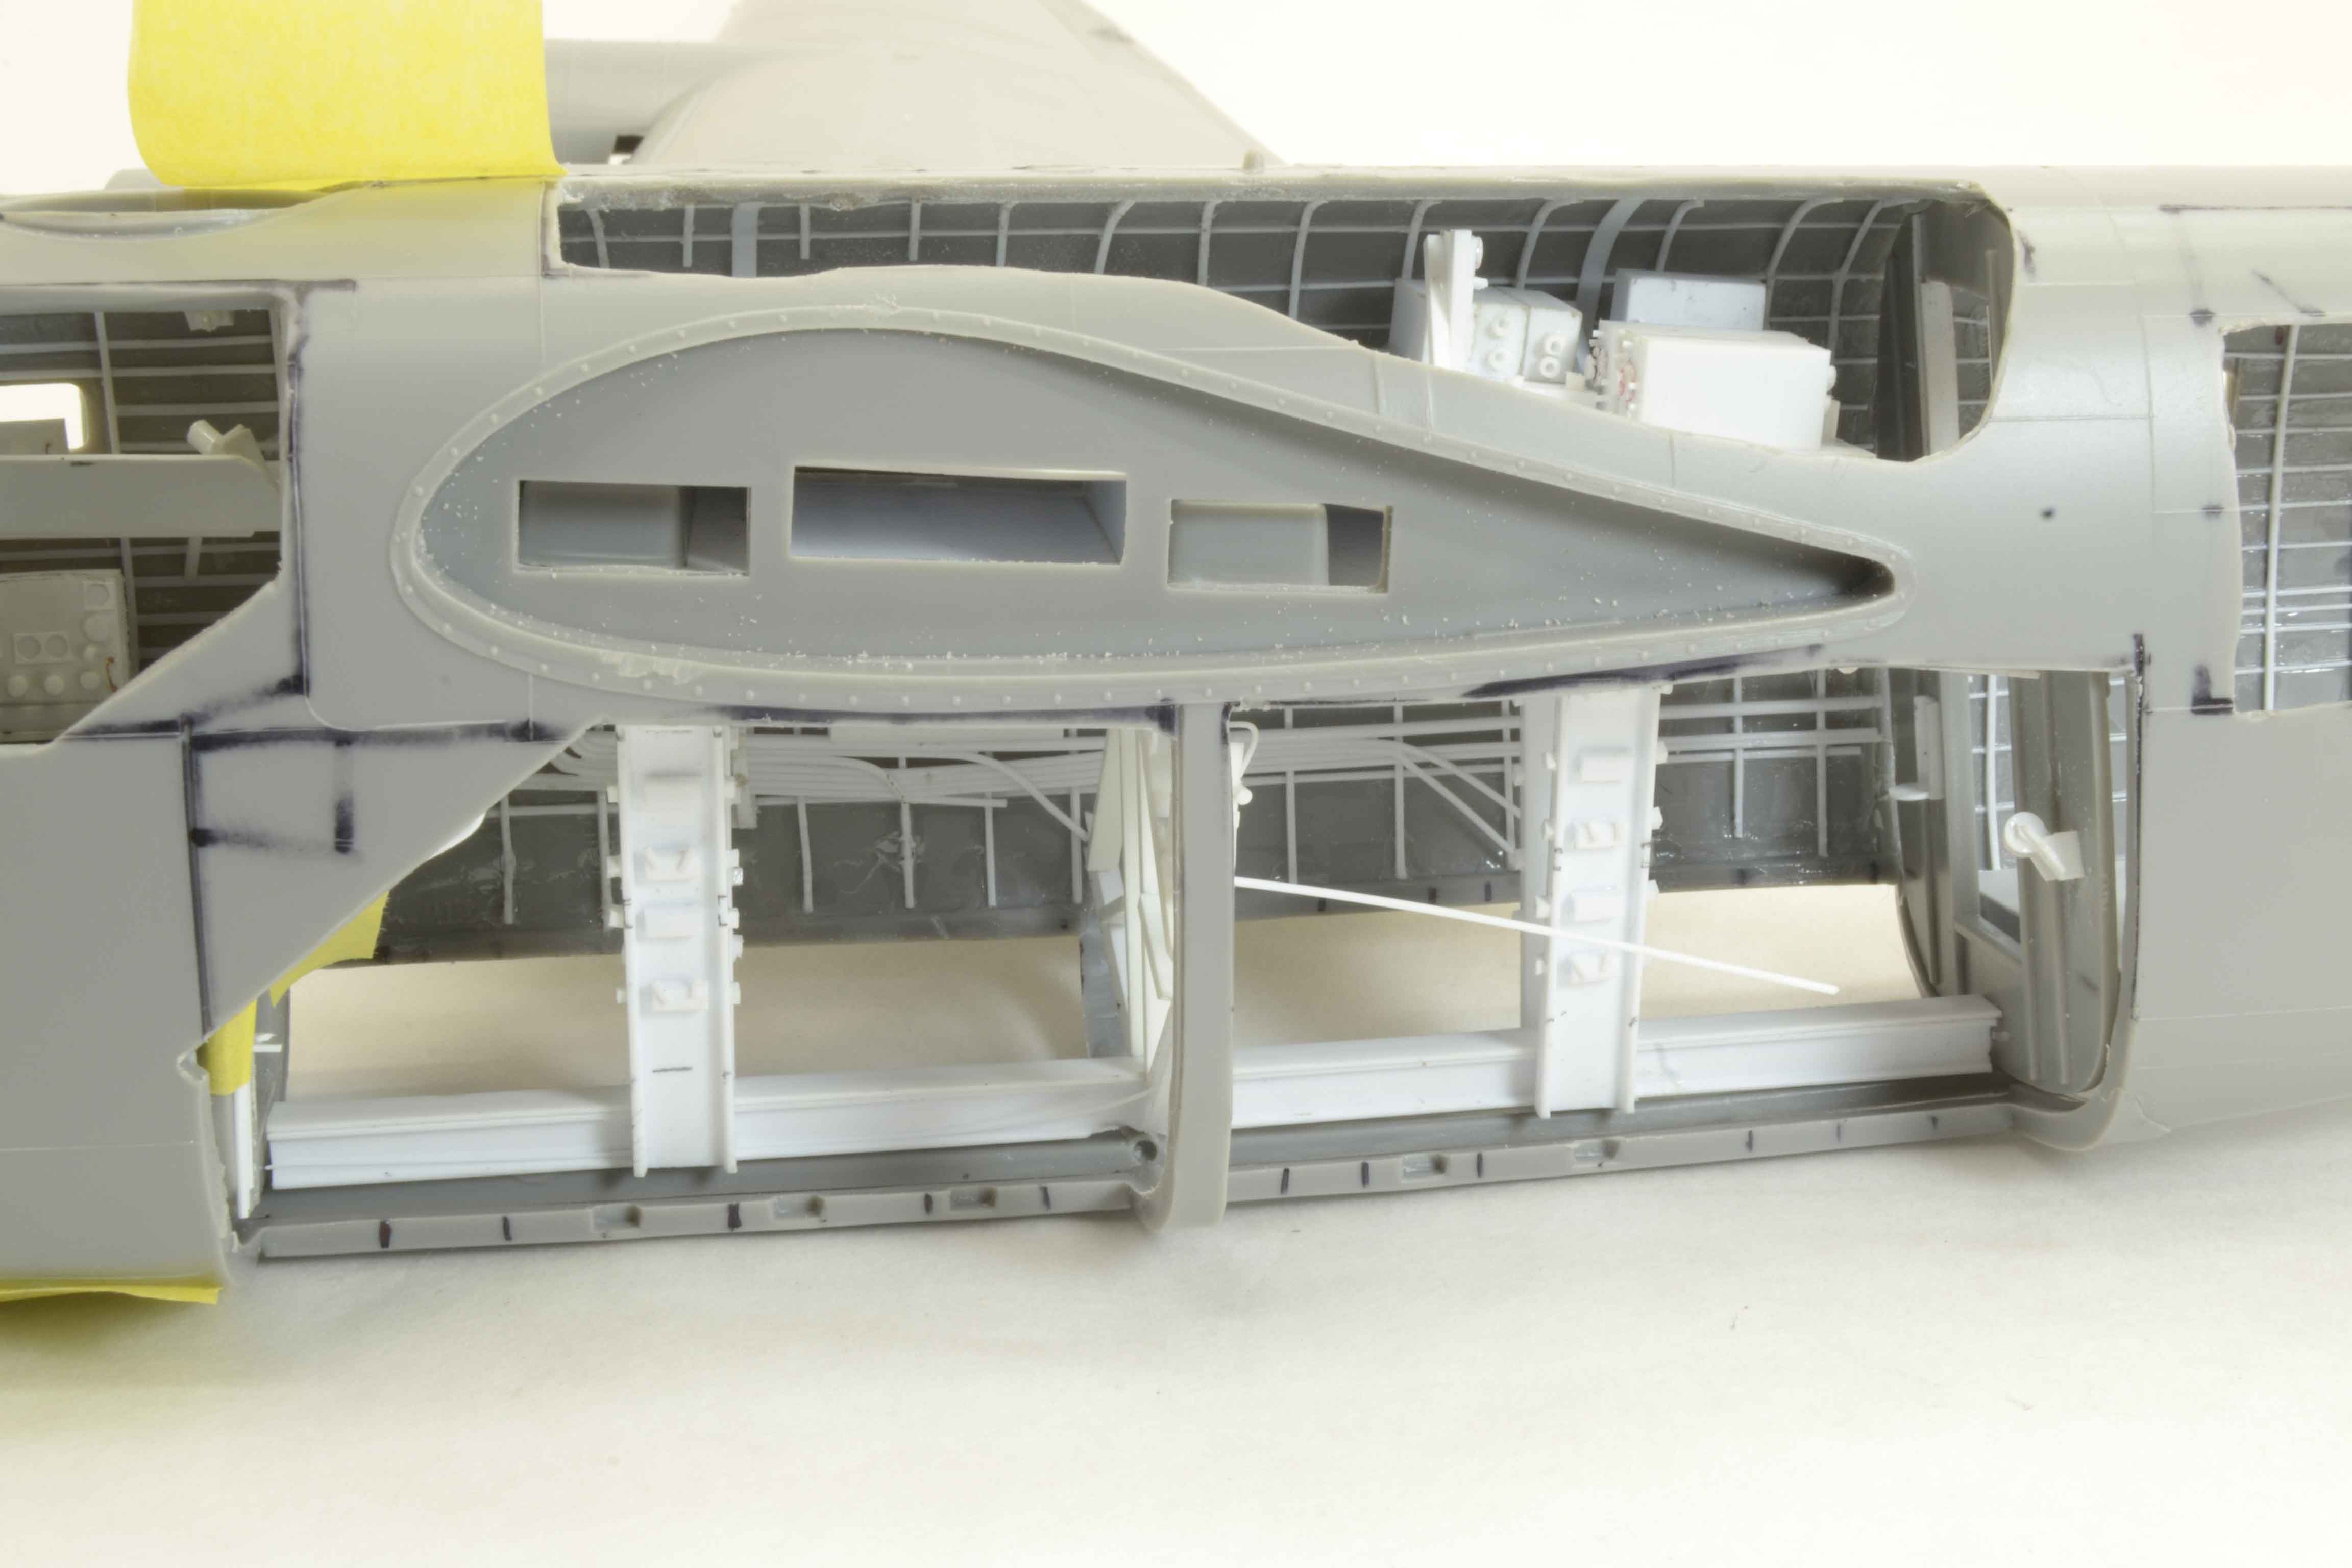

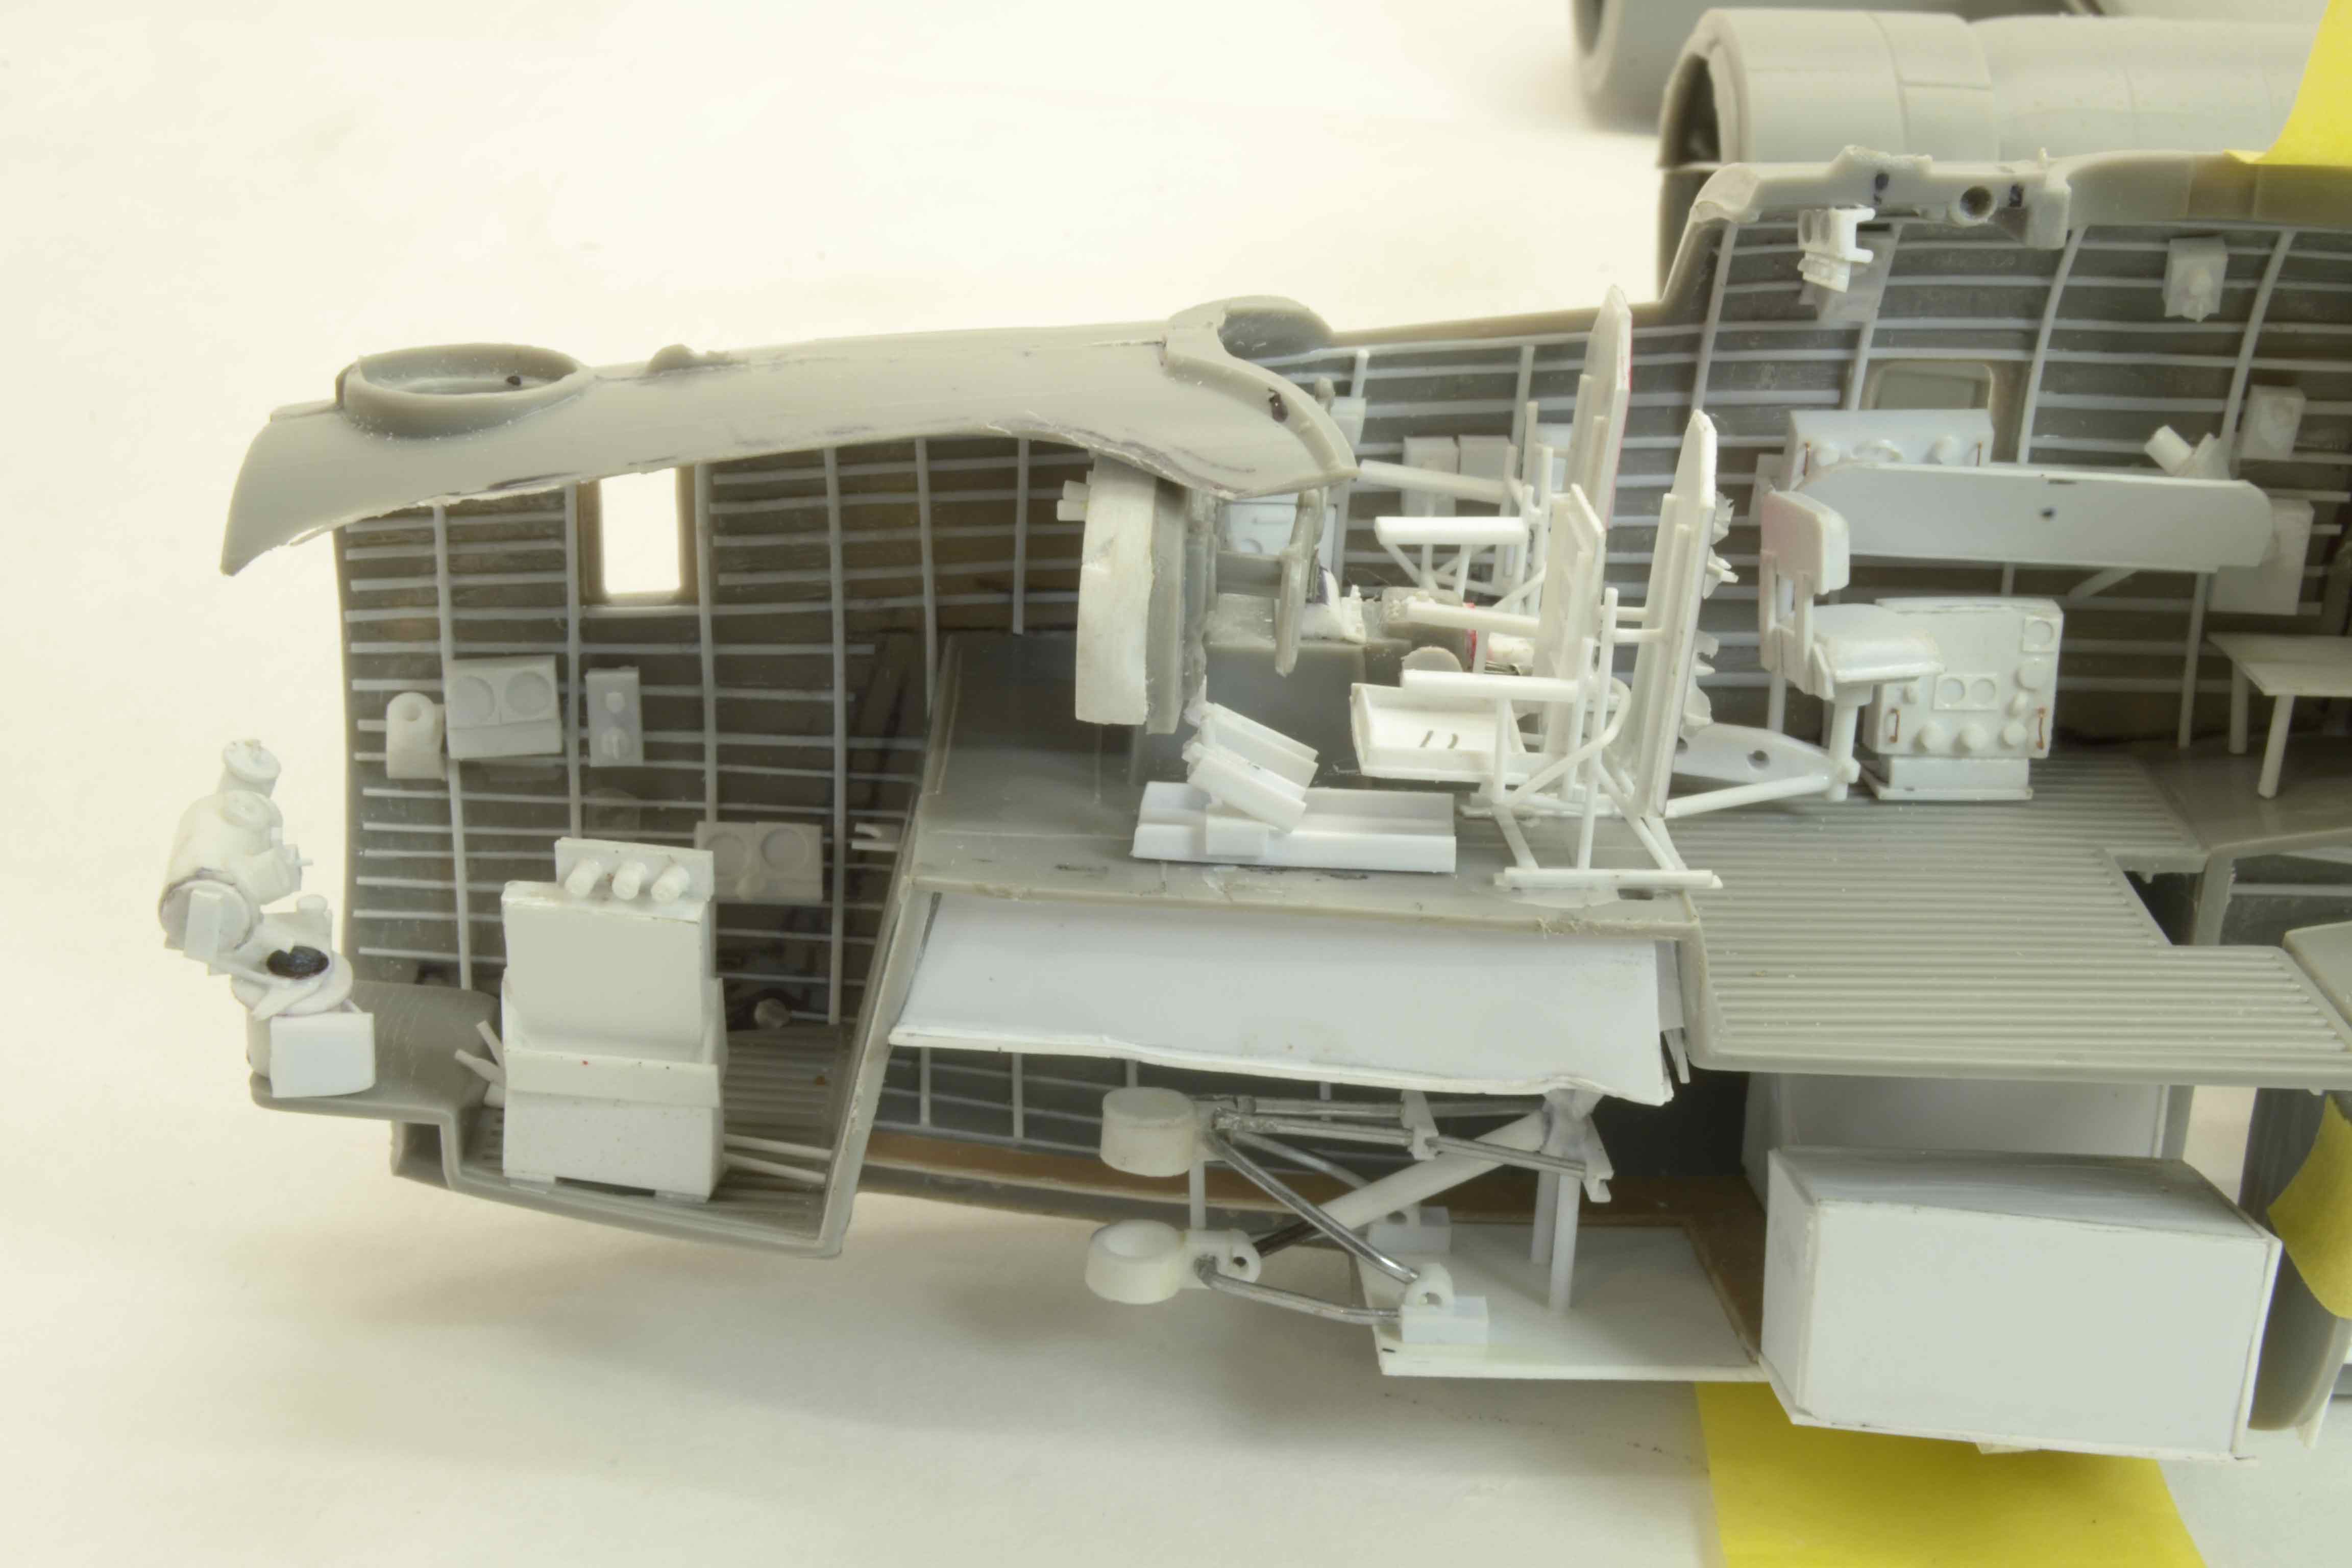

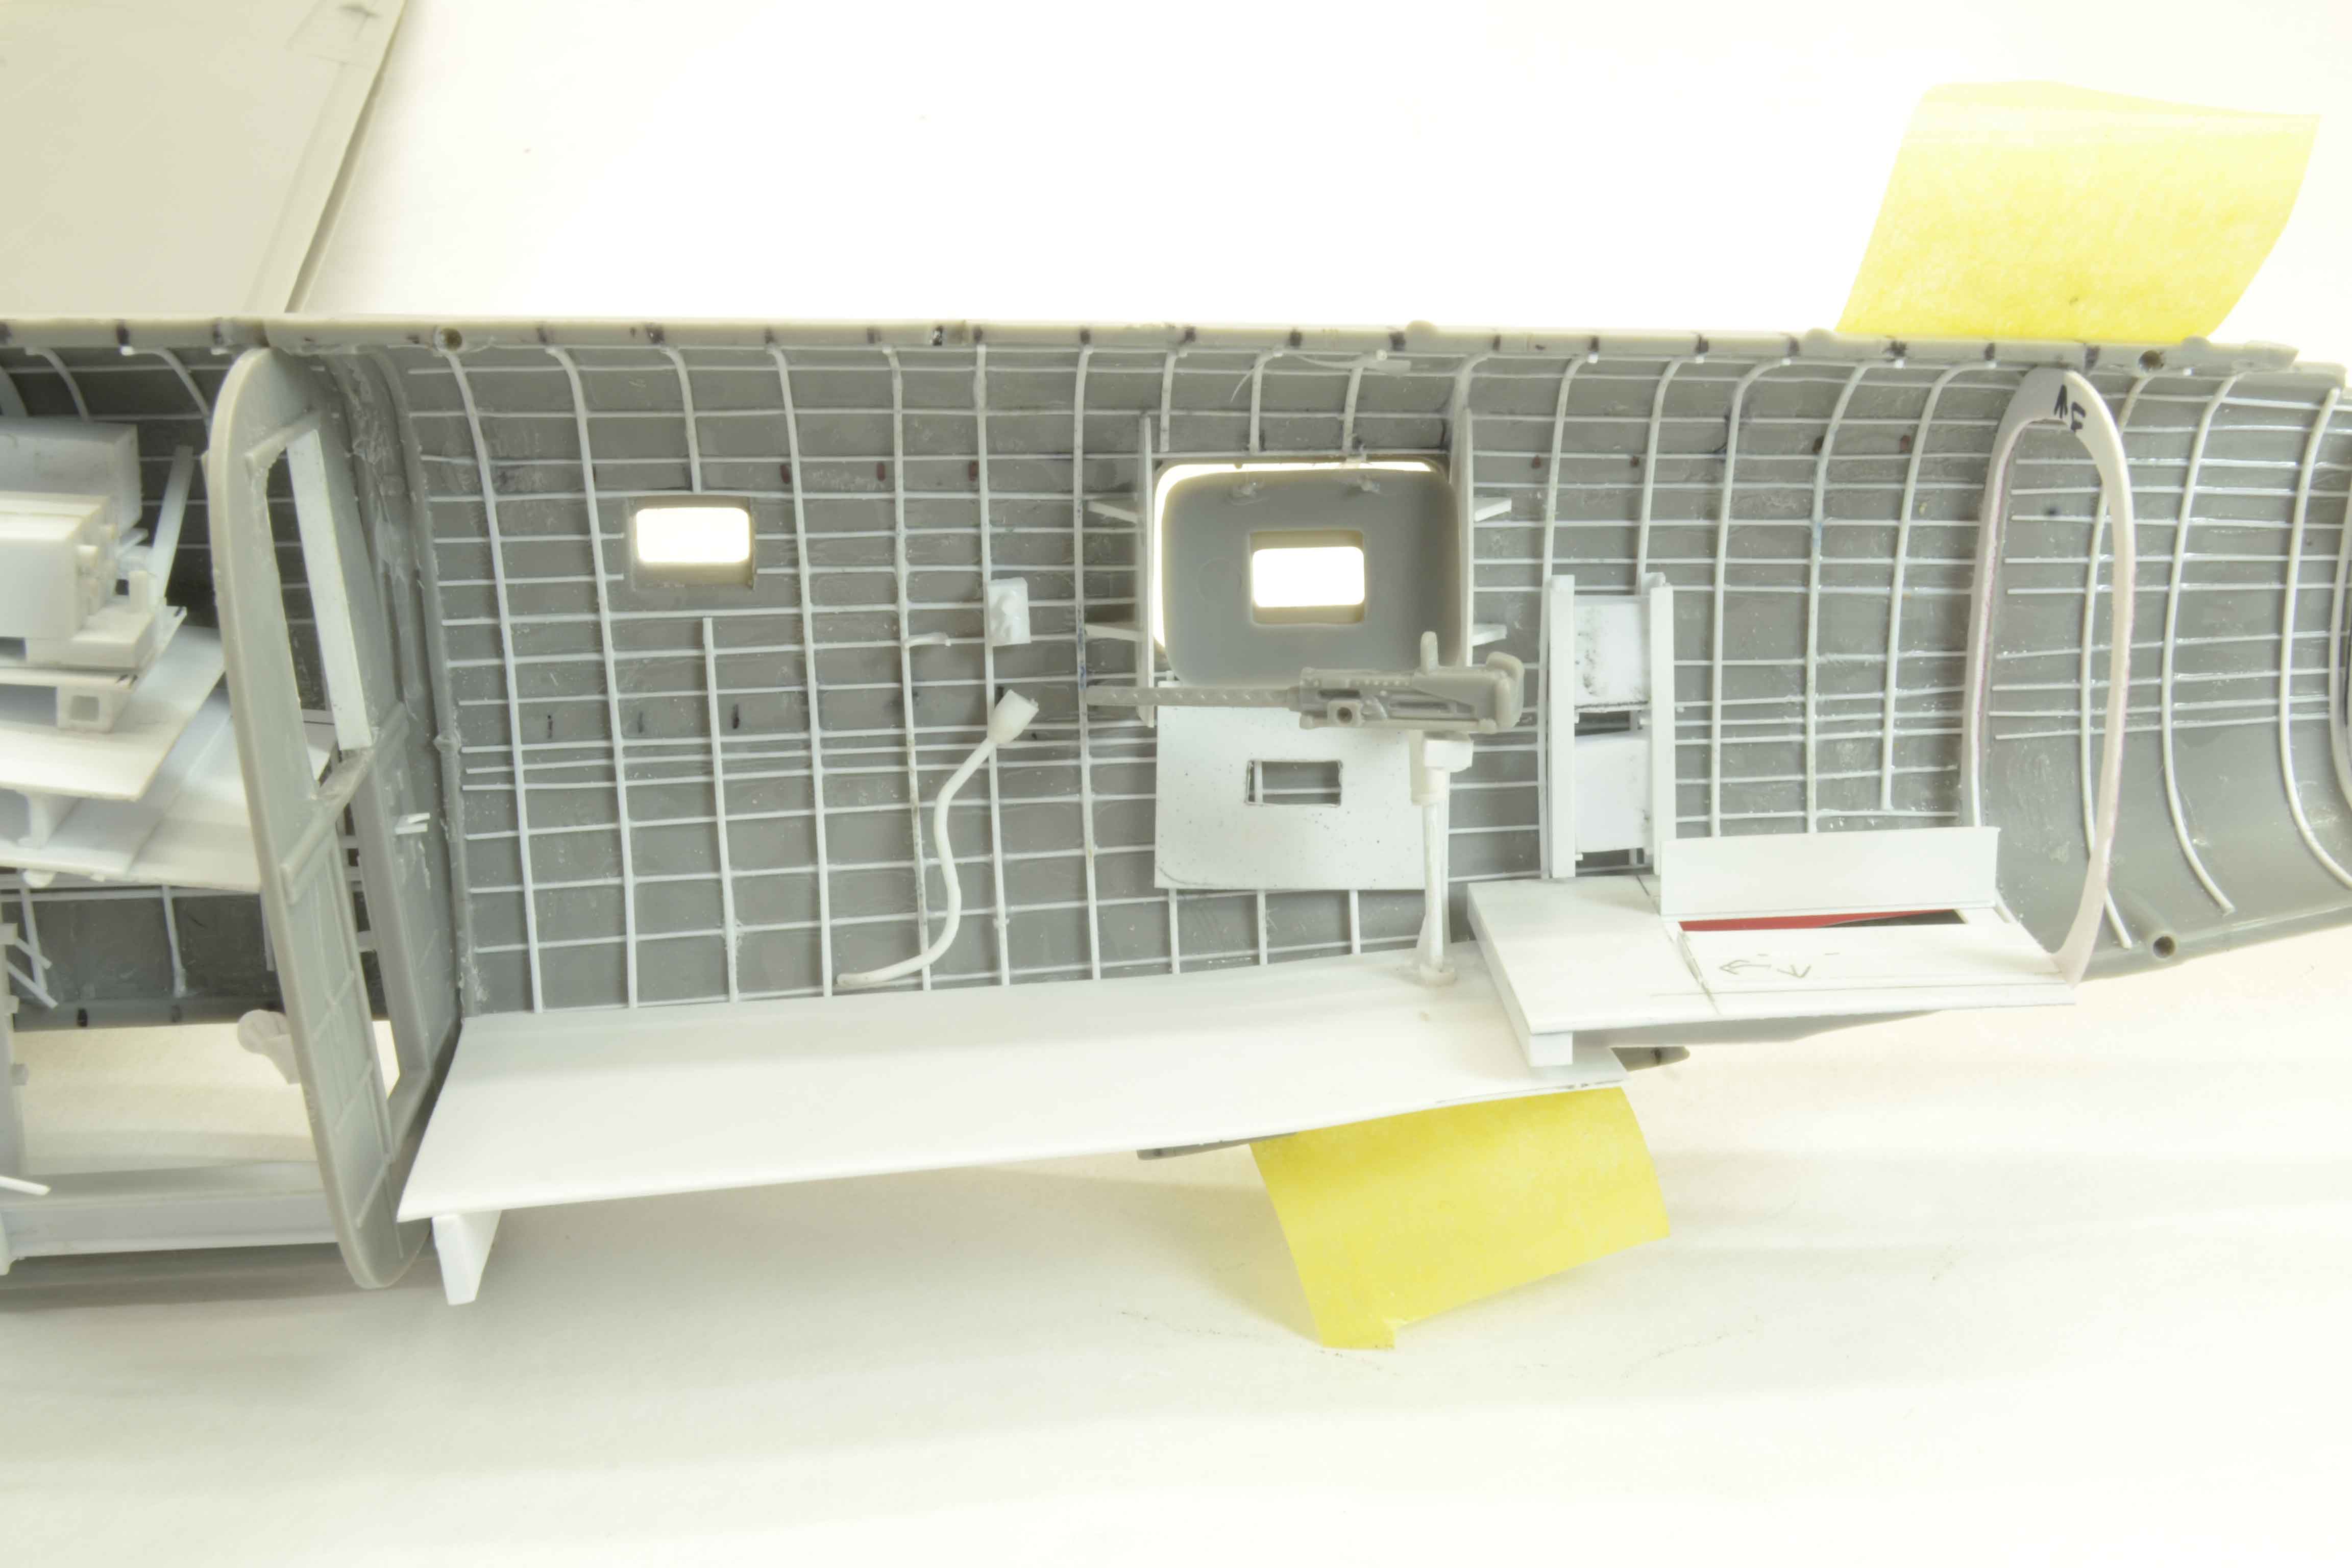
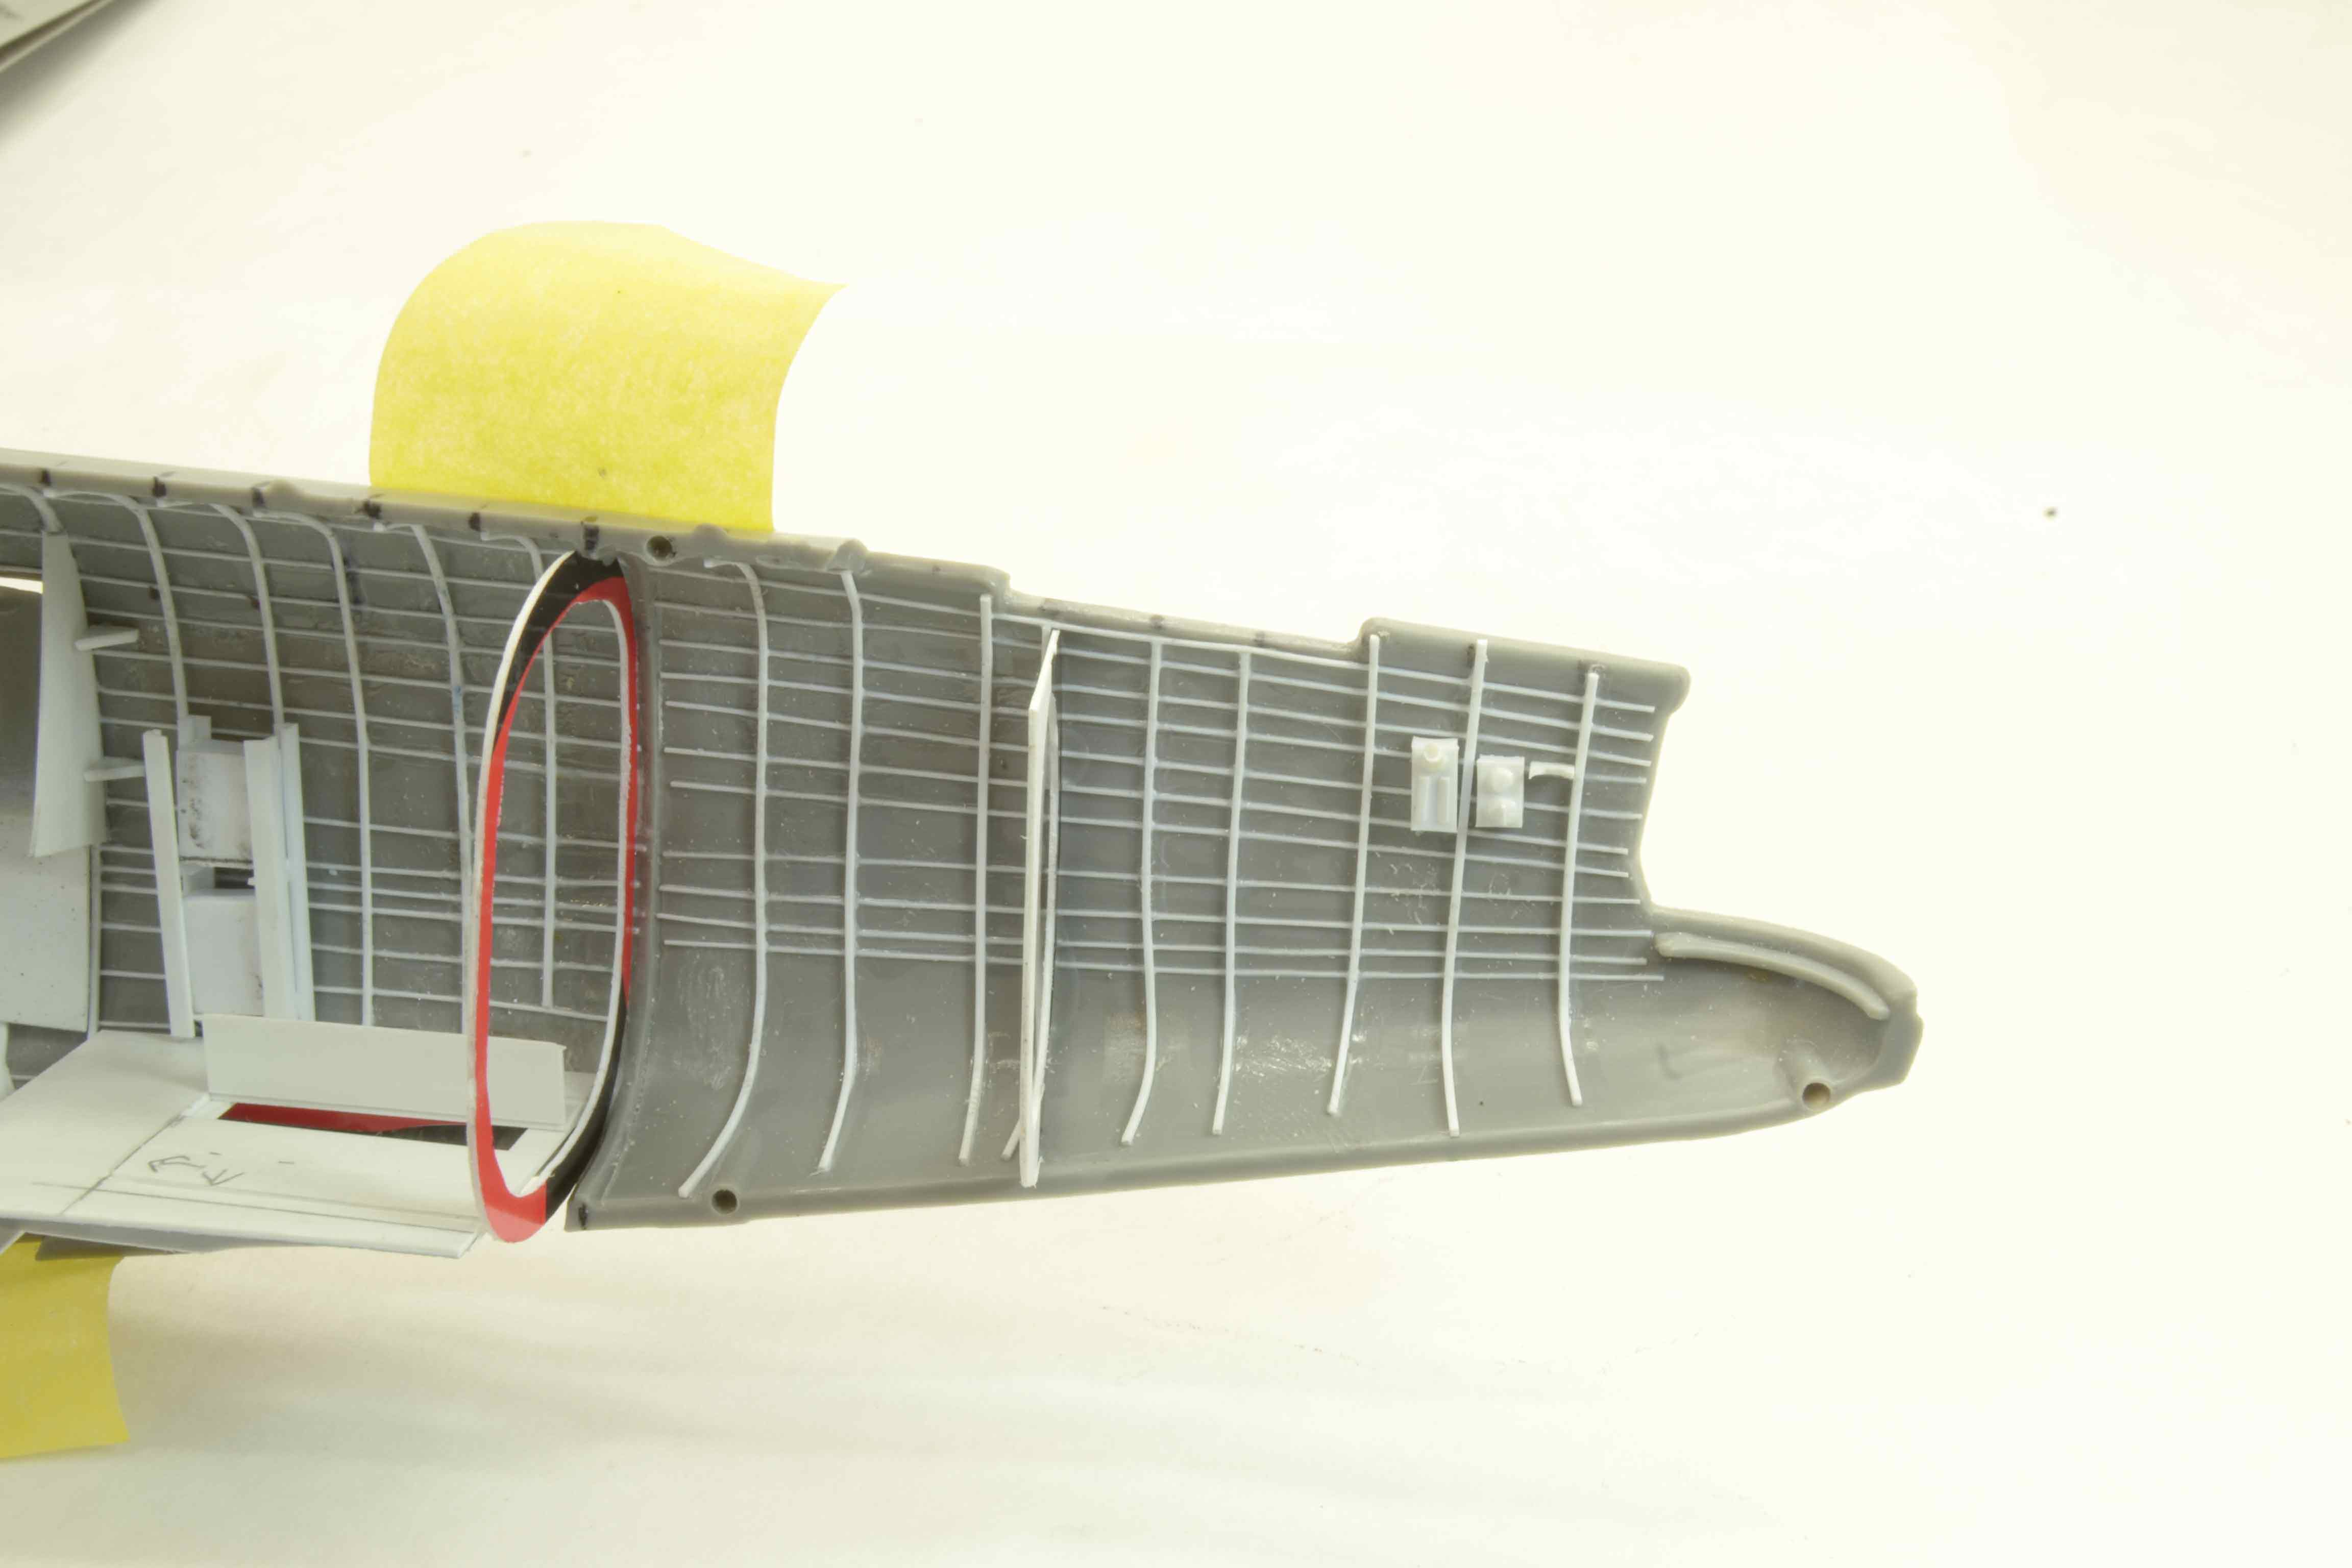
I am sharing two sets of images. One is showing what will be seen through the cuts and the other just focuses on the detail itself.
I still have work to do on the interior. More walkways, plumbing, and some smaller details however it is coming together.
Many thanks for all the kindness shown to this build and your very kind comments. I am both honored and humbled.
Please all comments, critiques, and criticism are encouraged.
Joe
As I move forward on this something that has really caught me is how it seems to be coming together. For this update some small parts such as the inter plane communication boxes and the heaters to larger things like the plumbing and wiring. For this update I again mocked up much of what I have minus the O2 bottles, some of the walkway, and some of the plumbing.
I am sharing two sets of images. One is showing what will be seen through the cuts and the other just focuses on the detail itself.
I still have work to do on the interior. More walkways, plumbing, and some smaller details however it is coming together.
Many thanks for all the kindness shown to this build and your very kind comments. I am both honored and humbled.
Please all comments, critiques, and criticism are encouraged.
Joe

Kevlar06
Joined: March 15, 2009
KitMaker: 3,670 posts
AeroScale: 833 posts
Posted: Wednesday, April 18, 2018 - 10:18 AM UTC
Joe,
Excellent work as usual-- your scratchbuilding is really something! Any chance you'll make it to the Seattle IPMS show this weekend?
VR, Russ
Excellent work as usual-- your scratchbuilding is really something! Any chance you'll make it to the Seattle IPMS show this weekend?
VR, Russ

magnusf

Joined: May 02, 2006
KitMaker: 1,953 posts
AeroScale: 1,902 posts
Posted: Wednesday, April 18, 2018 - 12:44 PM UTC
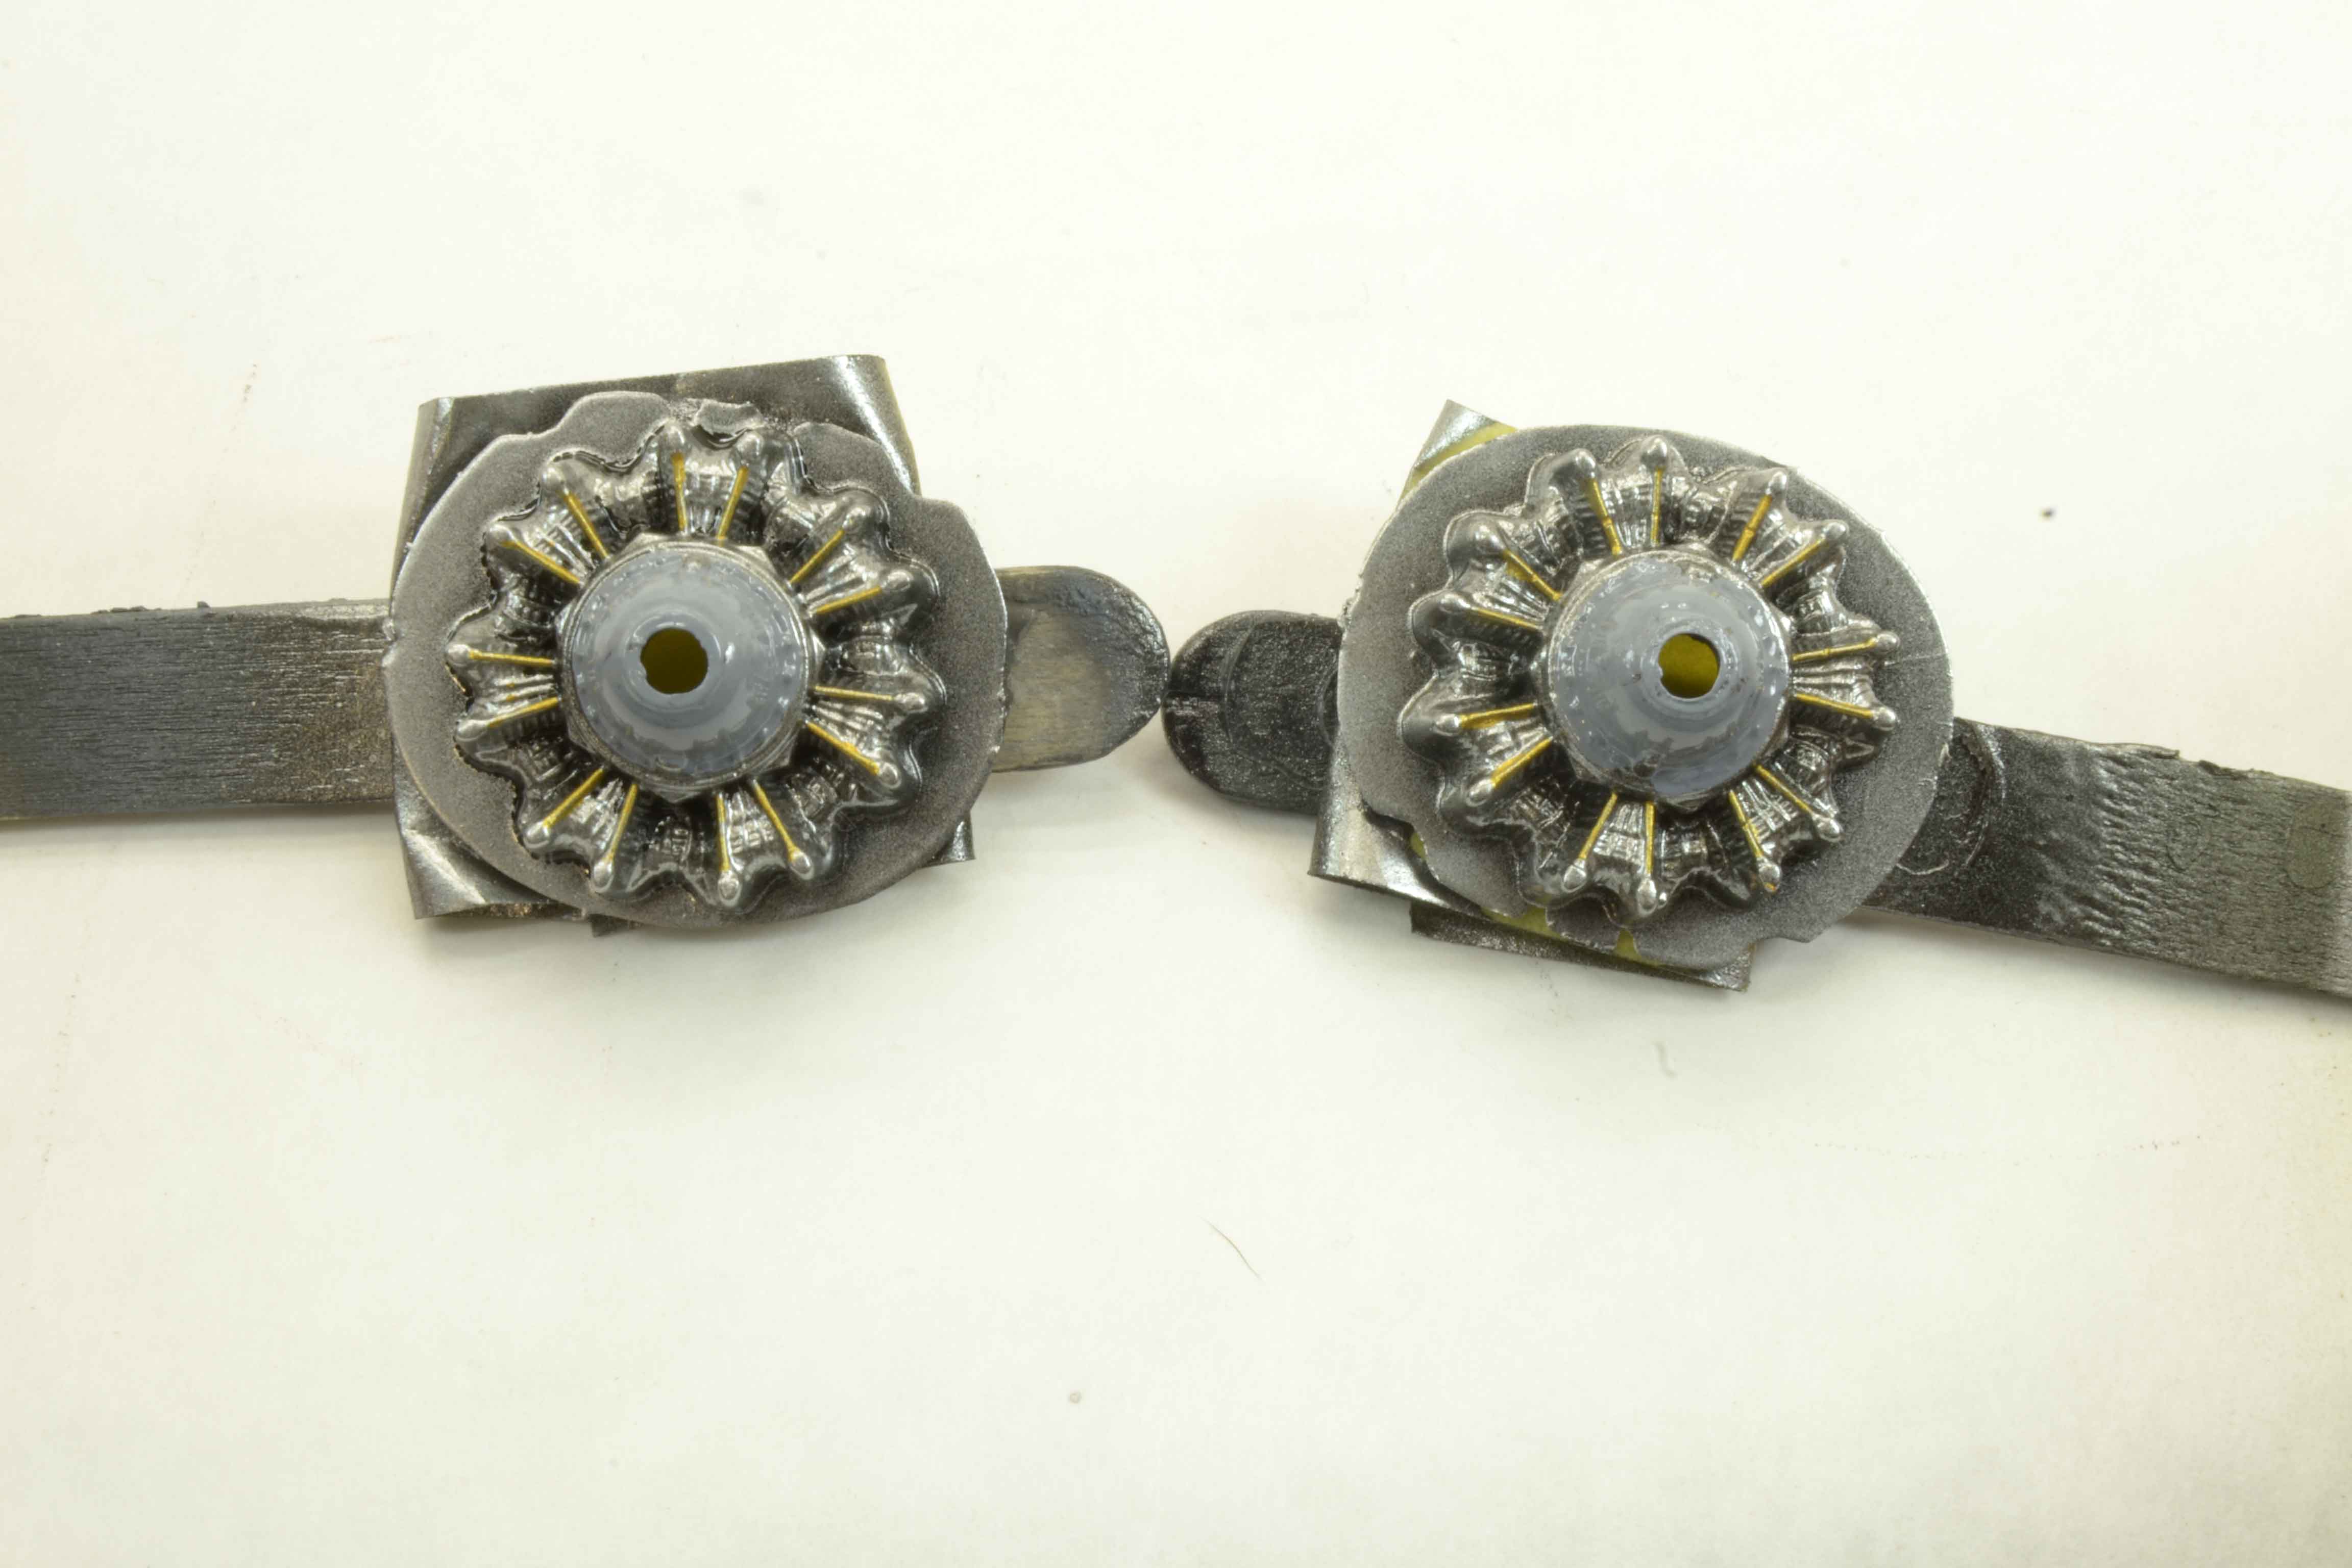
Joe! I look at those seats and think about a decision I took last night, looking at the pilot's seat of my Airfix Lancaster - they'll look fine with a set of tape belts I thought, avoiding the generally complicated PE-seat from Eduard... I'm not so sure anymore!
Your handiwork is amazing, I love watching and try to pick up a thing or two but would never be able to acquire neither the skill nor the patience required to do it your way !

Magnus
Your handiwork is amazing, I love watching and try to pick up a thing or two but would never be able to acquire neither the skill nor the patience required to do it your way
! Magnus
RussellE
#306
Joined: June 27, 2010
KitMaker: 3,959 posts
AeroScale: 598 posts
Posted: Wednesday, April 18, 2018 - 05:14 PM UTC
Holy cow, Joe!
That's amazing!
How will you paint it though?
That's amazing!
How will you paint it though?
fightnjoe
Joined: August 16, 2004
KitMaker: 603 posts
AeroScale: 565 posts
Posted: Wednesday, April 18, 2018 - 10:10 PM UTC
You are all very kind. Thank you.
Russ there is no chance this year. I am hoping though that a buddy of mine and I can make the trip next year. May not be bringing anything but would really enjoy the experience.
Joe
Russ there is no chance this year. I am hoping though that a buddy of mine and I can make the trip next year. May not be bringing anything but would really enjoy the experience.
Joe
fightnjoe
Joined: August 16, 2004
KitMaker: 603 posts
AeroScale: 565 posts
Posted: Sunday, May 06, 2018 - 05:01 AM UTC
Well a brief update is in order.
The time is here to throw a bit of paint at the white pieces. My normal is a black under coat and then the main color. I did some research and found that Liberators had a mix of colors but a couple of sources show Dull Dark Green for the forward sections, Aluminium for the bomb bay, and Interior Green for the aft sections. I went with this.
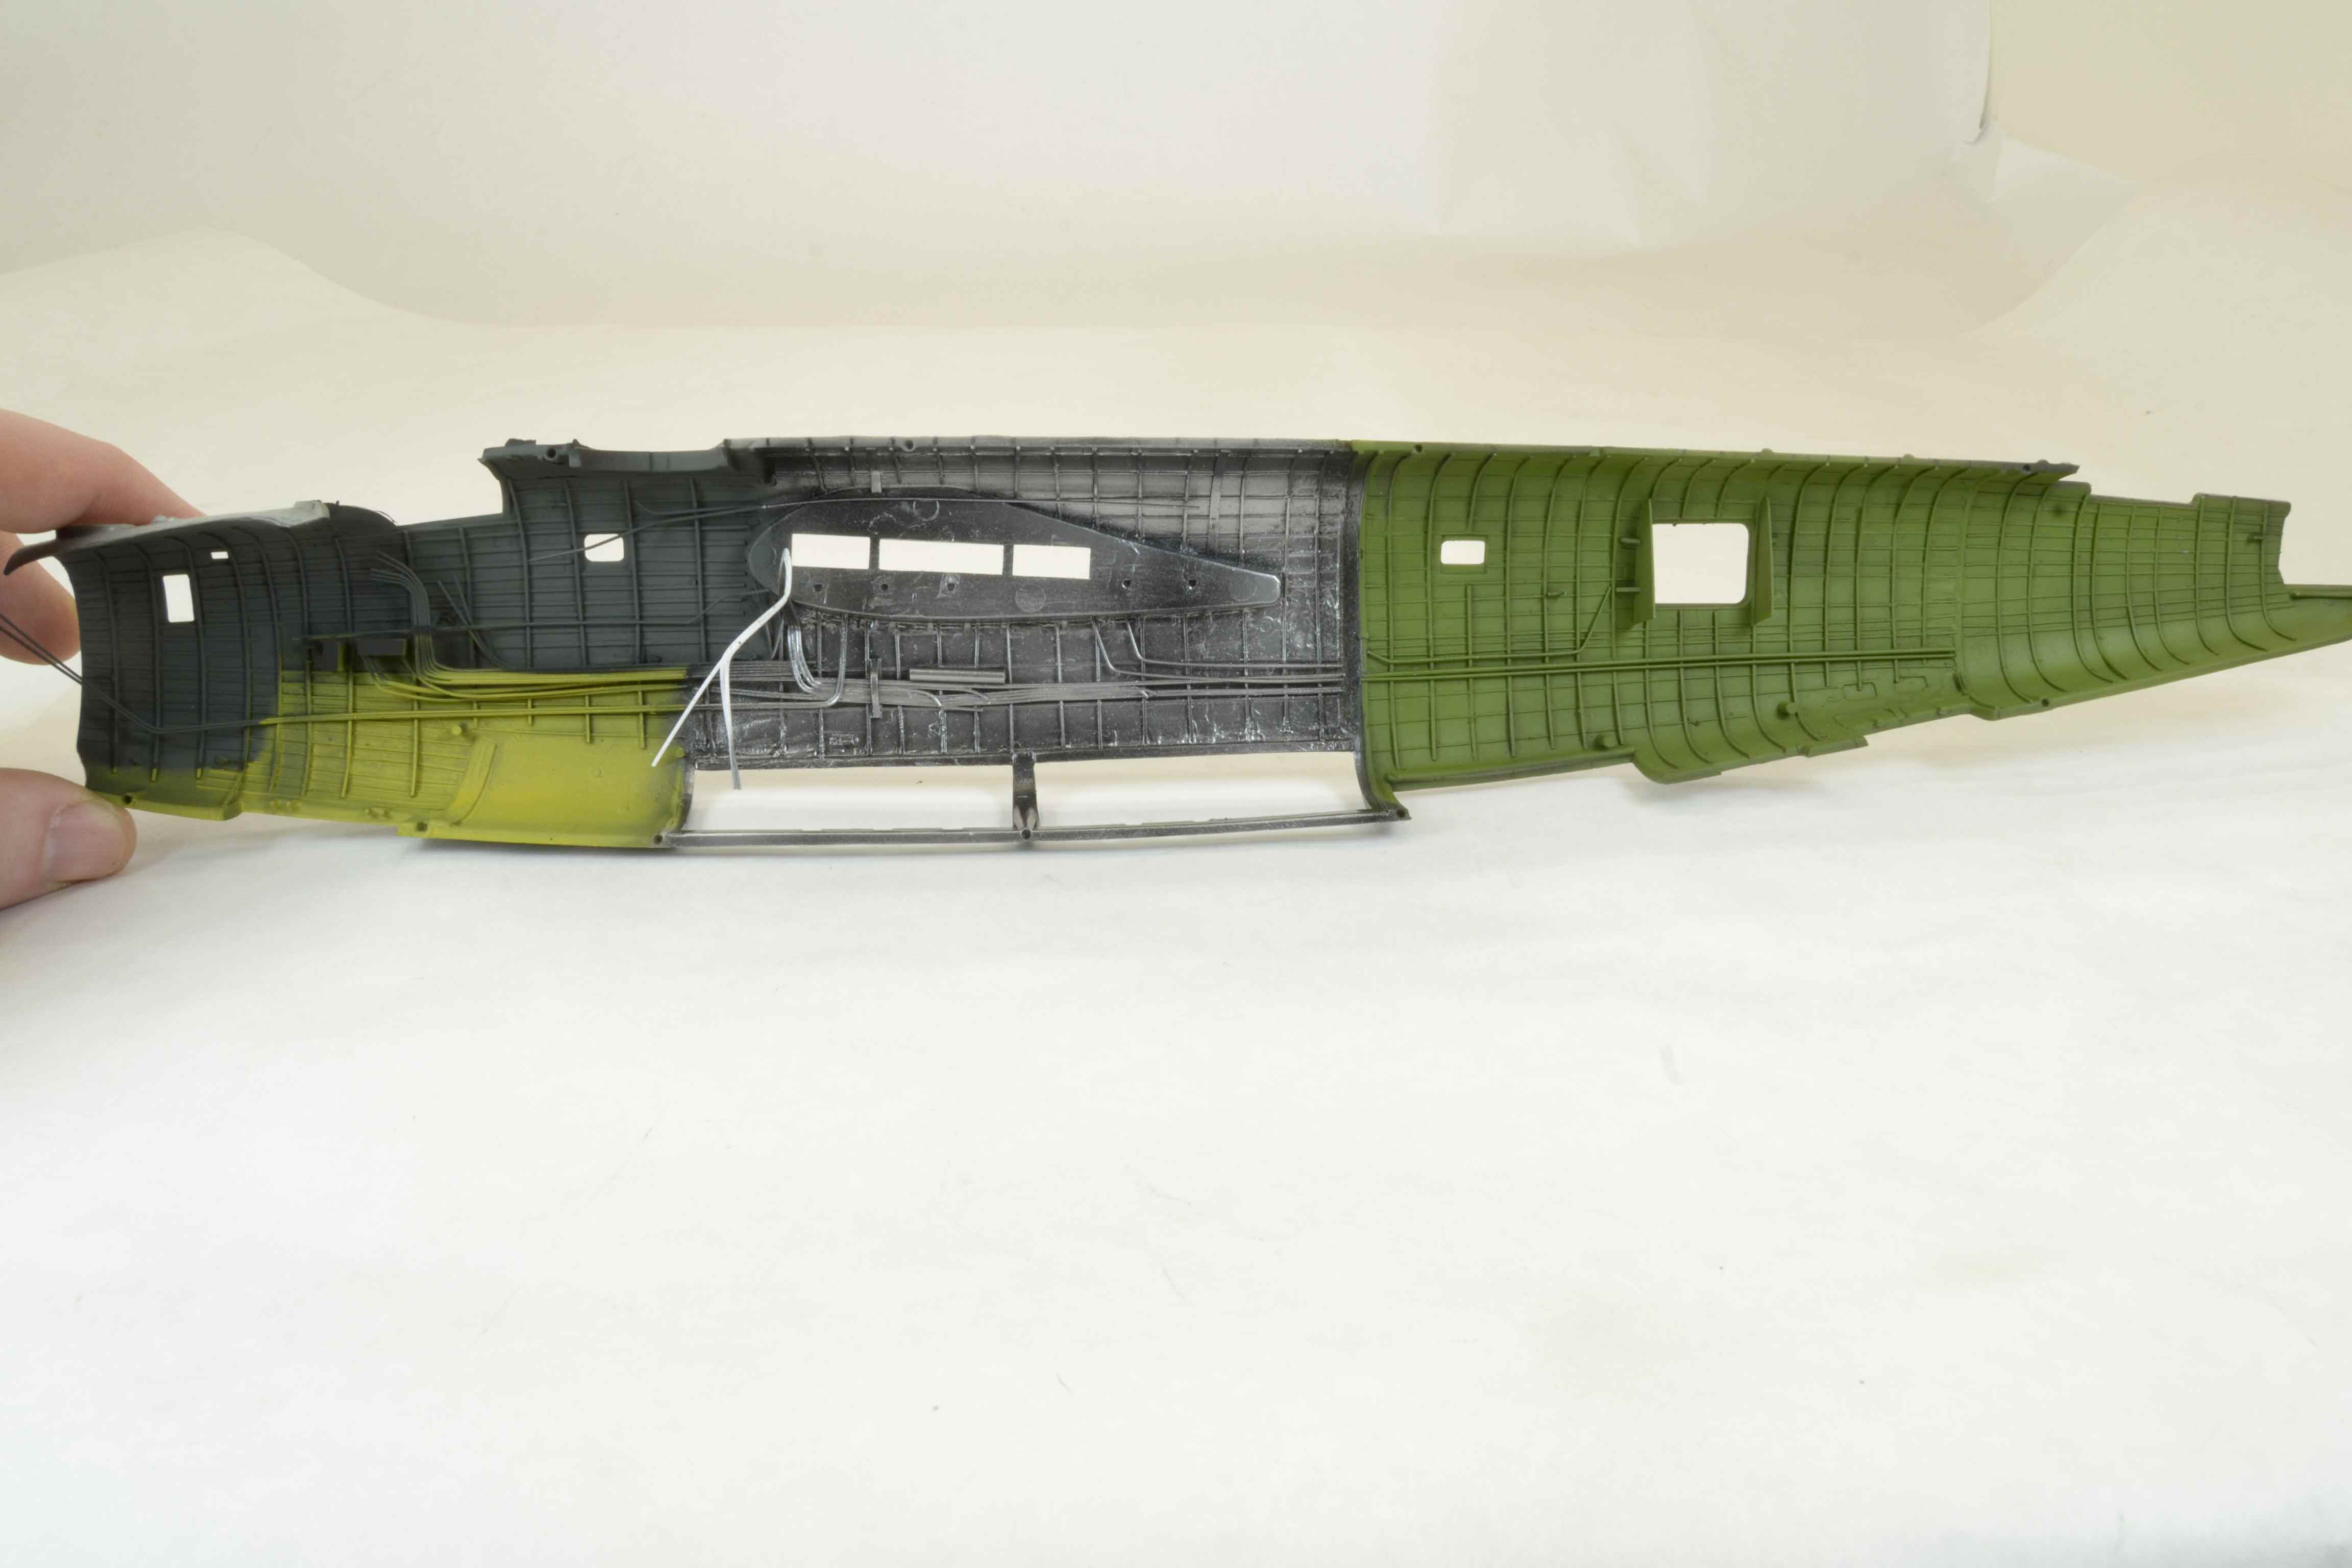
Then the detail painting began.
I threw some dry brushing on as well to give it just a bit of wear.
Like I said just a brief update but turning a corner.
Next will be to continue to permanently attach the detail pieces.
All comments, critiques, and criticism are encouraged.
Joe
The time is here to throw a bit of paint at the white pieces. My normal is a black under coat and then the main color. I did some research and found that Liberators had a mix of colors but a couple of sources show Dull Dark Green for the forward sections, Aluminium for the bomb bay, and Interior Green for the aft sections. I went with this.
Then the detail painting began.
I threw some dry brushing on as well to give it just a bit of wear.
Like I said just a brief update but turning a corner.
Next will be to continue to permanently attach the detail pieces.
All comments, critiques, and criticism are encouraged.
Joe
Joel_W
Joined: December 04, 2010
KitMaker: 11,666 posts
AeroScale: 7,410 posts
Posted: Sunday, May 06, 2018 - 07:14 PM UTC
Joe,
As usual, another outstanding and excellent update. I've never been a fan of cut-a-ways because the vast majority have a min. of added detail other then what's in the kit. Your build is on a whole different level. A real treat for builders like me whose mainly a OOB type of guy.
The paint and dry brushing just makes everything look so much better and just pops.
My only suggestion is that with the level that you've taken the interior to, the kit engines aren't in the same class. Have you considered some of the really nice resin engines?
Joel
RussellE
#306
Joined: June 27, 2010
KitMaker: 3,959 posts
AeroScale: 598 posts
Posted: Monday, May 07, 2018 - 04:51 PM UTC
looks great Joe

redcap

Joined: November 06, 2005
KitMaker: 753 posts
AeroScale: 311 posts

Posted: Monday, May 07, 2018 - 05:16 PM UTC
Scale modelling and scratch building at its very best - just magnificent work and skills in evidence here.
Gary
Gary
 |

WEB HOSTING BY


Copyright ©2021 AeroScale and Kitmaker Network, a subsidiary of Silver Star Enterprises
All Rights Reserved. Please read our Conditions of Use and Privacy Policy.
All Rights Reserved. Please read our Conditions of Use and Privacy Policy.