

Chris,
I'm looking forward to seeing the final results as you're really on the cutting edge with this approach
Joel
Hosted by Rowan Baylis
Hasegawa 1/48 Nakajima C6N1-S Saiun (Myrt)
Joel_W

Joined: December 04, 2010
KitMaker: 11,666 posts
AeroScale: 7,410 posts
Posted: Friday, December 22, 2017 - 03:31 AM UTC


c4willy

#305

Joined: February 01, 2006
KitMaker: 1,673 posts
AeroScale: 1,517 posts

Posted: Friday, December 22, 2017 - 05:05 AM UTC
Hi Joel, cutting edge? Me? Thanks Joel that's high praise coming from someone like yourself.
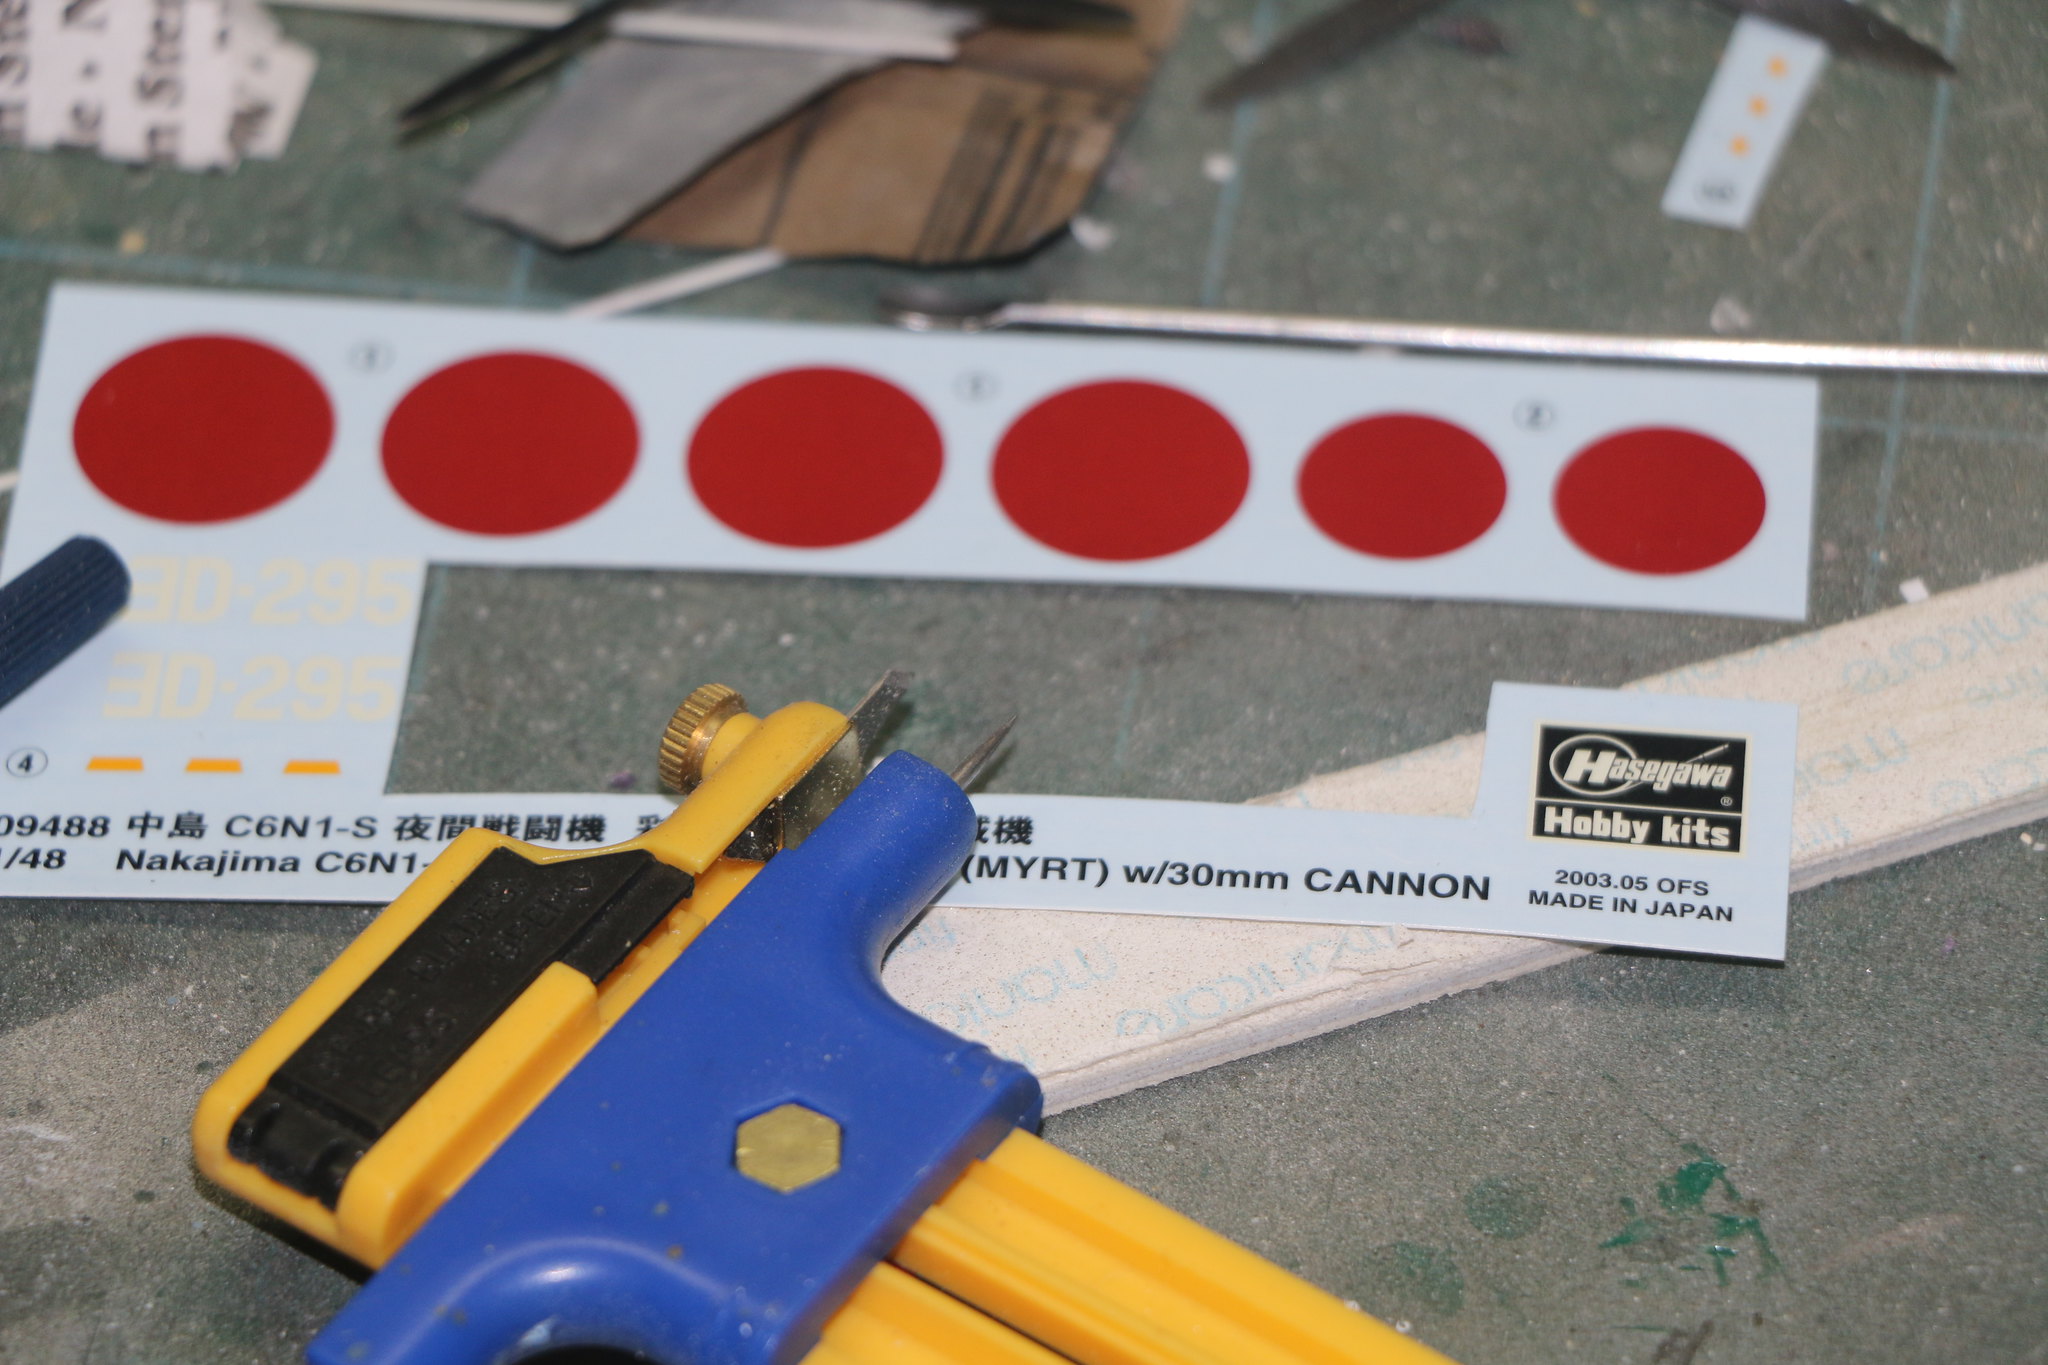
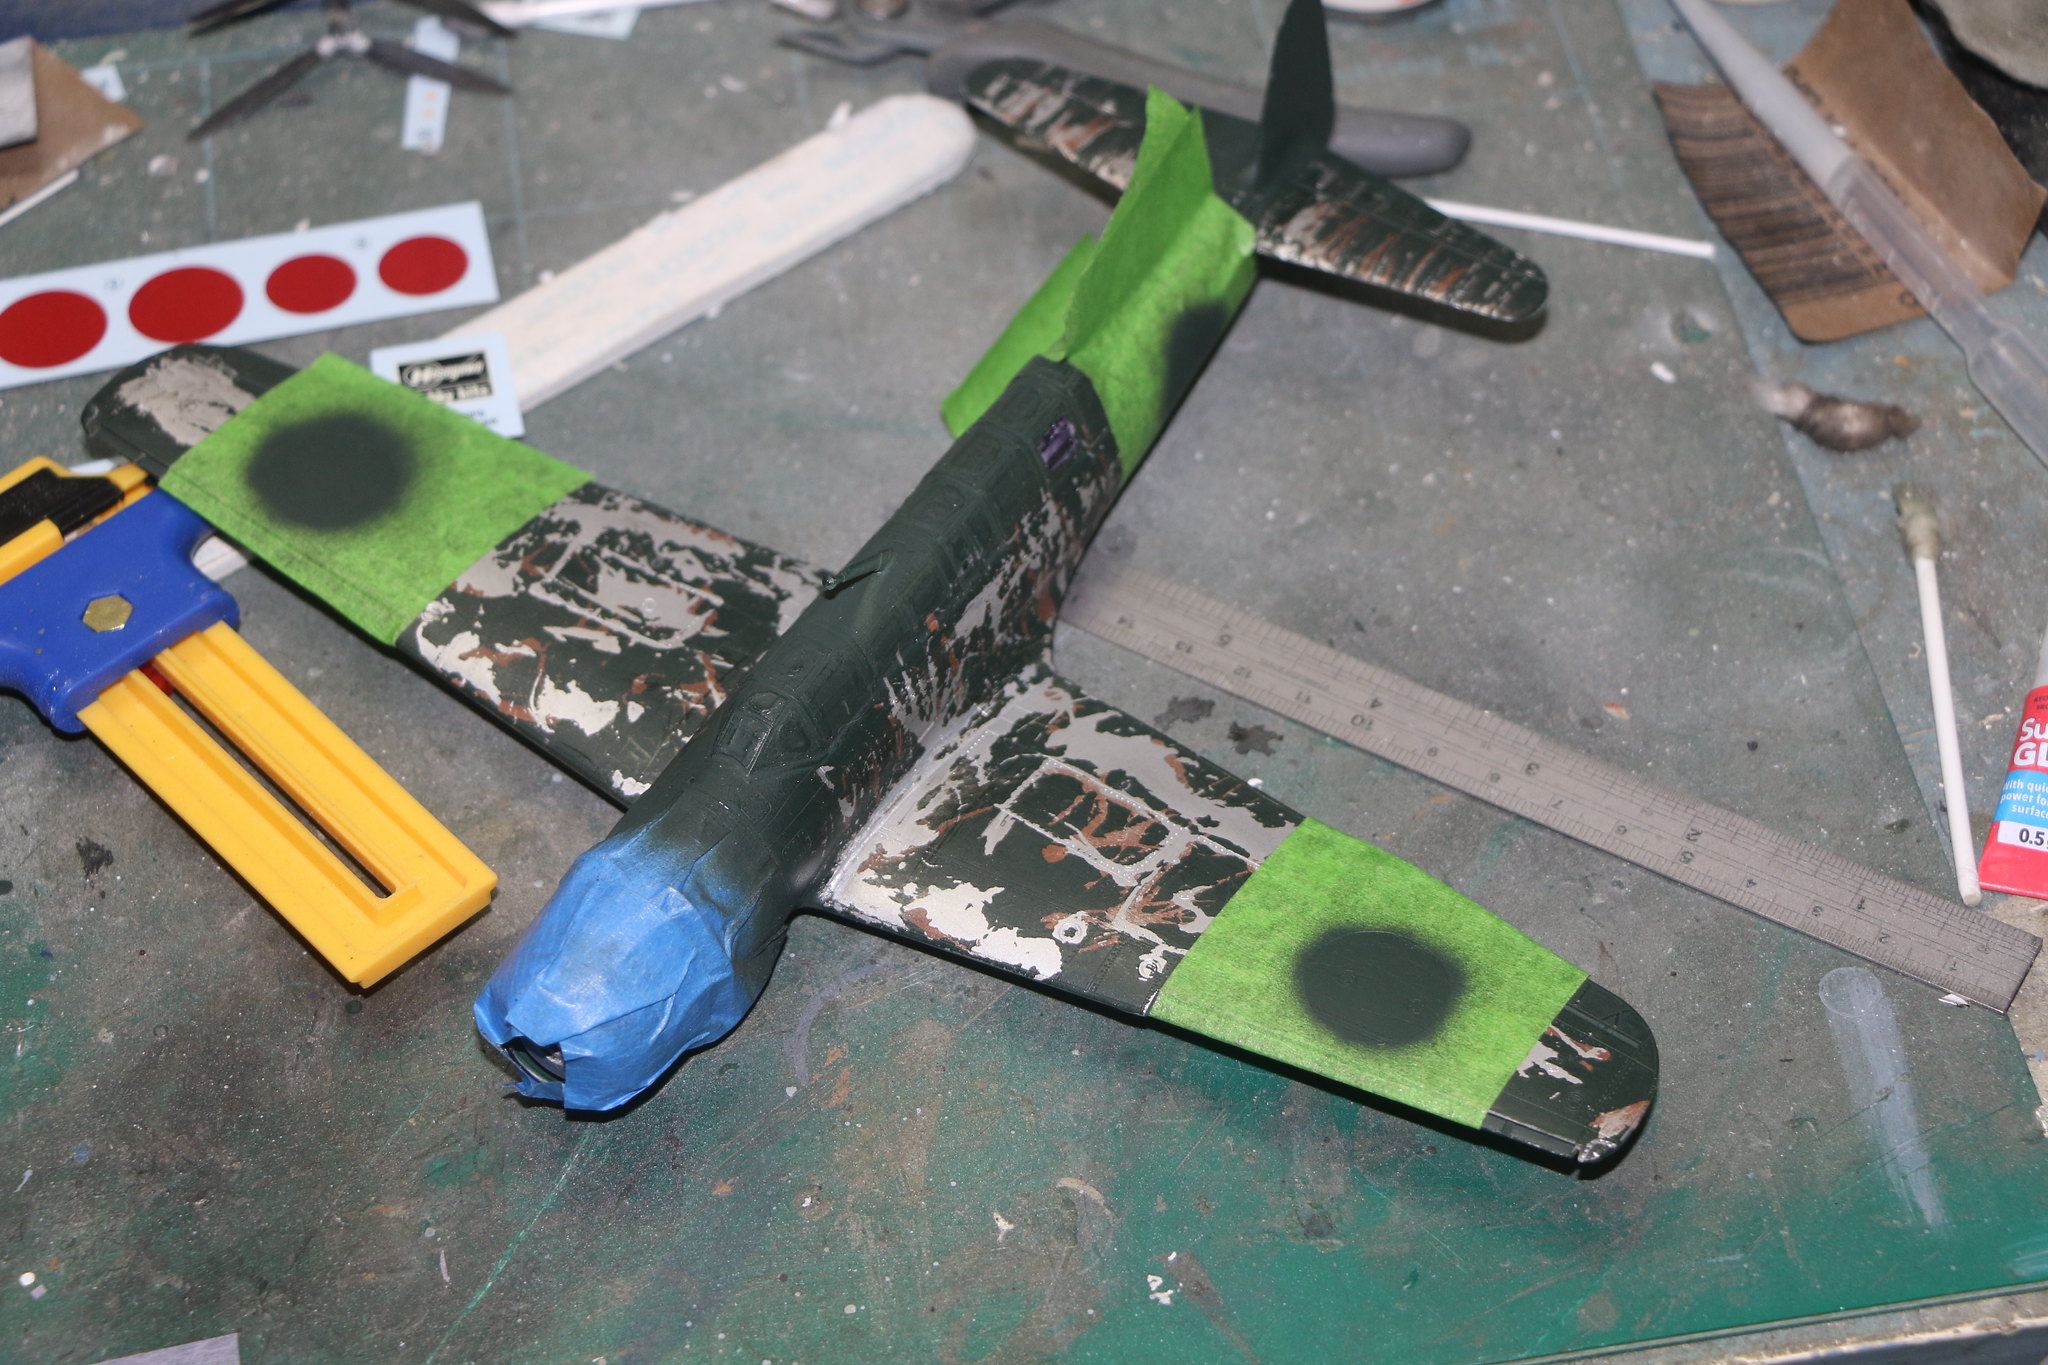
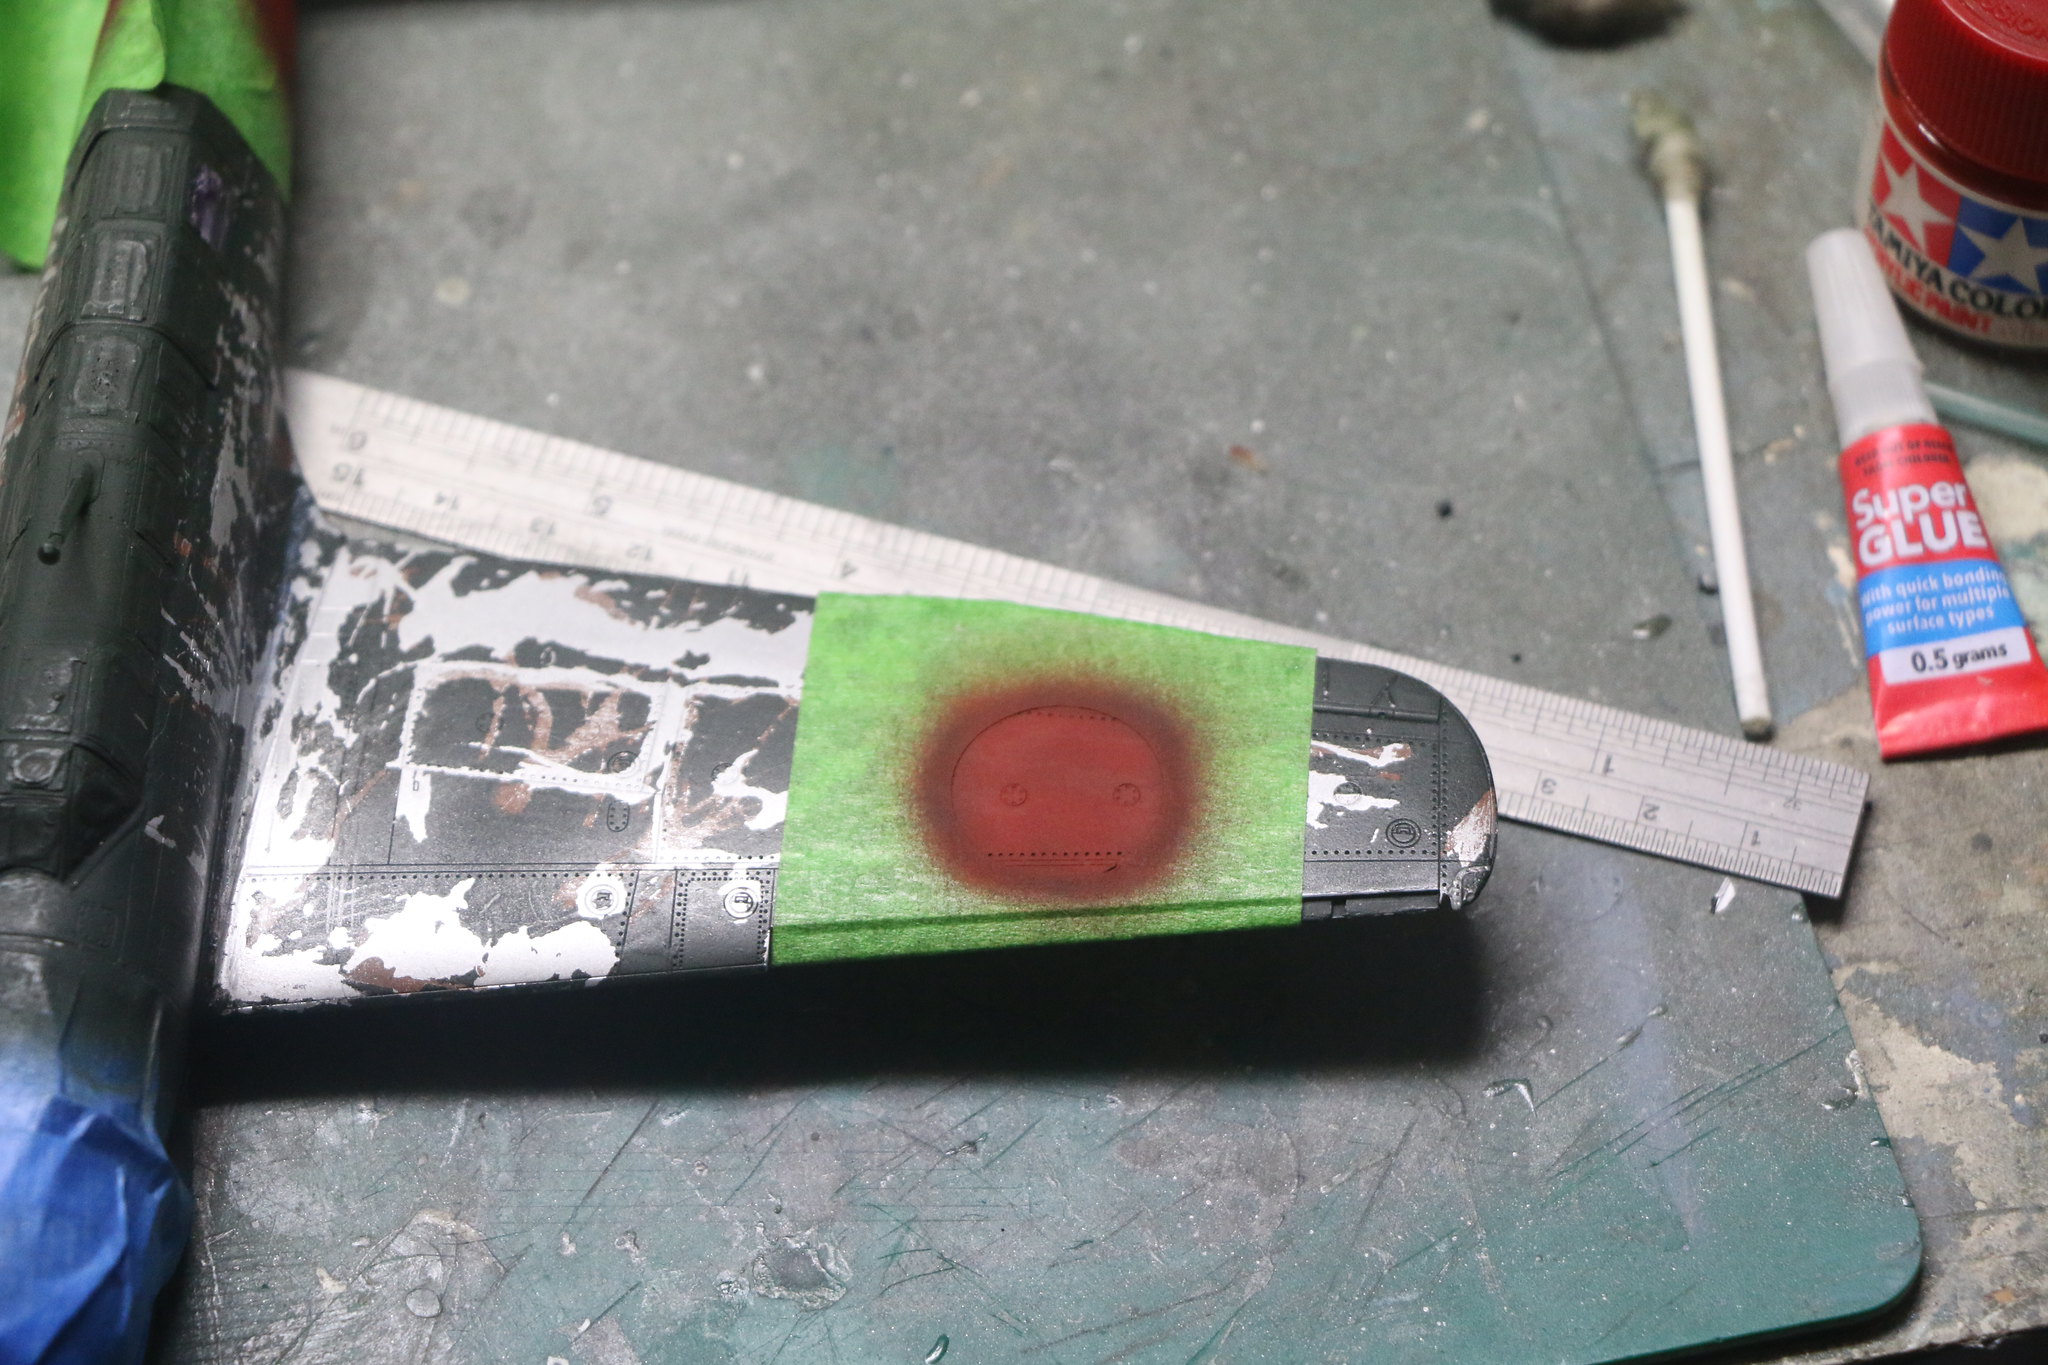
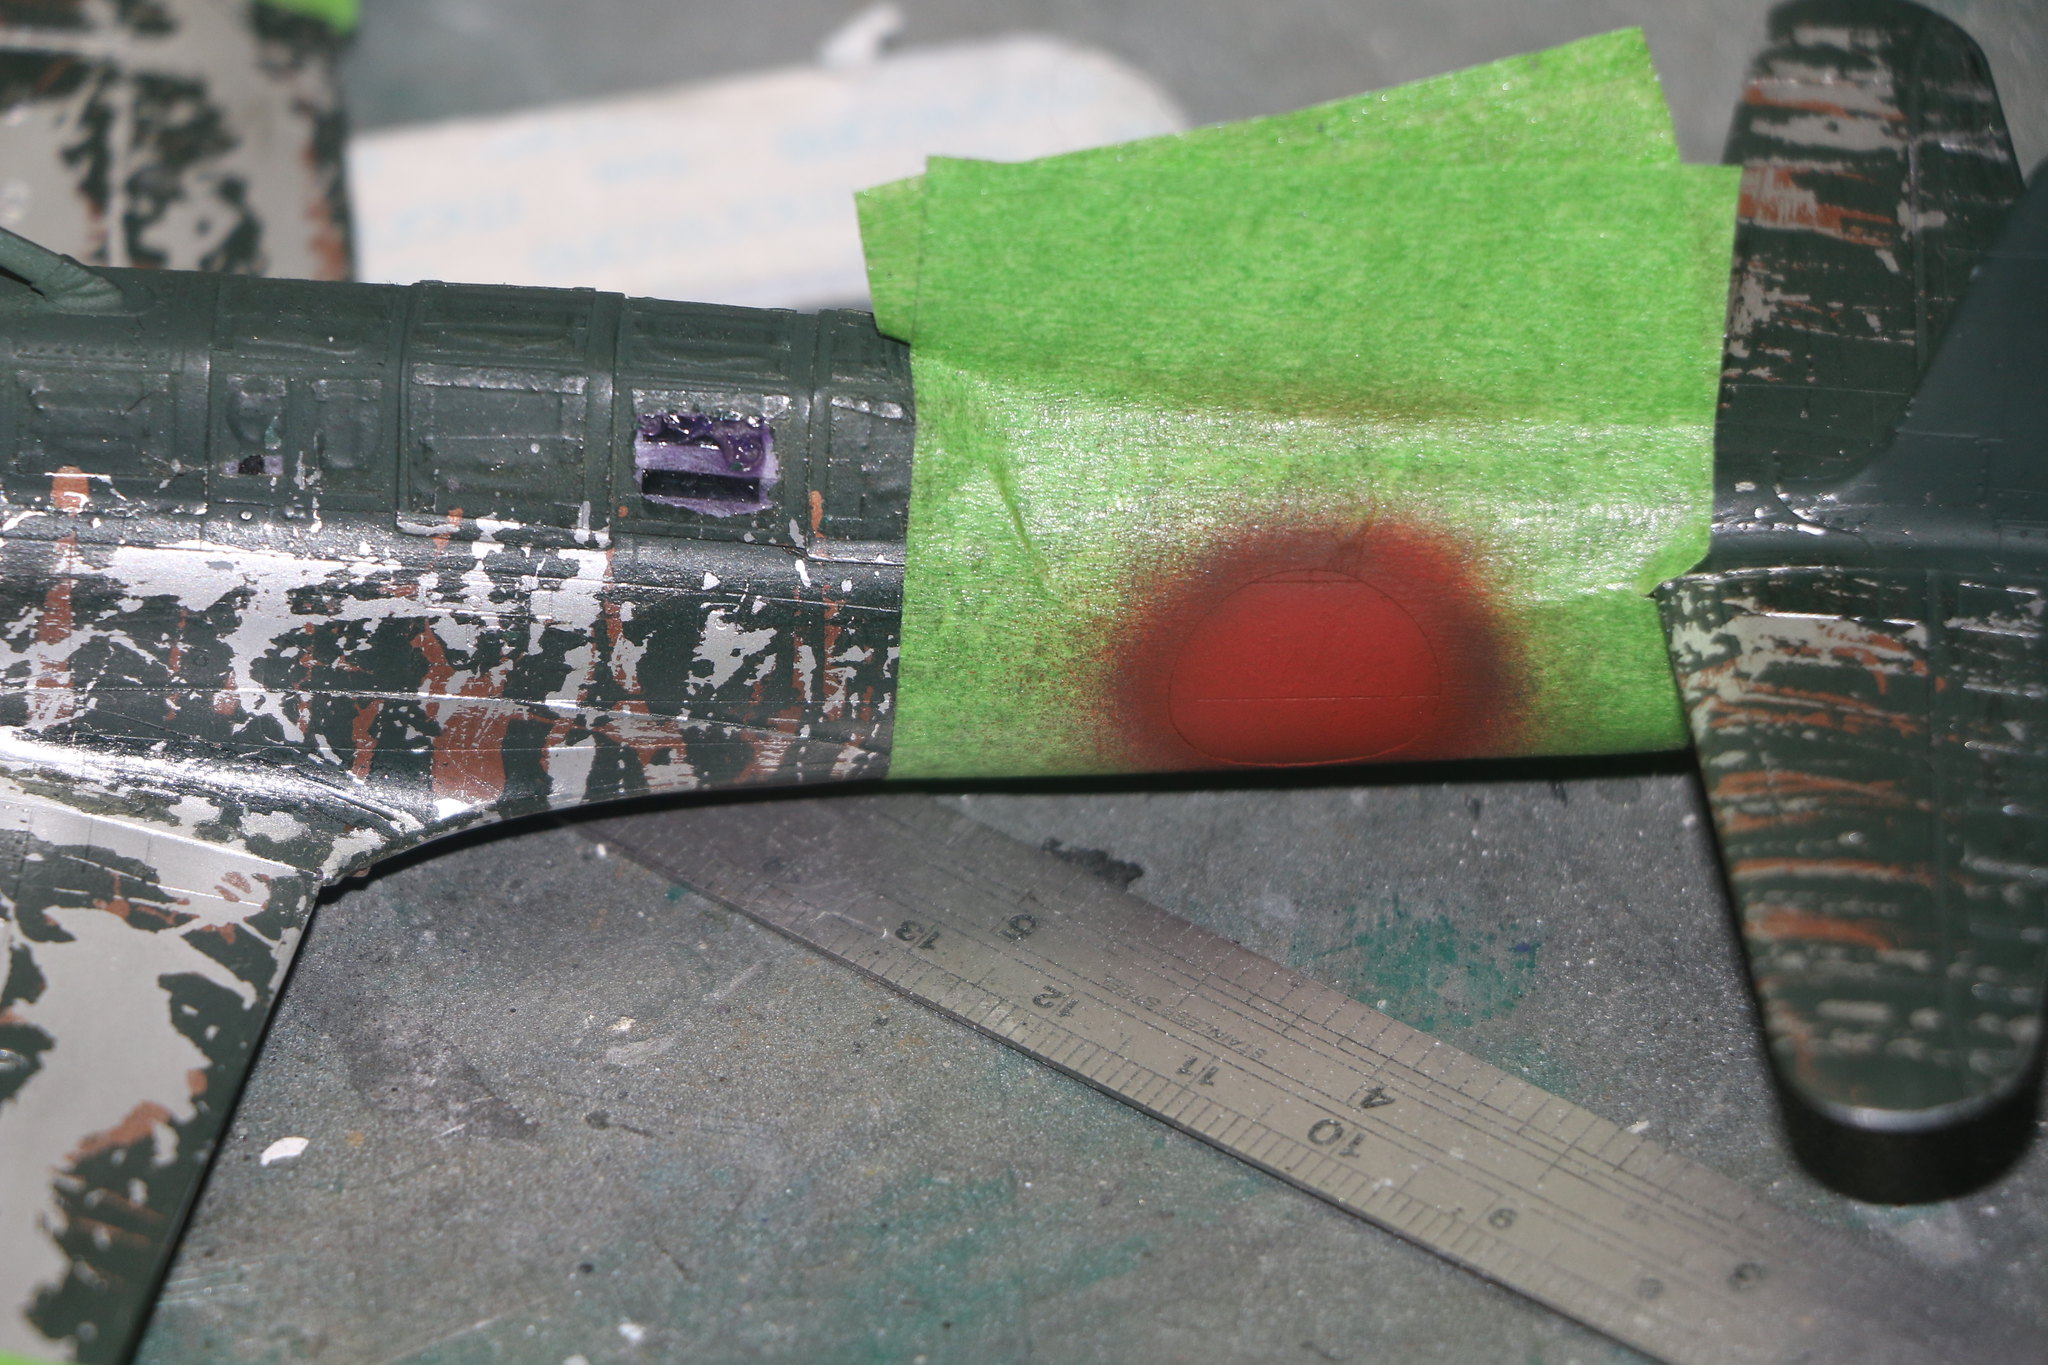
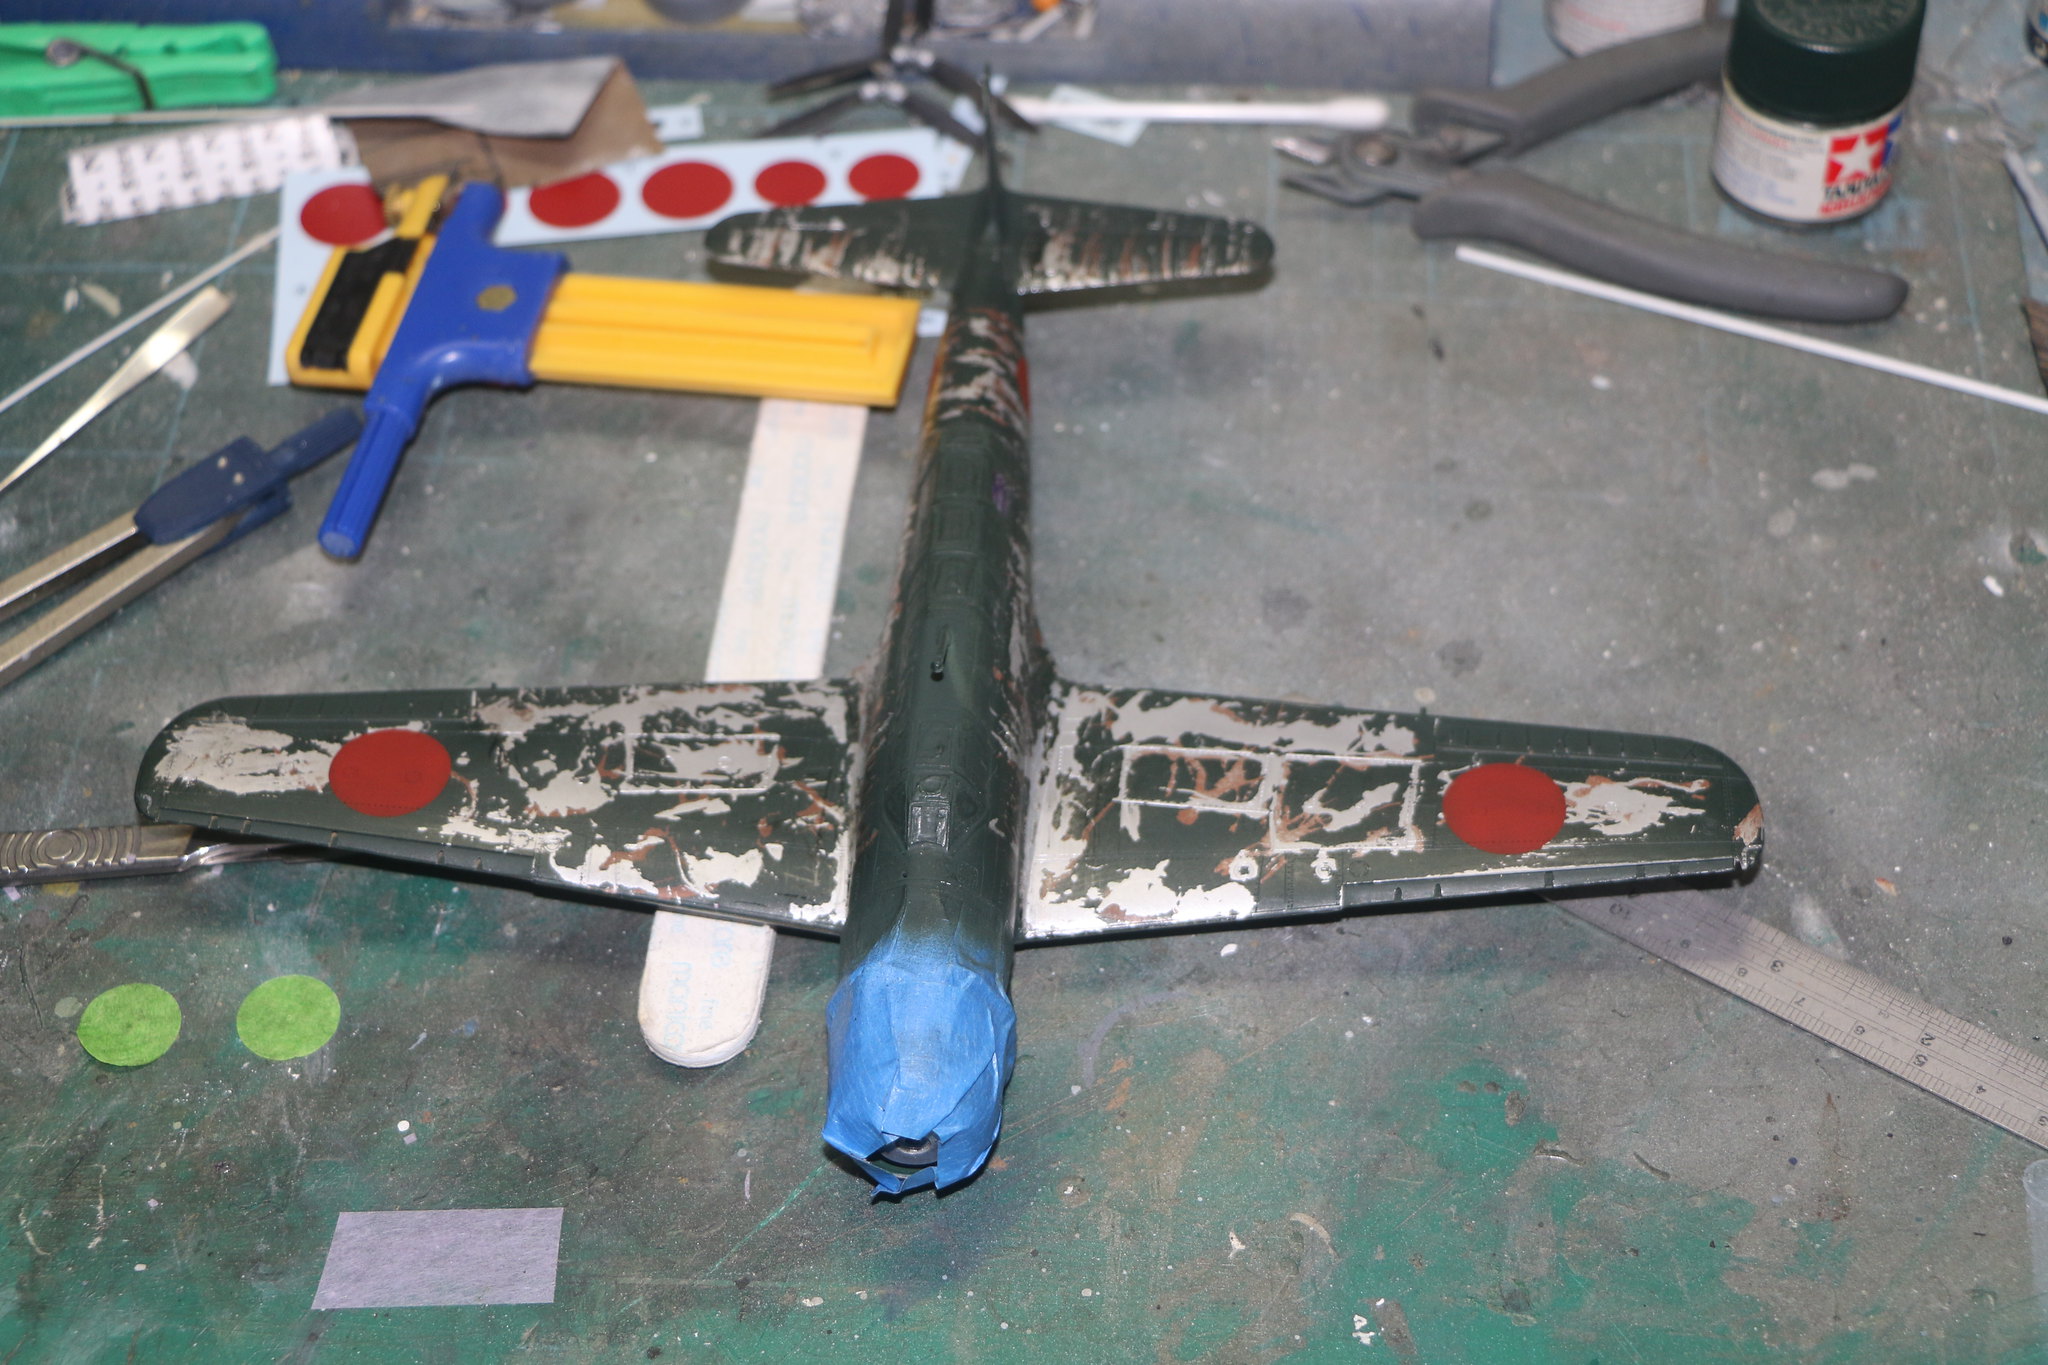
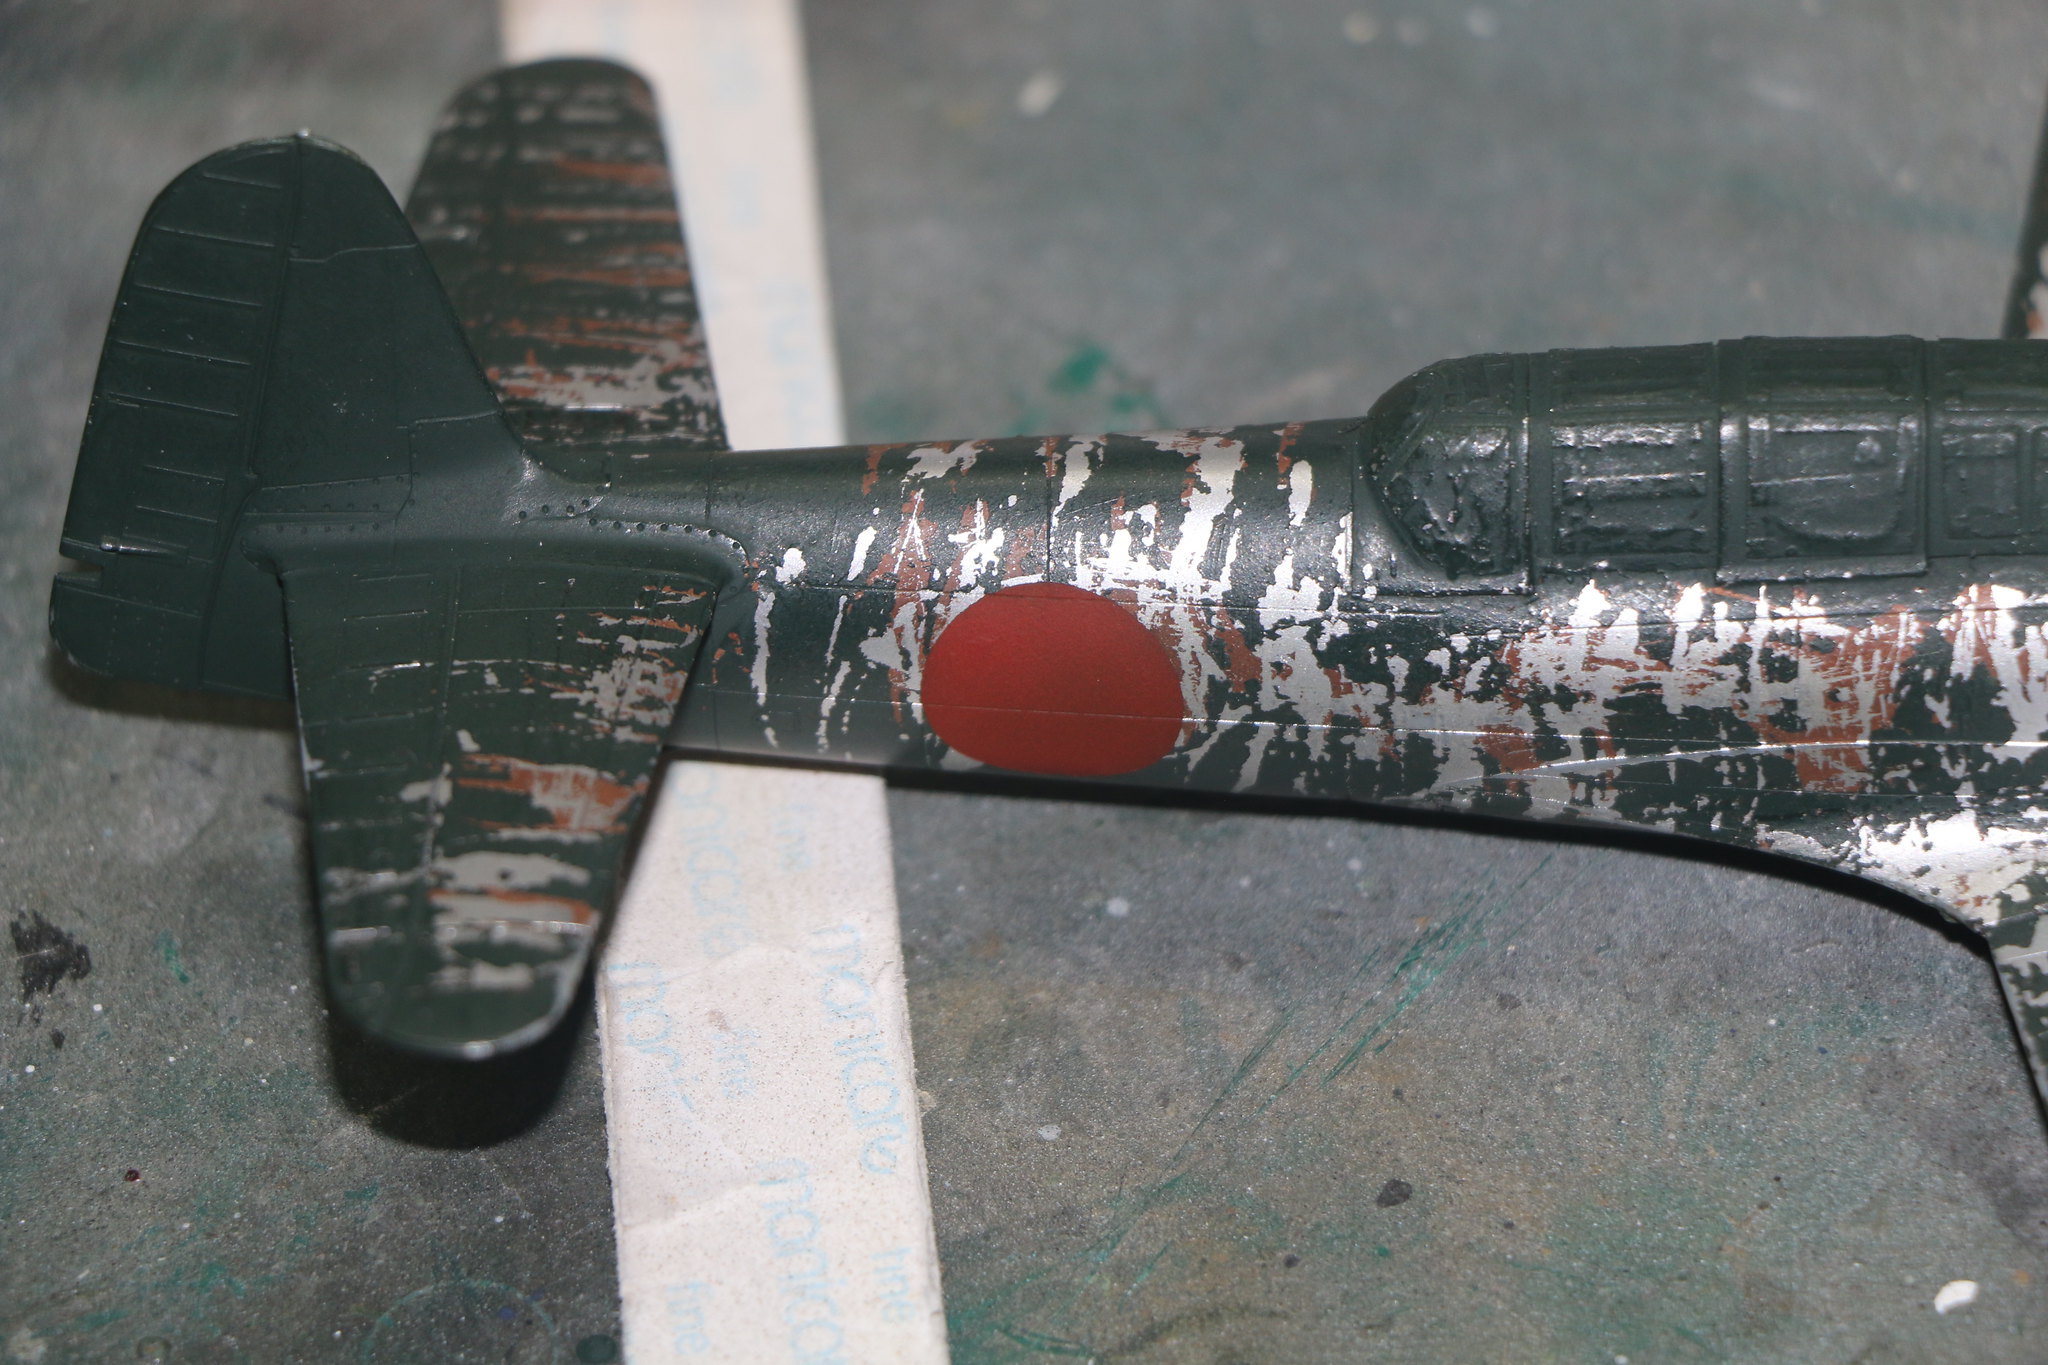
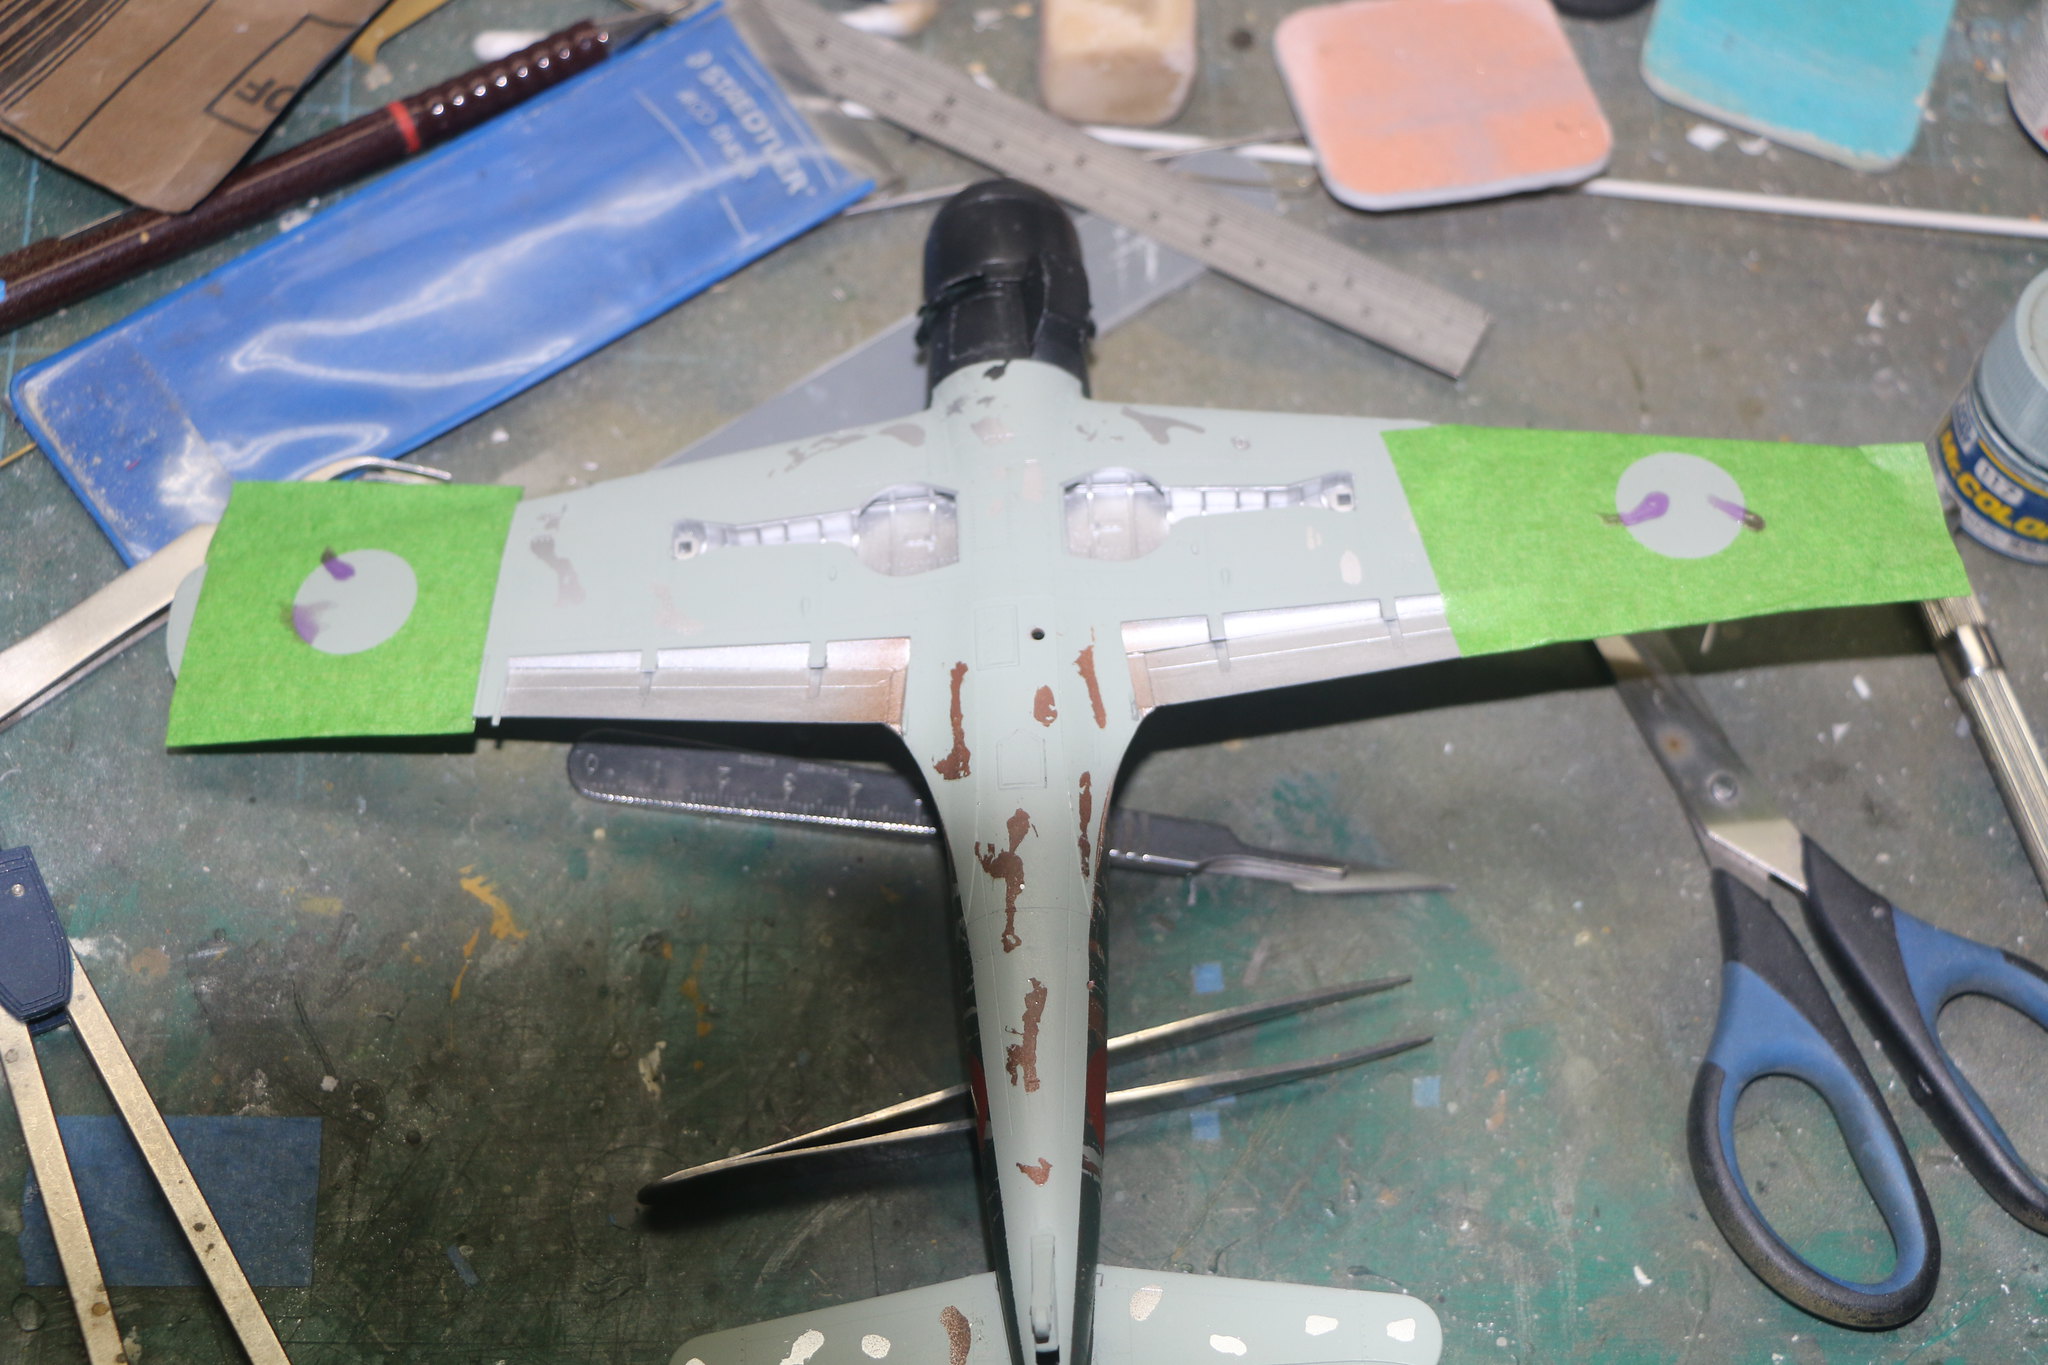
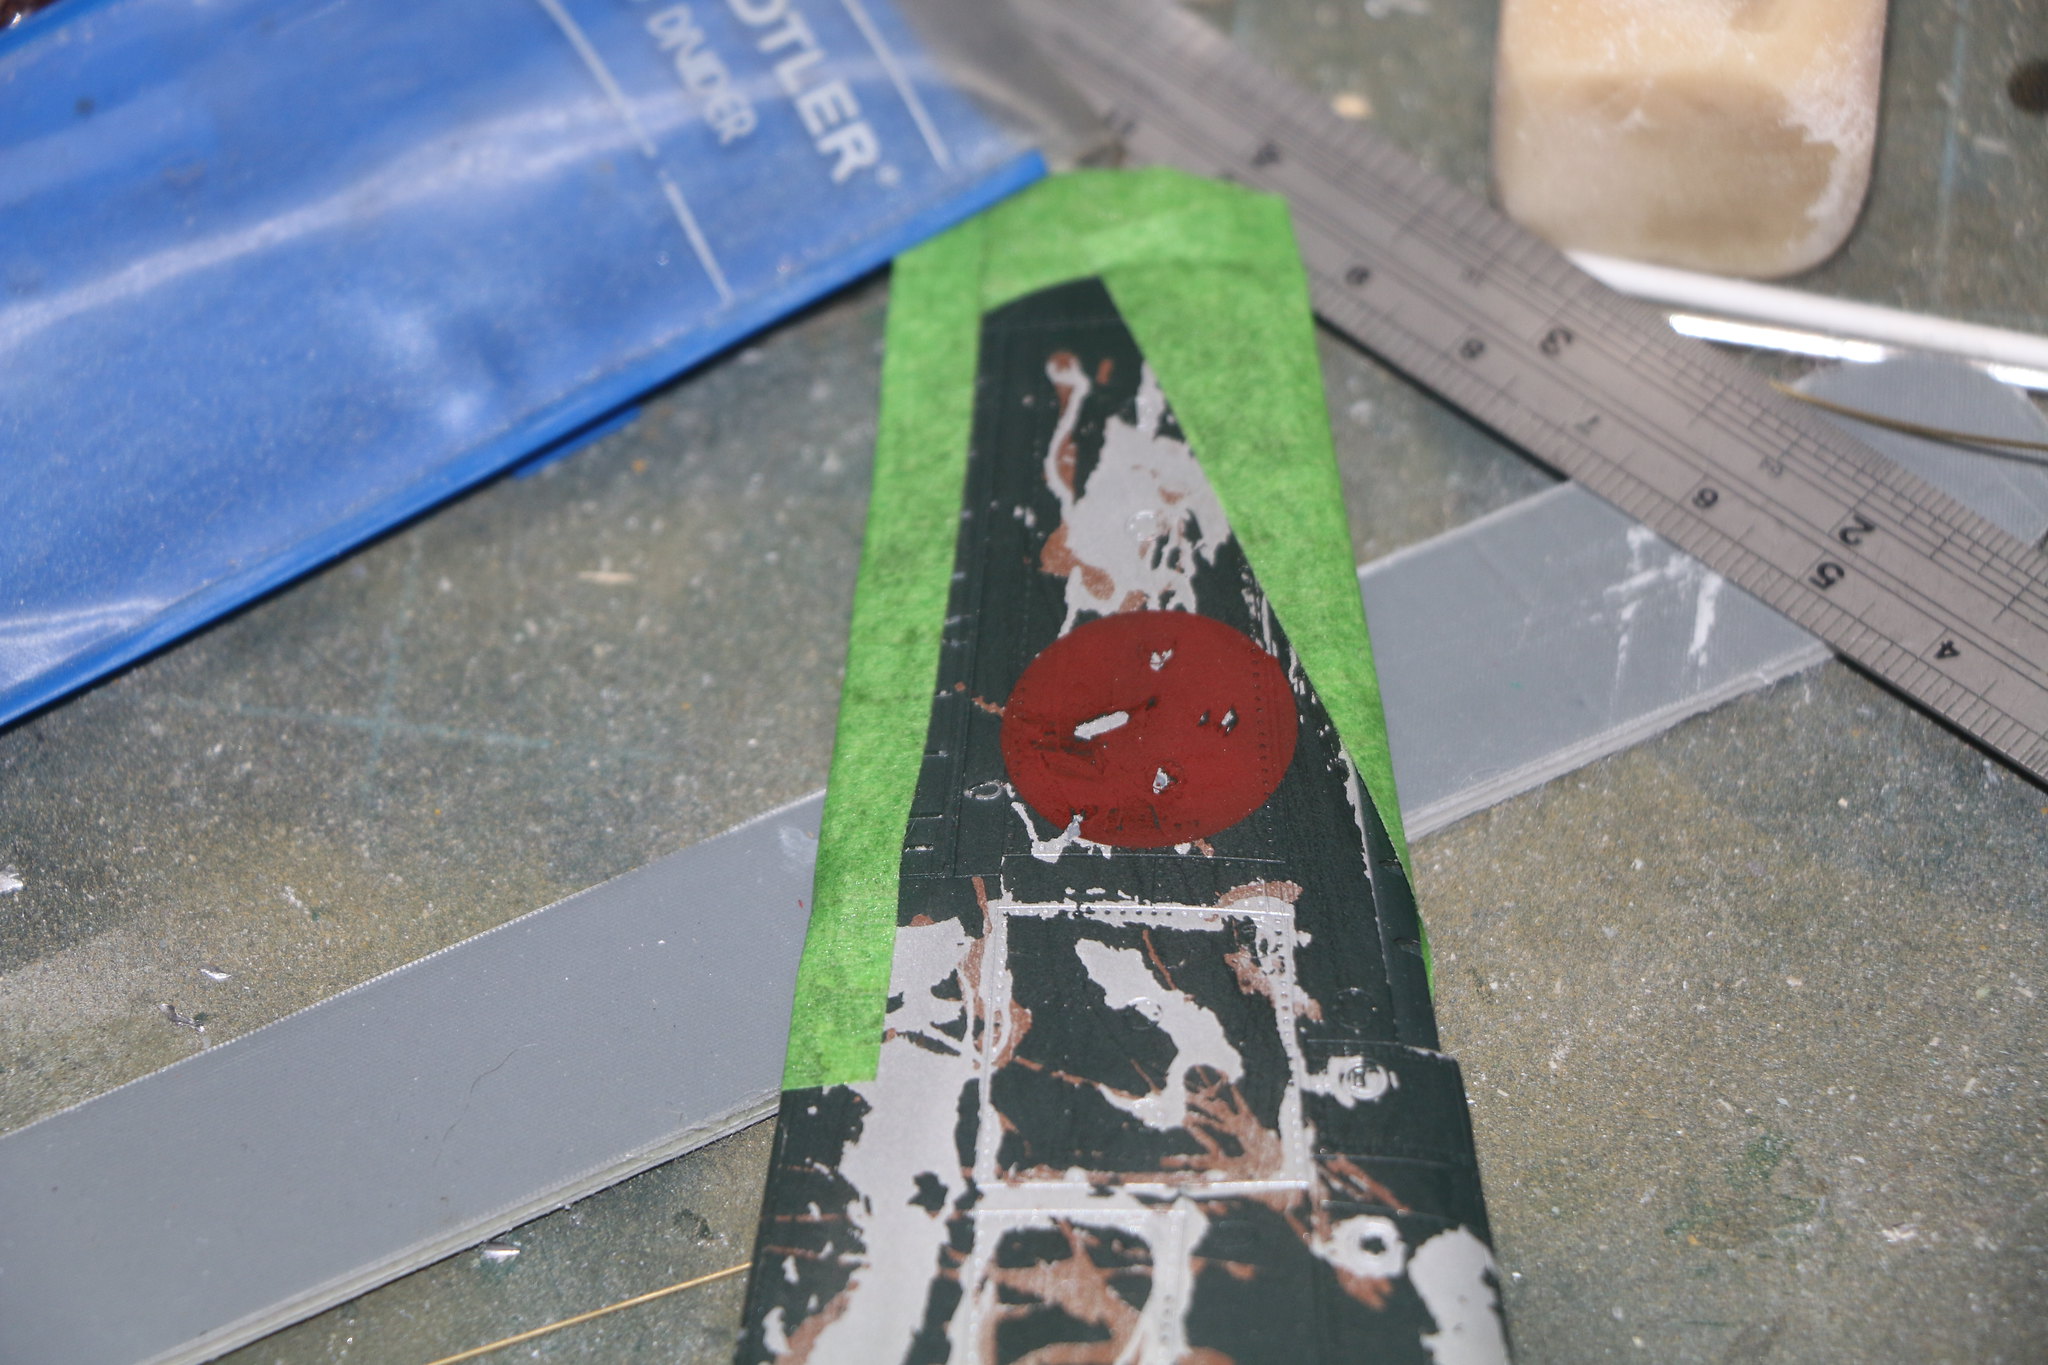
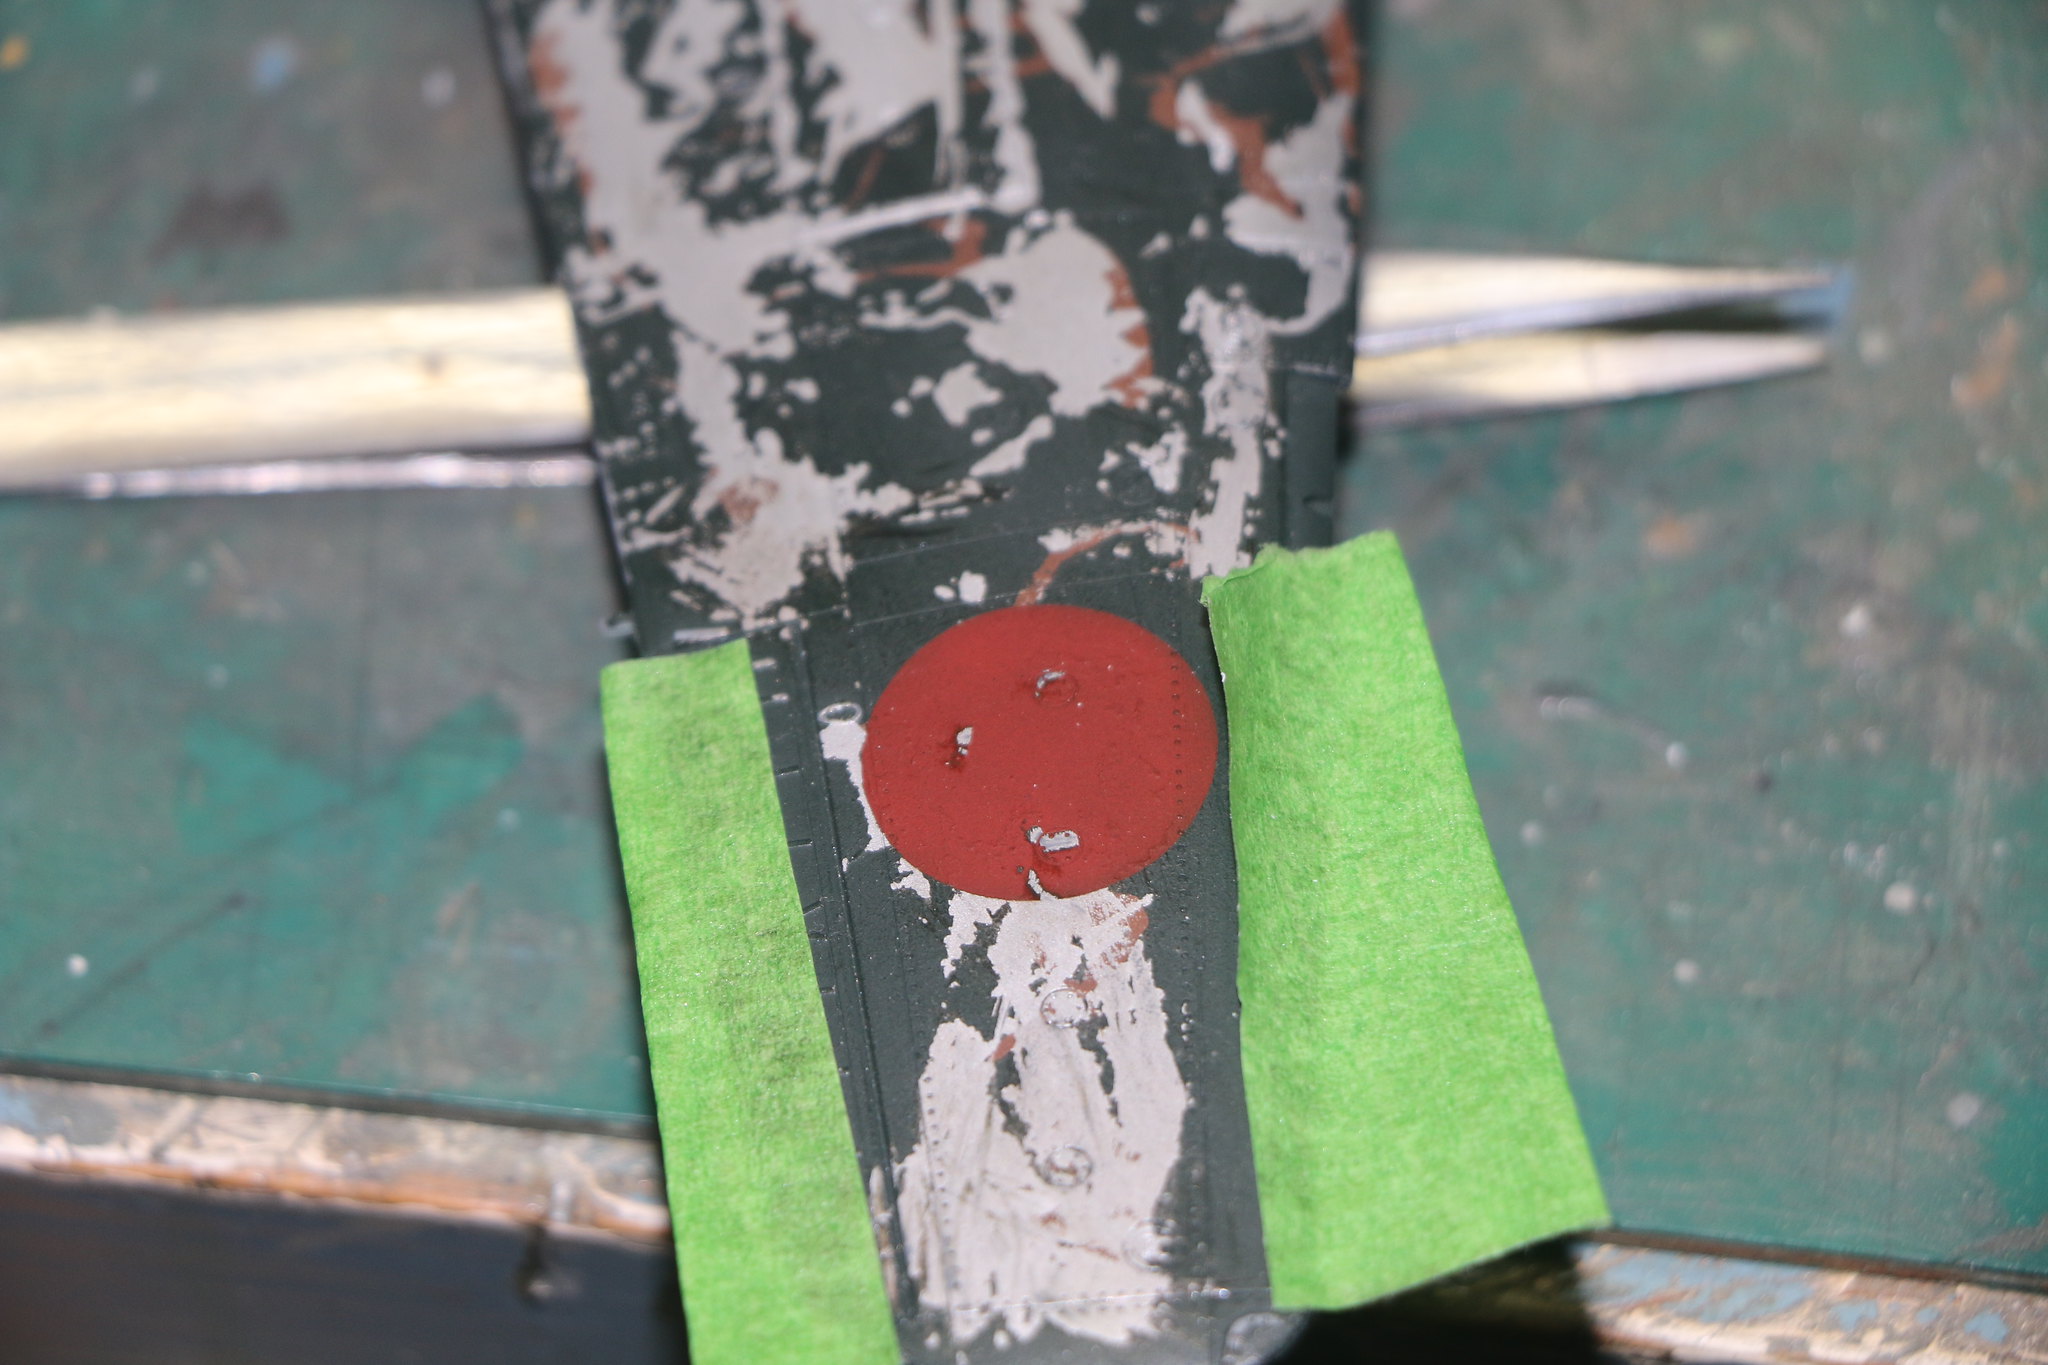
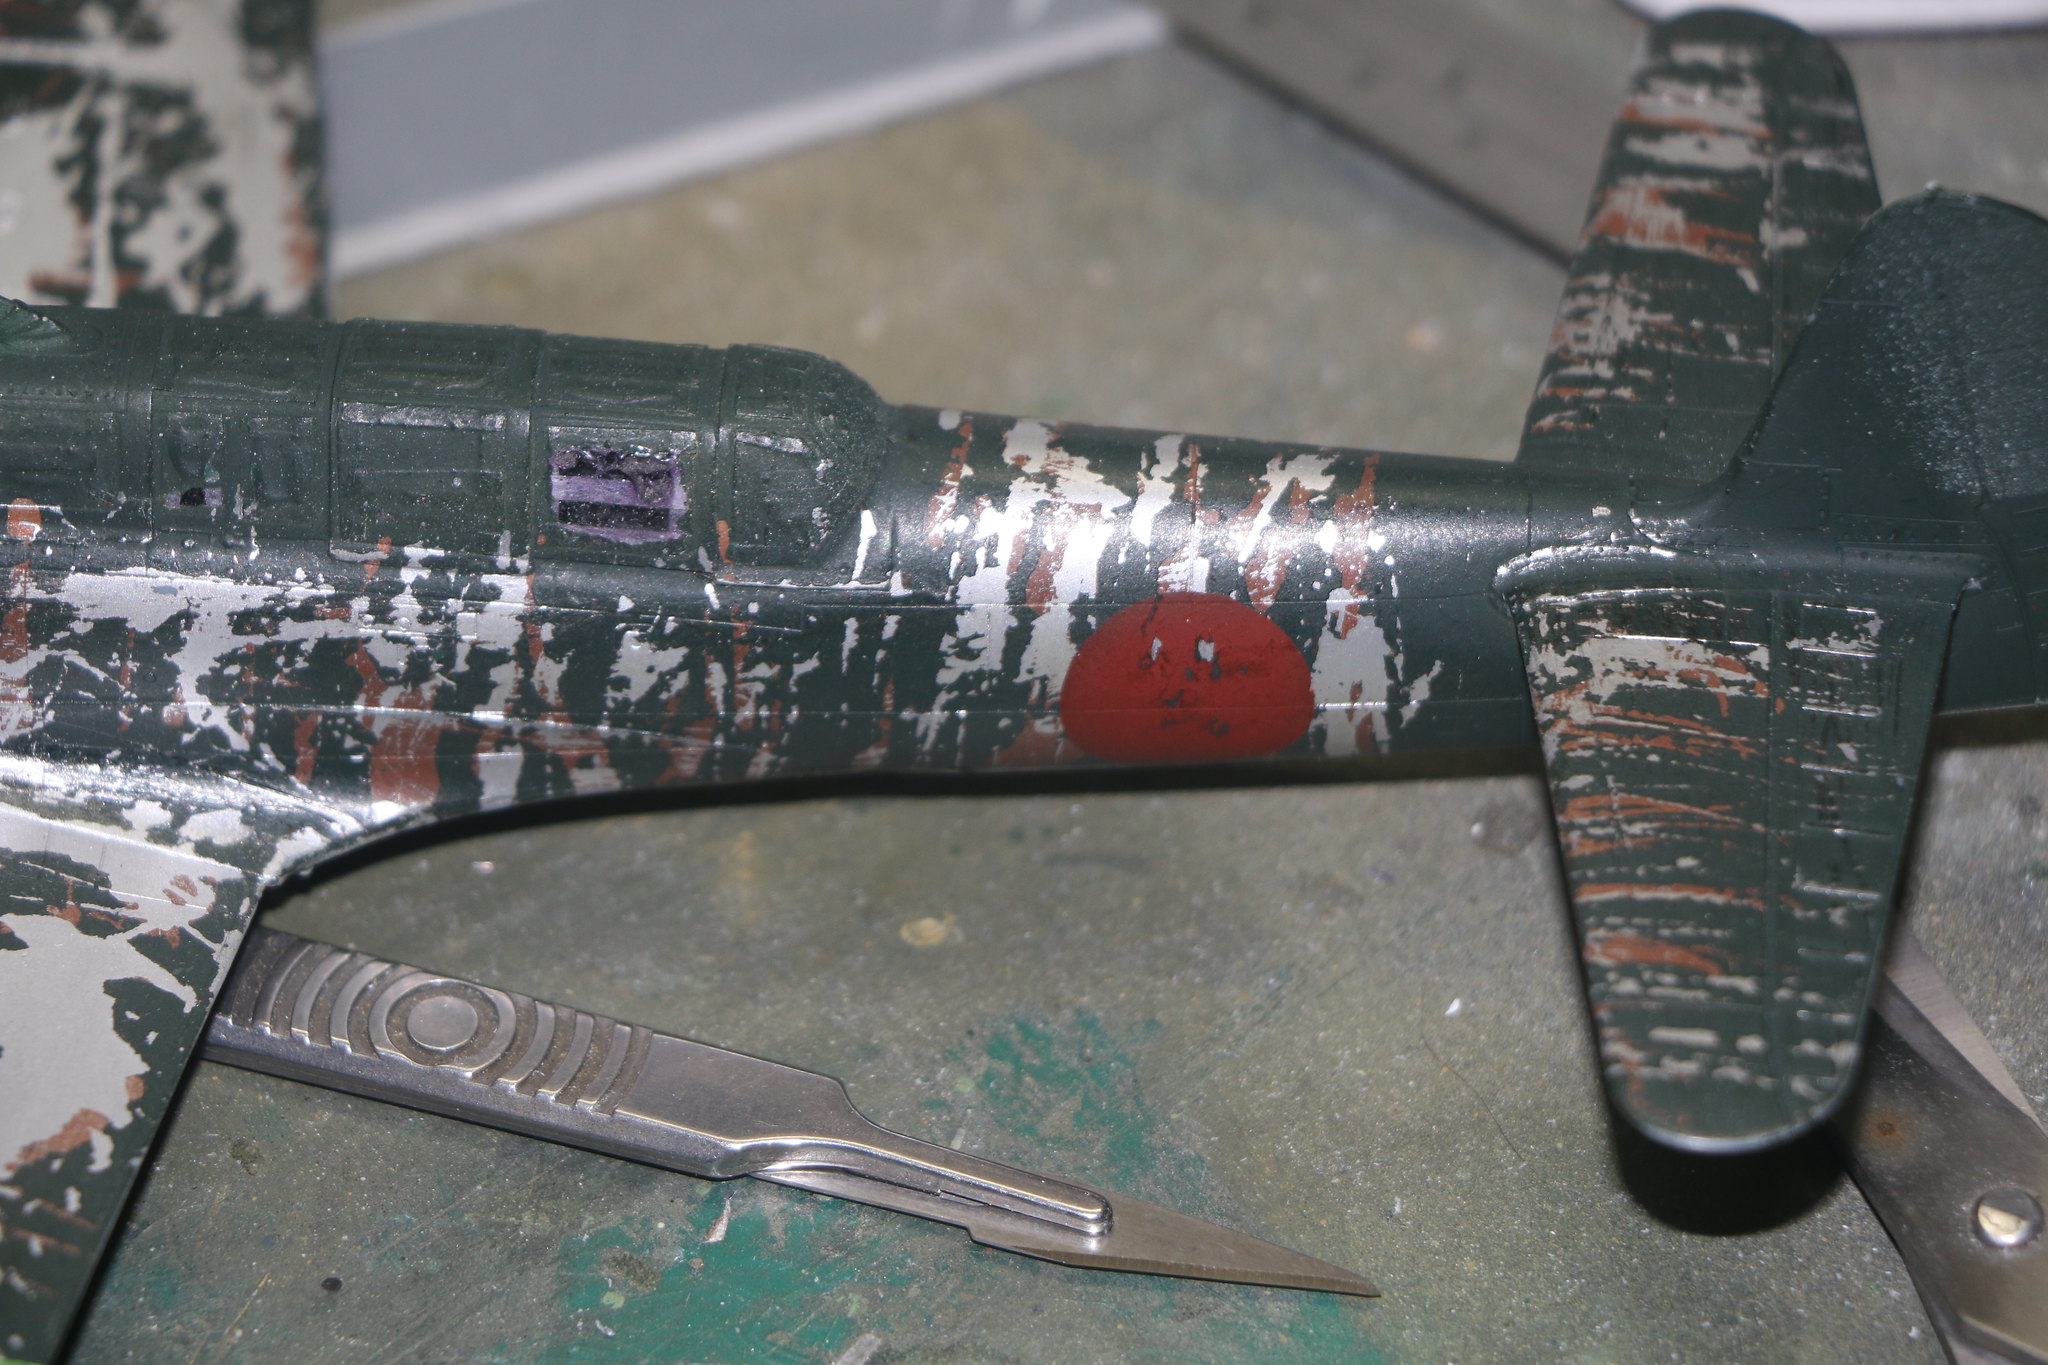
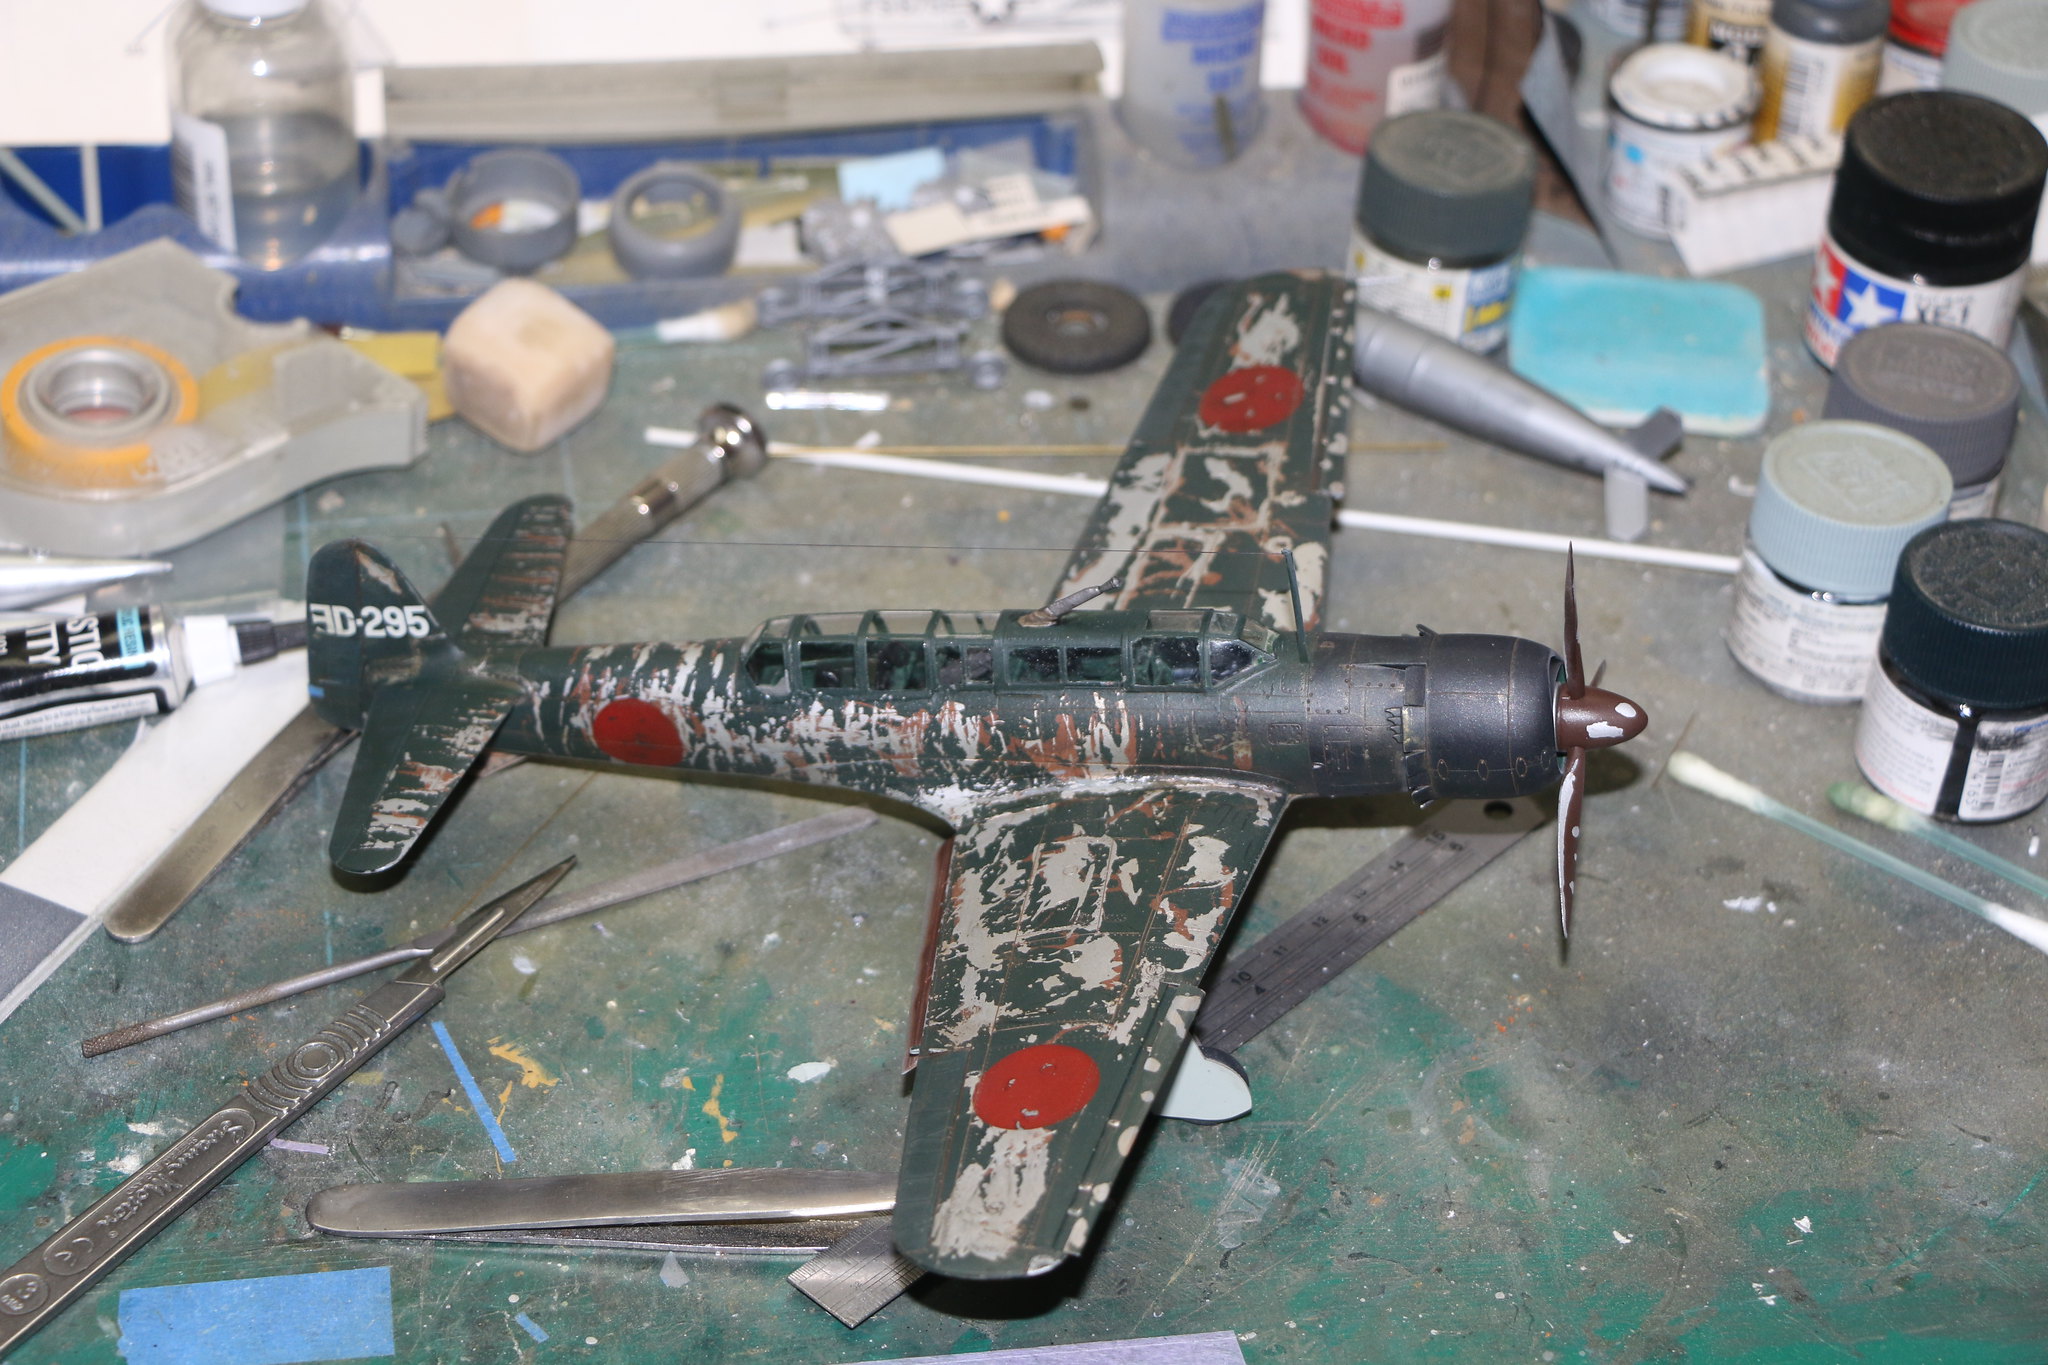
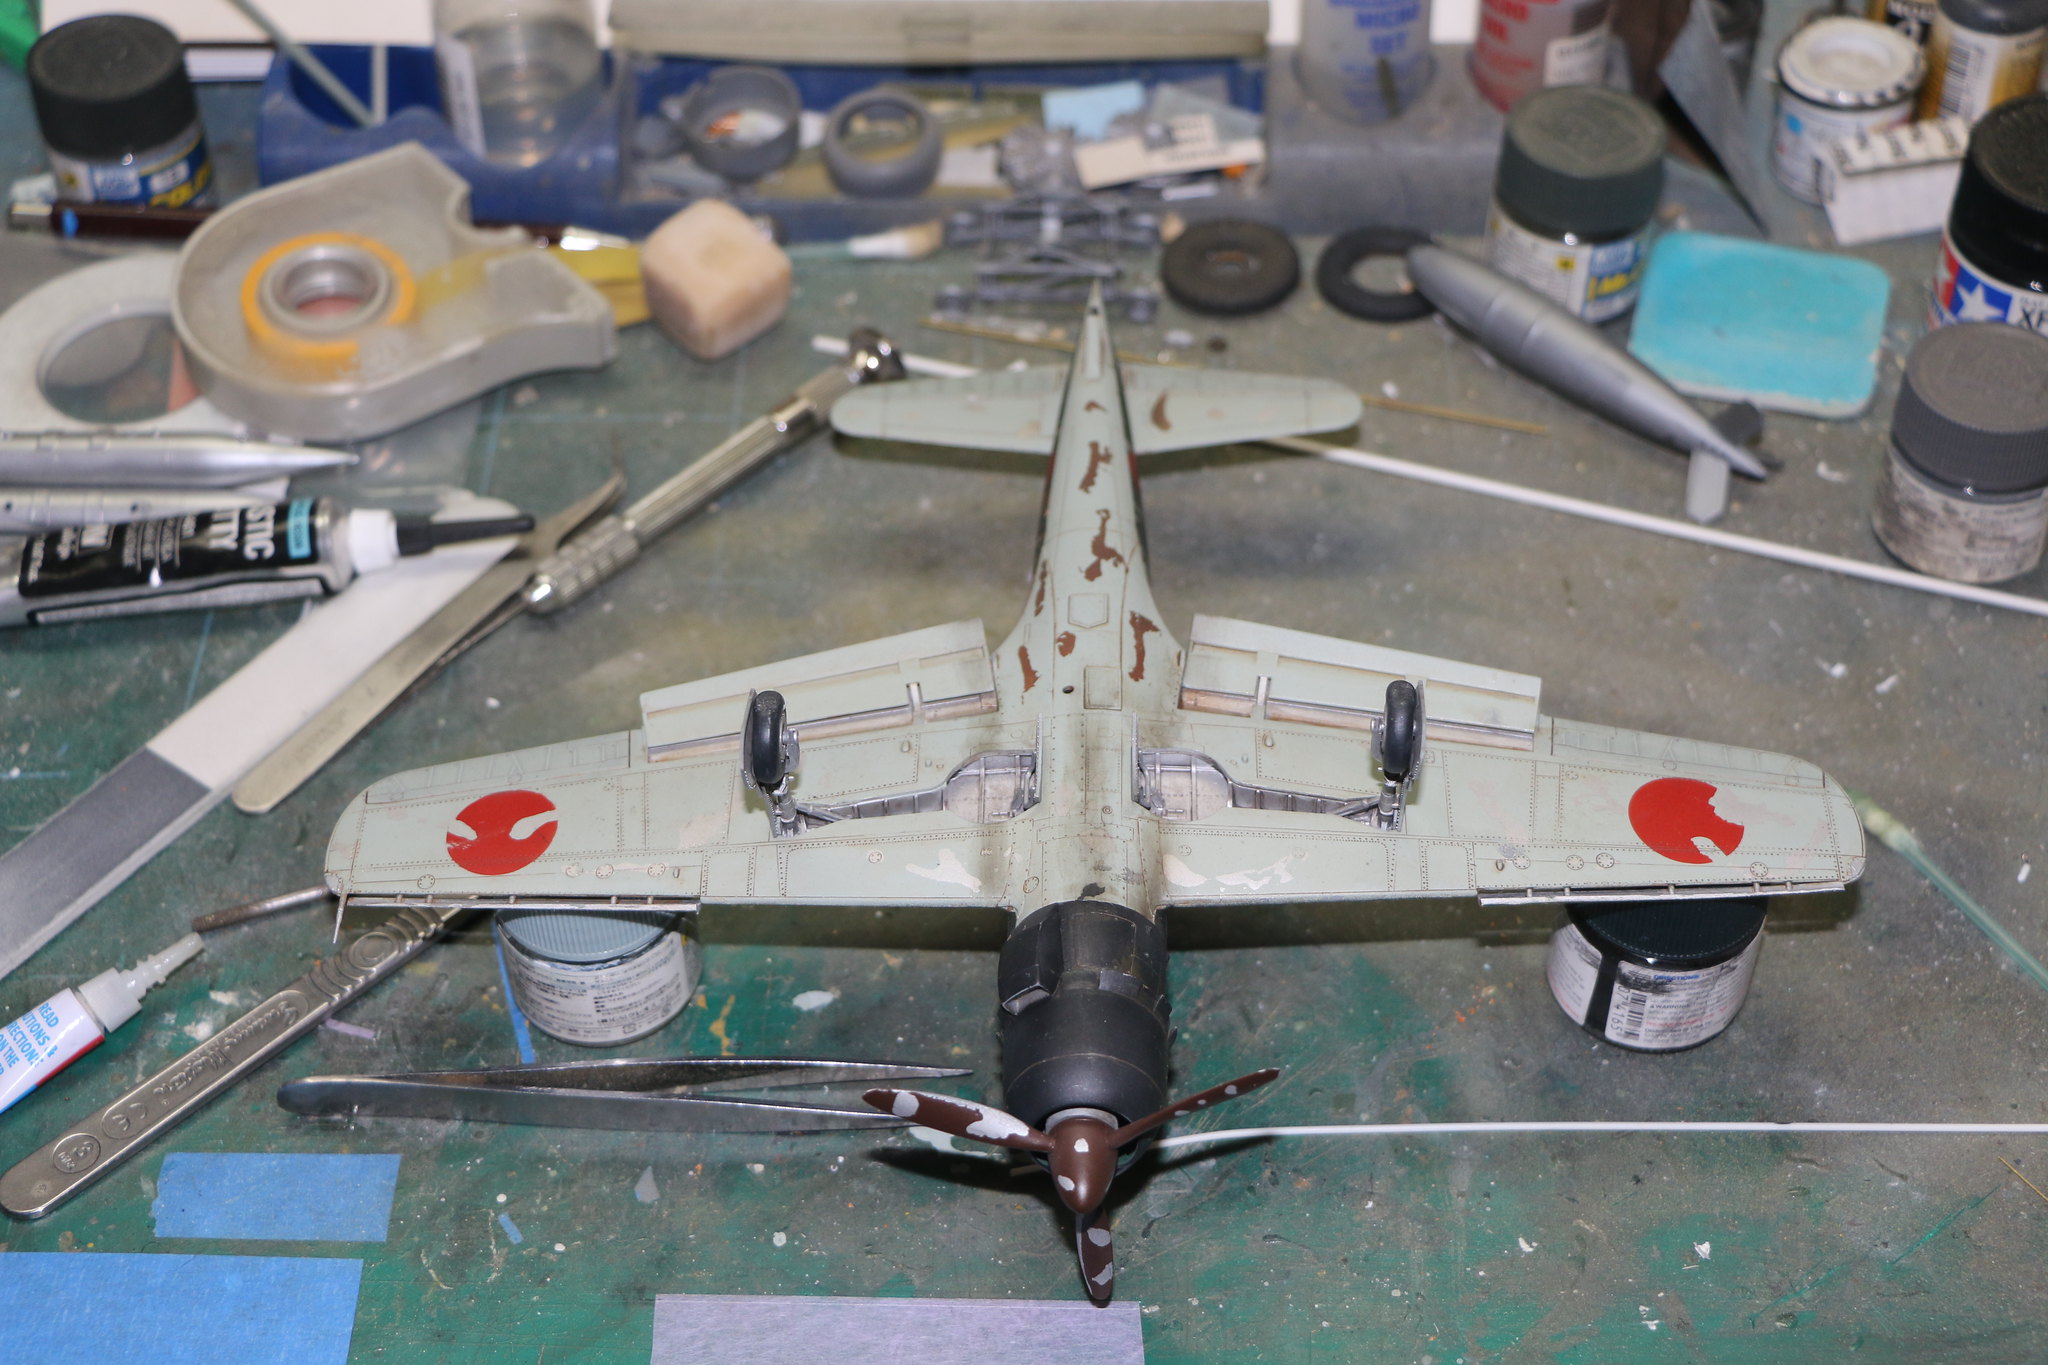
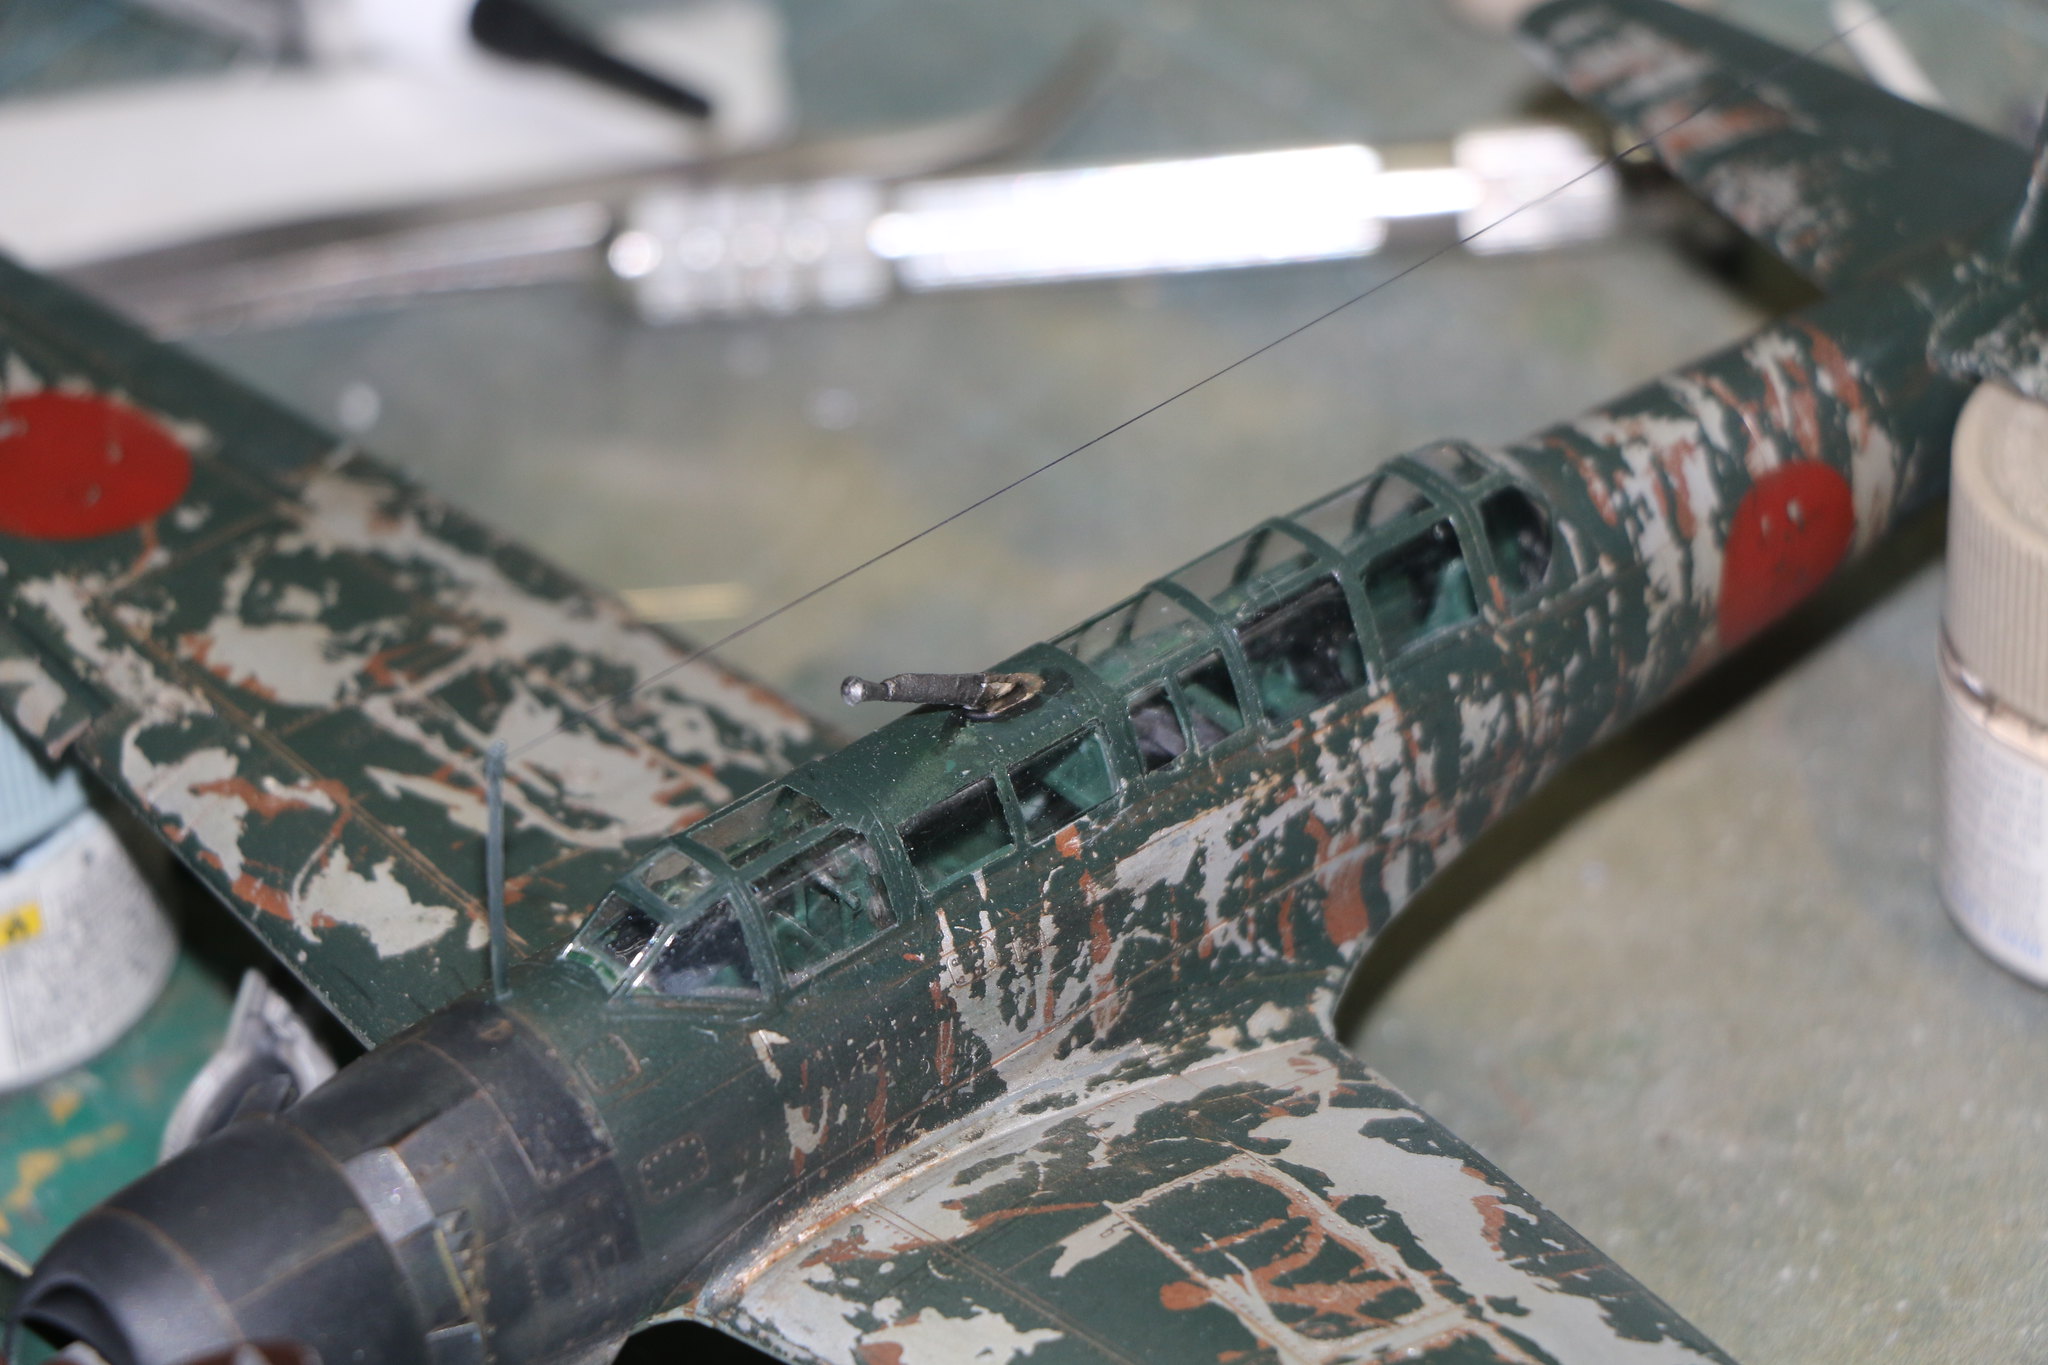
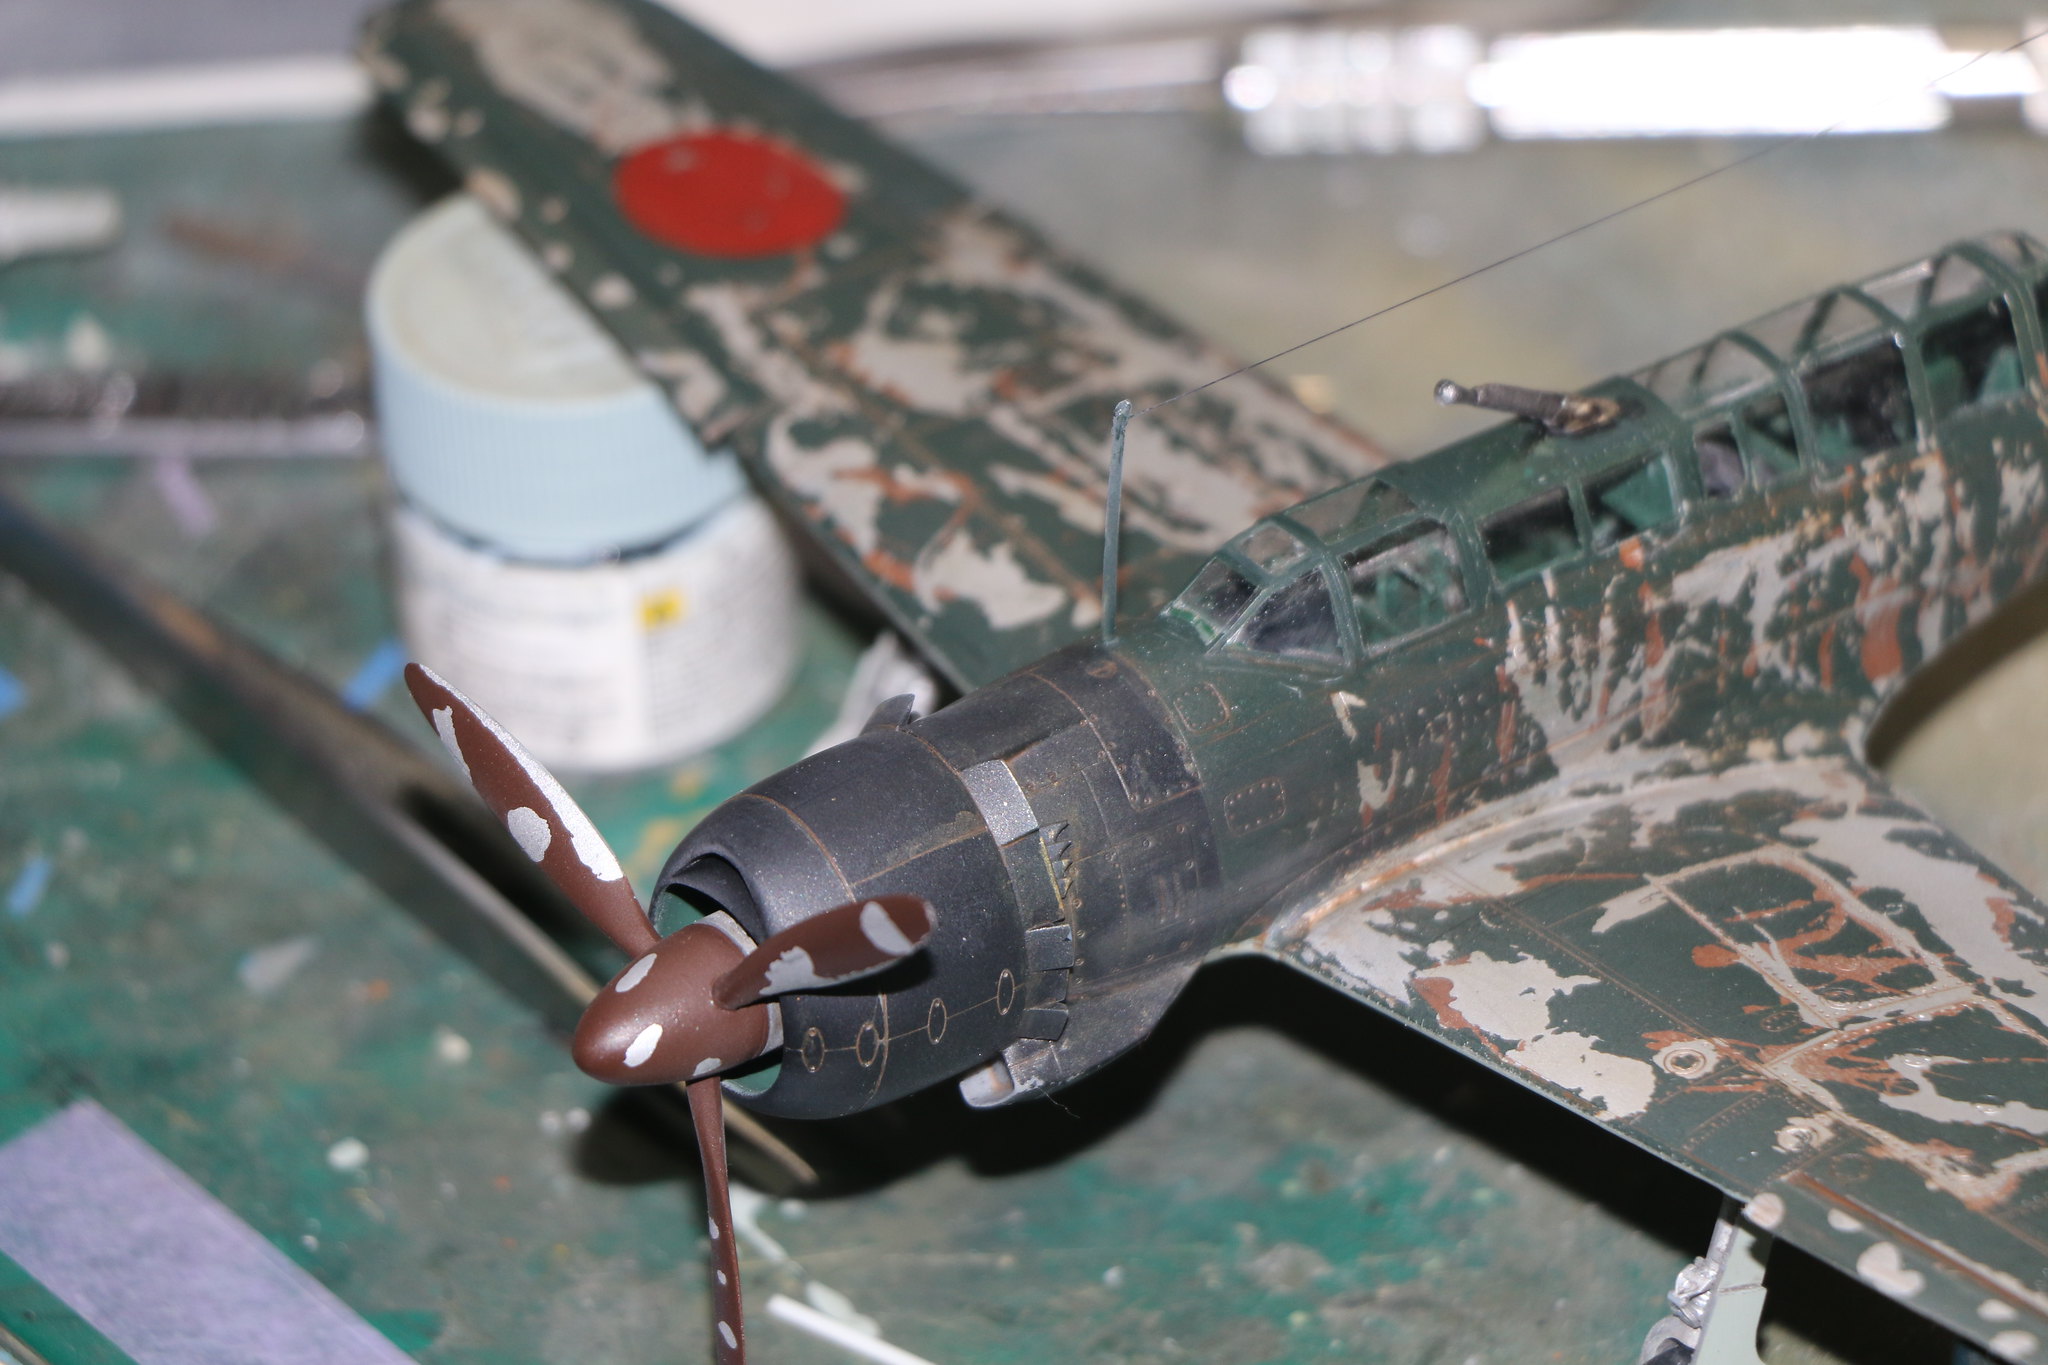
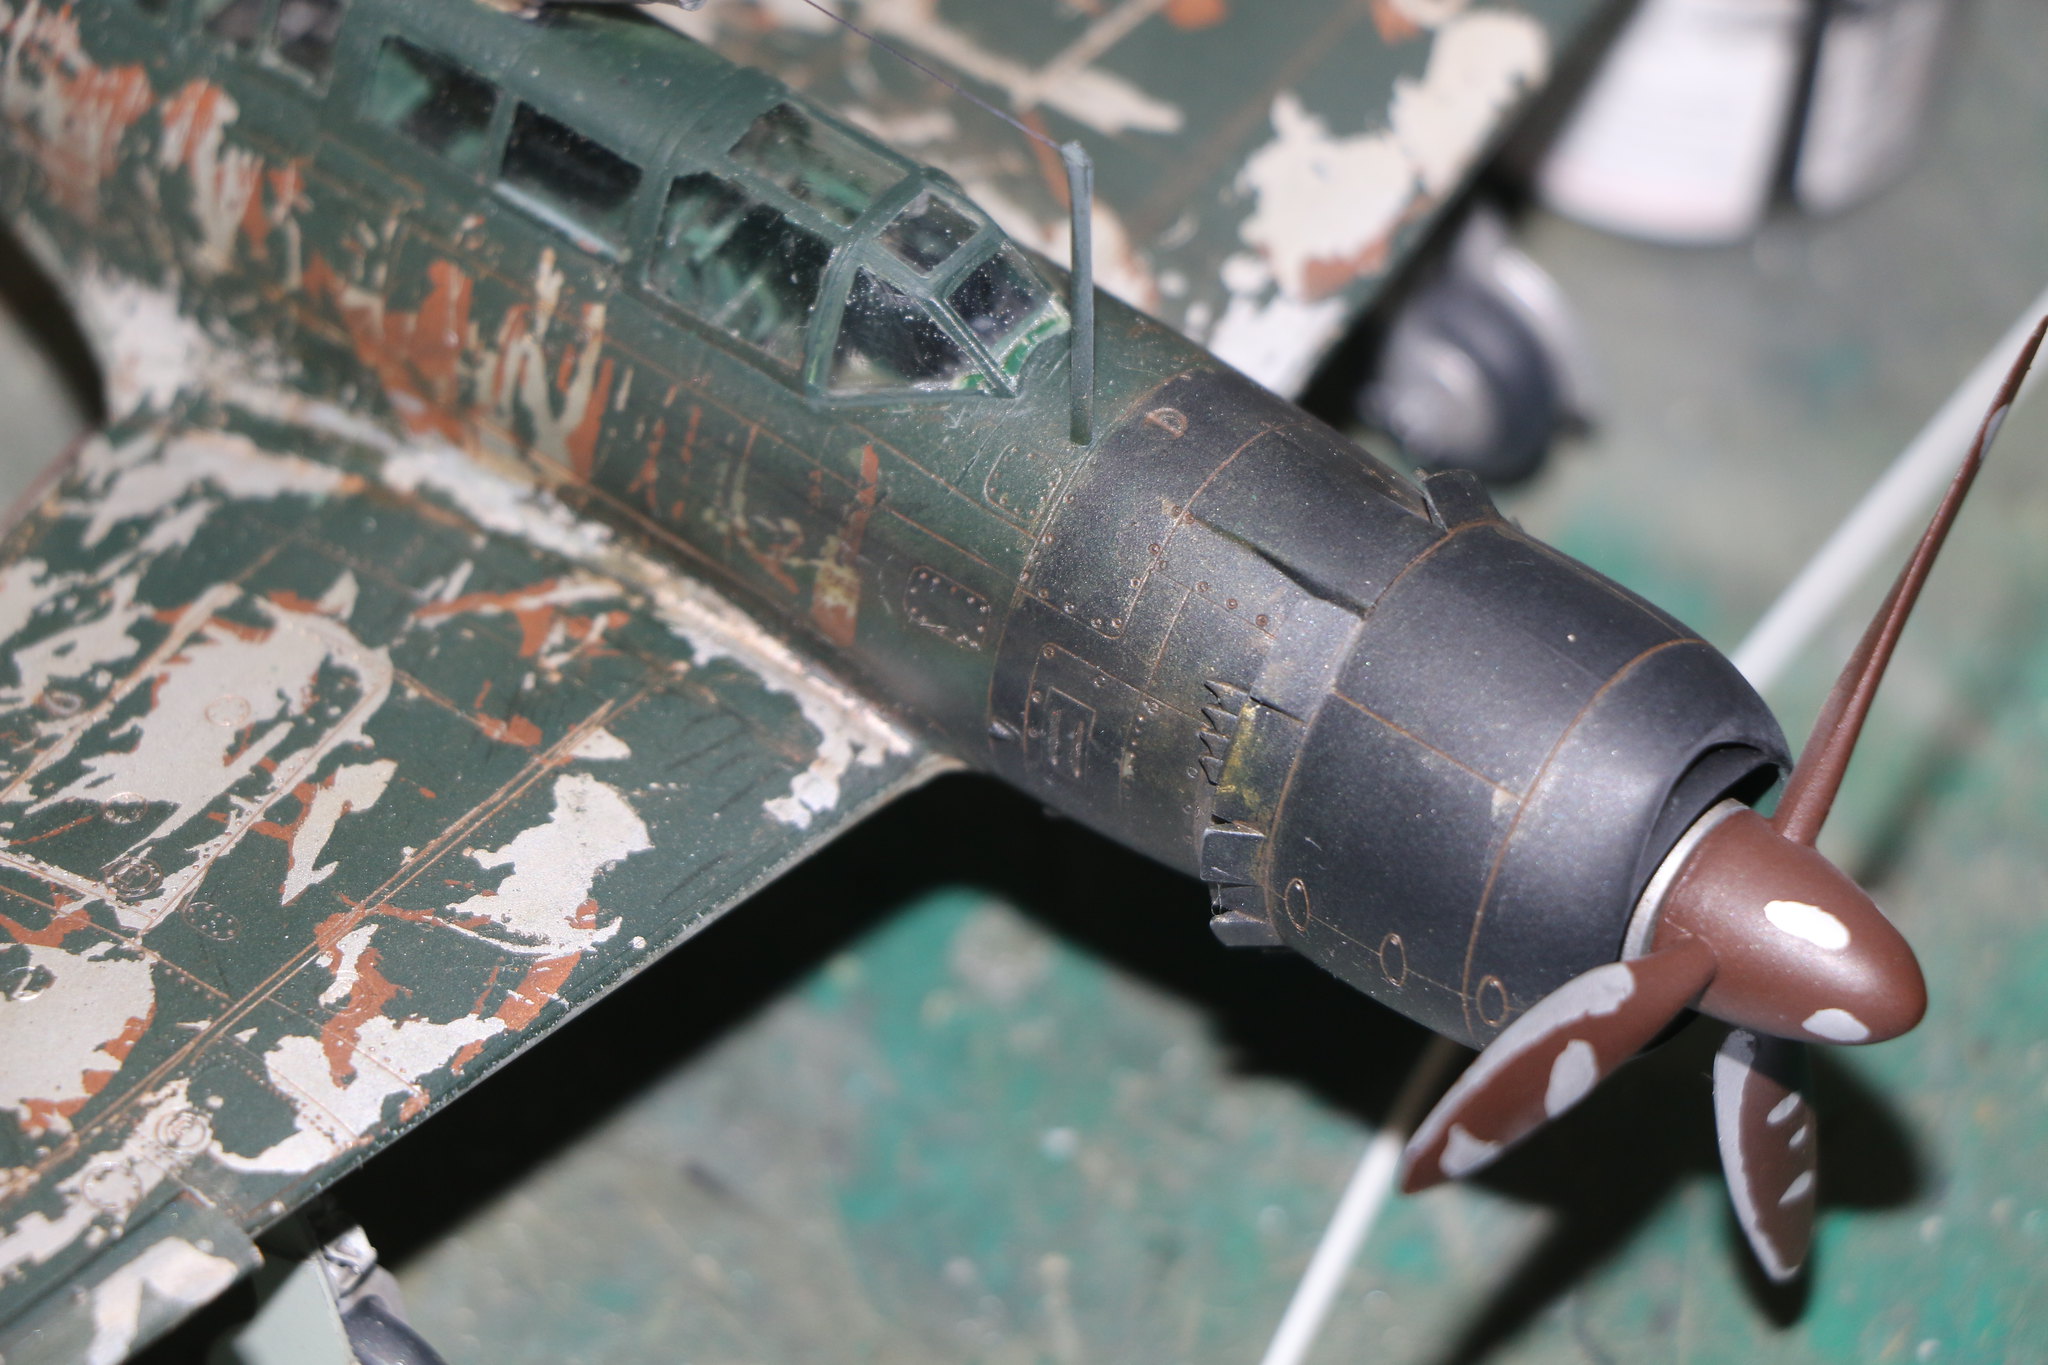
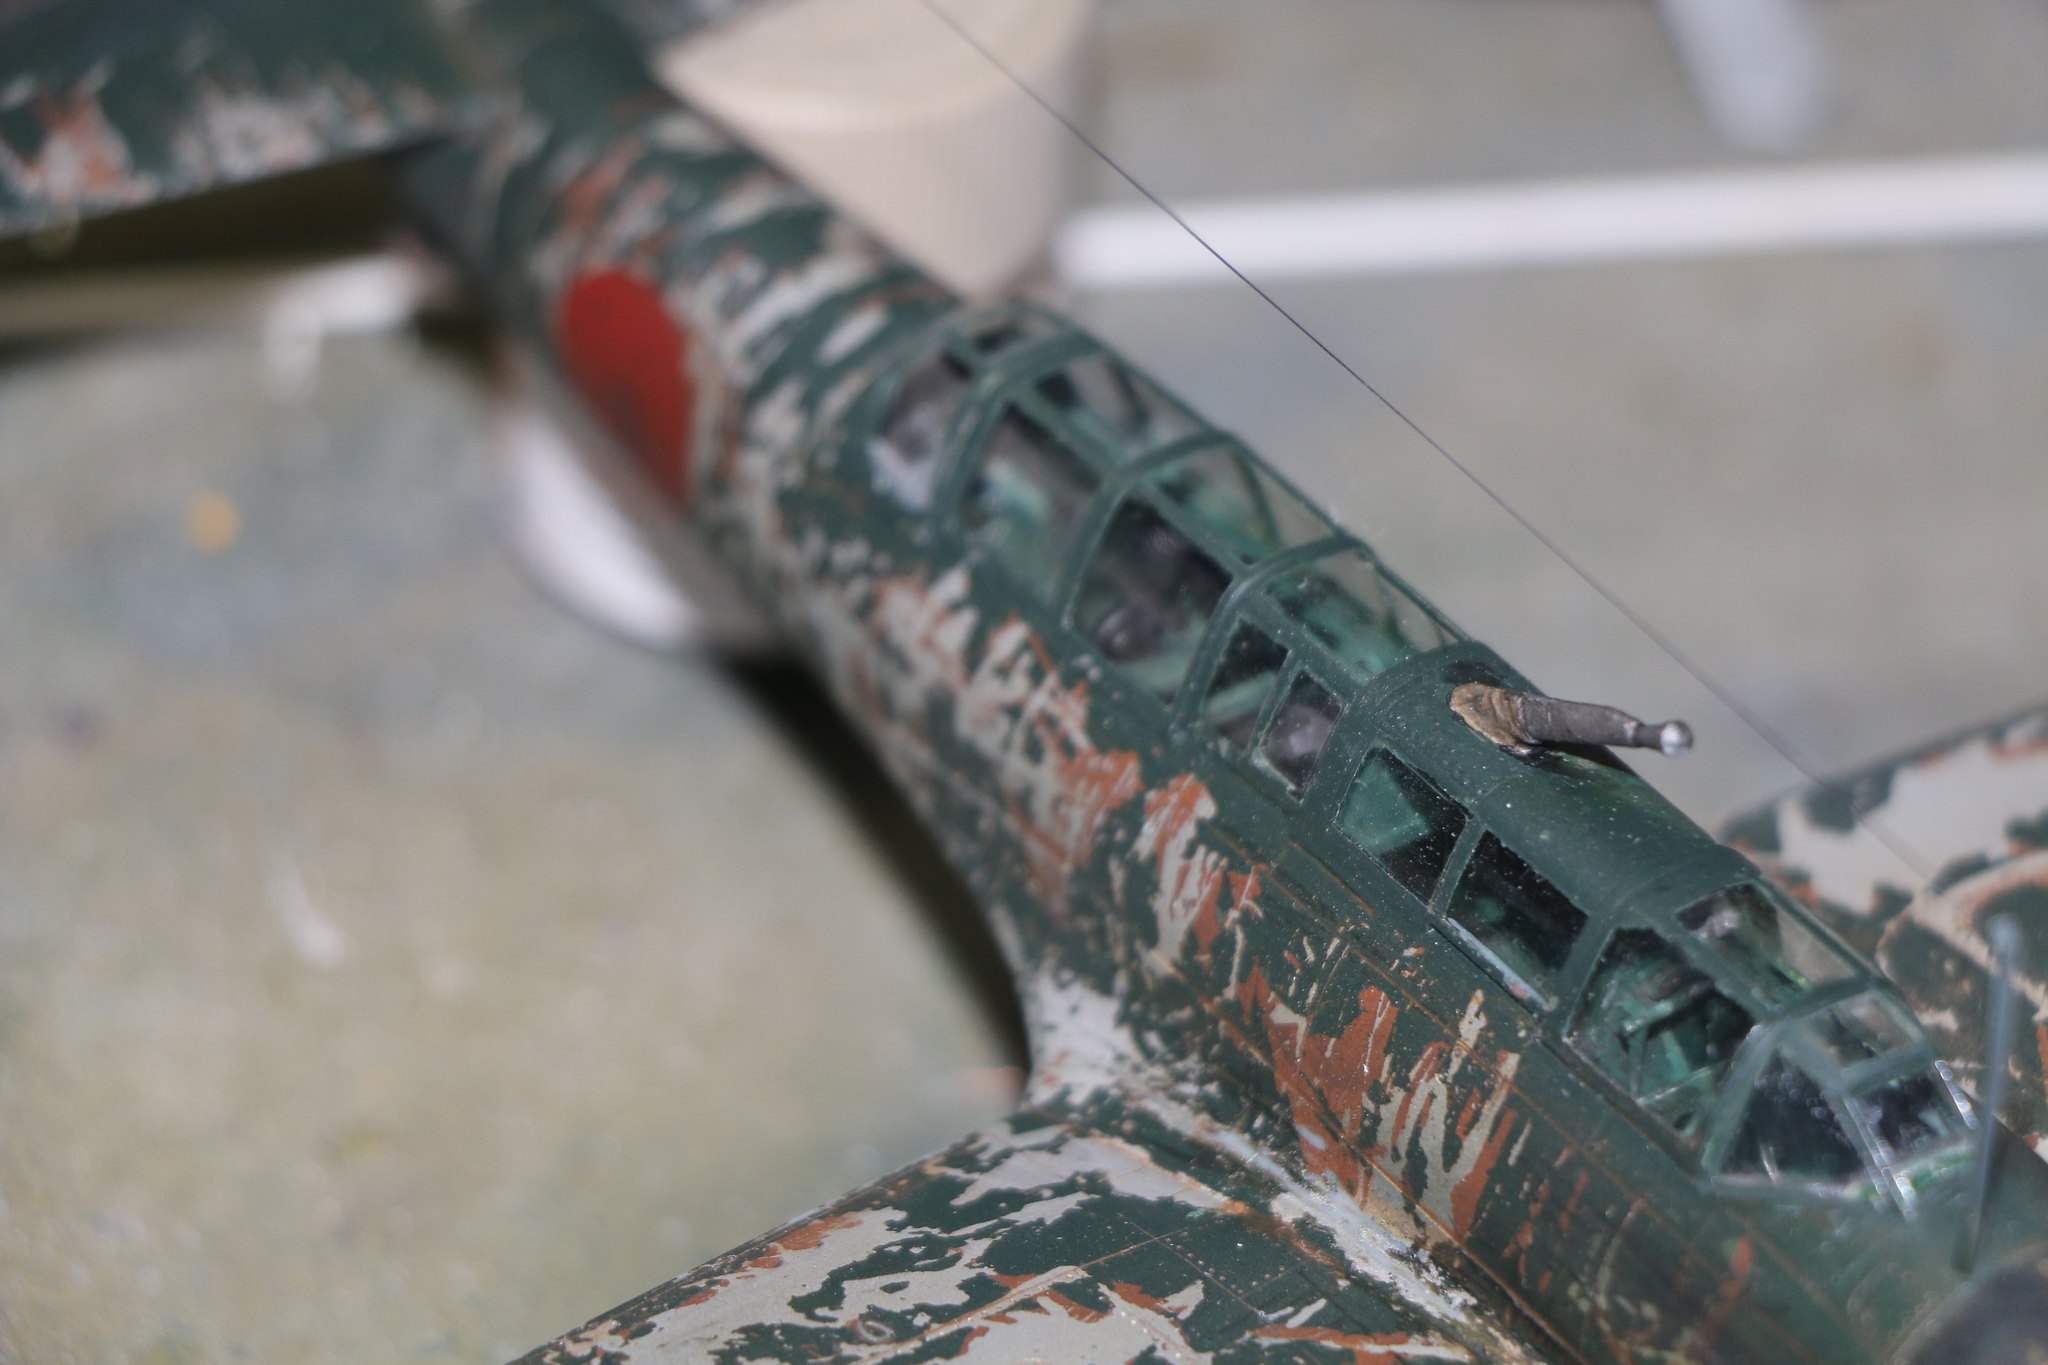
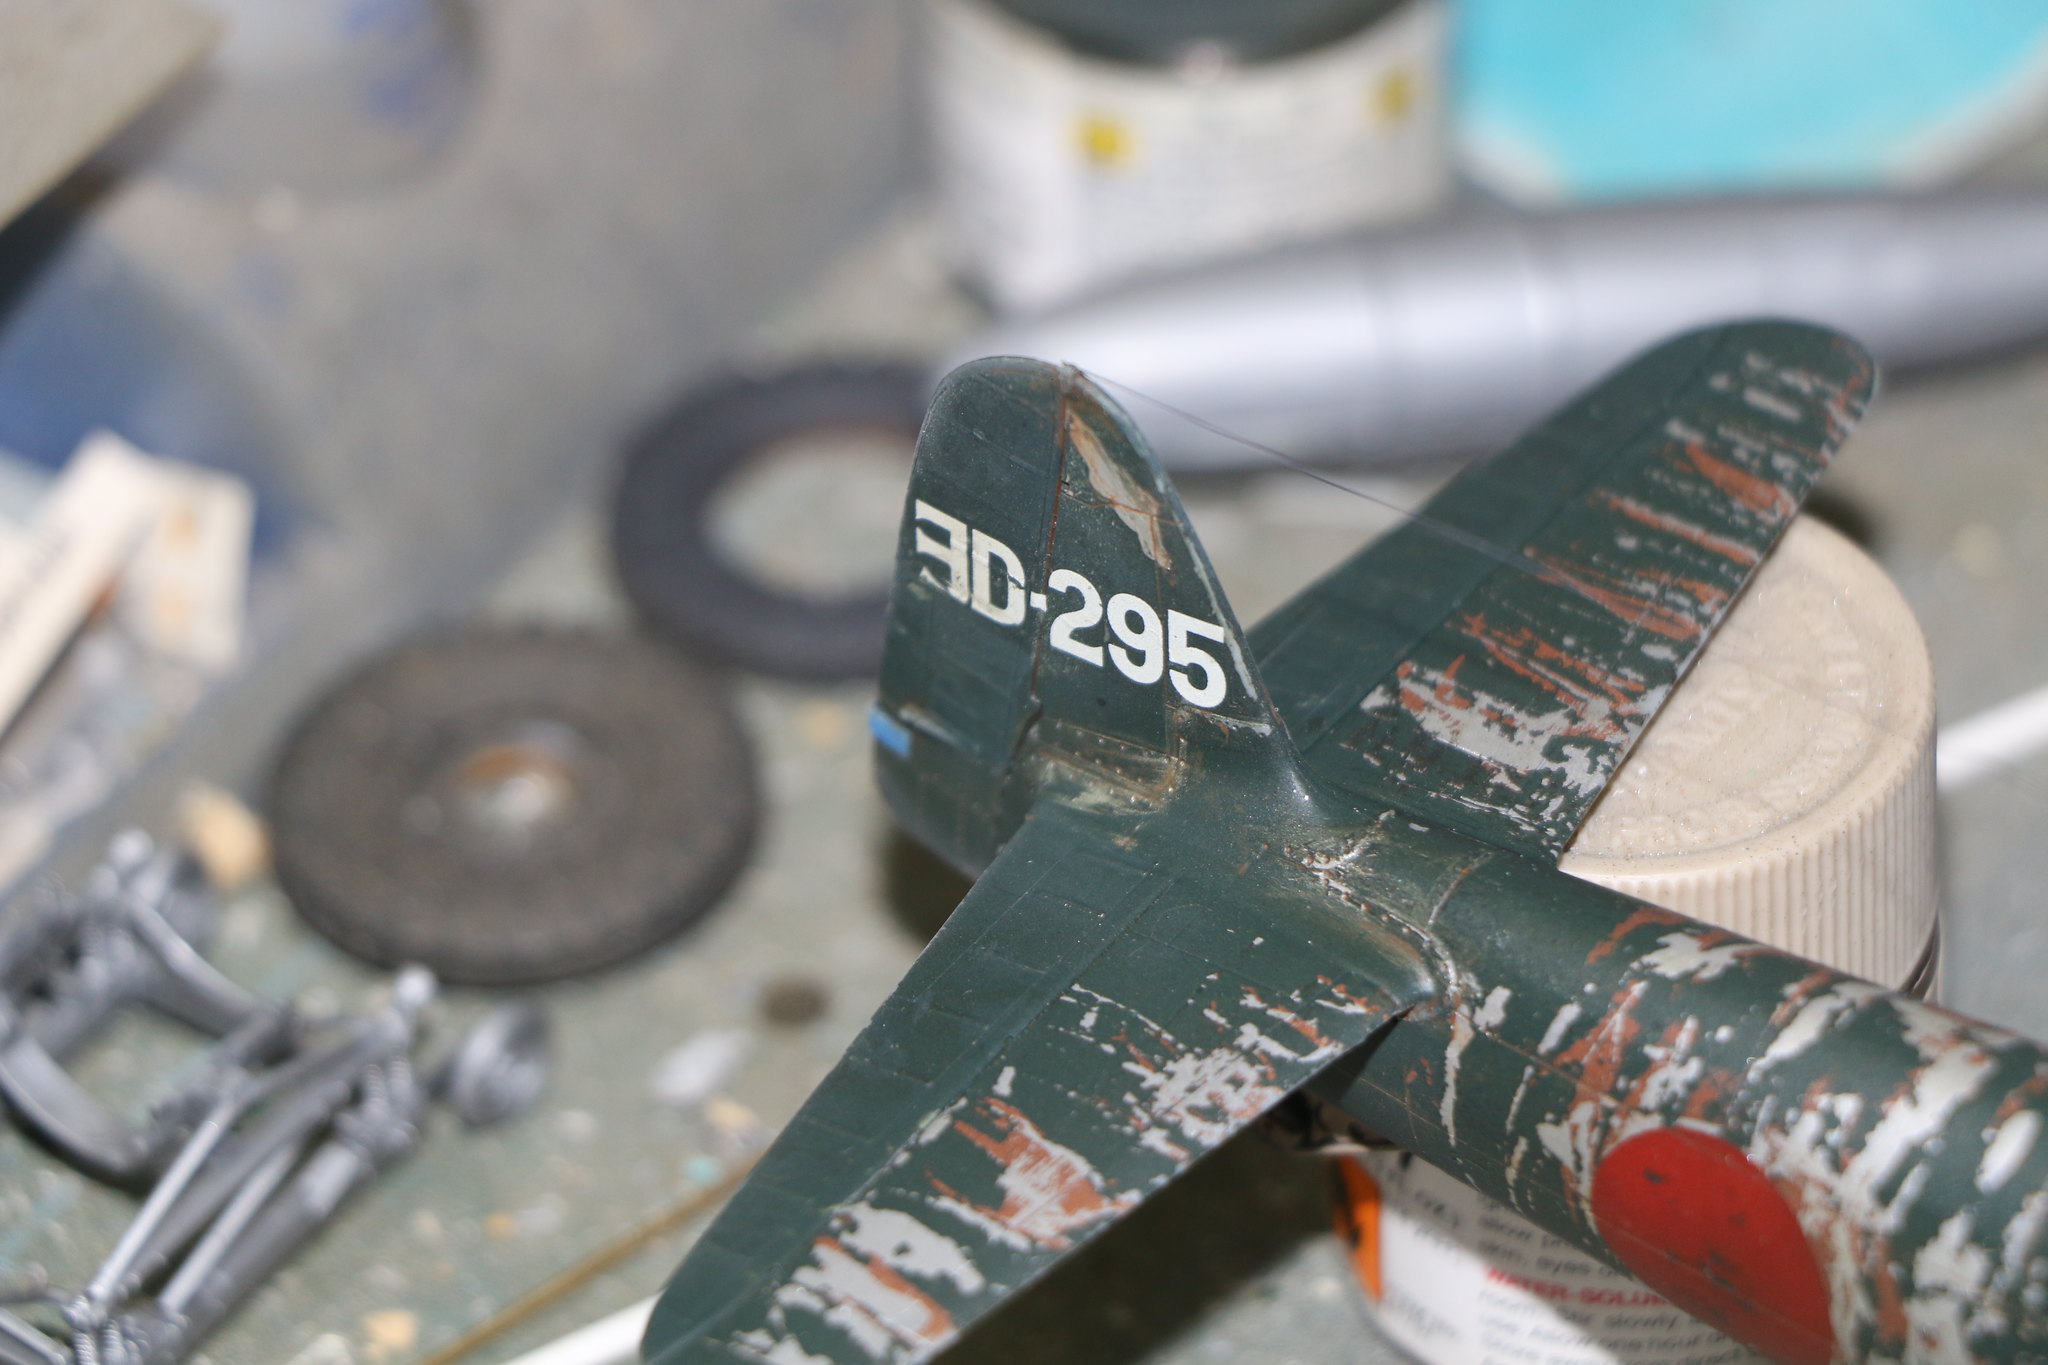
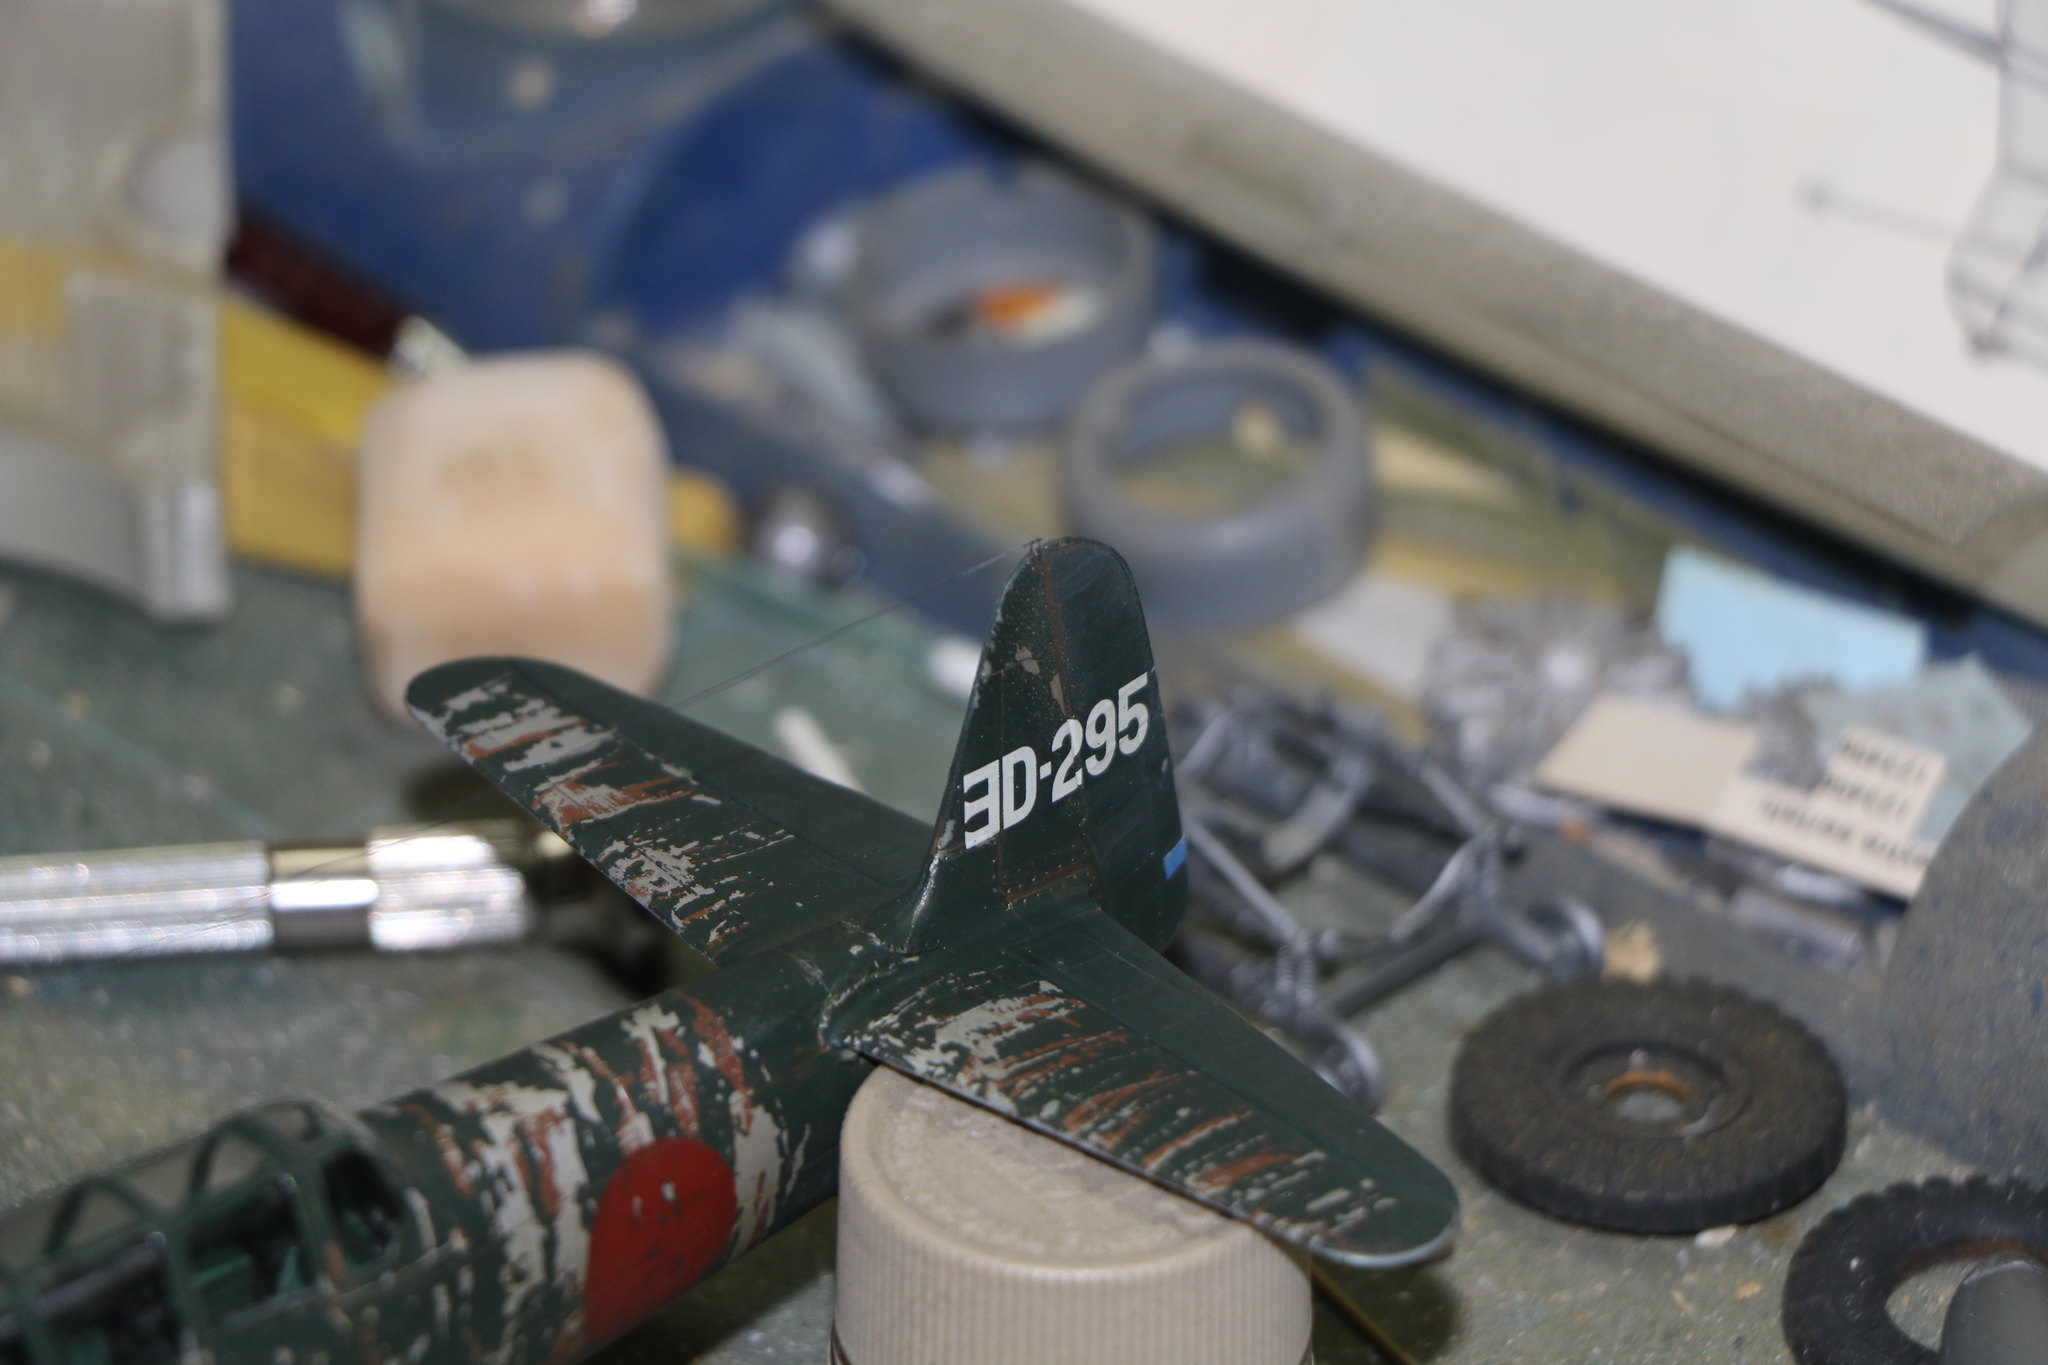
Okay so I'm pushing forward, the paint job will remain, while I could remove the acrylic and start again I think the point at this stage is to simply work with what I've got. To this end I've taken a look at the markings and decided that using the decals provided would highlight the paint chipping underneath as I'm certain the Hasegawa decals will be translucent. So I've decided to spray the national markings this being simple as they are simply circular. I'll first respray the top colour to even out the background then spray Tamiya XF-7 flat red. I'm hoping this will be somewhere close to the correct colour.
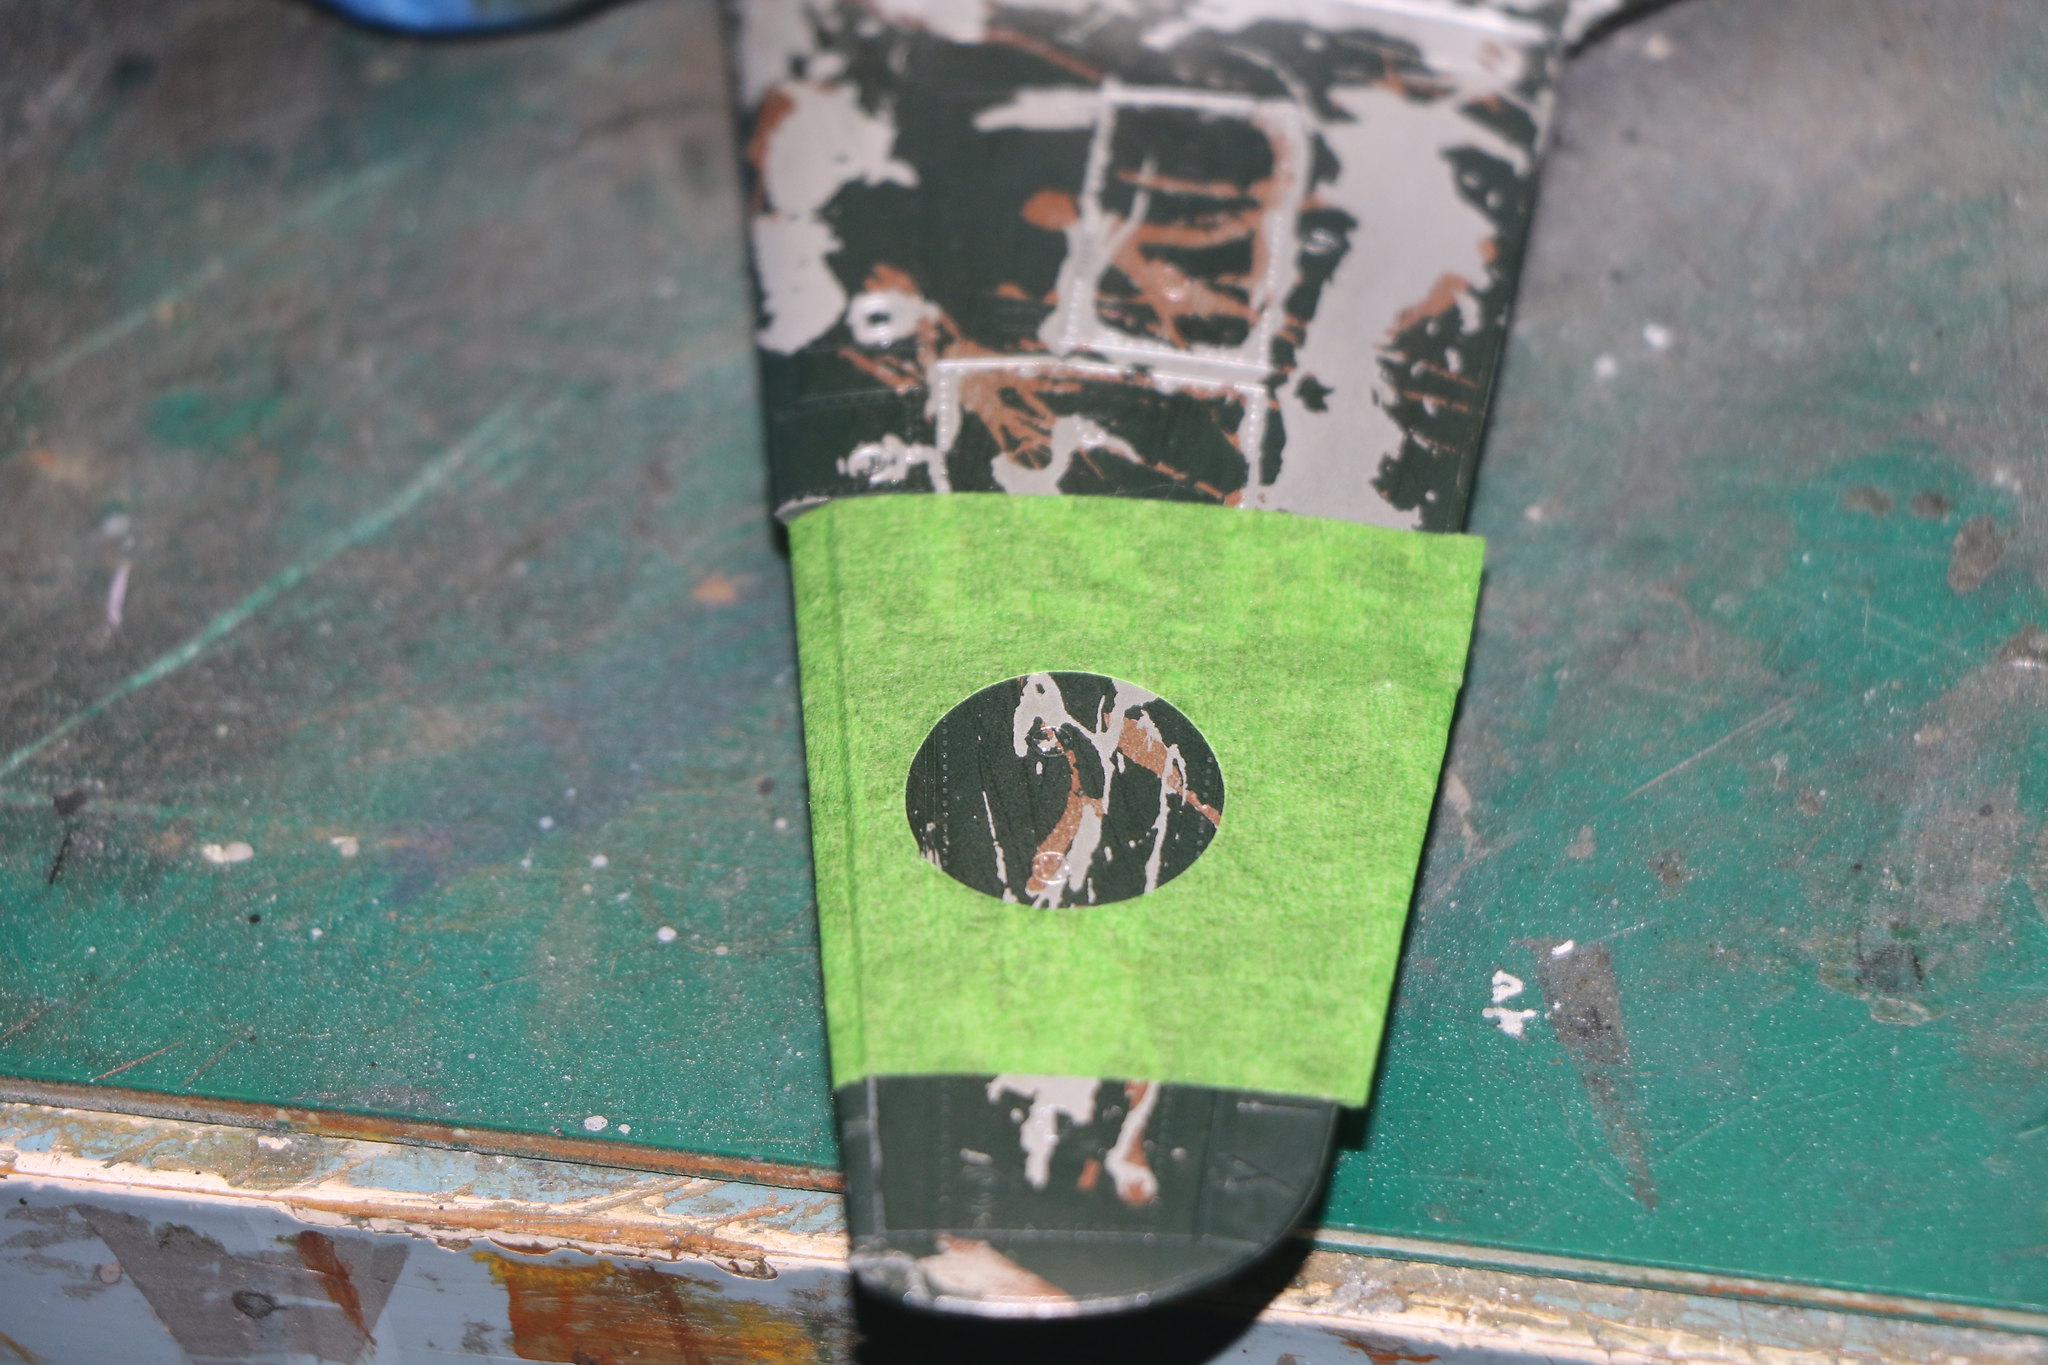
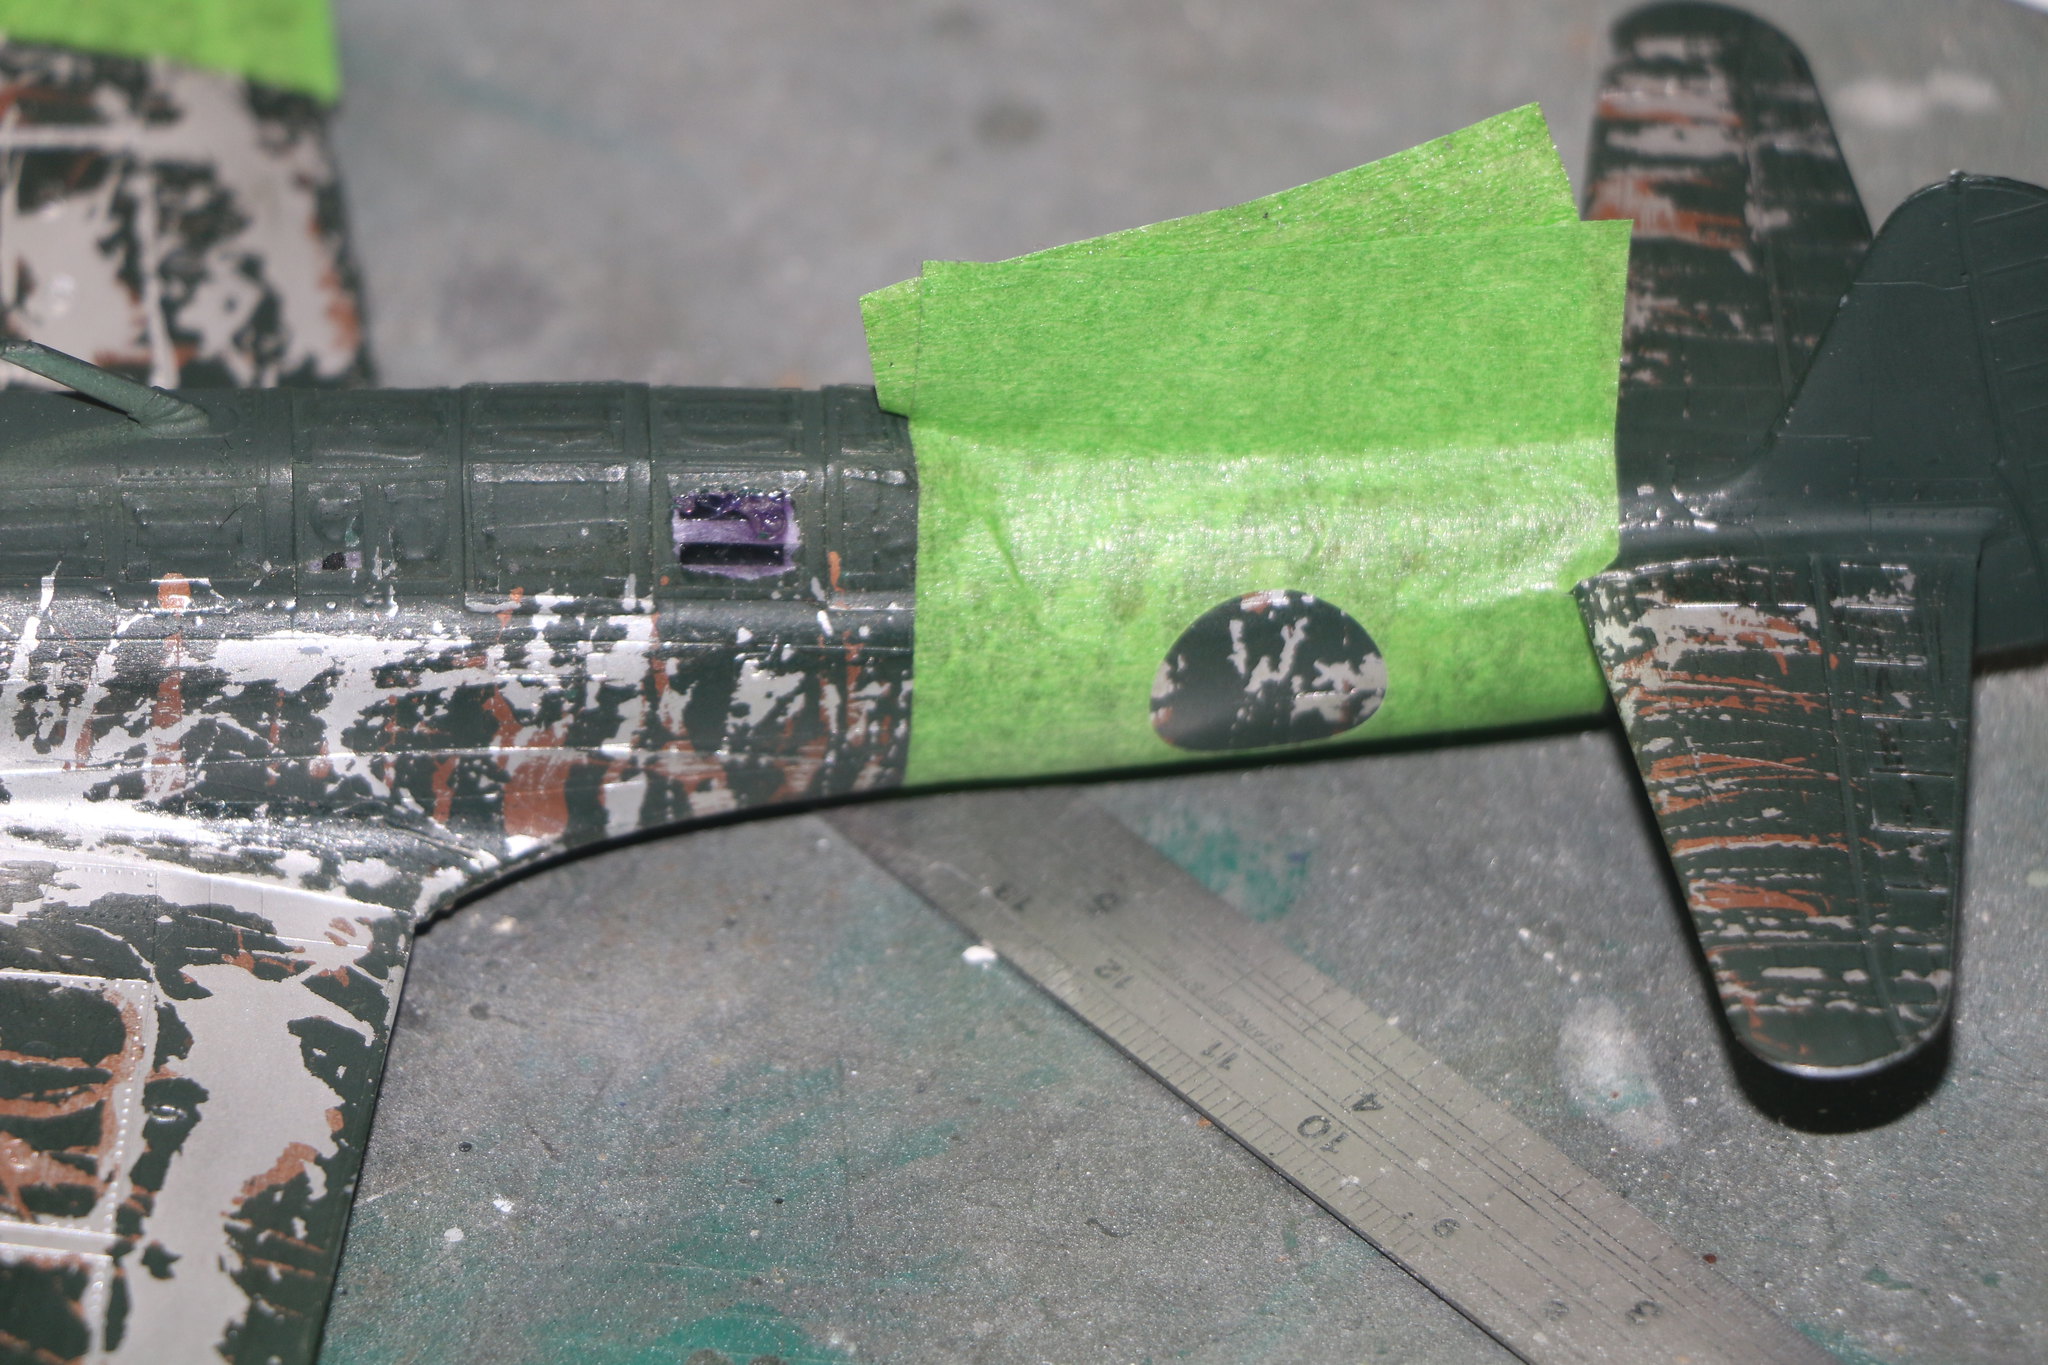
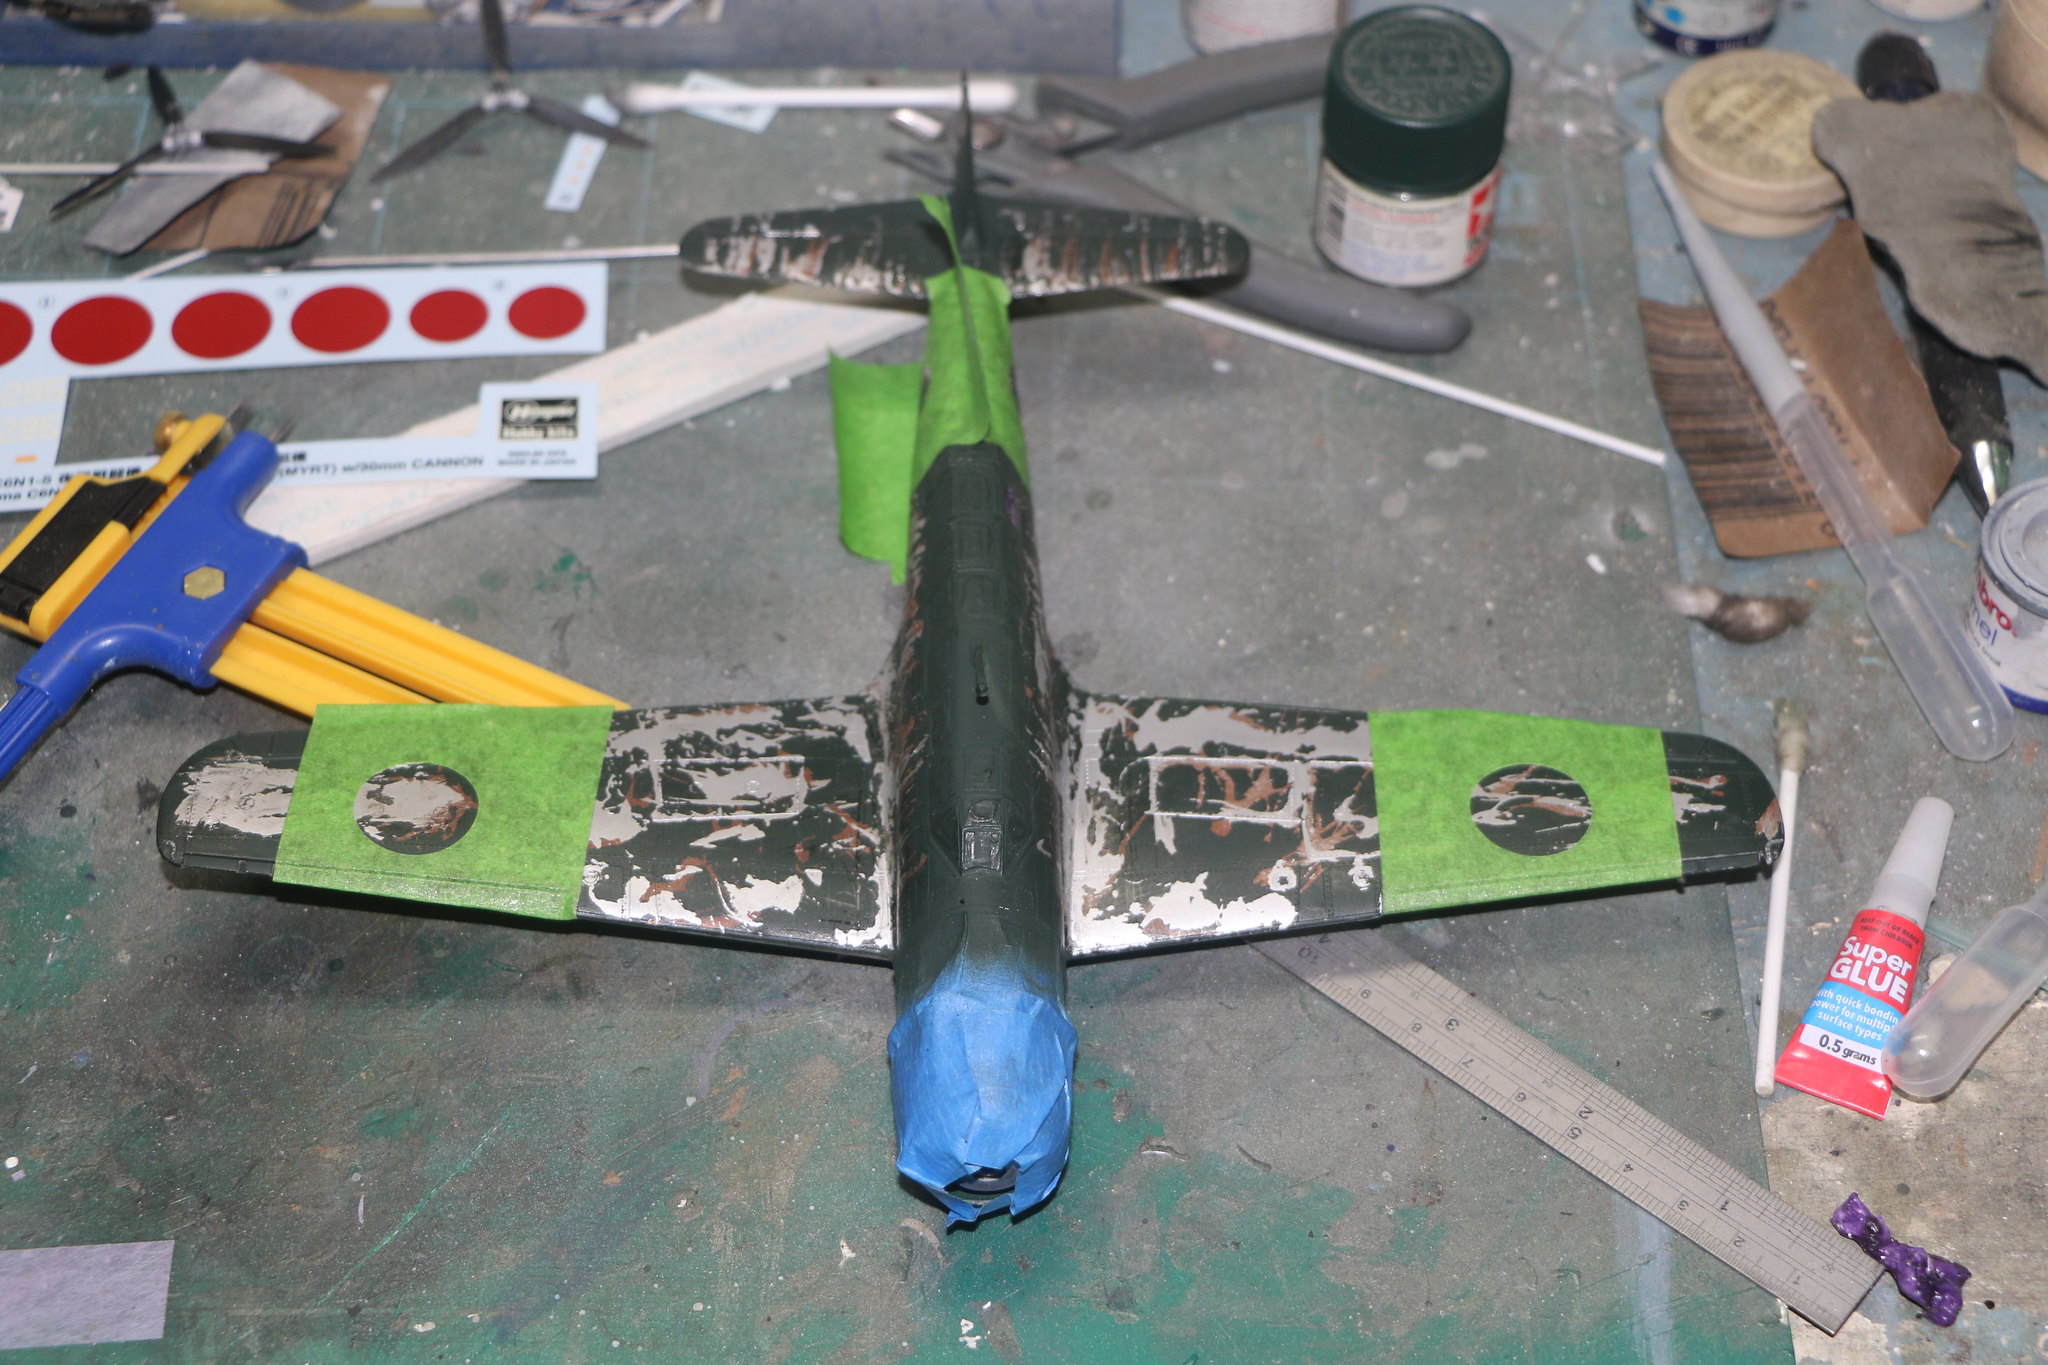
I created the masks by first measuring the diameter of the decals supplied and then cutting circles of a similar size. I took the cut out circles and applied them to the airframe so I could accurately locate them to make sure (hopefully) everything was symmetrical. It was then a simple matter of placing the masks over the circles and then removing the circles, hopefully leaving the masks correctly located. A quick spray with Tamiya XF-11 navy green, then after allowing it to dry to touch dry I sprayed the XF-7. Then removed the masks, the underside has yet to be painted but I'll leave it fairly pristine as it wasn't subjected to the elements that the topside was. I'll also use the same method to paint the insignia underneath so they're all uniform.
 IMG_1934 by Chris WIlson, on Flickr
 IMG_1932 by Chris WIlson, on Flickr
 IMG_1931 by Chris WIlson, on Flickr
 IMG_1933 by Chris WIlson, on Flickr
 IMG_1935 by Chris WIlson, on Flickr
 IMG_1936 by Chris WIlson, on Flickr
 IMG_1941 by Chris WIlson, on Flickr
 IMG_1944 by Chris WIlson, on Flickr
 IMG_1947 by Chris WIlson, on Flickr
 IMG_1948 by Chris WIlson, on Flickr
 IMG_1946 by Chris WIlson, on Flickr
Okay so I'm pushing forward, the paint job will remain, while I could remove the acrylic and start again I think the point at this stage is to simply work with what I've got. To this end I've taken a look at the markings and decided that using the decals provided would highlight the paint chipping underneath as I'm certain the Hasegawa decals will be translucent. So I've decided to spray the national markings this being simple as they are simply circular. I'll first respray the top colour to even out the background then spray Tamiya XF-7 flat red. I'm hoping this will be somewhere close to the correct colour.
I created the masks by first measuring the diameter of the decals supplied and then cutting circles of a similar size. I took the cut out circles and applied them to the airframe so I could accurately locate them to make sure (hopefully) everything was symmetrical. It was then a simple matter of placing the masks over the circles and then removing the circles, hopefully leaving the masks correctly located. A quick spray with Tamiya XF-11 navy green, then after allowing it to dry to touch dry I sprayed the XF-7. Then removed the masks, the underside has yet to be painted but I'll leave it fairly pristine as it wasn't subjected to the elements that the topside was. I'll also use the same method to paint the insignia underneath so they're all uniform.
IMG_1934 by Chris WIlson, on FlickrIMG_1932 by Chris WIlson, on FlickrIMG_1931 by Chris WIlson, on FlickrIMG_1933 by Chris WIlson, on FlickrIMG_1935 by Chris WIlson, on FlickrIMG_1936 by Chris WIlson, on FlickrIMG_1941 by Chris WIlson, on FlickrIMG_1944 by Chris WIlson, on FlickrIMG_1947 by Chris WIlson, on FlickrIMG_1948 by Chris WIlson, on FlickrIMG_1946 by Chris WIlson, on Flickr
AussieReg

#007

Joined: June 09, 2009
KitMaker: 8,156 posts
AeroScale: 3,756 posts
Posted: Friday, December 22, 2017 - 06:15 AM UTC
Nice build C4, enjoyed reading right through the thread. Great detail provided on your paint techique as well. Giving us all of your research results, thought processes and progress shots is a huge help for anybody looking to achieve this type of weathering effect. Thanks for take by the time to share so much detail.
Cheers, D
Cheers, D

c4willy
#305
Joined: February 01, 2006
KitMaker: 1,673 posts
AeroScale: 1,517 posts
Posted: Friday, December 22, 2017 - 07:18 AM UTC
Hi D welcome back! Not a problem about taking the time to lay it all out, it's all part of why we're in this community. And it's a relatively new process for me so I'm experimenting as I go. Putting it all down here gives other modellers the chance to pick and choose what methods they want to try and those that they might do differently.
Joel_W
Joined: December 04, 2010
KitMaker: 11,666 posts
AeroScale: 7,410 posts
Posted: Saturday, December 23, 2017 - 12:06 AM UTC
Chris,
Your chipping method certainly works. Just as a personal preference, I would have been a little more conservative on the amount of chipping but then again, that's just me.
Joel
Your chipping method certainly works.
Just as a personal preference, I would have been a little more conservative on the amount of chipping but then again, that's just me. Joel
c4willy
#305
Joined: February 01, 2006
KitMaker: 1,673 posts
AeroScale: 1,517 posts
Posted: Saturday, December 23, 2017 - 02:13 AM UTC
I'm actually with you Joel however my impatience to see if it worked as I'd hoped had me to trying to remove the masking fluid before the top was sufficiently dry. The result being removing more of the top coat than I had originally intended. Chalk it up to experience and next time I'll know to wait!

Merlin
#017


Joined: June 11, 2003
KitMaker: 17,582 posts
AeroScale: 12,795 posts

Posted: Saturday, December 23, 2017 - 02:44 AM UTC
Hi Chris
I really like the random effect of the weathering (and some Japanese aircraft were really heavily weathered), but I think you need to chip the national insignia a bit as well to tie them into the overall finish. If the paint's not too dry, scrubbing gently with a wooden cocktail stick should take away the pristine look of the hinomarus.
All the best
Rowan


rochaped

Joined: August 27, 2010
KitMaker: 679 posts
AeroScale: 669 posts

Posted: Saturday, December 23, 2017 - 05:17 AM UTC
Hi Chris,
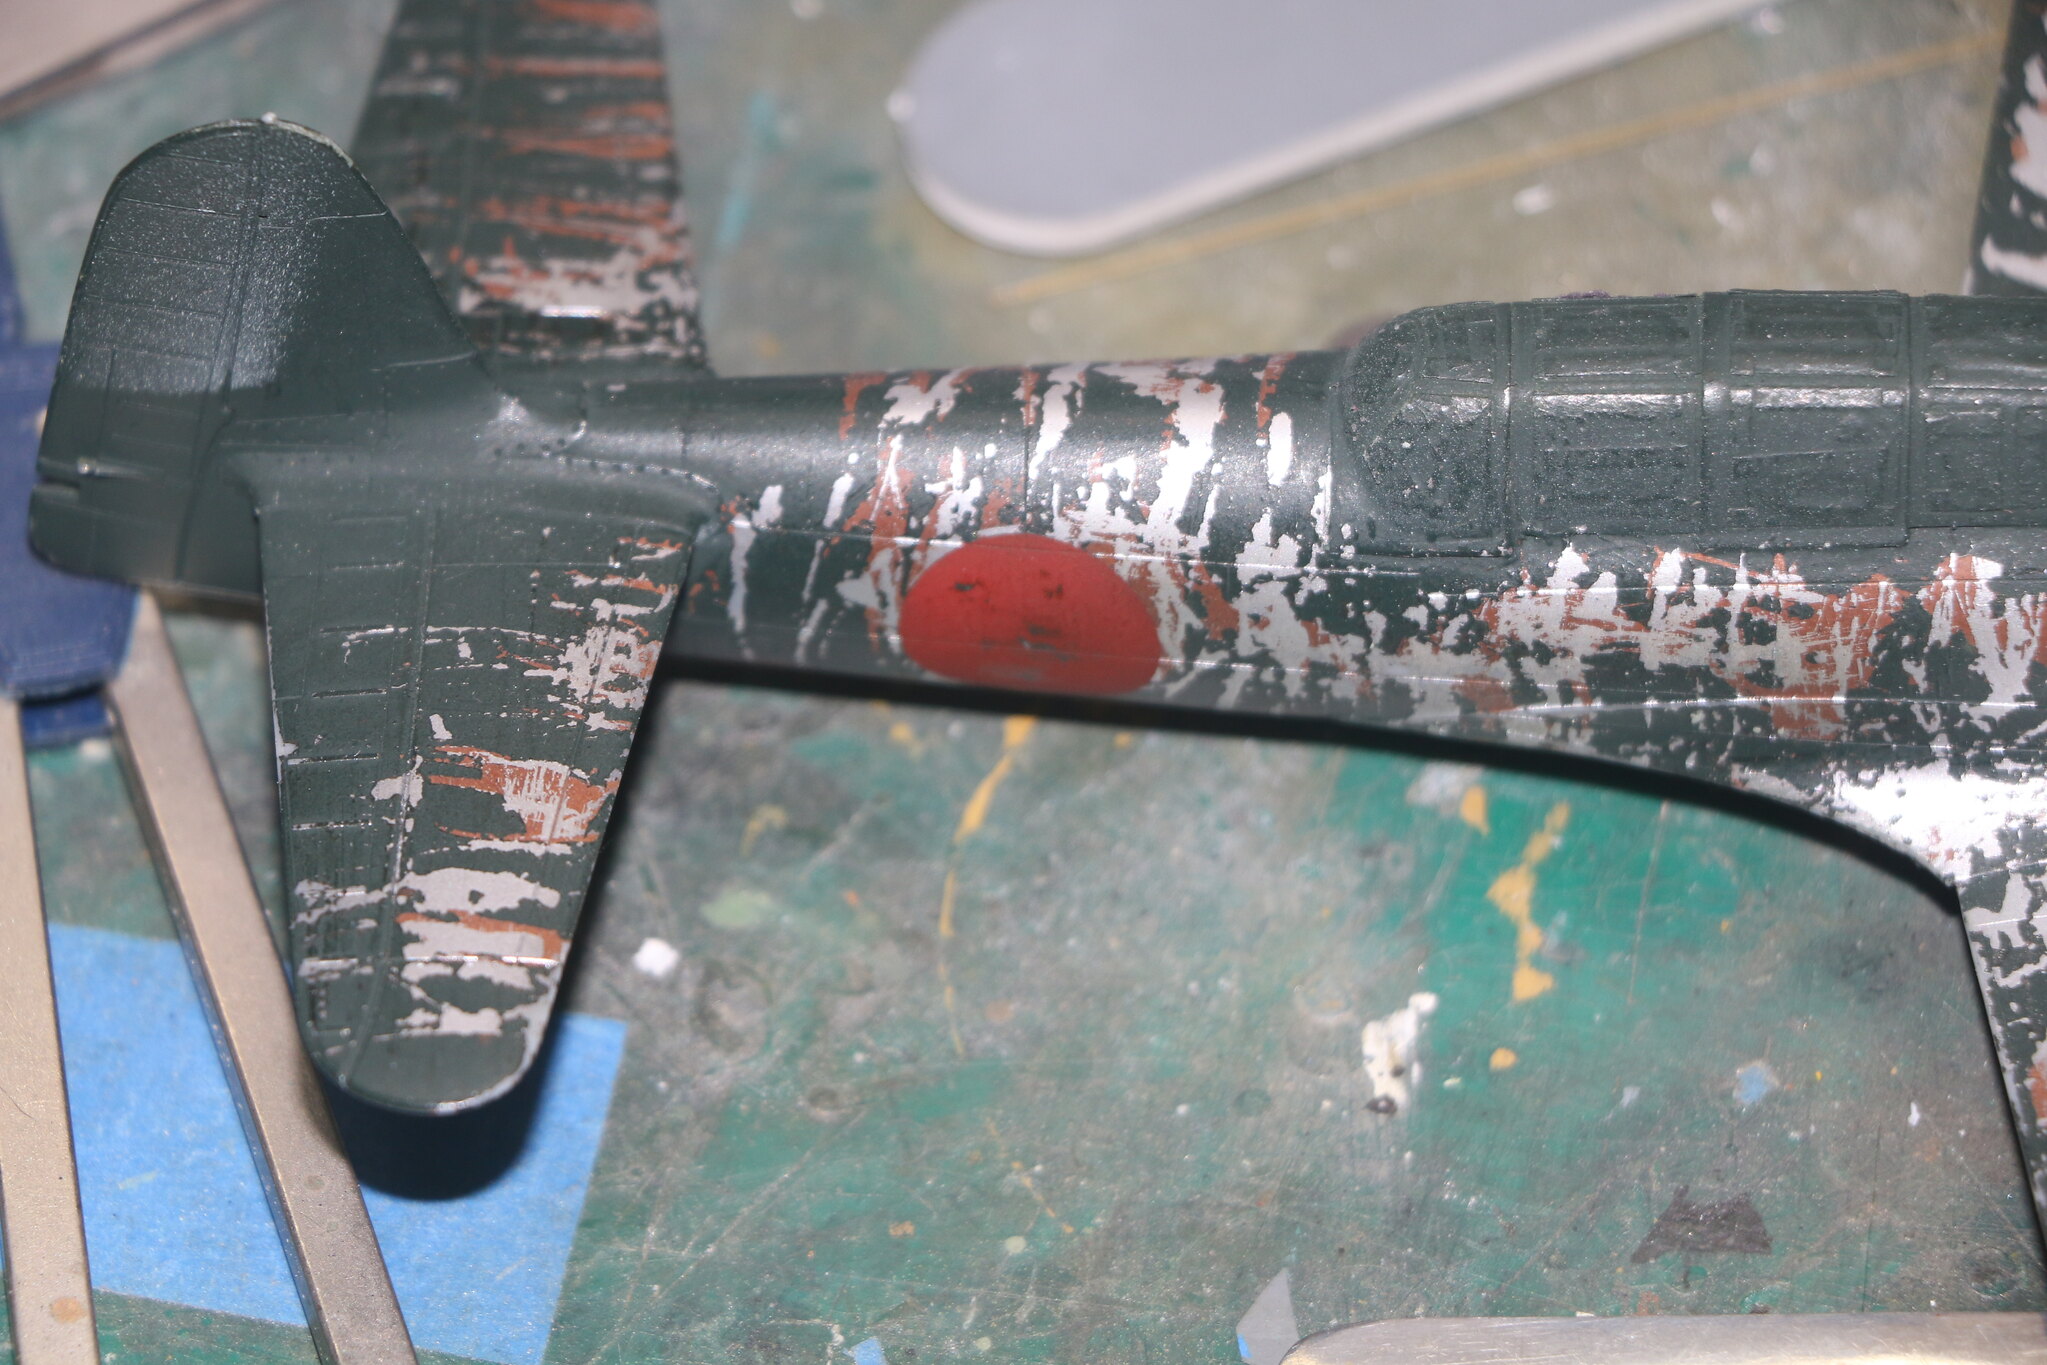
Looking at your last photos I have to agree with Rowan, meaning if the aircraft has that amount of chipping it would be odd that the red balls go so pristine.
That said, it is also relevant that the national insignia was regularly retouched by the ground crews (I recall reading this somewhere and it does make sense) but still some weathering should blend them more to the overall looks of your Saiun.
Keep it up!
Cheers and Merry Xmas!
Pedro

Scrodes

Joined: July 22, 2012
KitMaker: 771 posts
AeroScale: 763 posts
Posted: Saturday, December 23, 2017 - 08:43 AM UTC
Quoted Text
I think you need to chip the national insignia a bit as well to tie them into the overall finish.
All the best
Rowan
Precisely what I was about to type. It's tricky with this method because you can't exactly mask the hinomarus over the maskol to make the chipping continuous.
c4willy
#305
Joined: February 01, 2006
KitMaker: 1,673 posts
AeroScale: 1,517 posts
Posted: Friday, February 02, 2018 - 04:57 AM UTC
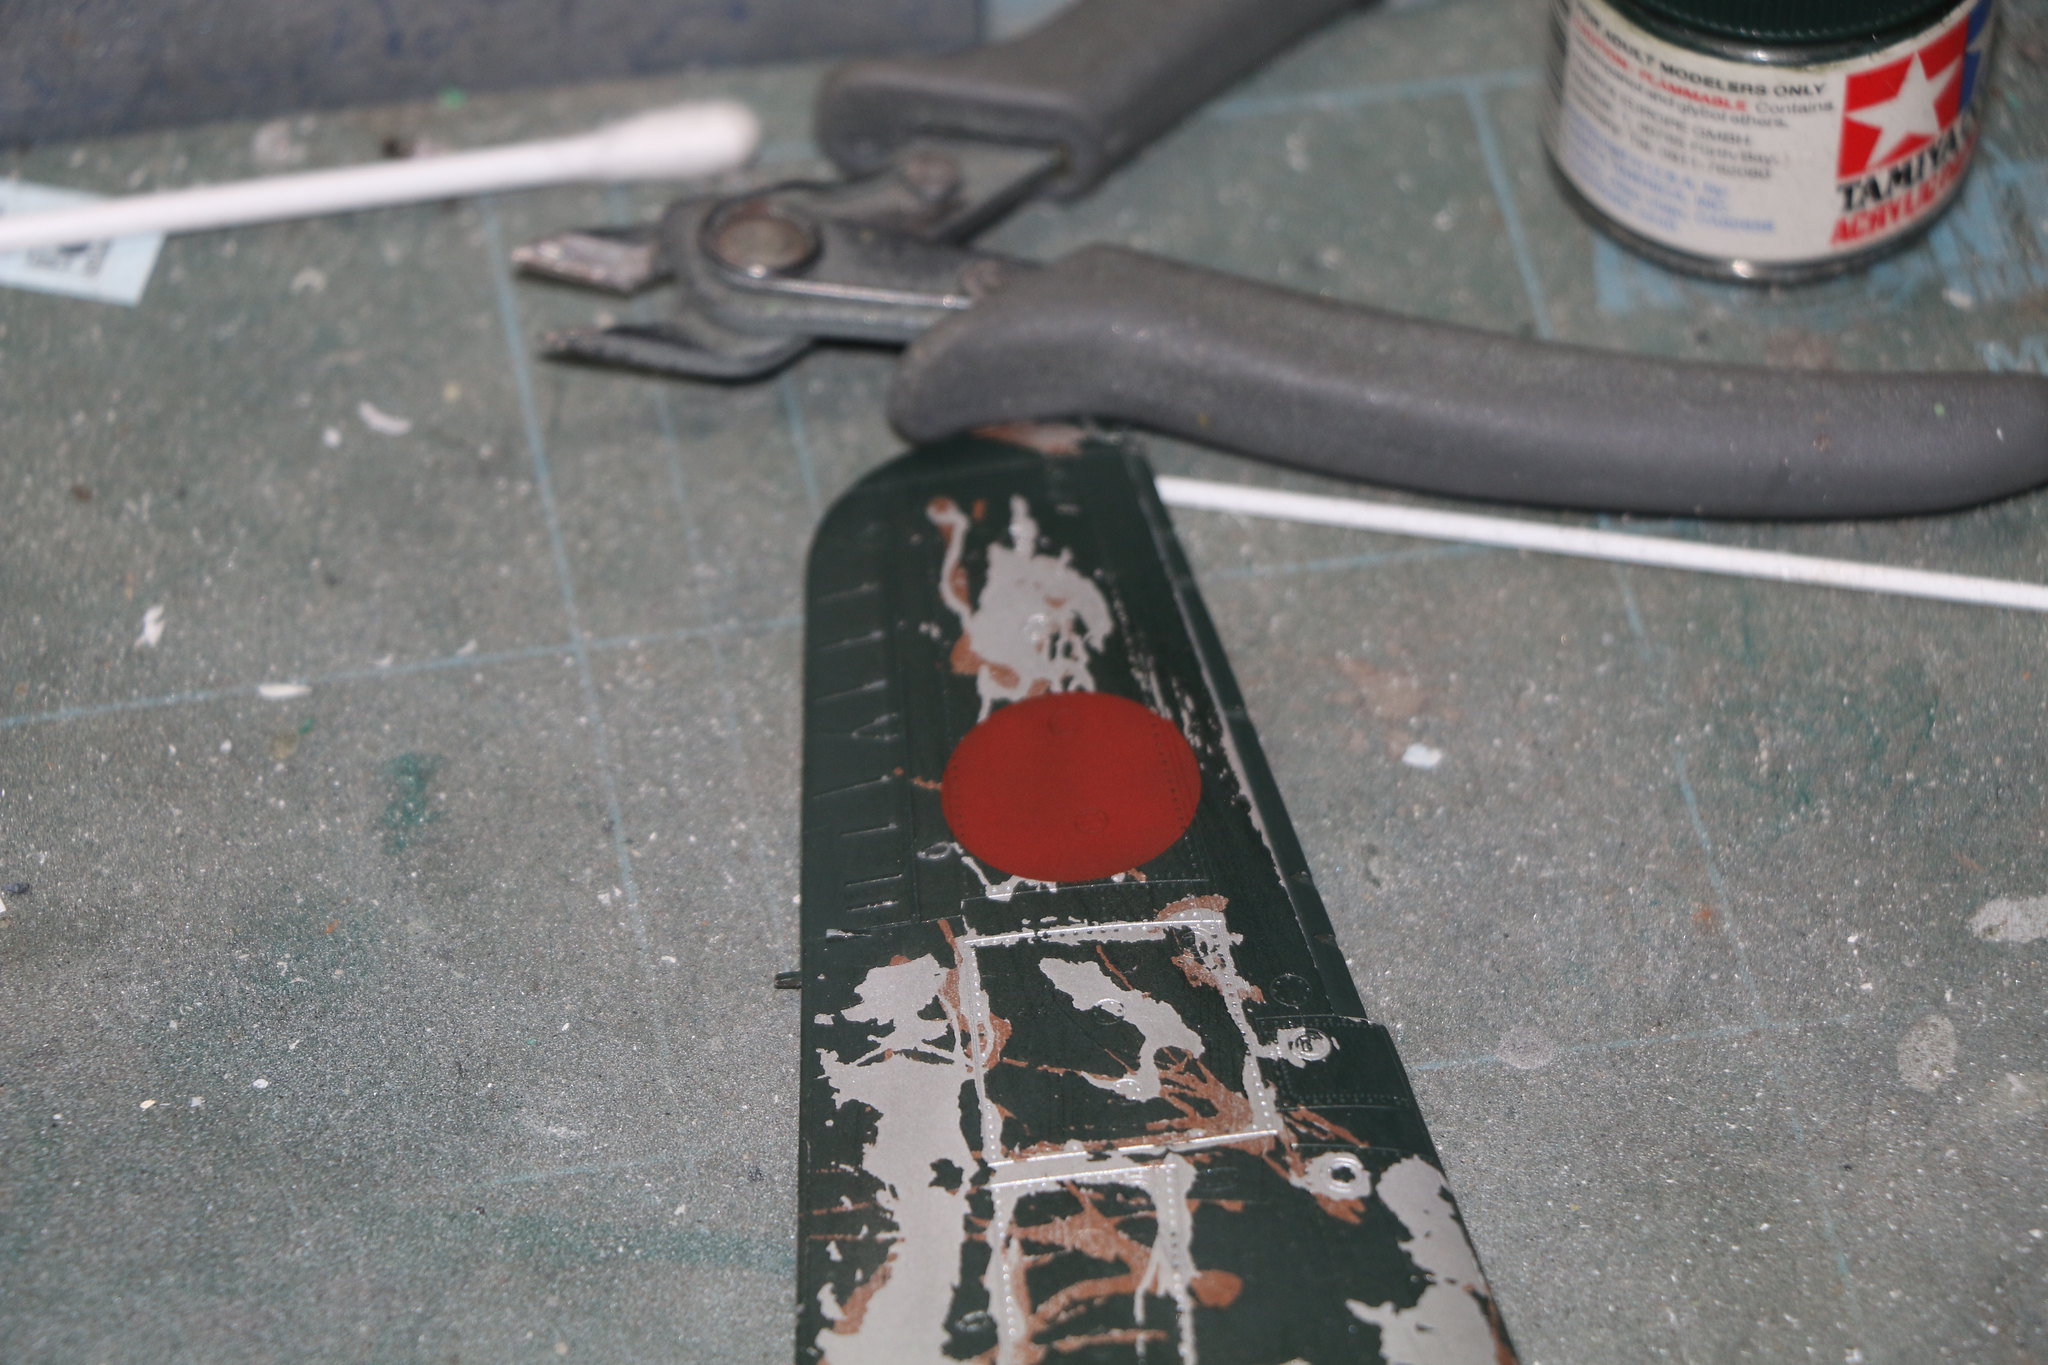
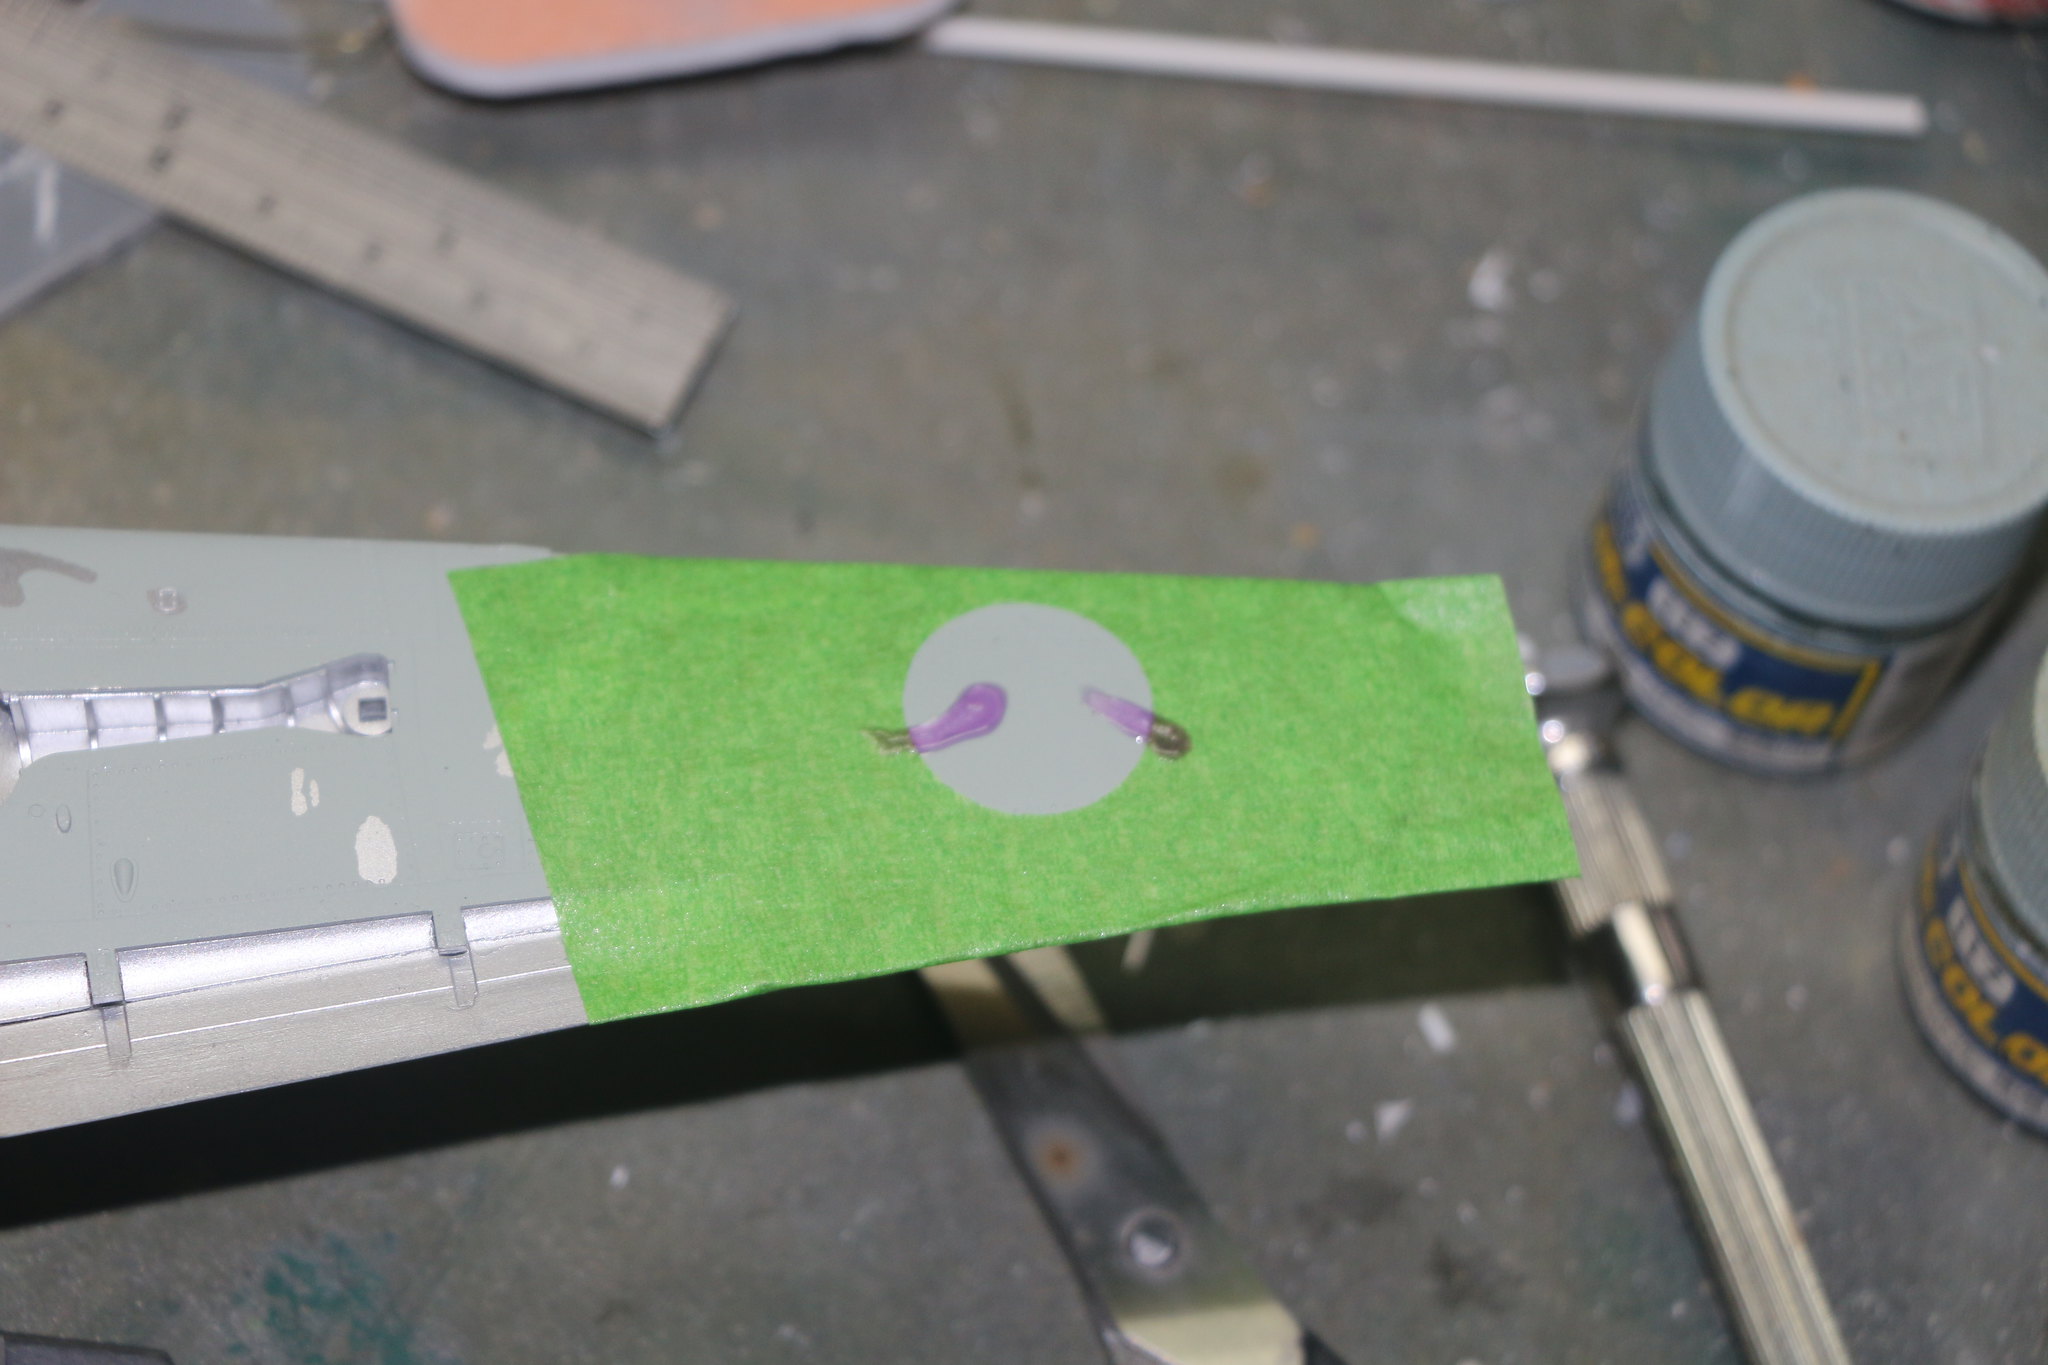
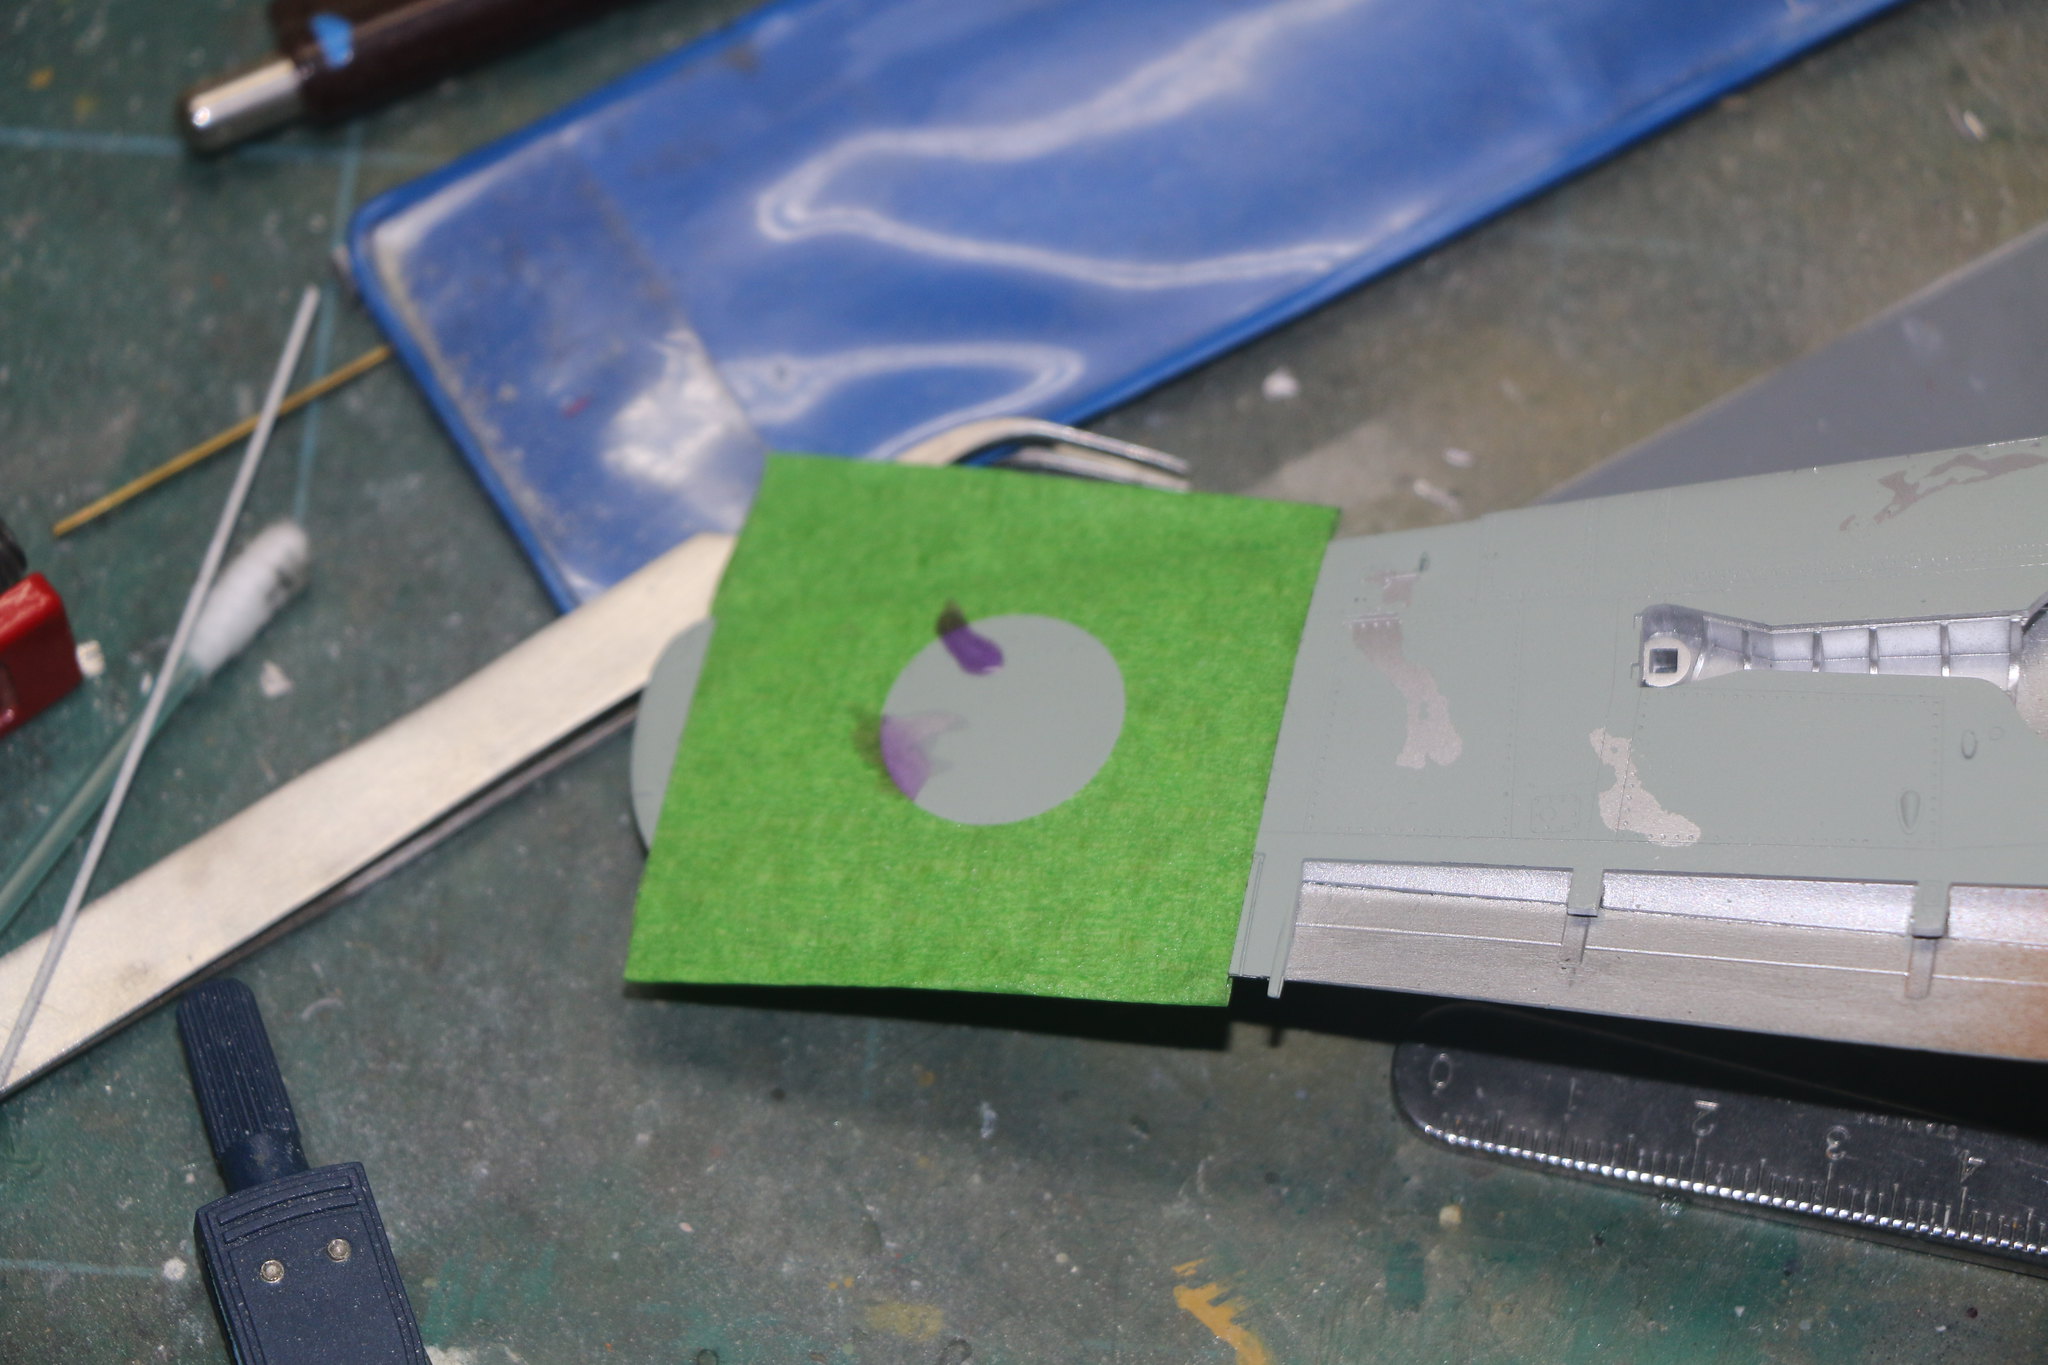
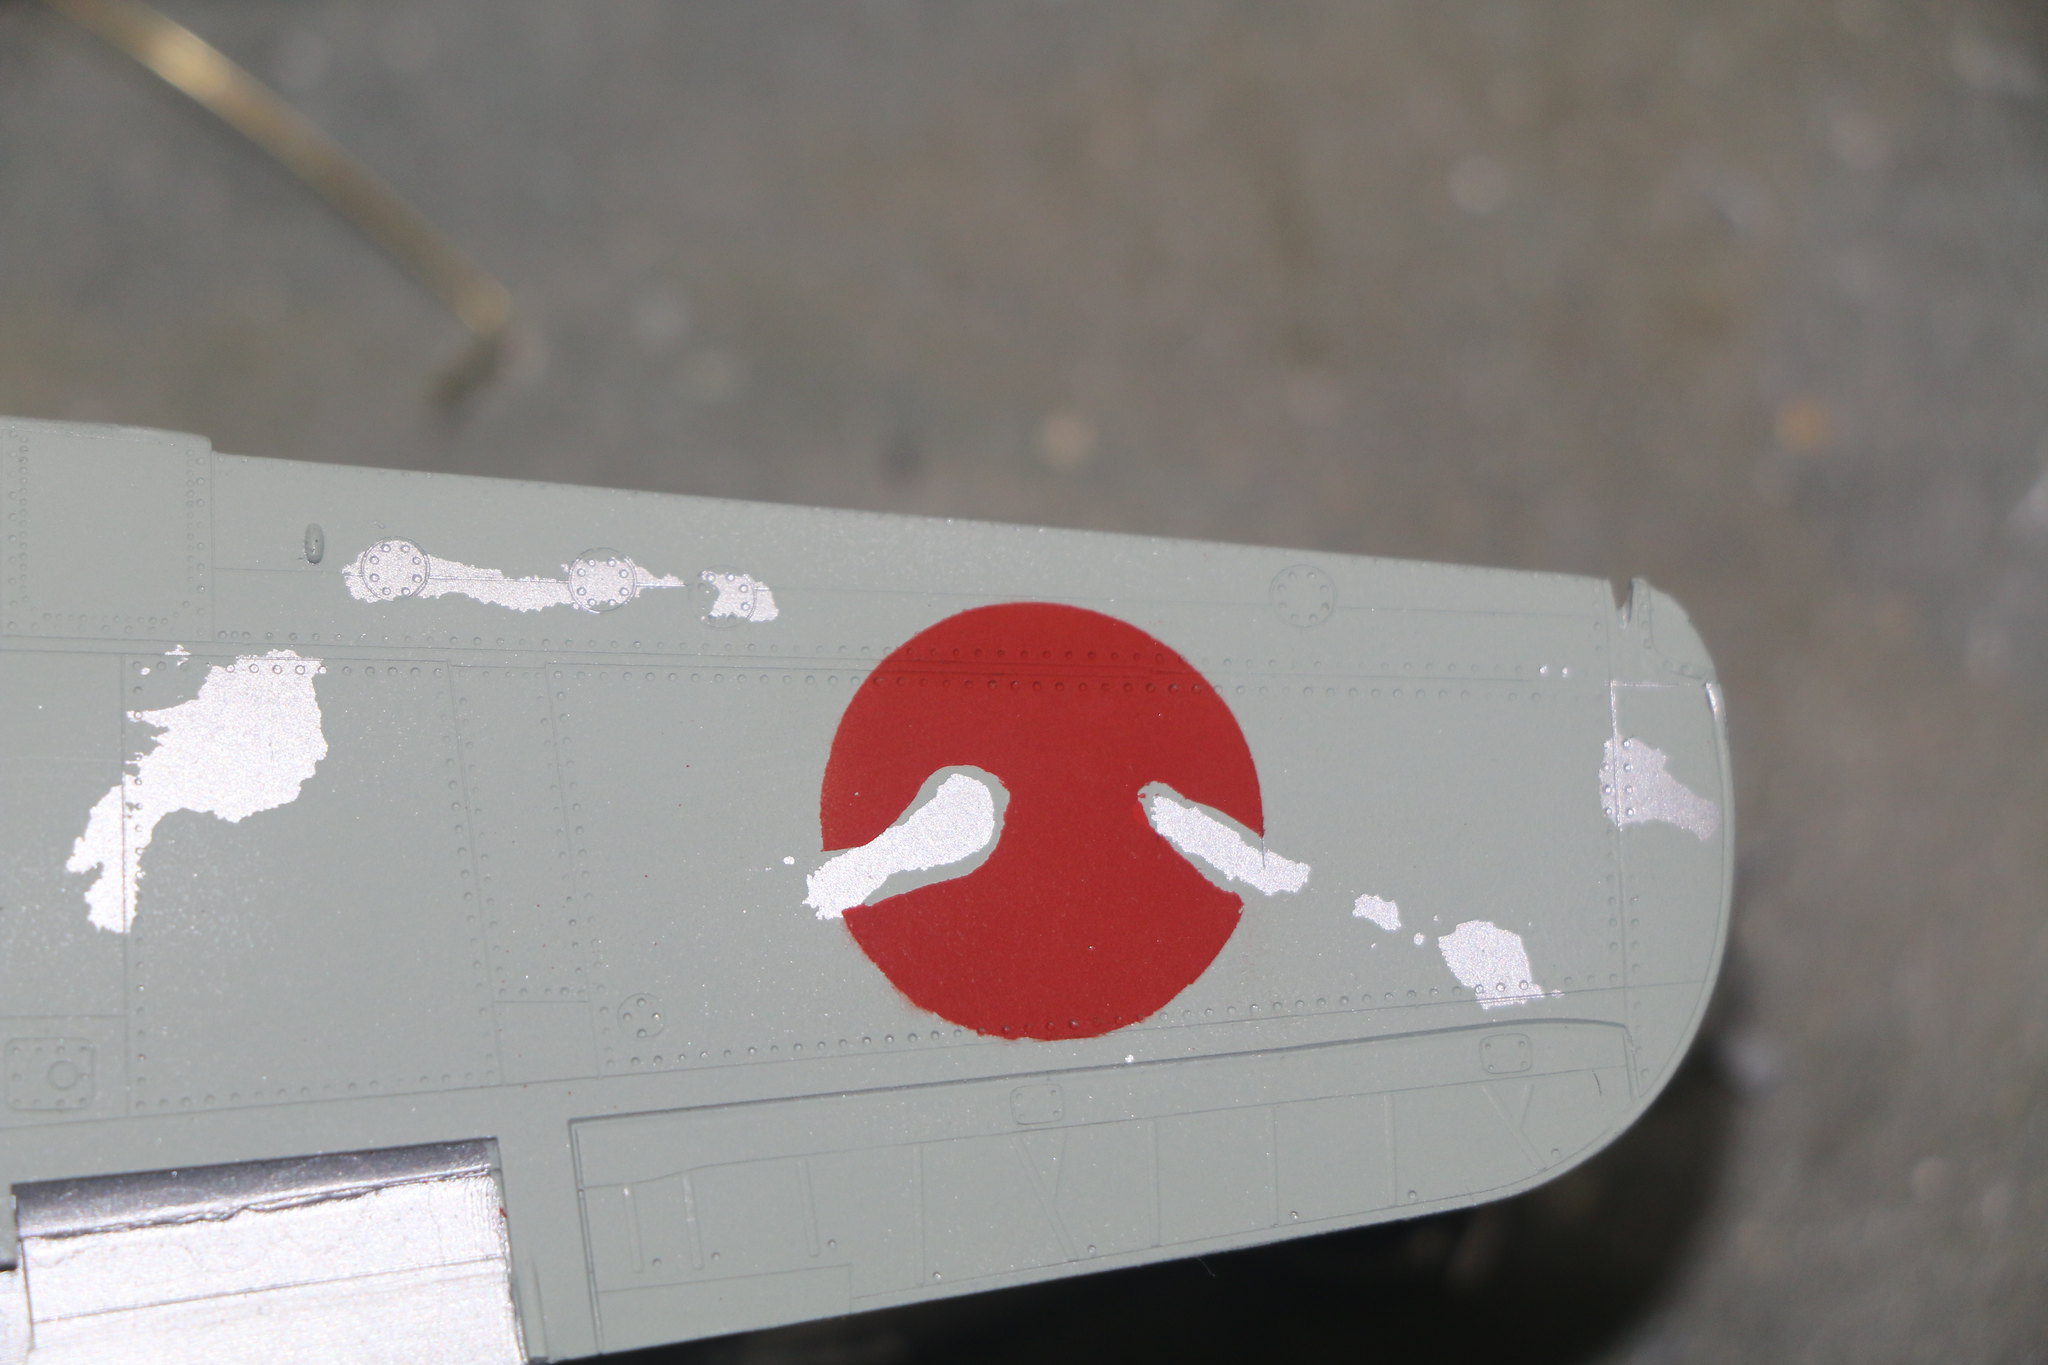
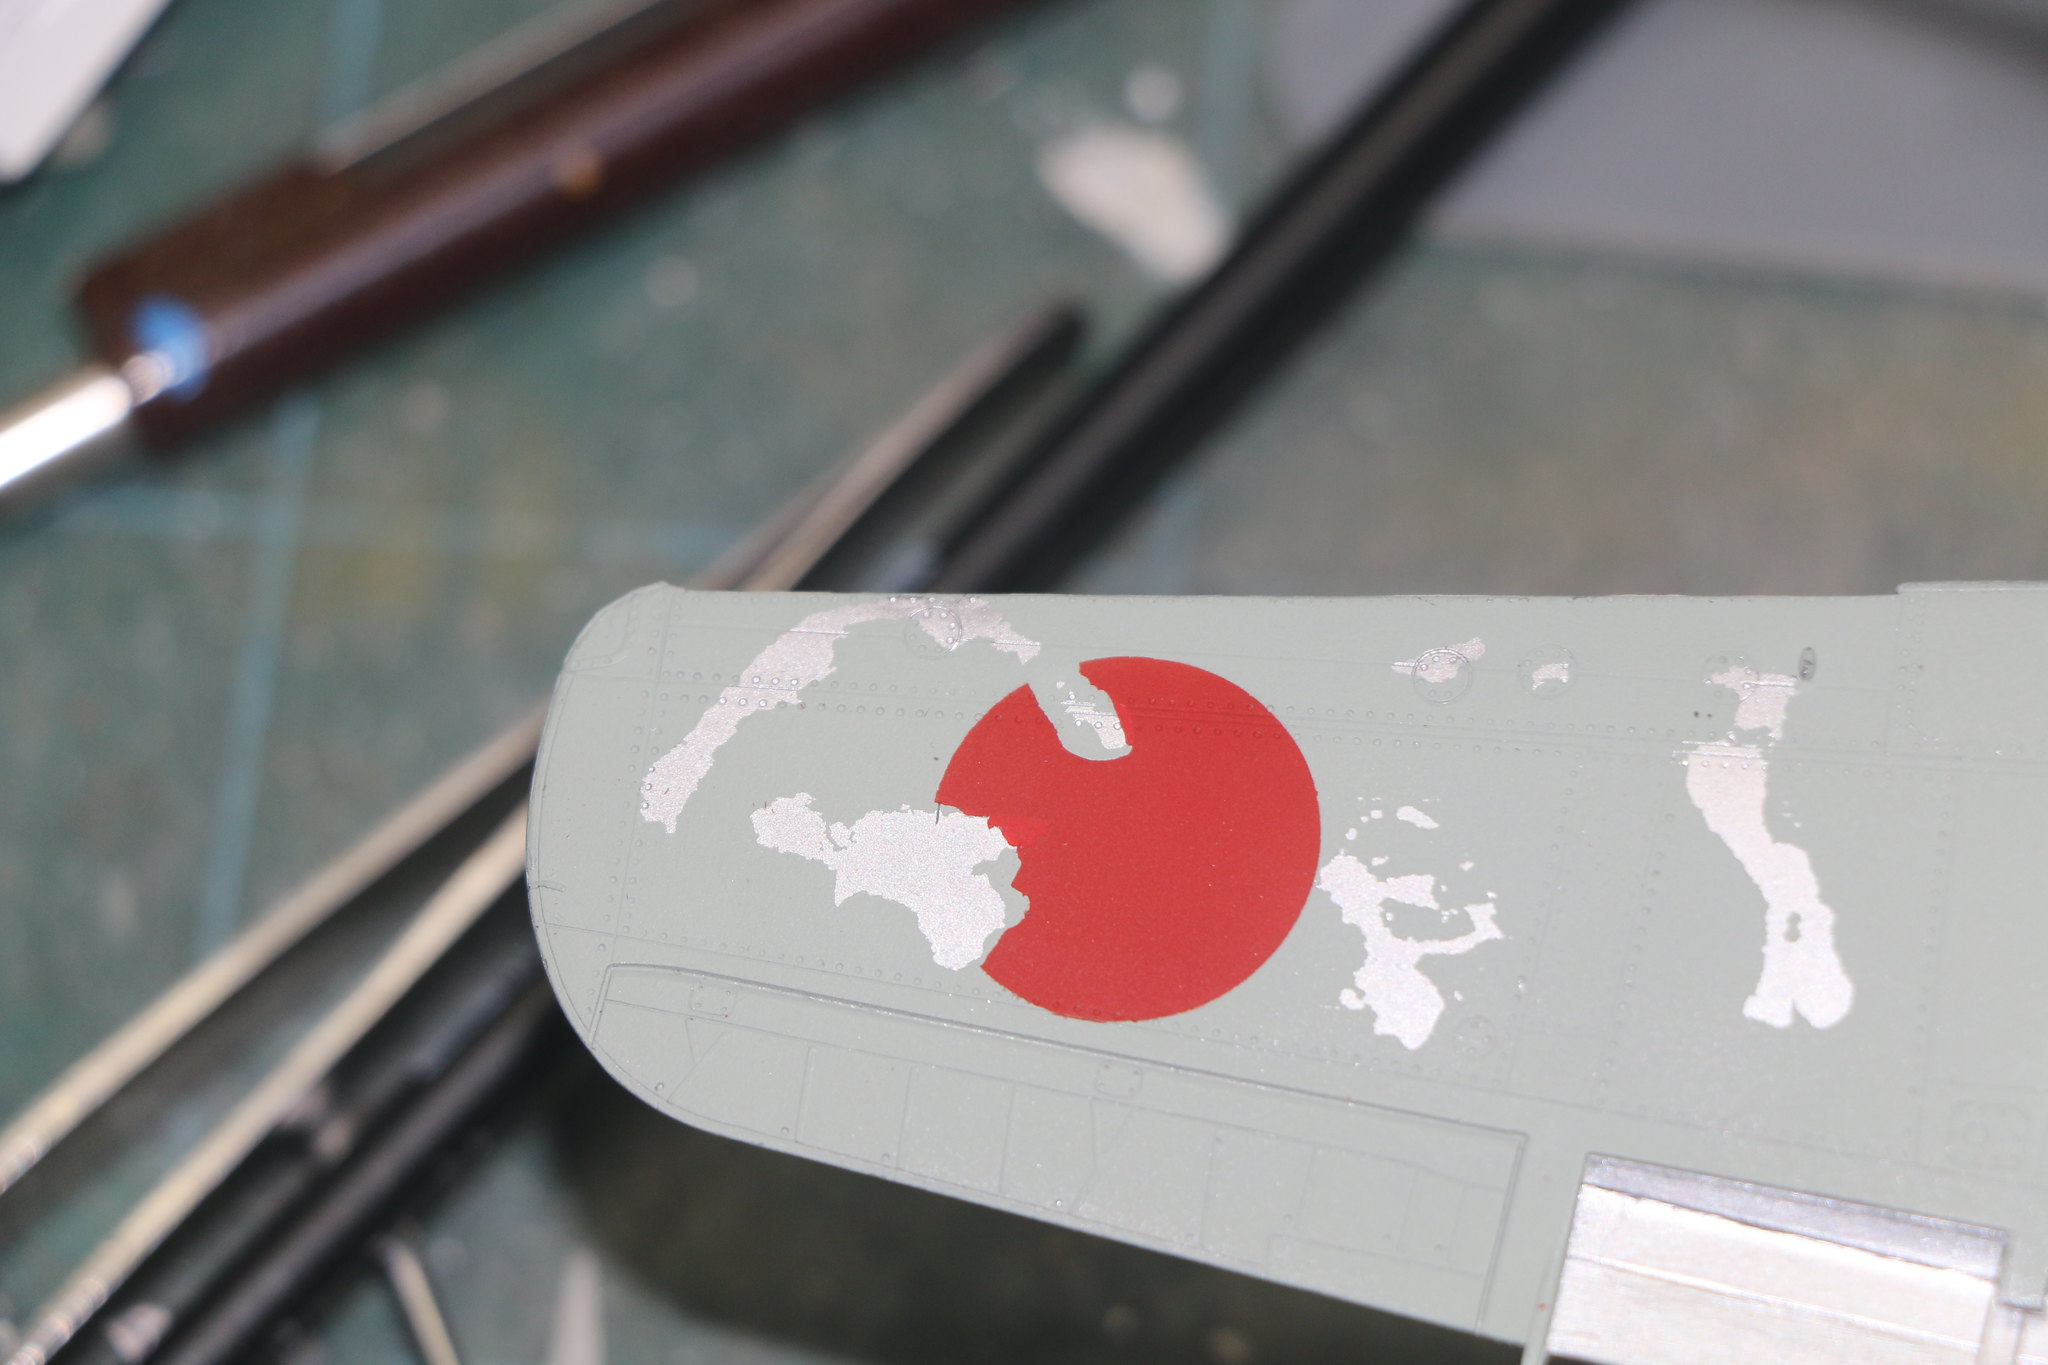
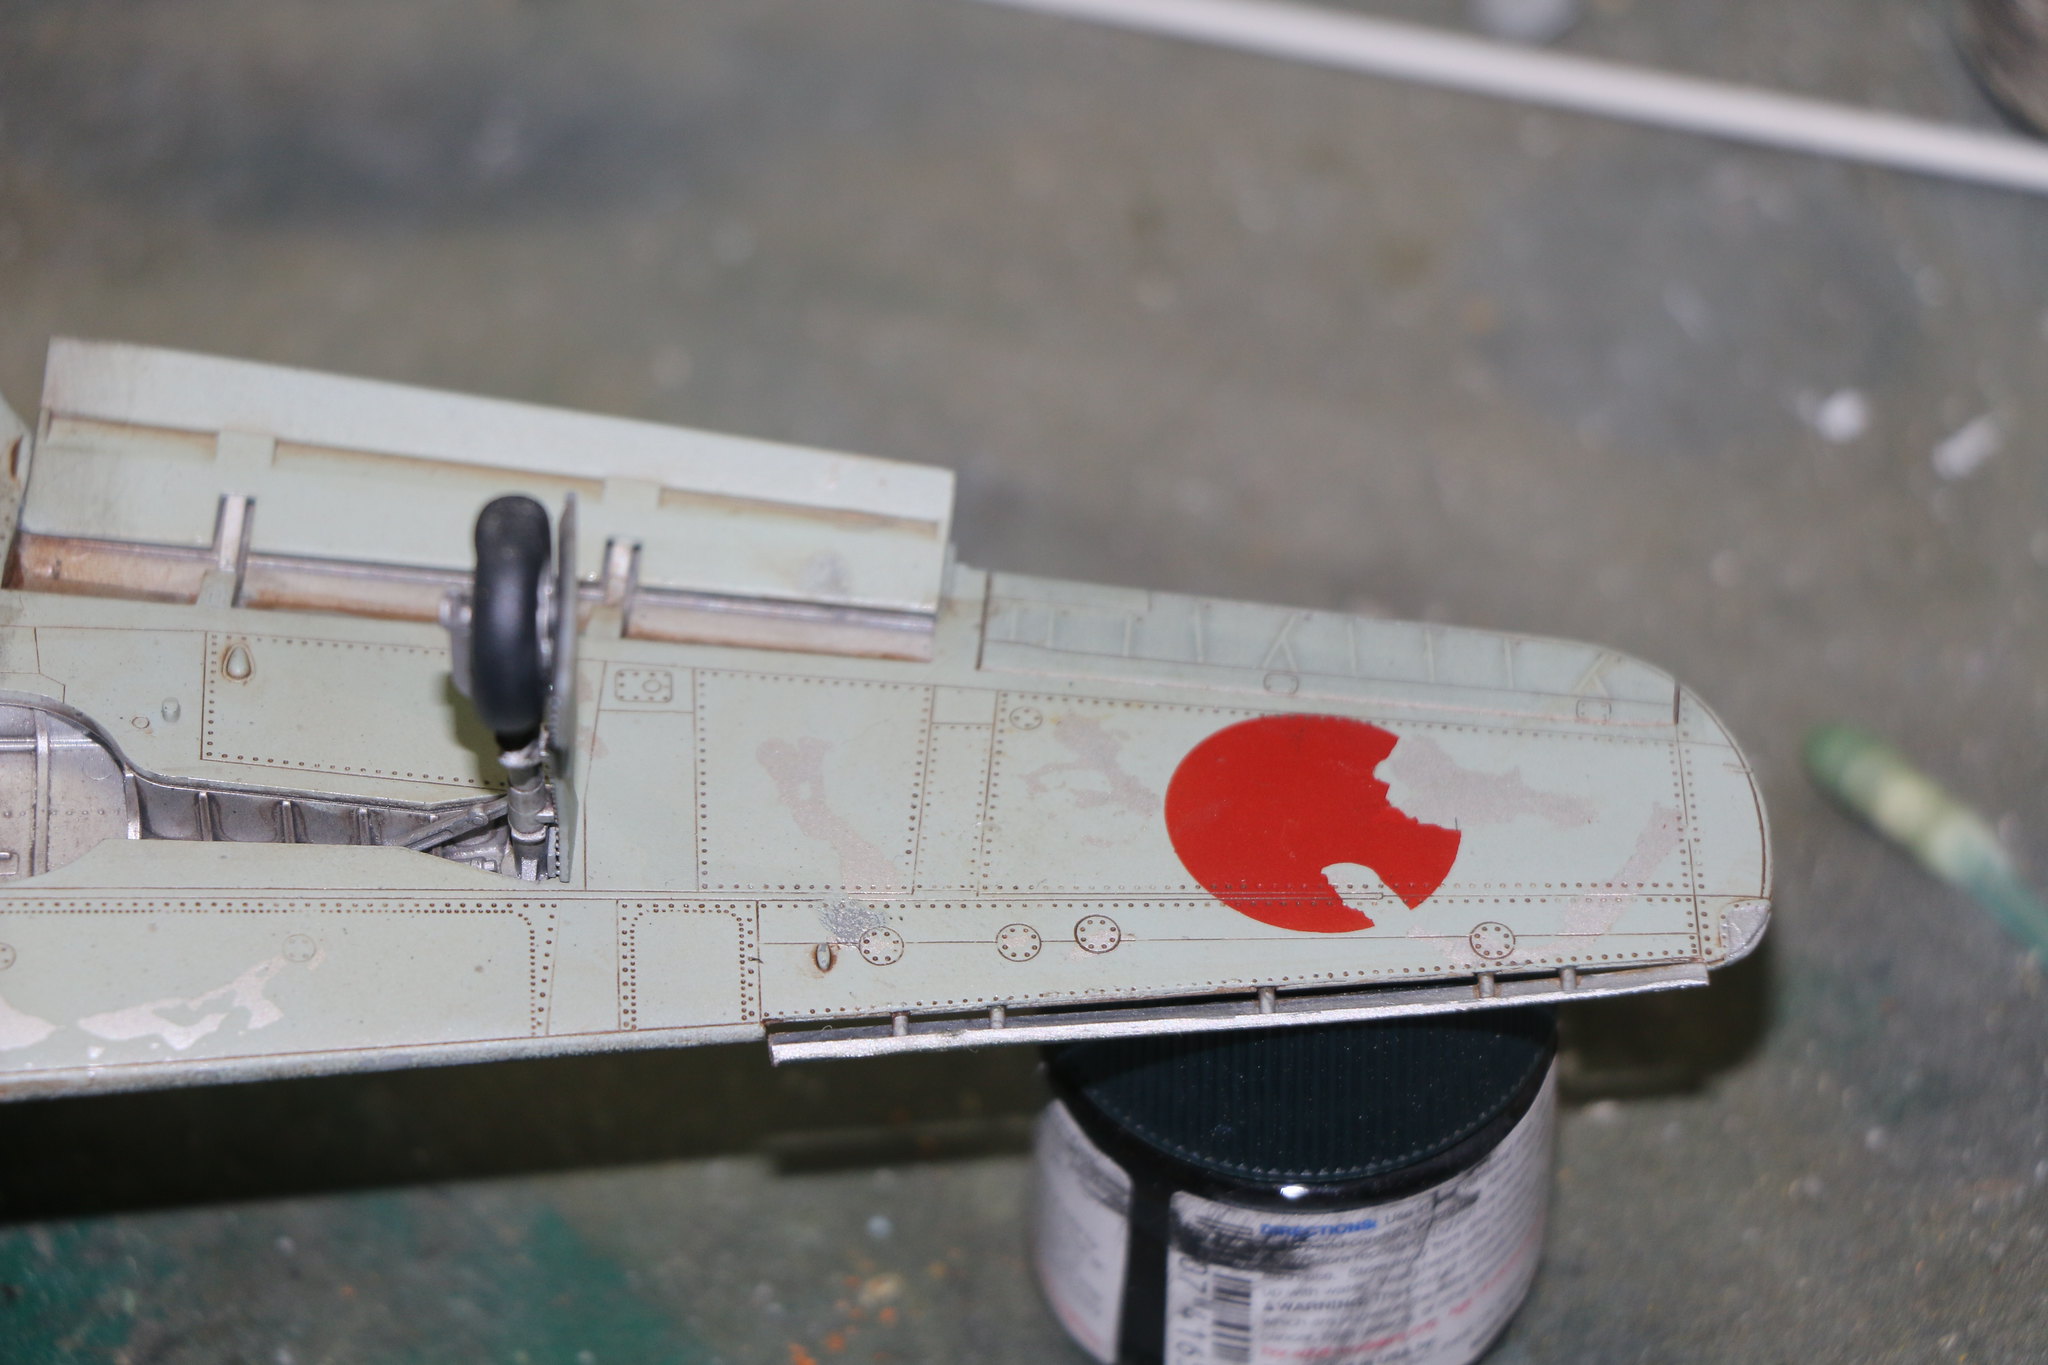
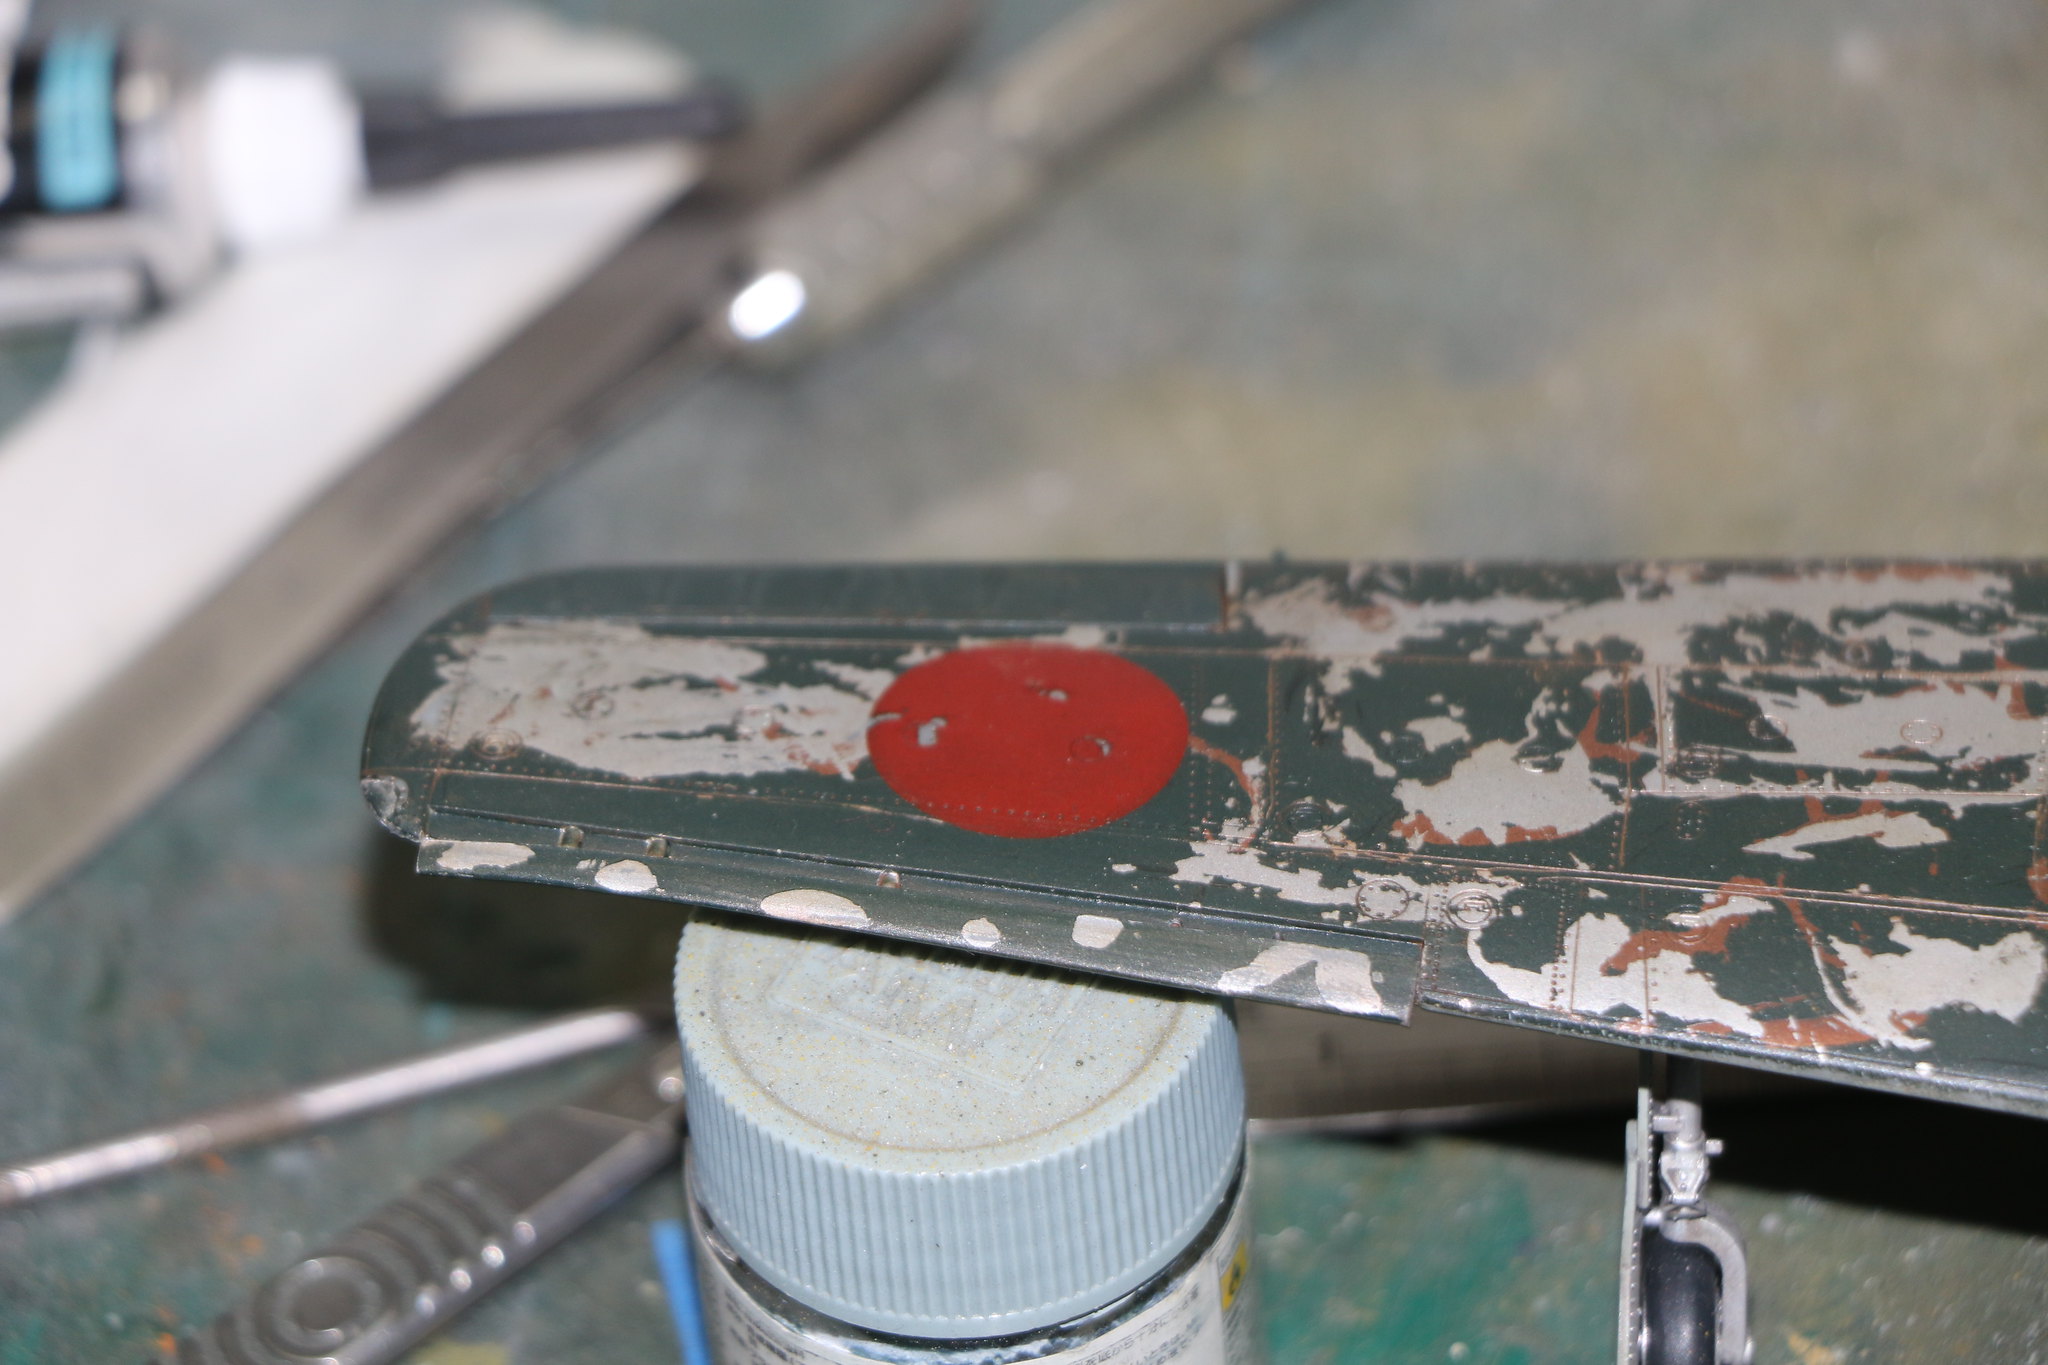
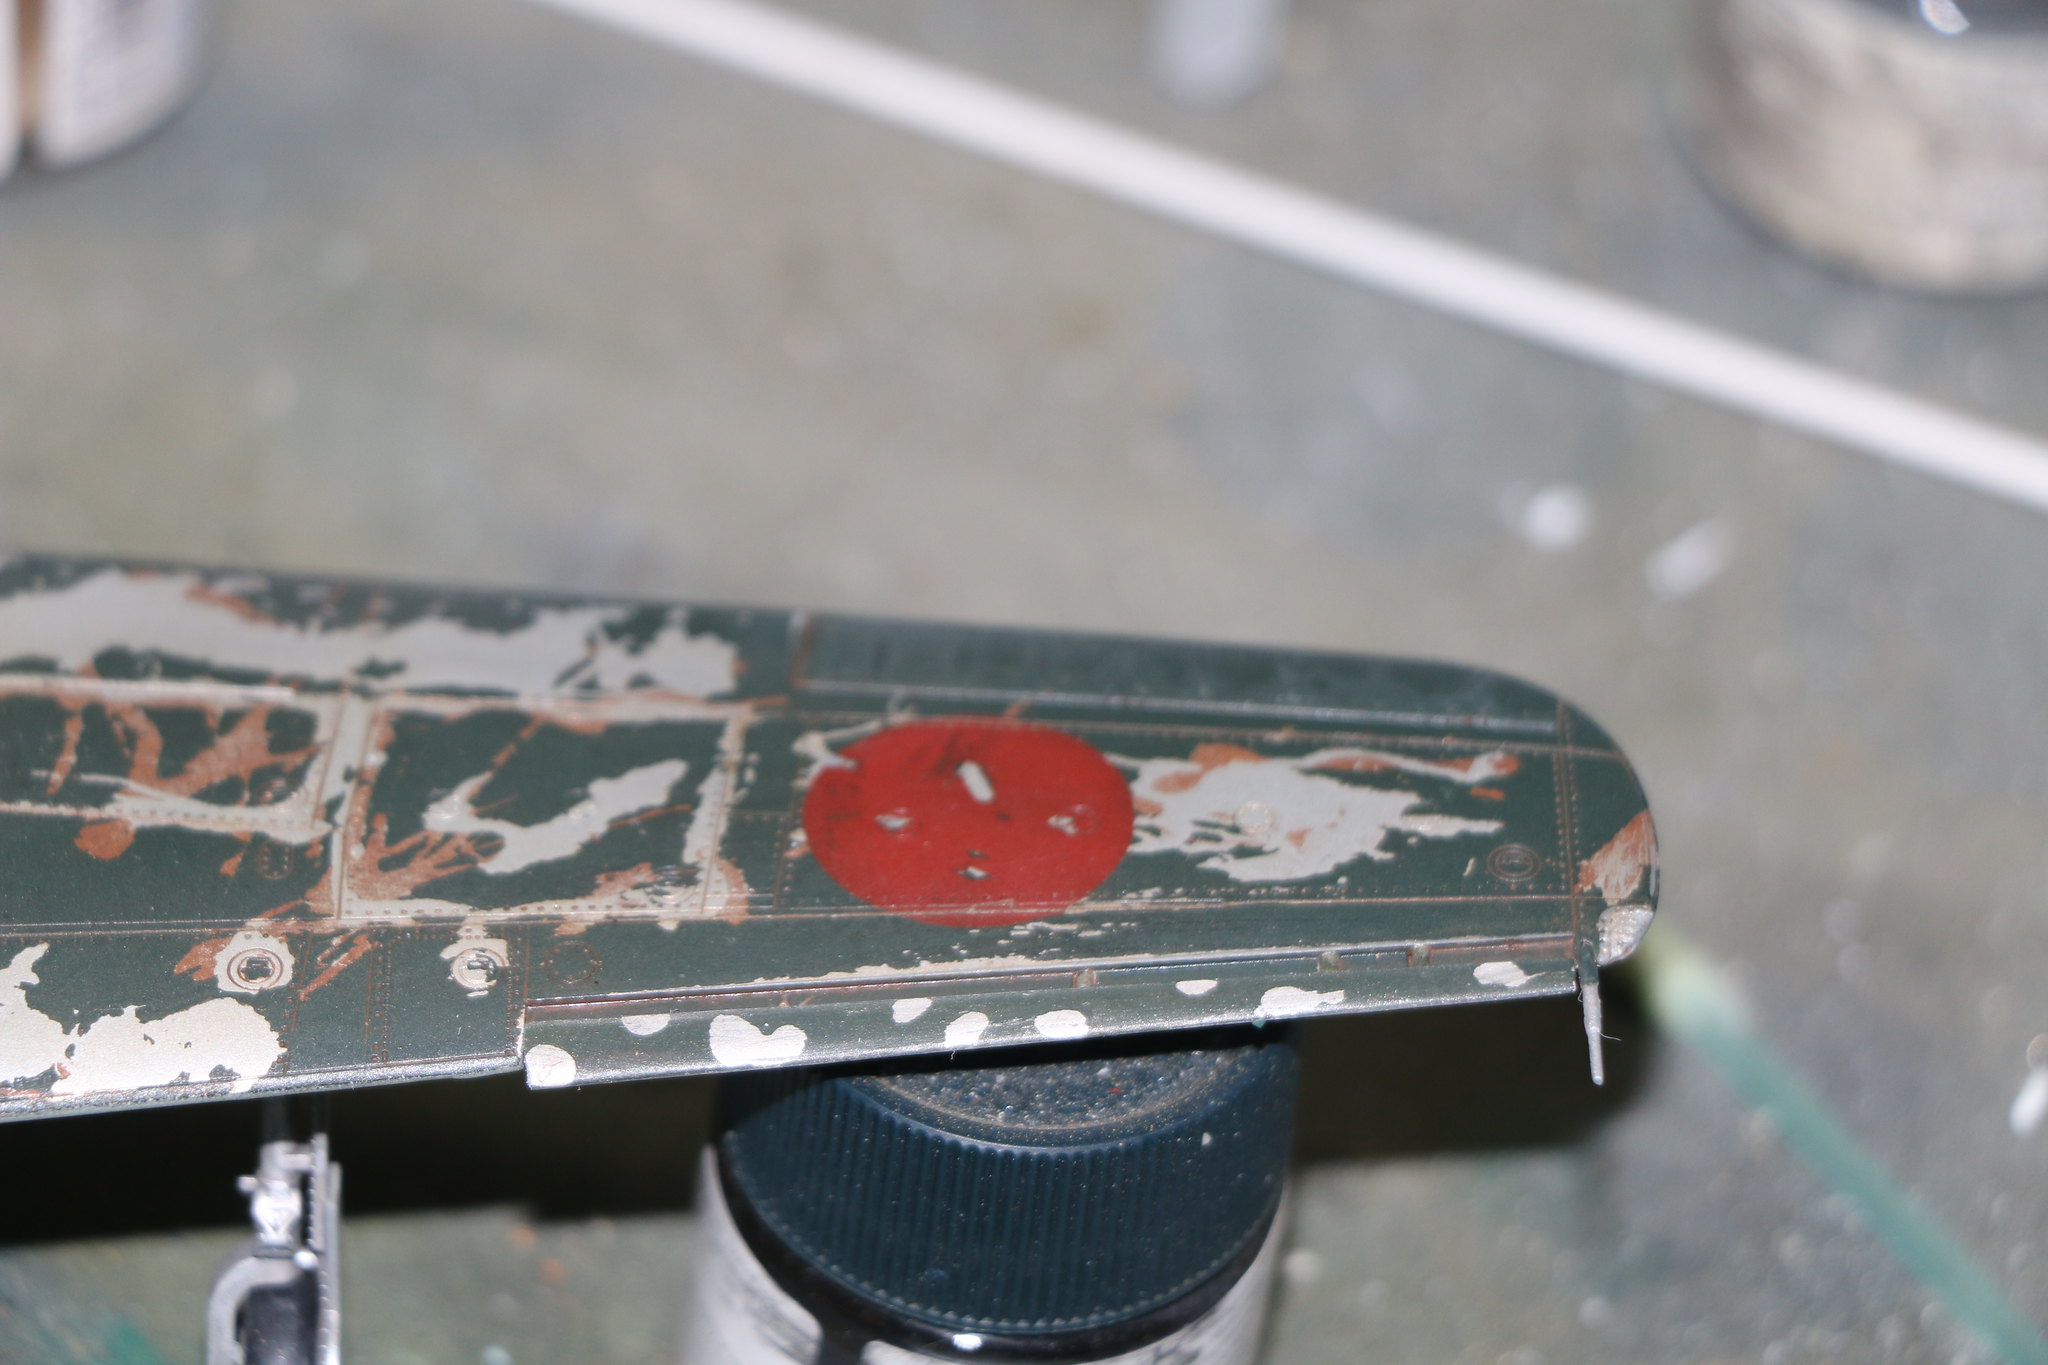
I've put a little thought into the painting of the Hinomaru's on the underside and while you can't apply masking tape over the Humbrol maskol you can apply the Maskol over the tape. So after placing the masks where there was alloy showing I applied Maskol to the exposed areas so when I remove the masks it'll remove some of the Hinomaru.
I've also abraded the painted Hinomaru's with a scalpel blade to show some of the paint and alloy underneath in an effort to tie it all together. I've also applied some aluminium paint to the cowl area in an effort to tie it in as well. The paint is in a paint pen and I simply went over the panels lines and while it was still wet removed the overflow on the panels with a cotton bud (Q-tip).
 IMG_2024 by Chris WIlson, on Flickr
 IMG_2025 by Chris WIlson, on Flickr
 IMG_2026 by Chris WIlson, on Flickr
 IMG_2027 by Chris WIlson, on Flickr
 IMG_2028 by Chris WIlson, on Flickr
 IMG_2029 by Chris WIlson, on Flickr
 IMG_2030 by Chris WIlson, on Flickr
 IMG_2031 by Chris WIlson, on Flickr
I've also abraded the painted Hinomaru's with a scalpel blade to show some of the paint and alloy underneath in an effort to tie it all together. I've also applied some aluminium paint to the cowl area in an effort to tie it in as well. The paint is in a paint pen and I simply went over the panels lines and while it was still wet removed the overflow on the panels with a cotton bud (Q-tip).
IMG_2024 by Chris WIlson, on FlickrIMG_2025 by Chris WIlson, on FlickrIMG_2026 by Chris WIlson, on FlickrIMG_2027 by Chris WIlson, on FlickrIMG_2028 by Chris WIlson, on FlickrIMG_2029 by Chris WIlson, on FlickrIMG_2030 by Chris WIlson, on FlickrIMG_2031 by Chris WIlson, on Flickrc4willy
#305
Joined: February 01, 2006
KitMaker: 1,673 posts
AeroScale: 1,517 posts
Posted: Friday, February 02, 2018 - 08:00 AM UTC
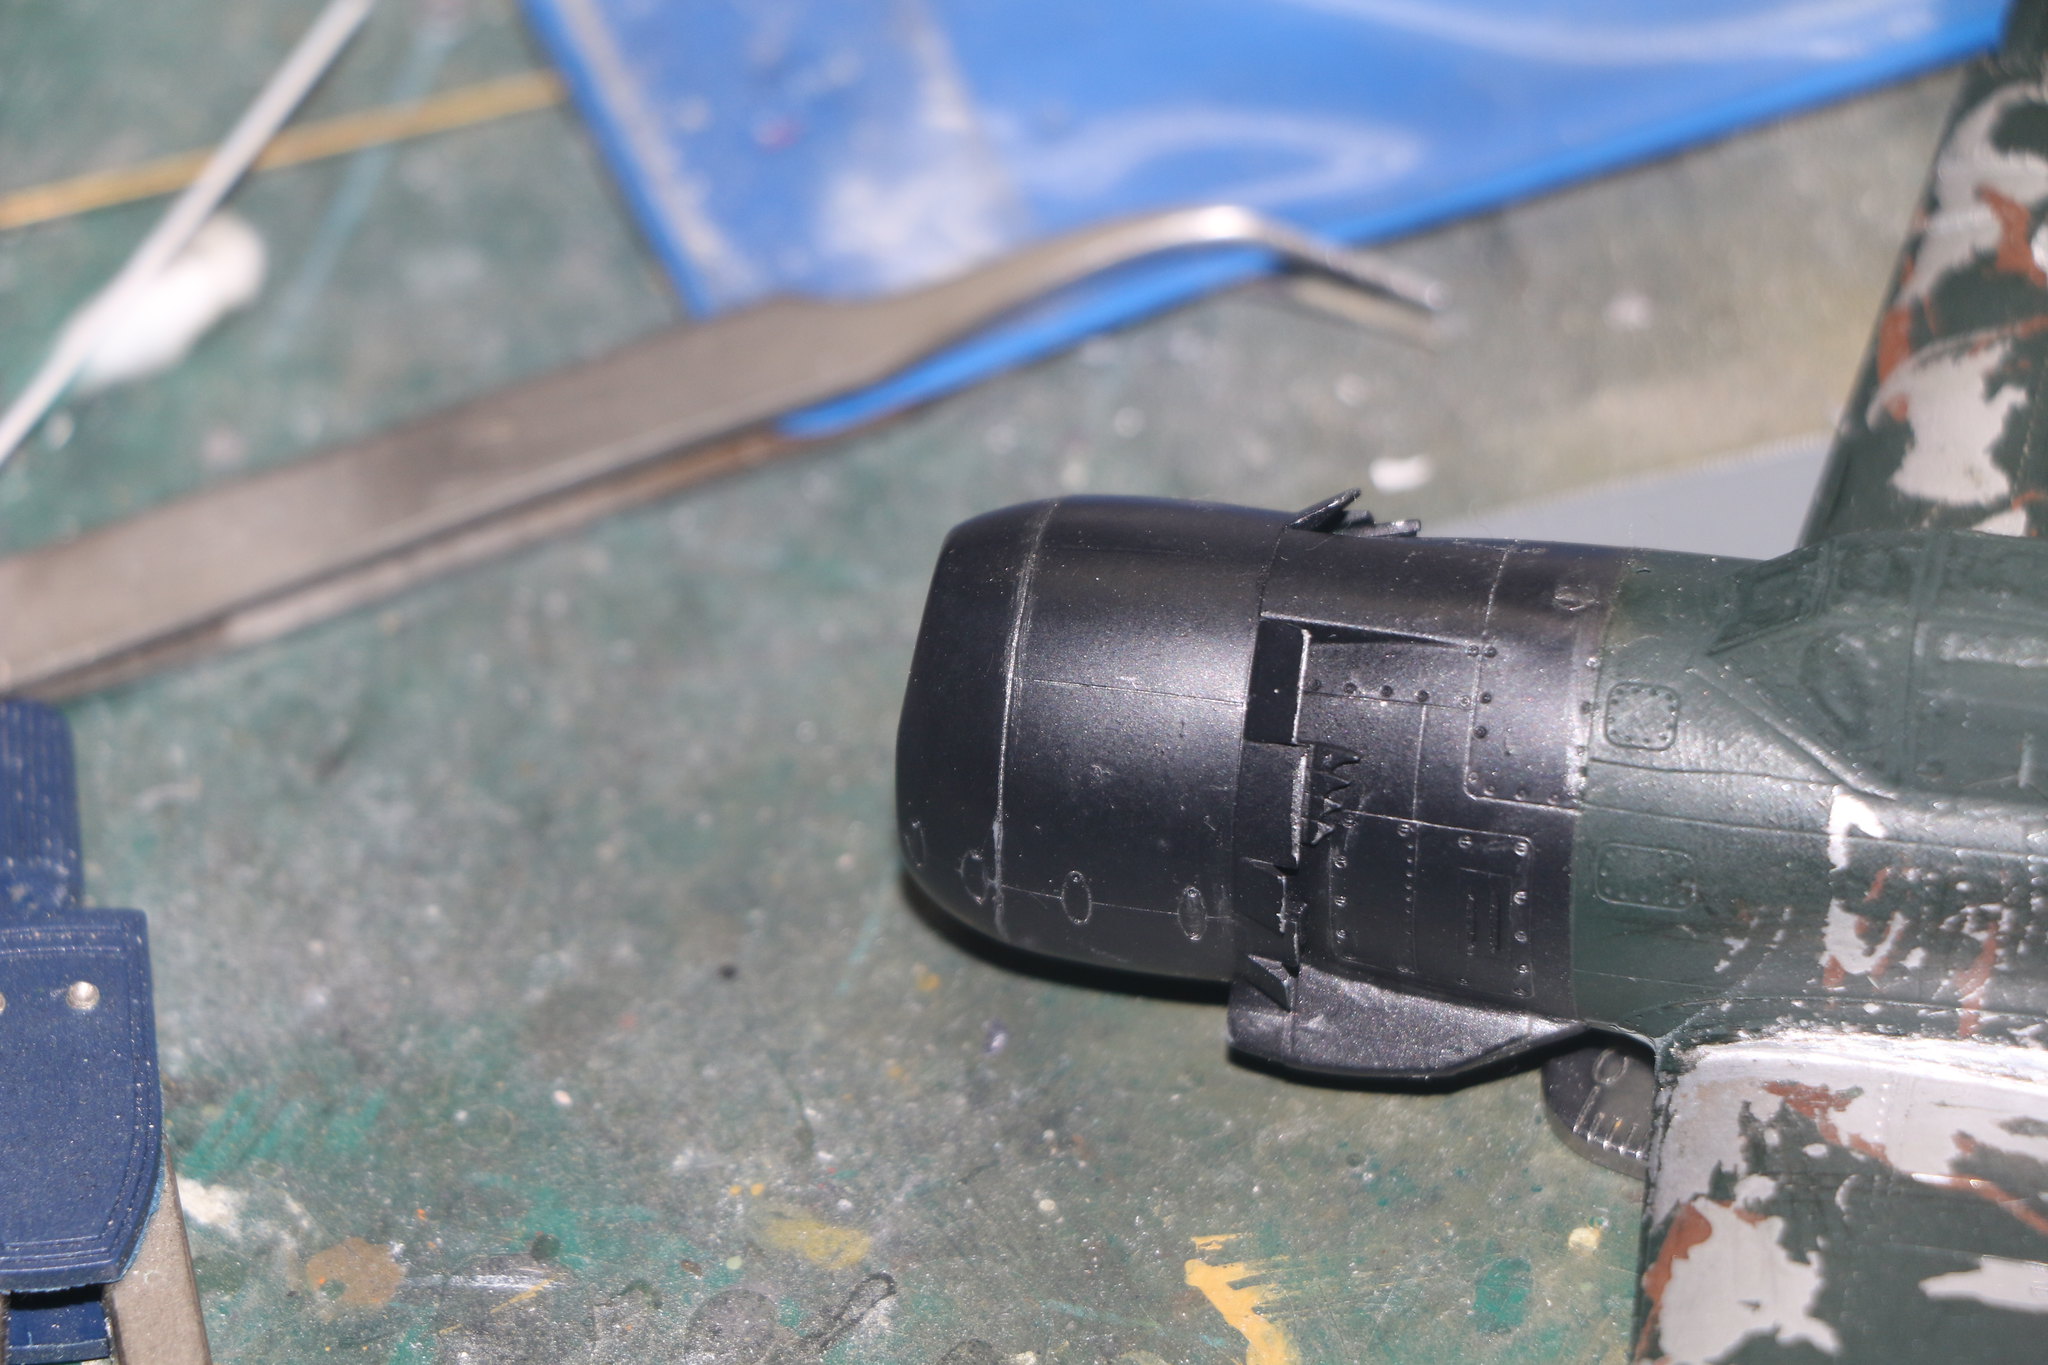
And after painting this is the result, I'm pretty happy I think it'll look better the next time round. It certainly mimics the way paint flakes now it's just a matter of studying just exactly what form that flaking took.
 IMG_2039 by Chris WIlson, on Flickr
 IMG_2038 by Chris WIlson, on Flickr
IMG_2039 by Chris WIlson, on FlickrIMG_2038 by Chris WIlson, on FlickrJoel_W
Joined: December 04, 2010
KitMaker: 11,666 posts
AeroScale: 7,410 posts
Posted: Saturday, February 03, 2018 - 01:35 AM UTC
Chris
The top side Hinomaru's look more like they belong now. The bottom as a whole shows enough wear and tear so one does get the sense of a wear used aircraft. One area you still need to address is the tail Rudder as it now stands out from the rest of the aircraft without a scratch in the paint.
Joel
The top side Hinomaru's look more like they belong now. The bottom as a whole shows enough wear and tear so one does get the sense of a wear used aircraft. One area you still need to address is the tail Rudder as it now stands out from the rest of the aircraft without a scratch in the paint.
Joel
c4willy
#305
Joined: February 01, 2006
KitMaker: 1,673 posts
AeroScale: 1,517 posts
Posted: Saturday, February 03, 2018 - 01:51 AM UTC
Hi Joel I'm with you there I've been worrying at the paint and I've still got some work to do before I apply the tail codes as well as some touch up work here and there. But it's beginning to look like a whole now rather than a work in progress.
c4willy
#305
Joined: February 01, 2006
KitMaker: 1,673 posts
AeroScale: 1,517 posts
Posted: Friday, February 09, 2018 - 06:20 AM UTC
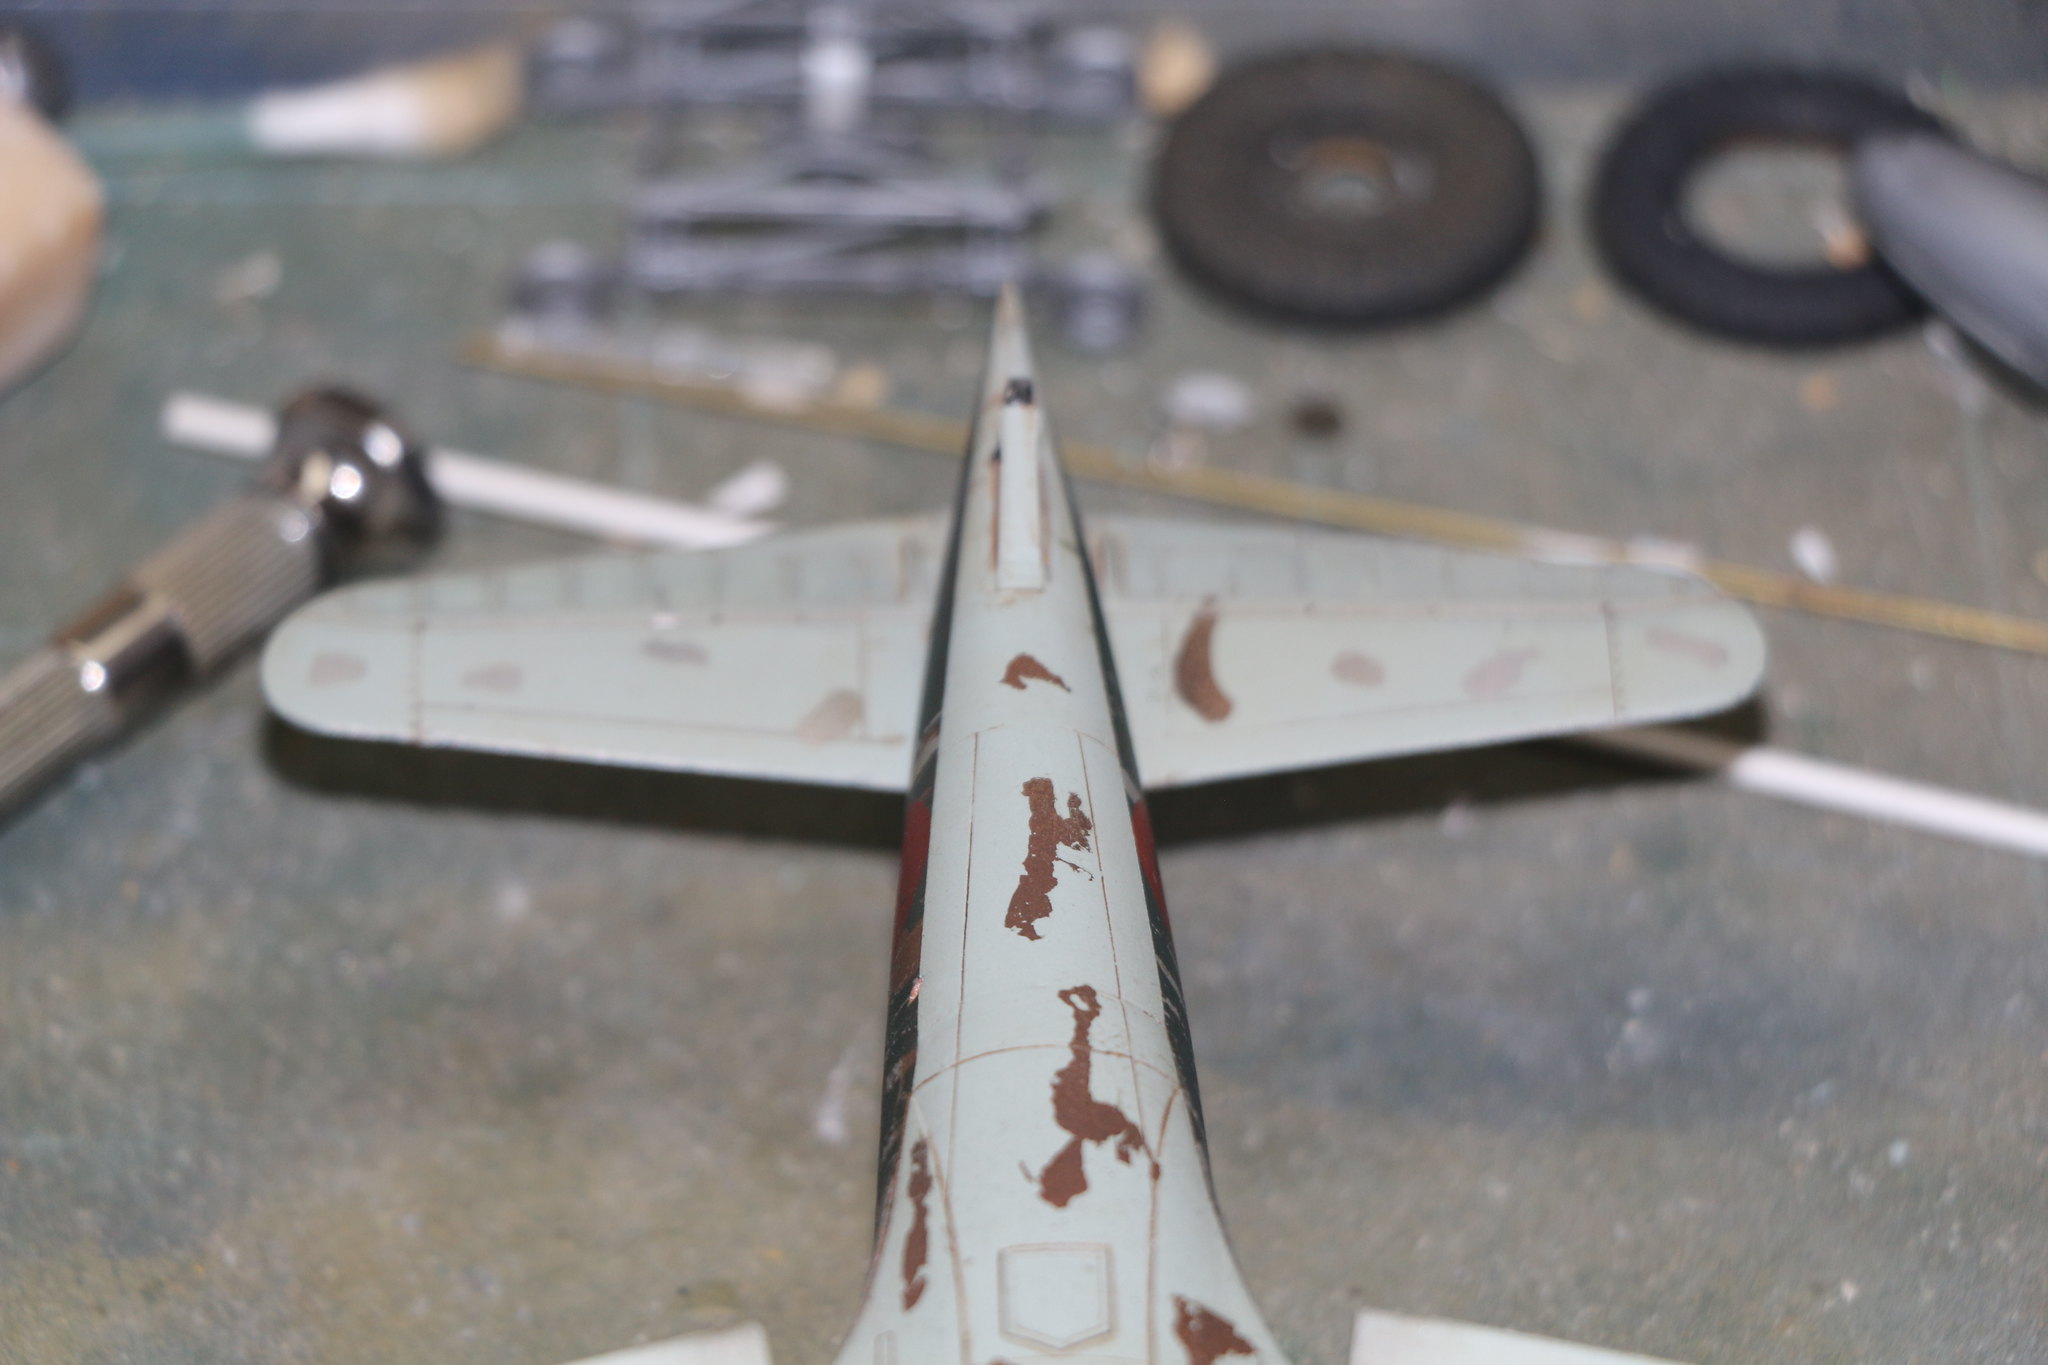
I've finished the Myrt. Would I do it differently next time? Most definitely yes. The process needs some tweaking not the least of which is waiting till the paint is dry at least 24 hours till removing the masking fluid. I'd cover the whole kit in aluminum paint add masking fluid and then spray an irregular coat of undercoat. Hopefully giving the effect of a worn primer in some areas before adding more masking fluid overlapping the already applied masking fluid. I'd also apply masking fluid to areas not yet masked thereby exposing just the primer. I'd try to make the areas masked smaller and more irregular in some cases just a series of dots built up to make a larger area thereby hopefully making the exposed areas a little more irregular.
But it's a work in progress, am I happy with the results? Yes and no. Happy with the achieved chipping not so happy with the amount of chipping however. Next time I'll also add a few other touches such as concentrating the effect on those surfaces in direct sunlight and rain. I'll add a coat of paint to fade the exposed areas. I'll also try to mimic water run off on the paint not directly exposed to sun and rain. The markings will need to be sprayed and masking fluid added where the chipping impinges on them. So a uniform effect can be achieved over the whole model.
A picture is worth a thousand words so I'm told so here are some pics to see the result.
 IMG_2045 by Chris WIlson, on Flickr
 IMG_2046 by Chris WIlson, on Flickr
 IMG_2047 by Chris WIlson, on Flickr
 IMG_2048 by Chris WIlson, on Flickr
 IMG_2049 by Chris WIlson, on Flickr
 IMG_2050 by Chris WIlson, on Flickr
 IMG_2051 by Chris WIlson, on Flickr
 IMG_2052 by Chris WIlson, on Flickr
 IMG_2053 by Chris WIlson, on Flickr
 IMG_2054 by Chris WIlson, on Flickr
 IMG_2055 by Chris WIlson, on Flickr
 IMG_2056 by Chris WIlson, on Flickr
But it's a work in progress, am I happy with the results? Yes and no. Happy with the achieved chipping not so happy with the amount of chipping however. Next time I'll also add a few other touches such as concentrating the effect on those surfaces in direct sunlight and rain. I'll add a coat of paint to fade the exposed areas. I'll also try to mimic water run off on the paint not directly exposed to sun and rain. The markings will need to be sprayed and masking fluid added where the chipping impinges on them. So a uniform effect can be achieved over the whole model.
A picture is worth a thousand words so I'm told so here are some pics to see the result.
IMG_2045 by Chris WIlson, on FlickrIMG_2046 by Chris WIlson, on FlickrIMG_2047 by Chris WIlson, on FlickrIMG_2048 by Chris WIlson, on FlickrIMG_2049 by Chris WIlson, on FlickrIMG_2050 by Chris WIlson, on FlickrIMG_2051 by Chris WIlson, on FlickrIMG_2052 by Chris WIlson, on FlickrIMG_2053 by Chris WIlson, on FlickrIMG_2054 by Chris WIlson, on FlickrIMG_2055 by Chris WIlson, on FlickrIMG_2056 by Chris WIlson, on FlickrJoel_W
Joined: December 04, 2010
KitMaker: 11,666 posts
AeroScale: 7,410 posts
Posted: Friday, February 09, 2018 - 11:11 PM UTC
Chris,
Congratulations for crossing the finish line. As well as double thumbs up for attempting a completely new technique, analyzing it for both it's positives, negatives, and already formulating newer procedures for the next build using your chipping concept.
One thing I've come to realize the hard way (as with most things I do), is the smaller the scale, the harder it is to keep the scale effect consistent in respect to reality.
All told Chris, you did an exceptional job on the 1/48 Nakajima C6N1-S.
Joel

greif8

Joined: January 17, 2006
KitMaker: 673 posts
AeroScale: 492 posts

Posted: Saturday, February 10, 2018 - 01:27 AM UTC
Hi Chris, that is one worn bird! I think your chipping and flaking hits the spot for a mid - late war Japanese aircraft. You have more courage that I do using the technique you did on such a large amount of the airframe. I am only brave enough to try it on very specific areas like the wing root. Again, nice work!
Ernest
Ernest
c4willy
#305
Joined: February 01, 2006
KitMaker: 1,673 posts
AeroScale: 1,517 posts
Posted: Saturday, February 10, 2018 - 04:42 AM UTC
Hi Joel my thanks kind sir. I believe the technique has merit it's just ironing out the application. Scale is always going to be an issue it's funny I've found myself lately analysing the way clear coat peels off of cars here in New Zealand to give me insights into how best to achieve the same results.
Ernest my thanks and believe me I wasn't anywhere near my comfort zone with the painting of this kit. But it's given me valuable experience and insights for later attempts. I think the one major aspect of this build I fund is that modellers tend to forget that there was primer under the paint and we need to show that when chipping paint work.
Ernest my thanks and believe me I wasn't anywhere near my comfort zone with the painting of this kit. But it's given me valuable experience and insights for later attempts. I think the one major aspect of this build I fund is that modellers tend to forget that there was primer under the paint and we need to show that when chipping paint work.
 |

WEB HOSTING BY


Copyright ©2021 AeroScale and Kitmaker Network, a subsidiary of Silver Star Enterprises
All Rights Reserved. Please read our Conditions of Use and Privacy Policy.
All Rights Reserved. Please read our Conditions of Use and Privacy Policy.