

Air Campaigns
Want to start or join a group build? This is where to start.
Want to start or join a group build? This is where to start.
Hosted by Frederick Boucher, Michael Satin
OFFICIAL: PTO Campaign

c4willy

#305

Joined: February 01, 2006
KitMaker: 1,673 posts
AeroScale: 1,517 posts

Posted: Thursday, November 09, 2017 - 04:14 AM UTC
Ernest have you tried micro scale decal film? That's my go to for desintergrating decals. Works pretty well too, a couple of coats is all that is uaully needed and it dries pretty quickly after application. Just let it dry between coats.

greif8

Joined: January 17, 2006
KitMaker: 673 posts
AeroScale: 492 posts

Posted: Thursday, November 09, 2017 - 10:39 PM UTC
Hi Chris, I have tried the Microscale decal film, but unfortunately this time it did not have the desired effect. I have been meaning to try my hand at using painting masks to spray the larger insignia and have also ordered some Maketar masks in addition to the decal I ordered from Dave Klaus. When they arrive, I'll have a reason to use them now. If I manage to do a good job, I'll have enough masks to also do the F4F and TBF I have waiting in the wings.
Sincerely,
Ernest
Sincerely,
Ernest
Quoted Text
Ernest have you tried micro scale decal film? That's my go to for desintergrating decals. Works pretty well too, a couple of coats is all that is uaully needed and it dries pretty quickly after application. Just let it dry between coats.

Antilles
Joined: March 22, 2015
KitMaker: 671 posts
AeroScale: 614 posts
Posted: Friday, November 10, 2017 - 03:06 AM UTC
Hello fellow modelers,
lots of nice builds are going on around here!
Mike:
Your kit seems to "fall" togeter very well. Nice paint job!
Matt:
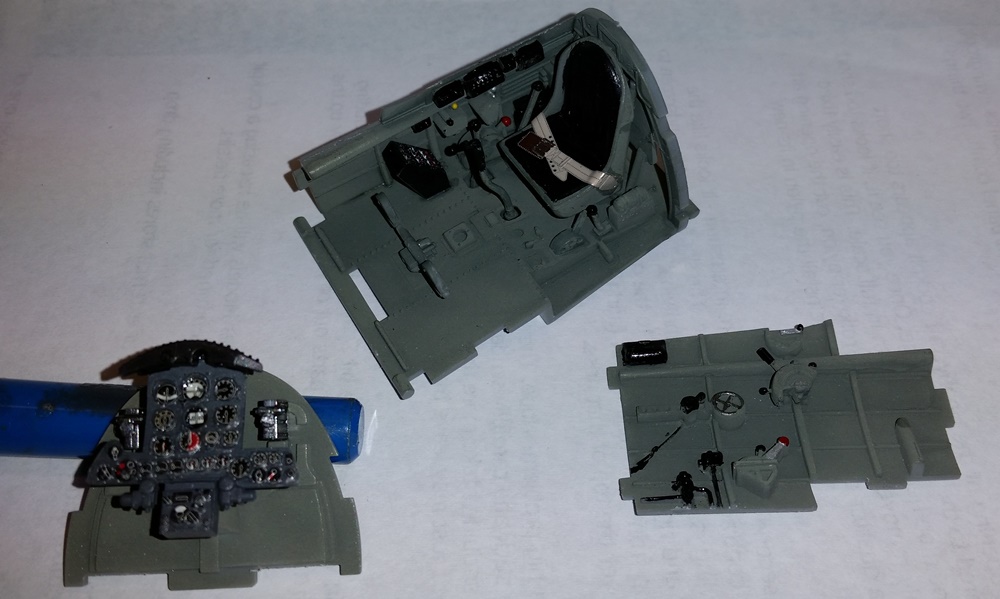
Cockpit section looks absolute fantastic! Wow!
Ken:
Nice figure! What colors will You use for painting? Oils?
Thomas:
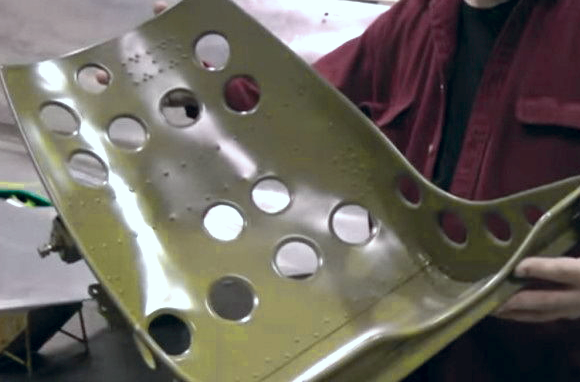
Nice start. The thinned and drilled out seat looks cool! Were these holes asymetrical?
Ernest:
Your dauntless looks really fine. Sorry for those decal-problem. I hope the set wil arrive soon.
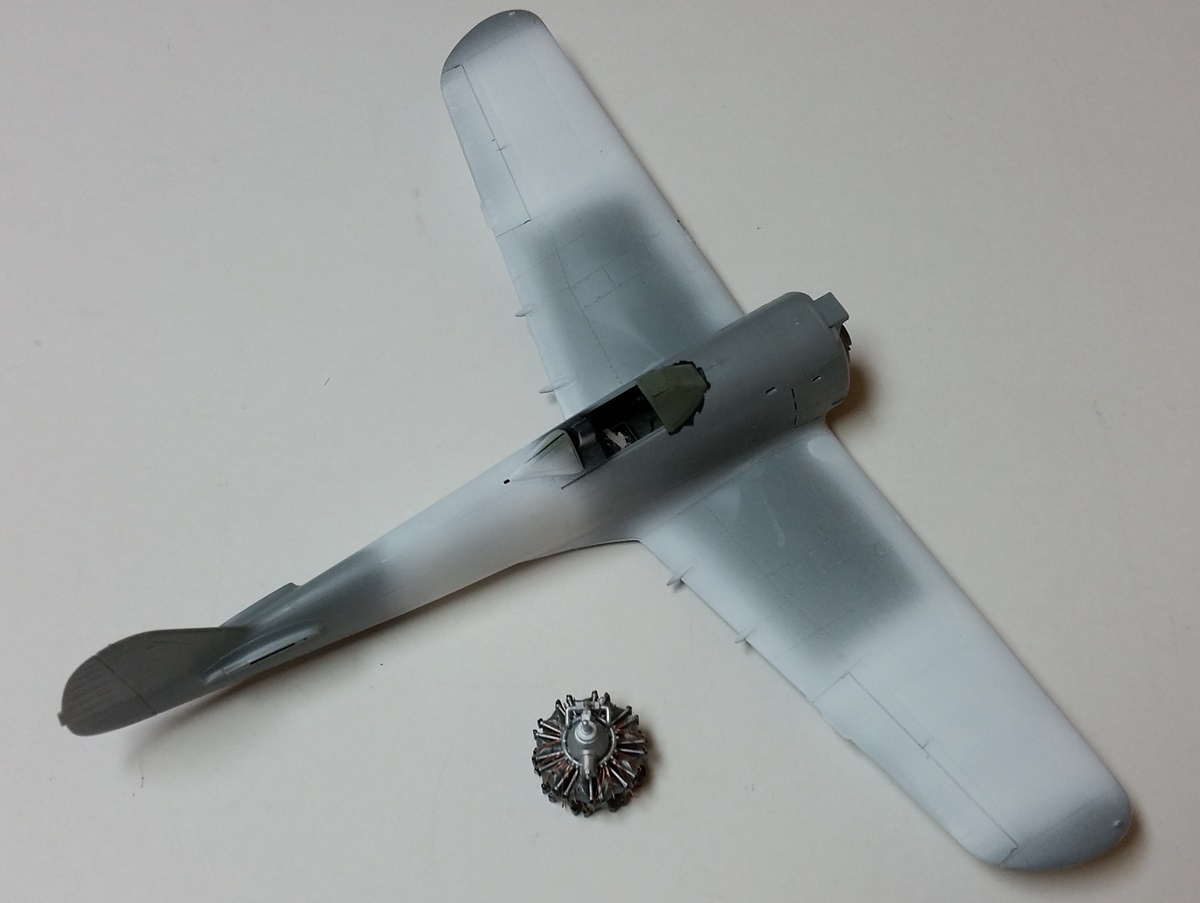
My Kate has been closed now. The old kit needed some more putty than I thought. Lights were cut out and redone by some clear material.
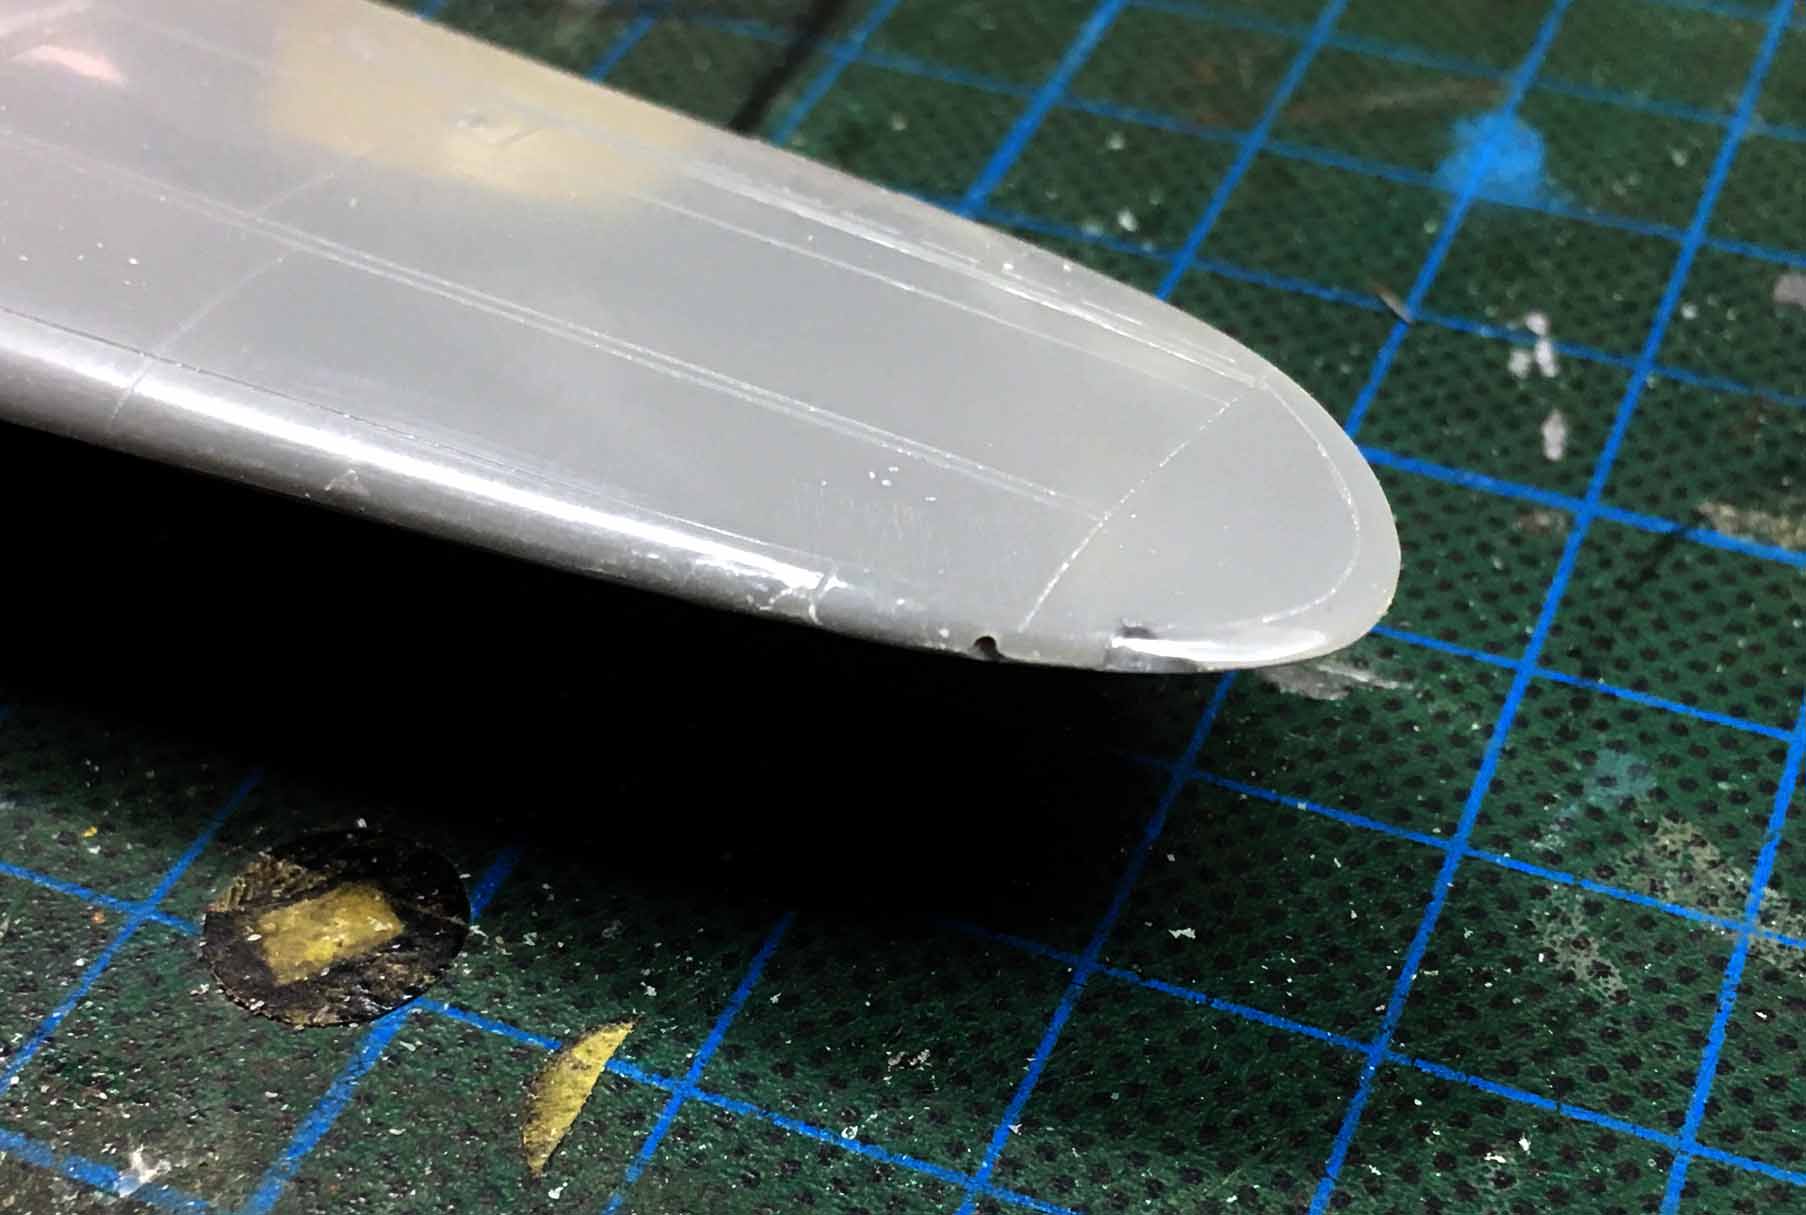
After sanding, some lines had to be rescribed. After this, the plane was primed followed by Tamiya Silver out of the rattle can.
As I want to build rather worn Kate, the metal parts were coated with hair spray.
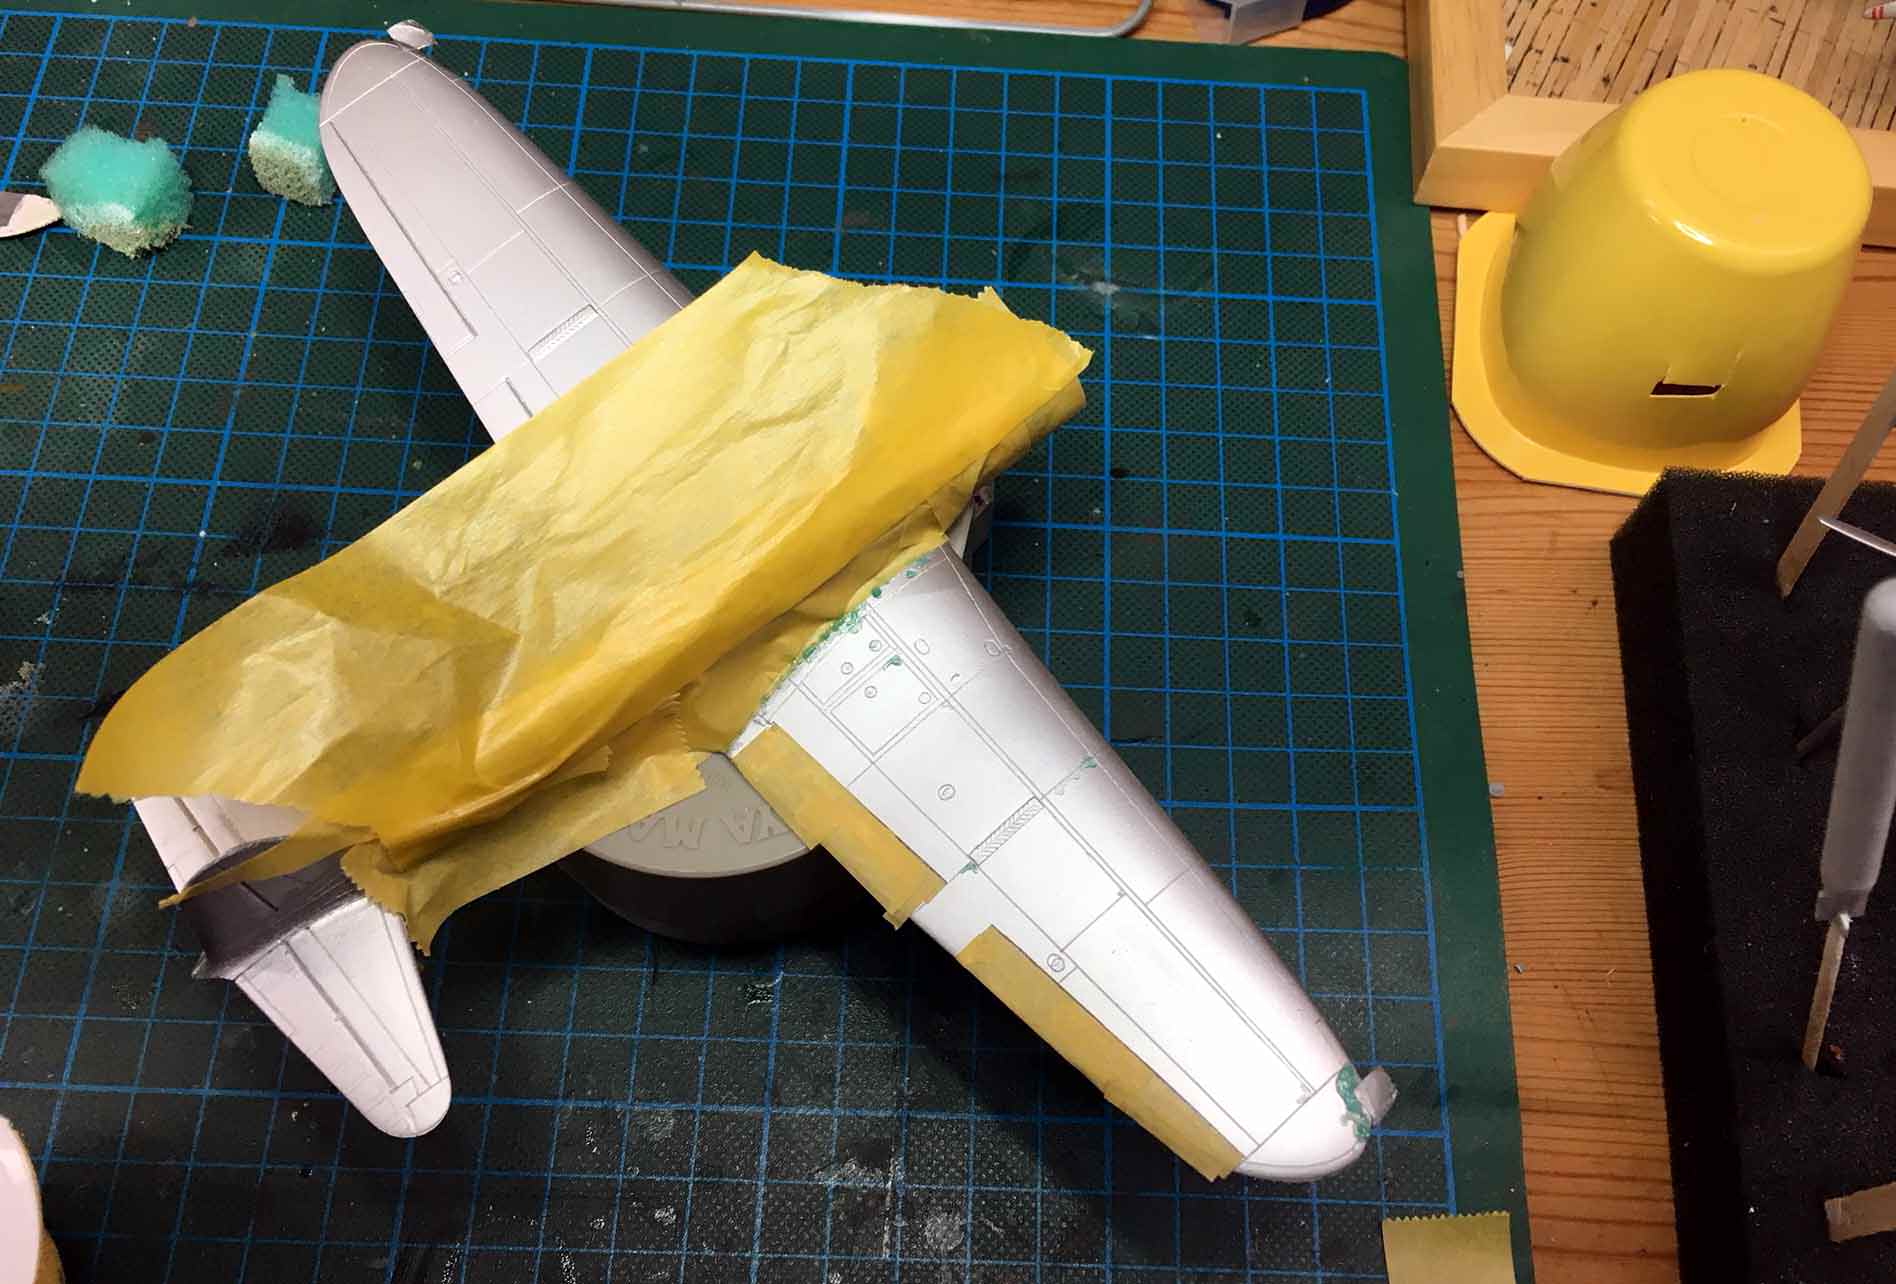
After a pre-shading with black the green color was applied onto the wing.
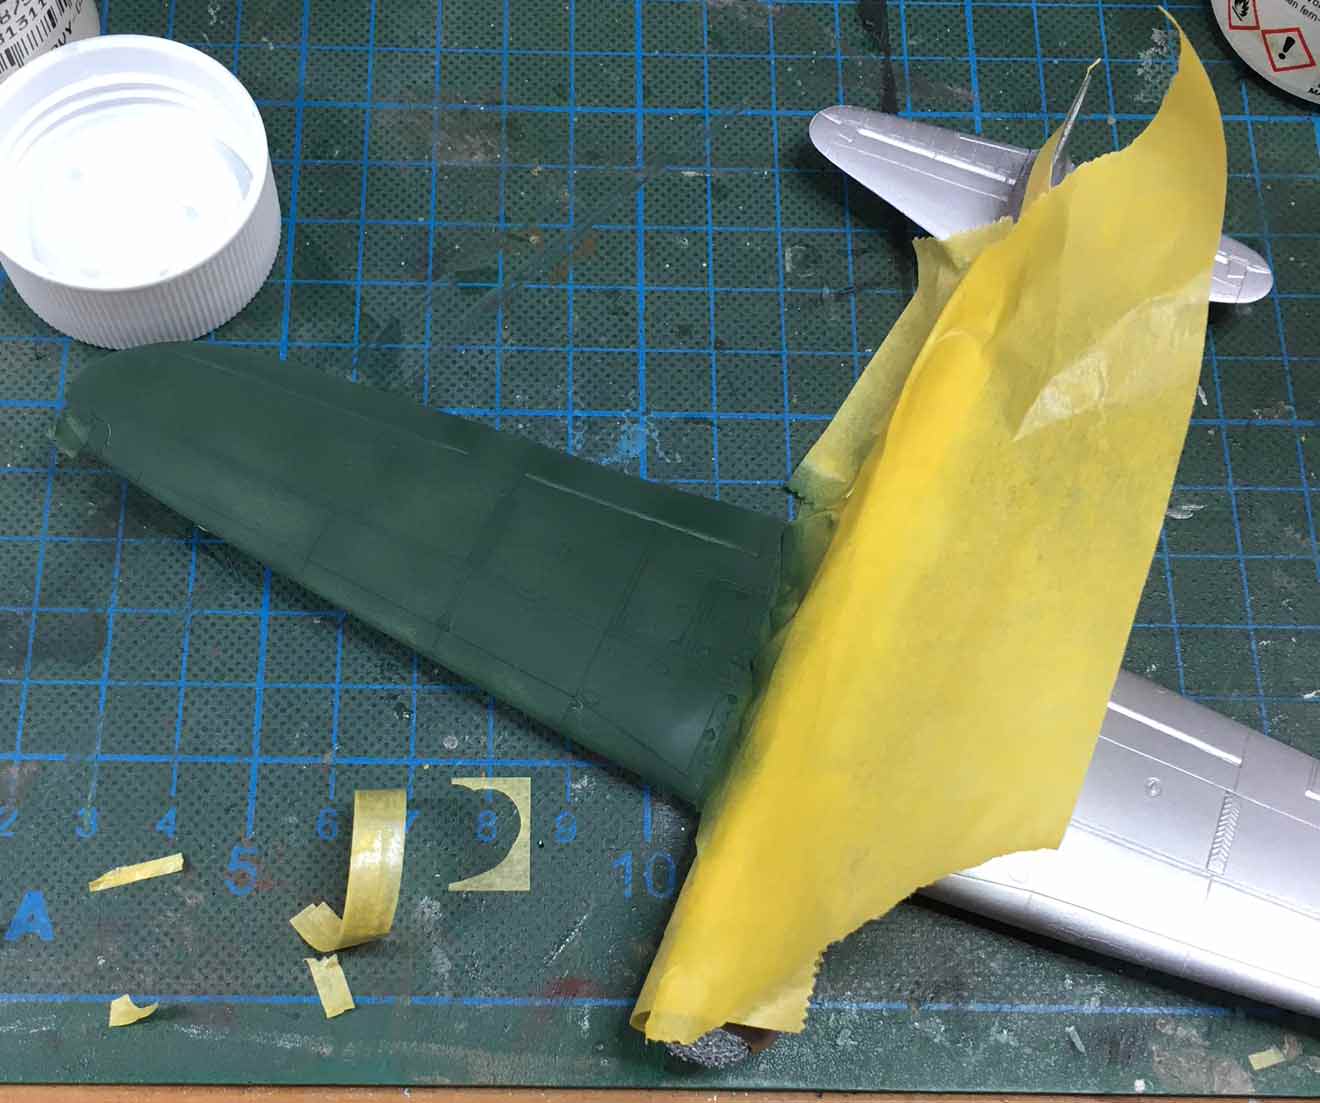
Then came the fun part and the color was stripped of again.
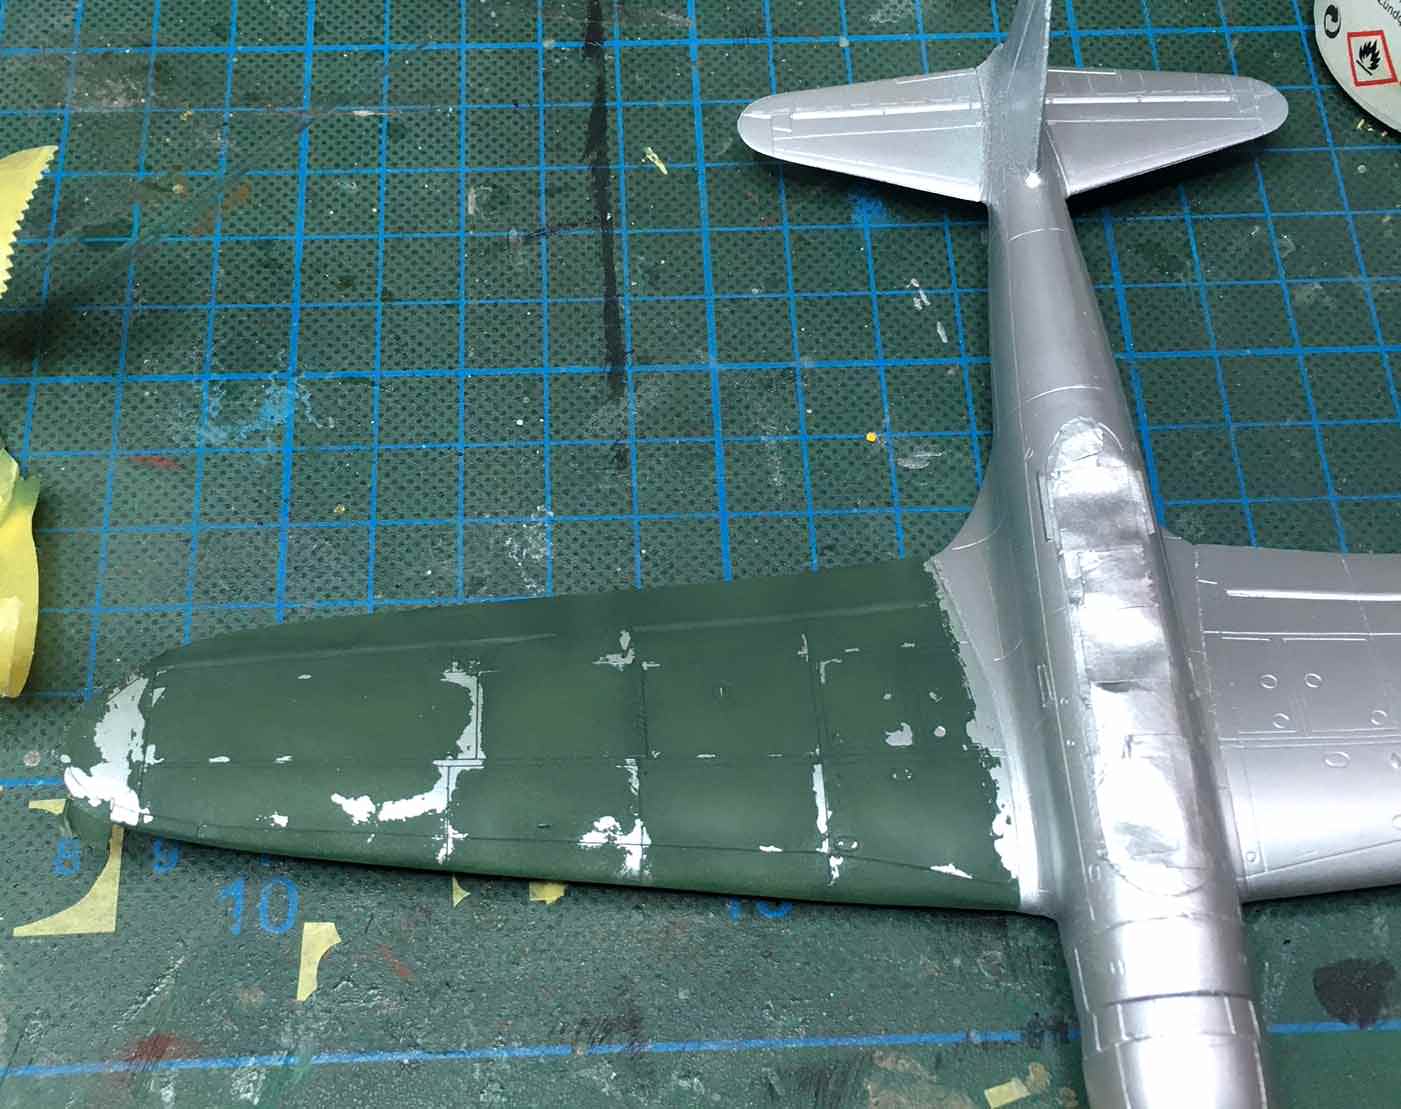
The same procedure was done with the other wing...
...and the fuselage.
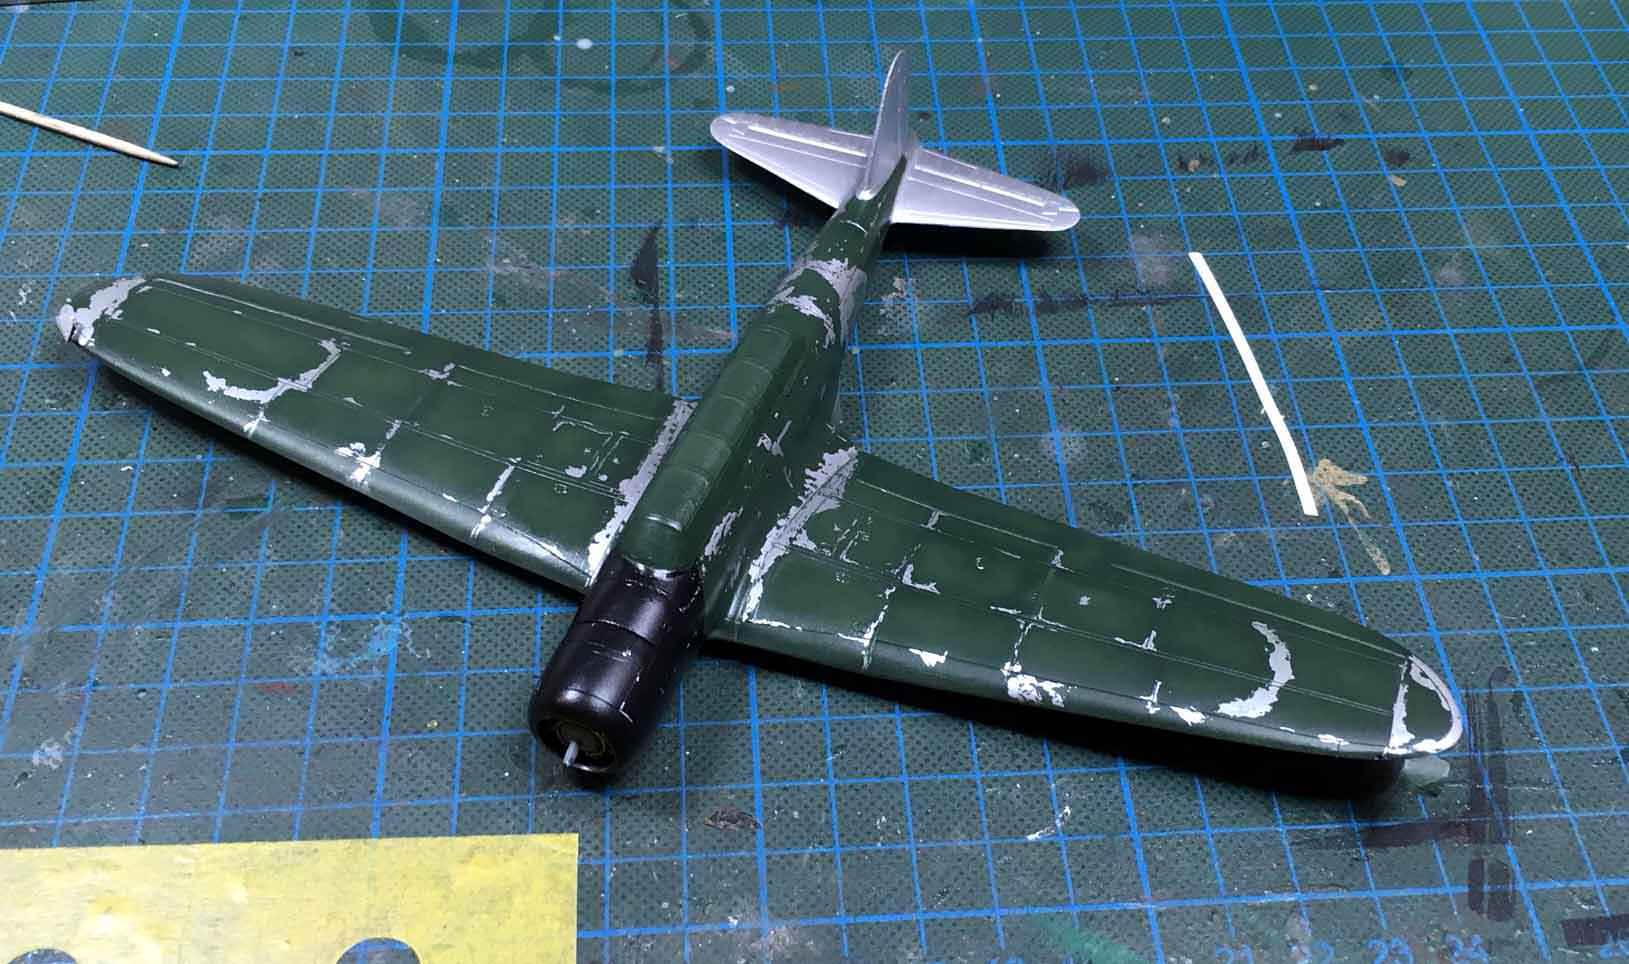
I found it much easier to do the stripping step by step as I did not know how long the effect of the hair spray would last.
Happy modeling!
Oliver
lots of nice builds are going on around here!
Mike:
Your kit seems to "fall" togeter very well. Nice paint job!
Matt:
Cockpit section looks absolute fantastic! Wow!
Ken:
Nice figure! What colors will You use for painting? Oils?
Thomas:
Nice start. The thinned and drilled out seat looks cool! Were these holes asymetrical?
Ernest:
Your dauntless looks really fine. Sorry for those decal-problem. I hope the set wil arrive soon.
My Kate has been closed now. The old kit needed some more putty than I thought. Lights were cut out and redone by some clear material.
After sanding, some lines had to be rescribed. After this, the plane was primed followed by Tamiya Silver out of the rattle can.
As I want to build rather worn Kate, the metal parts were coated with hair spray.
After a pre-shading with black the green color was applied onto the wing.
Then came the fun part and the color was stripped of again.
The same procedure was done with the other wing...
...and the fuselage.
I found it much easier to do the stripping step by step as I did not know how long the effect of the hair spray would last.
Happy modeling!
Oliver
greif8
Joined: January 17, 2006
KitMaker: 673 posts
AeroScale: 492 posts
Posted: Friday, November 10, 2017 - 05:17 PM UTC
Hi Oliver, how did you strip the green paint off the aluminum undercoating? It looks like you used the "tape method".
Ernest
Ernest
Quoted Text
Hello fellow modelers,
lots of nice builds are going on around here!
Mike:
Your kit seems to "fall" togeter very well. Nice paint job!
Matt:
Cockpit section looks absolute fantastic! Wow!
Ken:
Nice figure! What colors will You use for painting? Oils?
Thomas:
Nice start. The thinned and drilled out seat looks cool! Were these holes asymetrical?
Ernest:
Your dauntless looks really fine. Sorry for those decal-problem. I hope the set wil arrive soon.
My Kate has been closed now. The old kit needed some more putty than I thought. Lights were cut out and redone by some clear material.
After sanding, some lines had to be rescribed. After this, the plane was primed followed by Tamiya Silver out of the rattle can.
As I want to build rather worn Kate, the metal parts were coated with hair spray.
After a pre-shading with black the green color was applied onto the wing.
Then came the fun part and the color was stripped of again.
The same procedure was done with the other wing...
...and the fuselage.
I found it much easier to do the stripping step by step as I did not know how long the effect of the hair spray would last.
Happy modeling!
Oliver

goodn8
Joined: October 12, 2008
KitMaker: 709 posts
AeroScale: 651 posts
Posted: Friday, November 10, 2017 - 05:47 PM UTC
Ernest, the paint on looks pretty nice. Very smooth and even - great paint job. How much amount of thinner is used with the new MRP colors? An how is the a/b float and the drying time
Thomas
Thomas

goodn8
Joined: October 12, 2008
KitMaker: 709 posts
AeroScale: 651 posts
Posted: Friday, November 10, 2017 - 05:51 PM UTC
Wow Oliver, that is quite heavy chipping 
You really did a great job, respect! I've never used hairspray, should try it once. The position lights are very well done as well.
BTW: the seat ... uhhhm, maybe I match it not nicely but indeed the holes are more or less like that and have at least 2 different diameters.
Thomas
You really did a great job, respect! I've never used hairspray, should try it once. The position lights are very well done as well.
BTW: the seat ... uhhhm, maybe I match it not nicely but indeed the holes are more or less like that and have at least 2 different diameters.
Thomas
Antilles
Joined: March 22, 2015
KitMaker: 671 posts
AeroScale: 614 posts
Posted: Saturday, November 11, 2017 - 04:24 AM UTC
Thanks Thomas,
Wow that is interesting. What was the idea for asymetrical and different holes?
Oliver
Quoted Text
BTW: the seat ... uhhhm, maybe I match it not nicely but indeed the holes are more or less like that and have at least 2 different diameters.
Thomas
Wow that is interesting. What was the idea for asymetrical and different holes?
Oliver
Antilles
Joined: March 22, 2015
KitMaker: 671 posts
AeroScale: 614 posts
Posted: Saturday, November 11, 2017 - 04:34 AM UTC
Quoted Text
Hi Oliver, how did you strip the green paint off the aluminum undercoating? It looks like you used the "tape method".
Ernest
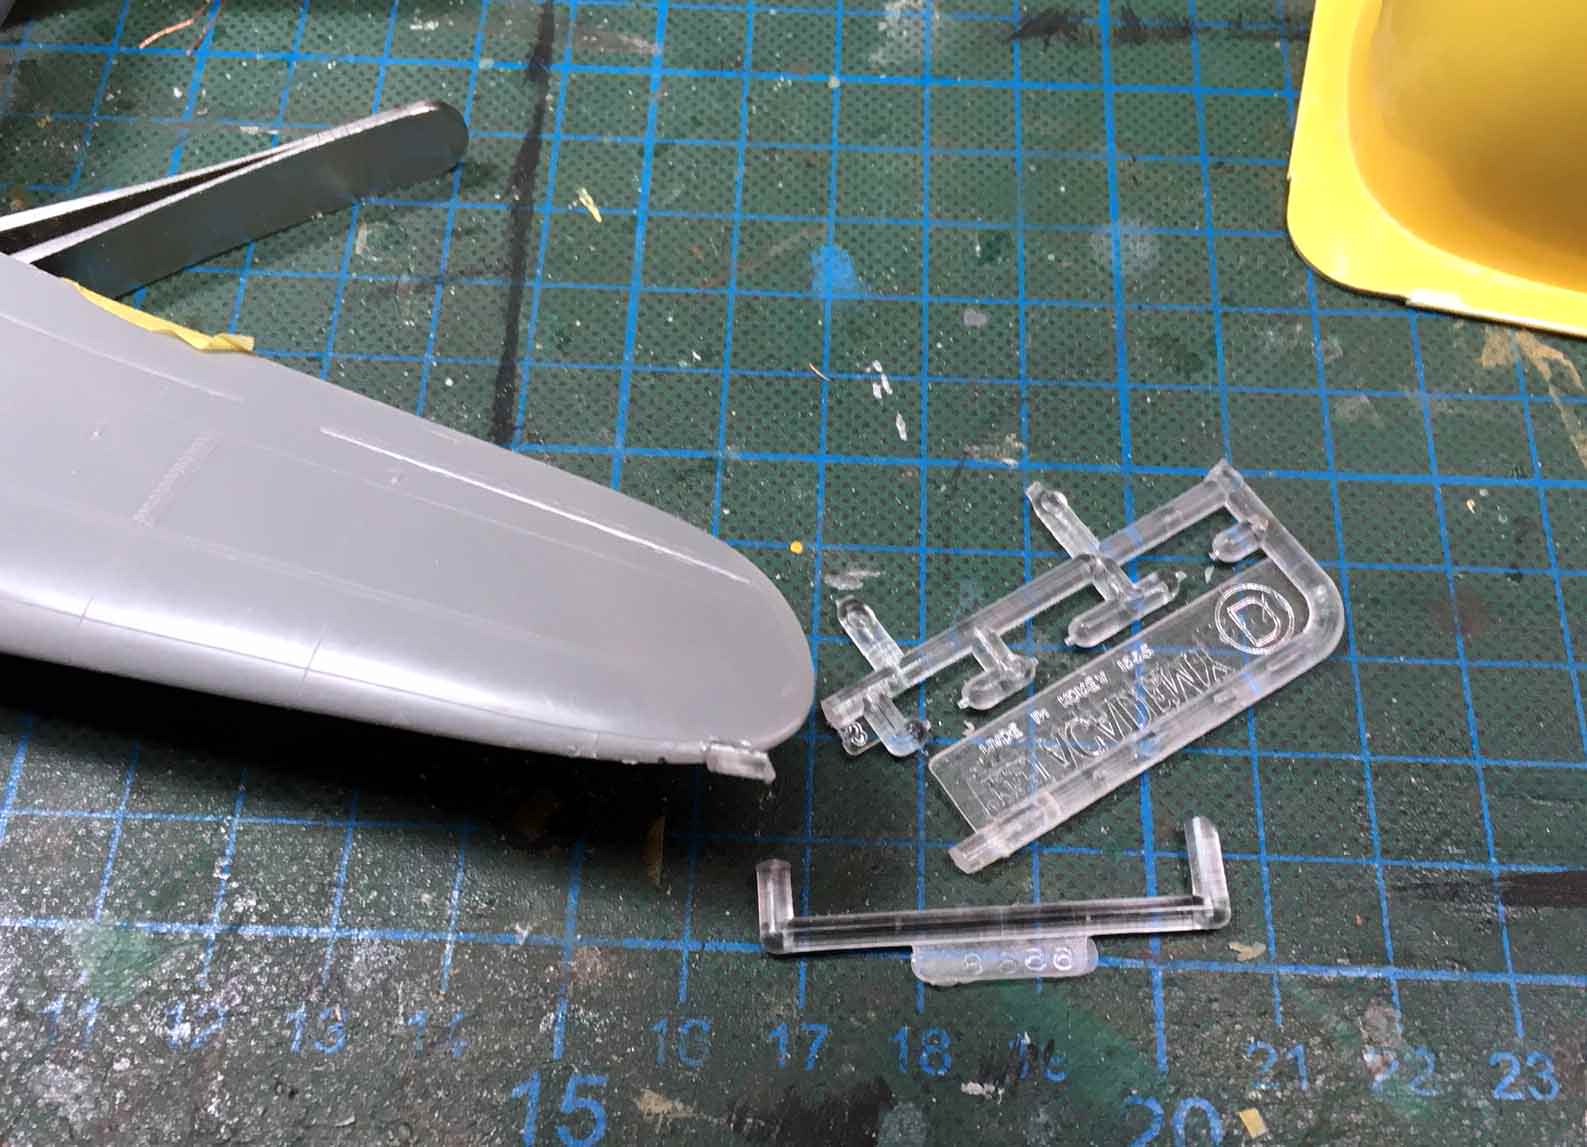
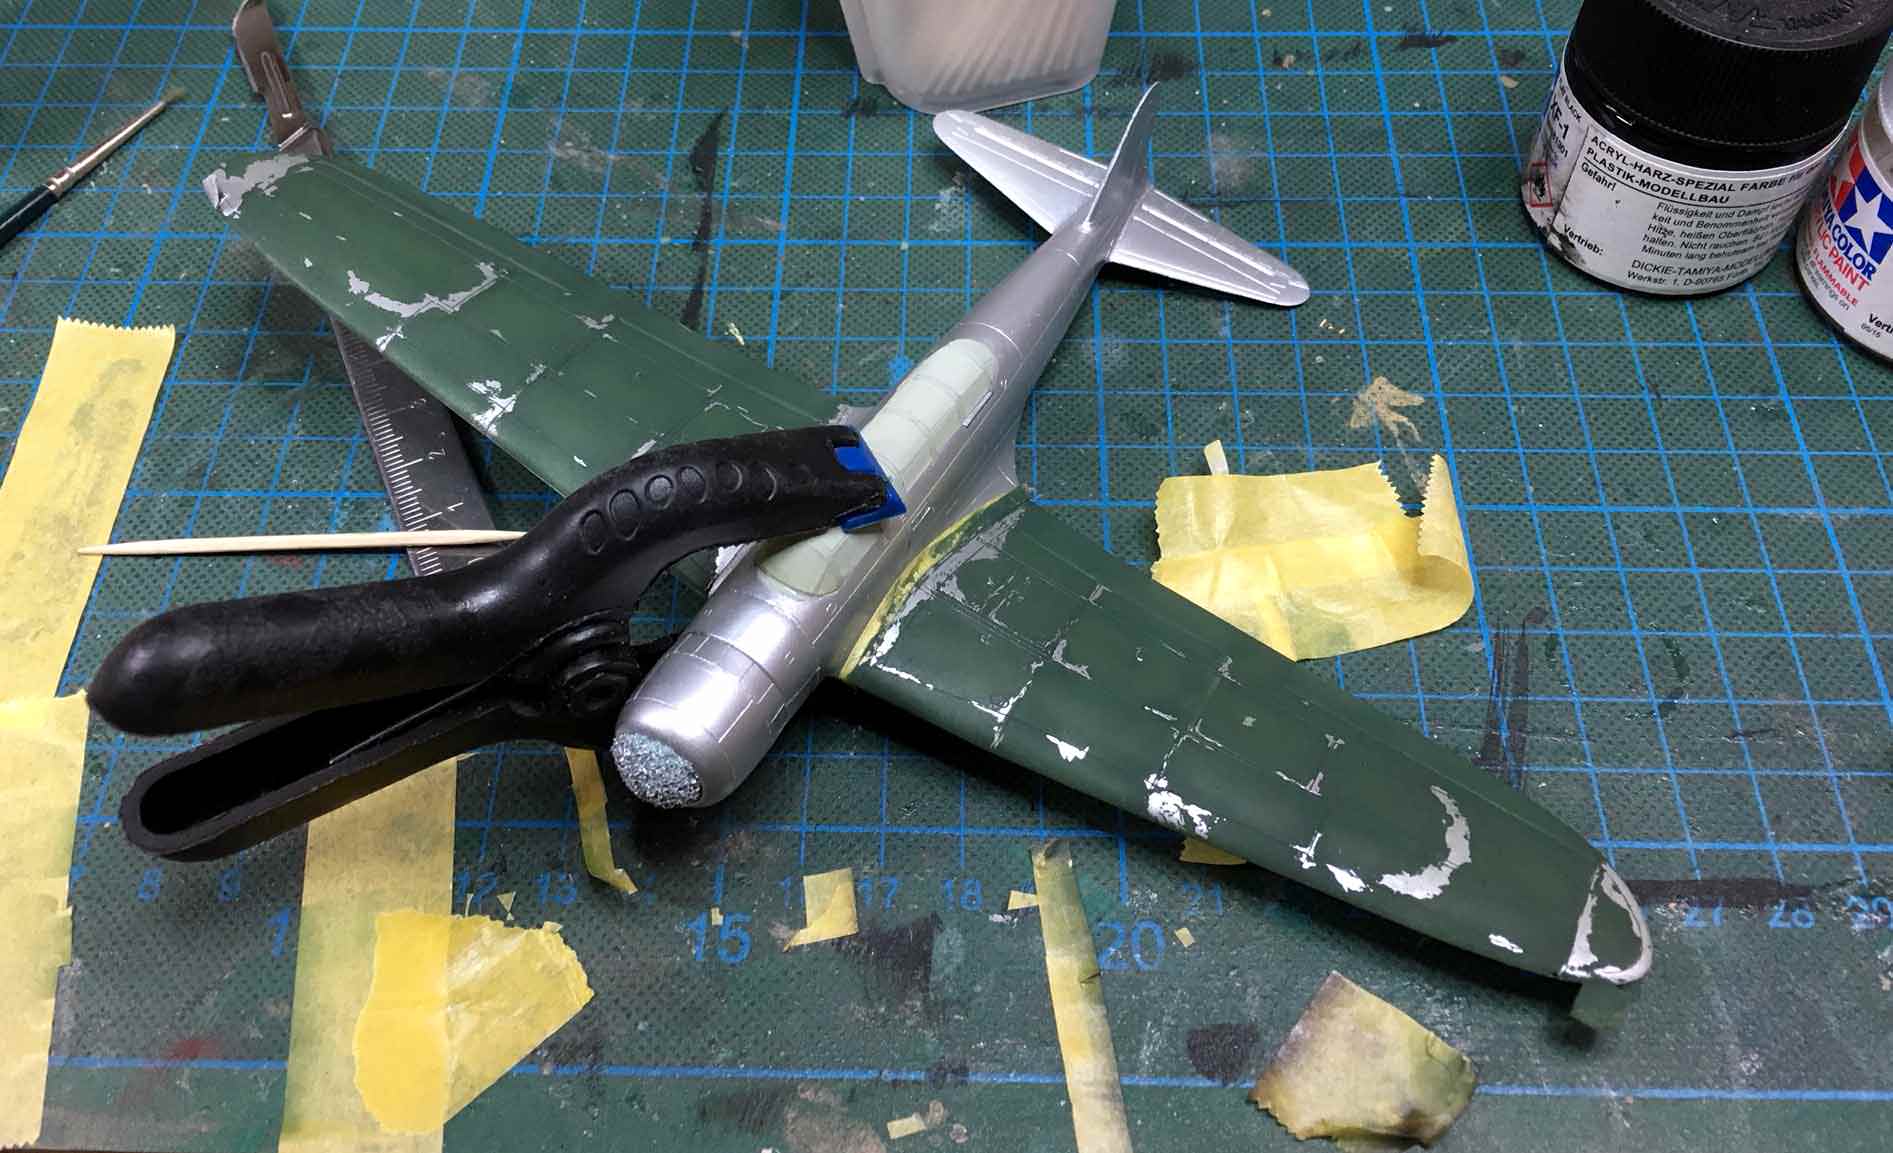
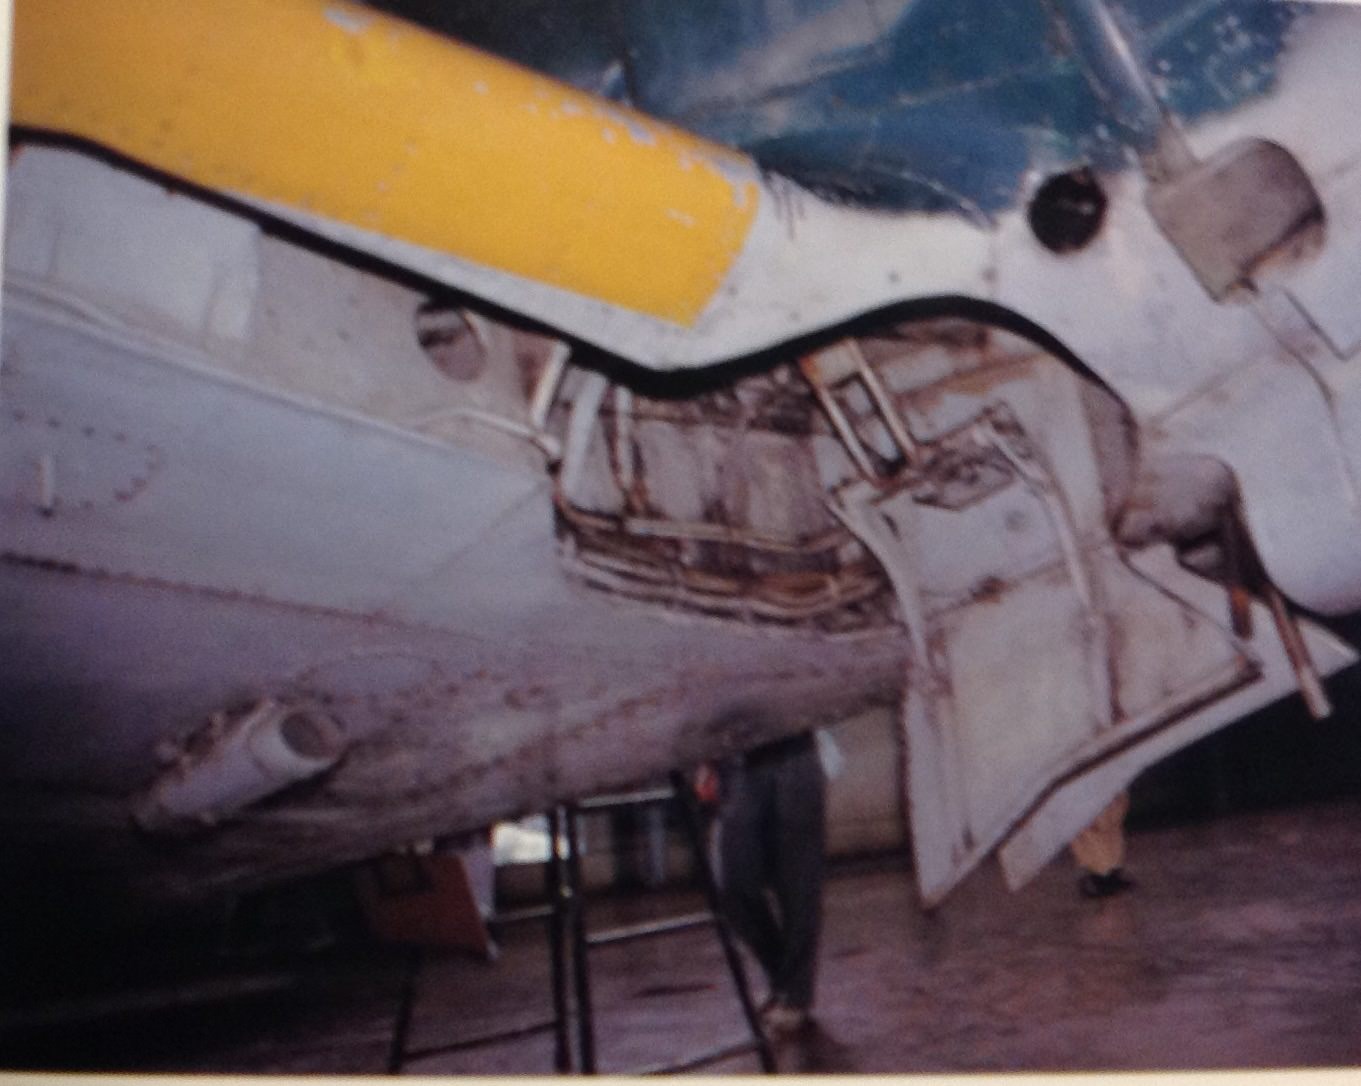
Hi Ernest,
here are the tools needed for the stripping method with hairspray.
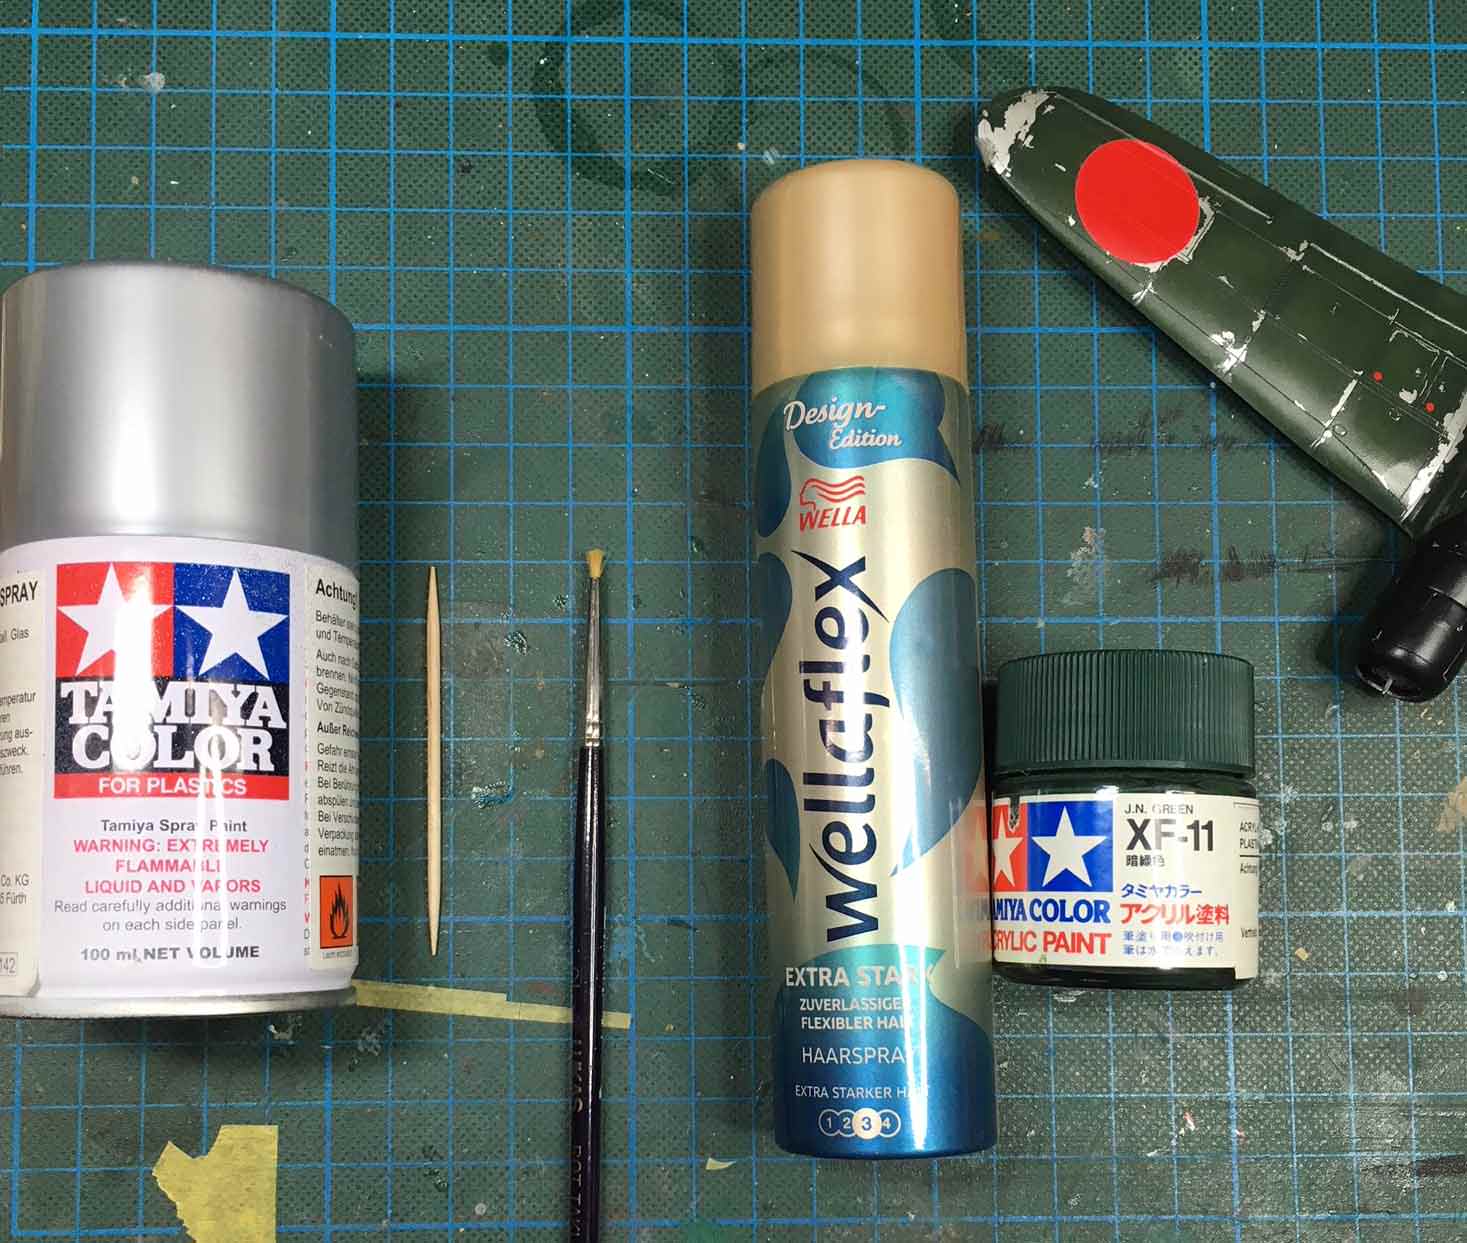
First, a silver paint out of the rattle can is applied.
Then, the surface is sprayed with hair-spray, decanted into the airbrush.
Subsequently, the acrylic color can be applied.
For stripping, I use a tooth-pic and a small brush. You have to moisten the surface to be stripped with clear water. The brush, used to apply the water, can be used to remove bigger areas of paint. Finer structures can be stripped of by scratching the area with the tooth-pic. I found, that moistening the surface is not necessary for the tooth-pic.
Oliver

PeeJay74
#363

Joined: January 08, 2014
KitMaker: 425 posts
AeroScale: 401 posts

Posted: Sunday, November 12, 2017 - 12:19 AM UTC
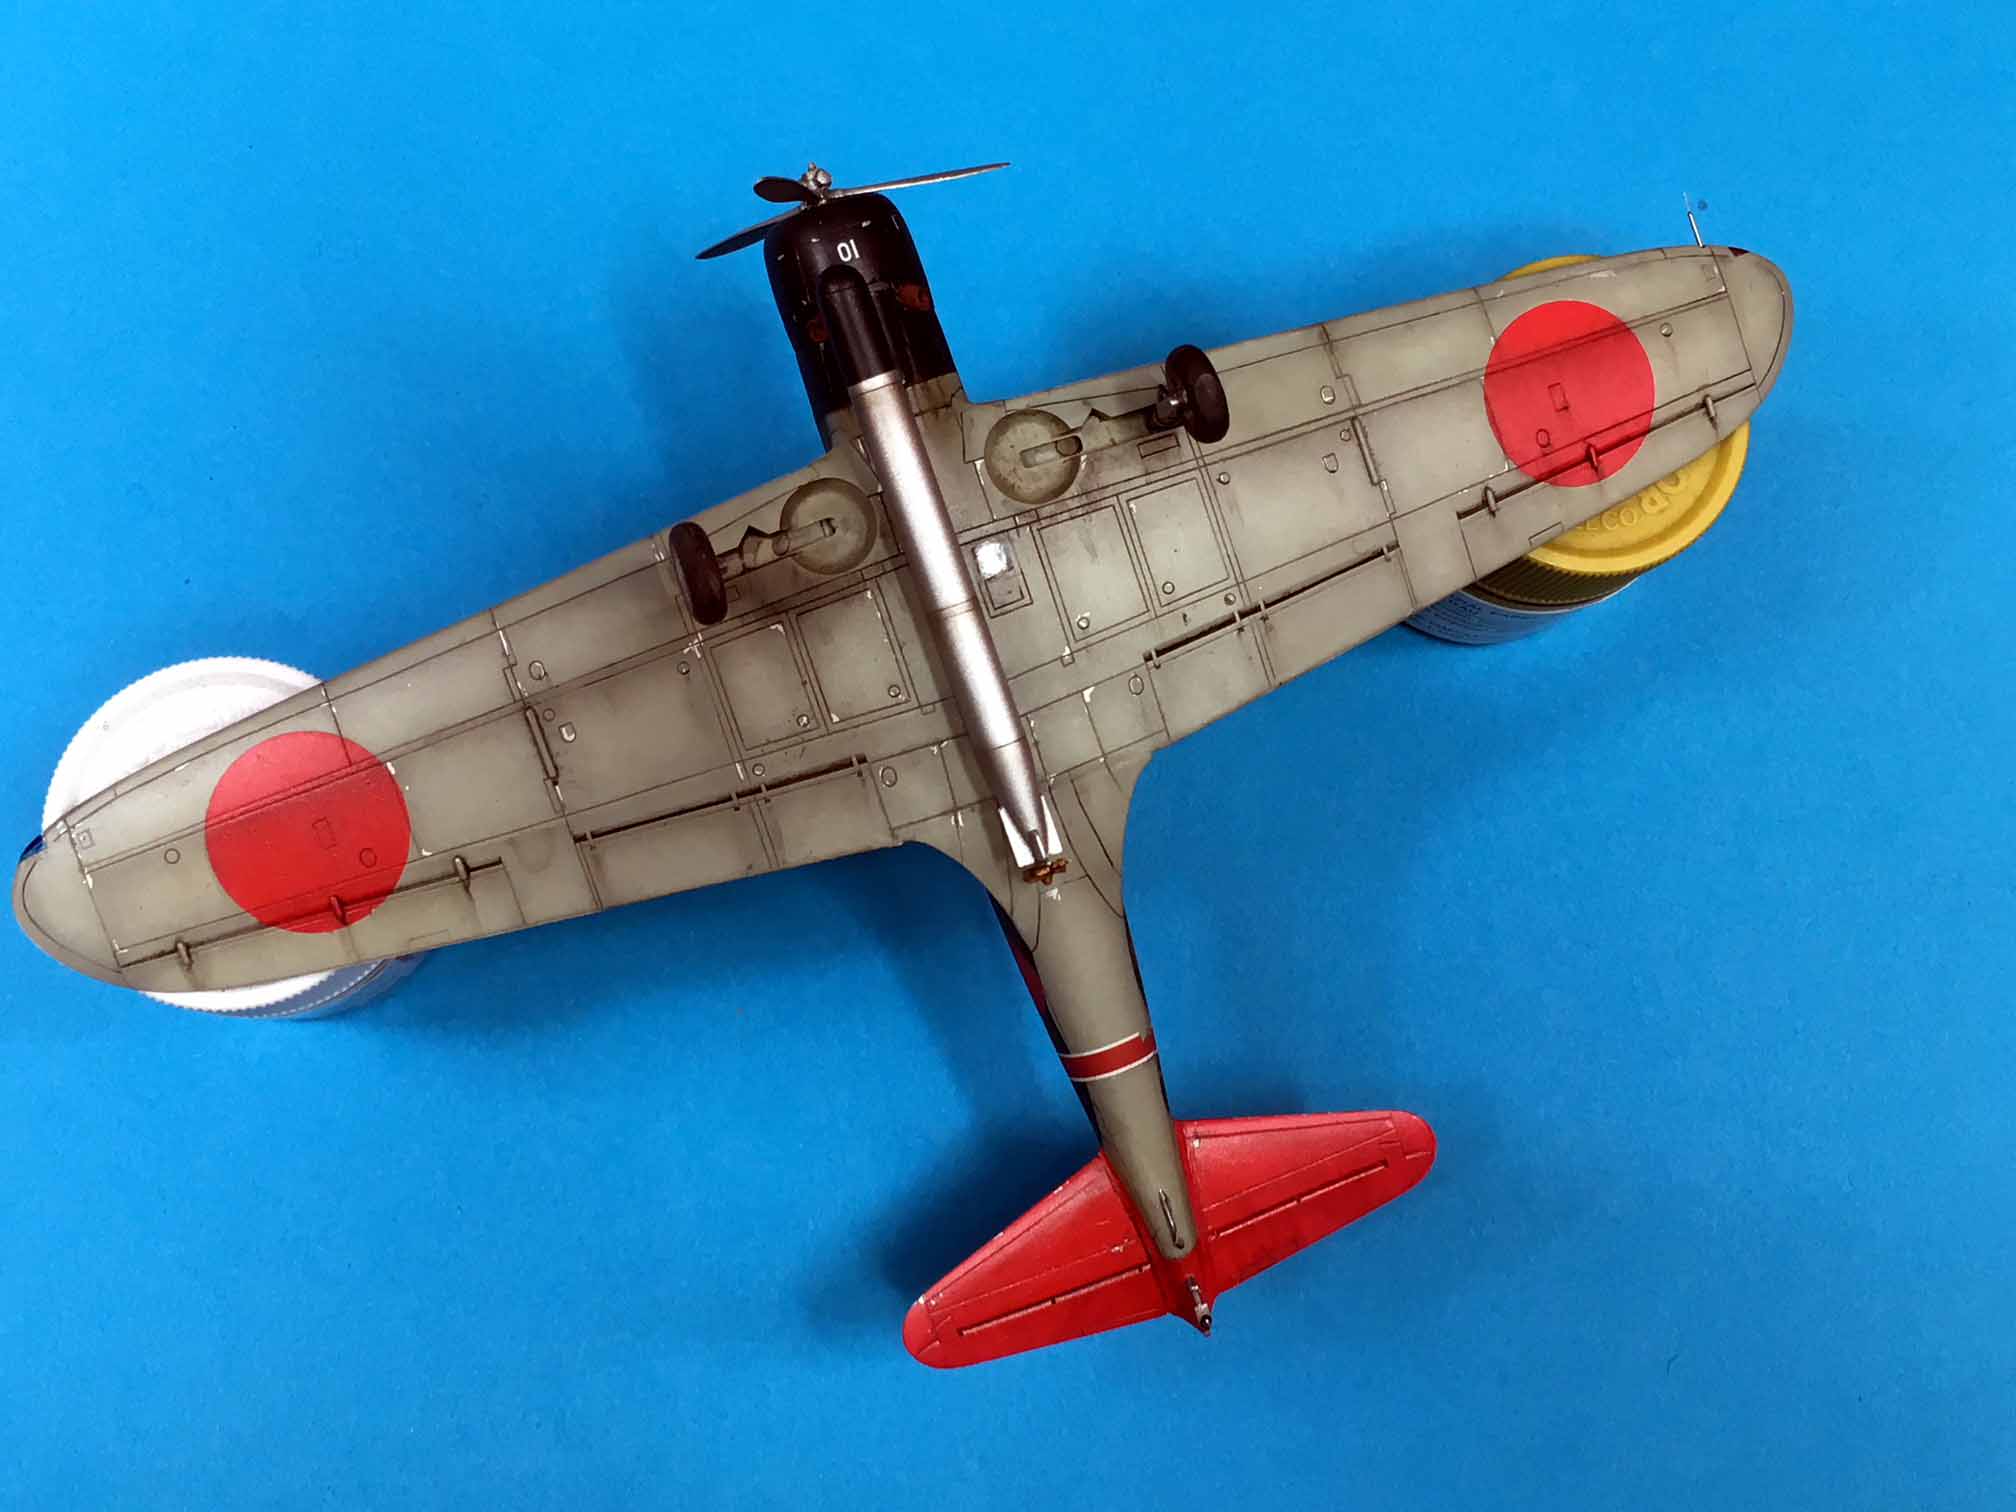
Tamiya 1:48 F4U-1D Corsair
I haven't posted an update in a while but I've been making progress. I finished detailing the cockpit then closed up the fuselage halves, which is when I ran into my first minor snag of the build.
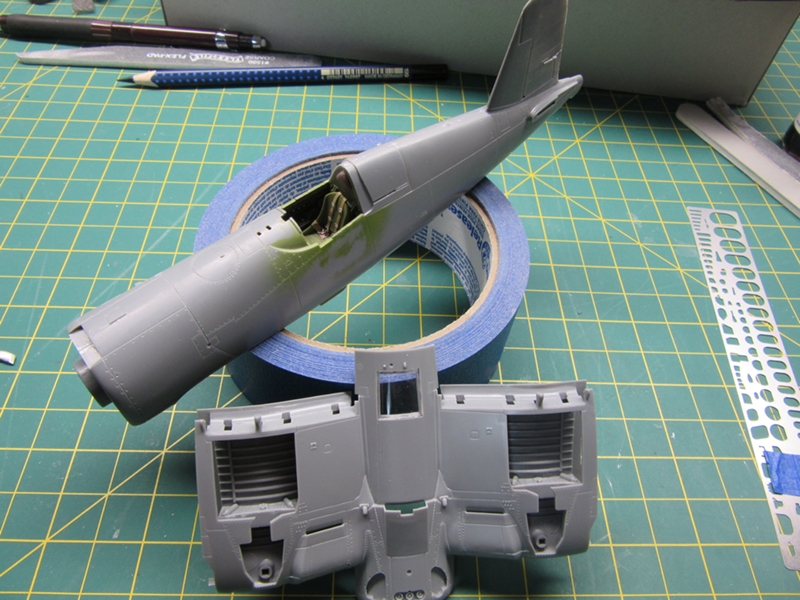
For some reason there was a bit of a ridge where the halves joined, and I had to sand down the entire seam line on the upper surface. At least it wasn't a step that would have required a lot of filler and smoothing out.
Unfortunately, the sanding wiped out a lot of the surface detail on top. I need to rescribe a few lines and replace a lot of rivets. I also need to replace a few bits of raised detail which is what I worked on today.
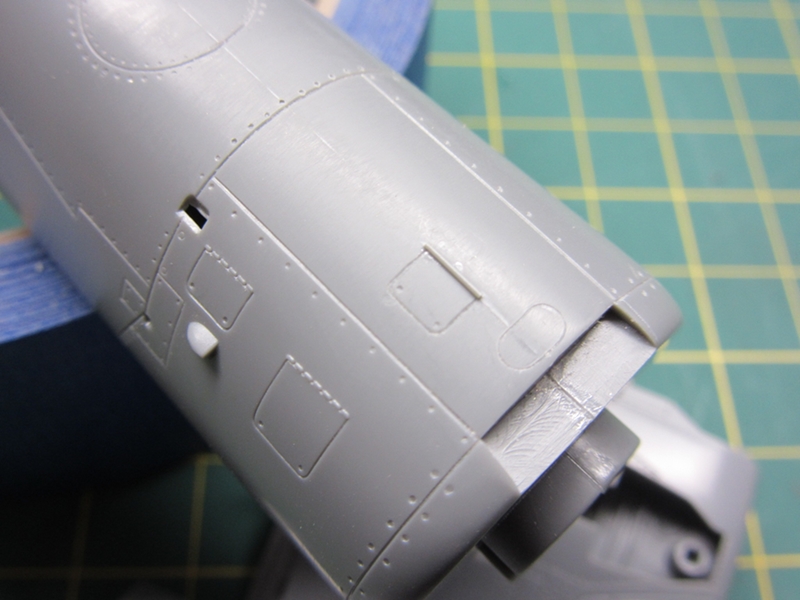
After rescribing the access hatches on the nose with my Verlinden templates, I glued down a bit of stretched sprue to try to recreate the lost hinges. Once its had time to cure overnight I'll touch it up with a scalpel and a razor saw to add the hinge guides. I also began replacing the lost rivets by lightly drilling divots into the surface with a #80 bit.
I'll need to fix the fuel tank and oil cap next.
I haven't posted an update in a while but I've been making progress. I finished detailing the cockpit then closed up the fuselage halves, which is when I ran into my first minor snag of the build.
For some reason there was a bit of a ridge where the halves joined, and I had to sand down the entire seam line on the upper surface. At least it wasn't a step that would have required a lot of filler and smoothing out.
Unfortunately, the sanding wiped out a lot of the surface detail on top. I need to rescribe a few lines and replace a lot of rivets. I also need to replace a few bits of raised detail which is what I worked on today.
After rescribing the access hatches on the nose with my Verlinden templates, I glued down a bit of stretched sprue to try to recreate the lost hinges. Once its had time to cure overnight I'll touch it up with a scalpel and a razor saw to add the hinge guides. I also began replacing the lost rivets by lightly drilling divots into the surface with a #80 bit.
I'll need to fix the fuel tank and oil cap next.

TacFireGuru
Joined: December 25, 2004
KitMaker: 3,770 posts
AeroScale: 201 posts

Posted: Tuesday, November 14, 2017 - 07:12 AM UTC
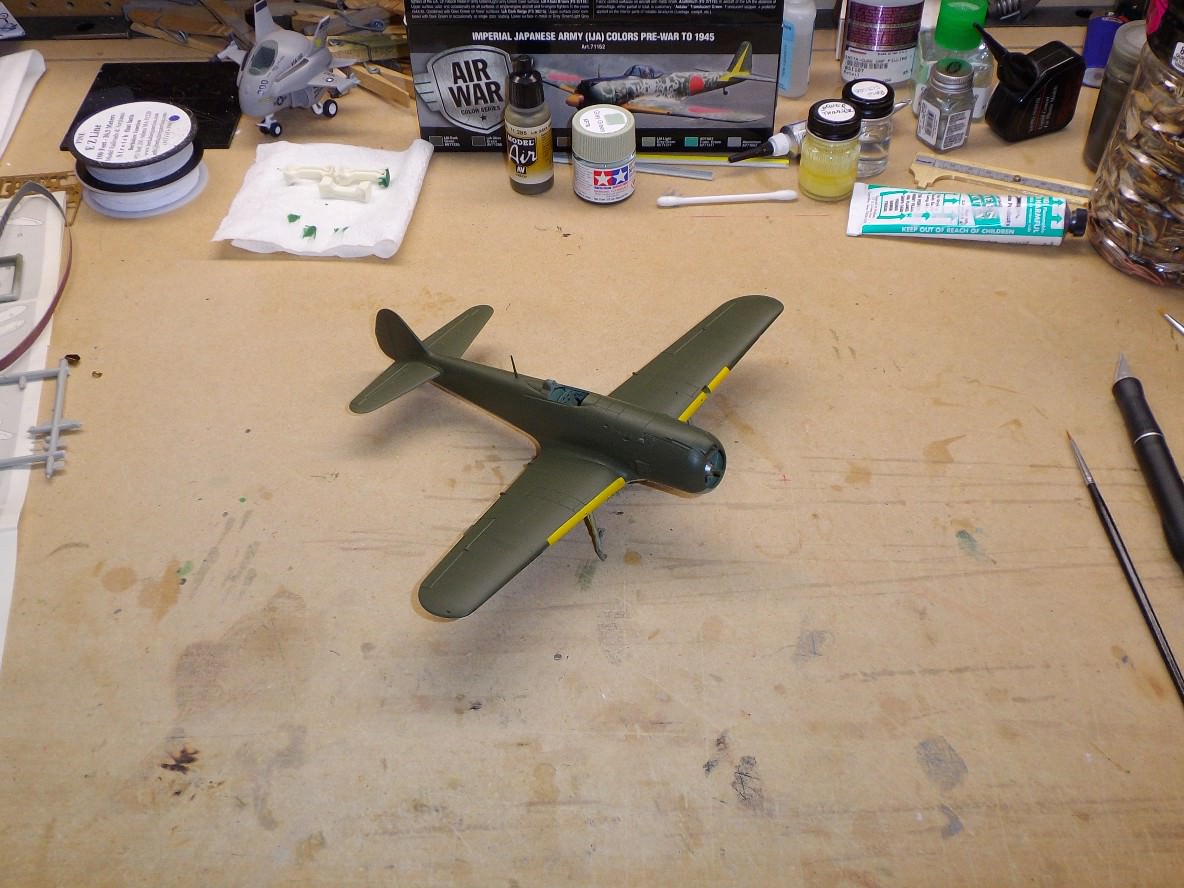
A little more on the Frank.
I really don't know if the yellow is the right "shade," but Chrome Yellow is a "see through" color, so that didn't work.
Mike
I really don't know if the yellow is the right "shade," but Chrome Yellow is a "see through" color, so that didn't work.
Mike

c4willy
#305
Joined: February 01, 2006
KitMaker: 1,673 posts
AeroScale: 1,517 posts
Posted: Tuesday, November 14, 2017 - 02:41 PM UTC
Mike I thought the wing leading edges were an orange yellow is this incorrect for the Frank?
TacFireGuru
Joined: December 25, 2004
KitMaker: 3,770 posts
AeroScale: 201 posts
Posted: Tuesday, November 14, 2017 - 07:38 PM UTC
Quoted Text
Mike I thought the wing leading edges were an orange yellow is this incorrect for the Frank?
I'll go digging around for other Frank instructions to see if I can see what they suggest.
edit: Tamiya shows "orange" for the color and all the other kits I could find use decals. Time to mix some colors and repaint? Or, hit it with one light coat of clear orange...
Mike
c4willy
#305
Joined: February 01, 2006
KitMaker: 1,673 posts
AeroScale: 1,517 posts
Posted: Wednesday, November 15, 2017 - 12:09 AM UTC
Hi Mike Mr hobby range of paints make (in both an acrylic and a lacquer)an orange yellow for the ID bands that I use eclusively for this purpose. Not sure of the availability in your region.
Antilles
Joined: March 22, 2015
KitMaker: 671 posts
AeroScale: 614 posts
Posted: Wednesday, November 15, 2017 - 01:54 AM UTC
Hello Mike,
just checked my references. Most pictures I found show a yellow color.
Aero Detail 24 of the Ki-84 says:
"...and caution markings were changed to yellow or orange."
Maybe this refers to the leading edge, as well. But, this is a tactical recognition marking. So, paint instructions of Aero Detail show it as a yellow leading edge, too.
Oliver

Scrodes

Joined: July 22, 2012
KitMaker: 771 posts
AeroScale: 763 posts
Posted: Wednesday, November 15, 2017 - 05:54 AM UTC
Correct, the wing ID bands are yellow.
I read somewhere (as I'm running low on WEM Japanese Yellow) that the RLM yellow is a good substitute.
I read somewhere (as I'm running low on WEM Japanese Yellow) that the RLM yellow is a good substitute.
TacFireGuru
Joined: December 25, 2004
KitMaker: 3,770 posts
AeroScale: 201 posts
Posted: Thursday, November 16, 2017 - 06:57 AM UTC
Well, I have a tin of the WEM Japanese Yellow coming (along with a couple others).
I do appreciate the input Gents! Tamiya's yellow is just too yellow.
Mike

I do appreciate the input Gents! Tamiya's yellow is just too yellow.
Mike
Antilles
Joined: March 22, 2015
KitMaker: 671 posts
AeroScale: 614 posts
Posted: Saturday, November 18, 2017 - 09:27 PM UTC
Small update of the my Kate:
Red markings and the tail were painted. Then I applied a pin-wash, followed by some filtering, post-shading and oil stain.
Ready for some matt coat.
Oliver
Red markings and the tail were painted. Then I applied a pin-wash, followed by some filtering, post-shading and oil stain.
Ready for some matt coat.
Oliver
Scrodes
Joined: July 22, 2012
KitMaker: 771 posts
AeroScale: 763 posts
Posted: Sunday, November 19, 2017 - 06:30 AM UTC
Quoted Text
Well, I have a tin of the WEM Japanese Yellow coming (along with a couple others).
Where did you find it? *raised eyebrow*
MichaelSatin

Joined: January 19, 2008
KitMaker: 3,909 posts
AeroScale: 2,904 posts
Posted: Tuesday, November 21, 2017 - 09:27 PM UTC
Very nice work going on here!
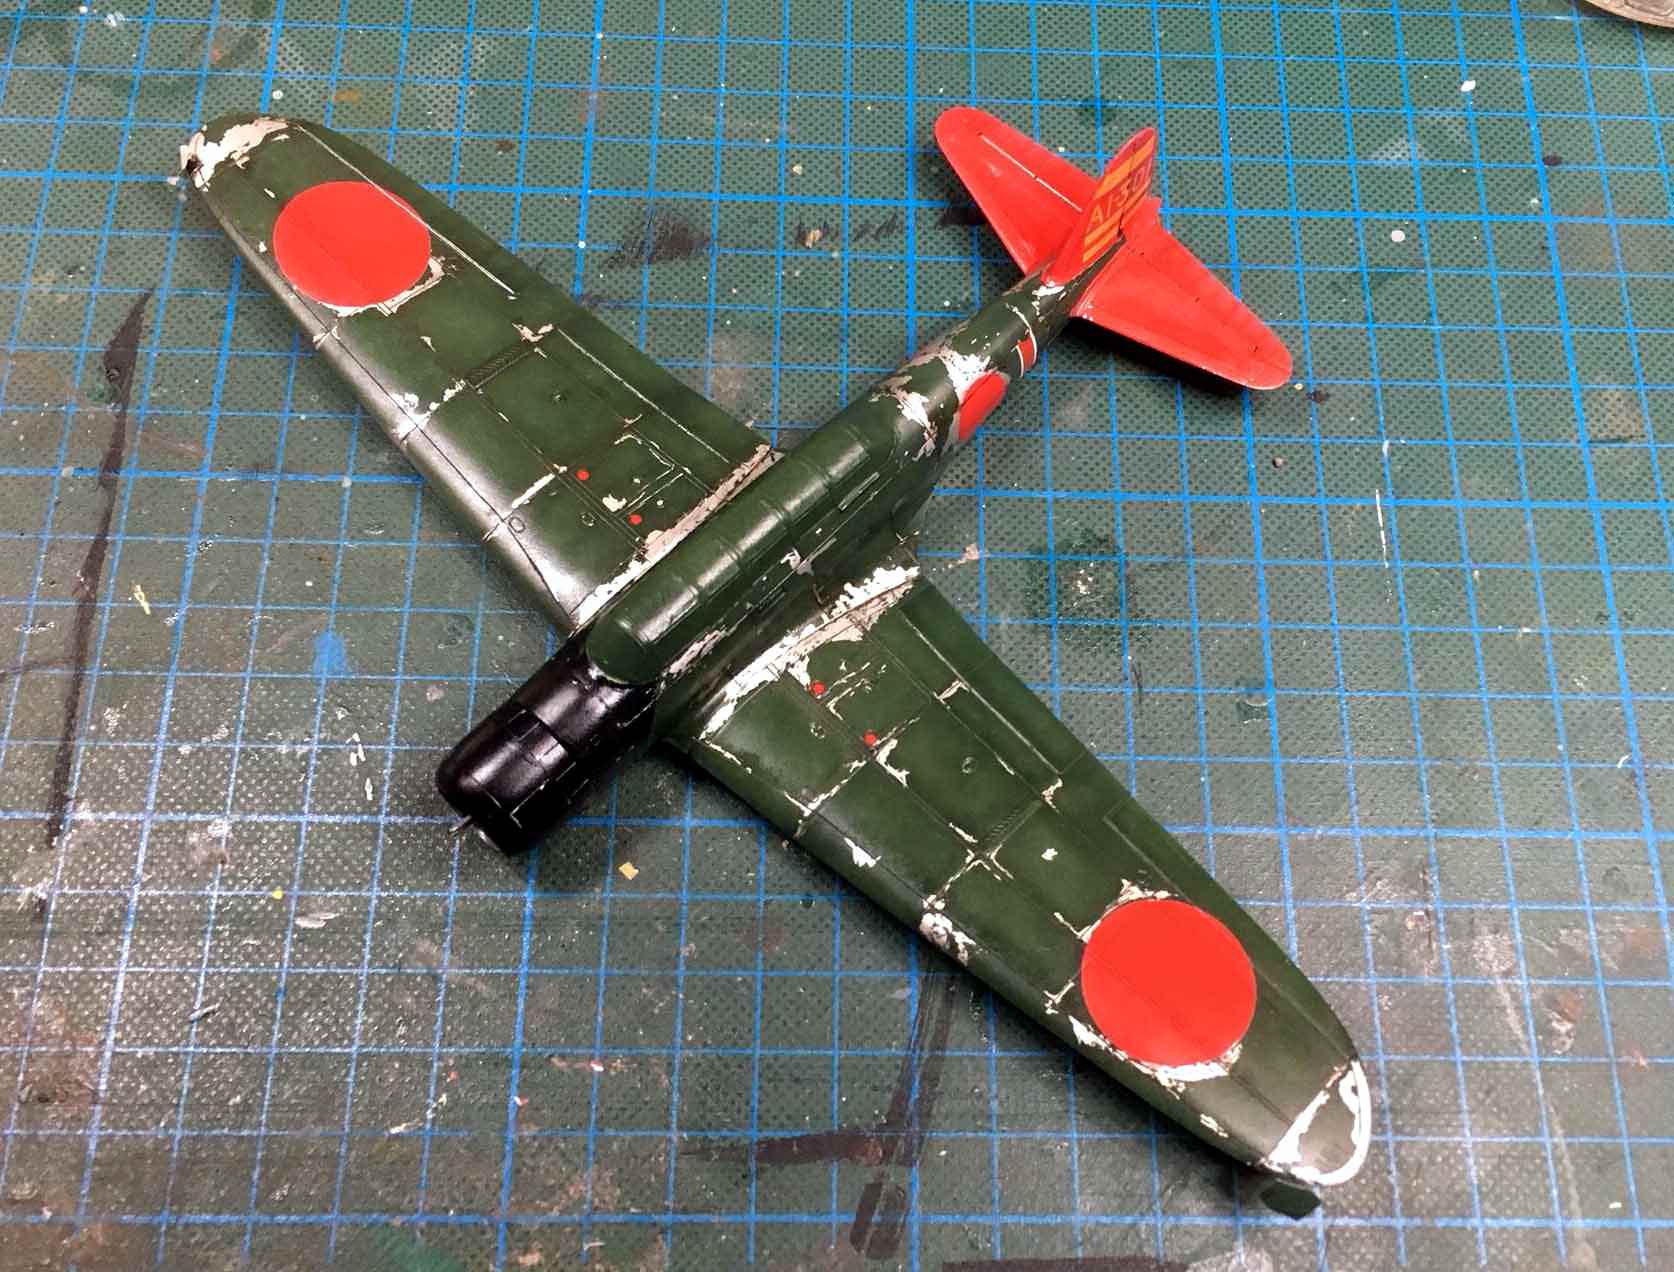
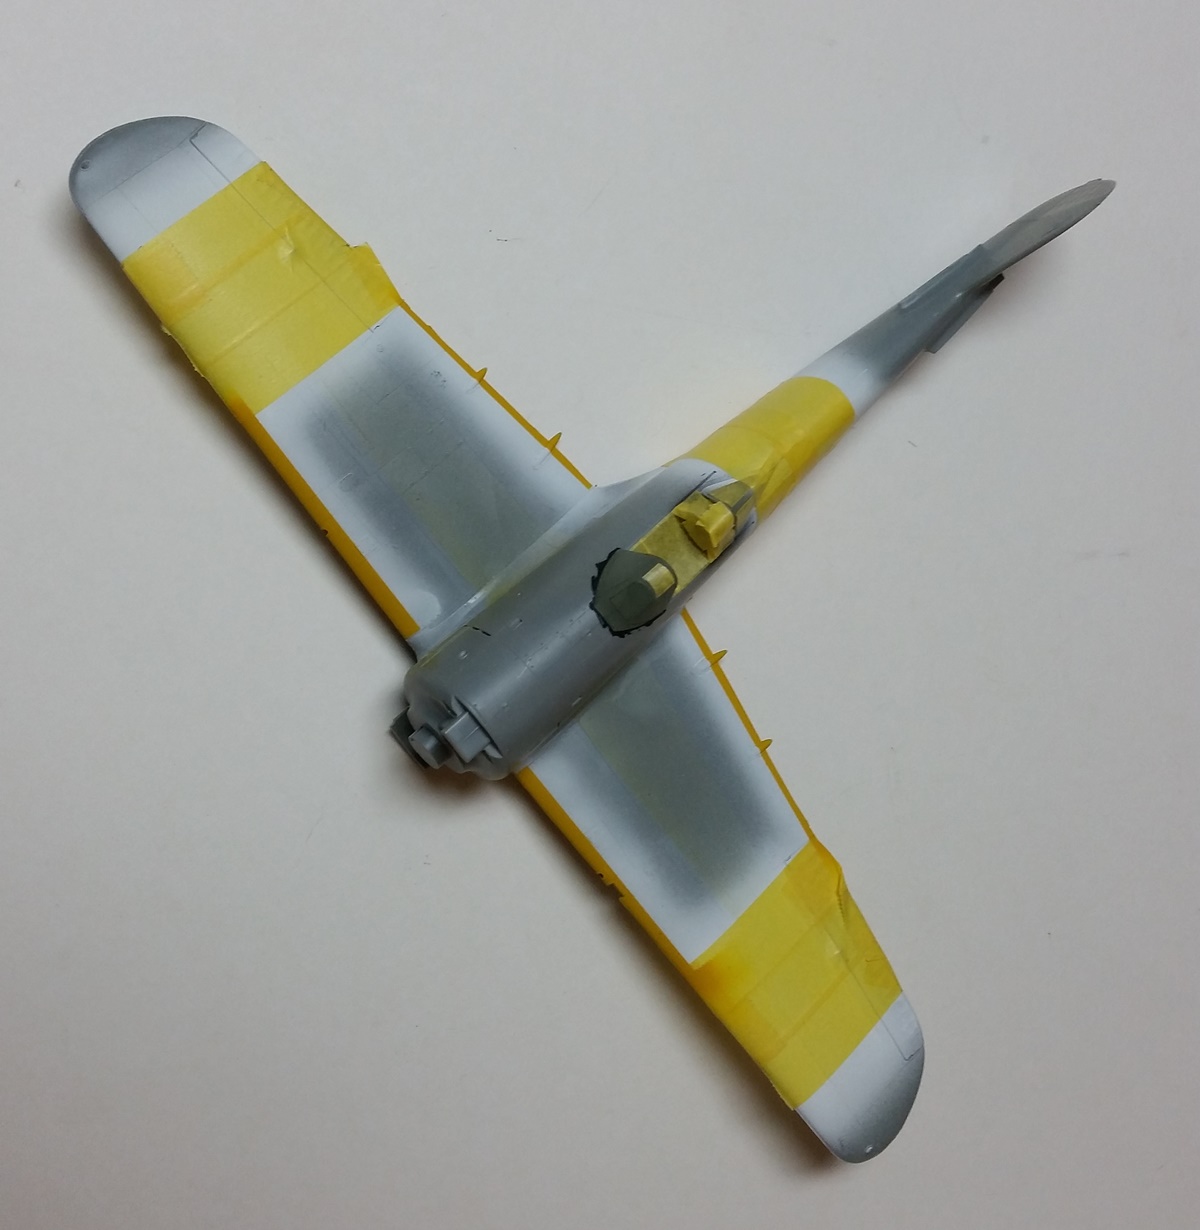
I have been pretty quiet lately (not like me at all!) but I have been stealthily working on my entry. Up to this point I haven't been sure it's what I wanted to do, but given how far I am now I guess it's time to come out of hiding.
I've been working on the Hasegawa 1/32 Ki-84 as part of the F4U vs Ki-84 build. I still don't know if I'll have the time or energy to do the Corsair as well, but here's my progress on the Frank:
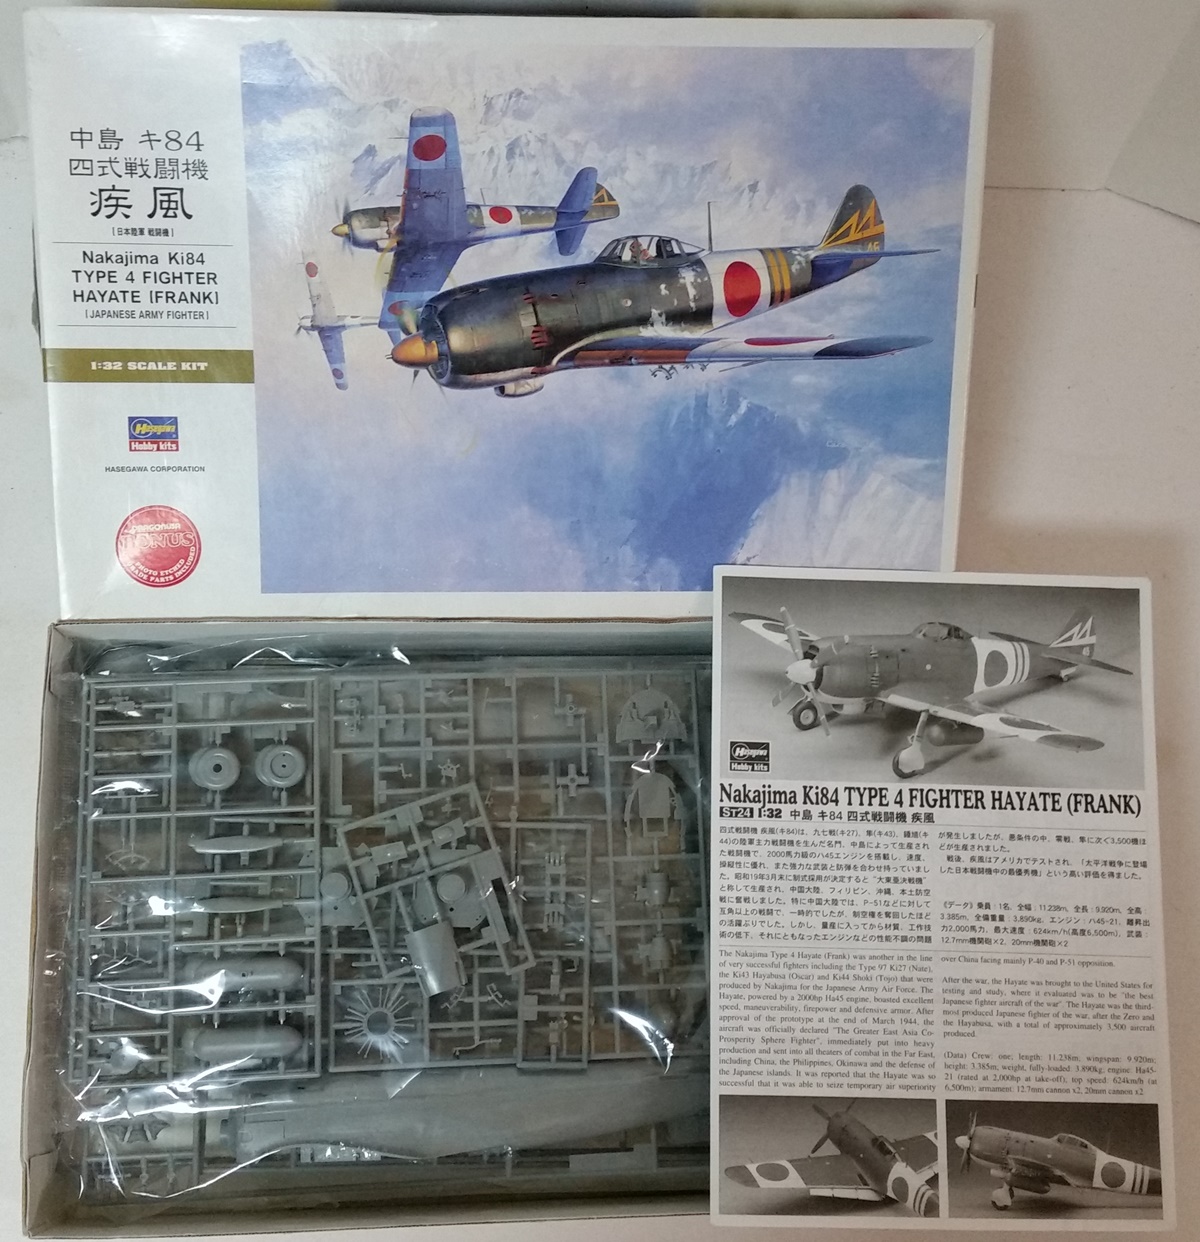
I'm planning on doing the cover art aircraft and decided to paint the big white areas rather than use the provided decals. I'm also going to paint the yellow leading and trailing edges with my dwindling supply of AeroMaster Japanese orange-yellow. I painted those areas white too, since yellow doesn't cover very well. The only things I've added to the kit are Eduard seat belts and some copper wire for the engine.
Michael
I have been pretty quiet lately (not like me at all!) but I have been stealthily working on my entry. Up to this point I haven't been sure it's what I wanted to do, but given how far I am now I guess it's time to come out of hiding.
I've been working on the Hasegawa 1/32 Ki-84 as part of the F4U vs Ki-84 build. I still don't know if I'll have the time or energy to do the Corsair as well, but here's my progress on the Frank:
I'm planning on doing the cover art aircraft and decided to paint the big white areas rather than use the provided decals. I'm also going to paint the yellow leading and trailing edges with my dwindling supply of AeroMaster Japanese orange-yellow. I painted those areas white too, since yellow doesn't cover very well. The only things I've added to the kit are Eduard seat belts and some copper wire for the engine.
Michael
greif8
Joined: January 17, 2006
KitMaker: 673 posts
AeroScale: 492 posts
Posted: Saturday, November 25, 2017 - 01:57 AM UTC
Hi all, I returned from a 10 day long business trip on Wednesday and I see that a lot has been done during that time.
Everyone's builds are coming along nicely and looking very good. Below are a few shots of where I am with my build. The small parts are ready for gloss coating prior to the first step in weathering for me, which is always a wash. The Dauntless is decaled and ready to be cleaned then gloss coated and afterwards weathered as well. I decided to build an aircraft based out of Henderson Field on Guadalcanal sometime during late 1942 and early 1943. If I am lucky, I will be able to get the above tasks at least started tomorrow.
Ernest
 DSC03675 (2) by Ernest Roth, on Flickr
 DSC03676 by Ernest Roth, on Flickr
 DSC03678 by Ernest Roth, on Flickr
 DSC03679 by Ernest Roth, on Flickr
 DSC03681 by Ernest Roth, on Flickr
Everyone's builds are coming along nicely and looking very good. Below are a few shots of where I am with my build. The small parts are ready for gloss coating prior to the first step in weathering for me, which is always a wash. The Dauntless is decaled and ready to be cleaned then gloss coated and afterwards weathered as well. I decided to build an aircraft based out of Henderson Field on Guadalcanal sometime during late 1942 and early 1943. If I am lucky, I will be able to get the above tasks at least started tomorrow.
Ernest
DSC03675 (2) by Ernest Roth, on FlickrDSC03676 by Ernest Roth, on FlickrDSC03678 by Ernest Roth, on FlickrDSC03679 by Ernest Roth, on FlickrDSC03681 by Ernest Roth, on FlickrAntilles
Joined: March 22, 2015
KitMaker: 671 posts
AeroScale: 614 posts
Posted: Saturday, November 25, 2017 - 05:45 AM UTC
Michael:
Nice start of Your Hayate. Cockpit area looks nice and the fit seems to be good.
Ernest:
Very nice progress. The cockpit framing looks spot on. And the brake lines of the landing gear are great!
Finished my Kate today. Applied some matt coat and fixed the remaining parts. So here it is. Hasegawas B5N2 Kate in 1/72 scale:
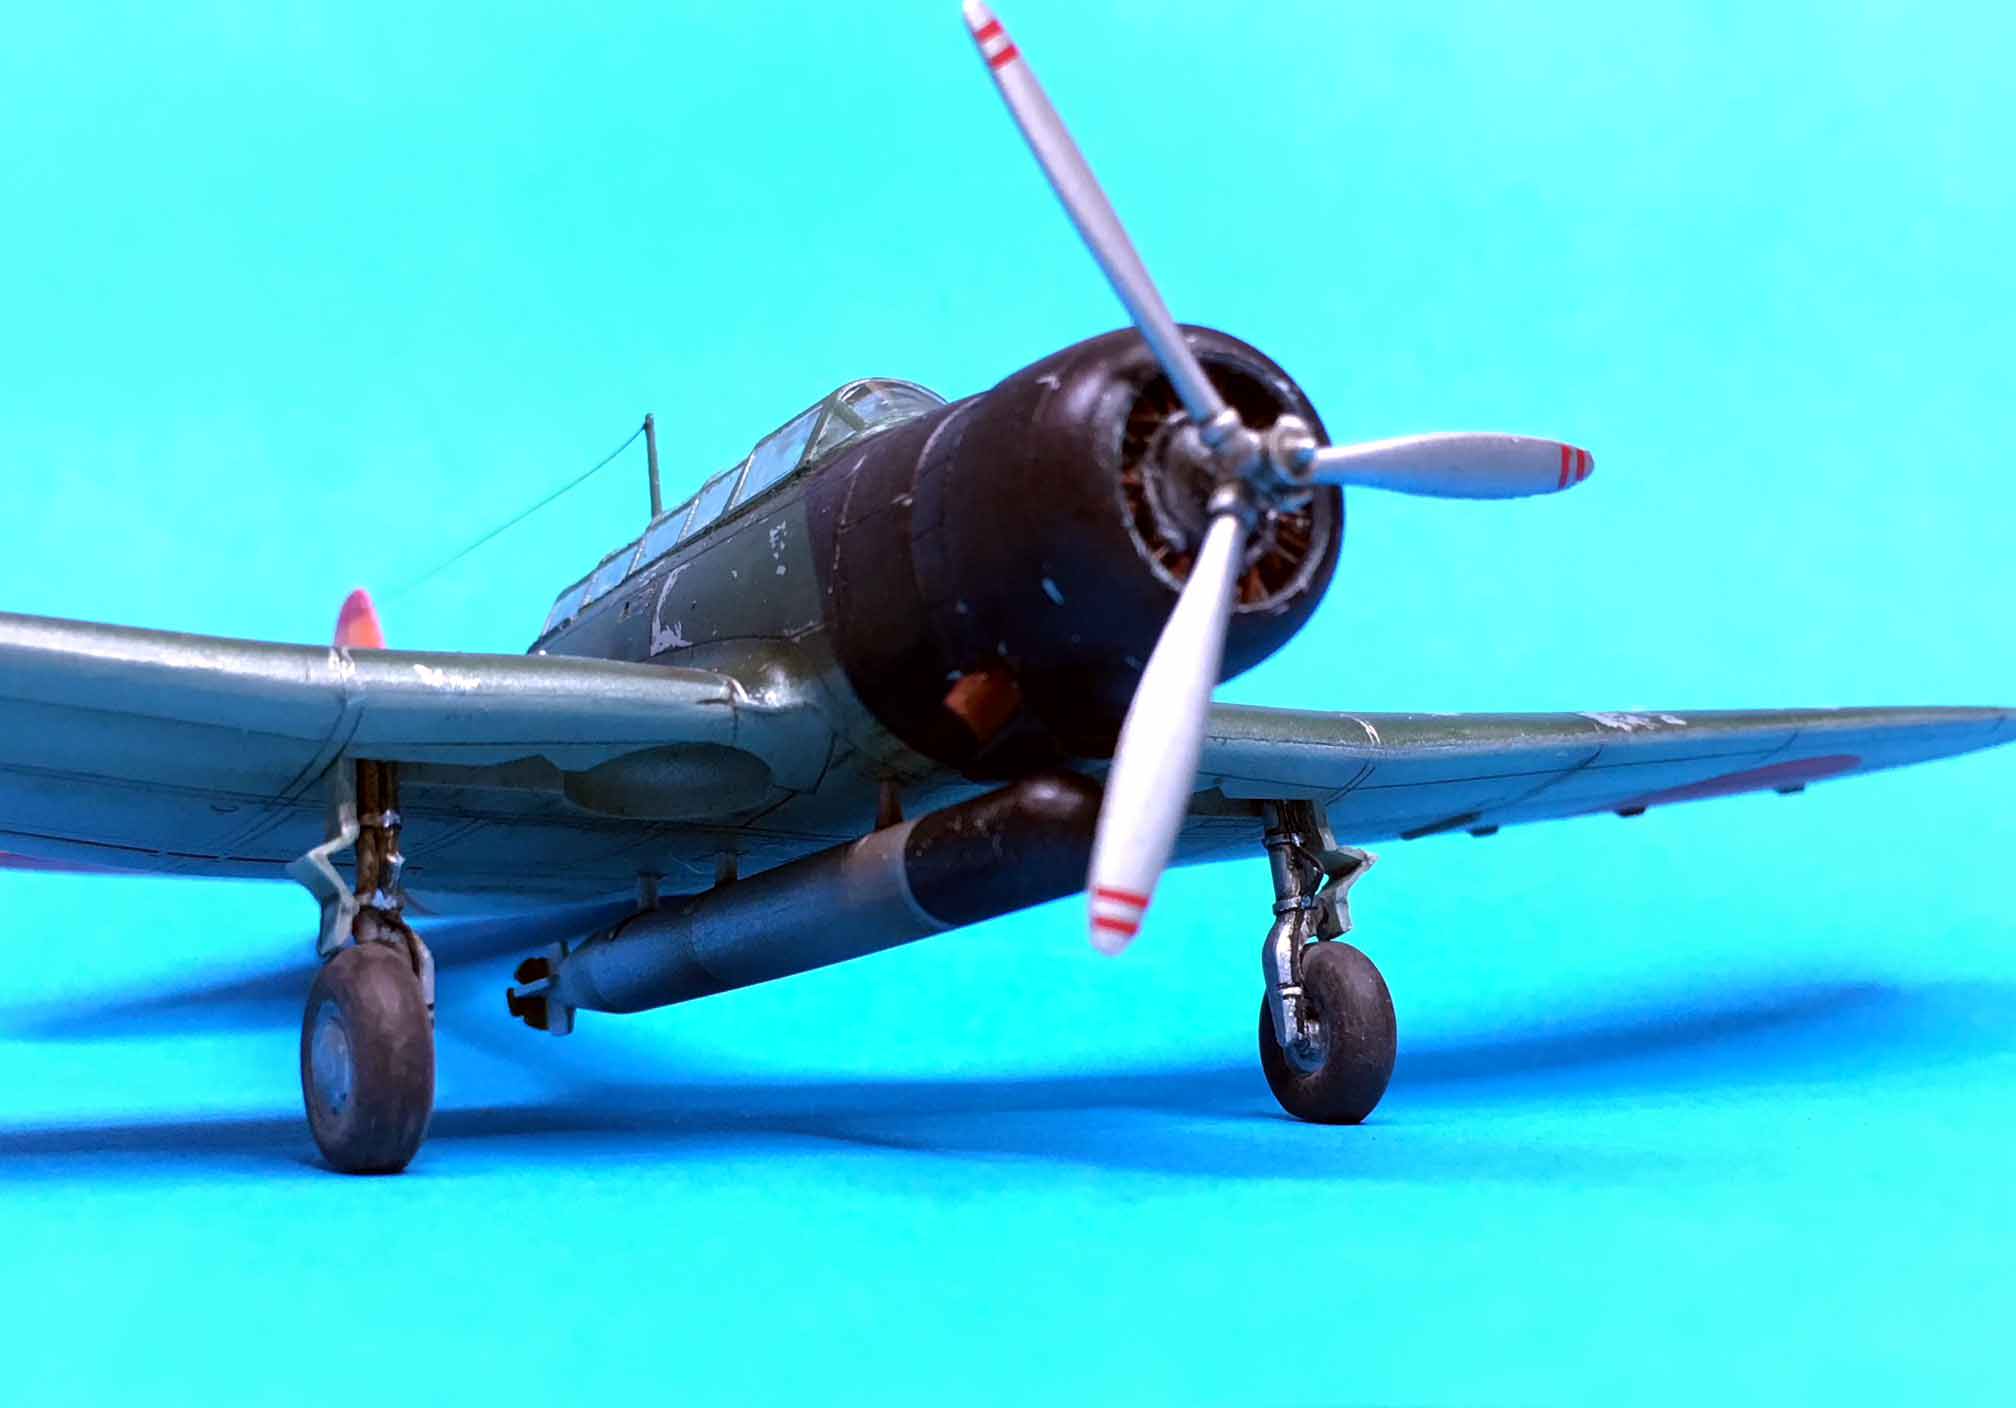
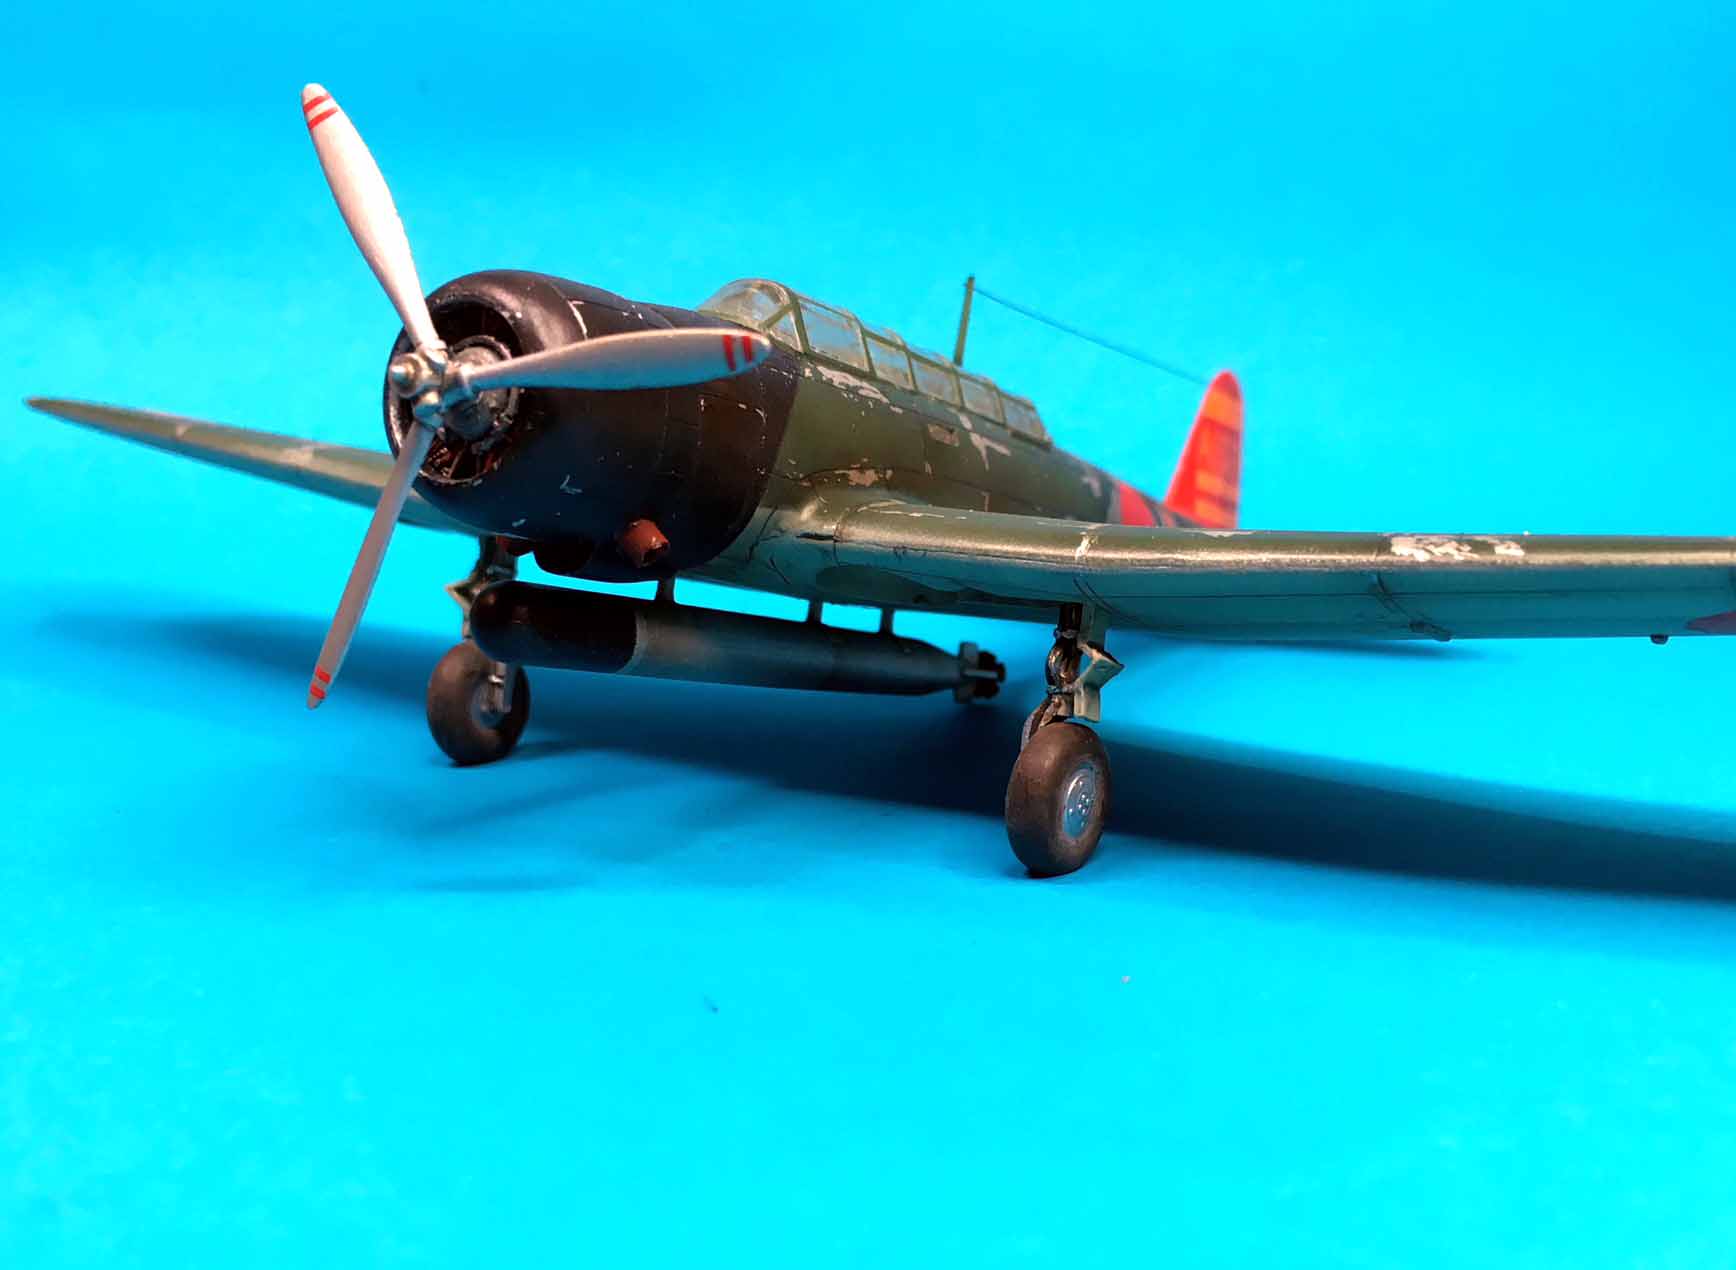
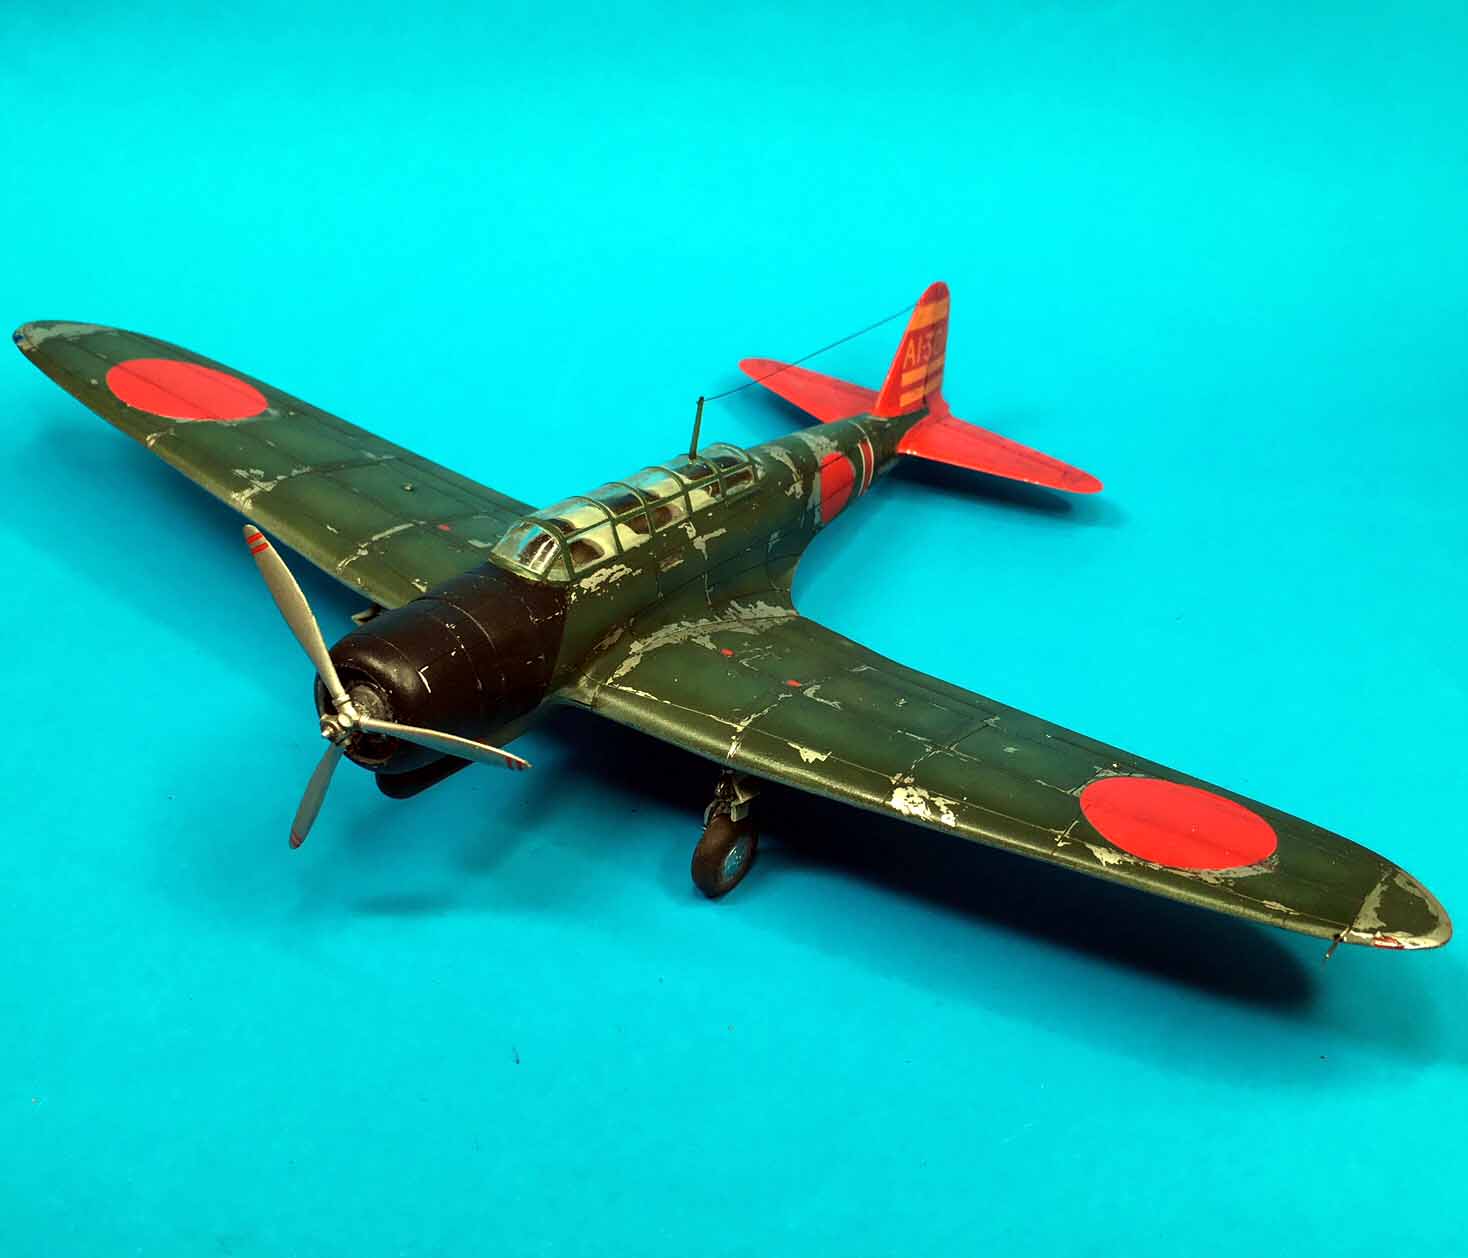
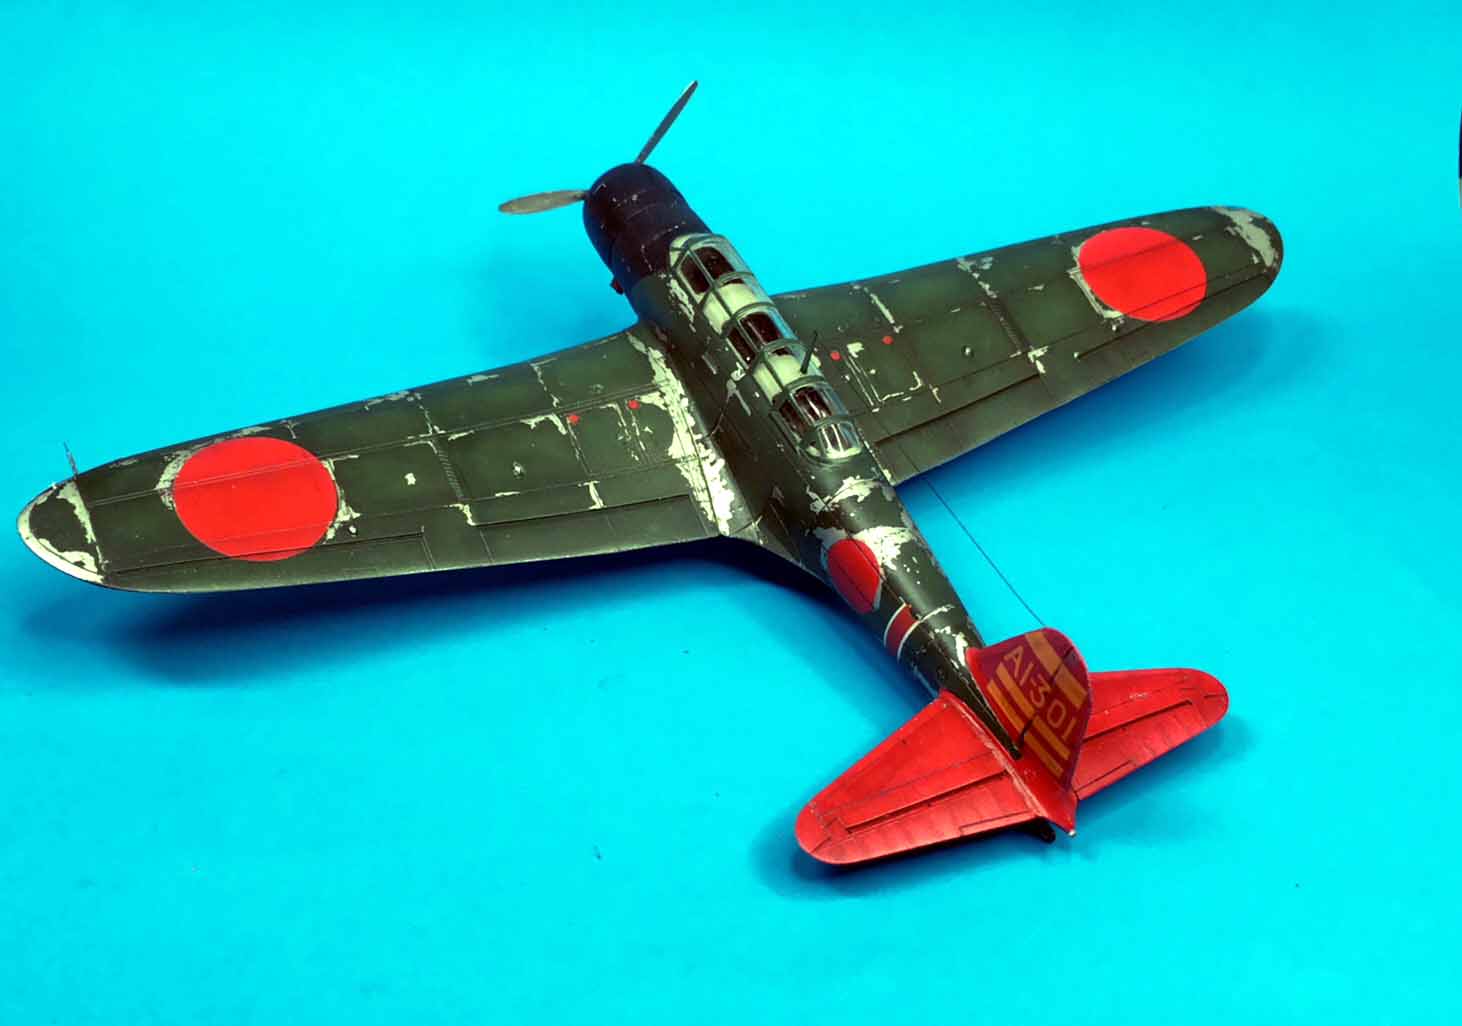
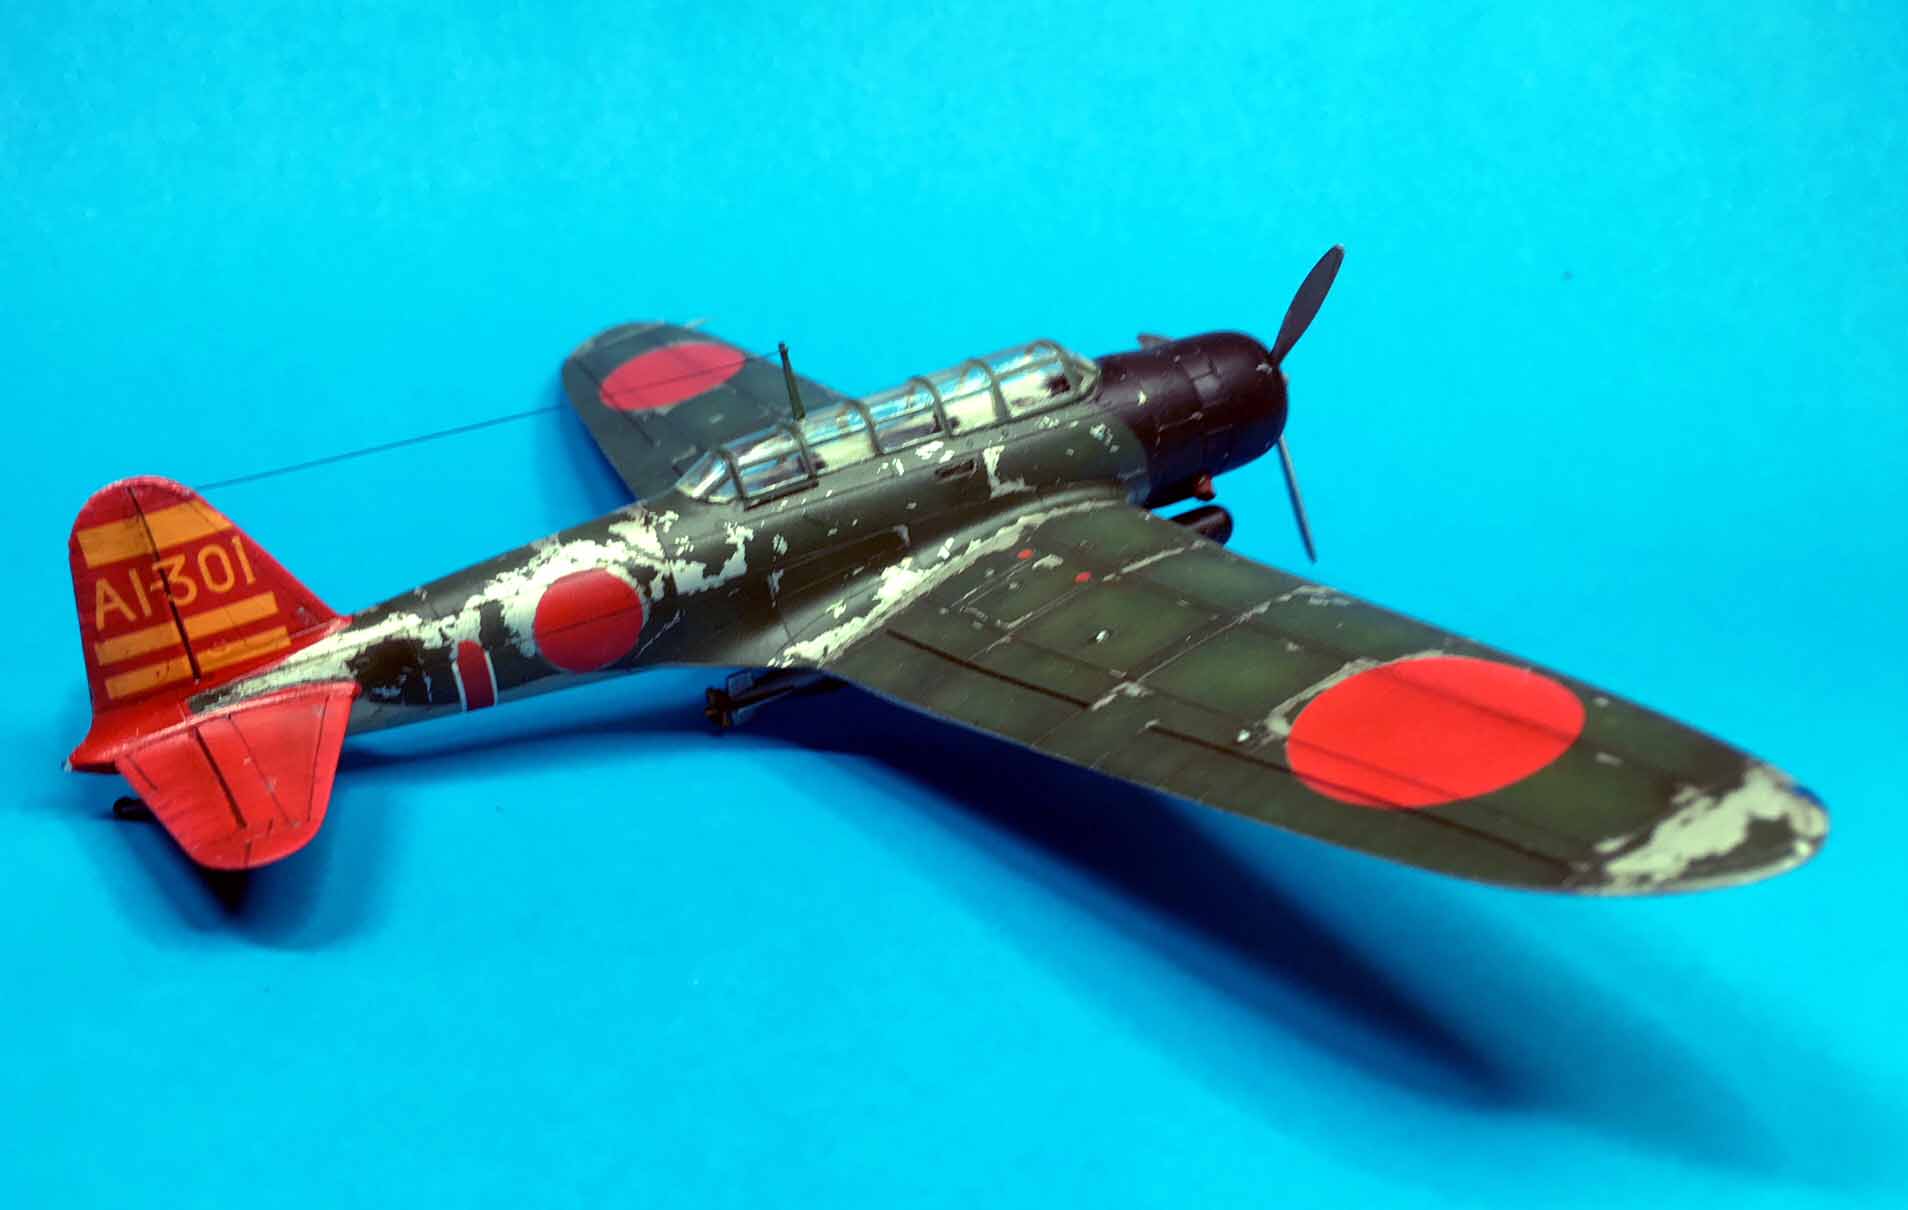
Hope You like it. Next will be the set up of a small diorama!
Oliver
Nice start of Your Hayate. Cockpit area looks nice and the fit seems to be good.
Ernest:
Very nice progress. The cockpit framing looks spot on. And the brake lines of the landing gear are great!
Finished my Kate today. Applied some matt coat and fixed the remaining parts. So here it is. Hasegawas B5N2 Kate in 1/72 scale:
Hope You like it. Next will be the set up of a small diorama!
Oliver
MichaelSatin
Joined: January 19, 2008
KitMaker: 3,909 posts
AeroScale: 2,904 posts
Posted: Saturday, November 25, 2017 - 06:08 AM UTC
Ernest: Looking good!
Oliver: Great job!
I'm plugging along, hopefully throwing some gray paint at Frank tomorrow.
Michael
Oliver: Great job!
I'm plugging along, hopefully throwing some gray paint at Frank tomorrow.
Michael
greif8
Joined: January 17, 2006
KitMaker: 673 posts
AeroScale: 492 posts
Posted: Saturday, November 25, 2017 - 03:22 PM UTC
Hi Oliver your Kate looks very good. I think you did a great job getting the paint chipping in large areas. I have never tried to replicate such large areas of chipping when I use the hairspray technique; I would probably mess it up pretty bad if I did.
Ernest
Ernest
MichaelSatin
Joined: January 19, 2008
KitMaker: 3,909 posts
AeroScale: 2,904 posts
Posted: Saturday, November 25, 2017 - 08:33 PM UTC
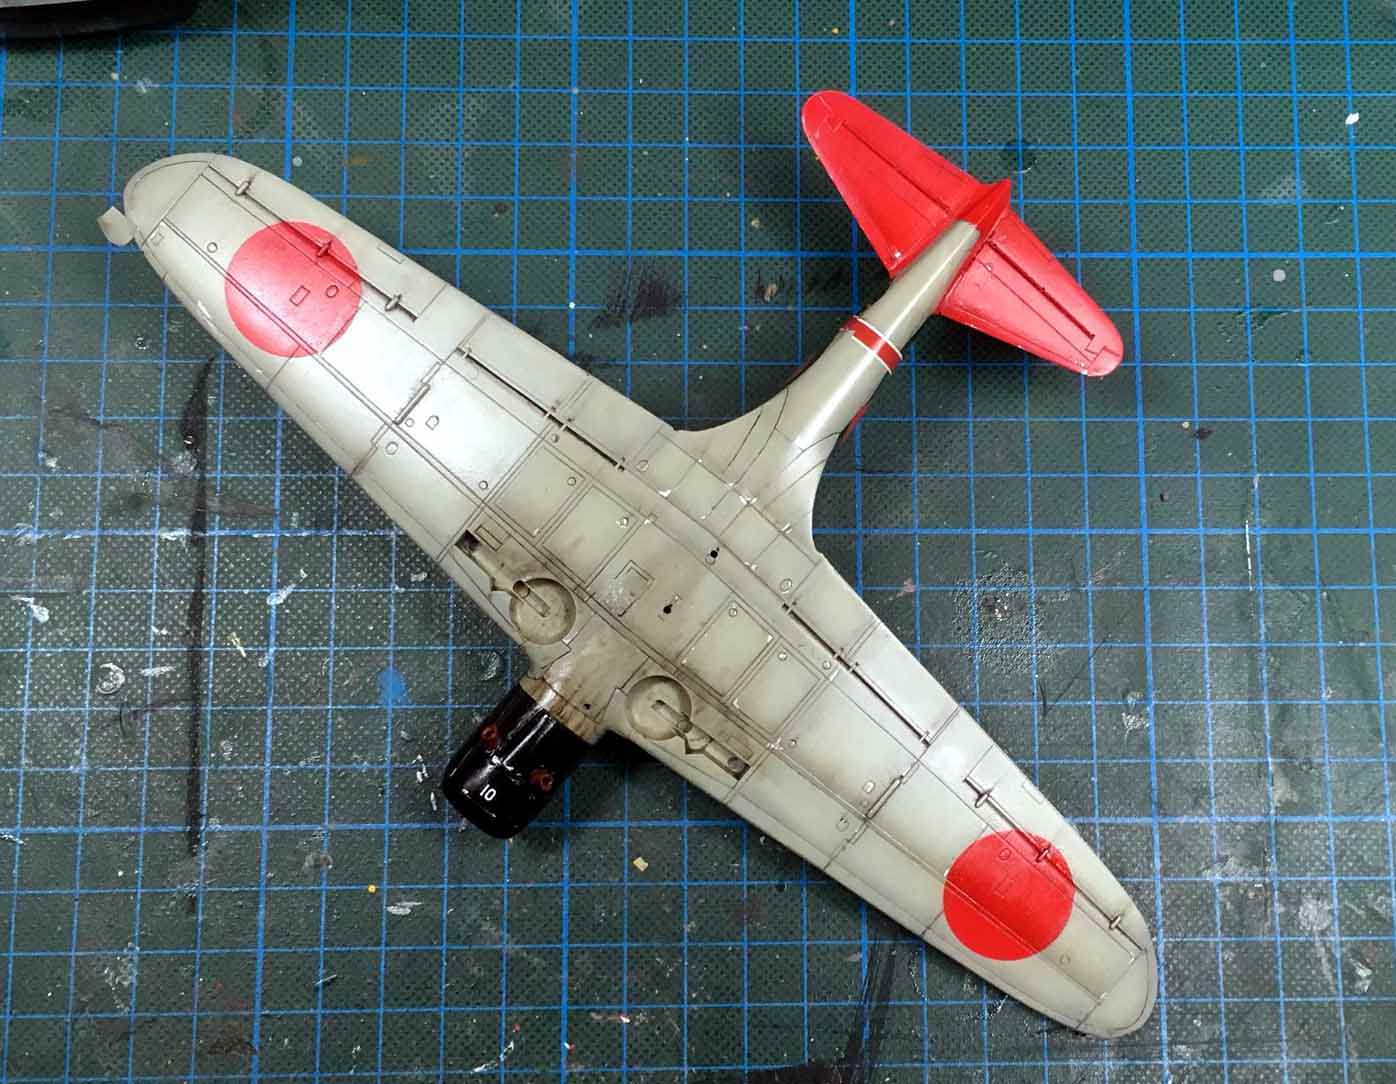
Well, got the yellow on the Frank. Still hoping to paint the undersides gray today, I'm planning on using good old Tamiya IJA Green and Grey.
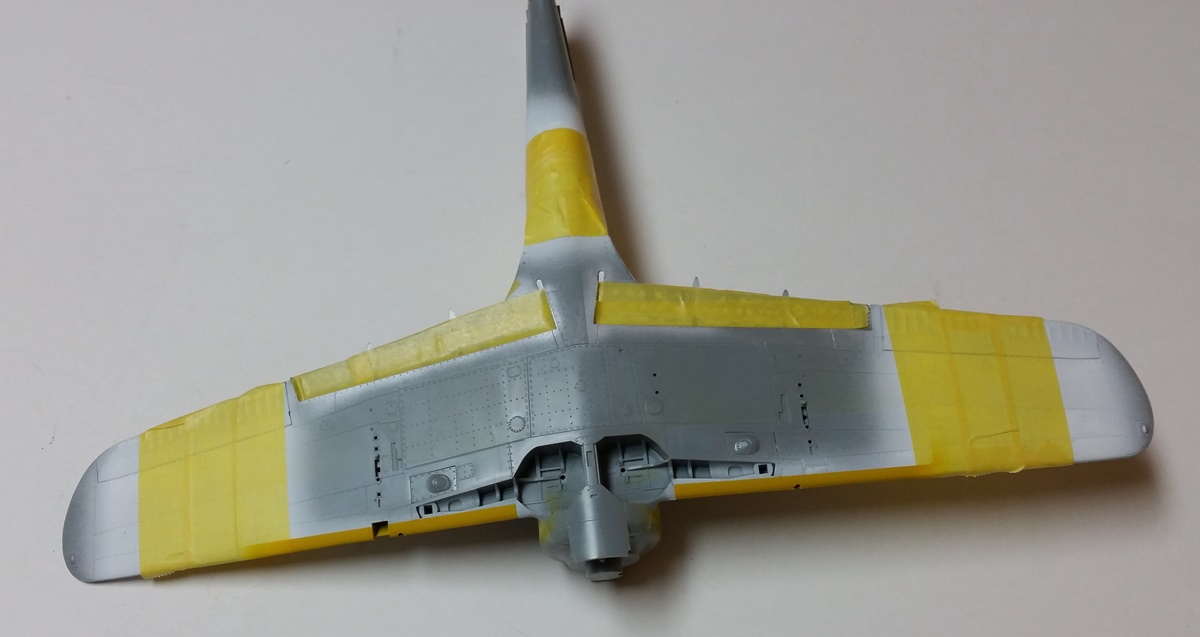
Michael
Michael

mrockhill
Joined: June 17, 2009
KitMaker: 566 posts
AeroScale: 507 posts
Posted: Saturday, November 25, 2017 - 08:51 PM UTC
Michael, great subject choice! That hayate is going to look really nice amoung your other 1/32 builds
Ernest, the paint work on your SBD looks fantastic I cant wait to see how it turns out!
Oliver, Congrats on finishing your Kate it looks excellent! I was just admiring my copy of this kit the other day. Beautiful little kit hard to imagine its as old as it is.
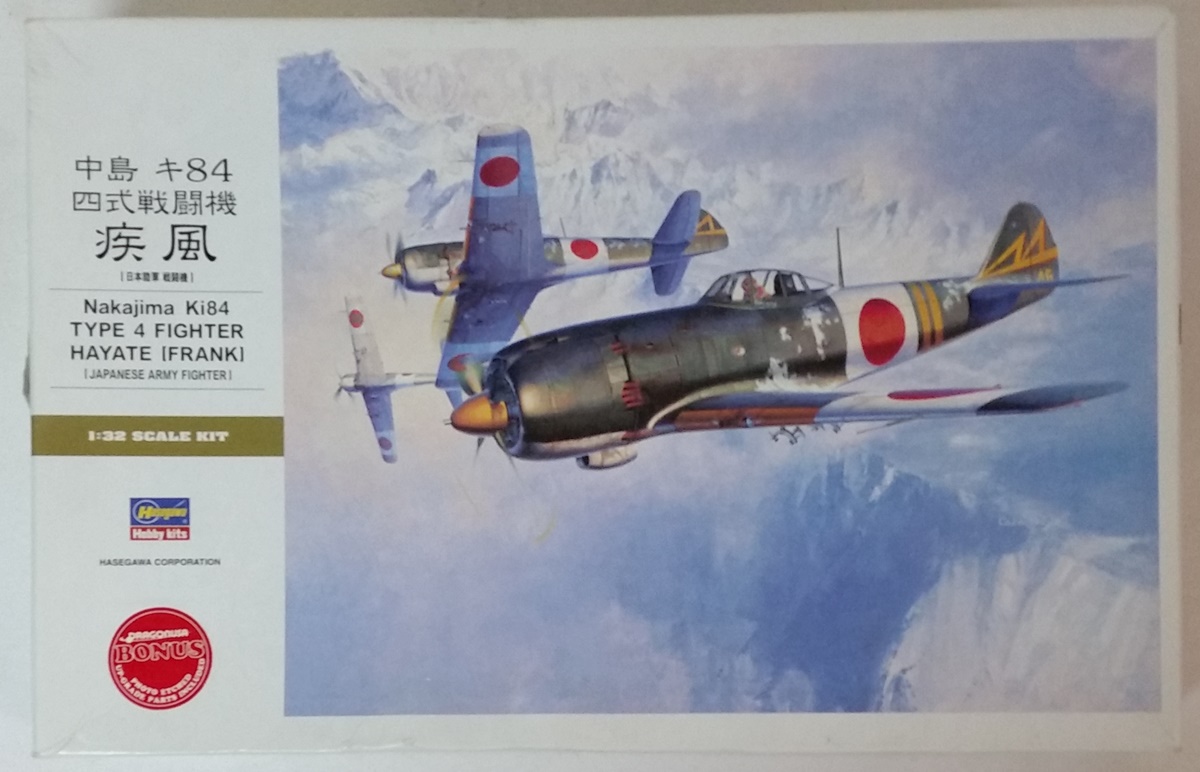
As for myself Ive decided to change subjects and switch sides. I will be building a hasegawa 1/72 a6m5 zero in the markings of Tetsuzo Iwamoto, 53-104 shown here on the box.
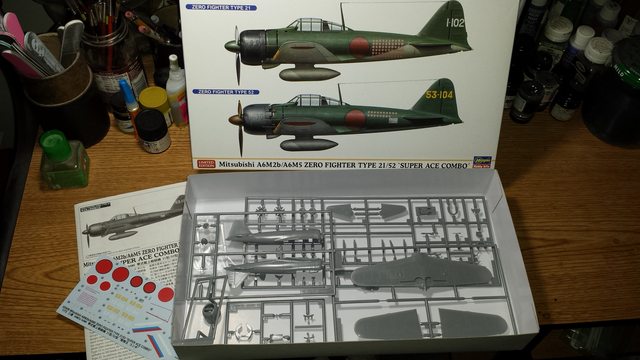
Ive been working on the a6m2 out of this combo kit for the pearl harbor campaign and having a great time with it. So I figure I should build the other as I have all my zero references out and this half empty kit in the stash.
Ernest, the paint work on your SBD looks fantastic I cant wait to see how it turns out!
Oliver, Congrats on finishing your Kate it looks excellent! I was just admiring my copy of this kit the other day. Beautiful little kit hard to imagine its as old as it is.
As for myself Ive decided to change subjects and switch sides. I will be building a hasegawa 1/72 a6m5 zero in the markings of Tetsuzo Iwamoto, 53-104 shown here on the box.
Ive been working on the a6m2 out of this combo kit for the pearl harbor campaign and having a great time with it. So I figure I should build the other as I have all my zero references out and this half empty kit in the stash.
 |

WEB HOSTING BY


Copyright ©2021 AeroScale and Kitmaker Network, a subsidiary of Silver Star Enterprises
All Rights Reserved. Please read our Conditions of Use and Privacy Policy.
All Rights Reserved. Please read our Conditions of Use and Privacy Policy.