Air Campaigns
Want to start or join a group build? This is where to start.
OFFICIAL: PTO Campaign
Vicious
_VISITCOMMUNITY
Queensland, Australia
Joined: September 04, 2015
KitMaker: 1,517 posts
AeroScale: 75 posts
Posted: Monday, February 19, 2018 - 06:47 AM UTC

Quoted Text


Quoted Text

Hi Radek,
I wonder if thinning the primer weakened it? How heavy were the subsequent coats?
regards


Thanks Spud, I'm curious about your results.
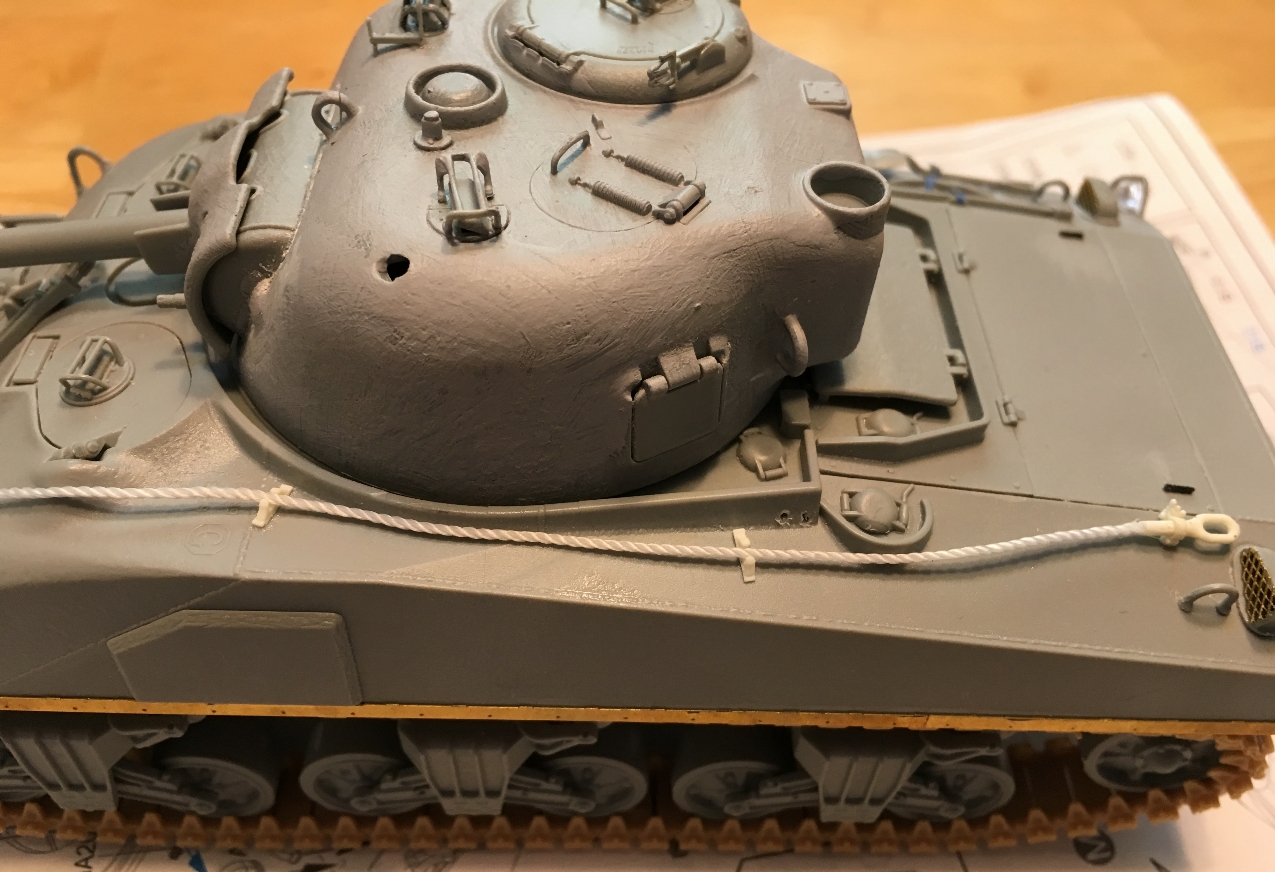
As for coating of primer - I went for 3 coats. I applied light ones, full coverage, with 0.2 nozzle AB. Although I have some problems with keeping my compressor at level pressure I kept it ~15-20PSi.
As said earlier I let the primer dry for several days (business duties didn't give me too much opportunity to continue with painting), so it had plenty time to dry.
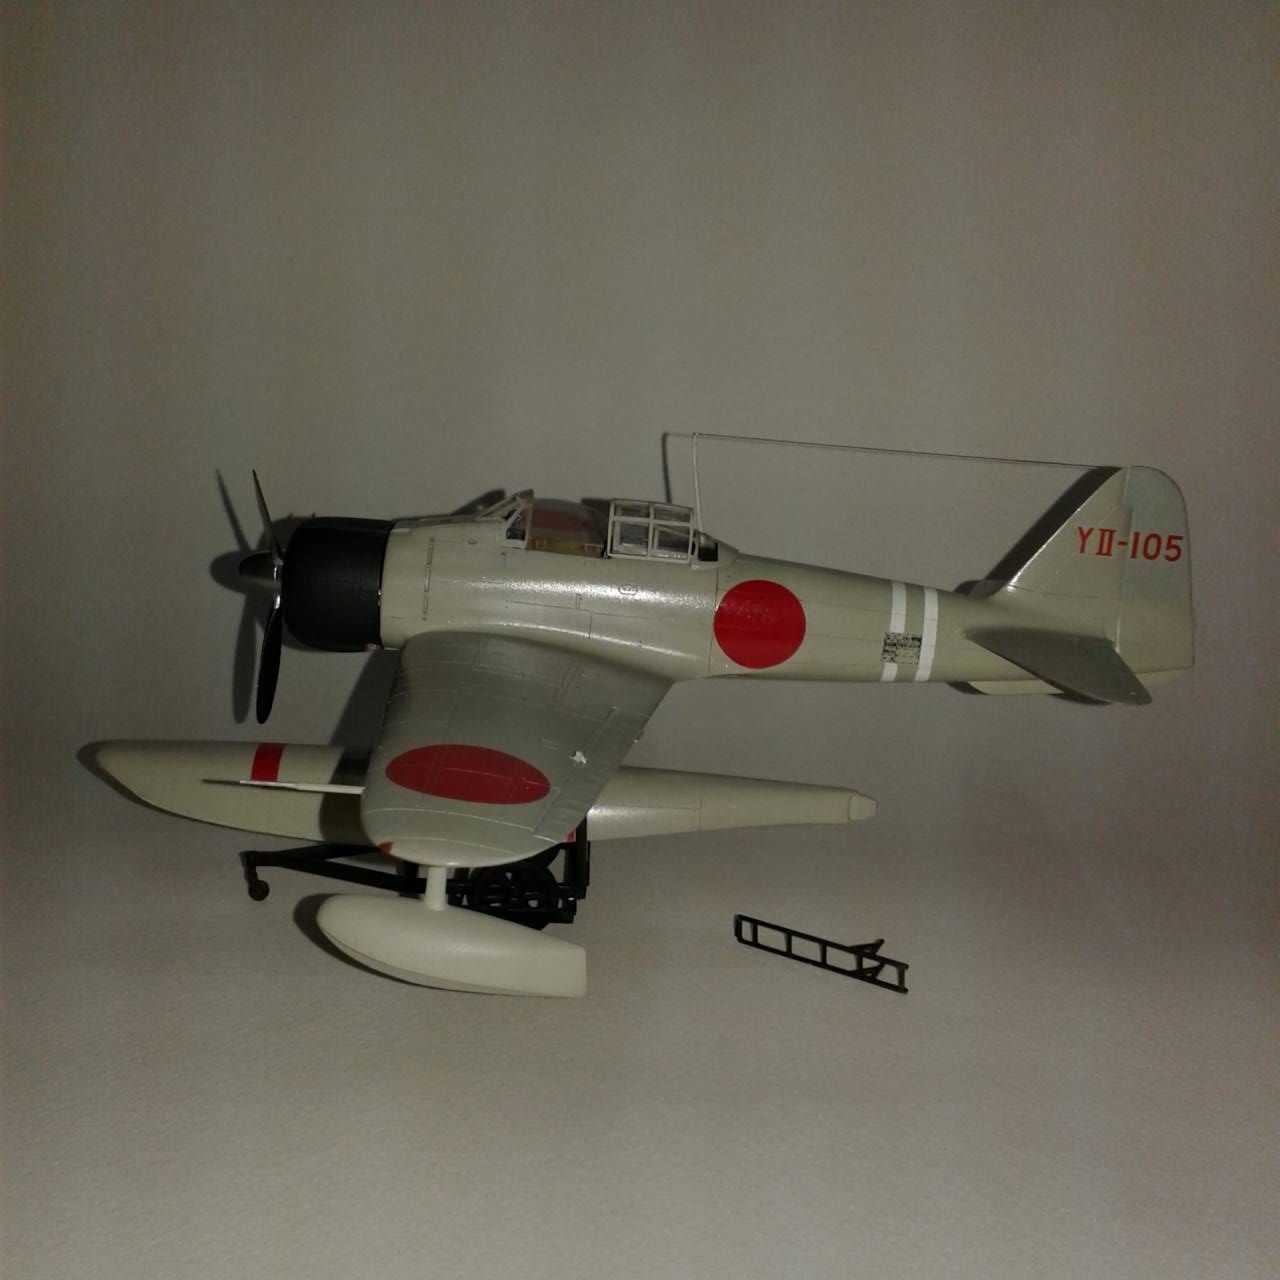
I have tried OneShot several times and it seemed to be working well, however that's the first time I've tried "hard" masking (previously only with blue tack which seems to have no impact on it).
From other side I also had an incident where I primed Airfix new Hurricane kit directly from bottle. Paint started to peel off even after touching with hand.
I need to learn a little bit more how to use this one...


Oneshot primer are the badger primer don't need to be thinned and is very different to any other acrylic primer suppose to be used in one thick layer and don't worry about the details the comeback when dry and need higher pressure 20-30psi I use with a 0.3 AB without any problem,have the feeling the bigger problem is the thinner
john41492
#442
_VISITCOMMUNITY
Malacca, Malaysia
Joined: July 20, 2015
KitMaker: 363 posts
AeroScale: 335 posts
Posted: Tuesday, February 20, 2018 - 02:53 PM UTC
Hi All!

It’s certainly nice to see some of the older Tamiya kits being built in this campaign. Having built their A6M2b numerous times, I know that they build into nice looking models.

I mated the floats and plane. The fit was a little off, but on the rear side, so pretty hard to notice, given the tight space I let it ride. I then added the little stuff. For me this one is done.

Not my best effort, however this build, for me was about getting things restarted after the move. While waiting for the house to be move in ready, hopefully by months end, I learned that I can still make something respectable on a plywood board! Acquiring paints was an interesting endeavor. Through mail order I was able to get most of what I enjoy working with, as long as I remain patient given the three-week delivery at best. I will be missing the Model Master brand though. The cost of shipping is too rich for my blood!

Overall this was a fun build and all the errors are mine alone. This is a nice kit, at a very reasonable price. Molded in 1973, it builds into a nice kit. One that I’d recommend to beginners and up. Bringing it up to todays standards is not difficult at all. Really all that’s needed is a cockpit. A wonderful media to work on scratch building, which kept the cost down for me. If one wanted they could add a resin cockpit, though with the current prices it will put the cost around the same as the Hasegawa offering, something to consider.

There are a couple of areas that do require some work out of the box. The cowling/fuselage interface needs a little thinning, the alerion actuators are difficult to work with, consider adding them prior to painting (not sure), and the radio mast is realistically thin. After five builds using great care I’ve managed to break four! I broke the one on this kit, fortunately I used an extra and it made it through. I also used EZ line for rigging the radio, and instantly fell in love with it! Easy to use and looks exceptionally convincing!

So here it is, Lt. Ono Jiro’s A6M2-N circa October 1942. Operating from the Shortland Island Atoll, assigned to the Seaplane Tender Kamikawa Maru. Sorry for the poor quality on the pictures, I’m still finding decent lighting.


Enjoy the campaign!

Oh, and if you can’t finish, don’t forget there is Hangar Queen 8 in progress till the end of the year!

goodn8
_VISITCOMMUNITY
Berlin, Germany
Joined: October 12, 2008
KitMaker: 709 posts
AeroScale: 651 posts
Posted: Tuesday, February 20, 2018 - 10:07 PM UTC
John,
very nice job and beautifully done with a crisp snd clean finish - congrats!

Looks like I'm working on the same molding (1973) with my Tamiya Zero, hope to show some more progress soon ...

Thomas
69mudbone
_VISITCOMMUNITY
California, United States
Joined: April 26, 2016
KitMaker: 362 posts
AeroScale: 42 posts
Posted: Wednesday, February 21, 2018 - 07:44 AM UTC
John, congrats on crossing the finish line. Don't be to hard on yourself, nice Zero.
MichaelSatin
Staff MemberCampaigns Administrator
AEROSCALE
_VISITCOMMUNITY
Colorado, United States
Joined: January 19, 2008
KitMaker: 3,909 posts
AeroScale: 2,904 posts
Posted: Wednesday, February 21, 2018 - 06:40 PM UTC
Nice work, John! Older kits, even Tamiya, can be tough. You've done a great job there.

A month and about a week left, everyone. Time to advance the throttle.

After this campaign I believe we have two left: Eastern Front and MTO. Any thoughts?

Michael
bomber14
_VISITCOMMUNITY
New Jersey, United States
Joined: February 02, 2015
KitMaker: 330 posts
AeroScale: 286 posts
Posted: Wednesday, February 21, 2018 - 06:51 PM UTC
got a question. i am making a tbd devestator from the midway battle. i want to use model master enamels. what color blue grey should i use? i know they make a non spec blue grey and intermediate. the bottle i have dried up and the label is smeared with paint.

great job on the rufe john. what paint did you use?


thanks- joe
69mudbone
_VISITCOMMUNITY
California, United States
Joined: April 26, 2016
KitMaker: 362 posts
AeroScale: 42 posts
Posted: Wednesday, February 21, 2018 - 09:28 PM UTC

Quoted Text

Nice work, John! Older kits, even Tamiya, can be tough. You've done a great job there.

A month and about a week left, everyone. Time to advance the throttle.

After this campaign I believe we have two left: Eastern Front and MTO. Any thoughts?

Michael


Let's go to the eastern front
md72
#439
_VISITCOMMUNITY
Washington, United States
Joined: November 05, 2005
KitMaker: 4,950 posts
AeroScale: 3,192 posts
Posted: Wednesday, February 21, 2018 - 09:41 PM UTC
Fairly sure I don't have anything for the Eastern Front, might have a few for MTO
goodn8
_VISITCOMMUNITY
Berlin, Germany
Joined: October 12, 2008
KitMaker: 709 posts
AeroScale: 651 posts
Posted: Wednesday, February 21, 2018 - 09:44 PM UTC

Quoted Text

Fairly sure I don't have anything for the Eastern Front, might have a few for MTO


MTO - my choice too.
... and summer is on it's way so it could give a realistic overall feeling for the mediterranean

Thomas
c4willy
#305
_VISITCOMMUNITY
Christchurch, New Zealand
Joined: February 01, 2006
KitMaker: 1,673 posts
AeroScale: 1,517 posts
Posted: Thursday, February 22, 2018 - 12:02 AM UTC
MTO .... I've so been waiting to build the iconic Bf109E-4/7 in MTO camo in either 1/32nd or 1/48 (although I'm leaning towards 1/32) and a shark mouth P-40 c'mon MTO!


Although I have a plethora of Eastern front as well, there's an Hs129 with photo etch that's looking particularly good. Or I could finally build the 1/48 Ju88-P that's been quietly whispering to me.
Pave-Hawk
_VISITCOMMUNITY
Western Australia, Australia
Joined: May 05, 2006
KitMaker: 900 posts
AeroScale: 200 posts
Posted: Thursday, February 22, 2018 - 12:00 PM UTC
N1K1Ja complete and in the gallery


b17-peter
#392
_VISITCOMMUNITY
Hessen, Germany
Joined: January 09, 2013
KitMaker: 696 posts
AeroScale: 608 posts
Posted: Friday, February 23, 2018 - 04:59 AM UTC
[quote]N1K1Ja complete and in the gallery

@Iain - congrats, excellent work! I must google that thing

I've cut and painted the first plastic of my campaign kit...


Btw, you guys did great jobs already, beautiful models so far.

I hope there will be some more till the finish line
Scrodes
_VISITCOMMUNITY
Ontario, Canada
Joined: July 22, 2012
KitMaker: 771 posts
AeroScale: 763 posts
Posted: Friday, February 23, 2018 - 06:29 AM UTC
John - may I ask why you left the Rufe with a gloss finish?

I know the ameiro coloured birds were a 'semi gloss' so I'm guessing that's why.


I keep telling myself I'll build this kit - but truth be told, after finishing my 1/32 Tamiya Rufe conversion I'm a bit burnt out.


md72
#439
_VISITCOMMUNITY
Washington, United States
Joined: November 05, 2005
KitMaker: 4,950 posts
AeroScale: 3,192 posts
Posted: Friday, February 23, 2018 - 09:12 AM UTC
Well, I'm thinking of changing streams in the middle of a horse..
Giving up on the Airfix F4F-4 until I sort out the missing part. Thinking of calling up this hanger queen for duty. Antares 1/72 SC-1 Seahawk


PasiAhopelto
_VISITCOMMUNITY
Uusimaa, Finland
Joined: October 01, 2016
KitMaker: 514 posts
AeroScale: 239 posts
Posted: Friday, February 23, 2018 - 11:34 AM UTC
Well, this is something I didn't expect:


The 1/32 Mitchell would need 350 grams of fishing weights to keep the nose down. I could fit third of that to gun housing. DU wouldn't be dense enough either, but iridium might work

I don't want to start taking cockpit or engine nacelles apart, so I think I'll just place "invisible" brass rod under the hull.
Removed by original poster on 02/25/18 - 16:37:27 (GMT).
bomber14
_VISITCOMMUNITY
New Jersey, United States
Joined: February 02, 2015
KitMaker: 330 posts
AeroScale: 286 posts
Posted: Saturday, February 24, 2018 - 09:44 PM UTC

Quoted Text

Well, this is something I didn't expect:


The 1/32 Mitchell would need 350 grams of fishing weights to keep the nose down. I could fit third of that to gun housing. DU wouldn't be dense enough either, but iridium might work

I don't want to start taking cockpit or engine nacelles apart, so I think I'll just place "invisible" brass rod under the hull.


pasi try using wheel weights that are used on your car. they are flat and different sizes. maybe that will work. i'm sure your local auto garage has some used ones the are happy to donate.
joe
bomber14
_VISITCOMMUNITY
New Jersey, United States
Joined: February 02, 2015
KitMaker: 330 posts
AeroScale: 286 posts
Posted: Saturday, February 24, 2018 - 10:09 PM UTC
well i know i have not made any posts on my progress on the monogram devastator but that doesn't mean i haven't been working on it.
here is some WIP photos of my progression over the course of the last month or so.
i scratch made some gauges punched from sheet plastic for the side consoles and radio and added a throttle,canopy cranks,seat harnesses and afew levers. got the fuselage and wings together and filled the gaps at the root with strip plastic and 3m glaze. i wired the engine,and resin cast my own torpedo and built the box to go on the fins (which is good since the fins didn't come out of the mold too well ) it will be going to paint soon.


[imghttps://scontent-lga3-1.xx.fbcdn.net/v/t1.0-9/28166993_10211433893778768_8686446642760669458_n.jpg?oh=7e84be6f24b8d12b125aad5a3bc973d8&oe=5B0EA7D3][/img]
i somehow lost the flaps so i had to scratch a set.
i am making the plane of the CO of torpedo 8 battle of midway. i know they were the only squadron to have duel 30's in the rear gunner. so far the plan is to use a duel 30 from another kit. i see gaspatch makes 30 cal guns on their site but i don't see them on squadron, spruebro, or any of the other US companies. so i will have to use the donated set. maybe i will order a set of barrels from master.

joe
bomber14
_VISITCOMMUNITY
New Jersey, United States
Joined: February 02, 2015
KitMaker: 330 posts
AeroScale: 286 posts
Posted: Saturday, February 24, 2018 - 10:12 PM UTC
for some reason the underside photo didn't work so here it is- the torpedo it not attached yet-

Charlie-66
#186
_VISITCOMMUNITY
Texas, United States
Joined: May 24, 2006
KitMaker: 771 posts
AeroScale: 13 posts
Posted: Saturday, February 24, 2018 - 10:17 PM UTC
Finally got tired of waiting on Dragon Care for the correct high bustle turret parts, and swiped what I needed from a kit in my stash. This is about ready for paint.


I tried something new for me which was to use blue painters masking tape for the tool hold downs. Used the buckles from the kit along with it. For a first try I'm happy with it.


The tow cables and ends are from Formations. Awesome stuff! Need to clean up the drain hole around the fuel filler caps.


RadekZ
_VISITCOMMUNITY
Warszawa, Poland
Joined: March 12, 2013
KitMaker: 125 posts
AeroScale: 85 posts
Posted: Sunday, February 25, 2018 - 03:42 AM UTC
OK, recovery process on Buffalo is kind of finished.

First, I'd like to share something interesting.
For recovery I used a pure isoprophyl (99.9%) bath and Tamiya's & Gunze went off easy. However this damn One Shot primer was generally immune to it, so I had to sand it off after bath. I know One Shot is not an alcohol based, but still I have expected it will crack or become gluish or slimey...
Here is the effect just after the bath. Note the large patches of the surfaces on upper areas. Also interesting thing - bottom of plane was covered with One Shot and later Vallejo Metal Color and it survived bath almost on 100% of area:


Now I have restored it to premasking stage . This time I used Tamiya XF-24 as a "primer" and later reference paints (Vallejo Metal Color Silver on bottom).
I have to reapply Silver paint on bottom of wings as it was lifted in 2 areas, but nothing serious - this time primer survived


If all goes well it will get gloss coat tomorrow in preparation for decals.
Scrodes
_VISITCOMMUNITY
Ontario, Canada
Joined: July 22, 2012
KitMaker: 771 posts
AeroScale: 763 posts
Posted: Sunday, February 25, 2018 - 11:13 PM UTC
I have surprisingly found this whole 'campaign' idea to be pretty fun. I even finished ahead of time


Tamiya's 1/32nd F4U-1A with the Brassin cockpit, Brassin wheels and without [don't get me started ] the Brassin engine


Now how do I get the campaign ribbon?
MichaelSatin
Staff MemberCampaigns Administrator
AEROSCALE
_VISITCOMMUNITY
Colorado, United States
Joined: January 19, 2008
KitMaker: 3,909 posts
AeroScale: 2,904 posts
Posted: Sunday, February 25, 2018 - 11:43 PM UTC

Quoted Text

I have surprisingly found this whole 'campaign' idea to be pretty fun. I even finished ahead of time

Now how do I get the campaign ribbon?


Very nice indeed, Matt! To get the ribbon just load two or three pics into the campaign gallery and when the campaign is over I will hand out the ribbons.

Michael
PasiAhopelto
_VISITCOMMUNITY
Uusimaa, Finland
Joined: October 01, 2016
KitMaker: 514 posts
AeroScale: 239 posts
Posted: Sunday, February 25, 2018 - 11:51 PM UTC

Quoted Text


pasi try using wheel weights that are used on your car. they are flat and different sizes. maybe that will work. i'm sure your local auto garage has some used ones the are happy to donate.


Not a bad idea. I have some left over lead free "lead" used for casting cannons and anchors of a ship model. It should fill up the space better than fishing weights. Have to check the inside volume, and make a mould if it's sufficient. Thanks.

Radoslaw: that's determination. I would've given up and moved to next campaign when the paint lifted.
Willard79
_VISITCOMMUNITY
Wellington, New Zealand
Joined: June 01, 2014
KitMaker: 189 posts
AeroScale: 179 posts
Posted: Sunday, February 25, 2018 - 11:56 PM UTC
Matt, beautiful work on the weathering. Although I’m curious, I won’t get you started on the brassin engine. I like your style and how you always seem to be experimenting, so always good to follow one of your builds.
Like you, I’ve just finished my first ‘campaign’ (ANZAC) and found it fun also. It was certainly different (for me) to work to a hard date and get comfortable with compromising to be able to keep moving forward. Although I didn’t participate in this one, I’m seriously considering the MTO or Eastern front that follows.
Regards.