_GOTOBOTTOM
World War II: Germany
Aircraft of Germany in WWII.
Hosted by Rowan Baylis
RS Models 1/72 Heinkel 112B
Szmann
_VISITCOMMUNITY
Netherlands Antilles
Joined: September 02, 2014
KitMaker: 1,977 posts
AeroScale: 295 posts
Posted: Tuesday, August 08, 2017 - 05:28 AM UTC
Hello, guys!

I had this kit for a while now and I decided to build it as a fast build, OOB.

It's an interesting kit, although a little difficult. I've shot a full detailed video review, but the filmed material is still raw. I'm going to post the link as soon as I upload it to YT.


Here's the artwork on the box:


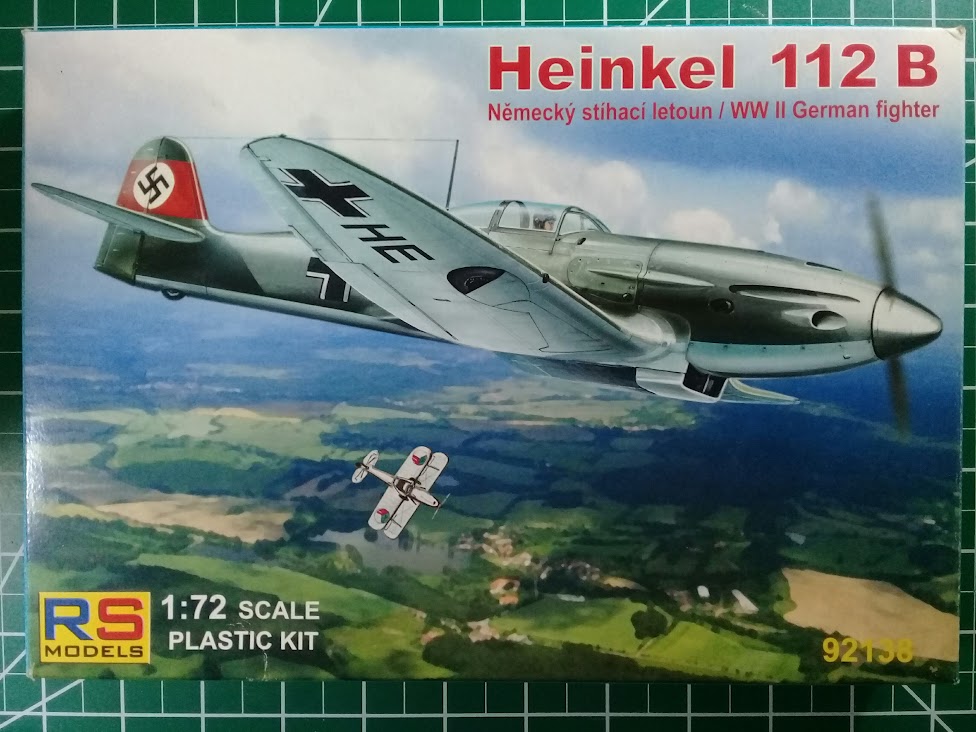
It has three marking options: two Romanian and a German one. It may seem surprising, but Romania was the main operator of the plane at the beginning of Barbarossa, having two squadrons equipped with this type (approx 30 aircraft out of approx 90 produced)


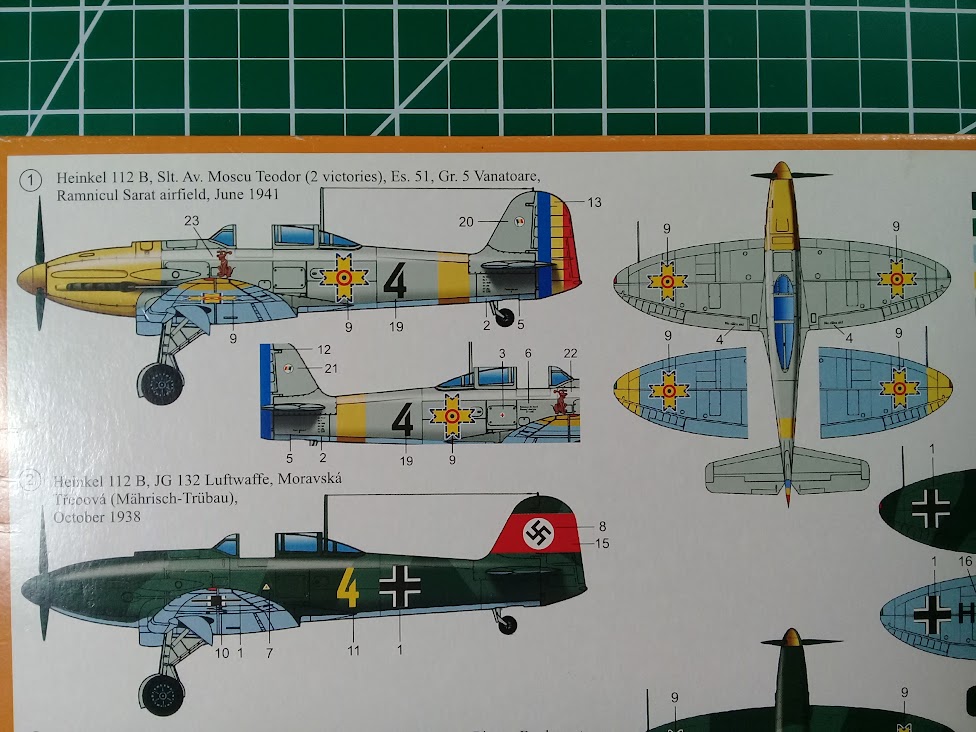
I choose the grey (early) version, flown by sublocotenent aviator (junior locotenent) Teodor Moscu, from 51st Fighter Squadron.

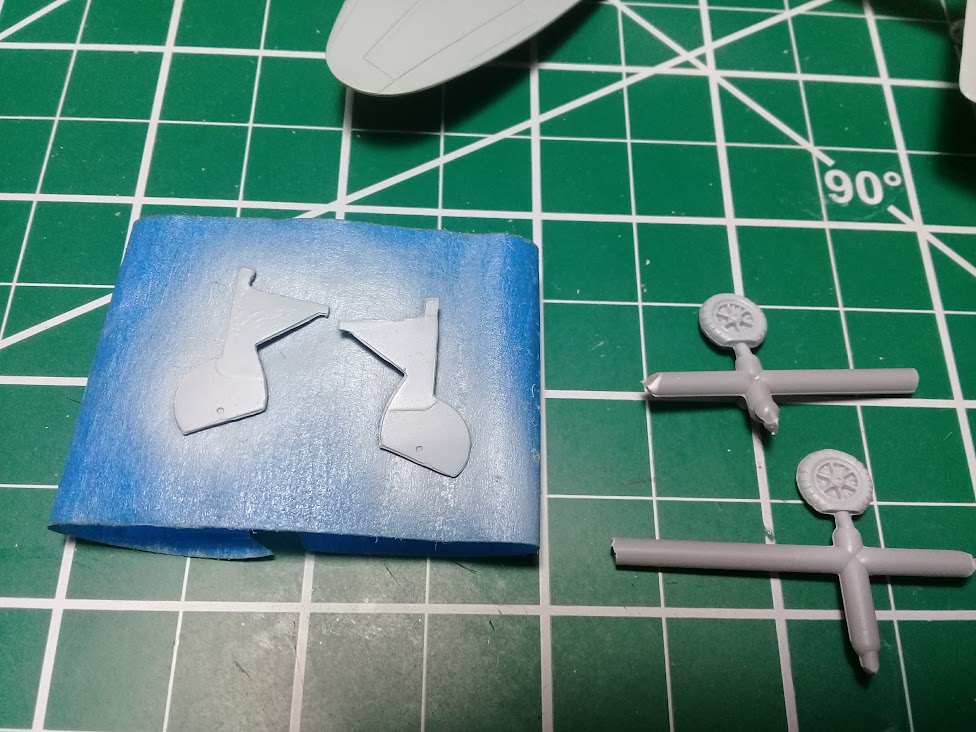
The kit is a short run, carrying the expected problems: no locator pins, poor detail in places, sink marks. As the building advances, I have to say that it is better than expected and the main parts are fitting well. A part called in instructions is missing from the sprue (not lost - missing) and the wings have bores for guns but no guns either in the kit. I scratch built wing cannons, but I'm not quite sure yet if 112B1 had wing cannons or nose only (I need to check it up).
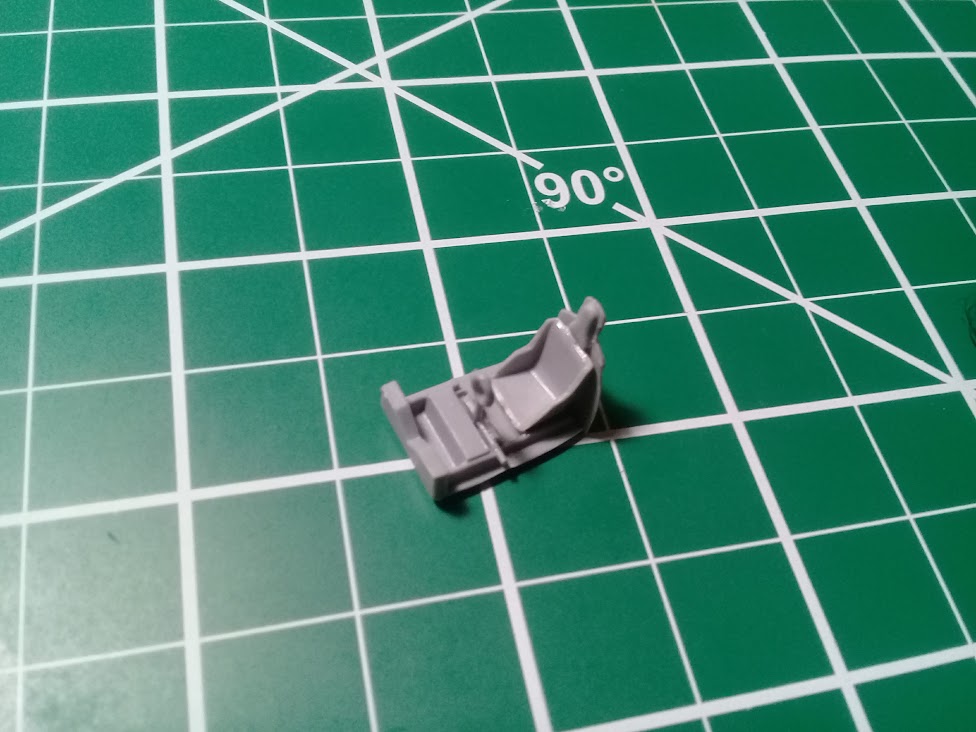
The cockpit:


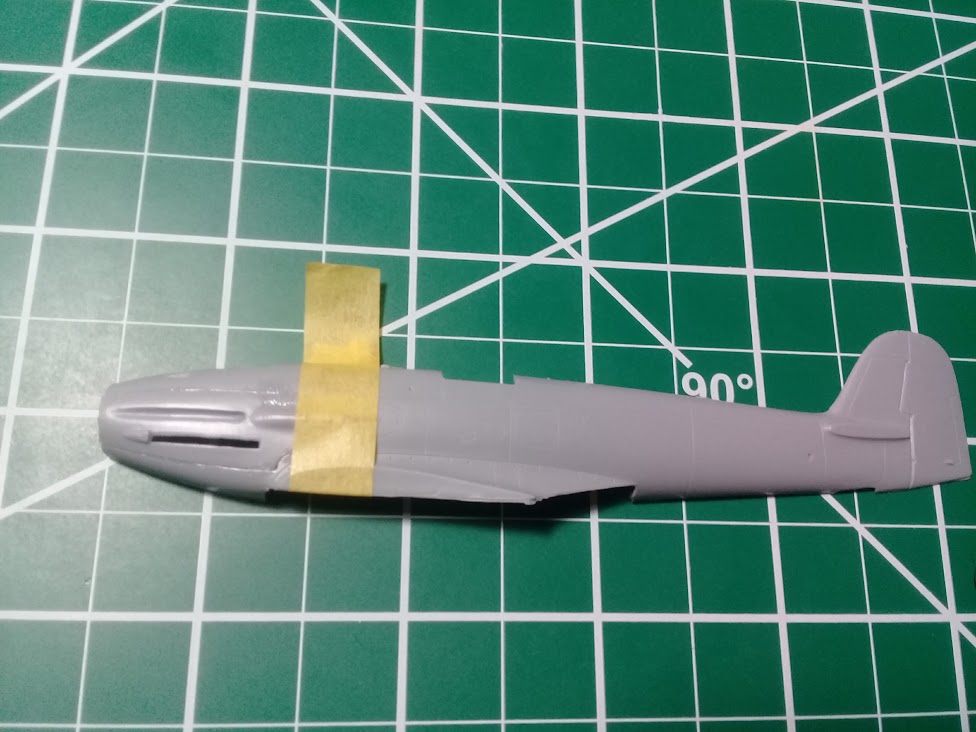
Engine access panels:


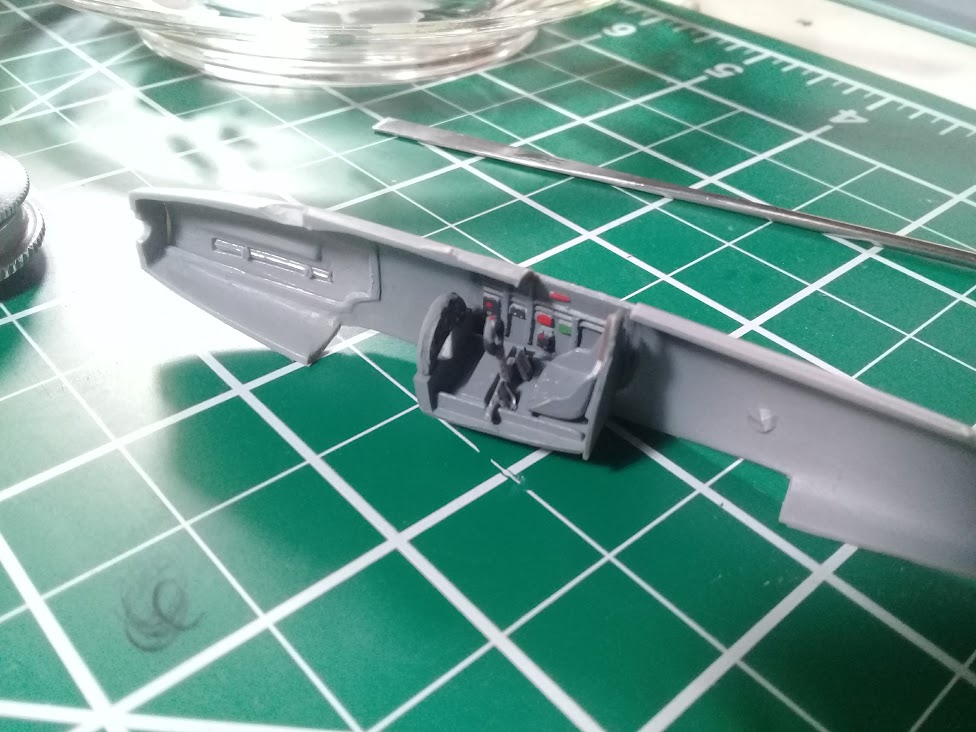
Cockpit added to the fuselage half:


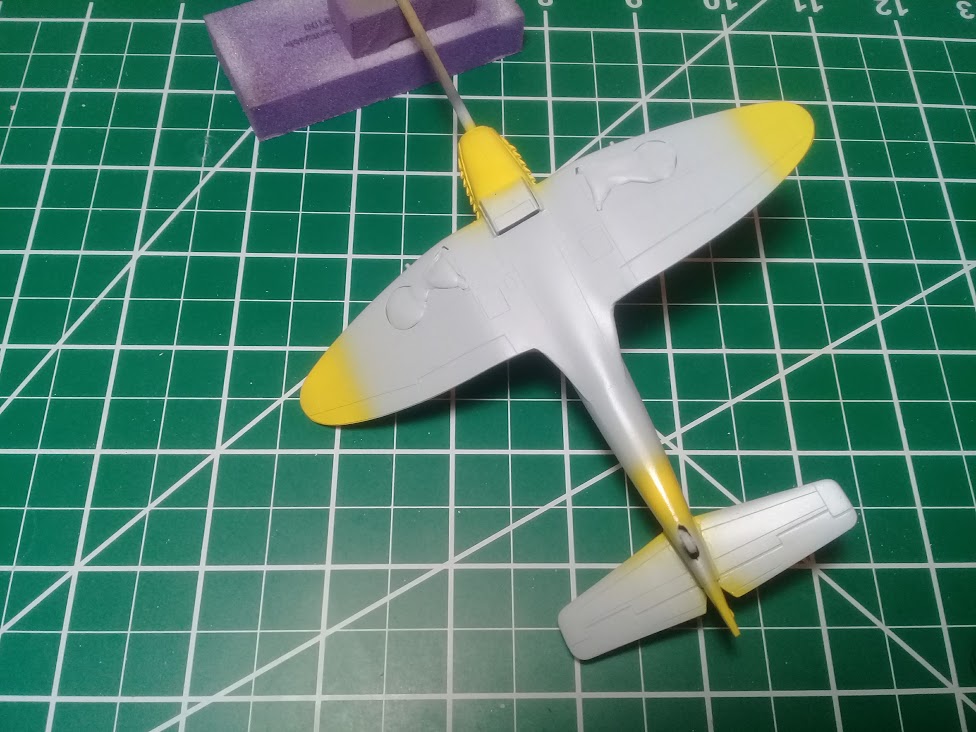
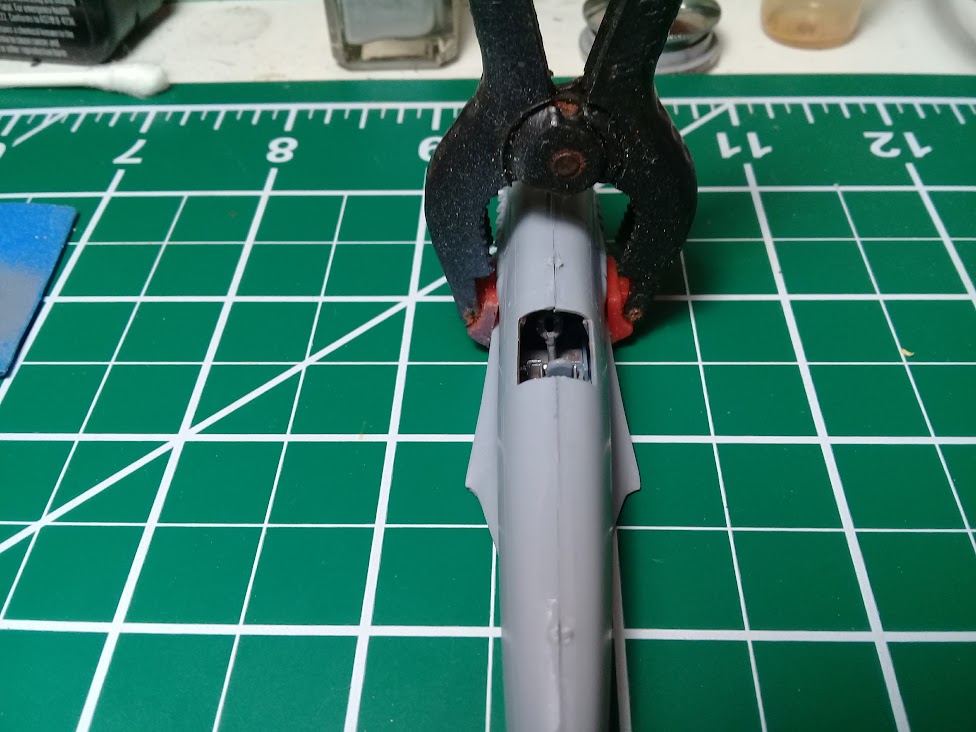
Not much to be seen after closing the fuselage:


That's the current progress - more coming soon.

Cheers!
Gabriel
Szmann
_VISITCOMMUNITY
Netherlands Antilles
Joined: September 02, 2014
KitMaker: 1,977 posts
AeroScale: 295 posts
Posted: Thursday, August 10, 2017 - 04:09 PM UTC
Hello, guys!

My build continued by applying a transparent brown wash to interior:


The same wash over the landing gear covers


The fuselage buttoned up. The two halves fit very well, with only couple of spots in need for filler:


Cheers!
Gabriel
Szmann
_VISITCOMMUNITY
Netherlands Antilles
Joined: September 02, 2014
KitMaker: 1,977 posts
AeroScale: 295 posts
Posted: Friday, August 11, 2017 - 04:21 PM UTC
Hi, guys!

Today's update:

1. The fuselage halves joined


The fit is decent for a short run kit.


2. "Guns" added in wing fairings made from stretched tube (I removed them since then because the fairings are not aligning good and I'm going to need a bigger bore)


3. Upper wing surfaces added. The fit is not perfect, but I've seen worst


Small gaps at the wing roots also - you can notice the bad alignment on fairings here


4. Stabilizers added; basically the frame is completed and ready for filler / sanding


5. The canopy is most treacherous part in this build. First, she was foggy from the box:

I polished it with Novus and I brought it to decent looks.
Second, the instructions are unclear and I need to drill a hole thru the canopy for antenna mast. I almost missed that; thankfully, I checked my references. (see part 46 in drawing)


Canopy masked and ready for drilling. I still need to sand the fuselage seams first. there are no locator pins, the canopy just sits on top of the fuselage. I did some dry-fit and for sure I'm gonna have some gaps fore and aft the cockpit, not huge though.


Side note: my video review on the kit still trailing - I had a very busy week at work. Hopefully this weekend.

Cheers!
Gabriel
Szmann
_VISITCOMMUNITY
Netherlands Antilles
Joined: September 02, 2014
KitMaker: 1,977 posts
AeroScale: 295 posts
Posted: Saturday, August 12, 2017 - 08:59 AM UTC
And there is my inbox review, with a very short history of the airplane and few considerations about the color scheme. Please enjoy!

Gabriel


Szmann
_VISITCOMMUNITY
Netherlands Antilles
Joined: September 02, 2014
KitMaker: 1,977 posts
AeroScale: 295 posts
Posted: Monday, August 14, 2017 - 01:49 AM UTC
Hi, guys!

I found some time yesterday to fiddle with the model.

1. I drilled the canopy to accommodate the antenna mast, glued it in place with Pledge and painted the inside segment with black.


2. I re-engraved most of the surface detail after I sanded the joints and attached a couple more fiddle parts:


The interior was masked and ready for some paint fore and aft the cockpit - the canopy will cover those areas and I cannot reach them after button-up.

Thank you for following,
Gabriel
Szmann
_VISITCOMMUNITY
Netherlands Antilles
Joined: September 02, 2014
KitMaker: 1,977 posts
AeroScale: 295 posts
Posted: Tuesday, August 15, 2017 - 03:54 PM UTC
Hi, guys!

Small update:

Glued the canopy in place and filled the gaps. Sanded, re-scribed some lost detail.


A you an see in the pictures, the fit wasn't that bad, the notable exception being the canopy. I hoped I could apply some primer today but, obviously, the gap under the canopy still needs refining

Thank you for following,
Gabriel
litespeed
Staff MemberNews Reporter
AEROSCALE
_VISITCOMMUNITY
England - North West, United Kingdom
Joined: October 15, 2009
KitMaker: 1,976 posts
AeroScale: 1,789 posts
Posted: Wednesday, August 16, 2017 - 05:44 AM UTC
Looking good Gabriel. I like the marking option you have chosen
tim
Antilles
_VISITCOMMUNITY
Nordrhein-Westfalen, Germany
Joined: March 22, 2015
KitMaker: 671 posts
AeroScale: 614 posts
Posted: Wednesday, August 16, 2017 - 01:07 PM UTC
Interesting and nicely done project! I will follow!

Oliver
Szmann
_VISITCOMMUNITY
Netherlands Antilles
Joined: September 02, 2014
KitMaker: 1,977 posts
AeroScale: 295 posts
Posted: Wednesday, August 16, 2017 - 02:31 PM UTC

Quoted Text

Looking good Gabriel. I like the marking option you have chosen
tim


Thank you, Tim.
It's the "logical" choice, since Romania was the main operator of the type. As for the color scheme, I had the choice between splinter over light blue and and overall grey. I found overall grey is more characteristic for early war.

Cheers!
Gabriel
Szmann
_VISITCOMMUNITY
Netherlands Antilles
Joined: September 02, 2014
KitMaker: 1,977 posts
AeroScale: 295 posts
Posted: Wednesday, August 16, 2017 - 02:34 PM UTC
@Oliver: Thank you, sir! Hopefully today after work It will be ready for some primer.

Cheers!
Gabriel
Szmann
_VISITCOMMUNITY
Netherlands Antilles
Joined: September 02, 2014
KitMaker: 1,977 posts
AeroScale: 295 posts
Posted: Thursday, August 17, 2017 - 07:57 AM UTC
Hi, guys!

I start testing the paints before painting the model. Last time I have used Model Master grey primer the result was bad. I still have the model in its box, waiting to be stripped. I thought maybe because the model is resin, not plastic. This time I was compelled to mix the Model Master primer with white enamel (Krylon), because the canopy is already in place and the primer has to be the interior color (in my painting scheme, interior color = exterior color). The reason why I choose an enamel primer is because I know already is going to be a little sanding and enamel finishes sand better than acrylic. After couple of mixes, I found the color I think is the "right" one.


I also sprayed the propeller with Krylon black:


After a few minutes, the paint on the spoon seemed to be dry, and I sprayed the aircraft as well


The main reason I primed the model is obvious here: the imperfections appear more visible here so, yes, I still have to use micro-filler and sanding sponge


The underside looks quite good as it is - waiting for the second coat of primer:


The bad news is that, three hours later, the primer still has a tacky feeling to it. A such thin coat should have been dry by now... It seems is not curing properly. Anyhow, I'll let it dry overnight; if it sands well, then is OK. If not, should be easy to remove.

Thanks for following,
Gabriel
Emeritus
_VISITCOMMUNITY
Uusimaa, Finland
Joined: March 30, 2004
KitMaker: 2,845 posts
AeroScale: 1,564 posts
Posted: Thursday, August 17, 2017 - 04:28 PM UTC
Looking good.

Primer still tacky after 3 hours? I wouldn't worry about it yet. Let it sit for a while more before getting into paint stripping; the kinds of alkyd enamel spray primers I've used tend to need at least a day or two to dry properly. And in your case here mixing two different brands of paints might have altered the drying properties, making it dry slower.
rochaped
_VISITCOMMUNITY
Lisboa, Portugal
Joined: August 27, 2010
KitMaker: 679 posts
AeroScale: 669 posts
Posted: Thursday, August 17, 2017 - 08:35 PM UTC
Interesting and unusual model build thread. I like it Gabriel, keep the good work!
Wonder if there's a quarter scale for this subject??
Emeritus
_VISITCOMMUNITY
Uusimaa, Finland
Joined: March 30, 2004
KitMaker: 2,845 posts
AeroScale: 1,564 posts
Posted: Friday, August 18, 2017 - 12:39 AM UTC

Quoted Text

Wonder if there's a quarter scale for this subject??


To my knowledge, there's actually two: a resin kit of the V-6 variant by Rest Models and a limited run multimedia kit of the B variant by Classic Aiframes.
Szmann
_VISITCOMMUNITY
Netherlands Antilles
Joined: September 02, 2014
KitMaker: 1,977 posts
AeroScale: 295 posts
Posted: Friday, August 18, 2017 - 01:23 AM UTC

Quoted Text


Primer still tacky after 3 hours? I wouldn't worry about it yet. Let it sit for a while more before getting into paint stripping; the kinds of alkyd enamel spray primers I've used tend to need at least a day or two to dry properly. And in your case here mixing two different brands of paints might have altered the drying properties, making it dry slower.


It was just my lack of patience and the bad memories. It dried very well overnight and I could do some sanding.
Thanks for the input.

@ Pedro: Thank you! As Emeritus stated, there are two models in 1/48: two versions by Classic Airframes and one by Rest Models. The last one seems to be also very interesting. Although rather a prototype, it was tested in Spanish Civil War and also was sold for evaluation to Japan https://aeroscale.kitmaker.net/review/1801. Romania also has a prototype for testing, before placing the 30 pcs. order, but I think it was v9.

Gabriel
magnusf
_VISITCOMMUNITY
Stockholm, Sweden
Joined: May 02, 2006
KitMaker: 1,953 posts
AeroScale: 1,902 posts
Posted: Friday, August 18, 2017 - 01:31 PM UTC
Gabriel! I have always found the Heinkel an interesting aircraft, note how the wing and the tailplanes seem to be made by two completely different designers, they don't seem to belong on the same aircraft ! I remember the old Heller kit as a good one but it was a long time ago that I saw one.

Nice build, keep up the good work!


Magnus
Szmann
_VISITCOMMUNITY
Netherlands Antilles
Joined: September 02, 2014
KitMaker: 1,977 posts
AeroScale: 295 posts
Posted: Friday, August 18, 2017 - 04:08 PM UTC
@ Magnus: thank you! I believe the immaturity in design was the main reason behind RLM rejection of this a/c. Even the wings alone are intriguing: cranked elliptical? Hmmm! As a wit put it on another forum: looks like a crossbreed between a YAK and a Spit. And for sure the bugger stole some Stuka parts too! LOL!

Update:
I went with the second coat of primer - a heartier one this time.

Only watching the pictures I've realized the flash around the wheels covers, which I need to address.

After the primer dried superficially, I've shot the yellow theater markings (Rust-oleum 7747).


The tail doesn't have yellow, but the Romanian flag decal has it and I want to avoid any weird transparency effect (if any).

At this point I am ready for masking and base coat - acrylic this time, because oil washes will follow...

More updates soon,
Gabriel
Szmann
_VISITCOMMUNITY
Netherlands Antilles
Joined: September 02, 2014
KitMaker: 1,977 posts
AeroScale: 295 posts
Posted: Sunday, August 20, 2017 - 05:37 AM UTC
Hi, guys!

Update:
1. I applied pre-shading (Tamiya NATO black), followed by an own mix gray (Homefront acrylics).


I am quite happy with the result, but yellow still shows in places and I need to apply a second coat of grey.

2. Because the final assembly draws close, I painted some other small details (I forgot to spray the wheel covers, though)


Hopefully, tomorrow I will manage to cut masks and apply the custom '13'.

Stay tuned!
More updates soon,
Gabriel
Szmann
_VISITCOMMUNITY
Netherlands Antilles
Joined: September 02, 2014
KitMaker: 1,977 posts
AeroScale: 295 posts
Posted: Monday, August 21, 2017 - 12:16 AM UTC
Hi, guys!

Update:

I removed the masks. All went flawless: on the smooth and hard enamel, Tamiya tape has very good adhesion and practically I had no seeping. Because I ended up applying three coats of acrylics, I have a little raised edge around the fuselage band. It doesn't bother me too much, because is along the panel line and a couple coats of clear will sort it out.


I am not sure how much of the preshading you can see, but I swear is there, very discreet.


And a small incident here: it was a very hot day in Caribbean and my UHU tack was unusually gluey. It pulled out a little paint around one of the wheel wells. No big drama - easy fix with a little paint and a brush.


I am ready now for clear coat and decals.

Any thoughts on Tamiya X22? I never used it yet.

Cheers!
Gabriel
Willard79
_VISITCOMMUNITY
Wellington, New Zealand
Joined: June 01, 2014
KitMaker: 189 posts
AeroScale: 179 posts
Posted: Monday, August 21, 2017 - 02:15 AM UTC
X22 is great. Mix 50:50 with Tamiyas lacquer thinner,(or Mr Color).
Will Paterson has a video on how to get good results, which I've replicated with success.
https://www.youtube.com/watch?v=LDqmFkHTbMA

regards.
Szmann
_VISITCOMMUNITY
Netherlands Antilles
Joined: September 02, 2014
KitMaker: 1,977 posts
AeroScale: 295 posts
Posted: Monday, August 21, 2017 - 02:22 AM UTC
Thank you, Spud! I'll go for it, then.

Cheers!
Gabriel
Szmann
_VISITCOMMUNITY
Netherlands Antilles
Joined: September 02, 2014
KitMaker: 1,977 posts
AeroScale: 295 posts
Posted: Tuesday, August 22, 2017 - 05:55 AM UTC
Hi, guys!

UPDATE:

The "scariest" part for me in this build - besides the canopy that is - was getting the correct registration number for the aircraft flown by Slt. Av. Teodor Moscu. You can see the explanation in the video posted earlier on the blog. The writing is unusual and I couldn't use the printer because I didn't find the appropriate font. I photo-edited the original picture (also shown in the video) and then cut the masks with my plotter. Of course during photo editing and tracing I lost a little from the original shape but the result is convincing enough:


Thank you for following,
Cheers!
Gabriel
Antilles
_VISITCOMMUNITY
Nordrhein-Westfalen, Germany
Joined: March 22, 2015
KitMaker: 671 posts
AeroScale: 614 posts
Posted: Tuesday, August 22, 2017 - 07:42 PM UTC

Quoted Text

Of course during photo editing and tracing I lost a little from the original shape but the result is convincing enough:


Not only convincing. Spot on, IMHO. Nice Work!

Oliver
Szmann
_VISITCOMMUNITY
Netherlands Antilles
Joined: September 02, 2014
KitMaker: 1,977 posts
AeroScale: 295 posts
Posted: Wednesday, August 23, 2017 - 01:24 AM UTC
Thank you, Oliver, for your appreciation.

I'm ready for clear coating now and decals.

Cheers!
Gabriel
Szmann
_VISITCOMMUNITY
Netherlands Antilles
Joined: September 02, 2014
KitMaker: 1,977 posts
AeroScale: 295 posts
Posted: Thursday, August 24, 2017 - 07:06 AM UTC
Hello, guys!

UPDATE:

After more than two hours decal session, I managed to get the things done. The decals are very thin and excess care is needed. They're setting very nicely just with water. The colors are good without unwanted transparency. Unfortunately, the Michael's Cross is a little off register. Hopefully the surrounding white will be less visible after weathering.
Word of advice: don't keep the decals more than 30 seconds in water (room temperature, in my case = 30C), otherwise they have a tendency to curl and to stick to themselves. The stencils are particularly prone to tear. Note on stencils: they are in Romanian and actually can be read, so they cannot be used for the German variant of the aircraft.
The colors are also slightly off, specially the blue, but I'm not going to dwell into it, because Michael's Cross is unmistakable and I don't think anybody can take it for Belgian.

Conclusion to this step: I'm glad I managed to completely avoid the looming disaster due decals' fragility. I'm pleased with the result. The model looks colorful and cheery, despite the grey overall scheme. A little bit too cheery for now, but the next steps will take care of it.


Thank you for following,
Cheers!
Gabriel
 _GOTOTOP