OFFICIAL: ANZAC Campaign 2017

#439
Washington, United States
Joined: November 05, 2005
KitMaker: 4,950 posts
AeroScale: 3,192 posts
Posted: Sunday, January 21, 2018 - 12:47 AM UTC
Remind me, am I building a P-40, or the Mummy?
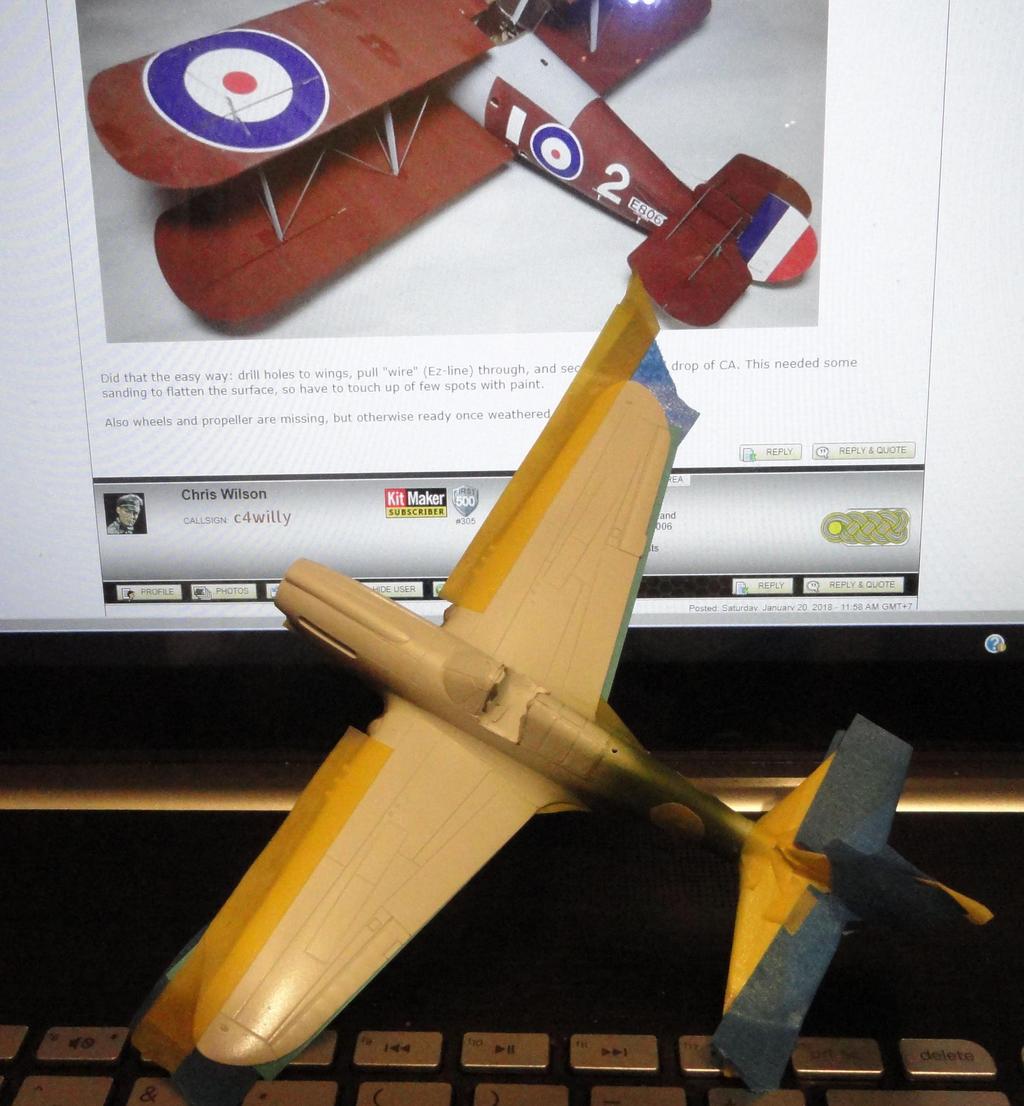
Hopefully this is the last masking before the final coat of paint...

Hanger Queens in Waiting:
Monogram 1/72 F8F-1
Corsair the Sky Pirate - 1/72 Ace A-7D
Century Series - Airfix 1/72 F-105G
Anti Shipping - Academy 1/72 PBJ-1D
Academy 1/72 F-84E
Wellington, New Zealand
Joined: June 01, 2014
KitMaker: 189 posts
AeroScale: 179 posts
Posted: Sunday, January 21, 2018 - 01:09 AM UTC
Quoted Text
Remind me, am I building a P-40, or the Mummy?
Hopefully this is the last masking before the final coat of paint...
I hear you, masking for me is a necessary PITA to get to the more enjoyable bits.
#372
United Kingdom
Joined: March 10, 2010
KitMaker: 2,568 posts
AeroScale: 1,619 posts
Posted: Sunday, January 21, 2018 - 02:29 AM UTC
Quoted Text
Quoted Text
Colin, also meant to congratulate you on your build. The figures are fantastic and I love the ground work and jungle vegetation. Will have to check back through the pages to see how you did it.
Hi Stephen,
thanks for the comments, unfortunately i only jumoed in on this build in the last minute so there werent any builds of the jungle.
basically, the base is a block of Jarrah from a mate over here that had a rough section on it. Over this section i poured some clear resin mixed with a couple of drops of light brown to produce murky water for the river. The grass is just commercial glued into holes then the spaces filled with more grass. Plants are mainly commercial laser cut, with some fish tank plastics thrown in.
The bamboo is leaves from a local tree (cant remember the name of it), looks just like scale bamboo trunks though. The small vines etc are grass roots and some artificial hair. then it was all spray painted varying shades of green
Thanks Colin. Will have to keep my eyes open for some suitable vegetation. Always wanted to have a go at a jungle diorama.
Pasi, your Snipe is amazing. The paint work is very nicely done.
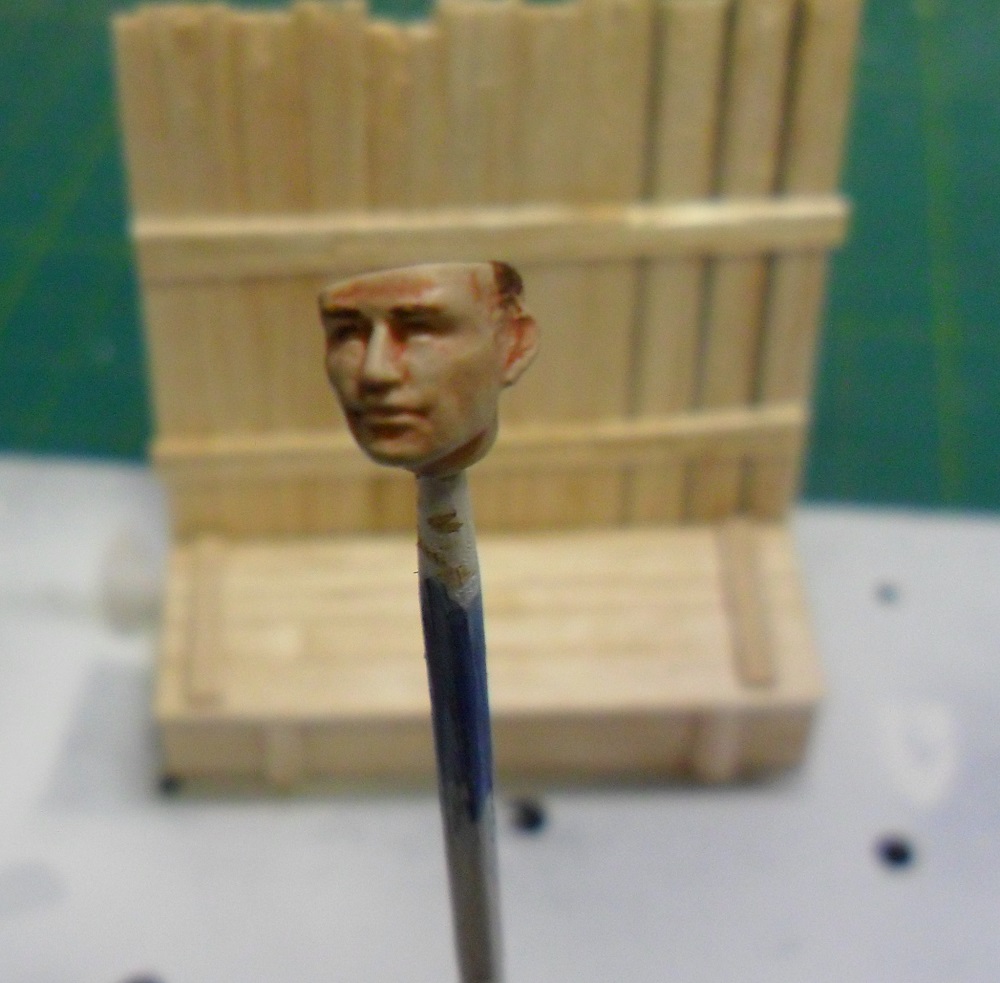
Did a little more work on my figure today. Happy to say he won't be far off finished.
On the bench: 1/72 Mosquito, Lightning F.6, DH.2,
AMT Vulcan Shuttle Surak.
Cyber-Hobby 1:35 Sherman Firefly IC - still stalled.
#439
Washington, United States
Joined: November 05, 2005
KitMaker: 4,950 posts
AeroScale: 3,192 posts
Posted: Sunday, January 21, 2018 - 03:40 AM UTC
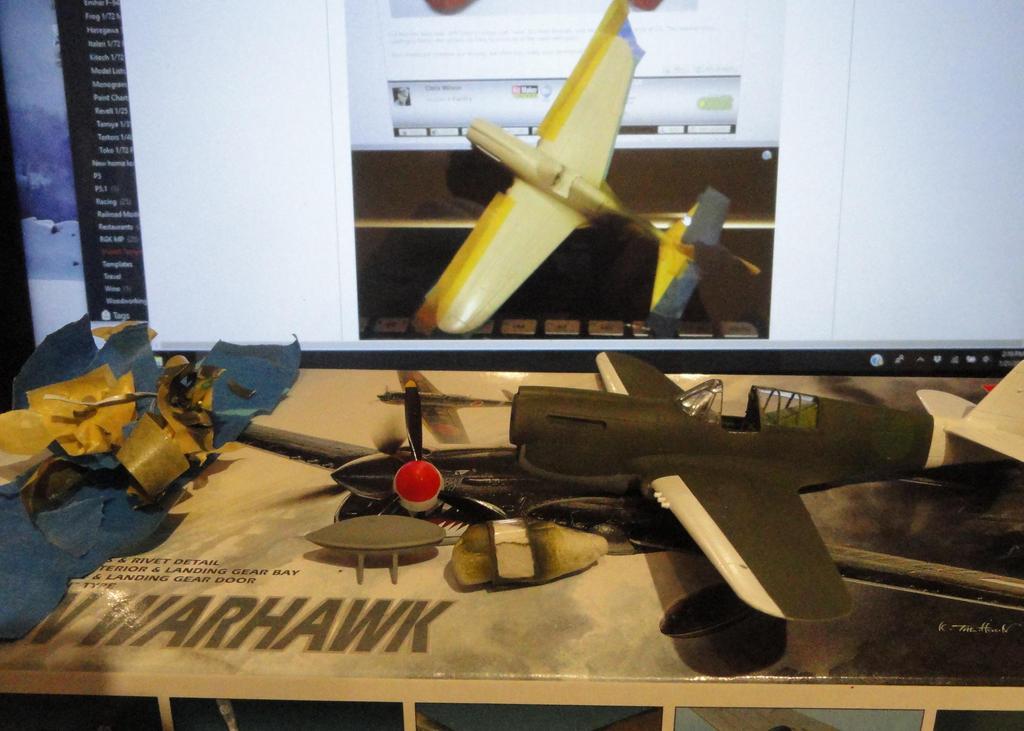
Well, it pretty much paid off. Only a few touch ups required..

Hanger Queens in Waiting:
Monogram 1/72 F8F-1
Corsair the Sky Pirate - 1/72 Ace A-7D
Century Series - Airfix 1/72 F-105G
Anti Shipping - Academy 1/72 PBJ-1D
Academy 1/72 F-84E
#298
Hong Kong S.A.R. / 繁體
Joined: August 08, 2002
KitMaker: 1,182 posts
AeroScale: 351 posts
Posted: Sunday, January 21, 2018 - 01:27 PM UTC
Bas-Rhin, France
Joined: September 22, 2016
KitMaker: 224 posts
AeroScale: 191 posts
Posted: Monday, January 22, 2018 - 02:25 AM UTC
#372
United Kingdom
Joined: March 10, 2010
KitMaker: 2,568 posts
AeroScale: 1,619 posts
Posted: Monday, January 22, 2018 - 03:27 AM UTC
Mark, excellent job with the masking. Turned out really neat.
Lap Man, your Bushmaster looks really cool. Can't wait to see it finished. Who makes the kit?
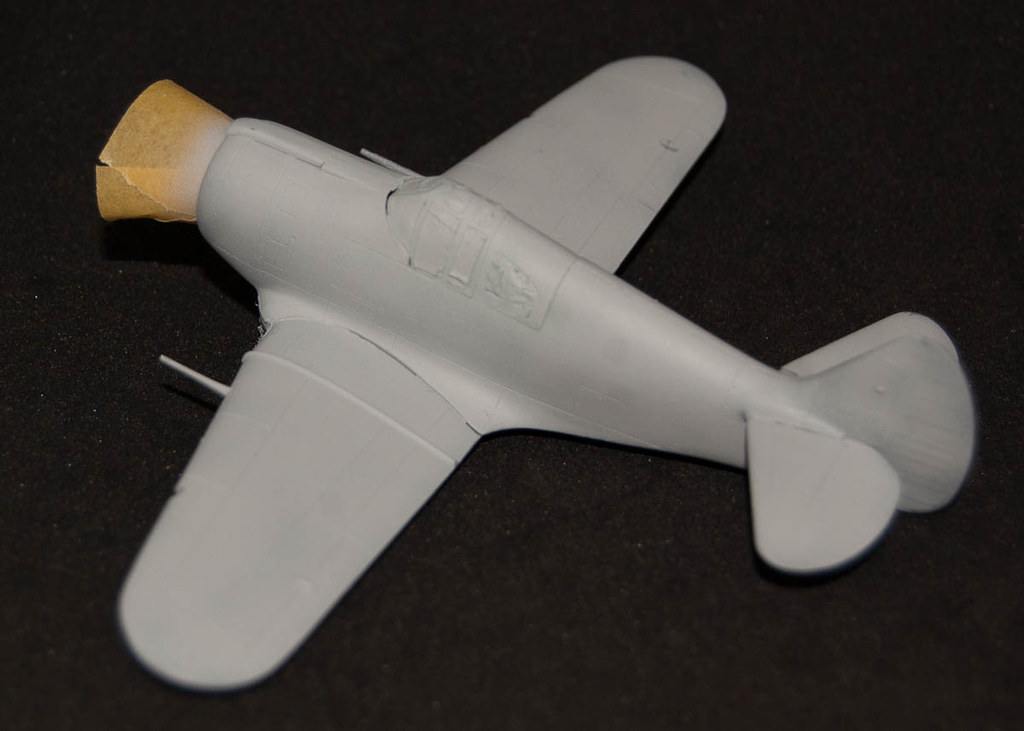
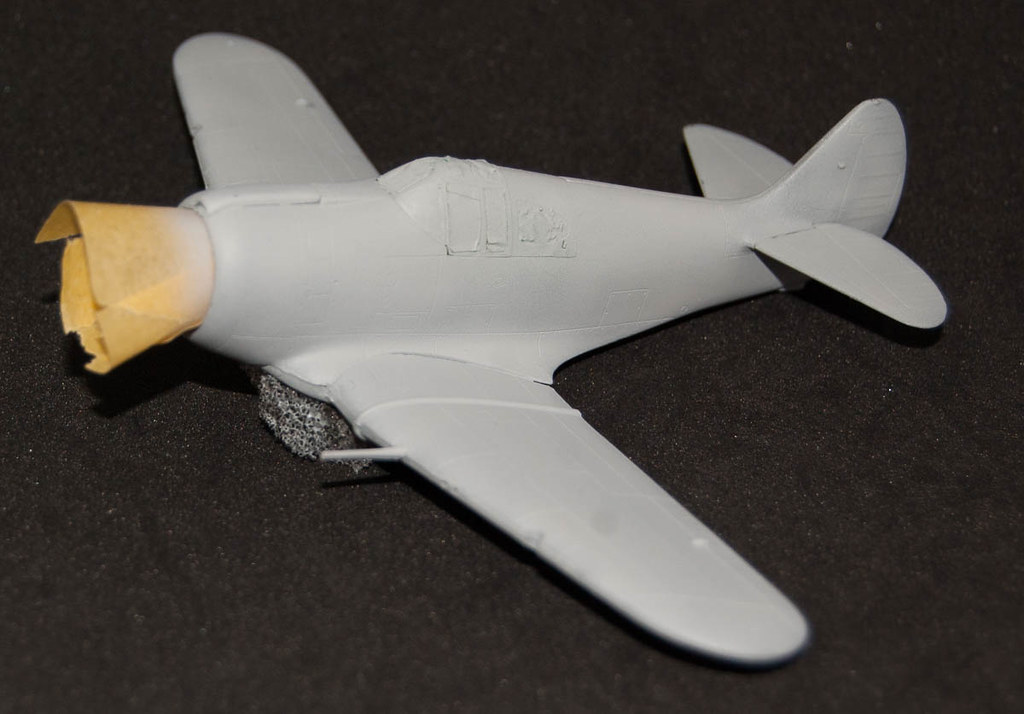
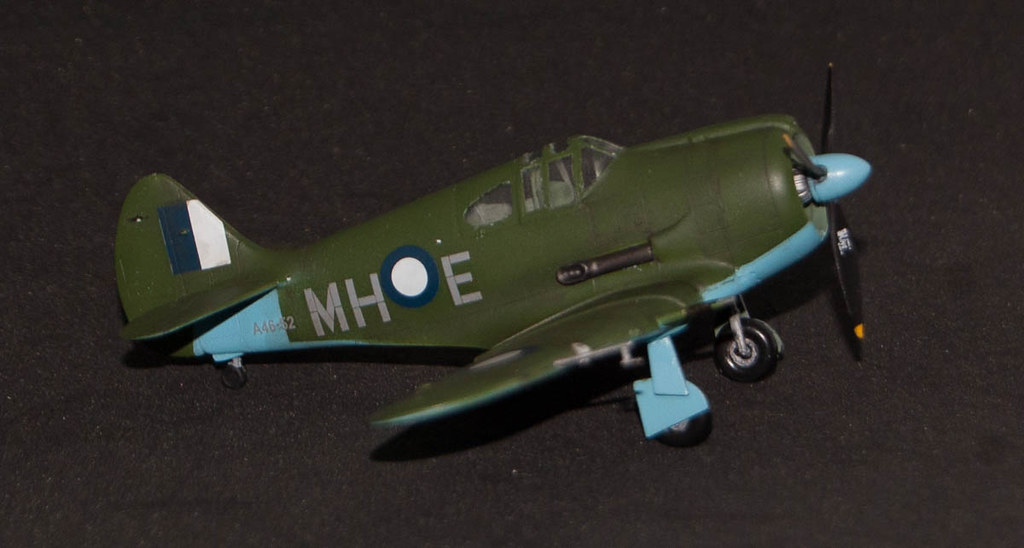
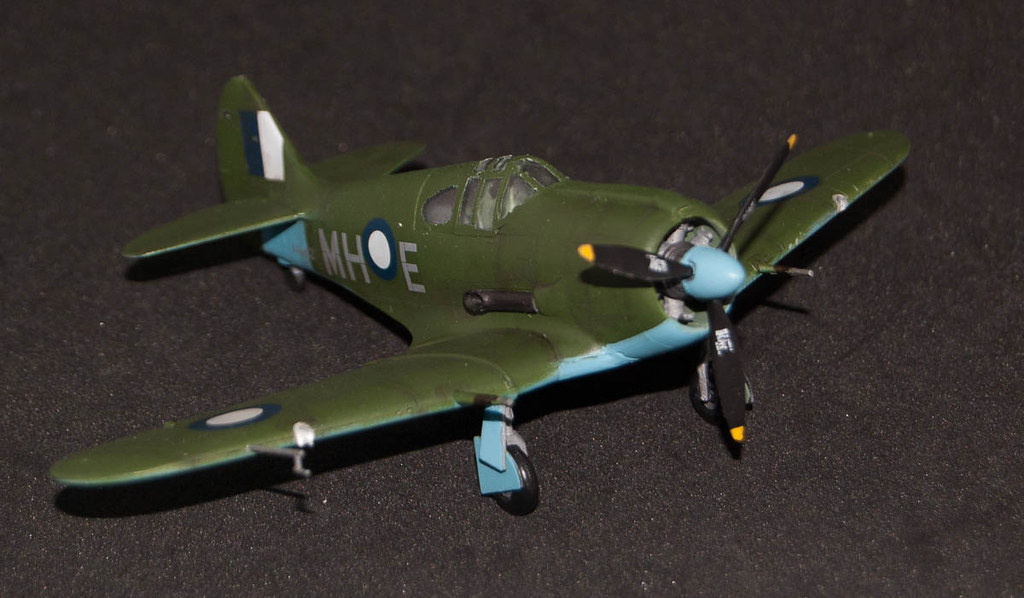
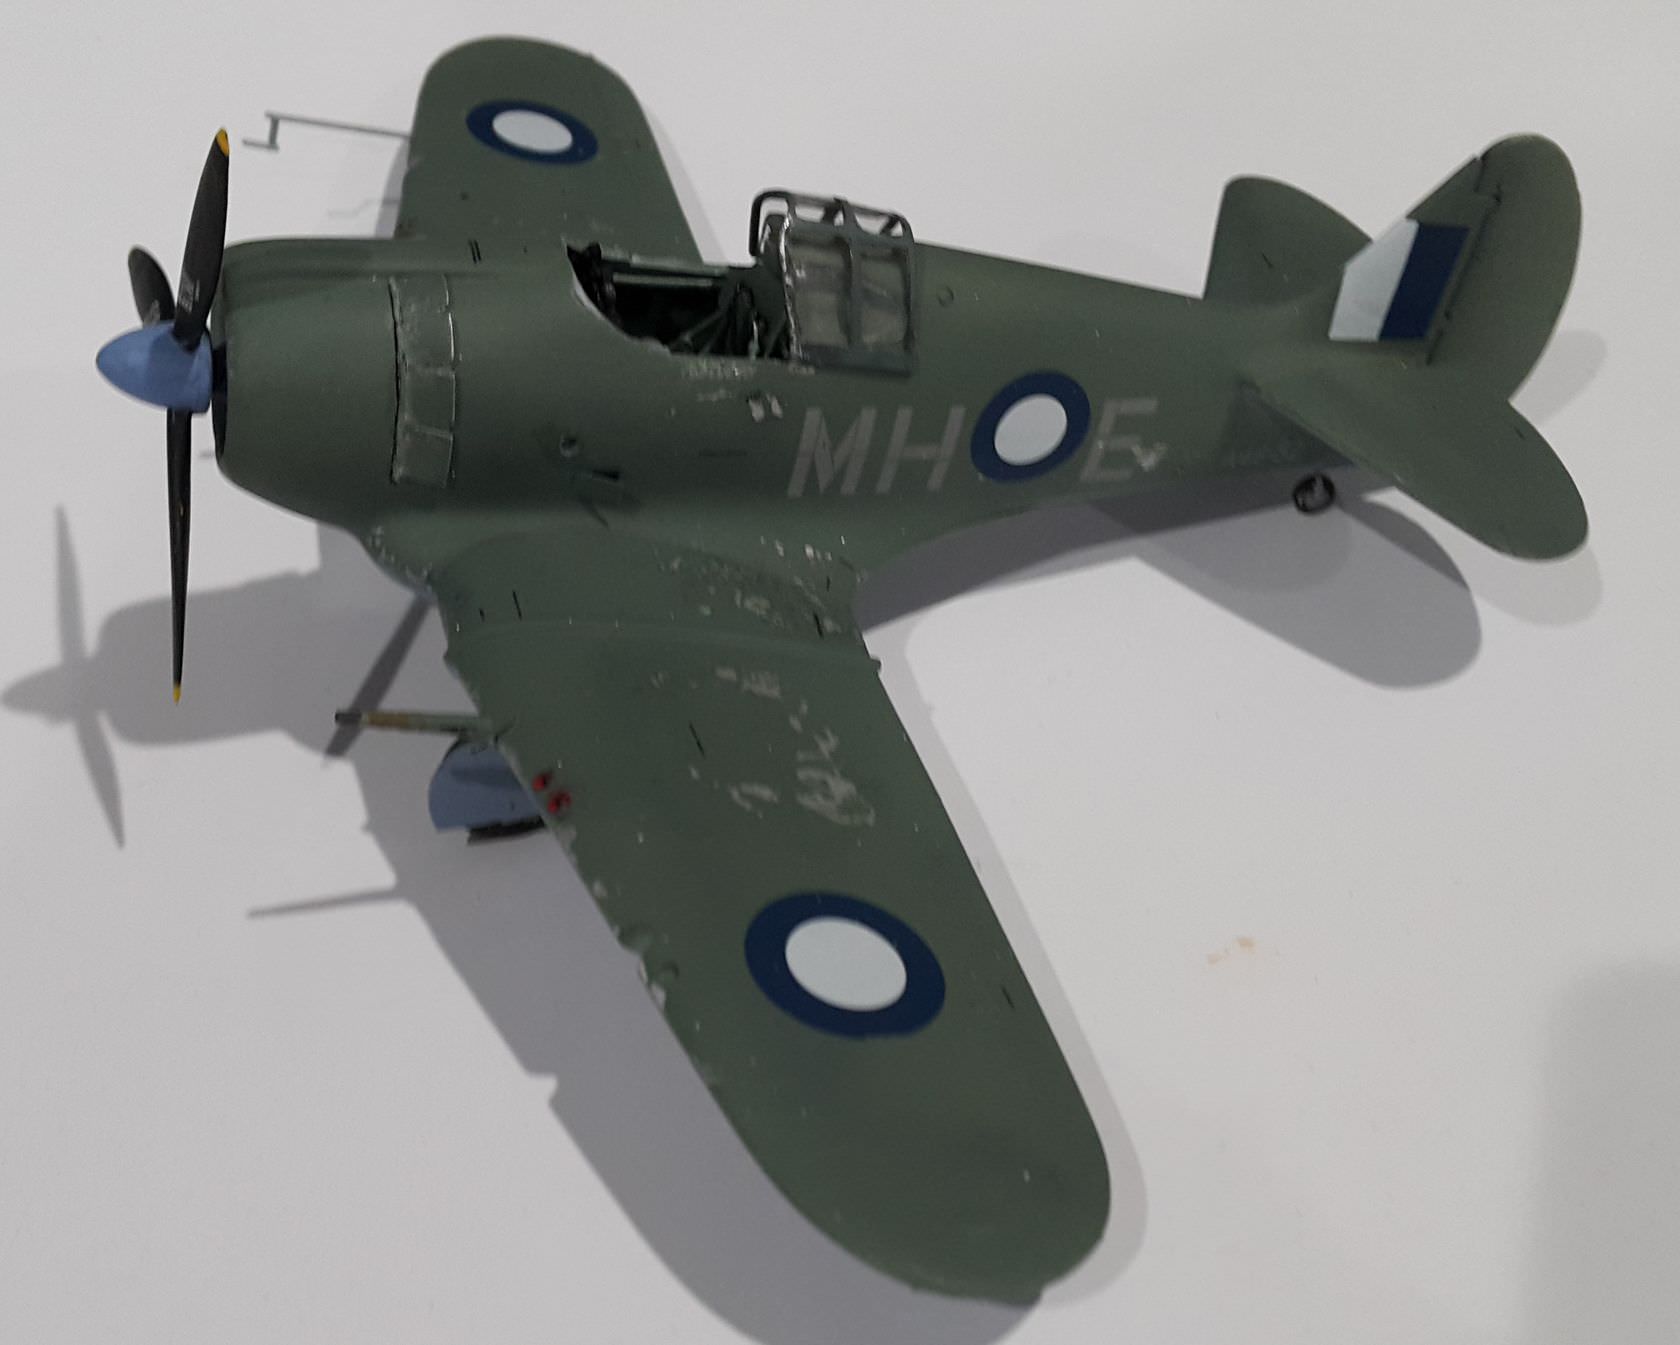
Franck, super work on the Boomerang. I never realised just how short the nose on that plane is!
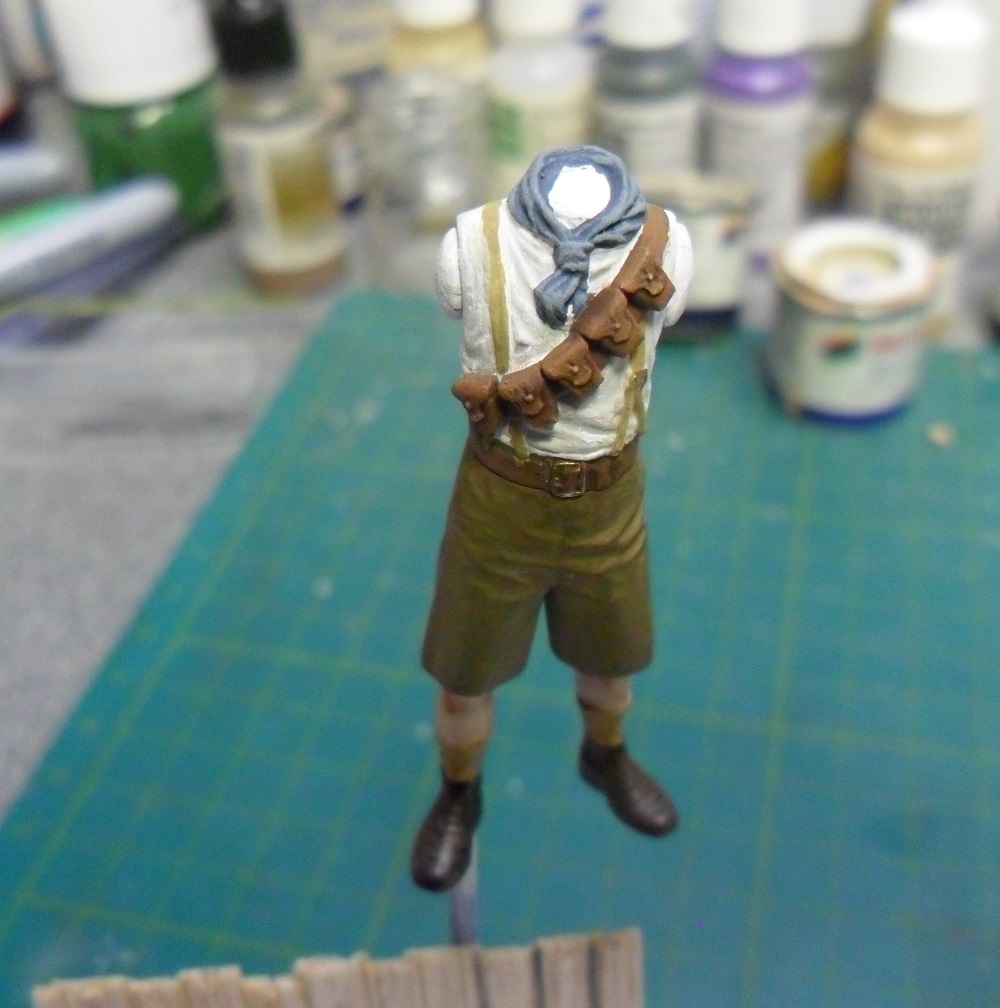
Mine too is finally nearing completion. Just a couple of bits, final assembly and a touch up of paint and I'm calling him done. I'm happy with how he has turned out an the first figure I've built and painted for years. All paints use were Humbrol or Revell enamels and some oil colours for washes. Also made a start on the scenery to place him in. Just some boarding and a firestep made from balsa.
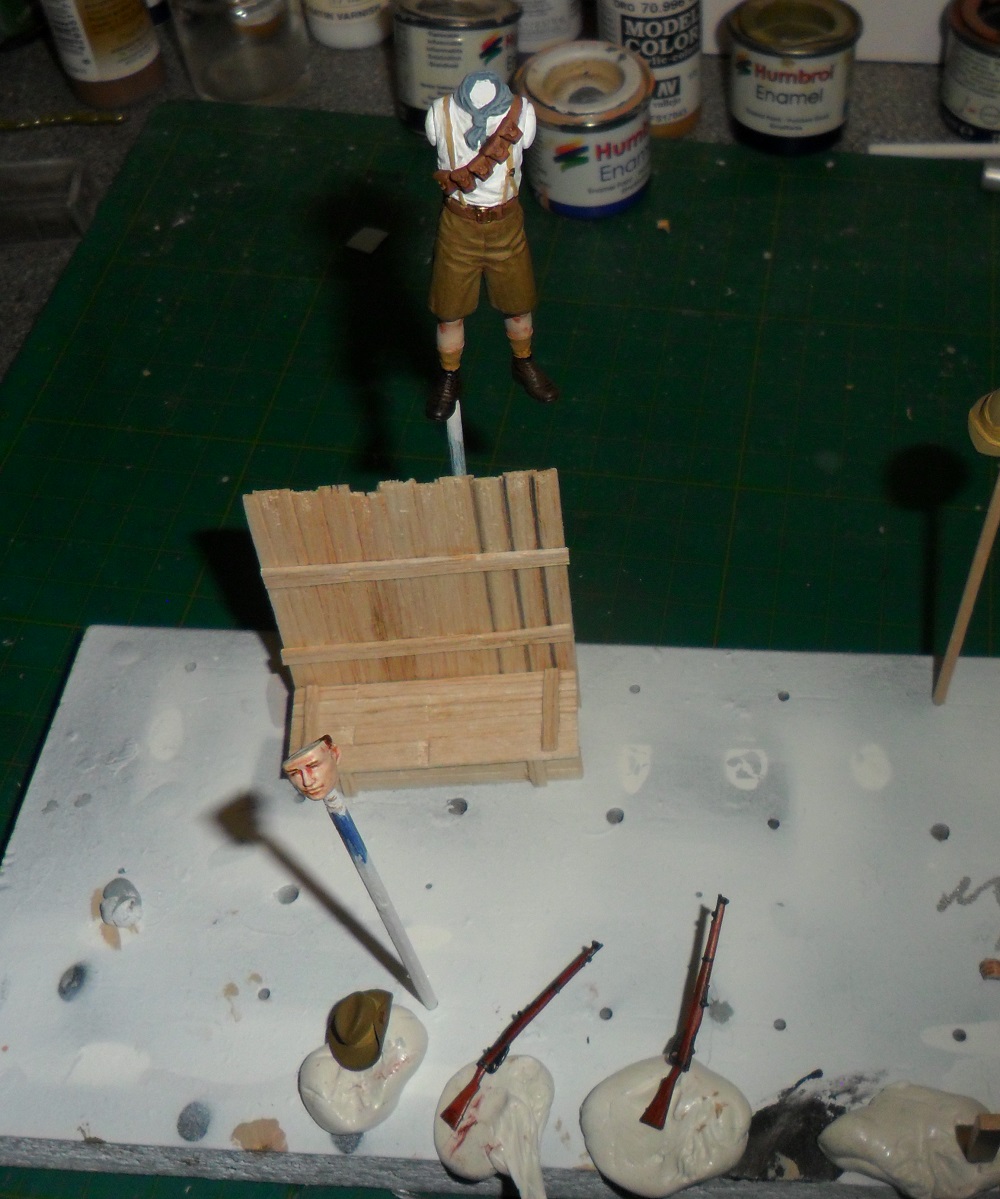
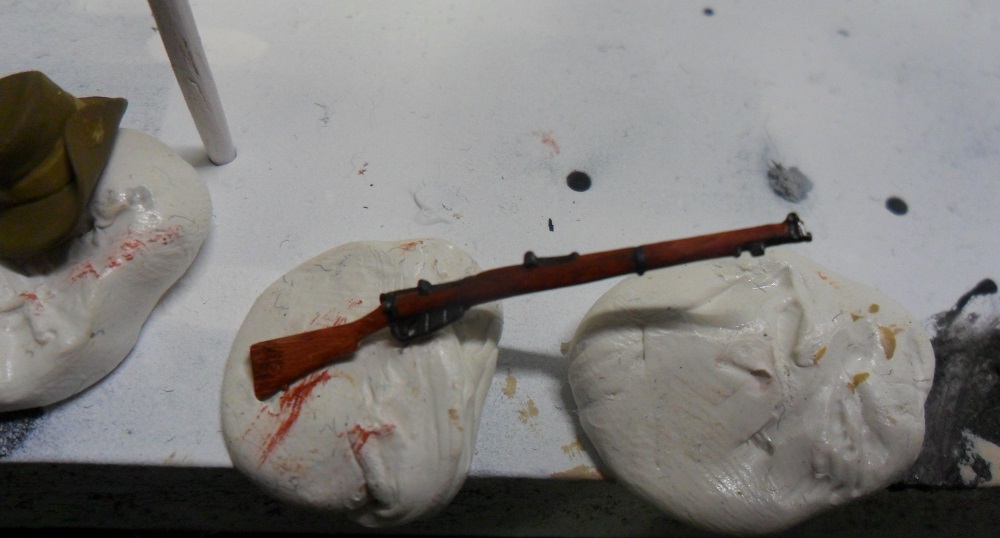
The Enfield I'm really pleased with. I used Vallejo light brown over painted with their dark woodgrain. This is a slightly transparent mahogany colour paint, that when used in a similar way to drybrushing creates a very convincing wood effect. The metal fittings were then painted with Revell 09 anthracite and highlighted with pencil graphite. Just the sling to make now for that.
On the bench: 1/72 Mosquito, Lightning F.6, DH.2,
AMT Vulcan Shuttle Surak.
Cyber-Hobby 1:35 Sherman Firefly IC - still stalled.
Queensland, Australia
Joined: May 16, 2010
KitMaker: 232 posts
AeroScale: 8 posts
Posted: Monday, January 22, 2018 - 05:45 PM UTC
Nice work on the figure Stephen. The rifle has turned out really nice
Ashore, it's wine, women and song, aboard it's rum, bum and baccy
#372
United Kingdom
Joined: March 10, 2010
KitMaker: 2,568 posts
AeroScale: 1,619 posts
Posted: Tuesday, January 23, 2018 - 04:51 AM UTC
Thanks Colin. For such a simple technique it works surprisingly well. Cannot recommend that paint enough for the wooden parts of rifles. All it needs after is a quick coat of Kleer to seal.
On the bench: 1/72 Mosquito, Lightning F.6, DH.2,
AMT Vulcan Shuttle Surak.
Cyber-Hobby 1:35 Sherman Firefly IC - still stalled.
#523
Idaho, United States
Joined: February 28, 2014
KitMaker: 342 posts
AeroScale: 250 posts
Posted: Tuesday, January 23, 2018 - 07:47 AM UTC
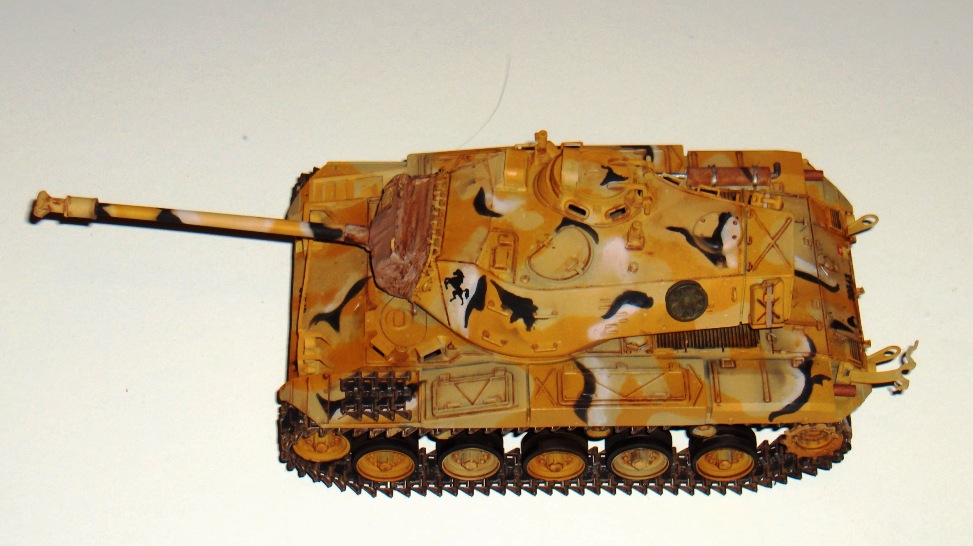
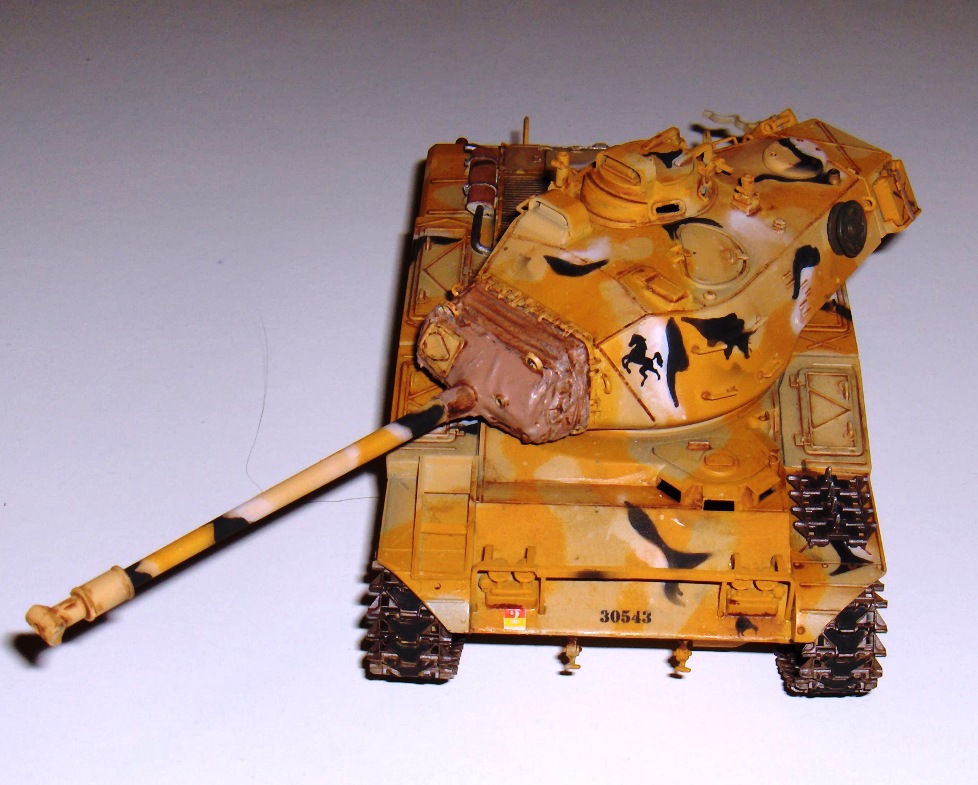
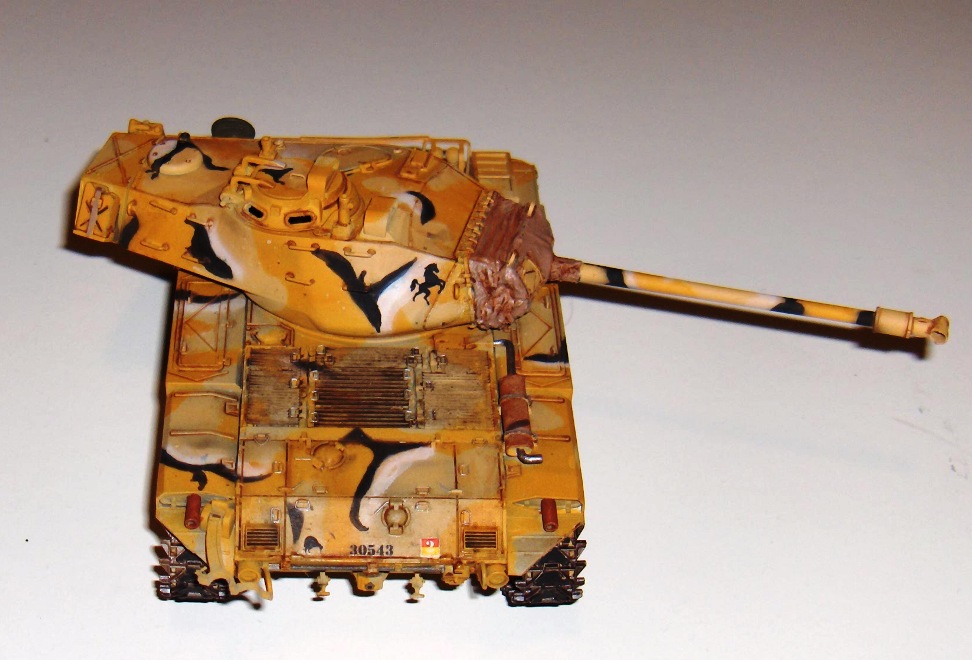
Completed main build and created decals on LaserJet printer of prancing horse, kiwi numbers etc.
Gave tank a basic burnt umber wash.
Now onto Machine gun, tools and stowage.....
Then weathering and I will be done

#439
Washington, United States
Joined: November 05, 2005
KitMaker: 4,950 posts
AeroScale: 3,192 posts
Posted: Tuesday, January 23, 2018 - 11:30 AM UTC
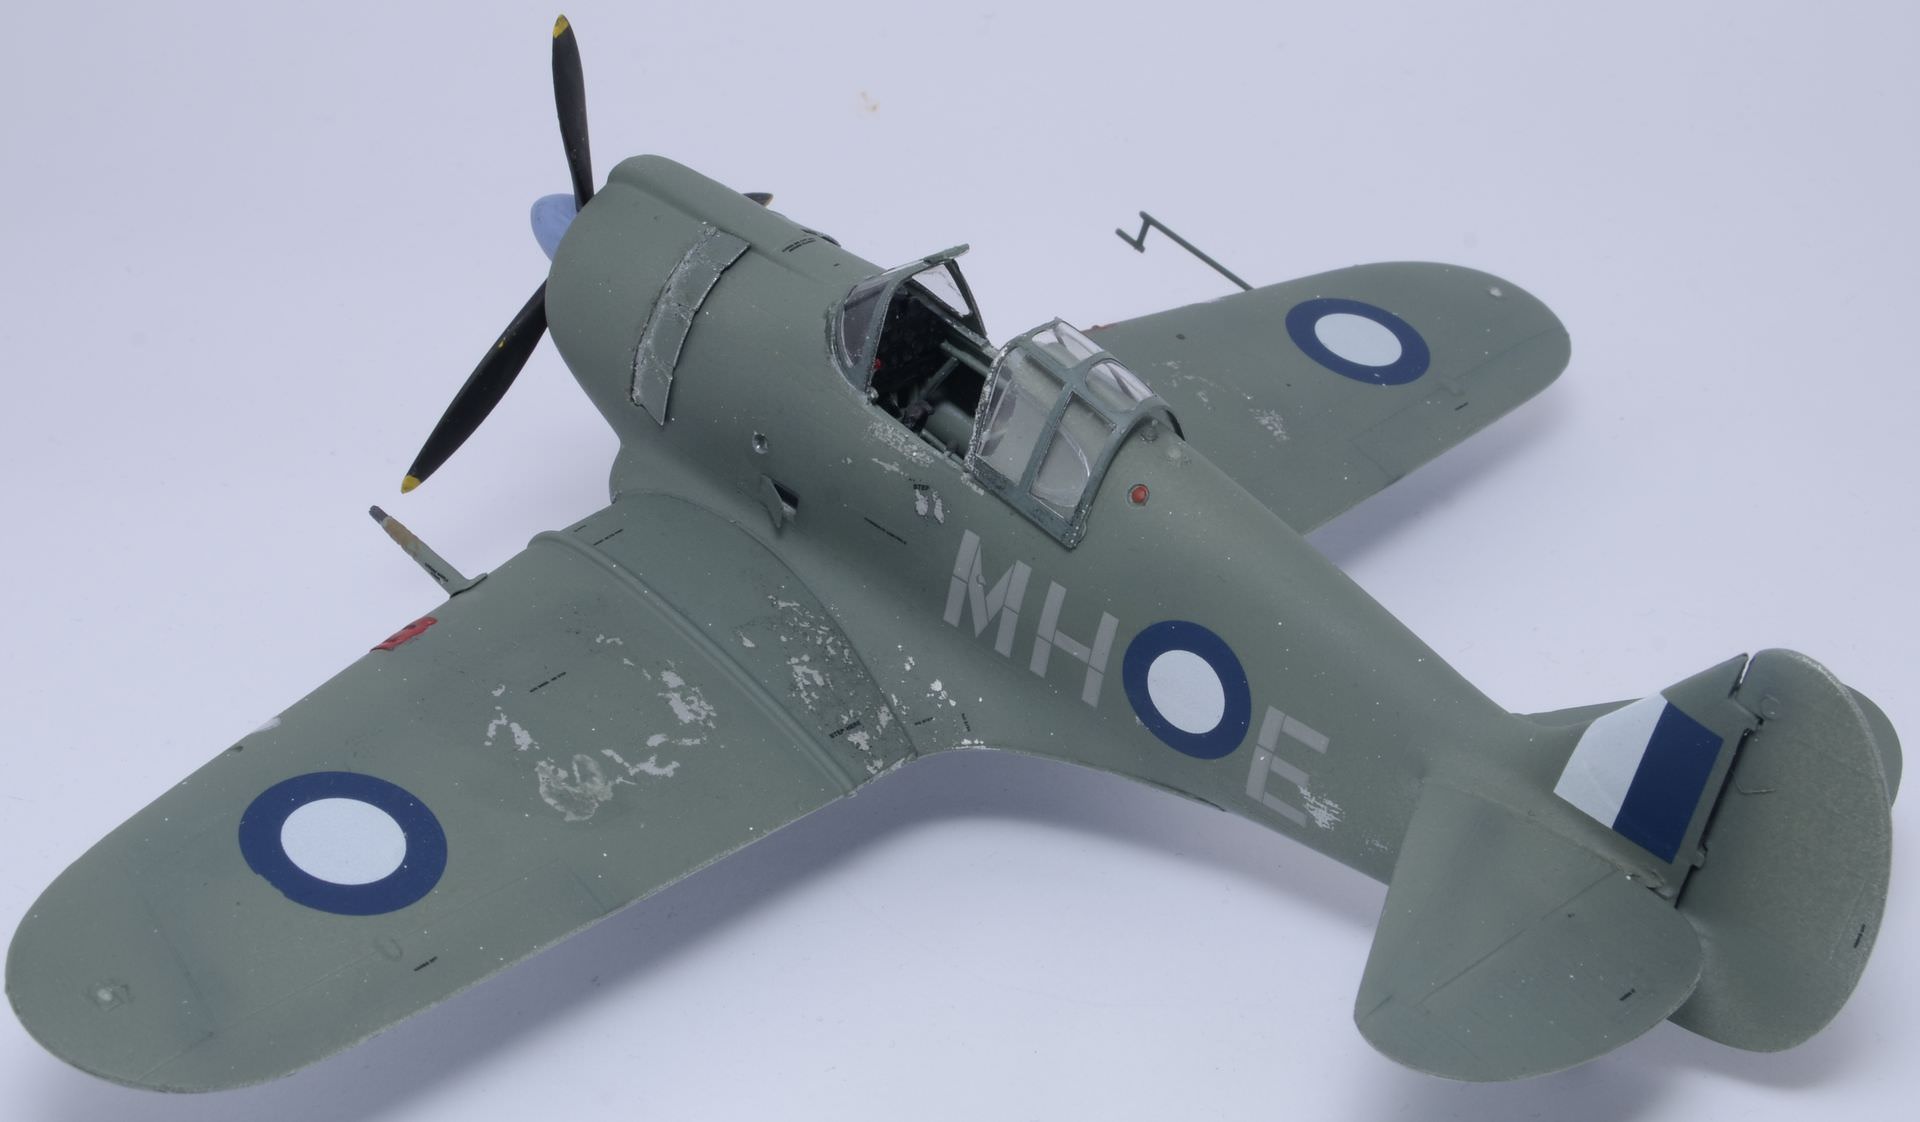
Well guyz, I never thought I'd do this. But I just shot a coat of Future (Pledge Multi surface) on a kit before decaling and weathering. But here it is:

It was about 1/2 the trouble I expected (so far).Shot it straight, slightly higher pressure than MM paints. Went on OK with no issues, cleaned up with window cleaner. I'll let it cure over night and see what happens...
Hanger Queens in Waiting:
Monogram 1/72 F8F-1
Corsair the Sky Pirate - 1/72 Ace A-7D
Century Series - Airfix 1/72 F-105G
Anti Shipping - Academy 1/72 PBJ-1D
Academy 1/72 F-84E
Western Australia, Australia
Joined: May 05, 2006
KitMaker: 900 posts
AeroScale: 200 posts
Posted: Tuesday, January 23, 2018 - 01:33 PM UTC
Nice to see so many nearing completion.
You Boomerang is looking pretty nice Franck.
Mine is very nearly done, just dealing with the painful cockpit pieces that I left out to make life a little easier masking up.
Don't you feel more like you do now than you did when you came in?
Western Australia, Australia
Joined: May 05, 2006
KitMaker: 900 posts
AeroScale: 200 posts
Posted: Thursday, January 25, 2018 - 01:40 PM UTC
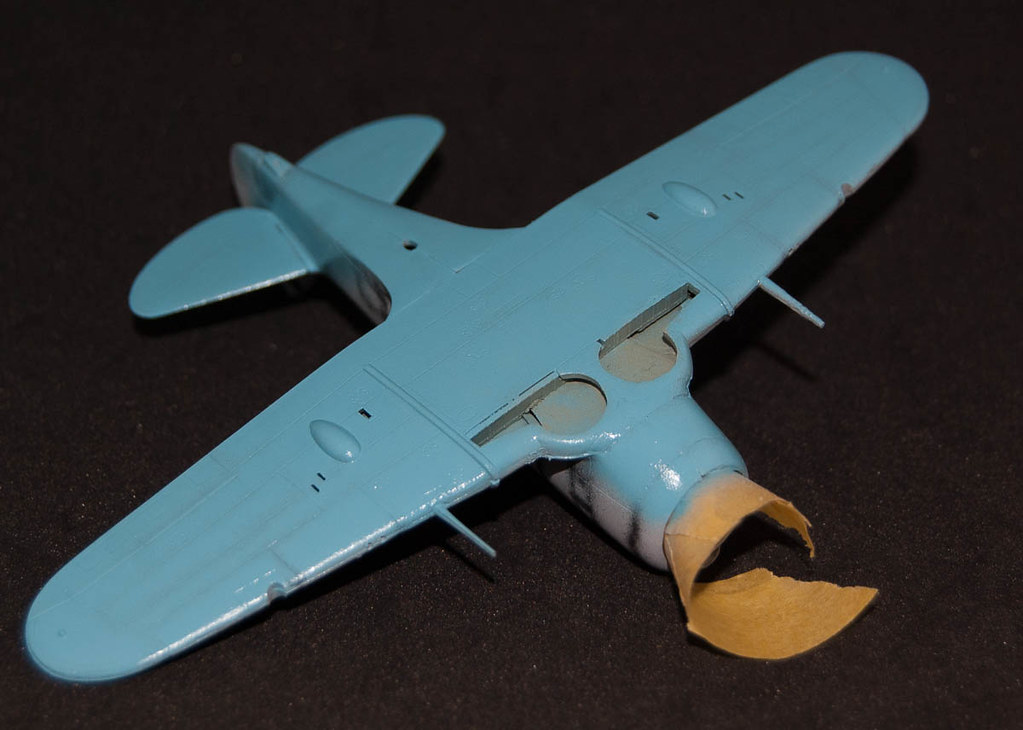
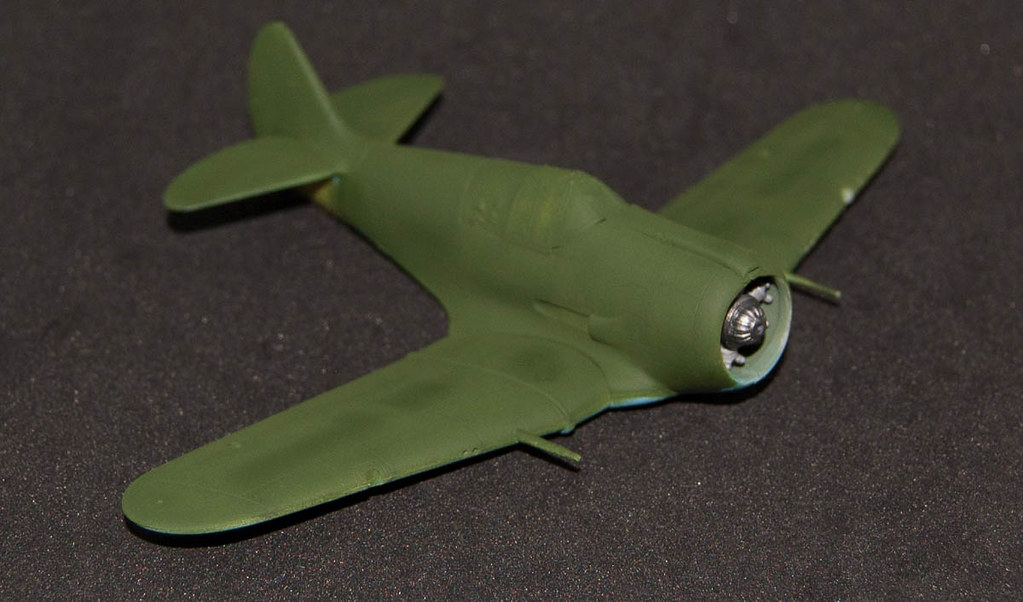
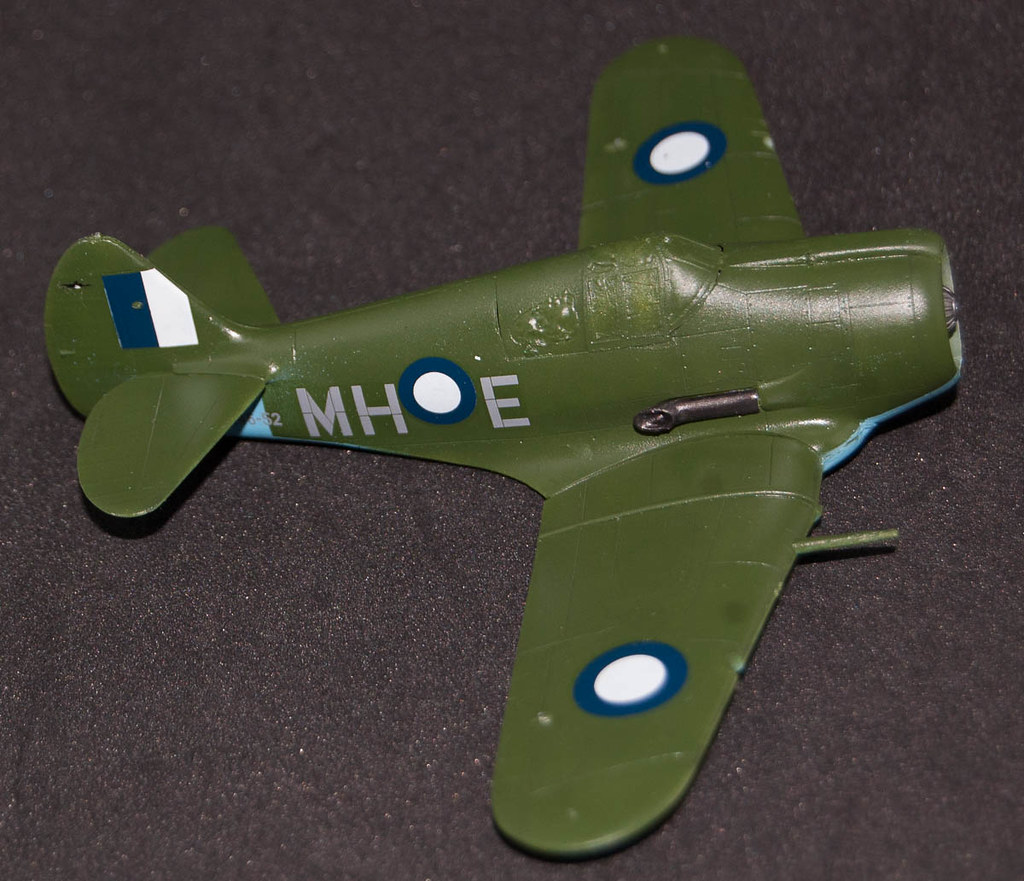
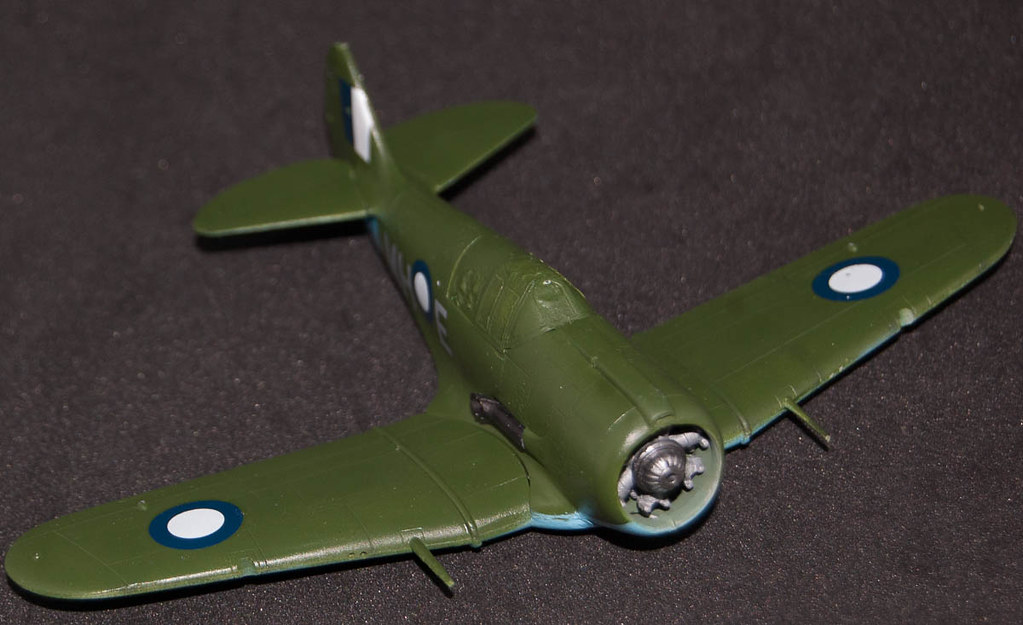
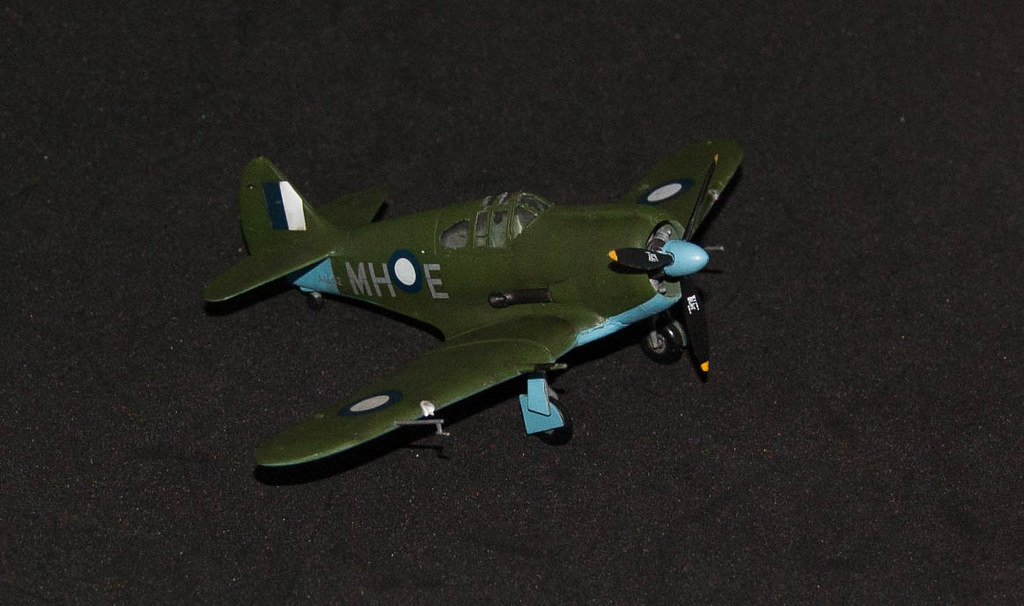
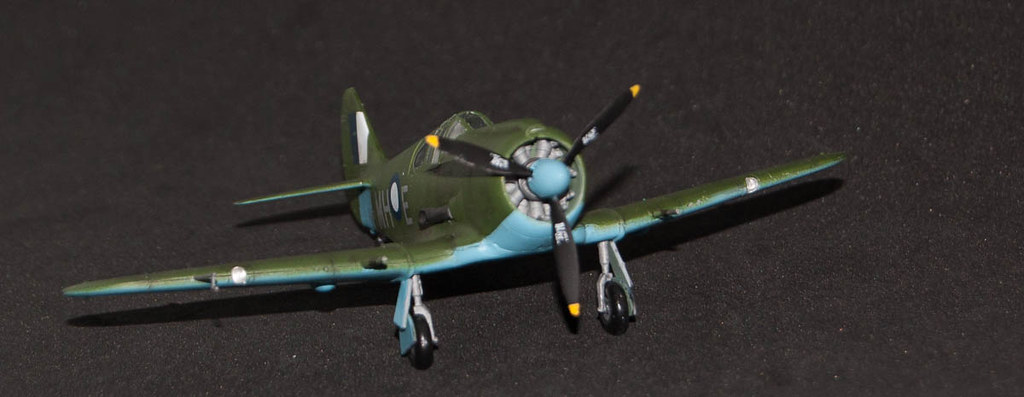
And one boomerang completed, and images uploaded to the gallery.

Had hoped to complete both for this campaign, but the amount of work needed just to get the thing assembled meant I had to just focus on the one.
Don't you feel more like you do now than you did when you came in?
#305
Christchurch, New Zealand
Joined: February 01, 2006
KitMaker: 1,673 posts
AeroScale: 1,517 posts
Posted: Thursday, January 25, 2018 - 02:01 PM UTC
Franck nice work subduing the kit and getting a coat of paint on her.
Colin I really like the figure you've created and I agree the wood effect is just awesome.
Jeff fantastic work on the M-41 especially the home made decals. And the camo is just simply perfect.
Iain love the Boomerang! I agree short run kits actually take quite a bit of work to assemble and often require numerous dry fits before committing to glue. Doing two side by side really adds to the workload.
This campaign is due to finish on the first of February and I'm still a couple of weeks off completion does anyone else require an extension?
#372
United Kingdom
Joined: March 10, 2010
KitMaker: 2,568 posts
AeroScale: 1,619 posts
Posted: Friday, January 26, 2018 - 12:50 AM UTC
Quoted Text
Franck nice work subduing the kit and getting a coat of paint on her.
Colin I really like the figure you've created and I agree the wood effect is just awesome.
Jeff fantastic work on the M-41 especially the home made decals. And the camo is just simply perfect.
Iain love the Boomerang! I agree short run kits actually take quite a bit of work to assemble and often require numerous dry fits before committing to glue. Doing two side by side really adds to the workload.
This campaign is due to finish on the first of February and I'm still a couple of weeks off completion does anyone else require an extension?
I wouldn't say no just to be on the safe side.
The M-41 looks fantastic. Cammo scheme is amazing.
On the bench: 1/72 Mosquito, Lightning F.6, DH.2,
AMT Vulcan Shuttle Surak.
Cyber-Hobby 1:35 Sherman Firefly IC - still stalled.
#439
Washington, United States
Joined: November 05, 2005
KitMaker: 4,950 posts
AeroScale: 3,192 posts
Posted: Friday, January 26, 2018 - 12:54 AM UTC
It's going to be tight for me. Only one day this weekend, and I still have decals, fiddly bits, clear coat, weathering and antenna to finish.
Hanger Queens in Waiting:
Monogram 1/72 F8F-1
Corsair the Sky Pirate - 1/72 Ace A-7D
Century Series - Airfix 1/72 F-105G
Anti Shipping - Academy 1/72 PBJ-1D
Academy 1/72 F-84E
#305
Christchurch, New Zealand
Joined: February 01, 2006
KitMaker: 1,673 posts
AeroScale: 1,517 posts
Posted: Friday, January 26, 2018 - 02:04 AM UTC
Okay so some of us would need an extension, how much of an extension do we need? Would two weeks be long enough or would you lot need 4?
#372
United Kingdom
Joined: March 10, 2010
KitMaker: 2,568 posts
AeroScale: 1,619 posts
Posted: Friday, January 26, 2018 - 11:36 PM UTC
2 weeks would be ok for me, but happy to go with the majority.
Was hoping to do some work today, but my other half threw a load of jobs at me she considered more of a priority than as she says 'playing with soldiers'.
On the bench: 1/72 Mosquito, Lightning F.6, DH.2,
AMT Vulcan Shuttle Surak.
Cyber-Hobby 1:35 Sherman Firefly IC - still stalled.
#439
Washington, United States
Joined: November 05, 2005
KitMaker: 4,950 posts
AeroScale: 3,192 posts
Posted: Saturday, January 27, 2018 - 02:20 AM UTC
Two weekends would be plenty for me. I got the decals on this morning. Now on to the antenna and clear coat.
Hanger Queens in Waiting:
Monogram 1/72 F8F-1
Corsair the Sky Pirate - 1/72 Ace A-7D
Century Series - Airfix 1/72 F-105G
Anti Shipping - Academy 1/72 PBJ-1D
Academy 1/72 F-84E
#305
Christchurch, New Zealand
Joined: February 01, 2006
KitMaker: 1,673 posts
AeroScale: 1,517 posts
Posted: Saturday, January 27, 2018 - 04:23 AM UTC
Oh well that's rather derogatory ..... but if you wargame then it's accurate I guess. LOL
One no make that two vote for 2 weeks so far anyone else?
Wellington, New Zealand
Joined: June 01, 2014
KitMaker: 189 posts
AeroScale: 179 posts
Posted: Saturday, January 27, 2018 - 04:50 AM UTC
No comment from me, I've got target fixation for the end of Feb, and it's getting veeeery close.

#298
Hong Kong S.A.R. / 繁體
Joined: August 08, 2002
KitMaker: 1,182 posts
AeroScale: 351 posts
Posted: Saturday, January 27, 2018 - 10:41 AM UTC
A two weeks extension will be great.

Western Australia, Australia
Joined: May 05, 2006
KitMaker: 900 posts
AeroScale: 200 posts
Posted: Saturday, January 27, 2018 - 11:08 AM UTC
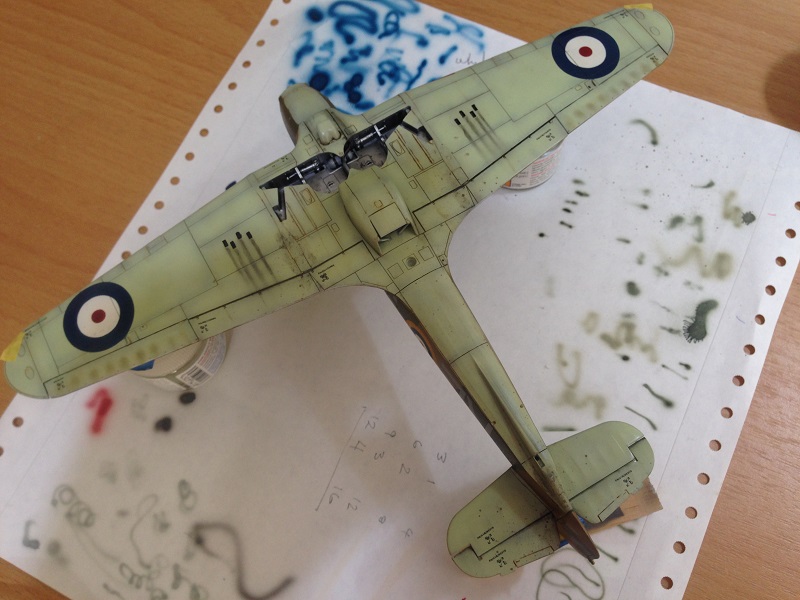
That's a moderately gorgeous looking Hurricane you have there Spud!
Don't you feel more like you do now than you did when you came in?
Bas-Rhin, France
Joined: September 22, 2016
KitMaker: 224 posts
AeroScale: 191 posts
Posted: Monday, January 29, 2018 - 01:46 AM UTC
#439
Washington, United States
Joined: November 05, 2005
KitMaker: 4,950 posts
AeroScale: 3,192 posts
Posted: Monday, January 29, 2018 - 11:51 AM UTC
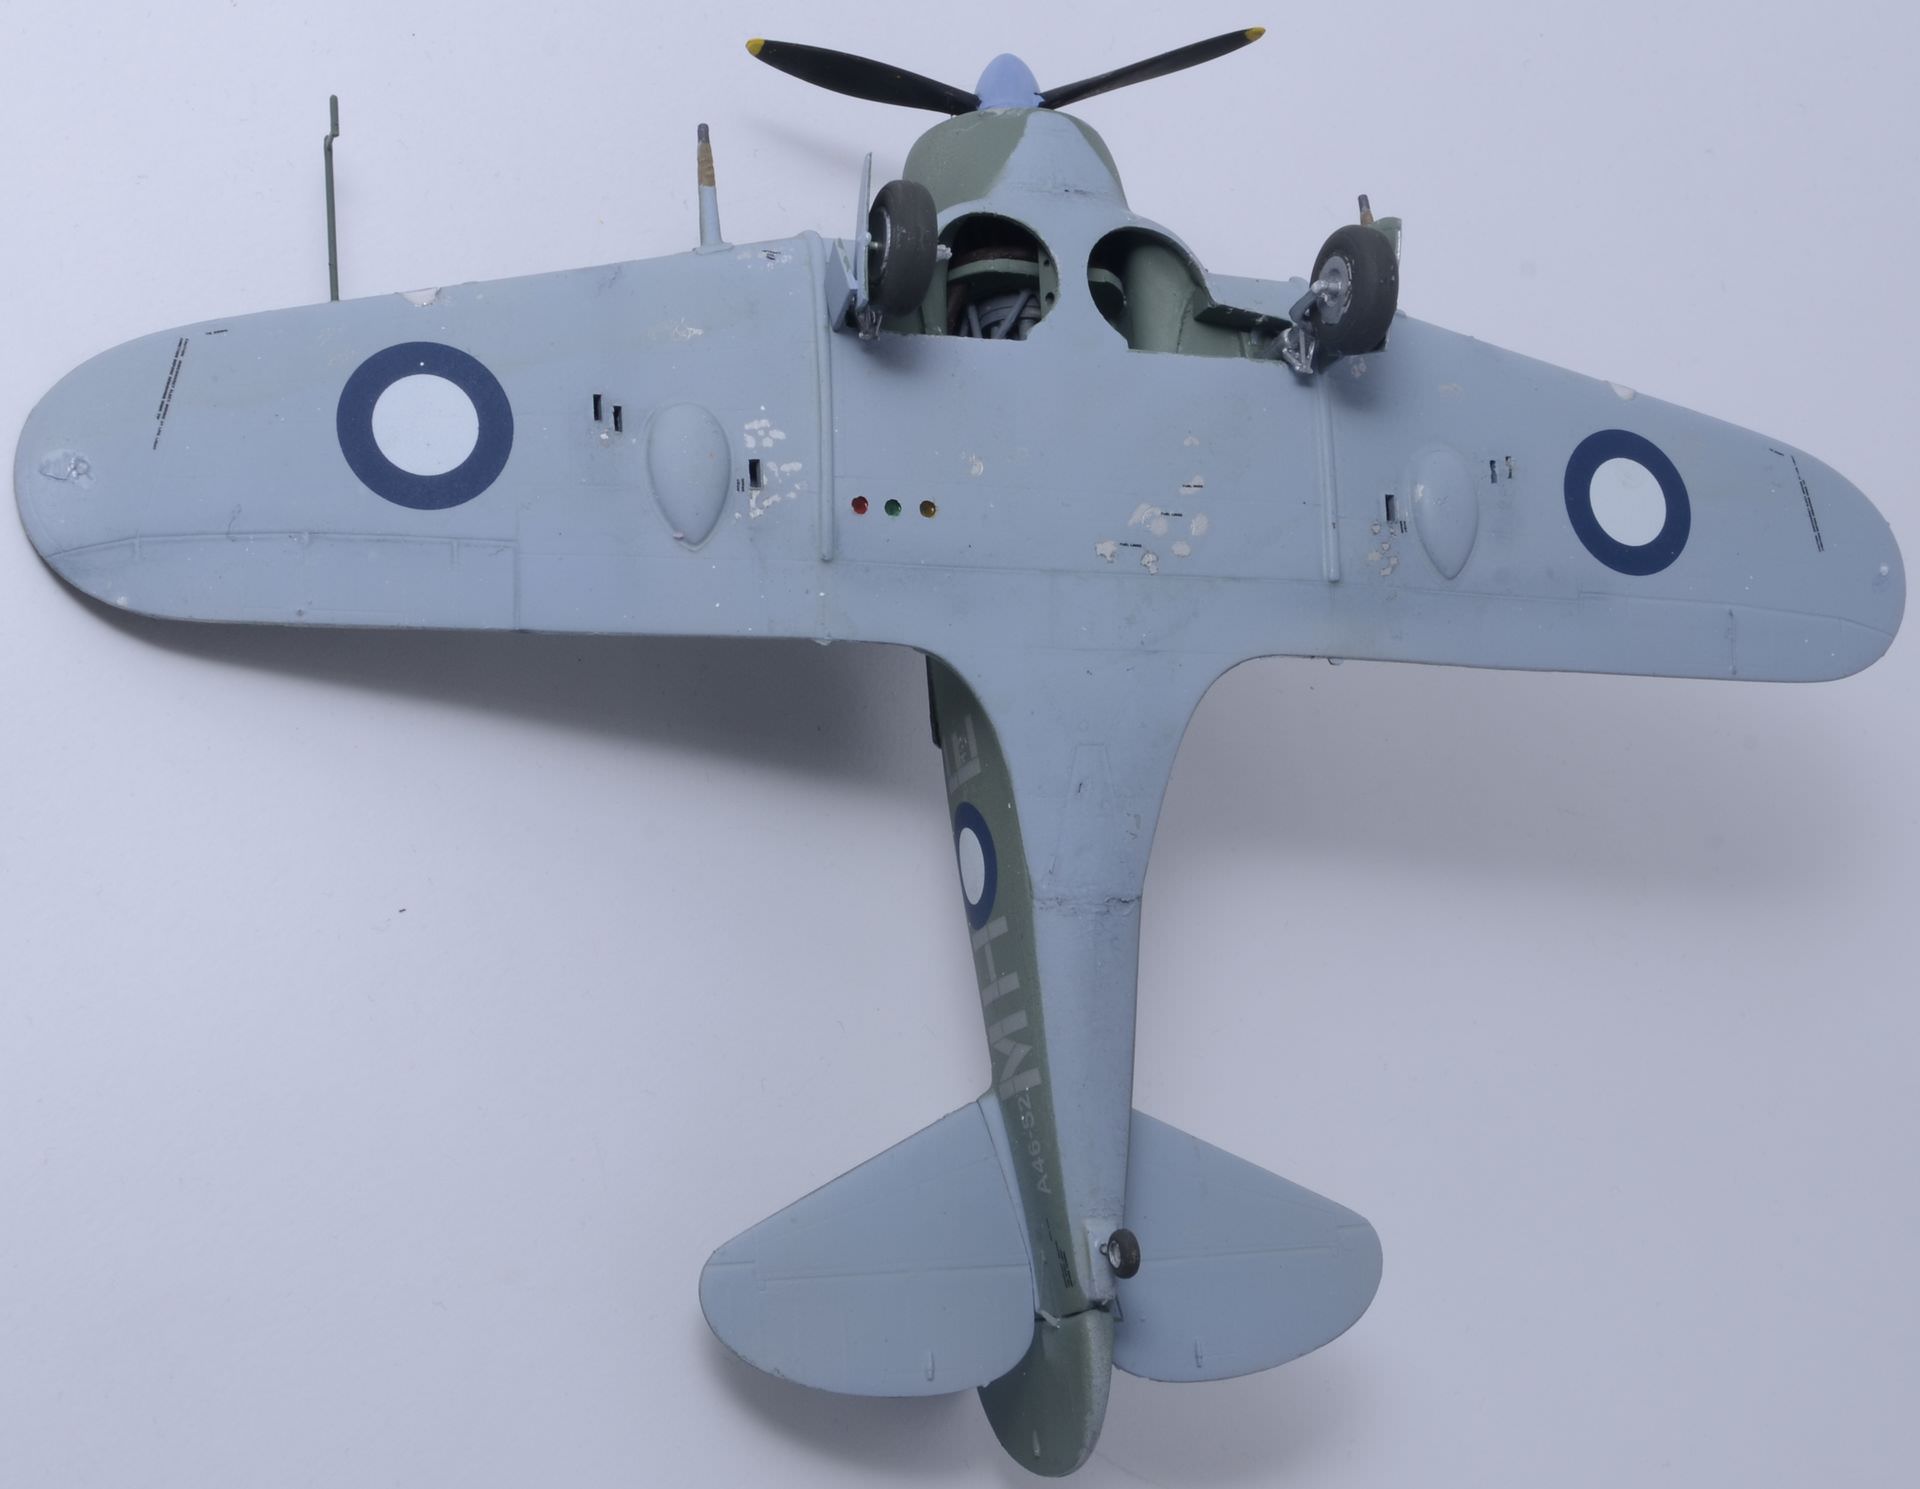
Sooo close... Got the LG in place, the belly tank is installed. Need to turn it right side up, install the antenna, pitot tube and exhaust pipes, then if needed I could call it done.

Hanger Queens in Waiting:
Monogram 1/72 F8F-1
Corsair the Sky Pirate - 1/72 Ace A-7D
Century Series - Airfix 1/72 F-105G
Anti Shipping - Academy 1/72 PBJ-1D
Academy 1/72 F-84E