OFFICIAL: Airfix IV Campaign
Berlin, Germany
Joined: October 12, 2008
KitMaker: 709 posts
AeroScale: 651 posts
Posted: Friday, July 14, 2017 - 01:01 PM UTC
Quoted Text
Well, it arrived today, so I'm in!
...And the wing-to-fuselage join looks to be foolproof.. Some hefty thought went into designing this puppy...
Gaz
But obviously no hefty thougts while boxing the puppy on the final check. And again - how does the wing-to-fuselage join looks like? For sure foolproof with no parts to fix...

Sorry for your mess, Thomas

Sometimes you need to distance yourself to see things clearly - Lao Tzu -
... in scale and in real life -T.
Dublin, Ireland
Joined: August 14, 2016
KitMaker: 148 posts
AeroScale: 123 posts
Posted: Friday, July 14, 2017 - 08:11 PM UTC
Hi all,
I've finally finished my 1:72 Hurricane. It's taken me a while, because I did not want to rush thorugh the stage I find most intimidating - the waethering. But I still managed to mess up big time. I've mostly cleaned up the mess, but I am still not happy with the wash and waethering, especally on the underside. Anyway this is still my best aircraft so far. Some mistakes made (including the wrong wings, doh!) but many lessons learned.
I tried to portray the aircraft of No.303 Squadron as it looked at the end of the Battle of Britain, piloted by Witold Urbanowicz (a real celebrity in Poland, every boy knows this name).
This particular plane (RF-F serial no. V6684) has been credited with seven confirmed kills by F/O Witold Urbanowicz (2), F/O Jan Zumbach (3), F/Lt. John Kent (1) and F/O Zdzislaw Hennenberg (1). Even though Urbanowicz is mostly associated with RF-E, he did fight in RF-F as well and I really wanted the iconic "126 Adolfs" emblem, hence the RF-F.


Currently in the workshop:
1:72 Spitfire Mark 1A by Airfix

#424
Queensland, Australia
Joined: April 23, 2015
KitMaker: 4,648 posts
AeroScale: 1,938 posts
Posted: Saturday, July 15, 2017 - 03:02 AM UTC
Your Hurricane looks fantastic, Shrimpman! Really great for 1/72!
Exceptional!
Gaz
"Artillery adds dignity, to what would otherwise be an ugly brawl."
Frederick The Great
#424
Queensland, Australia
Joined: April 23, 2015
KitMaker: 4,648 posts
AeroScale: 1,938 posts
Posted: Saturday, July 15, 2017 - 03:20 AM UTC
[quote]
Quoted Text
And again - how does the wing-to-fuselage join looks like? For sure foolproof with no parts to fix...
Sorry for your mess, Thomas
Hi Thomas,
Instead of me trying to explain with words alone, I've assembled a few pictures from the directions:


The highlighted-in-red parts show the part in it's final position.
Cheers,
Gaz
"Artillery adds dignity, to what would otherwise be an ugly brawl."
Frederick The Great
Texas, United States
Joined: February 22, 2008
KitMaker: 5,026 posts
AeroScale: 2,811 posts
Posted: Saturday, July 15, 2017 - 04:21 AM UTC
If it aint broke dont fix it.
#123
New Mexico, United States
Joined: November 17, 2008
KitMaker: 1,202 posts
AeroScale: 292 posts
Posted: Saturday, July 15, 2017 - 05:40 AM UTC
Shrimpman,
Great work in 1/72. Very nice detail and weathering.
Take care,
Don "Lakota"

Working on Campaigns:
1/72 Hasegawa Ki-84 Frank
1/144 Dragon Armor
Scotland, United Kingdom
Joined: May 11, 2015
KitMaker: 768 posts
AeroScale: 656 posts
Posted: Saturday, July 15, 2017 - 02:15 PM UTC
Great Hurricanes Bob and Shrimpman... We've assembled a nice collection !
Sorry i didn't pay attention earlier but were these both the early Airfix models?
Pax & Pallets: Revell 1/48 Dakota
Terrible Teens : Revell 1/48 F15E Strike Eagle
Airfix IV : Airfix 1.72 Vulcan
Berlin, Germany
Joined: October 12, 2008
KitMaker: 709 posts
AeroScale: 651 posts
Posted: Saturday, July 15, 2017 - 02:36 PM UTC
Gaz: Thanks a lot for the additional infos! Since I have already many of the newer Airfix molds stored, I'll go for this
Stuka as I have only one (Heller 1/72) in my stash

Hope you'll get your spare sprue soon so I can follow up your build what surely gives me some inspiration!
Thomas
Sometimes you need to distance yourself to see things clearly - Lao Tzu -
... in scale and in real life -T.
#306
Victoria, Australia
Joined: June 27, 2010
KitMaker: 3,959 posts
AeroScale: 598 posts
Posted: Sunday, July 16, 2017 - 02:21 AM UTC
Gaz Sorry to hear about the missing parts-not a good start to your first Airfix kit.
Hopefully there's plenty for you to go on with while the spare parts are on their way to you!

Stay home and build models!
In 1/72
Gloster Gladiator MkII for the Bi-planes Campaign
In 1/350
Airfix 1:350 Type 45 Destroyer
Dublin, Ireland
Joined: August 14, 2016
KitMaker: 148 posts
AeroScale: 123 posts
Posted: Sunday, July 16, 2017 - 02:54 AM UTC
Thanks guys for the kind words. Hurricane is a great looking aircraft. I has been a very satisfying project.
Quoted Text
Great Hurricanes Bob and Shrimpman... We've assembled a nice collection !
Sorry i didn't pay attention earlier but were these both the early Airfix models?
I'm not too sure, as I don't have enough experience to know for sure, but I believe my plane is a new one. Molds must have been quite new as all parts were very well made.
Currently in the workshop:
1:72 Spitfire Mark 1A by Airfix
Texas, United States
Joined: February 22, 2008
KitMaker: 5,026 posts
AeroScale: 2,811 posts
Posted: Sunday, July 16, 2017 - 04:15 AM UTC
Guys, thanks for the comments.
Bob
If it aint broke dont fix it.
Michigan, United States
Joined: January 02, 2012
KitMaker: 139 posts
AeroScale: 70 posts
Posted: Monday, July 17, 2017 - 06:35 AM UTC
Greetings,
Making progress on my Spitfire MkIIa.


Regards,
Firstsergeant
In progress:
MPC Boeing B-17G Mighty Eighth Campaign
California, United States
Joined: October 10, 2012
KitMaker: 204 posts
AeroScale: 52 posts
Posted: Monday, July 17, 2017 - 07:18 AM UTC
I had a quick question for those that are more versed in modeling. So I am doing the nightfight version of the Defiant so there doesn't really seem to be a need to do a black pin wash as the entire fighter is going to be black, but what about doing a metallic pin wash? would that help bring out some detail or would it just look strange?
Texas, United States
Joined: February 22, 2008
KitMaker: 5,026 posts
AeroScale: 2,811 posts
Posted: Monday, July 17, 2017 - 07:40 AM UTC
Casey, maybe a real subtle light gray would do for your Defiant.
Bob
If it aint broke dont fix it.
California, United States
Joined: October 10, 2012
KitMaker: 204 posts
AeroScale: 52 posts
Posted: Thursday, July 20, 2017 - 05:48 AM UTC
@Bob thanks i'll have to think about that.
well for the most part i'm ready to start painting. when doing a test fit of the turret I did find that the fit was a little tight prevents the guns from really moving and as delicate as they are did not want to force it, so you are going to want to position the guns before adding the top if you are going to do anything other then 6 o'clock

England - South East, United Kingdom
Joined: June 01, 2017
KitMaker: 8 posts
AeroScale: 7 posts
Posted: Saturday, July 22, 2017 - 04:59 PM UTC
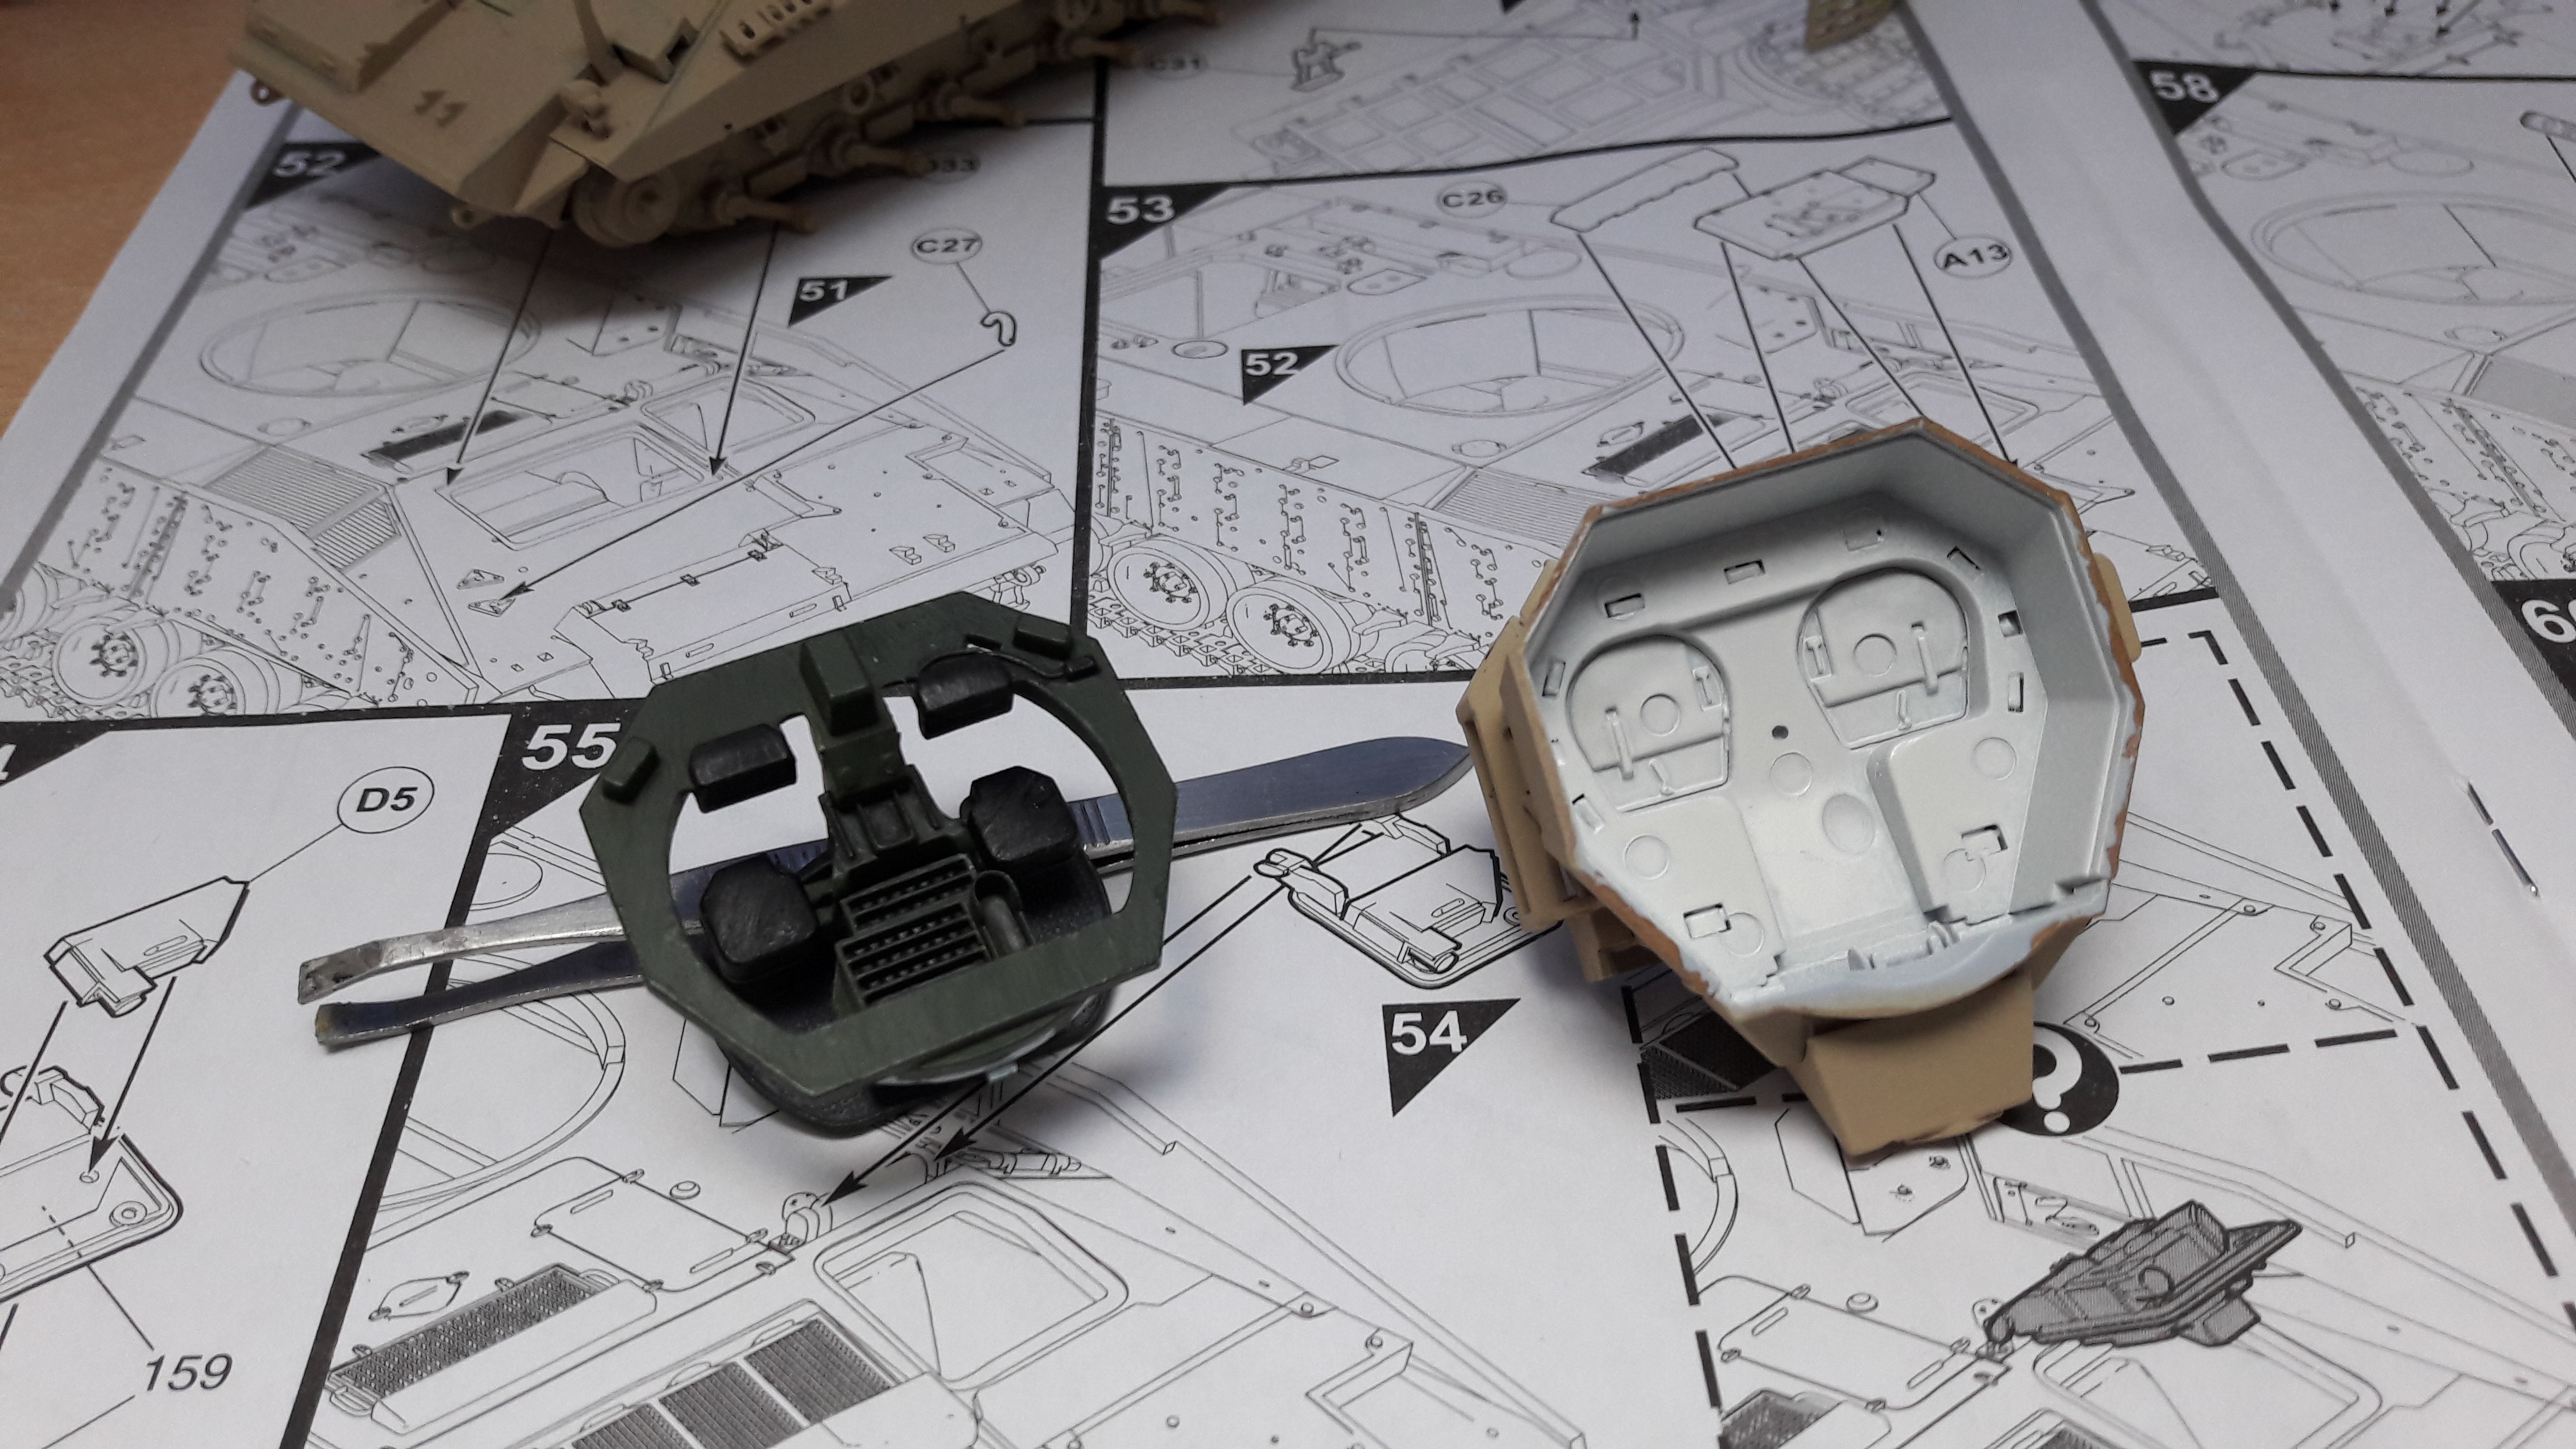
It's been a while, but I'm back to work on the Warrior. The base coat is sprayed (Humbrol acrylic Desert Tan, as per the kit instructions; to keep to the "Out of the Box" theme).
I actually tried using a spray can for this, and it turned out fairly well.
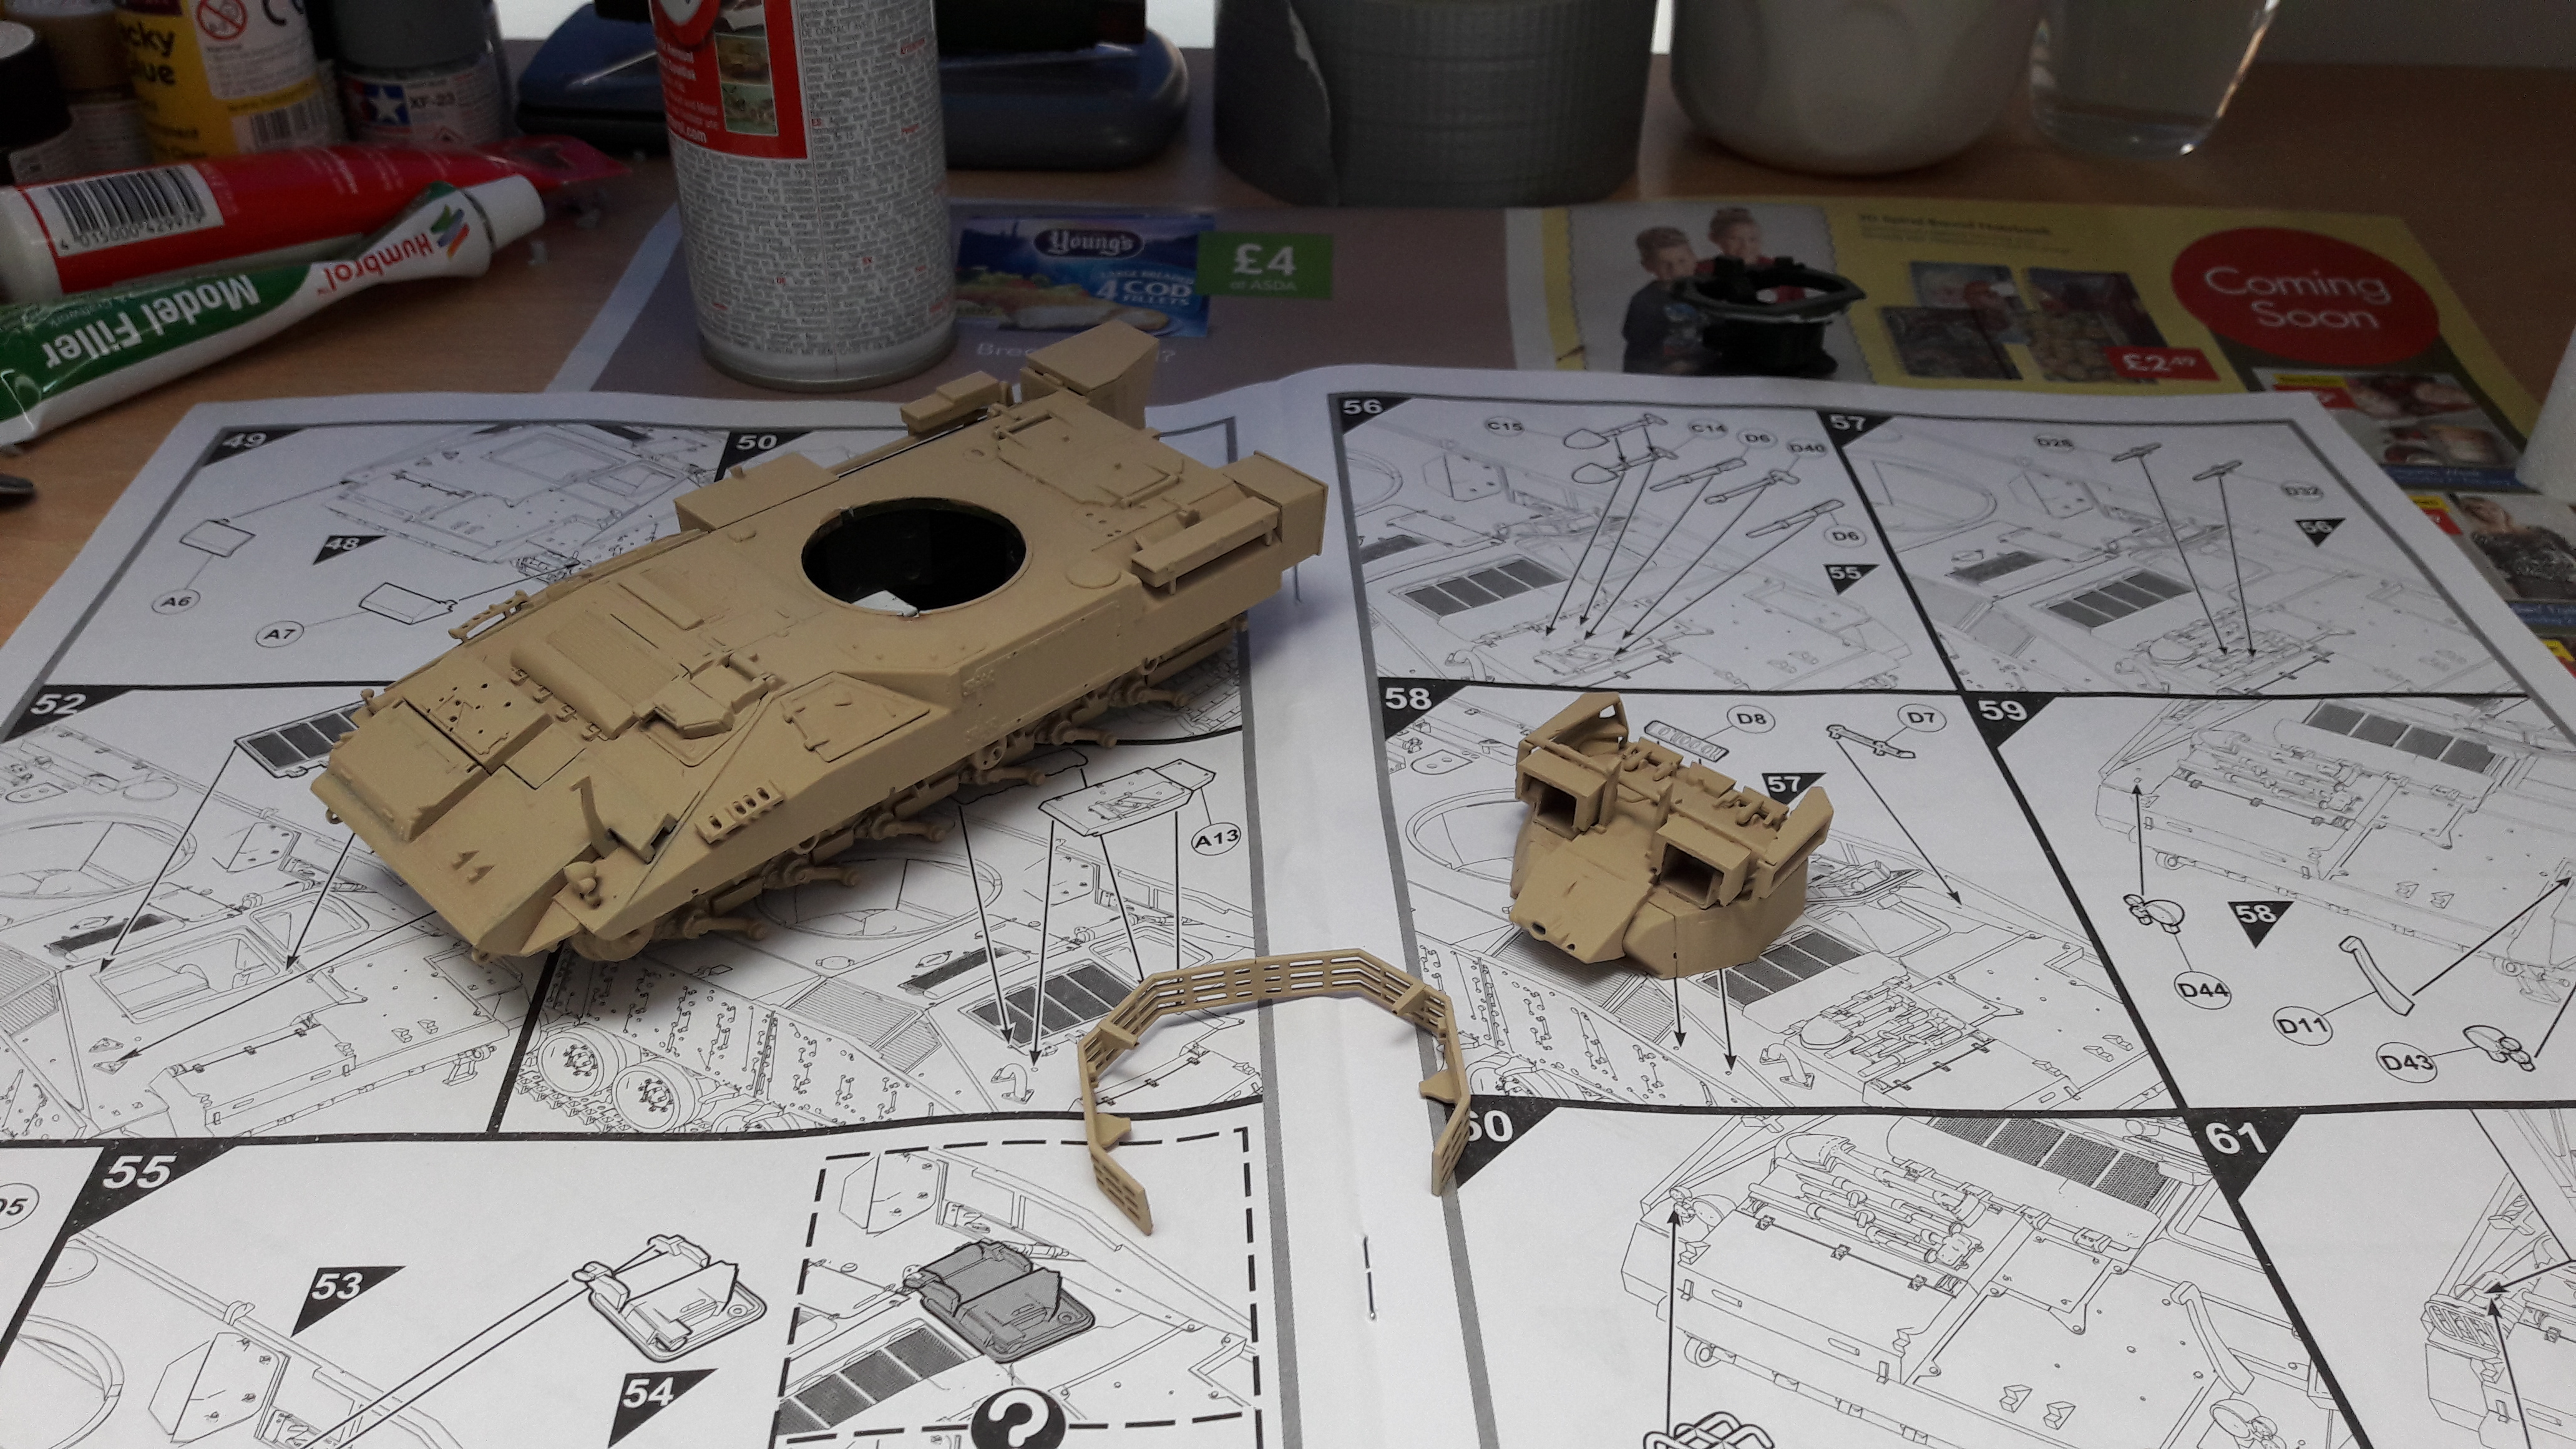
Turret interior is also done.
#041
Kobenhavn, Denmark
Joined: July 20, 2006
KitMaker: 10,069 posts
AeroScale: 3,788 posts
Posted: Sunday, July 23, 2017 - 03:04 AM UTC
Some really great builds here. Beautiful hurricane, Bob.
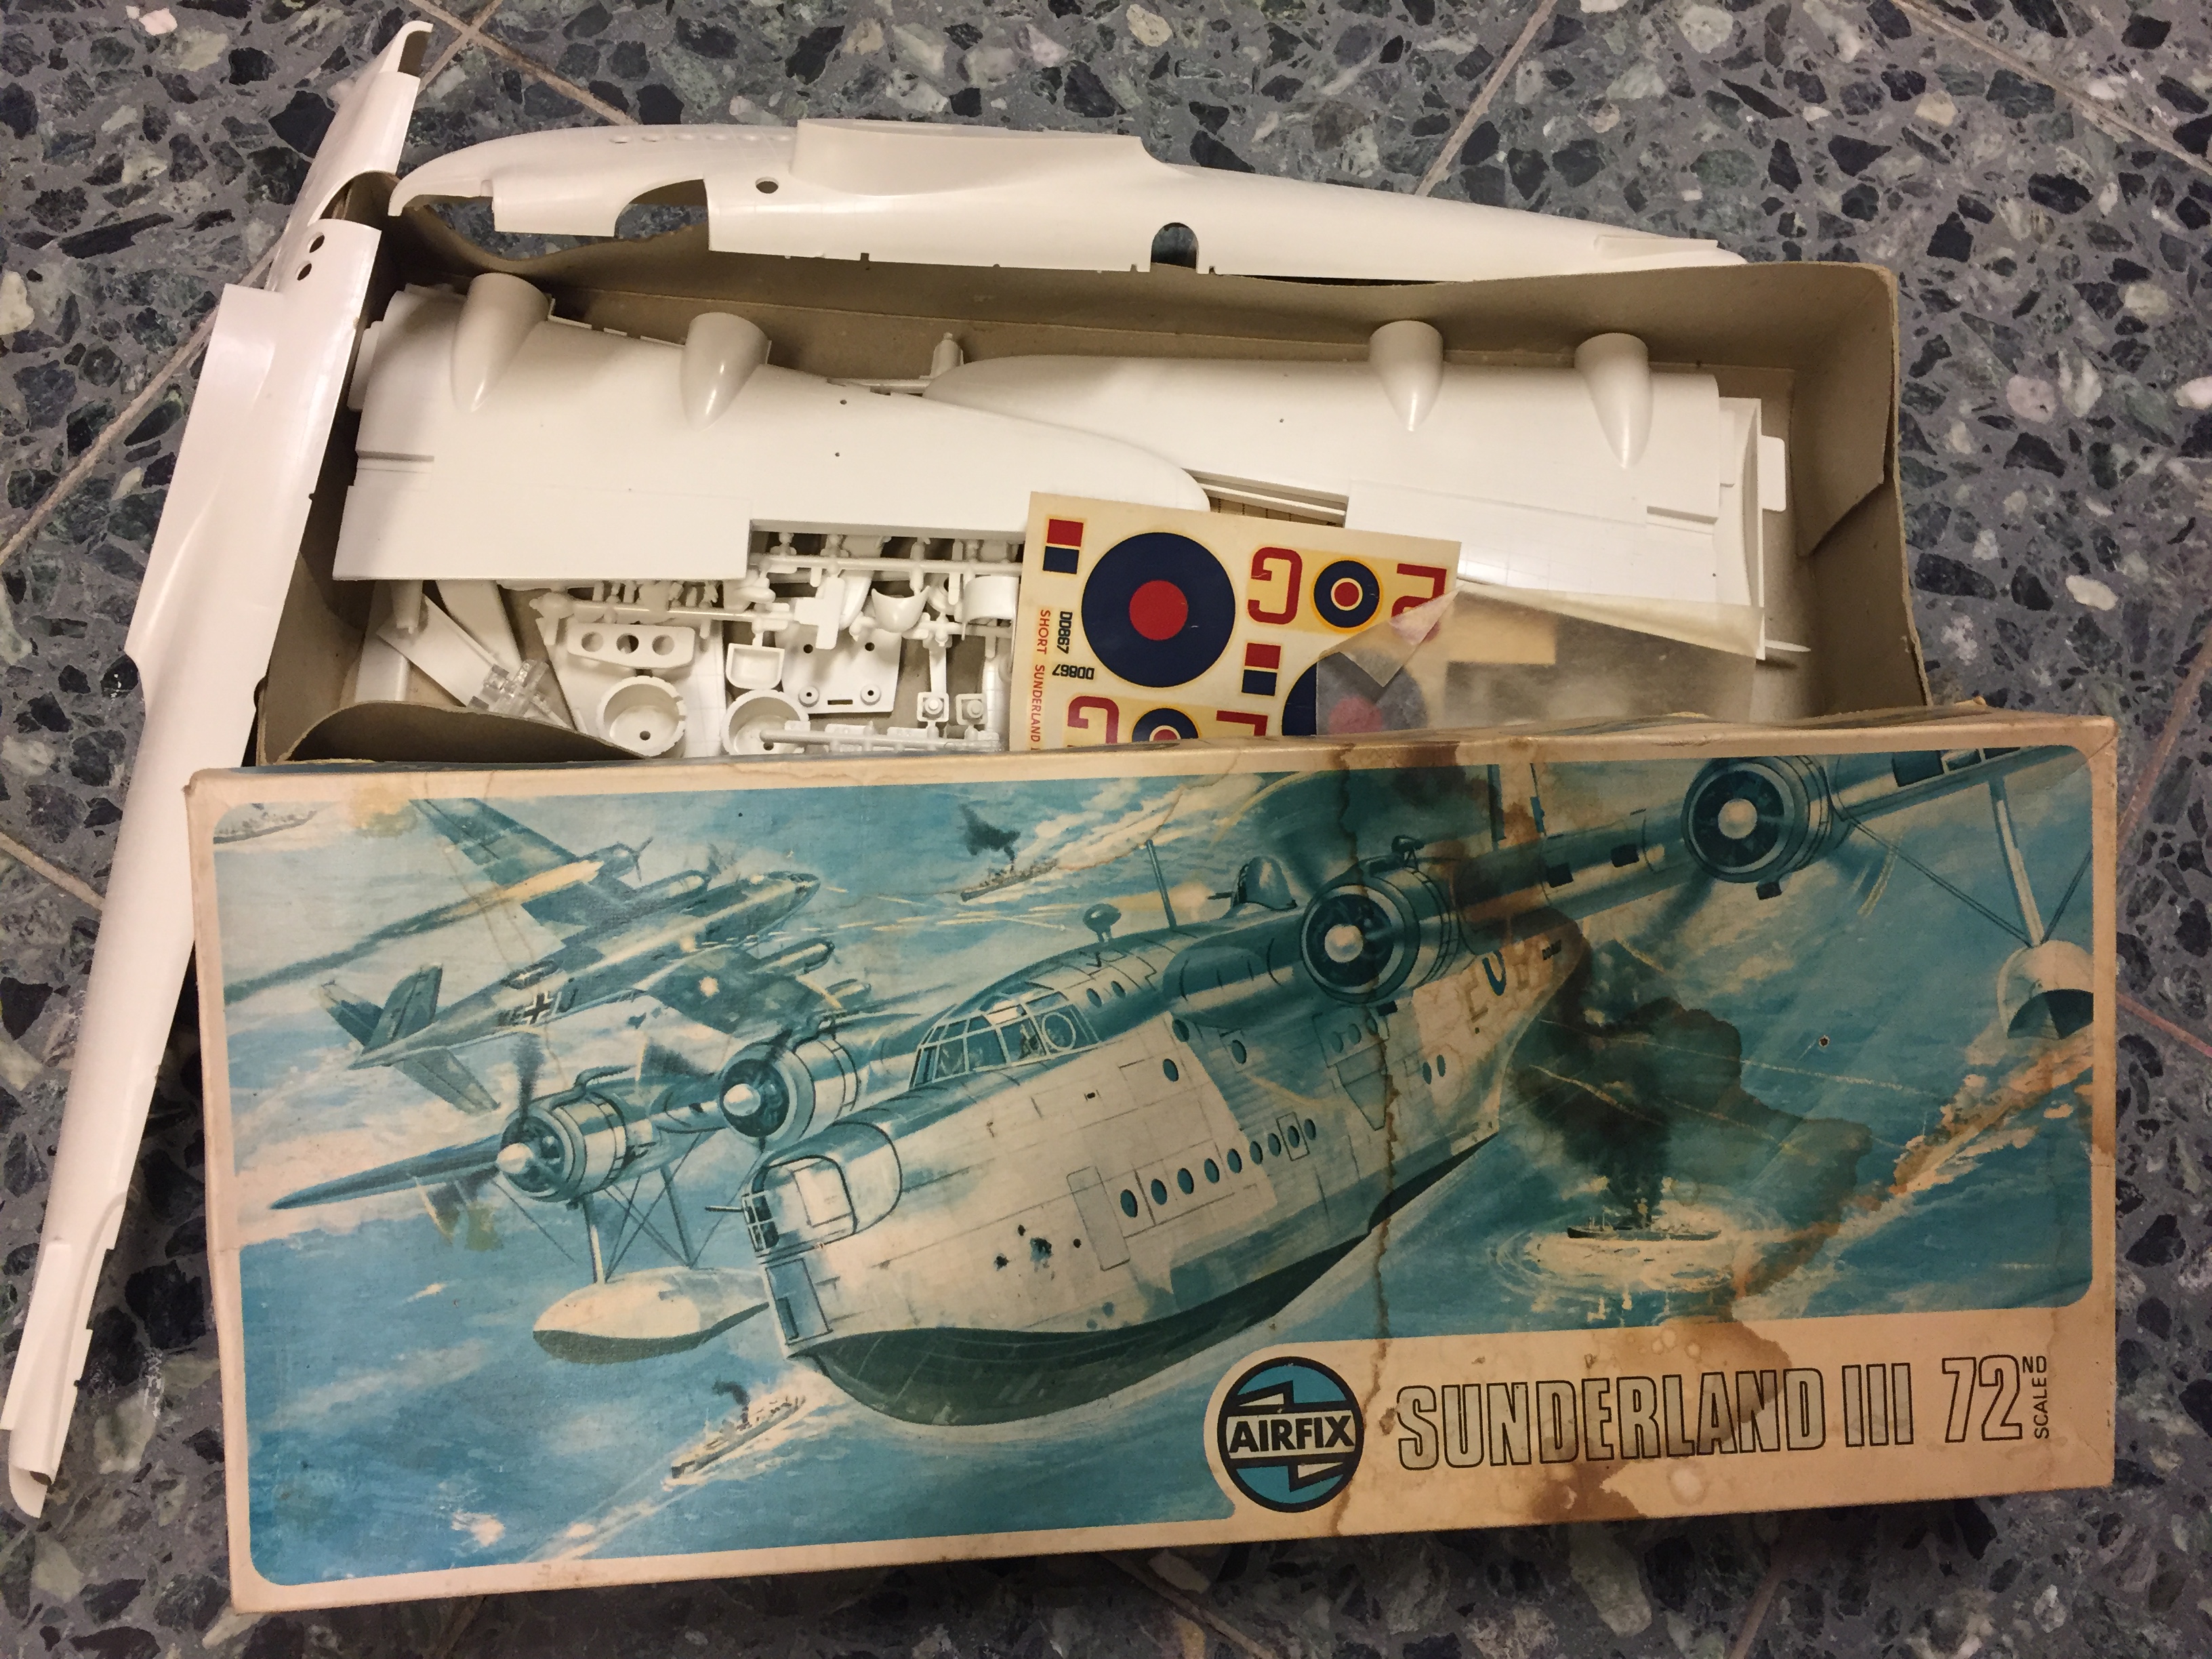
I will enter with a really old nostalgia build. The airfix Sunderland III. It will be a fun build I hope.
The instructions are long gone, so if anyone has a PDF to spare please pm me I managed to find pictures of the instructions online, but not the clearest and largest of pictures, so a PDF scan would help.
More to follow

Campaign'oholic - 252+ campaigns completed
Uusimaa, Finland
Joined: March 30, 2004
KitMaker: 2,845 posts
AeroScale: 1,564 posts
Posted: Sunday, July 23, 2017 - 05:51 AM UTC
Vintage-Airfix.com has pretty good sized scans of the Sunderland's instructions. Or was that already among the sites you came across before?
#305
Christchurch, New Zealand
Joined: February 01, 2006
KitMaker: 1,673 posts
AeroScale: 1,517 posts
Posted: Monday, July 24, 2017 - 01:24 PM UTC
Hi Jesper I've got the kit in my stash drop me a line if you have no luck and I'll scan the instructions and email them to you.
Dublin, Ireland
Joined: August 14, 2016
KitMaker: 148 posts
AeroScale: 123 posts
Posted: Monday, July 24, 2017 - 10:55 PM UTC
That Sunderland must be huge! Does the box say what is the wingspan?
Currently in the workshop:
1:72 Spitfire Mark 1A by Airfix
#259
Massachusetts, United States
Joined: October 23, 2011
KitMaker: 2,265 posts
AeroScale: 1,715 posts
Posted: Tuesday, July 25, 2017 - 05:42 AM UTC
if it' scaled properly is should be just under 19 inches across, or say 480mm.

United Kingdom
Joined: January 04, 2015
KitMaker: 32 posts
AeroScale: 29 posts
Posted: Friday, July 28, 2017 - 09:08 PM UTC
so, still plugging away! I've remembered why I don't enjoy scribing - can do it on 1/48, but its a lot trickier on this tiny thing. I may smooth it out and draw one or two panel lines on in pencil at the end if I cant get it to work out soon.
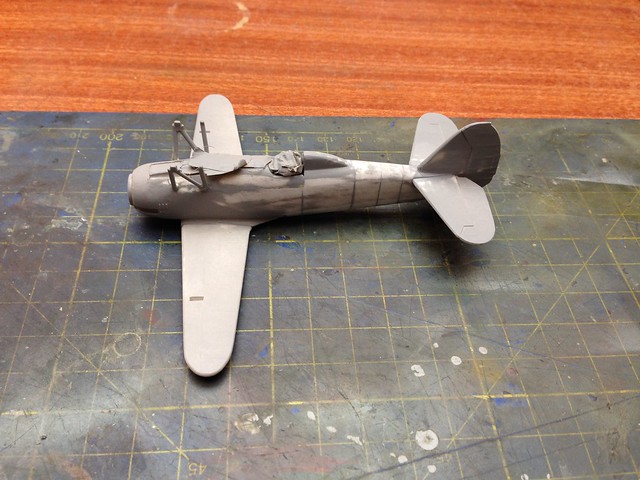
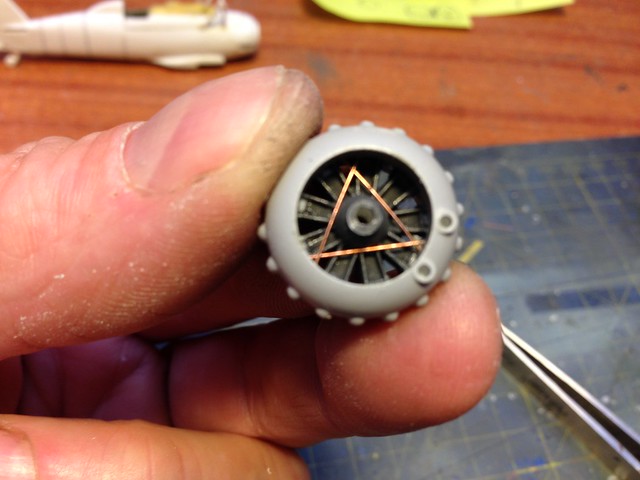
I did the distinctive bracing in the cowl, this should be at the front of the cowl but the thickness of the piece, and the need to mount the cowl motor with correct spacing meant I fixed it at the rear - life's too short to worry and it gives a good enough effect there.
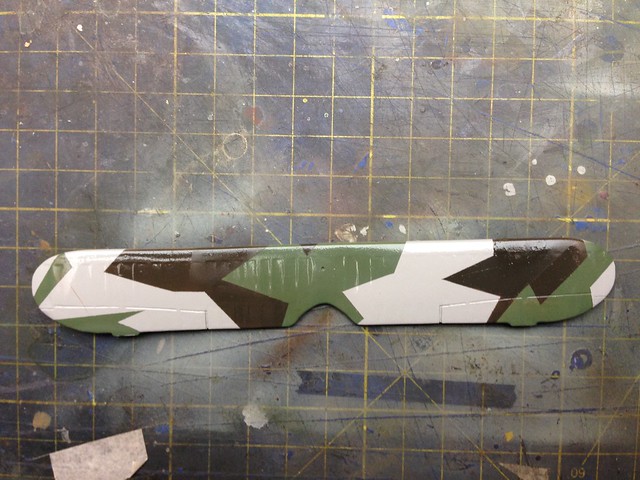
For a break I painted the upper wing, which now looks exciting - decals tomorrow.
cheers all
stu
#259
Massachusetts, United States
Joined: October 23, 2011
KitMaker: 2,265 posts
AeroScale: 1,715 posts
Posted: Saturday, July 29, 2017 - 04:56 AM UTC
Quoted Text
For a break I painted the upper wing, which now looks exciting - decals tomorrow.
Exciting indeed. you could cut yourself on those splinters.

#424
Queensland, Australia
Joined: April 23, 2015
KitMaker: 4,648 posts
AeroScale: 1,938 posts
Posted: Saturday, July 29, 2017 - 09:31 AM UTC
Great camo on that top wing!
"Artillery adds dignity, to what would otherwise be an ugly brawl."
Frederick The Great
#424
Queensland, Australia
Joined: April 23, 2015
KitMaker: 4,648 posts
AeroScale: 1,938 posts
Posted: Monday, July 31, 2017 - 10:28 AM UTC
Hi Everyone,
The replacement parts for my Stuka arrived last week. Today, my decals from NG Models arrived. And they look great. Tightly in register with hardly any excess decal film to be seen. Some of the best looking decals I've ever seen. Of course, that's only half the battle. But it'll be some time before I can apply them... Here's some pic of the decal pkt:
You get decals for any one of 6 machines:


I started on the cockpit. I used the Instrument Panel decal that comes with the Airfix decal sheet.

I'm not a super interior detail guy. I reckon it'll be hard enough to see anything once the cockpit is closed up.


The seat belts are just Tamiya tape with painted-on buckles.

Cheers!
Gaz
"Artillery adds dignity, to what would otherwise be an ugly brawl."
Frederick The Great


