_GOTOBOTTOM
Cold War (1950-1974)
Discuss the aircraft modeling subjects during the Cold War period.
Hosted by Tim Hatton
Review
Sanger: Boeing B-52H Stratofortress
betheyn
Staff MemberSenior Editor
AEROSCALE
#019
_VISITCOMMUNITY
England - South East, United Kingdom
Joined: October 14, 2004
KitMaker: 4,560 posts
AeroScale: 2,225 posts
Posted: Tuesday, May 02, 2017 - 10:15 PM UTC


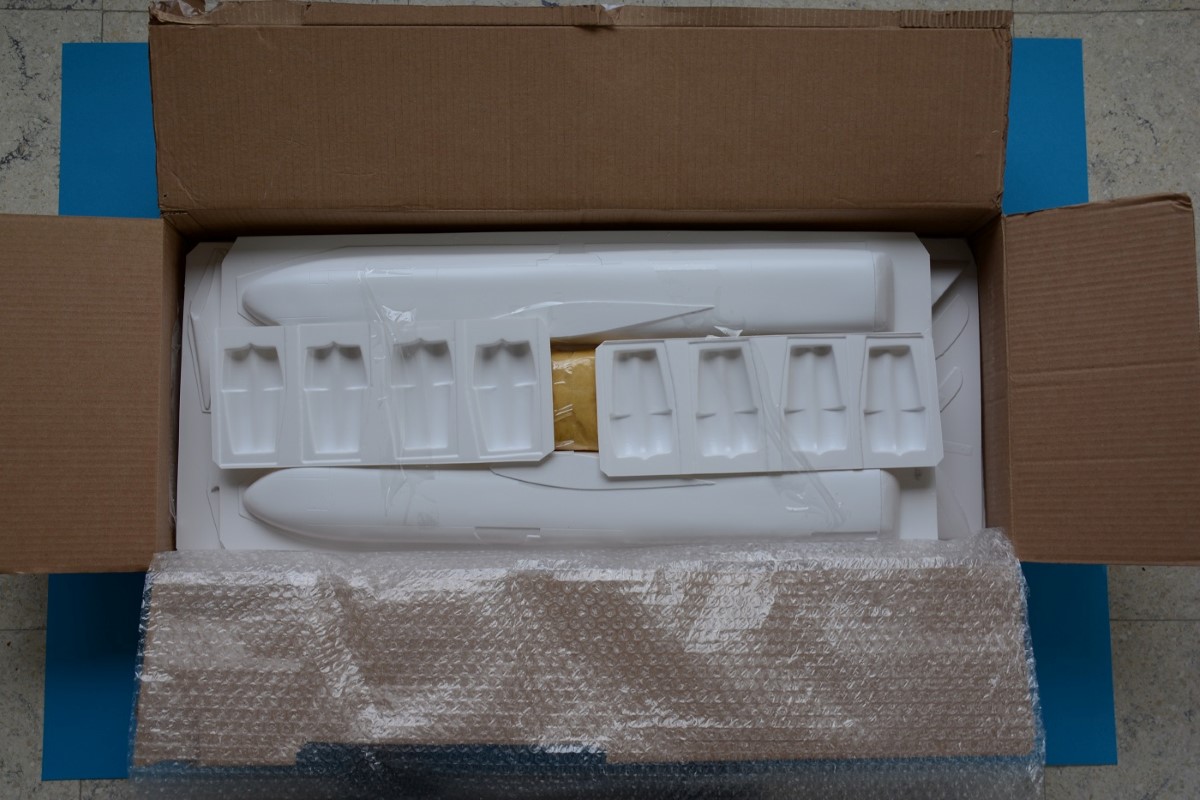
The mighty Boeing B-52H Stratofortress is one big plane, and Sanger have released this kit, in a beggars belief scale of 1/48th.
Drabslab has bought one of these behemoth kits and gives us a tour of the contents.

Read the Review

If you have comments or questions please post them here.

Thanks!
Merlin
Staff MemberSenior Editor
AEROSCALE
#017
_VISITCOMMUNITY
United Kingdom
Joined: June 11, 2003
KitMaker: 17,582 posts
AeroScale: 12,795 posts
Posted: Wednesday, May 03, 2017 - 01:46 AM UTC
Hi Drabslab

Excellent review! It's great to see this long awaited kit finally hit the market.

So - are you going to do a Blog for us? A subject like this could just inspire a whole new generation to delve into the sadly almost lost art of vacuform building...

All the best

Rowan
drabslab
_VISITCOMMUNITY
European Union
Joined: September 28, 2004
KitMaker: 2,186 posts
AeroScale: 1,587 posts
Posted: Wednesday, May 03, 2017 - 03:03 AM UTC
I hope so but some careful planning will be needed.

I have no experience whatsoever with vacform so I need to learn how to do it without ruining the only kit I have available, and then there is that huge need to learn about the B-52 and all its small details (not available in the kit) that will have to be added by scratch building.

So, for me, this is a multi year project I am afraid but I will be posting, of course, I will need the advice of the Aeroscale folks as well.
acktwice
_VISITCOMMUNITY
Massachusetts, United States
Joined: September 26, 2009
KitMaker: 51 posts
AeroScale: 50 posts
Posted: Wednesday, May 03, 2017 - 03:42 AM UTC
Holy cow !!! What an awesome kit. I'm really looking forward to your posts regarding this build. Like you I've never built a vacu-form kit but I fully intend to try one some day. The B-52 is a bit too pricey for me but I'm sure it's worth every penny. I have a 1/72 B-52 kit injection molded that is large enough that I will have to get creative with space once I build that. Thanks for the great review.
litespeed
Staff MemberNews Reporter
AEROSCALE
_VISITCOMMUNITY
England - North West, United Kingdom
Joined: October 15, 2009
KitMaker: 1,976 posts
AeroScale: 1,789 posts
Posted: Wednesday, May 03, 2017 - 04:10 AM UTC
Great review of an impressive kit Drabslab. Take your time with your planning for the build of this monster. Looking forward to the build log though... tim
Jessie_C
_VISITCOMMUNITY
British Columbia, Canada
Joined: September 03, 2009
KitMaker: 6,965 posts
AeroScale: 6,247 posts
Posted: Wednesday, May 03, 2017 - 04:43 AM UTC

Quoted Text

I hope so but some careful planning will be needed.

I have no experience whatsoever with vacform so I need to learn how to do it without ruining the only kit I have available...


The best way to do that is to purchase a smaller, less complicated vac kit to practise on before you attempt your masterpiece. If you like, I can recommend several different ones.

Once all the parts are cut out and prepared, a vac kit is very much like any other kit apart from the thickness of the plastic. You need to plan out supporting tabs along the edges of the parts, and for a large kit such as yours, you will likely need internal supports. There are several threads in other fora regarding the building of vac kits which can teach you much
Merlin
Staff MemberSenior Editor
AEROSCALE
#017
_VISITCOMMUNITY
United Kingdom
Joined: June 11, 2003
KitMaker: 17,582 posts
AeroScale: 12,795 posts
Posted: Wednesday, May 03, 2017 - 11:55 AM UTC

Quoted Text

I hope so but some careful planning will be needed.

I have no experience whatsoever with vacform so I need to learn how to do it without ruining the only kit I have available, and then there is that huge need to learn about the B-52 and all its small details (not available in the kit) that will have to be added by scratch building.

So, for me, this is a multi year project I am afraid but I will be posting, of course, I will need the advice of the Aeroscale folks as well.


Hi again Drabslab

I wrote an article on the basics of vacuform building many years ago that might give you some pointers.

All the best

Rowan

drabslab
_VISITCOMMUNITY
European Union
Joined: September 28, 2004
KitMaker: 2,186 posts
AeroScale: 1,587 posts
Posted: Thursday, May 04, 2017 - 12:55 PM UTC
@everybody: Thank you for the nice comments.

@Jessie: No doubt that you are right but it is just itching too badly to start this kit. I simply don't have the patience to do something else first. My plan is to start with the easy subassemblies first such as the tails, and in the meantime to search for documentation to gradually work myself up to the more demanding work.

My current biggest challenge is to find a system to enable removing the wings for allowing to move the model around, and I also struggle with how I will build the cockpit.

@Acktwice: Yes it is expensive, this will be my only kit this year, my modelling budget is gone (the time for anything else as well)

@Merlin: Yep, I do know about your article on Vac form, in fact, I read it at least 5 times the past days :-)

@Litespeed: I will use this forum thread to report on progress (or disaster). This way I keep the original review, and the real building experience connected.

My first task now is to find the best sources of info on the B-52 on the internet, and to order a book on the B-52. It happens that a belgian has produced a very good book for modellers on the B-52. (yet another hole in my wallet).
Merlin
Staff MemberSenior Editor
AEROSCALE
#017
_VISITCOMMUNITY
United Kingdom
Joined: June 11, 2003
KitMaker: 17,582 posts
AeroScale: 12,795 posts
Posted: Friday, May 05, 2017 - 12:59 AM UTC
Hi again Drabslab

What I find really exciting is that your Review is probably the most-read article we've ever had on Aeroscale in terms of its rapid rise up the ranks of current Reviews!

It's great to see a vacuform kit produced by a small company totally overshadow the latest kits from the "big boys" in the industry. I think Gordon Stevens would be delighted.

You've seriously got me thinking about building the 1:48 vacuform Fw 58 Weihe which I bought many moons ago. I mustn't get distracted form current projects, but that's one which I will come back to.

All the best

Rowan
drabslab
_VISITCOMMUNITY
European Union
Joined: September 28, 2004
KitMaker: 2,186 posts
AeroScale: 1,587 posts
Posted: Sunday, May 07, 2017 - 10:33 PM UTC
Common Merlin,

You do know that the only reason for the rapid rise of this review is my exquisite writing style, and not the subject itself

But yes, it is very nice to see how this review seems to be beating all records.

I guess that modellers don't really care whether it is vac form or injection, its the subject that counts the most "1/48 scale B-52" must be an eye catcher for any decent aircraft modeller.

I should not shout victory too fast and wait until I put together a left and a right part and see how well they match. If that goes well then I can finally conclude that vac form should be on the technology list of any modern kit manufacturer next to injection, resin, white metal casting, phot-etch and whatever else is there ...

Sanger, and the reaction on this site to the review, prove here that there is a market for "bigger than ..." kits. Can you imagine an A-400M, or a C-17 in 1/48 scale. The large parts in vac form, the details in anything else, up to photo etch ...

Would make someone dream, no

Something else which is not so good. In one week time +/-2000 hits on the article, but only 220 hits on this forum thread, and only 6 (very welcome of course ...) reactions.

Don't misunderstand me, I am not begging for whatever you may think I am begging for, but I do find it sad that such innovative and rare subject doesn't make the forum explode. I do not understand that

RotorHead67
_VISITCOMMUNITY
Virginia, United States
Joined: May 07, 2003
KitMaker: 1,174 posts
AeroScale: 226 posts
Posted: Wednesday, May 17, 2017 - 10:20 PM UTC
I always wondered if this would ever be attempted. I just can't see the possibility, of ever being able to display it. Only option would be to hang from ceiling
RotorHead67
_VISITCOMMUNITY
Virginia, United States
Joined: May 07, 2003
KitMaker: 1,174 posts
AeroScale: 226 posts
Posted: Wednesday, May 17, 2017 - 10:23 PM UTC
I'm curious to see if one ever makes a model show
drabslab
_VISITCOMMUNITY
European Union
Joined: September 28, 2004
KitMaker: 2,186 posts
AeroScale: 1,587 posts
Posted: Thursday, May 18, 2017 - 12:04 AM UTC

Quoted Text

I'm curious to see if one ever makes a model show


You could also say: "if ever one will be finished."

I have been walking around this kit now for almost 3 weeks and its a huge amount of work, and requires quite a bit of planning if you want to do more than simply put it together and paint it.

Displaying it is not such a big deal, it can easily be put vertically against a wall, or be hung from a ceiling. (at least that is what I am telling myself now
RotorHead67
_VISITCOMMUNITY
Virginia, United States
Joined: May 07, 2003
KitMaker: 1,174 posts
AeroScale: 226 posts
Posted: Wednesday, May 24, 2017 - 11:59 AM UTC
I always considered Scratching a 1/48 KC-10. I have the research collected, but haven't progressed further
drabslab
_VISITCOMMUNITY
European Union
Joined: September 28, 2004
KitMaker: 2,186 posts
AeroScale: 1,587 posts
Posted: Thursday, June 01, 2017 - 08:27 PM UTC
There is a proposal for a vac form campaign in the forum.

I've asked for a 3 year period as I will need it.

Merlin, Rotorhead67: its now or never
Headhunter506
_VISITCOMMUNITY
New York, United States
Joined: December 01, 2007
KitMaker: 1,575 posts
AeroScale: 45 posts
Posted: Tuesday, July 25, 2017 - 10:07 PM UTC

Quoted Text


Quoted Text

I hope so but some careful planning will be needed.

I have no experience whatsoever with vacform so I need to learn how to do it without ruining the only kit I have available...


The best way to do that is to purchase a smaller, less complicated vac kit to practise on before you attempt your masterpiece. If you like, I can recommend several different ones.

Once all the parts are cut out and prepared, a vac kit is very much like any other kit apart from the thickness of the plastic. You need to plan out supporting tabs along the edges of the parts, and for a large kit such as yours, you will likely need internal supports. There are several threads in other fora regarding the building of vac kits which can teach you much


The styrene is 1mm thick, which is about the average for injection molded models. The type of styrene used for vacuform models is formulated differently (softer, less rigid), which is why there is a greater amount of flex in the parts. The best way to use support tabs is to alternate them on each side of the fuselage, making them interlock with the tabs on the opposite edge. The scrap plastic left over from the wing sheets is perfect for making tabs,; just sand off the ridges until the surface is level and you're good to go.

Adding internal supports, like bulkheads, will eliminate the flexing. This kit contains parts for six bulkheads, four for the main and two for the rear fuselage sections. For a model 39.2"/995.4mm long, that isn't sufficient to eliminate torsional rotation along the fuselage. Adding two more in the main fuselage, with two more in the rear, will make for a sturdier, stiffer model. Invest around six bucks in a contour gauge. You can get accurate contours of the inside of the fuselage along different points and make bulkheads which will fit perfectly without any gaps around their edges and the fuselage. You could also use the contour gauge to fabricate ribs to reinforce the wings. If you want to take it a step further, reinforcing the interiors of both fuselage halves with fiberglass cloth will result in a really solid, non-flexing part.

Good scale drawings are a must when constructing this kit. I printed a set of 1:48 scale drawings using a Boeing factory plan. They're huge; but, they make building this model less of an ordeal. If anyone is interested in the plans, PM me. I'll provide you with a d/l link.
Headhunter506
_VISITCOMMUNITY
New York, United States
Joined: December 01, 2007
KitMaker: 1,575 posts
AeroScale: 45 posts
Posted: Wednesday, July 26, 2017 - 01:30 AM UTC
An interesting thing to note is that, according to the drawings I have, the spine of the rear fuselage isn't parallel to the main. There is a +2° rise of the spine, from where it attaches to the front main section. It's almost unnoticeable; but, it's there. You will see it if you lay the sections over the drawing.

You can glue an 8x70mm strip of .010 styrene along the join line on the inside of the front main fuselage; then, place the section on the drawing. Next, place the rear fuselage section on the drawing abutting the tip of the spine of the front section, keeping the styrene strip under the join line edge, aligning the top of the rear fuselage with the drawing. There will be a narrow wedge that will be formed. Brush a small amount of liquid cement where the styrene strip meets the rear fuselage join line in order to secure its position. Apply some 5 Minute epoxy along the wedge, filling it. Wait until it sets and sand the joint smooth.
drabslab
_VISITCOMMUNITY
European Union
Joined: September 28, 2004
KitMaker: 2,186 posts
AeroScale: 1,587 posts
Posted: Saturday, November 04, 2017 - 10:48 PM UTC
This B-52 will be quite a challenge, but the first steps are taken and ... lokoking more ofr less good so far:

First I painted all the borders of the parts black:
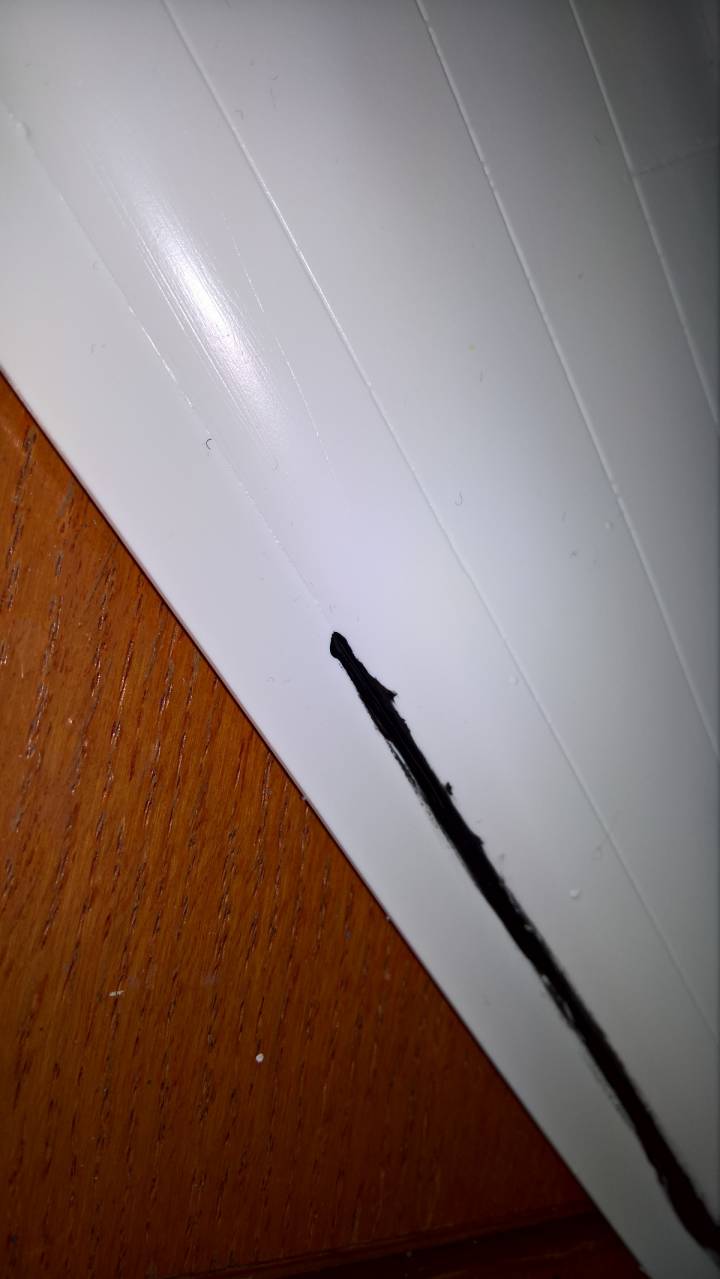


I tried a marker pen first but it proved difficult to reach the corners between part and frame and that is quite important for later steps.

It looks like this when all done:
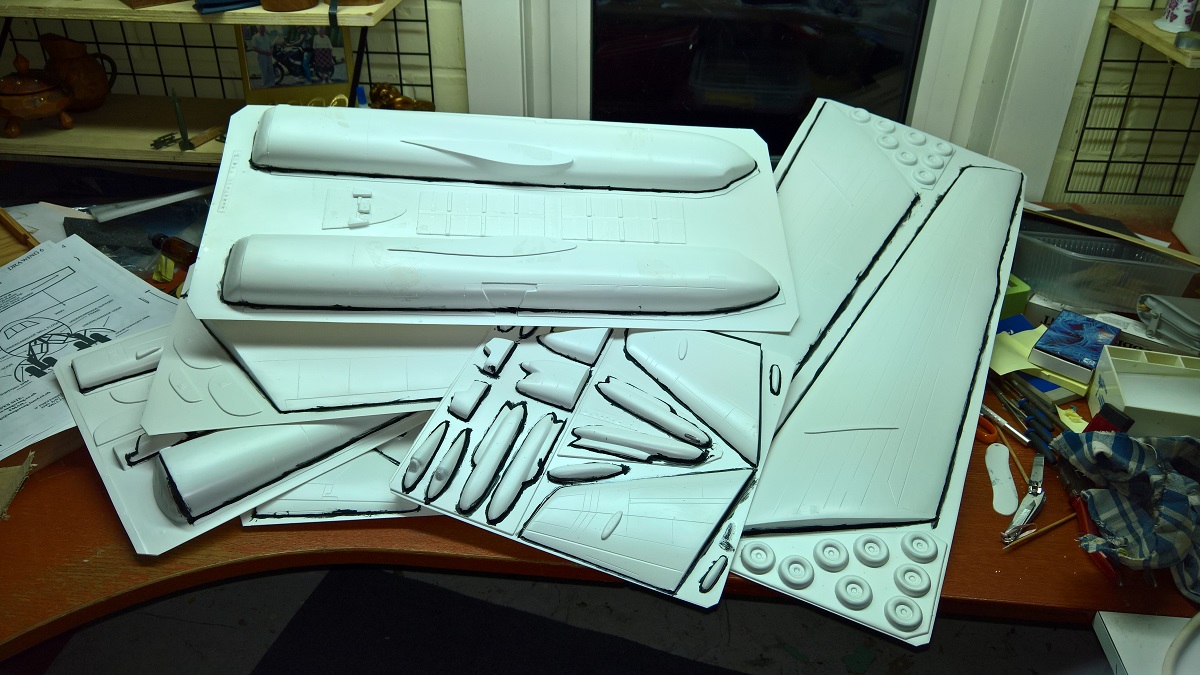


I would not paint these lines again, next time I will airbrush the parts in black primer. It will immediately emphasise the anomalies in the surface of the parts and it will probably give much better results compared to painting only the borders.

Then, with a new blade I cut the parts loose.
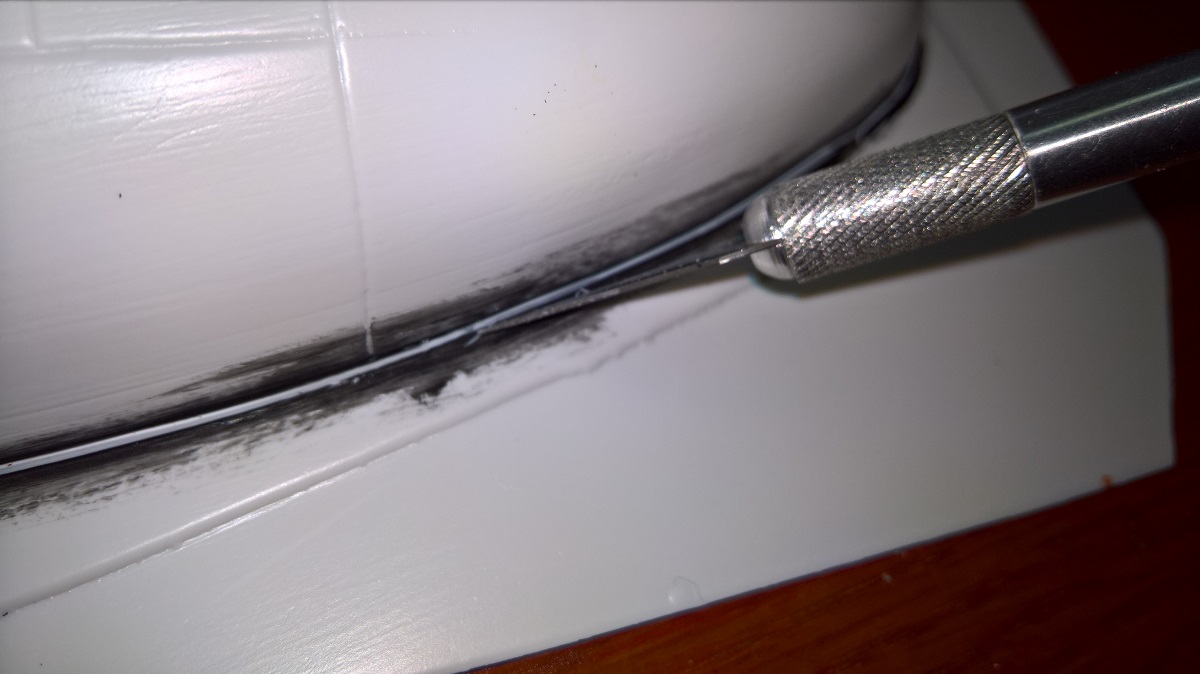


Instructions say that you have to try cutting under a 45 degrees angle so that you cut "under" the part. That is not as easy as it seems. My 3 day experience says that it is is better to cut gently and mulitple times along the same cutline than to try cutting through on one or two strikes. The same instructions say that it is not necessary to cut all the way through. However, I prefer doing one extra cut because that makes it much easier to break the parts from the sheet.

I am not cutting all of them in one go, just those parts that i need, but could not resist doing some of the main parts. This is going to become a big model:
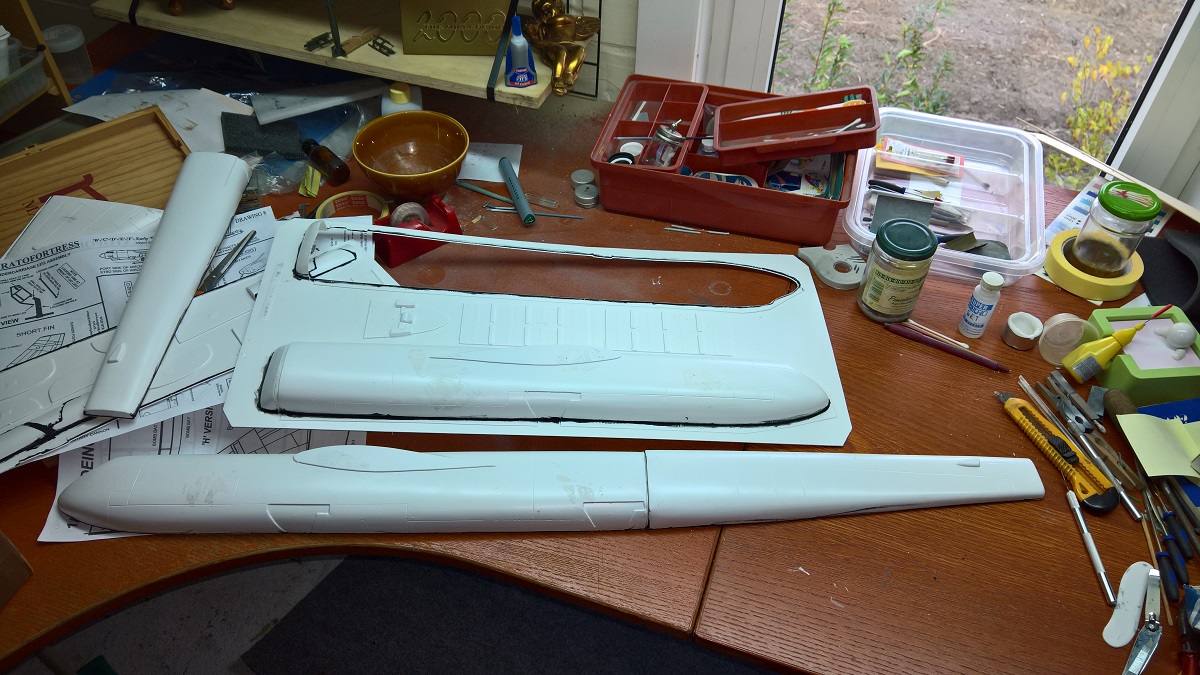


This is how it looks after cutting a part free from the plastic sheet. Everything below the black line mus be sanded away.
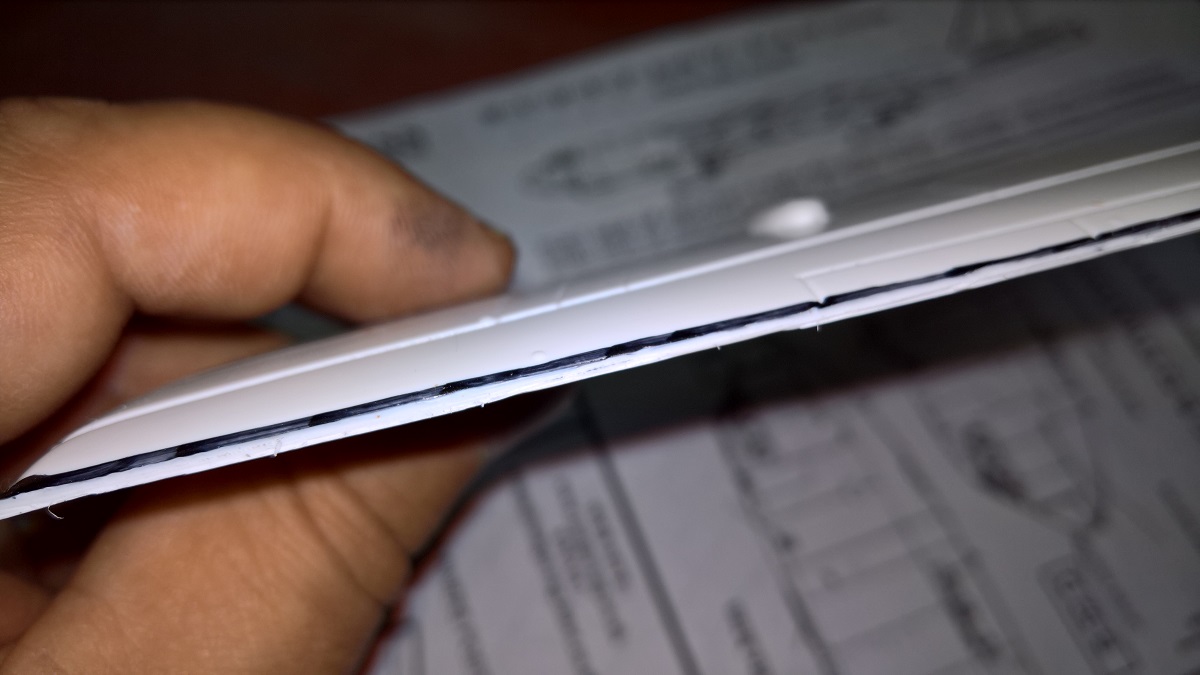


I expected that this sanding would be a nightmare but a large sheet of rough sandpaper on a flat surface works miracles.

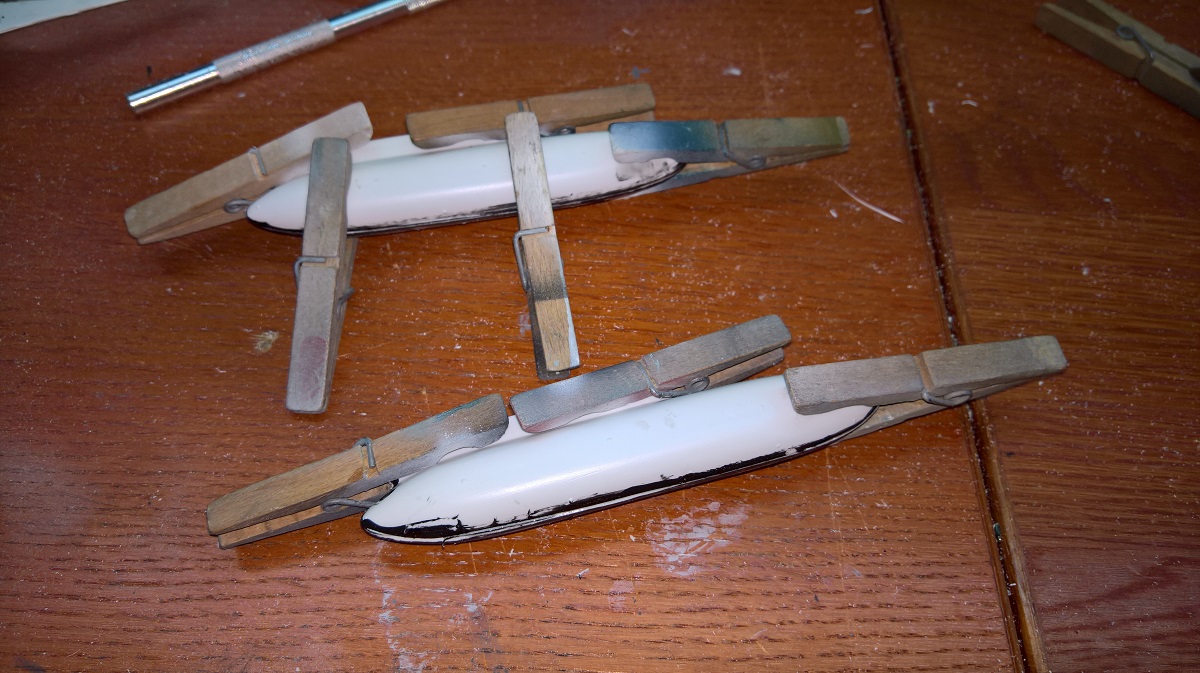
Having no experience with vacform, I decided to assemble some stand-alone parts first. So here it is, my first assembly; the 2650 liter external fuel tanks. Glueing these tanks proved more tricky than expected. The parts are not Tamgawa perfect, even are slightly different in size, and there are no pin-holes to help positioning the parts.


Next came the vertical tail parts.
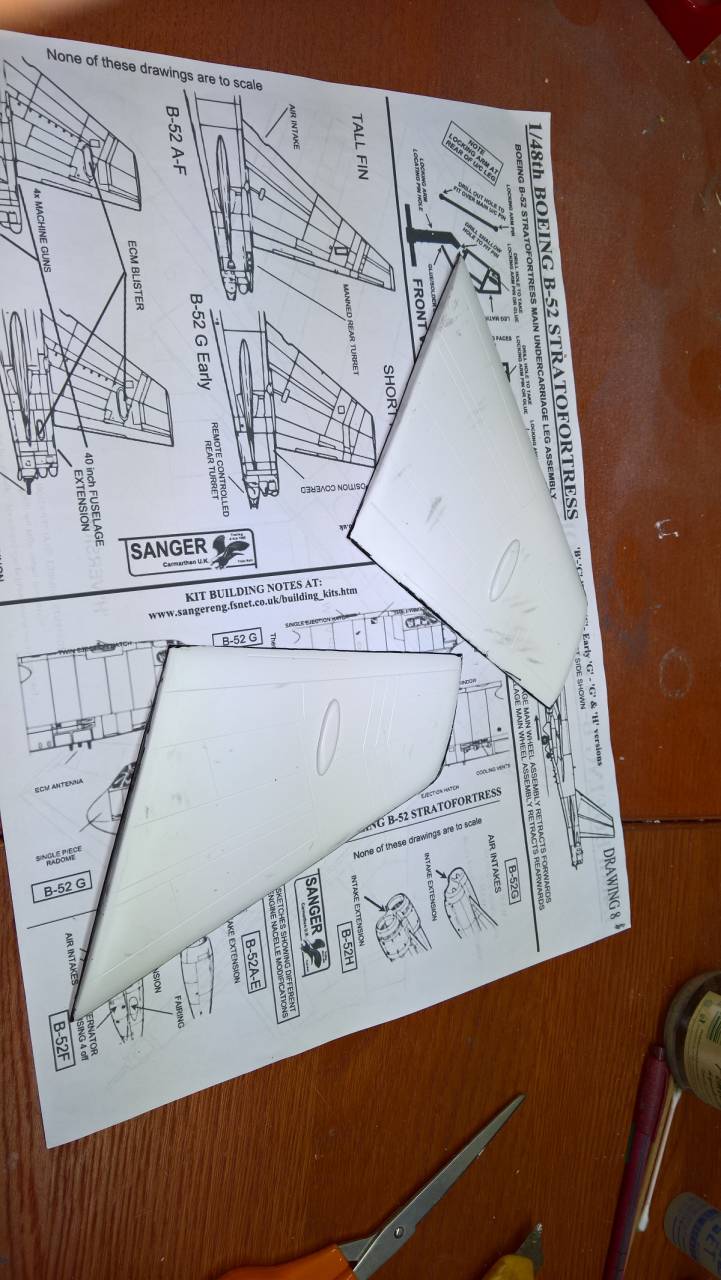


Not identical in size, and without any help from locator pins and holes, this seems like complete guesswork.

So I glued some small leftover plastic (one benefit of vacform is that you end up with heaps of such material) on the inside of the parts. These pins proved to be perfect for fixing one direction of travel of the parts.
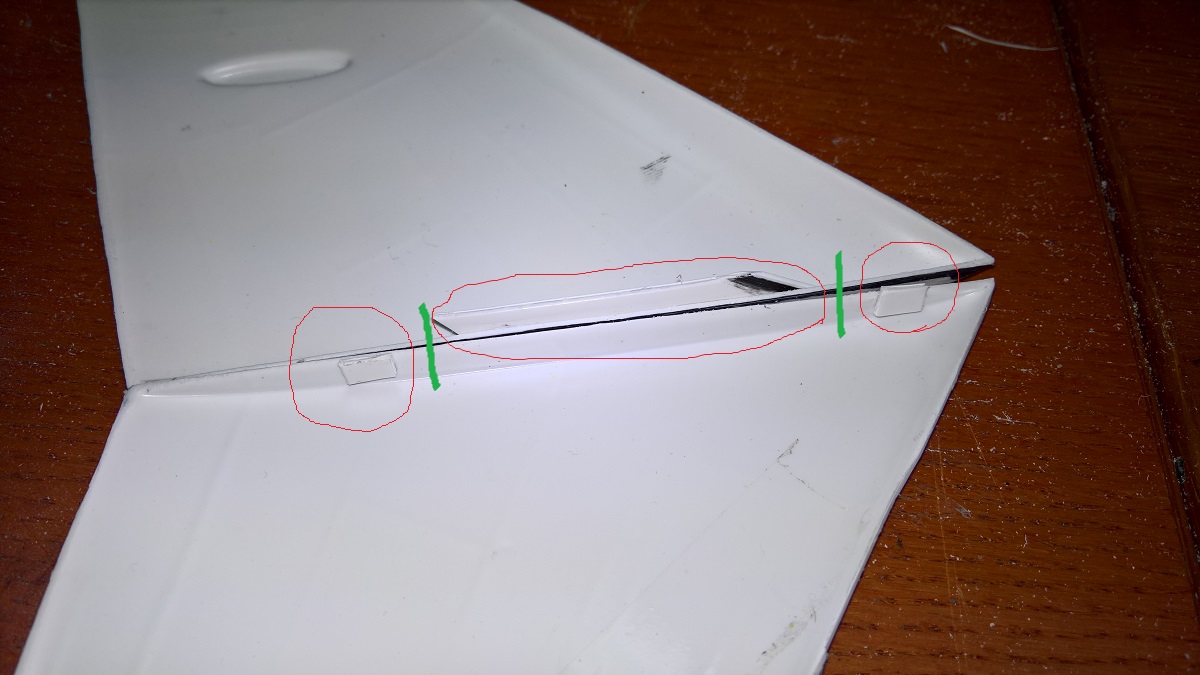


Which allowed me to set also this sub assembly aside.
JClapp
#259
_VISITCOMMUNITY
Massachusetts, United States
Joined: October 23, 2011
KitMaker: 2,265 posts
AeroScale: 1,715 posts
Posted: Sunday, November 05, 2017 - 03:33 AM UTC
Looking good. You have already a good grasp of the skills required.
I am confident you will make a good job of this!
lmsharp57
_VISITCOMMUNITY
Virginia, United States
Joined: August 24, 2014
KitMaker: 36 posts
AeroScale: 33 posts
Posted: Tuesday, May 29, 2018 - 03:13 AM UTC
Congratulations on starting the Sanger Buff. I have the B model but had to stop temporarily due to lack of construction space. I have all the parts cut away and sanded and a command deck partially completed. I look forward to seeing your progress on this fellow.
drabslab
_VISITCOMMUNITY
European Union
Joined: September 28, 2004
KitMaker: 2,186 posts
AeroScale: 1,587 posts
Posted: Tuesday, May 29, 2018 - 08:14 PM UTC

Quoted Text

Congratulations on starting the Sanger Buff. I have the B model but had to stop temporarily due to lack of construction space. I have all the parts cut away and sanded and a command deck partially completed. I look forward to seeing your progress on this fellow.


Hai,

It is NOT an easy one, I can tell you.

Unfortunately, I can't upload any pictures anymore on this site but if this gets resolved I will add a few pictures.
 _GOTOTOP