_GOTOBOTTOM
Cold War (1950-1974)
Discuss the aircraft modeling subjects during the Cold War period.
Hosted by Tim Hatton
Saab AJ 37 Viggen (Special Hobby)
PolarBear
_VISITCOMMUNITY
Västra Götaland, Sweden
Joined: February 23, 2005
KitMaker: 820 posts
AeroScale: 629 posts
Posted: Wednesday, April 19, 2017 - 08:31 PM UTC
Hello, folks!

Good models of Saab aircraft in 1/48 was once a rarity. Luckily, this has changed radically during the last few years, and we are now blessed with a wide range of these beauties. Having recently built the J 29F and the J 21A from Pilot Replicas, I was ready for the Viggen!

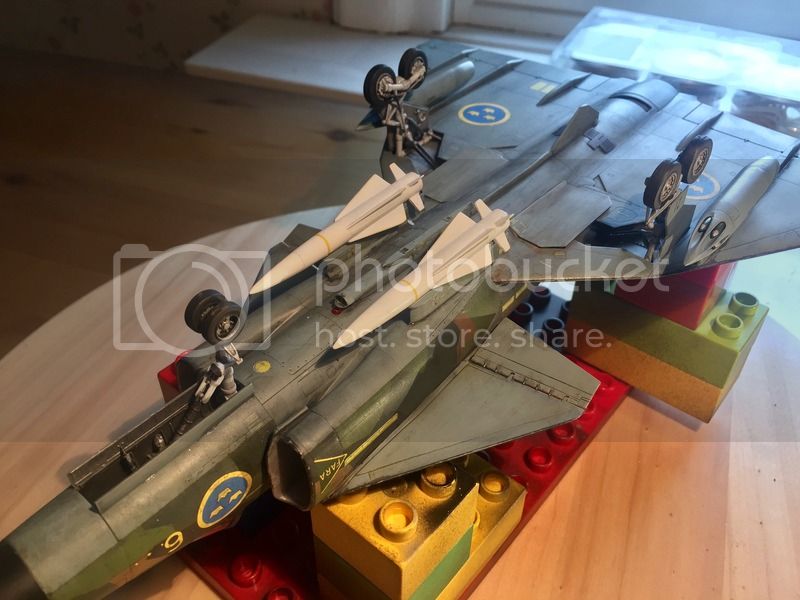
I started with a nice pilot figure from Pilot Replicas, painted with colors from Citadel.


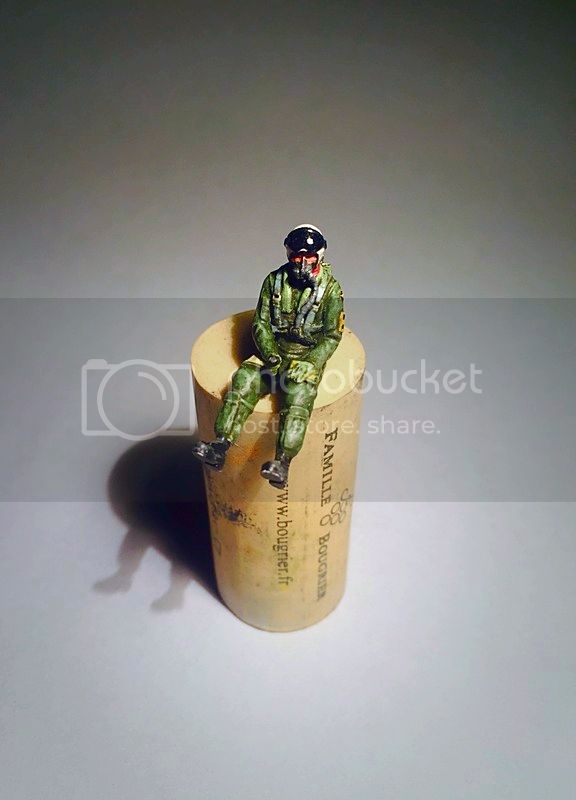
I love adding figures to my aircraft models. The only downside is that they become uneligable for the "Model of the Month" competition here at Aeroscale... Them rules are tough!

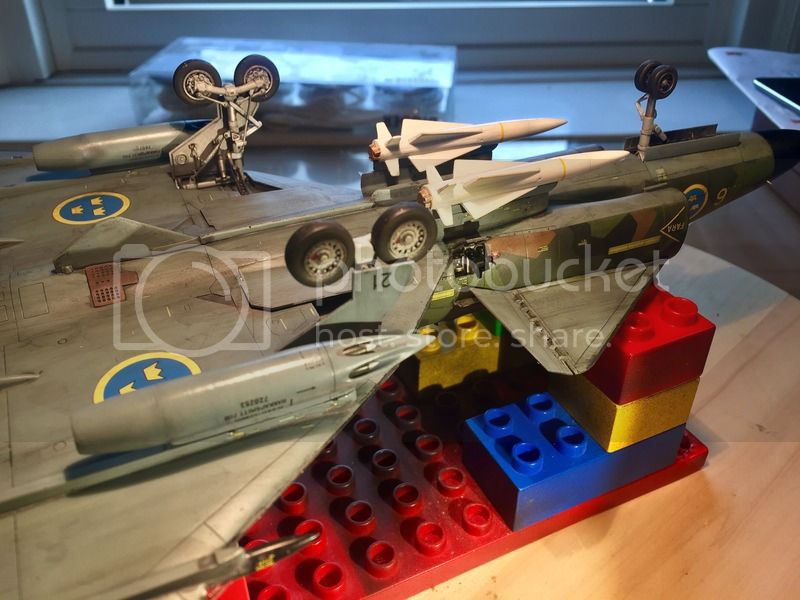
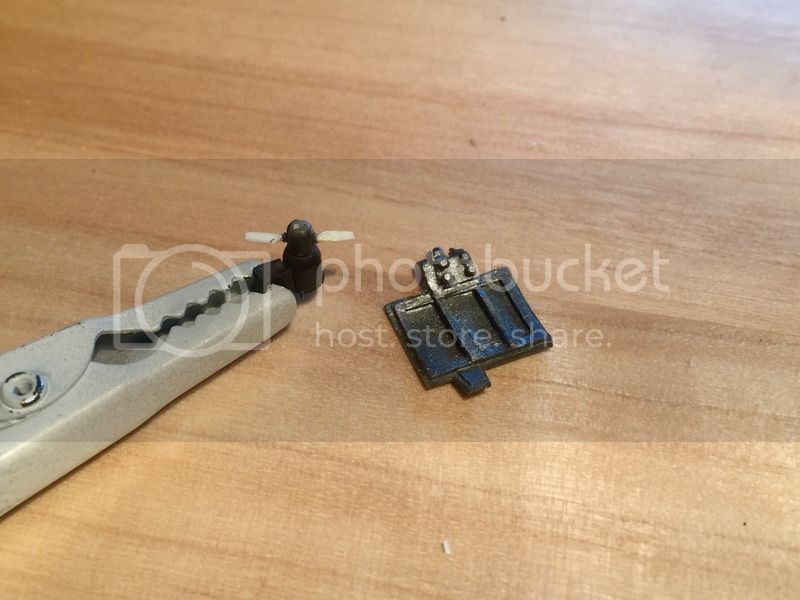
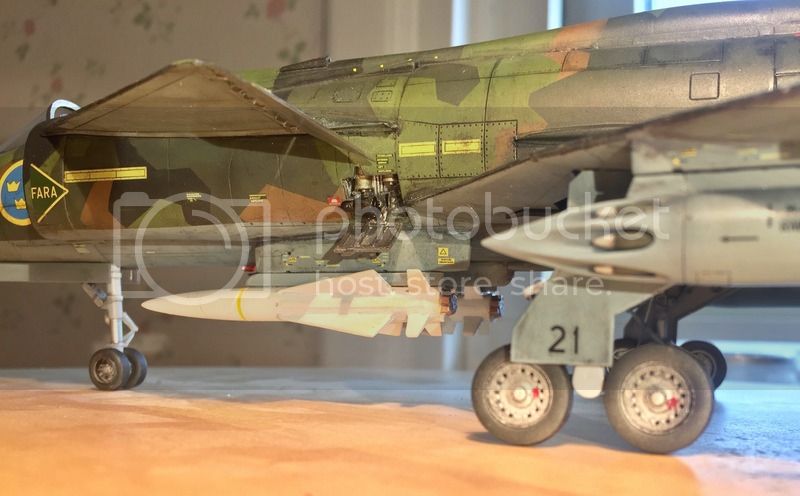
There is a lot of aftermarket stuff to the Tarangus/SH viggens. Some of it, I believe is "necessary", while other is not. The RAT is always visible on landed aircraft, but is not included in the kit. It was not easy to fit the Maestro RAT (which I believe was originally intended for the old ESCI/Airfix kit) in the fuselage, but after a lot of sawing, sanding, cursing and carving...


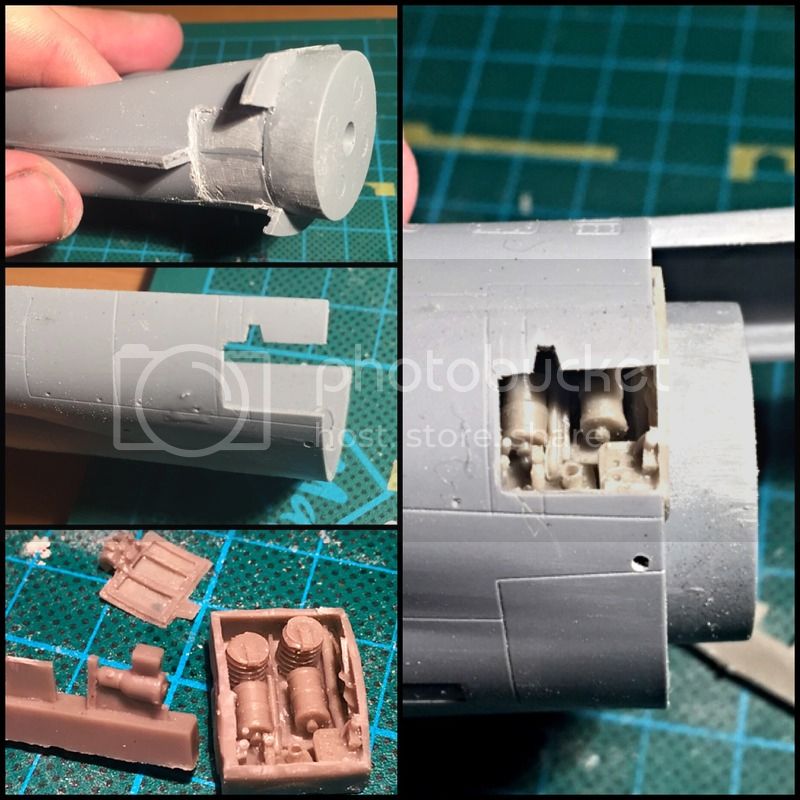
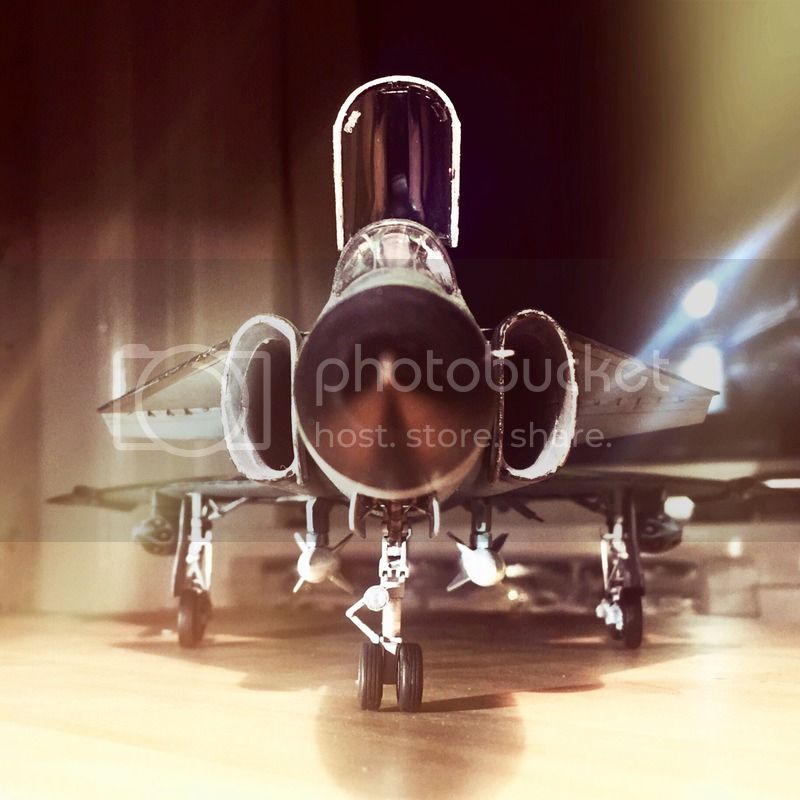
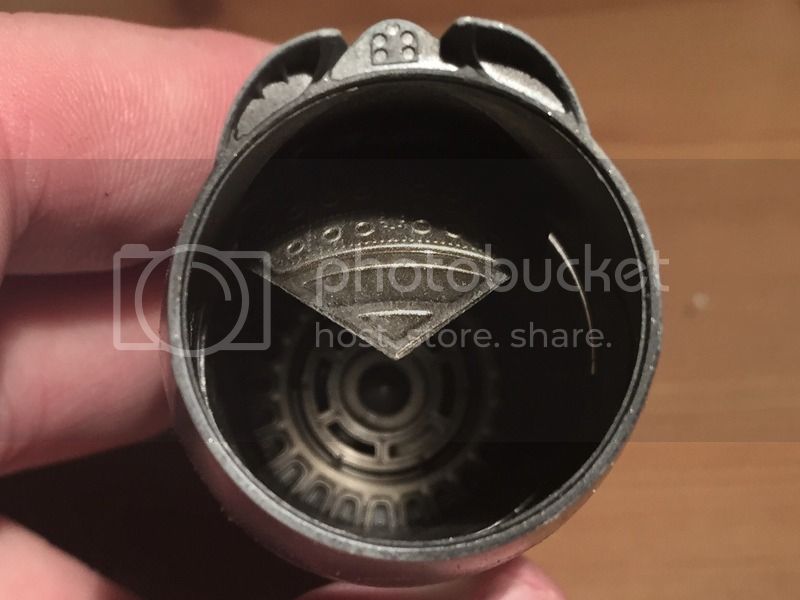
Viggen had a massive engine, and the exhaust area is highly visible. In my view, the detail level of the kit parts is top notch and more than sufficient for me.


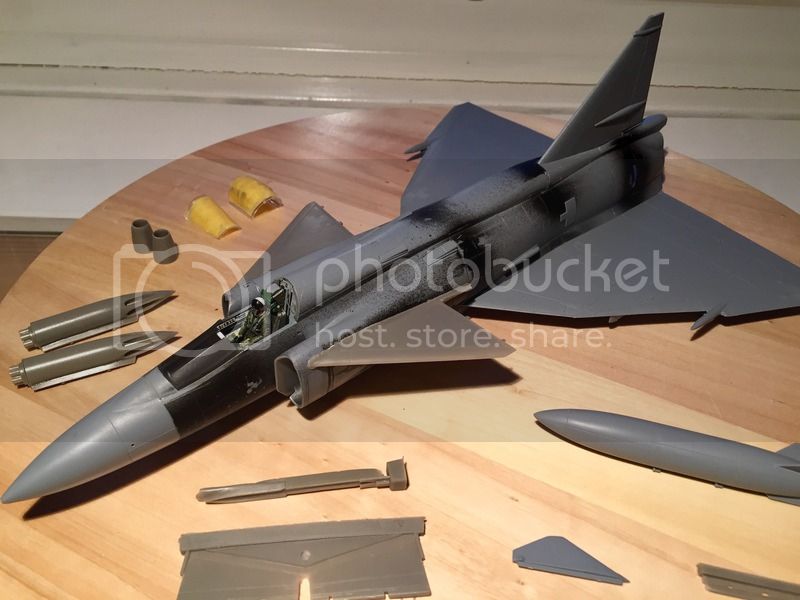
I used the kit seat, but with some small adjustments. I also added PE from Maestro (there is a small fret included in the kit, which is reasonably good) for the seat and cockpit.

The fit of the kit is generally very good (and at some times excellent). One has to be very careful though, since it is not the "standard two fuselage halves", but rather an intricate assebly where fit and presure needs to be applied at different points at the same time. Think first. Test fit. Think again. Pray a little (it doesn't hurt). And then go!


I managed to accomplish a decent fit in most areas. Please note that the spine should be shortened a little (not mentionned in the instructions, but there is a groove in the spine part where the cut should be made). Another after market item that I believe is "necessary" is new canards. Firstly, the kit canards have the wrong shape, and secondly, the flaps are always lowered on parked aircraft. The fit of Maeastro canards was not perfect but they look ok after CA-glue filling. I read that CMK has just released their version, but I don't know if they are better.


I've used a black primer (Mig "One Shot"), which I am getting quite fond of. It really smothens out to a very thin layer. I am trying out Mr Paint's range for the Swedish Airforce, and so far, I am totally impressed!


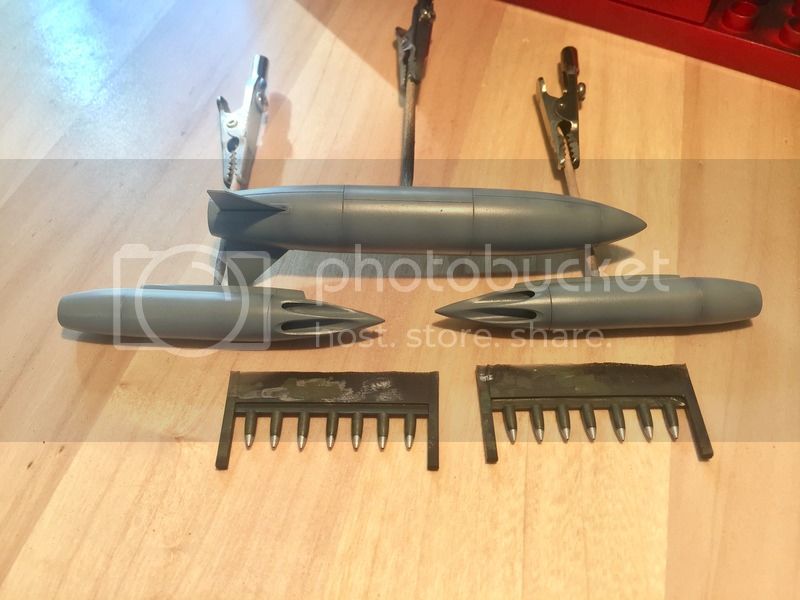
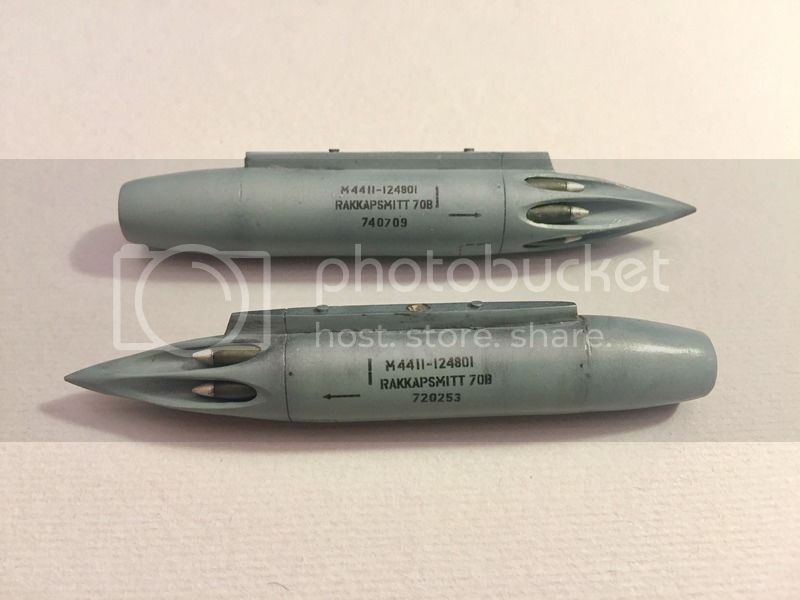
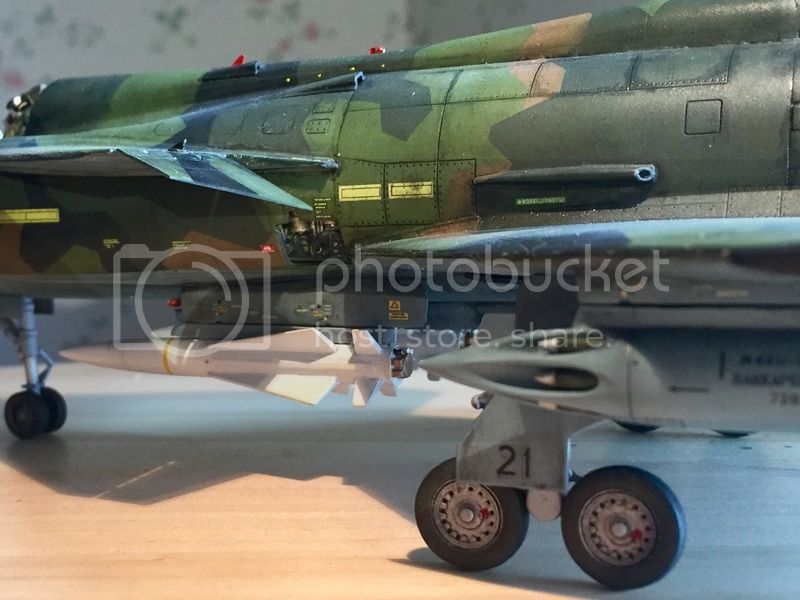
Weapons are not included. The massive rocket pods are from Maestro.

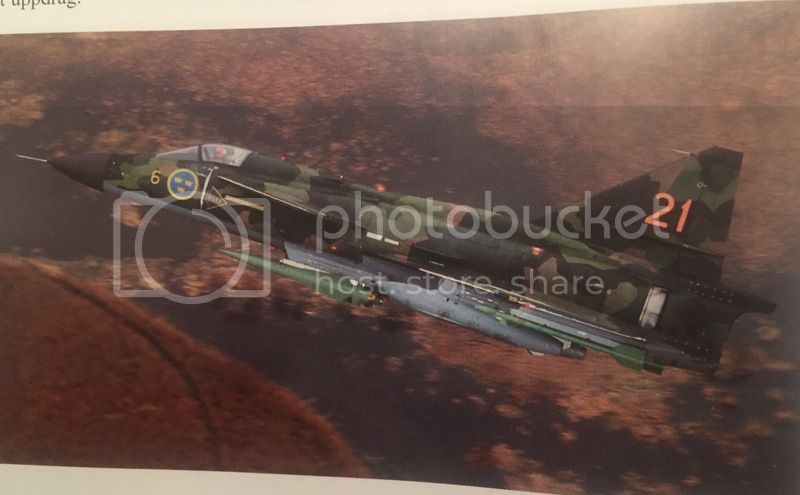
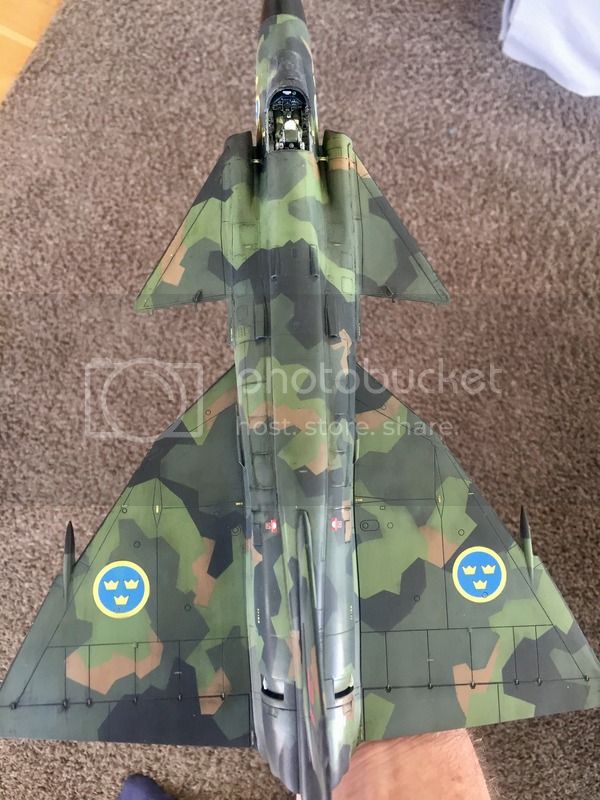
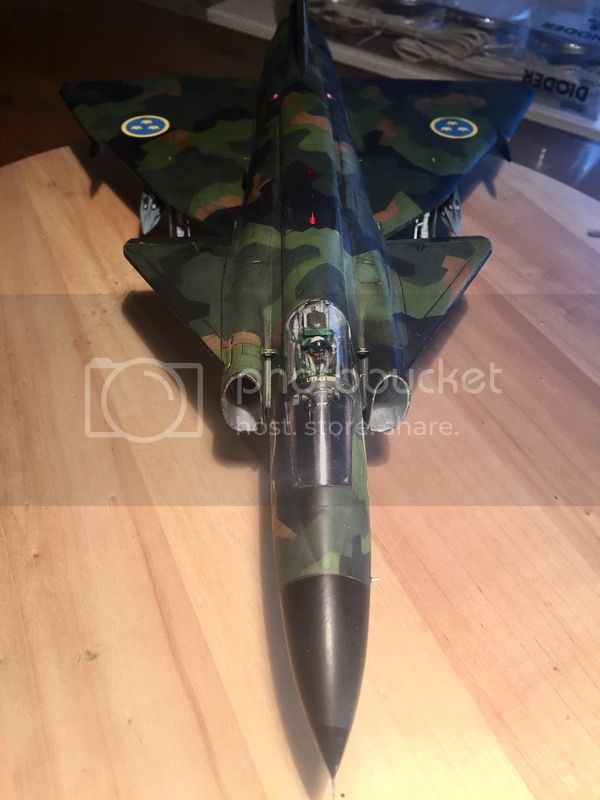
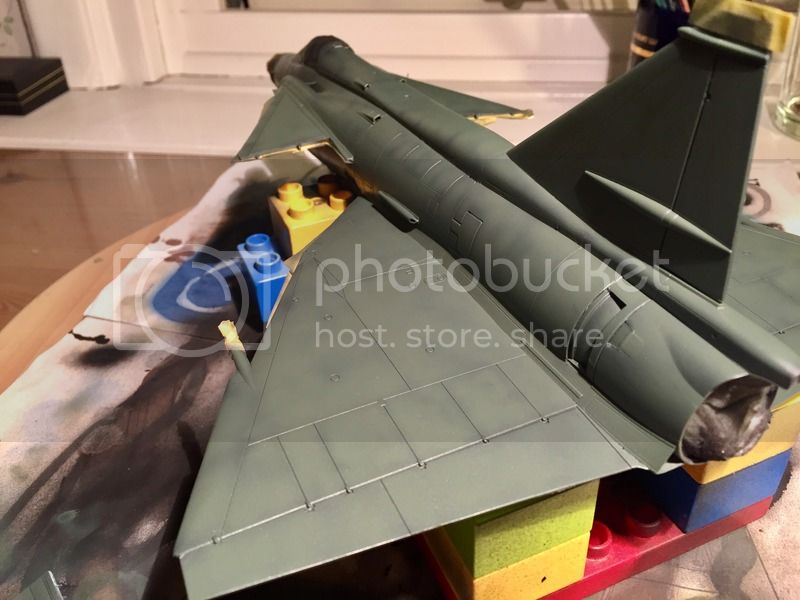
On to the infamous Viggen camouflage! I started with the dark green, since this covers most of the aircraft...


... and then started masking and adding colour after colour. Even with the Maestro Paint mask, it was an awsome task to try and align all the bits of tape in the right places...


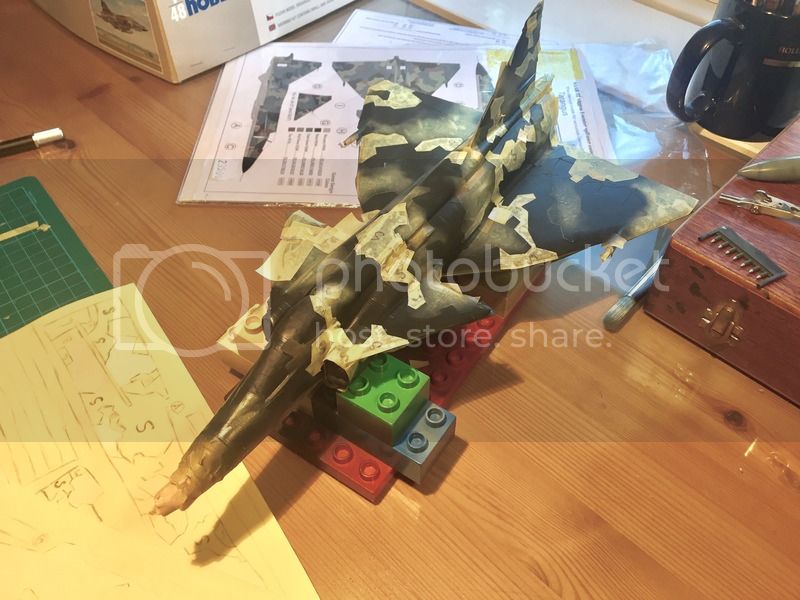
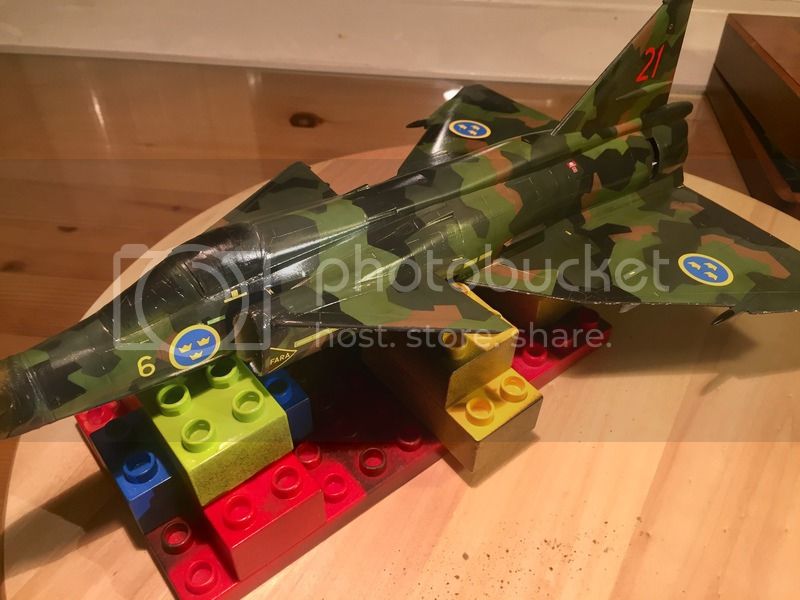
At the end, it looked something like this!


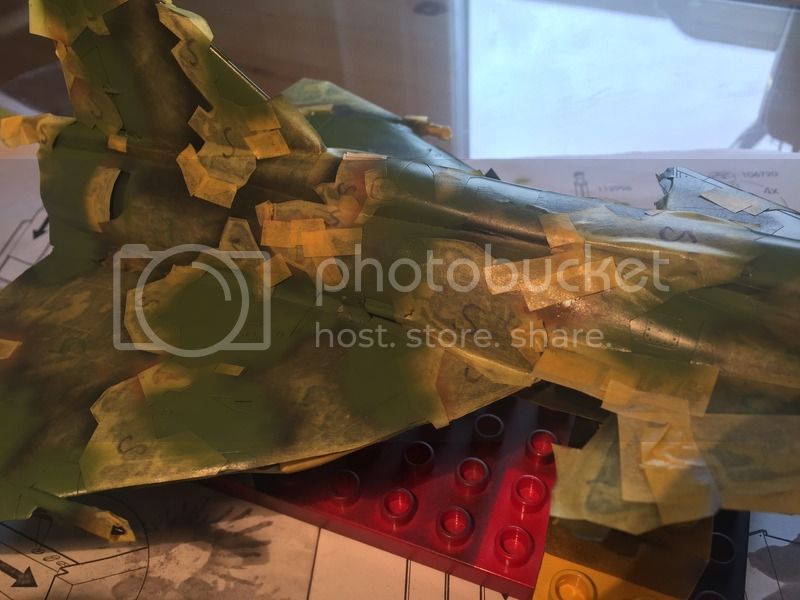
No longer could I see where one piece of tape ended or where the next piece started. My eyes where sore and my mouth tasted like Kabuki tape... Suddenly, I noticed a piece of tape that had fallen off, and I had no clue whatsoever where to put it... I attached it randomly and went to bed, dreaming of beatiful monochrome aircraft...

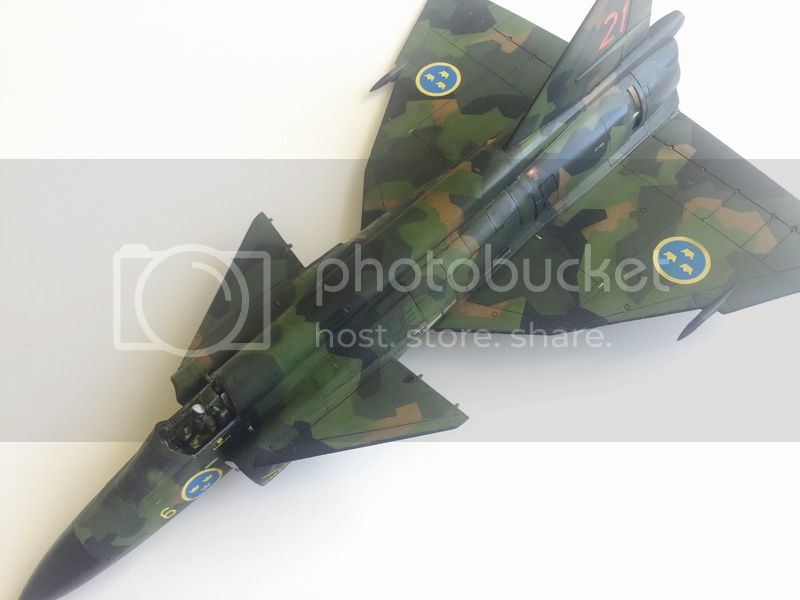
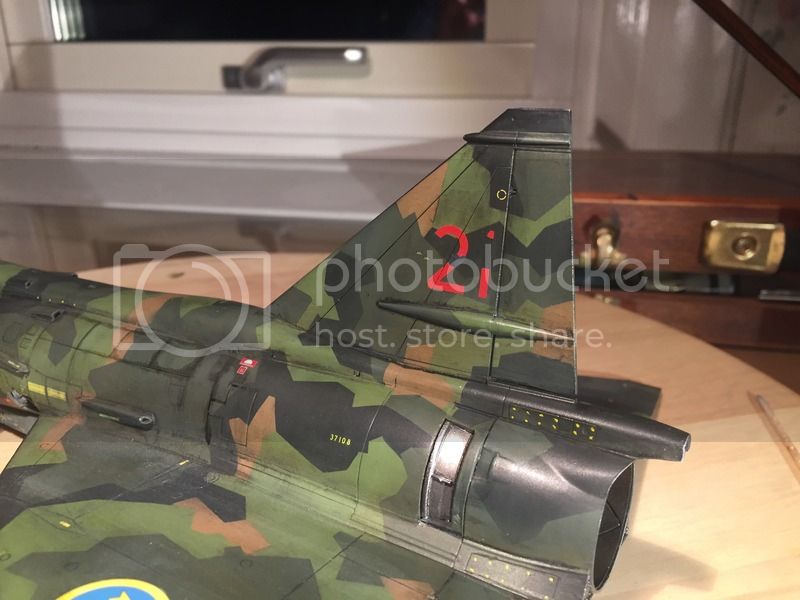
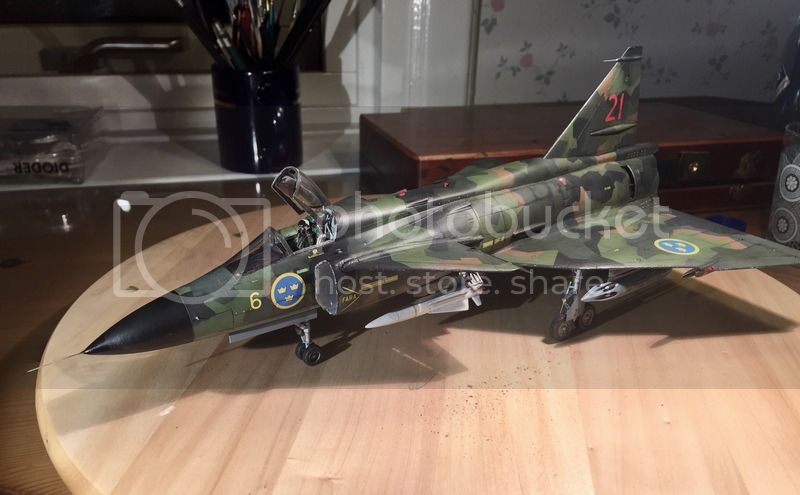
But the next morning... Ta-da!!!


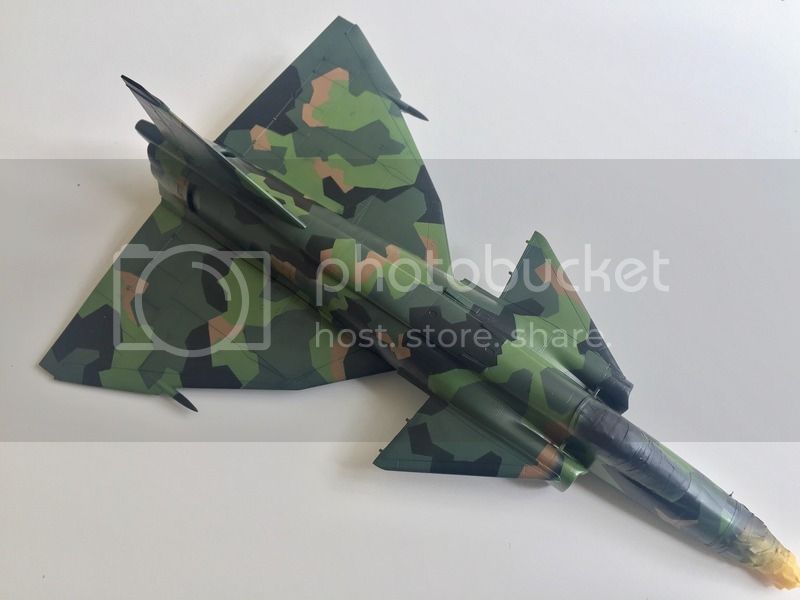
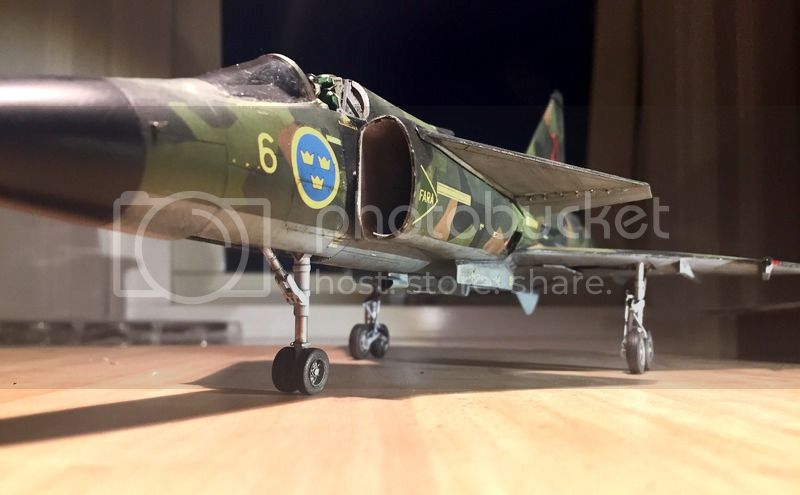
Having made quite a few touch-ups, she looked like this.


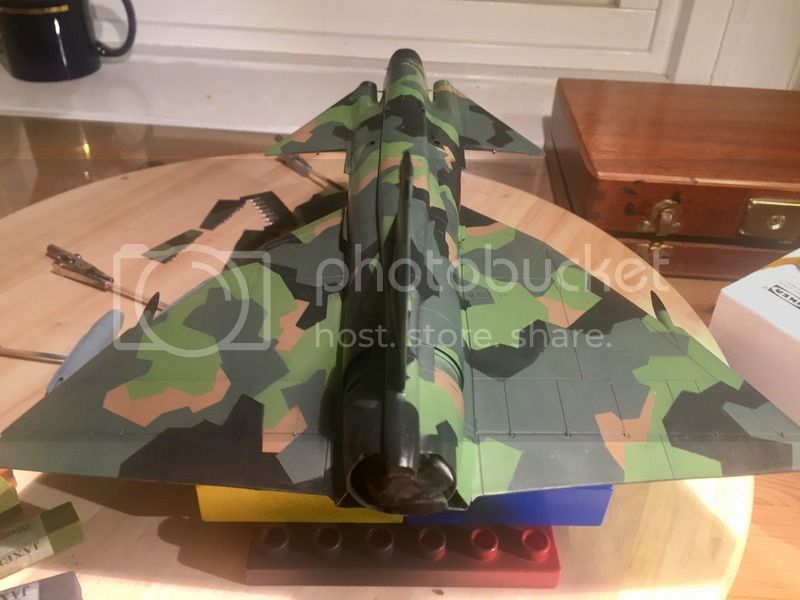
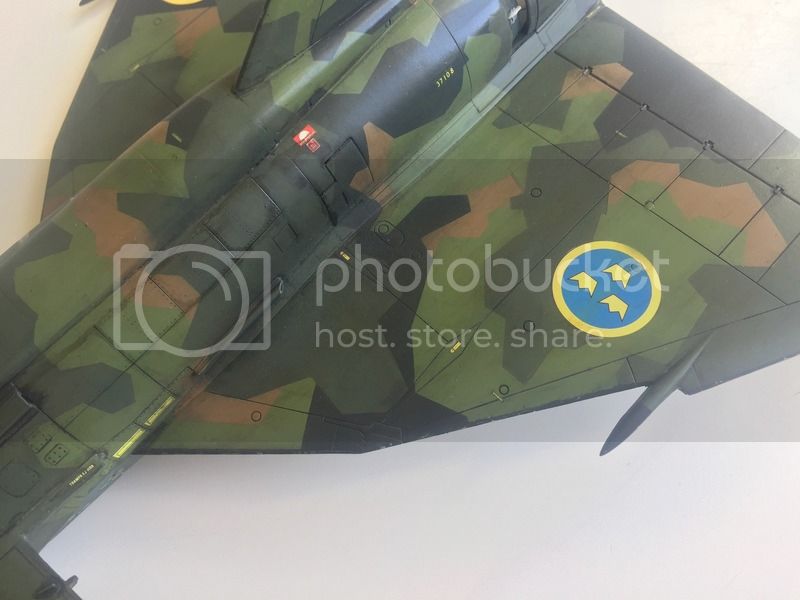
Very nice, but way to "perfect". The camo needs softening, blending, bleaching and dirtying in order to look realistic. This is what I'm aiming for...


I was hoping to try out a ready made filter (such as the AK Interactive NATO-filter), but no such filters at the local dealer. So I had to try some other methods that I had never tried before. First some oil dots...


A little scary, given all the work I had with the camo. But from here, there was no return. Only option was "Full speed ahead"!!!


Damn them seagulls!!!


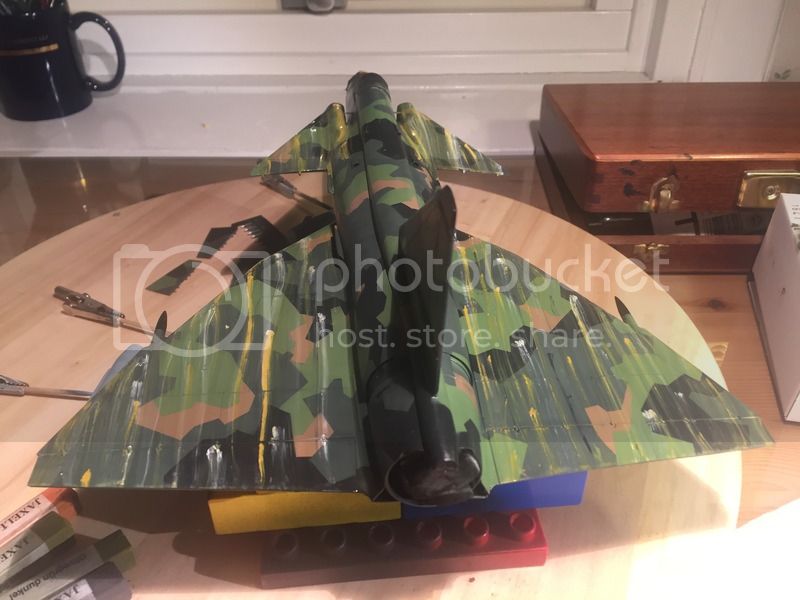
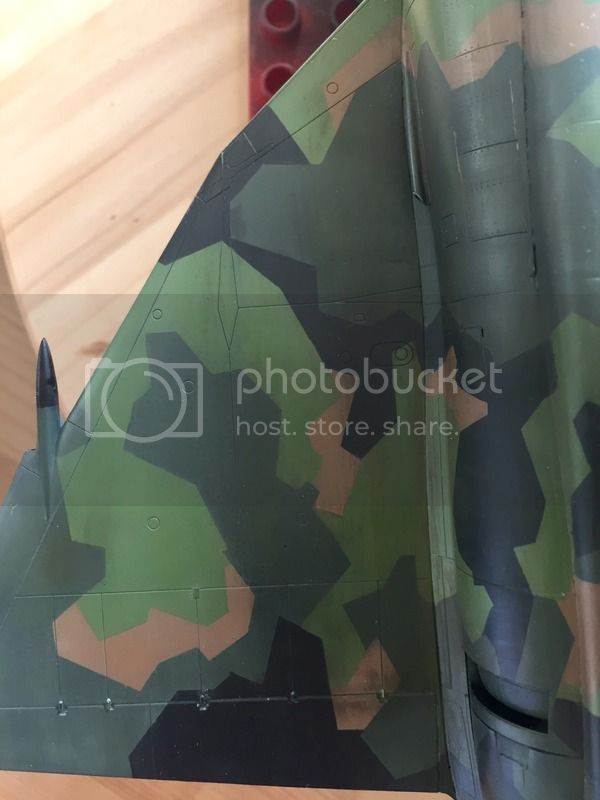
This is the result of the first filter. Not easy to detect in the particular light...


... but a closer look shows that the colours have definitely faded.


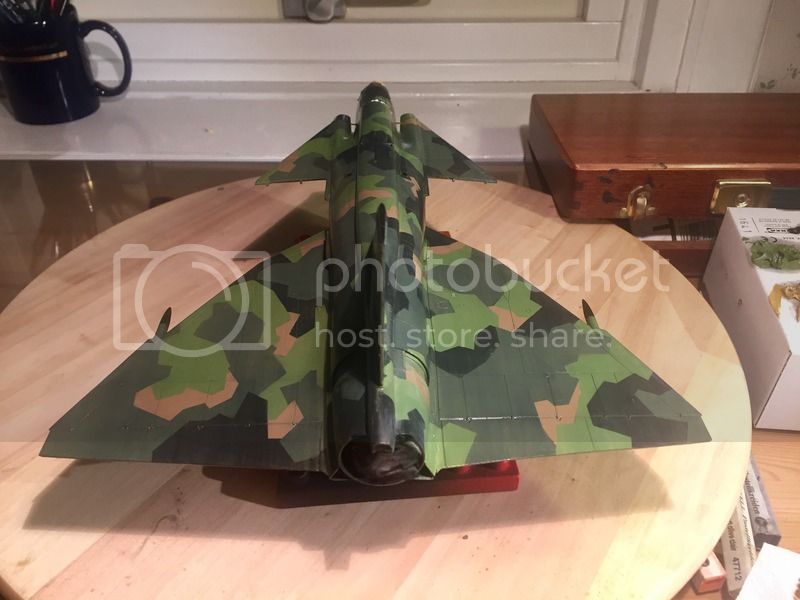
Next step was to try out pastels (another first for me)...


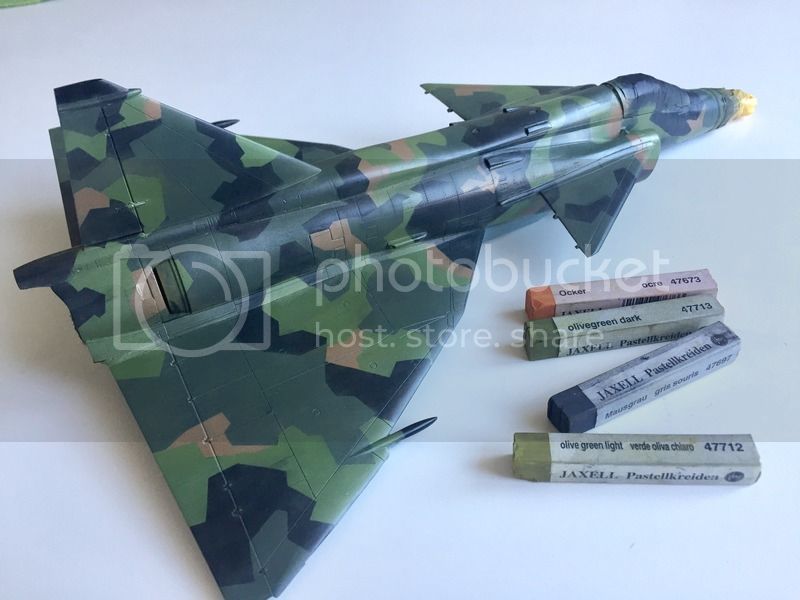
Just like being back at kindergarten...


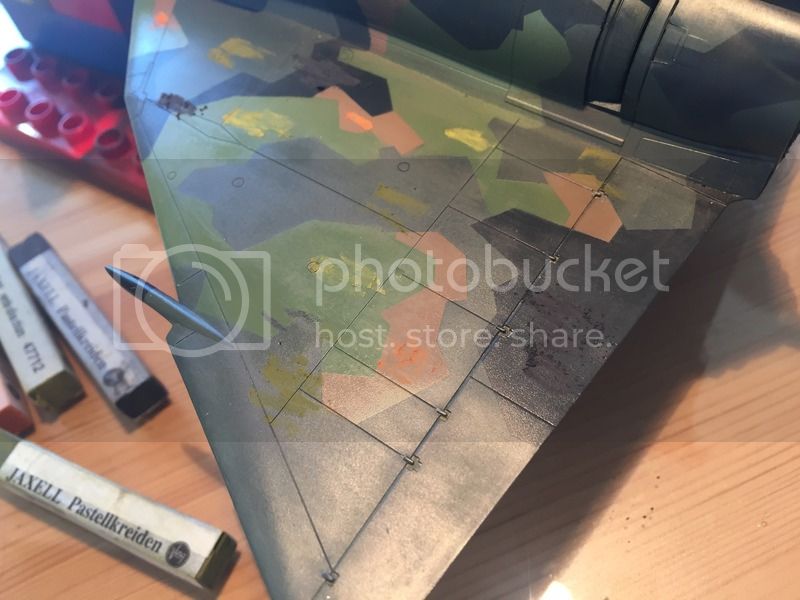
rubbing it in with my fingers... delectably dirty work!


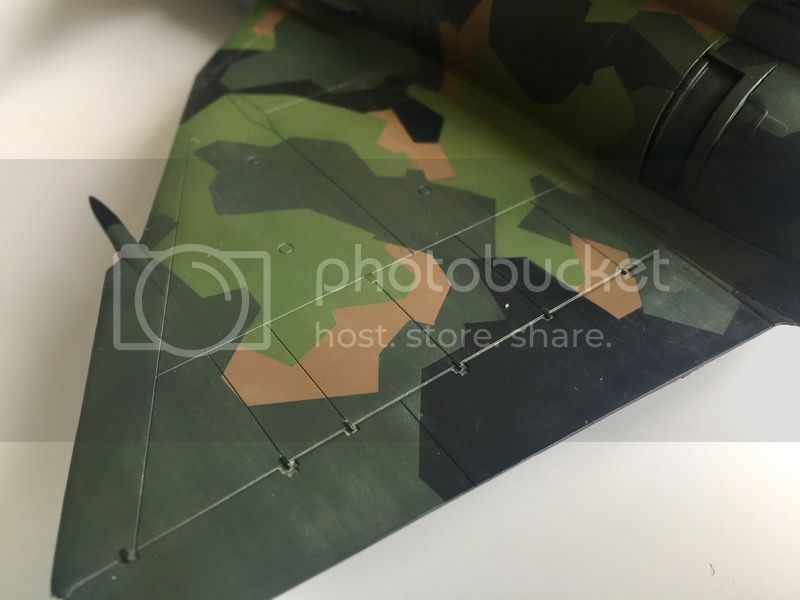
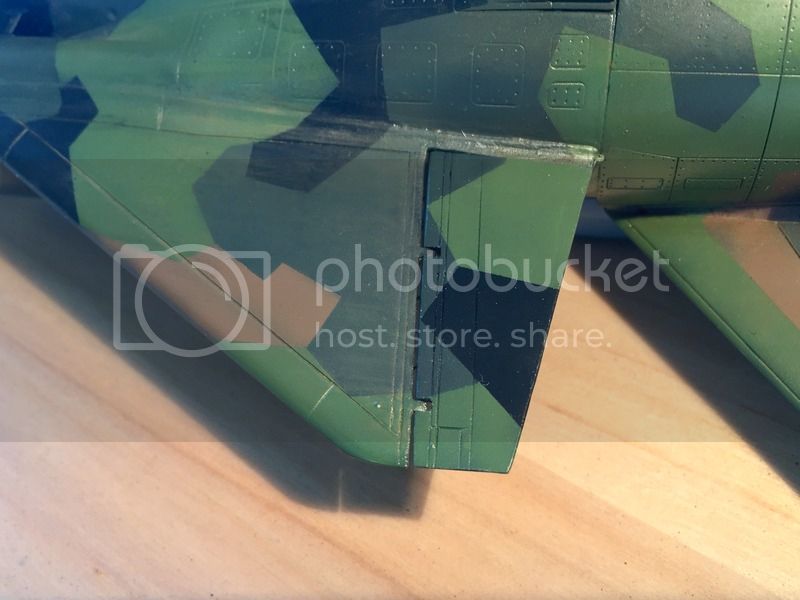
Starting slowly to obtain the effect that I was hoping for. Here's a comparison with the untreated flap.


More wheathering will be applied, but only after the decals. Any input, tips and ideas will be greatly welcomed!

Cheers! // PolarBear
BlackWidow
_VISITCOMMUNITY
European Union
Joined: August 09, 2009
KitMaker: 1,732 posts
AeroScale: 1,336 posts
Posted: Thursday, April 20, 2017 - 01:29 AM UTC
Björn,
I also have a soft spot for Saab aircraft and after finishing 2 Draken and a Tunnan the Lansen is close to the finish line.
The Viggen is one of the Saab family which is still missing in my stash. Your splinter camo on it looks awesome. The only quarterscale Viggen I know comes from Esci. Your weathering on it looks scary for me, especially that filter. But in the end I'm sure it will turn out the way you want and like it. I'm more a fan of that "museum like finish", so my Saab family don't have any weathering.

Torsten
litespeed
Staff MemberNews Reporter
AEROSCALE
_VISITCOMMUNITY
England - North West, United Kingdom
Joined: October 15, 2009
KitMaker: 1,976 posts
AeroScale: 1,789 posts
Posted: Thursday, April 20, 2017 - 03:35 AM UTC
Looking good Björn. You have done a great job replicating the camouflage and glad to see you are having a go at toning the colour down. I like the last image showing the contrast between the fresh paint look and the weathered look. Keep up the good work and please let us have a look at the final finish
tim
AussieReg
Staff MemberAssociate Editor
AUTOMODELER
#007
_VISITCOMMUNITY
Victoria, Australia
Joined: June 09, 2009
KitMaker: 8,156 posts
AeroScale: 3,756 posts
Posted: Thursday, April 20, 2017 - 06:41 AM UTC
Love the paint job, and a great tutorial on using various techniques to weather it. Great work so far, looking forward to more updates.

Cheers, D
Scrodes
_VISITCOMMUNITY
Ontario, Canada
Joined: July 22, 2012
KitMaker: 771 posts
AeroScale: 763 posts
Posted: Thursday, April 20, 2017 - 11:02 PM UTC
Wow, gorgeous build!
PolarBear
_VISITCOMMUNITY
Västra Götaland, Sweden
Joined: February 23, 2005
KitMaker: 820 posts
AeroScale: 629 posts
Posted: Wednesday, April 26, 2017 - 06:15 PM UTC
Thanks for all the comments. I have now started with the decals, which really makes this bird look the thing. I plan to do one more "layer" of filter and pastel wheathering once the decals and panellines are in place, and then seak it up with a protective coat of matt varnish.


I decided to go with an early Viggen based at the F6 base in Karlsborg. The reason for this was mainly some reference photos that really reveils both the beauty and the brutality of this aircraft. Here is one:


My model is going to carry a similar weapon load, albeit I'll use the rocket pod instead of the gun pod. The attack version of Viggen did not carry sidewinders on the outer pylons until the 1990's (the AJS version), so I'm probably not going to add those.

Cheers // PolarBear
PolarBear
_VISITCOMMUNITY
Västra Götaland, Sweden
Joined: February 23, 2005
KitMaker: 820 posts
AeroScale: 629 posts
Posted: Thursday, May 04, 2017 - 03:40 PM UTC
Time for an update. Many hours of work and and experiments in order to try and accomplish the desired weathering effects, she now looks like this...


Since the decals, I've added another layer of the home made oil dot wash, enhanced the panel lines, repainted certain ares, dirtied her up a little more, scrubbed, smudged, bleached, etc, etc. I tried an enamel product from Vallejo (engine oil stains?) to simulate the fluid stains that are often seen coming out from the panels on the fuselage. A close-up shows the effects better.


Fun work, and I'm starting to get really pleased with both the result and my "new attitude" to the work. I dare experiment and try out new things even more than before. I don't mind sanding down and repaint if I believe there is something that needs correction. Mostly, I', happy that the surface still look very smooth, even with all the fluids and all the mischief that I have exposed it to! I´ve also matte coated her, but might go back to a semi-matte finish based on the photographs that I have reviewed.


And then, just when I was feeling all satisfied and cocky, this happens...


I was going to improve the - in my view to dirty - light green field on the fin above the call number - so I masked parts off, decided to move the tape, and then... parts of the decal numbers came off! Good thing is that I have additional decals, so it should not be a big problem to rectify, but what went wrong? I used Microset and Microsol and then added a layer of Alclad Aqua Gloss, let it cure for more than 24h, then oil wash (cured for approx. 3 days), then Alclad Klear Kote (matte) which also cured for at least 24h. I don't know if it has anything to do with it, but the coat of matte varnish still feels a little sticky...

Cheers // PolarBear
PolarBear
_VISITCOMMUNITY
Västra Götaland, Sweden
Joined: February 23, 2005
KitMaker: 820 posts
AeroScale: 629 posts
Posted: Friday, May 26, 2017 - 12:03 PM UTC
Just a small uppdate. New numbers on the fin. Loads of sub-assemblies left, but she is getting close to the finishing line!


Cheers// PolarBear
PolarBear
_VISITCOMMUNITY
Västra Götaland, Sweden
Joined: February 23, 2005
KitMaker: 820 posts
AeroScale: 629 posts
Posted: Sunday, May 28, 2017 - 02:36 AM UTC
Swedish rocket pods m/70. Just had to include these babies!


Cheers! // PolarBear
PolarBear
_VISITCOMMUNITY
Västra Götaland, Sweden
Joined: February 23, 2005
KitMaker: 820 posts
AeroScale: 629 posts
Posted: Wednesday, June 07, 2017 - 08:02 PM UTC
Hard work continues!

The brass pitot tube was significantly smaller than the hole in the nose cone, so I had to stuff the hole with a mix of superglue and babypowder, and the sand it to shape. Not an easy task sanding so close to the sensitive tube, but it worked out fine.


Added some detail to the cockpit area, before turning her upside down.


Belly up! I started with the really nice main landing gear. I really like Tarangus/Special Hobbys' solution. Lots of small parts, but they all add up!


Testing alignement, so that all wheels are touching the ground. Second try and bingo.


Then came the intricte work of surgically attaching the remaining parts for the hatch and the wells. Some extra weathering needed, but I opted out on adding even more details, wires etc. I really want to finish this build soon! But maybe on my next Viggen?


The front wheel well is a fantastic mishmash of struts and lights and whatnots. Almost British? Tarangus forgot about the headlight on the forward strut, so I had to pillage this part from my old Airfix Viggen box. Kind of nice that the Airfix got to contribute to this build!


Then on to the weapon load! This is the original attack verision of the Viggen, so I wanted real firepower to match.


The forward attack missiles are Swedish RB05a:s. Since there were no aftermarket and none in the box, I once again stole from the Esci/Airfix's Viggen. I had to work quite hard to adjust those rather crude missiles into reasonable shape. At the exact same moment that I was done, Maestro models released what appears to be nice, crisp and highly detailed resin RB05a:s! Duh! I'll most likely exchange mine to theirs once I get a hold of them...


It may be the camera, but they appear too white on the pictures. Will add a light grey oilwash to tone them down and show detail.


All parked Viggens had a RAT hanging out (that was released once the wheels hit the ground). I hade to carve my own prop blades for the RAT, since there were none in the package.


The RAT from Maestro models is not 100% correct when compared to the real thing, but it is good enough for me!


Entering the final stretch now! Some minor details, additional paint jobs and cleaning up to do. I notice that my pilot figure is really eager to take his brand new Viggen for a spin!


Any and all comments are truly appreciated!

Cheers! // PolarBear
redcap
_VISITCOMMUNITY
England - East Midlands, United Kingdom
Joined: November 06, 2005
KitMaker: 753 posts
AeroScale: 311 posts
Posted: Thursday, June 08, 2017 - 02:48 AM UTC
Absolutely tremendous build and execution of the camo scheme.

I wish someone would a Viggen in 1/32 which is my scale!

Gary
brandydoguk
_VISITCOMMUNITY
England - North, United Kingdom
Joined: October 04, 2002
KitMaker: 1,495 posts
AeroScale: 643 posts
Posted: Thursday, June 08, 2017 - 08:33 PM UTC
That's a real beauty, the weathering looks spot on. Well worth all the effort you put in.
drabslab
_VISITCOMMUNITY
European Union
Joined: September 28, 2004
KitMaker: 2,186 posts
AeroScale: 1,587 posts
Posted: Friday, June 09, 2017 - 01:00 AM UTC
Very well done and also very informative. Thank you for putting this on-line
PolarBear
_VISITCOMMUNITY
Västra Götaland, Sweden
Joined: February 23, 2005
KitMaker: 820 posts
AeroScale: 629 posts
Posted: Tuesday, June 13, 2017 - 07:40 PM UTC
All done!!!


Well, there are some very minor details left, but since I've decided to get the newly released resin RB05 from Maestro Models (a lot more crisp than my modified Airfix ones), I'm going to wait with those until a later time.

Until then, this lady is going up on the mantlepiece! Thanks for the comments along the way! It's truly been a fun project with lots of challenges. It has allowed me to try out techniques that I haven't tried before, in particular with regard to painting and weathering.

Since childhood, I have always wanted to build a Viggen in 1/48. Growing up in Sweden, it was THE coolest and most awsome aircraft of them all. I can now proudly say that I have realized that longtime goal, and it feels great!

More pictures (with better lighting) will be posted when the new robots are in place. Until then, these will have to suffice.


Next project? - Something monochrome! Definitely something monochrome!!!

But first a well deserved whiskey. As brutal as the Viggen!

Cheers!!! // PolarBear
 _GOTOTOP