_GOTOBOTTOM
World War II: Great Britain
Aircraft of Great Britain in WWII.
Hosted by Rowan Baylis
Eduard Spit XVI in 1/72
magnusf
_VISITCOMMUNITY
Stockholm, Sweden
Joined: May 02, 2006
KitMaker: 1,953 posts
AeroScale: 1,902 posts
Posted: Wednesday, April 12, 2017 - 08:05 PM UTC
With these and and even these (!!) (portrait photos coming later, a friend of mine takes care of them for the time being) finally finished I came home to an empty working table from this years main modelling event here in Stockholm, ready to put whatever new marvellous toys I had invested in directly on it. What a lovely feeling. And what a worthy kit I found!

Another one of Eduards double kits, this is the Spit XVI bubbletop/highback combo. I do already have the Royal Class boxing (of course) so I would probably had been better off with twin bubbletops but you can't have everything your way, can you ?


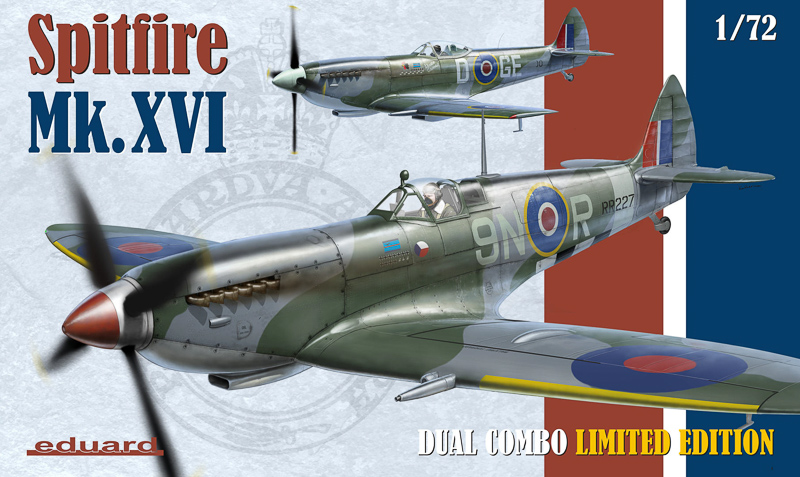
Once again, Eduard really manage to do a classy box. Solid as a safe as well!

Box contents can be found elsewhere, apart from that I had started building before it occurred to me to photograph the untouched plastic !


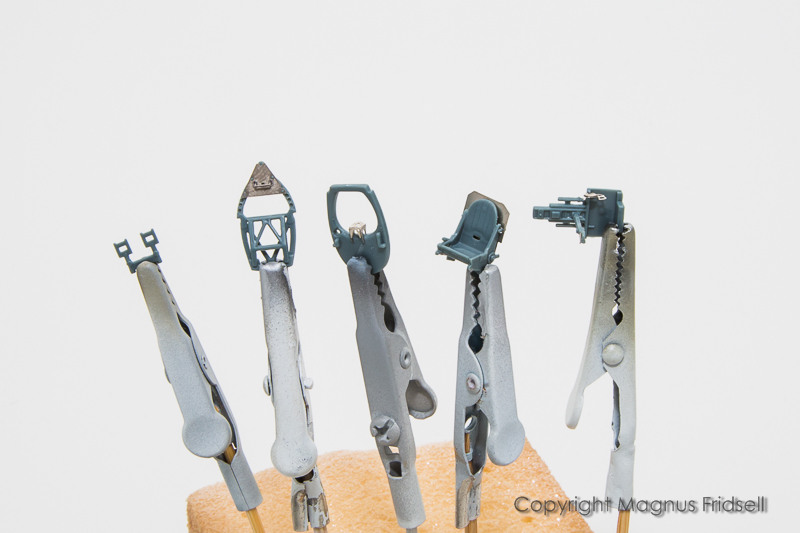
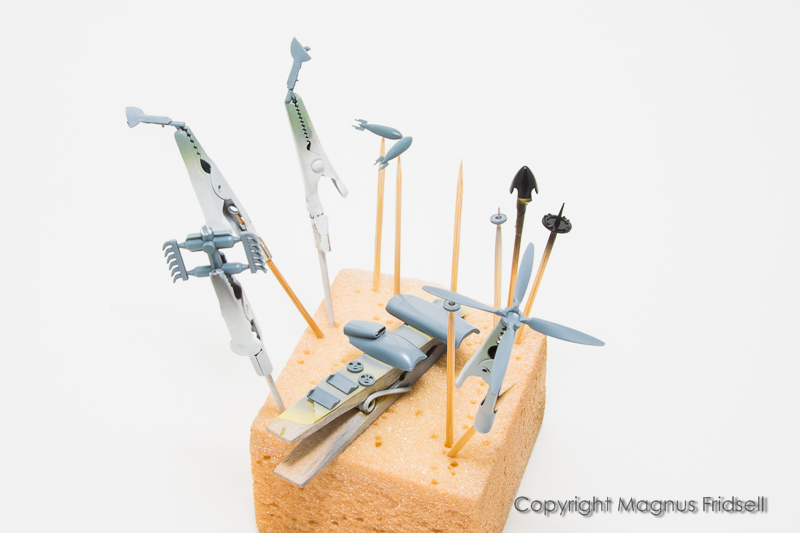
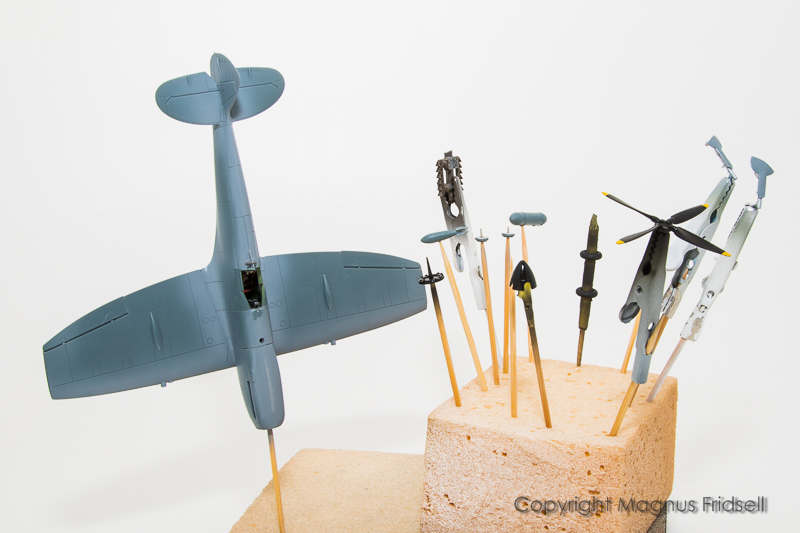
Interior parts on sticks (I know you have been missing them...)...


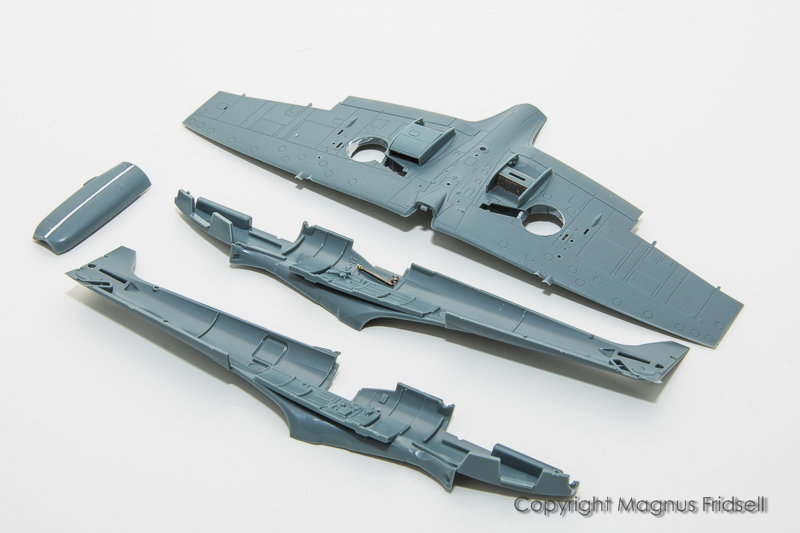
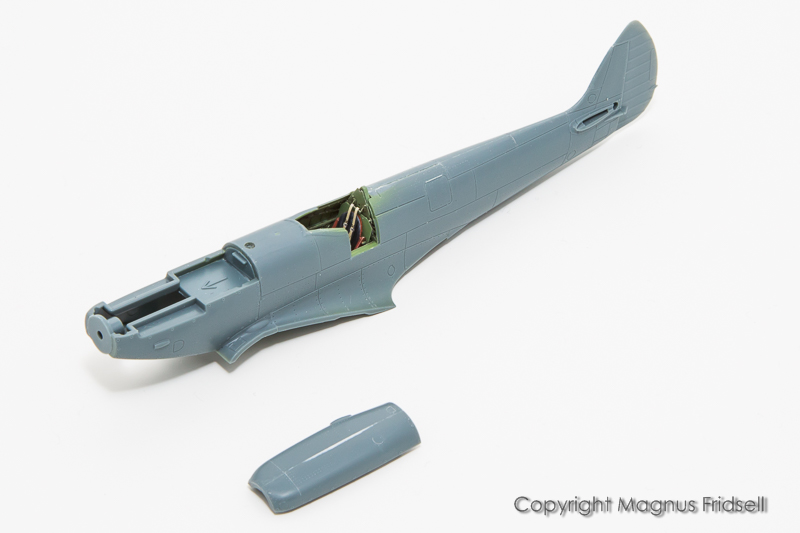
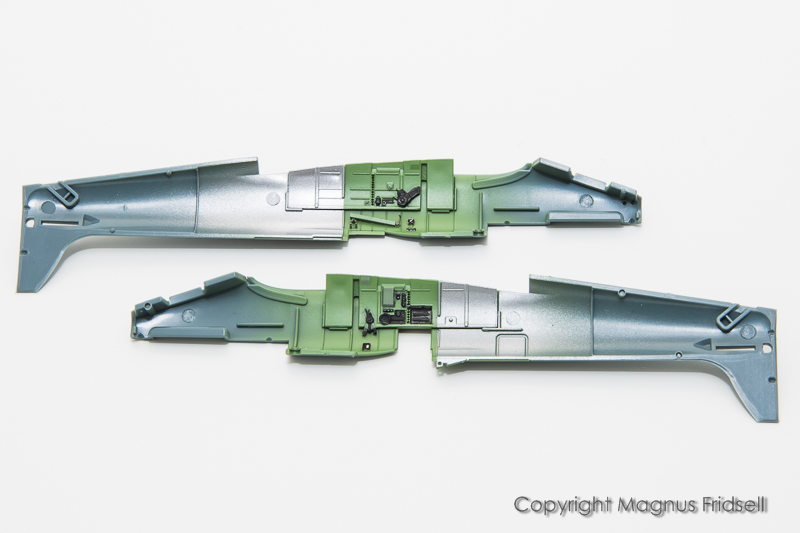
...fuselage halves, top cowl and lower wing seen from the outside. Note three-piece coolers giving nice detail on all surfaces!


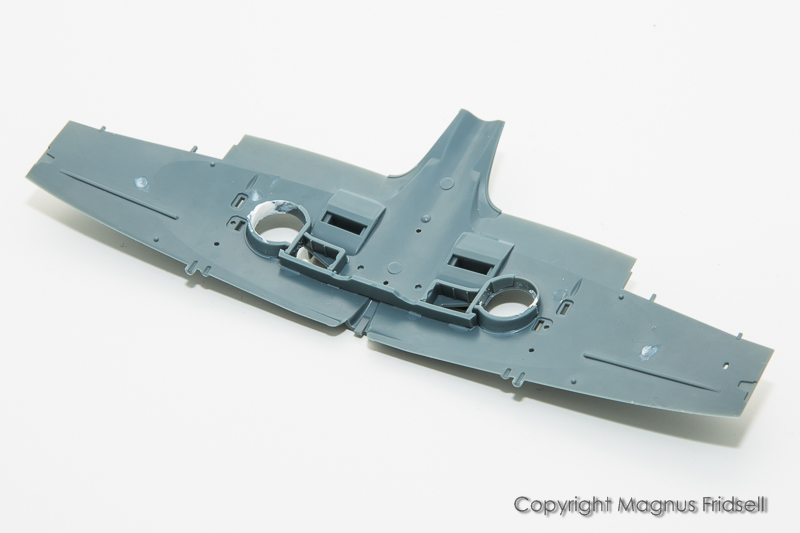
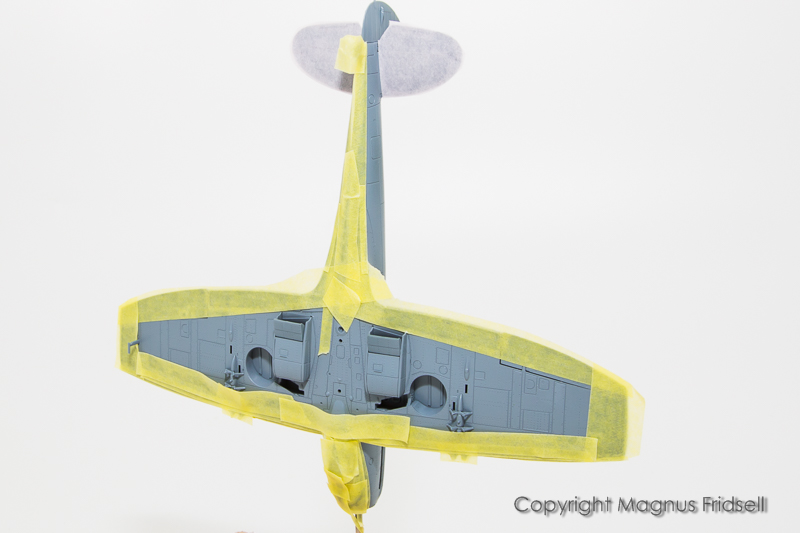
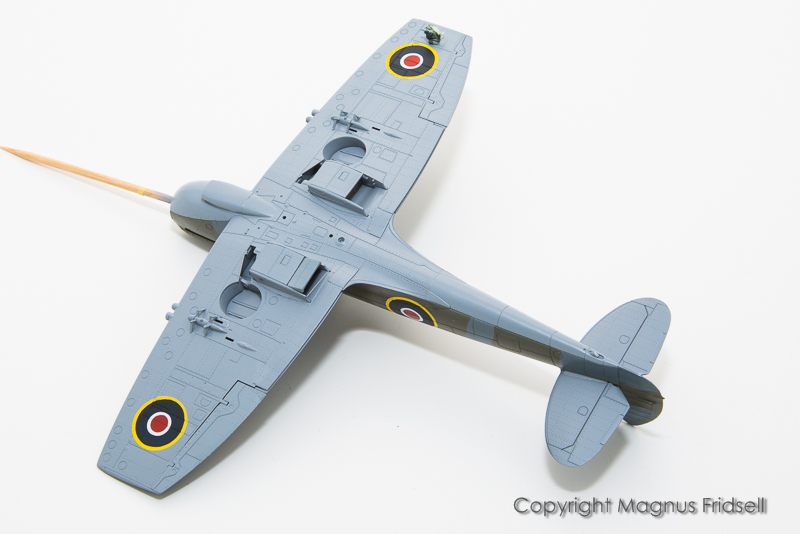
...lower wing with mulit-piece gear wells installed...


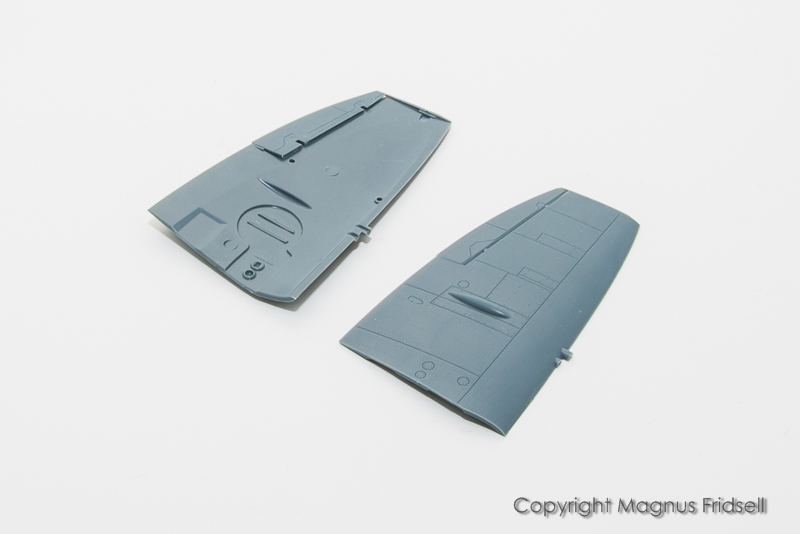
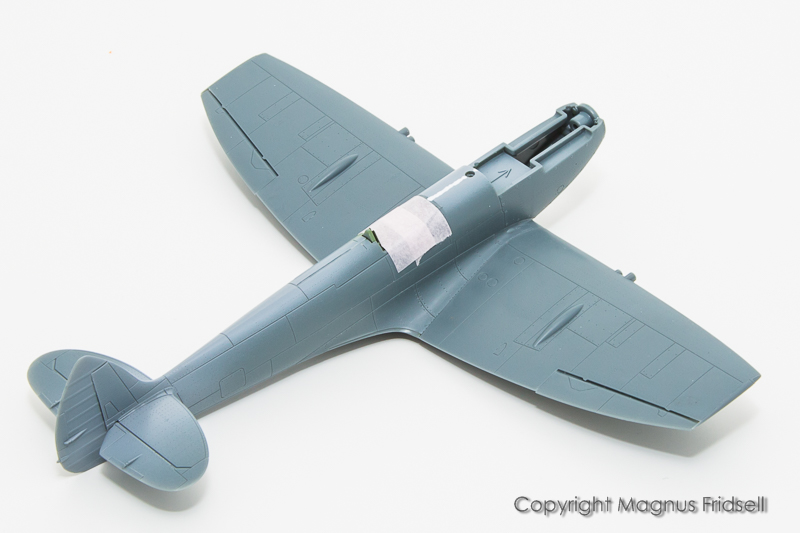
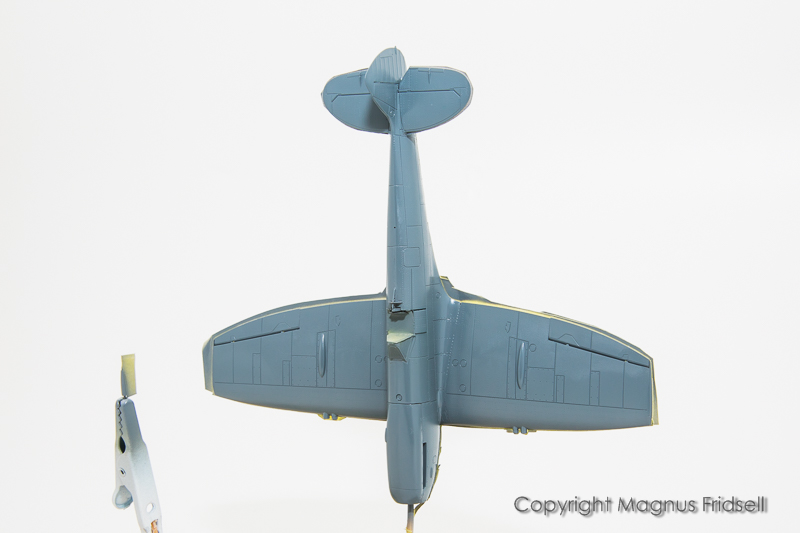
...and finally, during an attack of seldom seen cleverness, the upper wings with wing tips and ailerons glued in place. From the inside. Avoiding the unavoidable (or at least when it comes to me) glue mess!


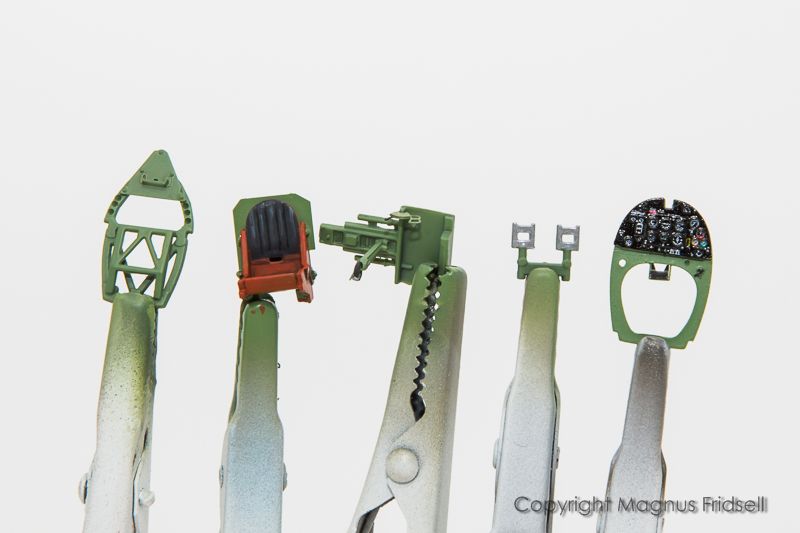
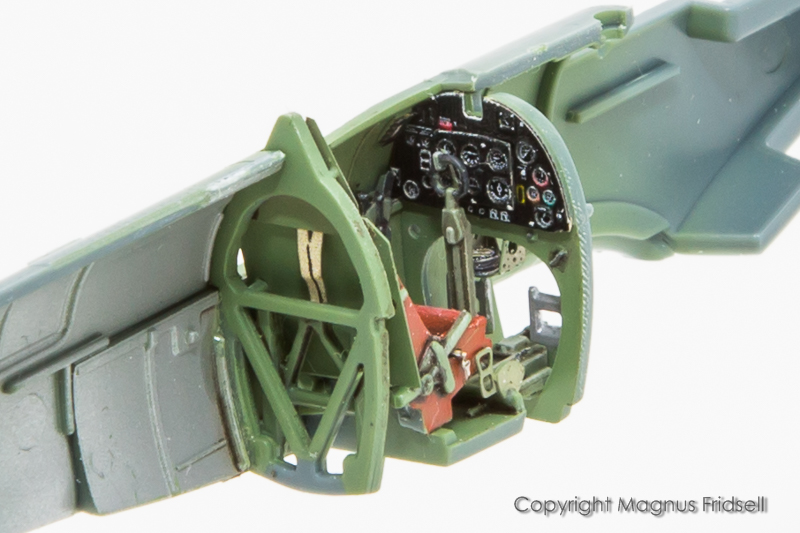
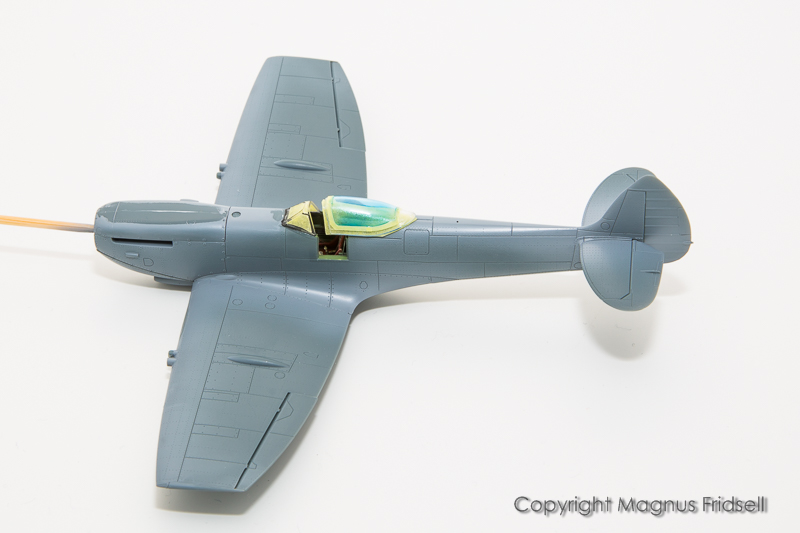
I am not very fond of PE but I'll use what there is this time, pre-printed instrument panel looks really good...


...and a few smaller placards for the fuselage interior! And while were at it, interior green is Gunze 312.

Everything is supplied in plastic as well (including a separate engraved panel if you prefer painting!) so you won't have to use the PE if you don“t want to.

I'll do only the bubbletop, I think I'll try to avoid any double-builds just to see if I can raise productivity a bit. I tend to get stuck in my builds over some boring bit or another and with double builds there are twice as many hurdles to overcome. At the same time...


Magnus
BlackWidow
_VISITCOMMUNITY
European Union
Joined: August 09, 2009
KitMaker: 1,732 posts
AeroScale: 1,336 posts
Posted: Thursday, April 13, 2017 - 12:13 AM UTC
Magnus, 1/72 is not my scale but I'll have a look over your shoulder at your Spits on sticks. I'm sure you'll turn them into little masterpieces as usual.

Torsten
magnusf
_VISITCOMMUNITY
Stockholm, Sweden
Joined: May 02, 2006
KitMaker: 1,953 posts
AeroScale: 1,902 posts
Posted: Thursday, April 13, 2017 - 11:05 PM UTC
Torsten! Thanks for hangin' with me !


Some shadows and a bit of drybrushing...


...and we're ready to button this one up!

I feel rather successful with my single-model-policy. Or it might just be due to this great kit ?


Magnus
magnusf
_VISITCOMMUNITY
Stockholm, Sweden
Joined: May 02, 2006
KitMaker: 1,953 posts
AeroScale: 1,902 posts
Posted: Saturday, April 15, 2017 - 11:21 AM UTC

Closing the fuselage... It is designed with an extra firewall, a horizontal stiffener that goes forward into the engine bay and a separate, perfectly flat, attachment plate for the spinner and prop. It feels really solid and it will be making it a lot easier to attach the cowling and under-the-chin scoop.

I ran into a bit of trouble with the separate top cowling: the parts didn't match 100%, there was the slightest difference in curvature. Really not much more than you can expect from the average kit but after having built this I expected better.

Rummaging through the box, a white slip of paper comes within sight, it says "ERRATA". There are several different cowling variants included and the instructions state the wrong part numbers, breaking the seam and glueing the correct parts together and voilą: perfect fit!

This is all very well but what fascinates me the most is that someone takes their Spitfires REALLY seriously: they have actually addressed this very minor difference in "bulgyness" that I think no other manufacturer would neither notice, nor care about.

I've said it before: Eduard are the Google of plastic: doing what they to with an irritating level of skill !


Magnus
GazzaS
#424
_VISITCOMMUNITY
Queensland, Australia
Joined: April 23, 2015
KitMaker: 4,648 posts
AeroScale: 1,938 posts
Posted: Saturday, April 15, 2017 - 12:51 PM UTC
Magnus,
Great job on that teeny-weeny cockpit! Not my scale either as my eyes struggle with 1/48.

I've only built one Eduard kit and found to my dismay it was made to allow the propeller to spin. It was a WWI fighter, and Eduard makes more of them than anyone else.

Gaz
magnusf
_VISITCOMMUNITY
Stockholm, Sweden
Joined: May 02, 2006
KitMaker: 1,953 posts
AeroScale: 1,902 posts
Posted: Monday, April 17, 2017 - 01:26 AM UTC
Gary! Thanks! And yes, this one spins too !


This is the only place I have found on this kit yet that needs putty, strangely enough there is a larger-than-expected gap between the horizontal tailplane and the fuselage. I filled this with Milliput, mixed and rolled into tiny sausages. I then used two rubber-tipped sculpting tools to push it in place and smooth it out, finally removing excess putty using water and a Q-tip. This is a good way to ensure a minimum of sanding in this kind of tight spots! Trick learnt from a figure modelling friend...


Once again back to parts-on-sticks ! I'm priming the seams using Mr Paint "Ocean Grey". Checking the judging protocols from the contests I enter shows where I am generally weak: building technique (usually slightly low on detailing as well while "overall impression" and "painting technique" is usually on par!)! So checking the seams carefully is the order for the day! No, it's not a matter of life and death for me but it is an easy thing to improve!


Finally I would like to show the amount of spares you get from just one of these kits ! Things that will come in handy to improve other, lesser kits, of the Spitfire!


Magnus
c4willy
#305
_VISITCOMMUNITY
Christchurch, New Zealand
Joined: February 01, 2006
KitMaker: 1,673 posts
AeroScale: 1,517 posts
Posted: Monday, April 17, 2017 - 04:29 AM UTC
As usual Magnus outstanding work in braille scale buddy. I don't enter contests myself, my toughest critic has always been myself.
magnusf
_VISITCOMMUNITY
Stockholm, Sweden
Joined: May 02, 2006
KitMaker: 1,953 posts
AeroScale: 1,902 posts
Posted: Friday, April 21, 2017 - 12:10 PM UTC
Chris! Thanks!

Lost a bit of speed this week due to work commitments but no worries, things are going according to plan anyway !


Wings are on! I've tried a trick a friend of mine showed many years ago: gluing the wing top surfaces to the fuselage before installing the lower surfaces with the aim of getting a cleaner wing root joint. There was a bit of plastic juggling on the bench with wings and fuselage since there are no hard locating points when doing it this way but everything ended up well. And I got that elusive clean joint!


Magnus
GazzaS
#424
_VISITCOMMUNITY
Queensland, Australia
Joined: April 23, 2015
KitMaker: 4,648 posts
AeroScale: 1,938 posts
Posted: Friday, April 21, 2017 - 01:43 PM UTC
Good job, Magnus!

I'm gonna try it too once I get back to low-winged planes.

Gaz
mrockhill
_VISITCOMMUNITY
Pennsylvania, United States
Joined: June 17, 2009
KitMaker: 566 posts
AeroScale: 507 posts
Posted: Saturday, April 22, 2017 - 05:50 PM UTC
Beautiful work Magnus! I do really enjoy 1/72 kits as well and Eduard's Spitfire has got to be one of the sharpest looking 1/72 kits out there.
Willard79
_VISITCOMMUNITY
Wellington, New Zealand
Joined: June 01, 2014
KitMaker: 189 posts
AeroScale: 179 posts
Posted: Sunday, April 23, 2017 - 02:08 AM UTC

Quoted Text

gluing the wing top surfaces to the fuselage before installing the lower surfaces with the aim of getting a cleaner wing root joint.


that's an interesting approach Magnus, did you have any problems with setting the wing dihedral? I've often attached the lower wing to the fuselage and then the uppers to try and minimize the root step but not the other way.

Enjoying your work.

magnusf
_VISITCOMMUNITY
Stockholm, Sweden
Joined: May 02, 2006
KitMaker: 1,953 posts
AeroScale: 1,902 posts
Posted: Friday, April 28, 2017 - 08:20 PM UTC
Gary! Considering your current metal working habits that ain't gonna happen anytime soon I guess ?

Mike! The Spit is nice but here is another one from Eduard that I think is even nicer! The sprues with the larger parts on in the Spit kits (fuselage, wings, stabilisers and so on) are REALLY fine while the smaller detail parts on their sprues seem to be a tiny bit coarser. They have a slightly pebbly structure that wasn't present on any of the parts in the 110-kit.

Spud! This approach requires well-fitting wings, otherwise it would probably be difficult. And an ill-fitting wing would require filling and sanding anyway, taking away most of the advantage! I also cheated and used the lower wing as a fixture while the glue set helping to fix the dihedral .


Still working on the cowl seam . I should have gotten me a resin replacement but it felt like cheating when I bought the kit. Now it feels more like a good idea !


Magnus
KelticKnot
_VISITCOMMUNITY
Scotland, United Kingdom
Joined: May 11, 2015
KitMaker: 768 posts
AeroScale: 656 posts
Posted: Friday, April 28, 2017 - 09:09 PM UTC
Seems like i somehow missed the kick-off here but your progress is great so far. The etch ip in 72nd scale really helps sell the detail doesn't it?
RussellE
#306
_VISITCOMMUNITY
Victoria, Australia
Joined: June 27, 2010
KitMaker: 3,959 posts
AeroScale: 598 posts
Posted: Sunday, April 30, 2017 - 02:54 PM UTC
I'm buckled up and along for the ride too
Mecenas
Joined: December 23, 2007
KitMaker: 1,596 posts
AeroScale: 1,275 posts
Posted: Wednesday, May 03, 2017 - 09:37 PM UTC
Hi Magnus!
You're doing great job. That's why you have a very bad influence on me - I'm struggling with myself not to buy this kit. Watching threads like yours it looks as a piece-of-cake build - something I need very much.
magnusf
_VISITCOMMUNITY
Stockholm, Sweden
Joined: May 02, 2006
KitMaker: 1,953 posts
AeroScale: 1,902 posts
Posted: Friday, May 05, 2017 - 12:08 PM UTC
Paul! Those pre-painted/printed instrument panels are really borderline to cheating but they look so nice that I throw away all my principles in this case ! There is however an extremely nice engraved plastic panel included in the kit that probably would come out almost as good if carefully painted!

Russell! Welcome along on the ride, and good that you've buckled up - safety first !

Michal! Ain't I a stinker ! It's a very good kit but it requires care. And a steady eye when reading the instructions! Go get one I would say!

A bit of a condensed history of last week's activities...


Using the very well-fitting masks that fully cover the windscreen panels and fits along the edges of the canopy perfectly. Filling in the rest using Bare Metal masking fluid.


Masking the lower surfaces...


...and ready for paint! I used a spare entry door (there are several in the kit ) attached using masking fluid to avoid some tricky masking around the opening. Sorry for the boring photos but masking doesn't get any more amusing than this...


Ocean Grey is on! With a bit of luck I'll start masking for green tonight.


Magnus
magnusf
_VISITCOMMUNITY
Stockholm, Sweden
Joined: May 02, 2006
KitMaker: 1,953 posts
AeroScale: 1,902 posts
Posted: Thursday, May 25, 2017 - 12:44 AM UTC
This took a lot longer than expected. I've had great trouble eliminating the upper cowl seam (yes, I know there is a one-piece resin cowl but I've succeeded on many other models so why should this one be harder?). It's not perfect but I'll let it go now, with hindsight I should probably have primed it my usual way!

I've also been drawing, cutting and adjusting the masks. Since I do a Spitfire every now and then I did the masks for the cutter so that I can re-use them in the future and it took some work to get them right.

So, on to the business...


Masks on...

...paint is on...


...and masks are off! Easy as that!


Magnus
Willard79
_VISITCOMMUNITY
Wellington, New Zealand
Joined: June 01, 2014
KitMaker: 189 posts
AeroScale: 179 posts
Posted: Thursday, May 25, 2017 - 01:28 AM UTC
That paint job is looking sweet. I feel your pain on the cowl joint, I've built two 1/48 Ed spits and they were a pain to eliminate on both. I've got a few more in the stash so I went and acquired some resin seamless versions to save myself some time.
Enjoying watching your work.

regards
magnusf
_VISITCOMMUNITY
Stockholm, Sweden
Joined: May 02, 2006
KitMaker: 1,953 posts
AeroScale: 1,902 posts
Posted: Friday, May 26, 2017 - 12:39 PM UTC
Spud! Thanks! What I'm trying to figure out is why it is more difficult on this kit than on others, I really see no reason ! Next time I'll try primer!


Magnus
magnusf
_VISITCOMMUNITY
Stockholm, Sweden
Joined: May 02, 2006
KitMaker: 1,953 posts
AeroScale: 1,902 posts
Posted: Friday, June 02, 2017 - 02:01 AM UTC
Roundel time!


A bit of blue tomorrow, then we're on to the registration letters!


Magnus
KelticKnot
_VISITCOMMUNITY
Scotland, United Kingdom
Joined: May 11, 2015
KitMaker: 768 posts
AeroScale: 656 posts
Posted: Friday, June 02, 2017 - 02:34 PM UTC
Magnus, the careful work on your masks has certainly paid off... really nice finish so far and looking forward to the grand reveal of the roundels.
magnusf
_VISITCOMMUNITY
Stockholm, Sweden
Joined: May 02, 2006
KitMaker: 1,953 posts
AeroScale: 1,902 posts
Posted: Sunday, June 04, 2017 - 11:37 AM UTC
Paul! It's reveal-time !


Will need to do a bit of touch-up here and there but that was hardly unexpected. Another thing that I find hard to avoid is paint buildup around the edges, I try to paint away from the edges but it doesn't help 100%. I might try to paint the markings before the come next time and see if it helps!


Magnus
RussellE
#306
_VISITCOMMUNITY
Victoria, Australia
Joined: June 27, 2010
KitMaker: 3,959 posts
AeroScale: 598 posts
Posted: Sunday, June 04, 2017 - 05:38 PM UTC
Lovely work, Magnus!
TimReynaga
Staff MemberAssociate Editor
MODEL SHIPWRIGHTS
_VISITCOMMUNITY
California, United States
Joined: May 03, 2006
KitMaker: 2,500 posts
AeroScale: 318 posts
Posted: Sunday, June 04, 2017 - 06:24 PM UTC
Magnus,
Super neat paint job so far. You are making the most of that cool scheme!
Mecenas
Joined: December 23, 2007
KitMaker: 1,596 posts
AeroScale: 1,275 posts
Posted: Sunday, June 04, 2017 - 09:38 PM UTC
That cutting-device was for sure a good capital expenditure.
 _GOTOTOP