OFFICIAL: Western Front/ETO Campaign
Scotland, United Kingdom
Joined: May 11, 2015
KitMaker: 768 posts
AeroScale: 656 posts
Posted: Monday, April 24, 2017 - 08:11 PM UTC
Decals are going down well so far but will need to be toned down a lot as the colours are too saturated for my tastes.


Pax & Pallets: Revell 1/48 Dakota
Terrible Teens : Revell 1/48 F15E Strike Eagle
Airfix IV : Airfix 1.72 Vulcan
Berlin, Germany
Joined: October 12, 2008
KitMaker: 709 posts
AeroScale: 651 posts
Posted: Monday, April 24, 2017 - 10:48 PM UTC
Paul: beautiful work and neat paint job, turns out really nice!
Sometimes you need to distance yourself to see things clearly - Lao Tzu -
... in scale and in real life -T.
Scotland, United Kingdom
Joined: May 11, 2015
KitMaker: 768 posts
AeroScale: 656 posts
Posted: Friday, April 28, 2017 - 05:54 PM UTC
Quoted Text
Paul: beautiful work and neat paint job, turns out really nice!
Thanks a lot Thomas but it didn't stay neat for long !

This was my first attempt at an overall oil wash and it turned out ok, once I got over the fear of ruining the model...


Pax & Pallets: Revell 1/48 Dakota
Terrible Teens : Revell 1/48 F15E Strike Eagle
Airfix IV : Airfix 1.72 Vulcan

#454
Georgia, United States
Joined: July 10, 2016
KitMaker: 1,273 posts
AeroScale: 63 posts
Posted: Friday, April 28, 2017 - 06:26 PM UTC
Darn good first attempt, Paul, that wash looks great!!
"I can make armored cars, safe and unassailable...and behind these our infantry will be able to follow quite unharmed and without any opposition."
-Leonardo da Vinci, 1487
Nordrhein-Westfalen, Germany
Joined: March 22, 2015
KitMaker: 671 posts
AeroScale: 614 posts
Posted: Sunday, April 30, 2017 - 03:09 AM UTC
Paul: Paint and wash is spot on and looks great!
Oliver

On the desk: Probably a Panzer III.
Berlin, Germany
Joined: October 12, 2008
KitMaker: 709 posts
AeroScale: 651 posts
Posted: Wednesday, May 03, 2017 - 06:54 PM UTC
Nicely done, Paul!
Meanwhile got some more colour on after a handicap due to a surgical intervention on my ellbow around Easter.
Went for RLM 74/82 over 76 for a better contrast. Cowling band and rudder made than yellow RLM 04 as those were the markings for ground attack units.
Revell's instructions are already known for it's wrong advice to give the tail fin and band a red colour!


Now I think about a random motteling...
Thomas
Sometimes you need to distance yourself to see things clearly - Lao Tzu -
... in scale and in real life -T.
New York, United States
Joined: March 08, 2010
KitMaker: 3,662 posts
AeroScale: 174 posts
Posted: Friday, May 05, 2017 - 09:13 PM UTC
Took my start up photo last week but hope to get started soon
Active Campaigns on the bench:
Operation Fall Gelb - Pz.Kpfw. IV Ausf. C
Engineering the Future - M-26 Recovery Vehicle
115 Campaigns completed
Scotland, United Kingdom
Joined: May 11, 2015
KitMaker: 768 posts
AeroScale: 656 posts
Posted: Saturday, May 06, 2017 - 03:01 AM UTC
That looks like a nice choice Sal
My poor Hurricane suffered from er, pilot error... The tailwheel has become detached but shouldn't be too hard to fix. Maybe i'll try pinning it with wire to strengthen it.
I've washed the underside now and the detail is really showing up well.

Pax & Pallets: Revell 1/48 Dakota
Terrible Teens : Revell 1/48 F15E Strike Eagle
Airfix IV : Airfix 1.72 Vulcan
Western Australia, Australia
Joined: March 21, 2016
KitMaker: 247 posts
AeroScale: 105 posts
Posted: Sunday, May 07, 2017 - 05:04 AM UTC
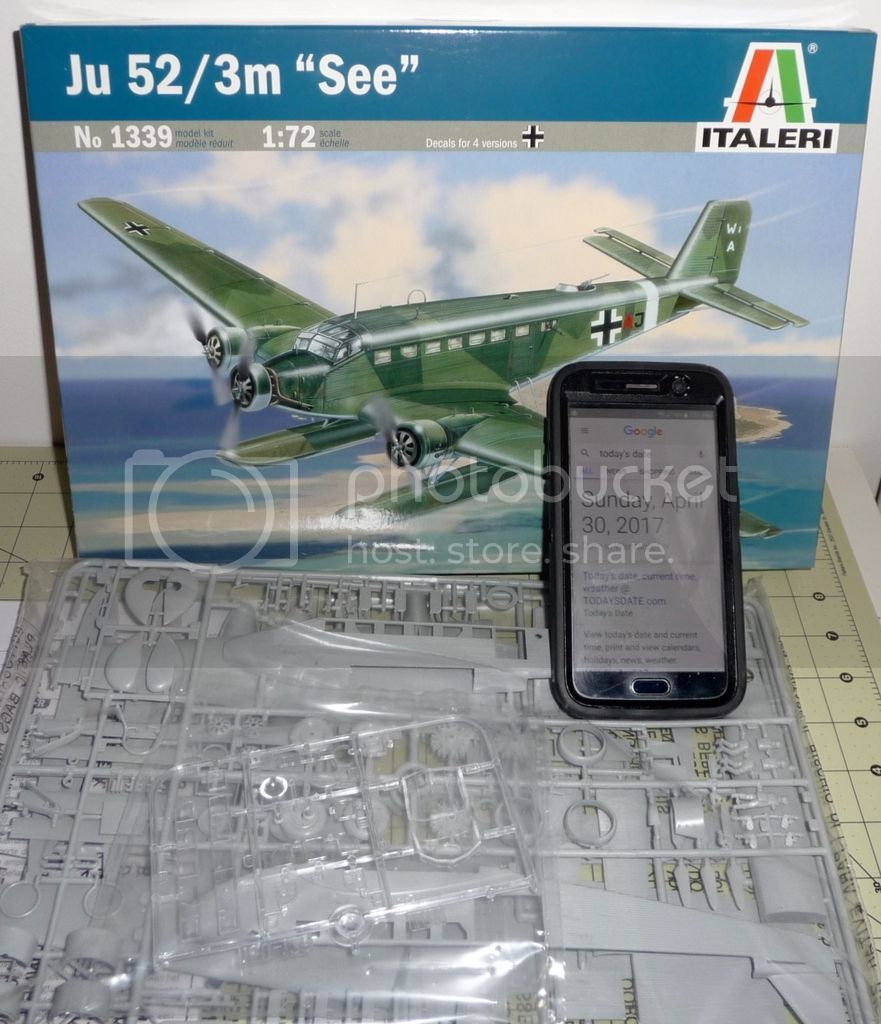
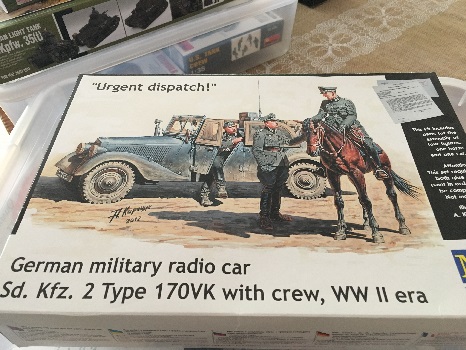
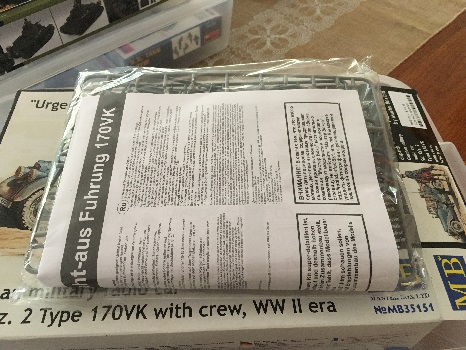
I have chopped and changed on this campaign a couple of times. I have settled on Master Box's Sd.Kfz. 2, German military radio car with markings for a vehicle used in the invasion of France in 1940.
MichaelSatin
 Campaigns Administrator
Colorado, United States
Joined: January 19, 2008
KitMaker: 3,909 posts
AeroScale: 2,904 posts
Posted: Sunday, May 07, 2017 - 06:55 PM UTC
Nice work Paul and Thomas, and interesting choices Sal and Linus!
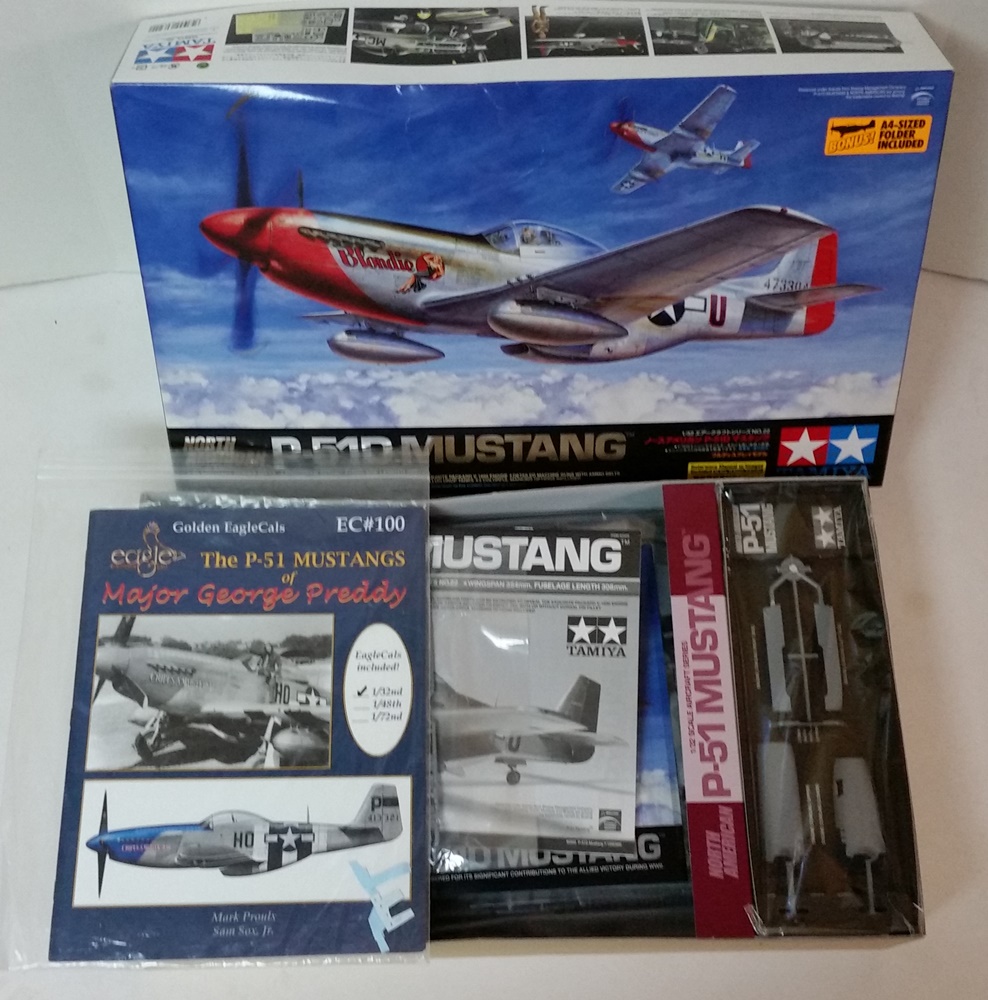
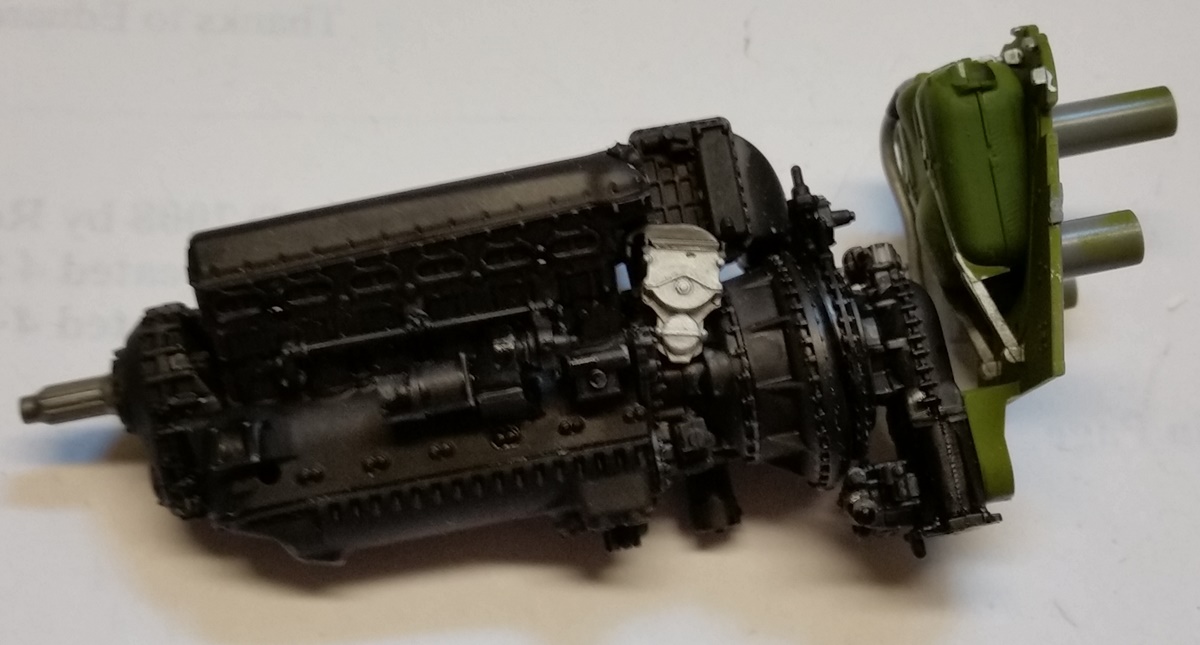
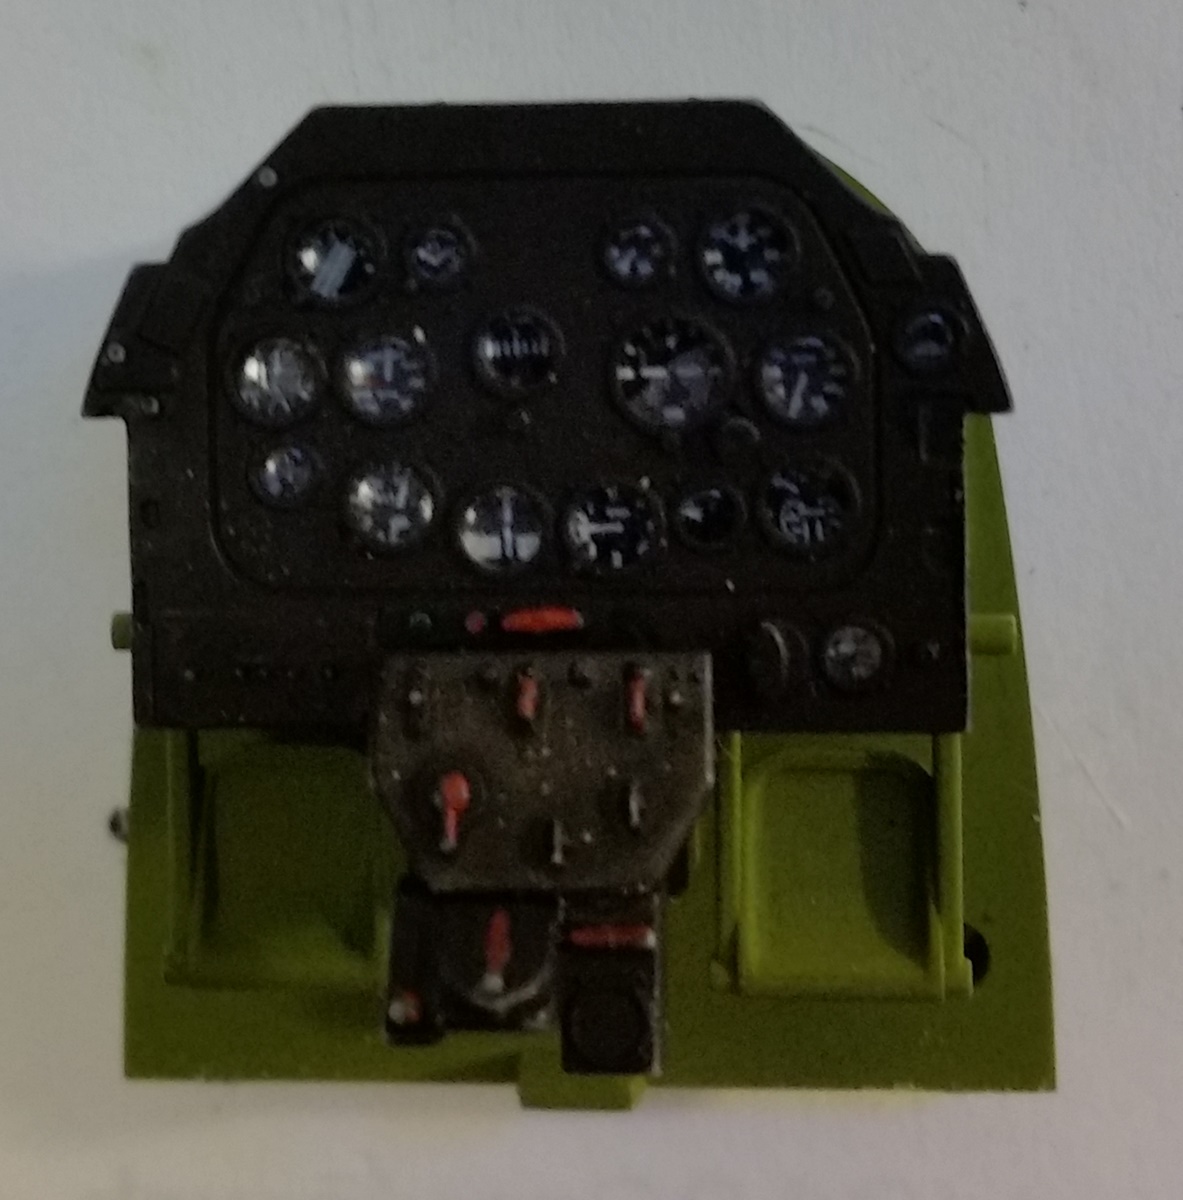
Finally getting off the ground with the Tamiya 1/32 P-51D. I'll be doing George Preddy's Cripes A Mighty 3rd, the highest scoring Mustang flown by the highest scoring Mustang pilot.
Start photo:
The engine:
I've run into a bit of a surprising snag. The decals for the instruments are quite translucent. I ended up sticking a piece of very thin white plastic card to the back of the instrument panel after I had the decal on, though I imagine you could paint it white as well. That did the trick. You won't be able to see it as the back of the panel isn't visible after construction. Indeed, the panel itself is buried pretty deeply, so it's hard to see the instruments. But I know it's there!
Michael

On the bench:
Sorta depends on your definition of "on the bench"...
Scotland, United Kingdom
Joined: May 11, 2015
KitMaker: 768 posts
AeroScale: 656 posts
Posted: Monday, May 08, 2017 - 02:27 PM UTC
Here's my completed Airfix Hurricane Mk1.
I really enjoyed this build, probably helped a lot by the lack of tedious gap filling and sanding. Well done Airfix ! Your new-tool kits are excellent !


Now i'm leaving the brown and green of my last two aircraft behind and moving into the jet age !
Pax & Pallets: Revell 1/48 Dakota
Terrible Teens : Revell 1/48 F15E Strike Eagle
Airfix IV : Airfix 1.72 Vulcan
#454
Georgia, United States
Joined: July 10, 2016
KitMaker: 1,273 posts
AeroScale: 63 posts
Posted: Monday, May 08, 2017 - 07:02 PM UTC
You've got a real looker there, Paul, very nice work!
"I can make armored cars, safe and unassailable...and behind these our infantry will be able to follow quite unharmed and without any opposition."
-Leonardo da Vinci, 1487
MichaelSatin
Campaigns Administrator Colorado, United States
Joined: January 19, 2008
KitMaker: 3,909 posts
AeroScale: 2,904 posts
Posted: Sunday, May 14, 2017 - 12:20 AM UTC
Nice Hurri Paul! Those new Airfix kits really are beauts.
Speaking of which, some progress on the Tamiya 1/32 P-51D:
Lots of pre-painting but it's coming together now.
Michael
On the bench:
Sorta depends on your definition of "on the bench"...
#454
Georgia, United States
Joined: July 10, 2016
KitMaker: 1,273 posts
AeroScale: 63 posts
Posted: Sunday, May 14, 2017 - 01:02 AM UTC
Looking sweet, Michael, I'll be starting my bird in the next two weeks....
"I can make armored cars, safe and unassailable...and behind these our infantry will be able to follow quite unharmed and without any opposition."
-Leonardo da Vinci, 1487
Western Australia, Australia
Joined: May 05, 2006
KitMaker: 900 posts
AeroScale: 200 posts
Posted: Monday, May 15, 2017 - 07:47 AM UTC
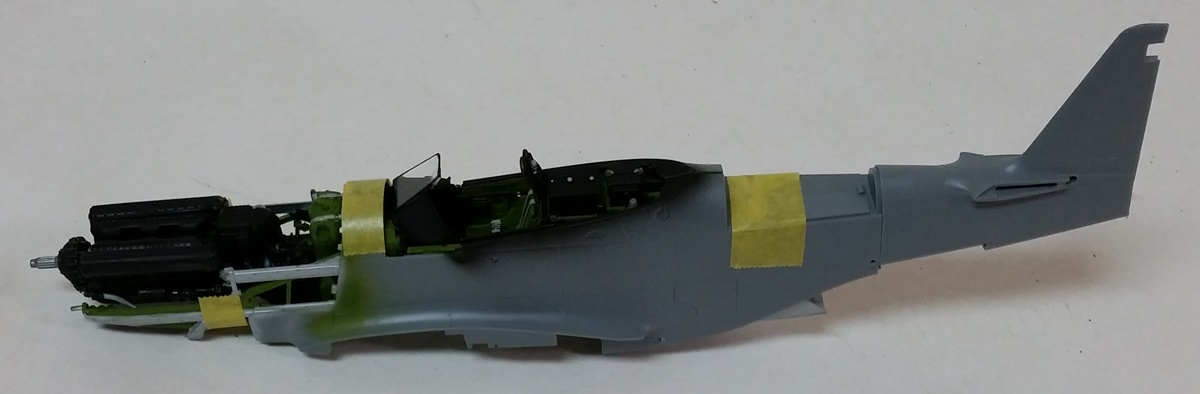
Both my Spitfires are moving along
Some small details and the rear canopy glass has been installed since this photo.
Don't you feel more like you do now than you did when you came in?
Uusimaa, Finland
Joined: October 01, 2016
KitMaker: 514 posts
AeroScale: 239 posts
Posted: Monday, May 15, 2017 - 10:53 PM UTC
I've almost completed Tempest V's paint job:

Bit shiny still, so needs one or two layers of matt varnish.
Then it's just matter of painting canopy frames, weathering wheels and tires and attaching cannons and antennas.
Berlin, Germany
Joined: October 12, 2008
KitMaker: 709 posts
AeroScale: 651 posts
Posted: Tuesday, May 16, 2017 - 08:07 PM UTC
Paul: Very well done, congrats for finishing!
Great build and looks beautifully done with your paint job, decaling and decent weathering. The underside wash gave the panels and details an extremely nice outcome. Now you really have something to start filling the empty Lancaster-space.
Michael: Great progress, very nice work on the pit and engine so far! Glad to see you processing on your Mustang.
Pasi: Very good painting and progress! Not sure about more matte varnish as for me it looks fine.
Iain Great work on your two Spits for the campaigns.
Obviously some putty is needed...

Thomas
Sometimes you need to distance yourself to see things clearly - Lao Tzu -
... in scale and in real life -T.
Berlin, Germany
Joined: October 12, 2008
KitMaker: 709 posts
AeroScale: 651 posts
Posted: Wednesday, May 17, 2017 - 12:42 AM UTC
I'm moving on as well. More paint and camo and decaling process.
Didn't want to mottle spot by spot and went for a more slightly confluent style with the basic colours with a different look on the fuselage sides. Not any wash/weathering yet. Had no swastika so printed a decal myself. Next time maybe a mask&paint.
It's going to look more and more like an A/C.


Thomas
Sometimes you need to distance yourself to see things clearly - Lao Tzu -
... in scale and in real life -T.
Scotland, United Kingdom
Joined: May 11, 2015
KitMaker: 768 posts
AeroScale: 656 posts
Posted: Wednesday, May 17, 2017 - 02:58 AM UTC
Quoted Text
Paul: Very well done, congrats for finishing!
Great build and looks beautifully done with your paint job, decaling and decent weathering. The underside wash gave the panels and details an extremely nice outcome. Now you really have something to start filling the empty Lancaster-space.
Thomas
Thanks Thomas! Its a pity I didnt get a chance to photograph the models together but the Hurricane wasn't done in time for the Lanc's big move !
Pax & Pallets: Revell 1/48 Dakota
Terrible Teens : Revell 1/48 F15E Strike Eagle
Airfix IV : Airfix 1.72 Vulcan
#392
Hessen, Germany
Joined: January 09, 2013
KitMaker: 696 posts
AeroScale: 608 posts
Posted: Saturday, May 20, 2017 - 03:13 AM UTC
On the bench:
EE(BAC) Lightning F.2A (Airfix 1:72)
MichaelSatin
Campaigns Administrator Colorado, United States
Joined: January 19, 2008
KitMaker: 3,909 posts
AeroScale: 2,904 posts
Posted: Saturday, May 20, 2017 - 04:02 AM UTC
Great progress Iain, Pasi, and Thomas! And nice choice Peter!
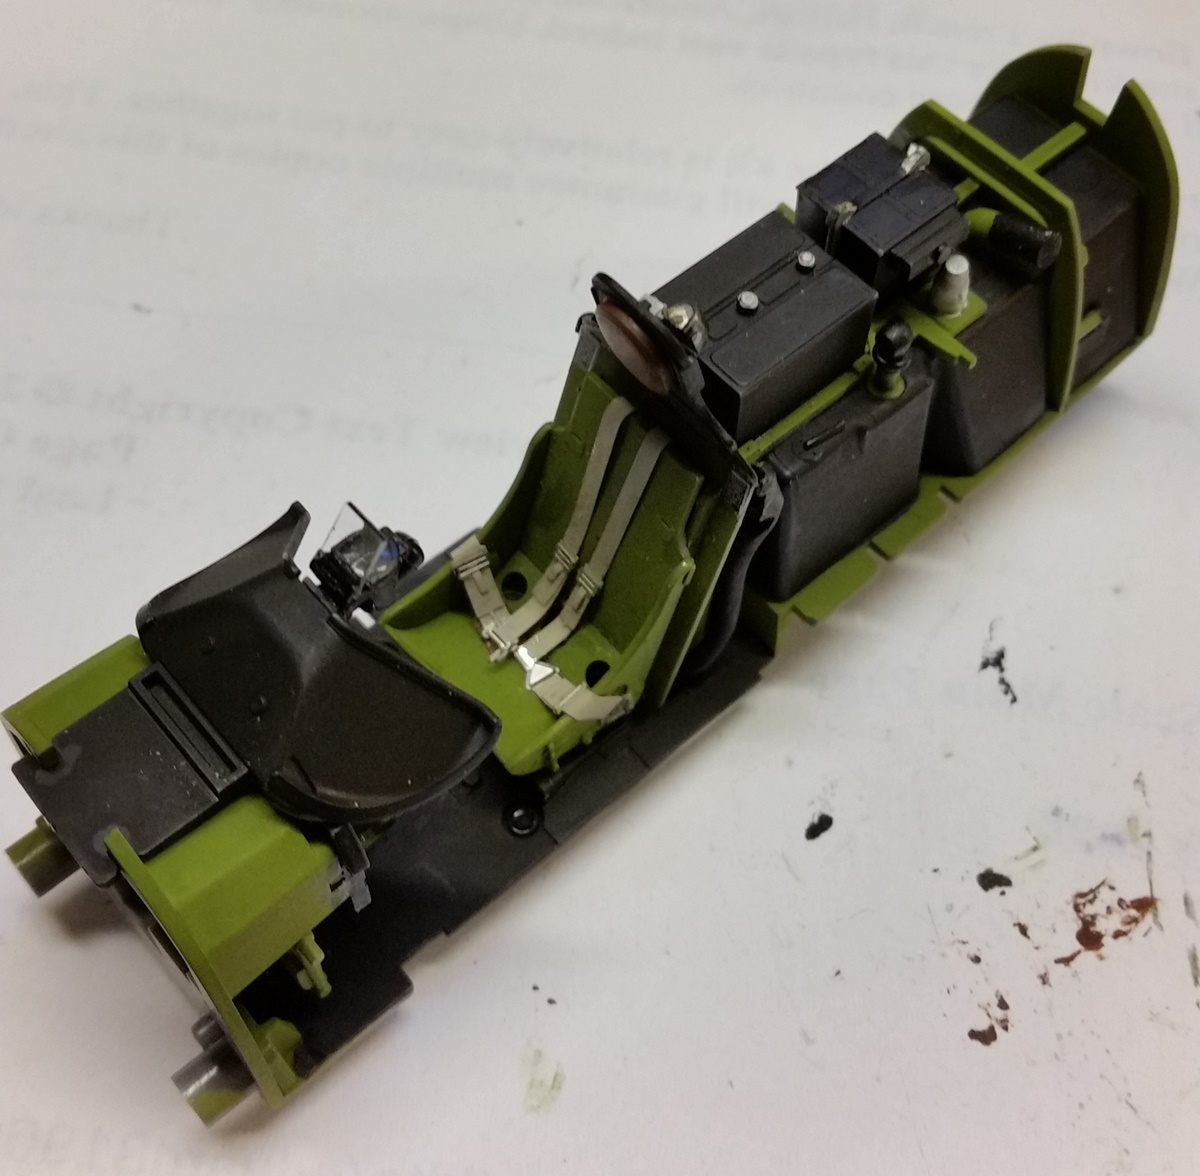
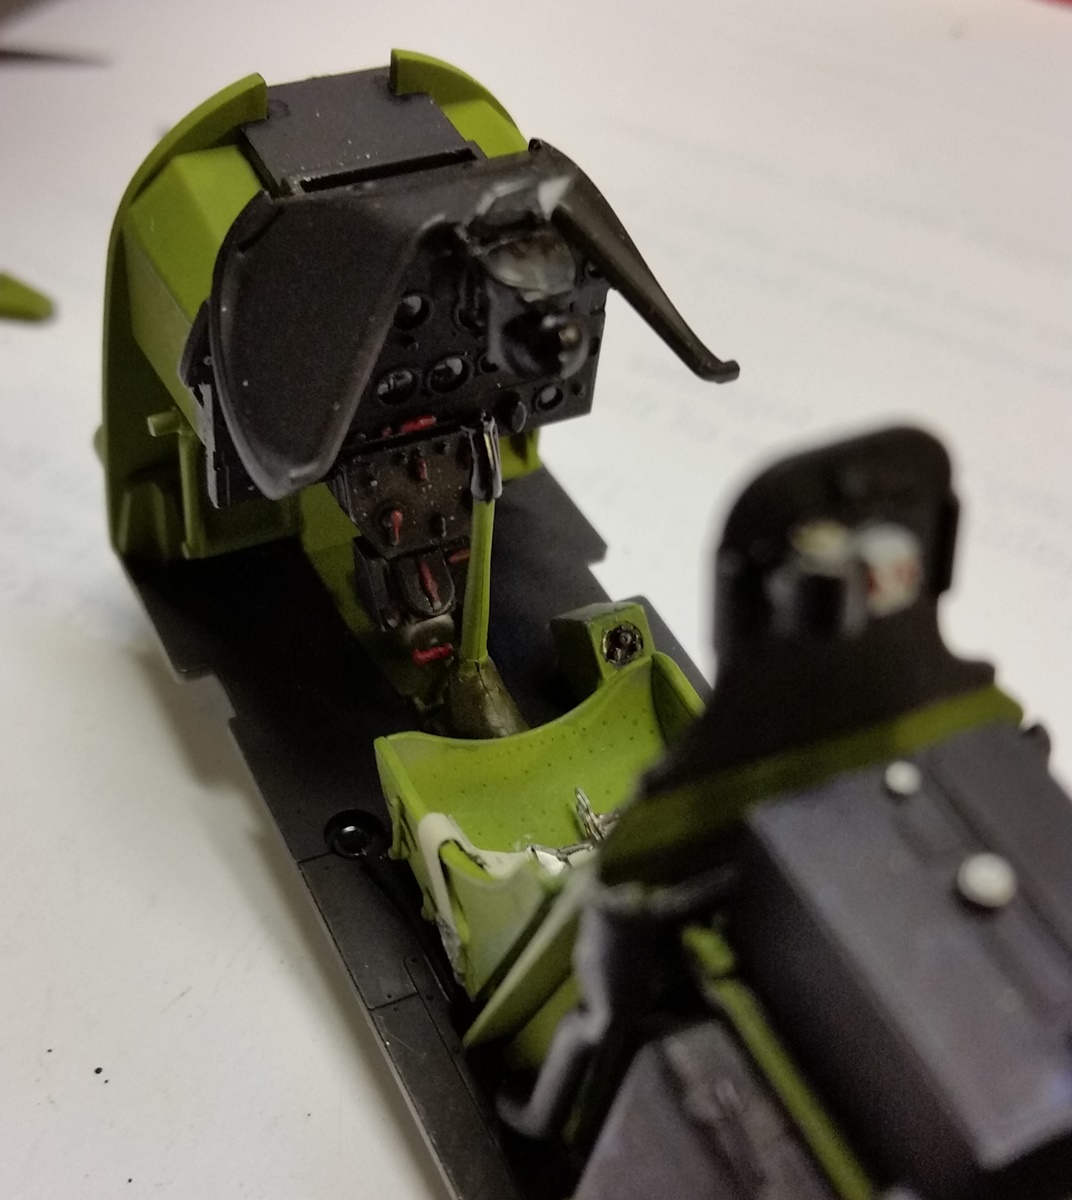
Today's work on the Tamiya 1/32 P-51D:
Fuselage closed up and the radiator exhaust ramps still operate. I'm gonna call that a win!
Michael
On the bench:
Sorta depends on your definition of "on the bench"...
Western Australia, Australia
Joined: May 05, 2006
KitMaker: 900 posts
AeroScale: 200 posts
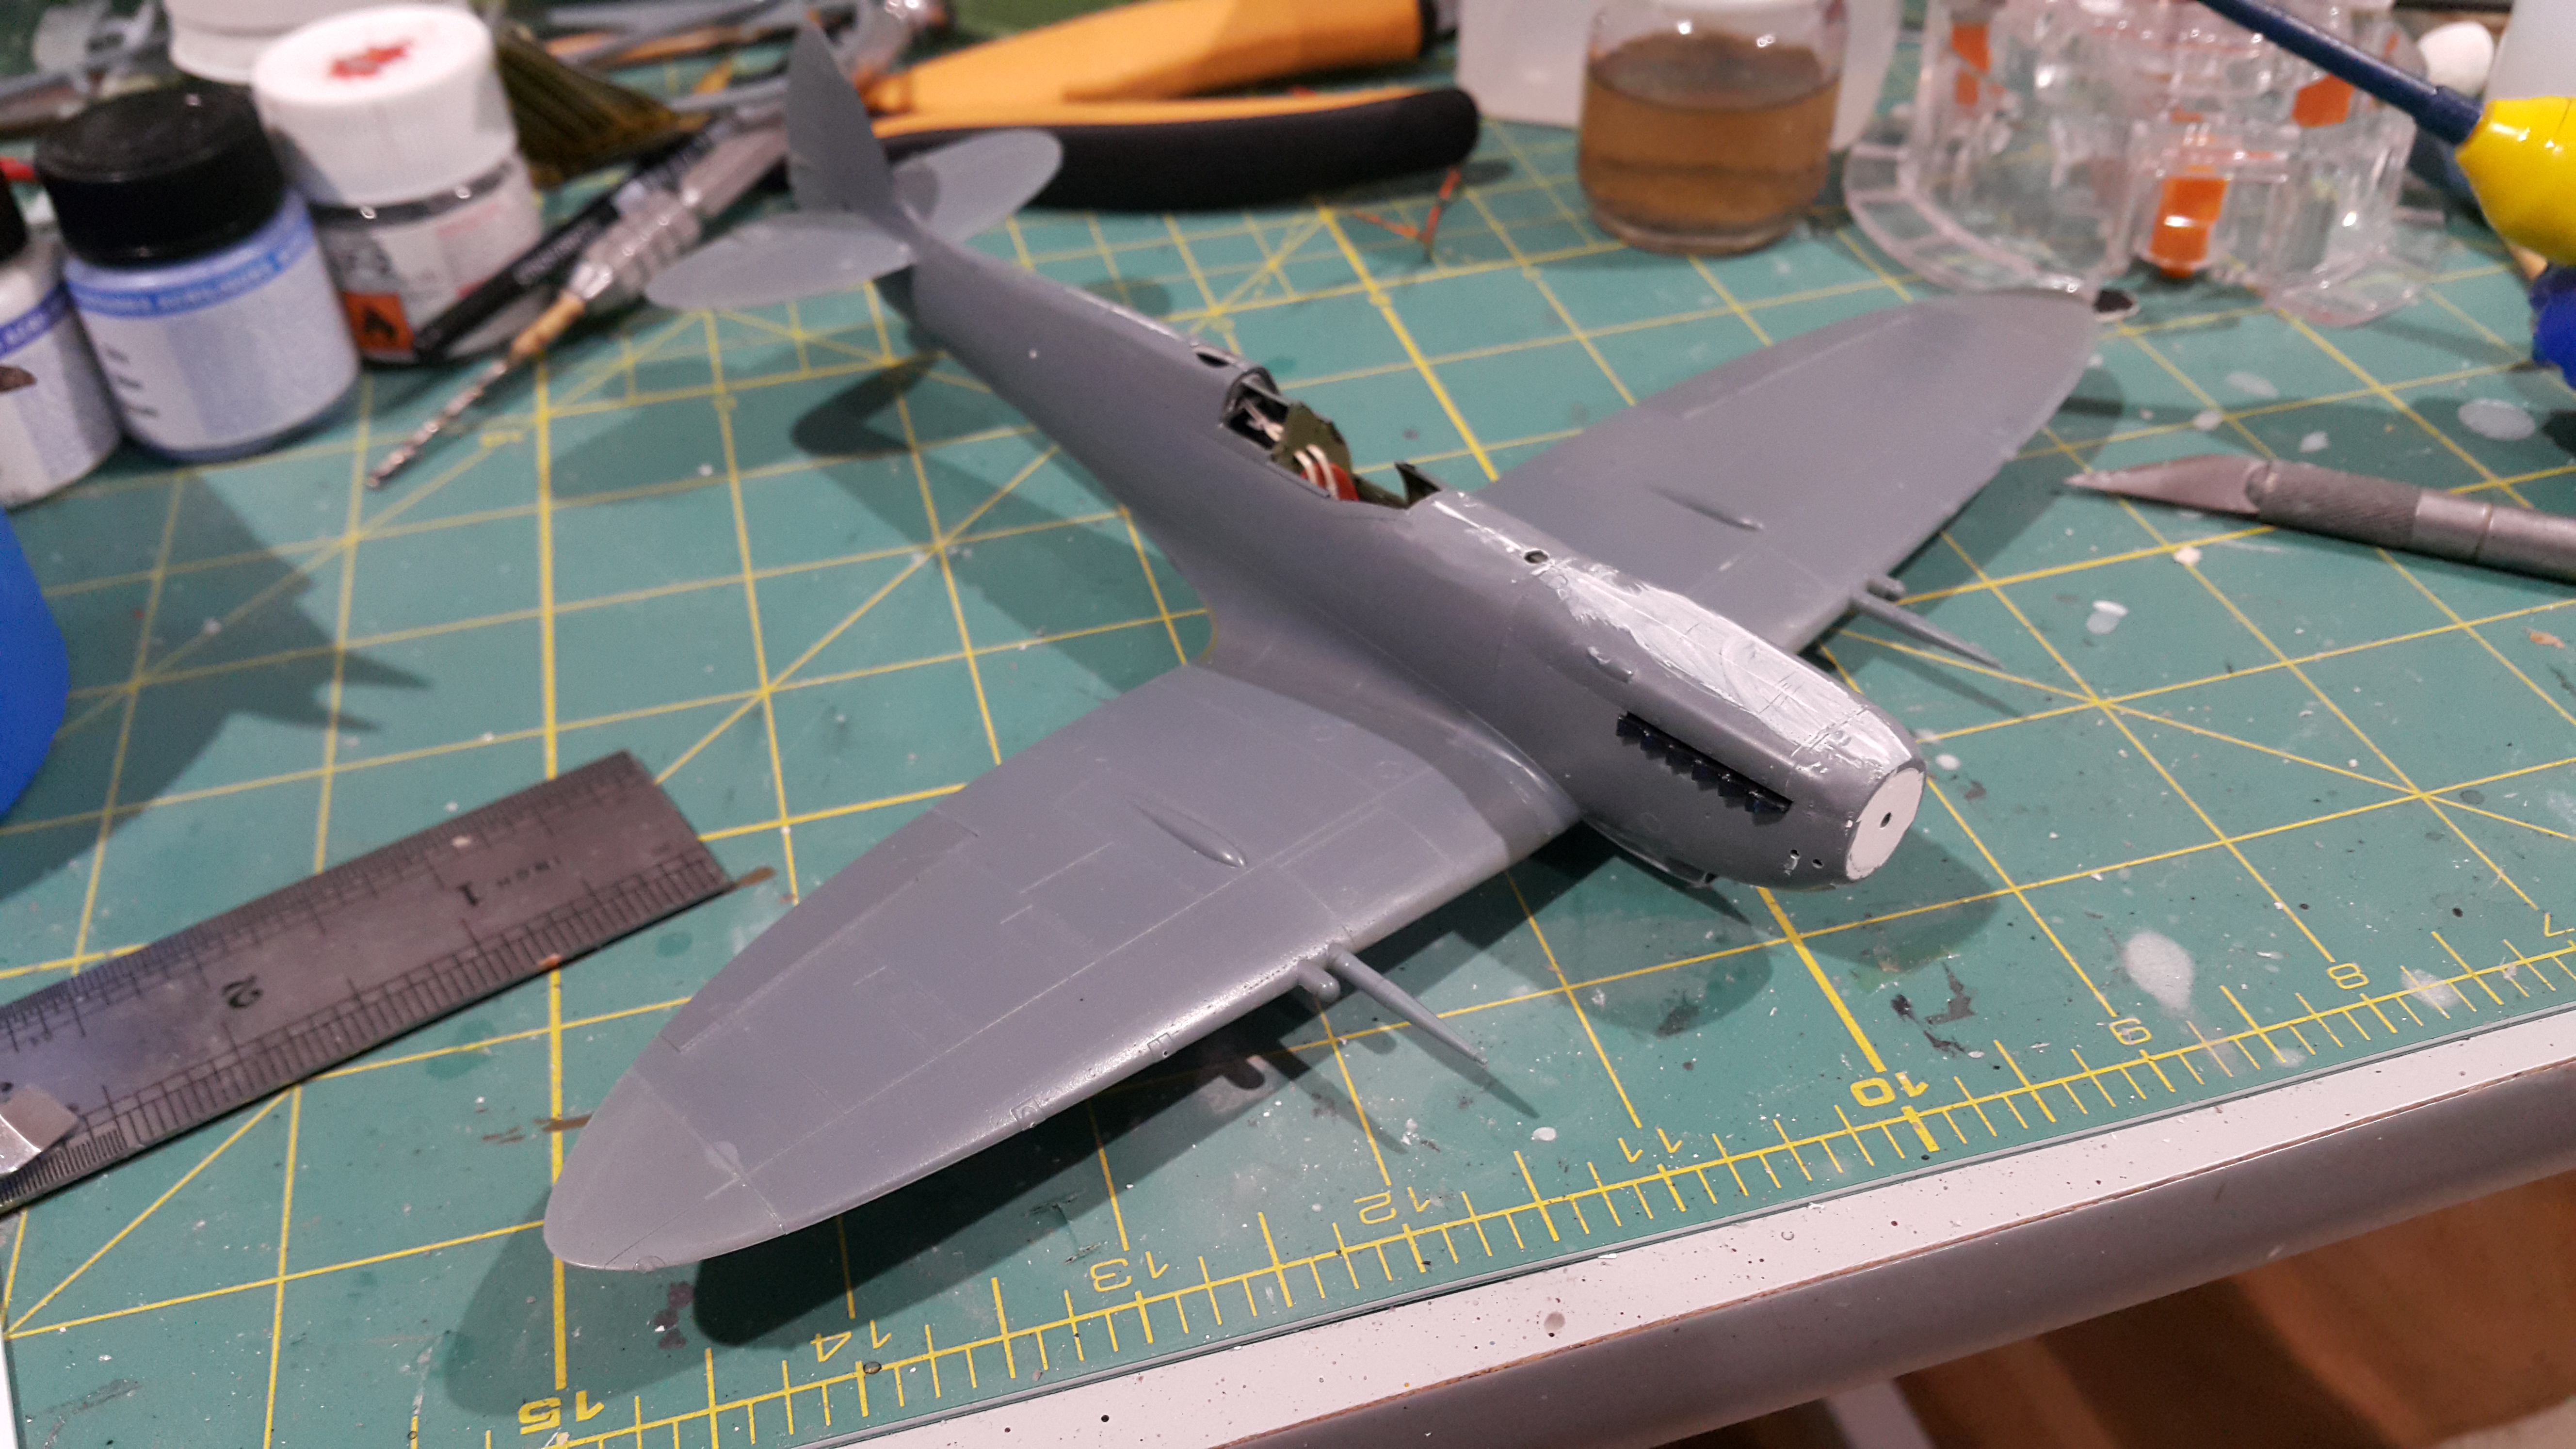
Posted: Saturday, May 20, 2017 - 07:26 AM UTC
Ready for primer

Quoted Text
Iain Great work on your two Spits for the campaigns.
Obviously some putty is needed...
Not a lot actually. Most of what you see there is where I applied primer to test how visible the seams were. Only a very thin line of putty was required on the top of the cowling, though a lot of care is need to ensure the parts align properly during assembly.
The front of the nose has a thin coat of putty, but that wasn't really necessary as it will be behind the spinner out of sight, but I couldn't help myself and just had to fill in the gaps that were there.
Don't you feel more like you do now than you did when you came in?
Western Australia, Australia
Joined: May 05, 2006
KitMaker: 900 posts
AeroScale: 200 posts
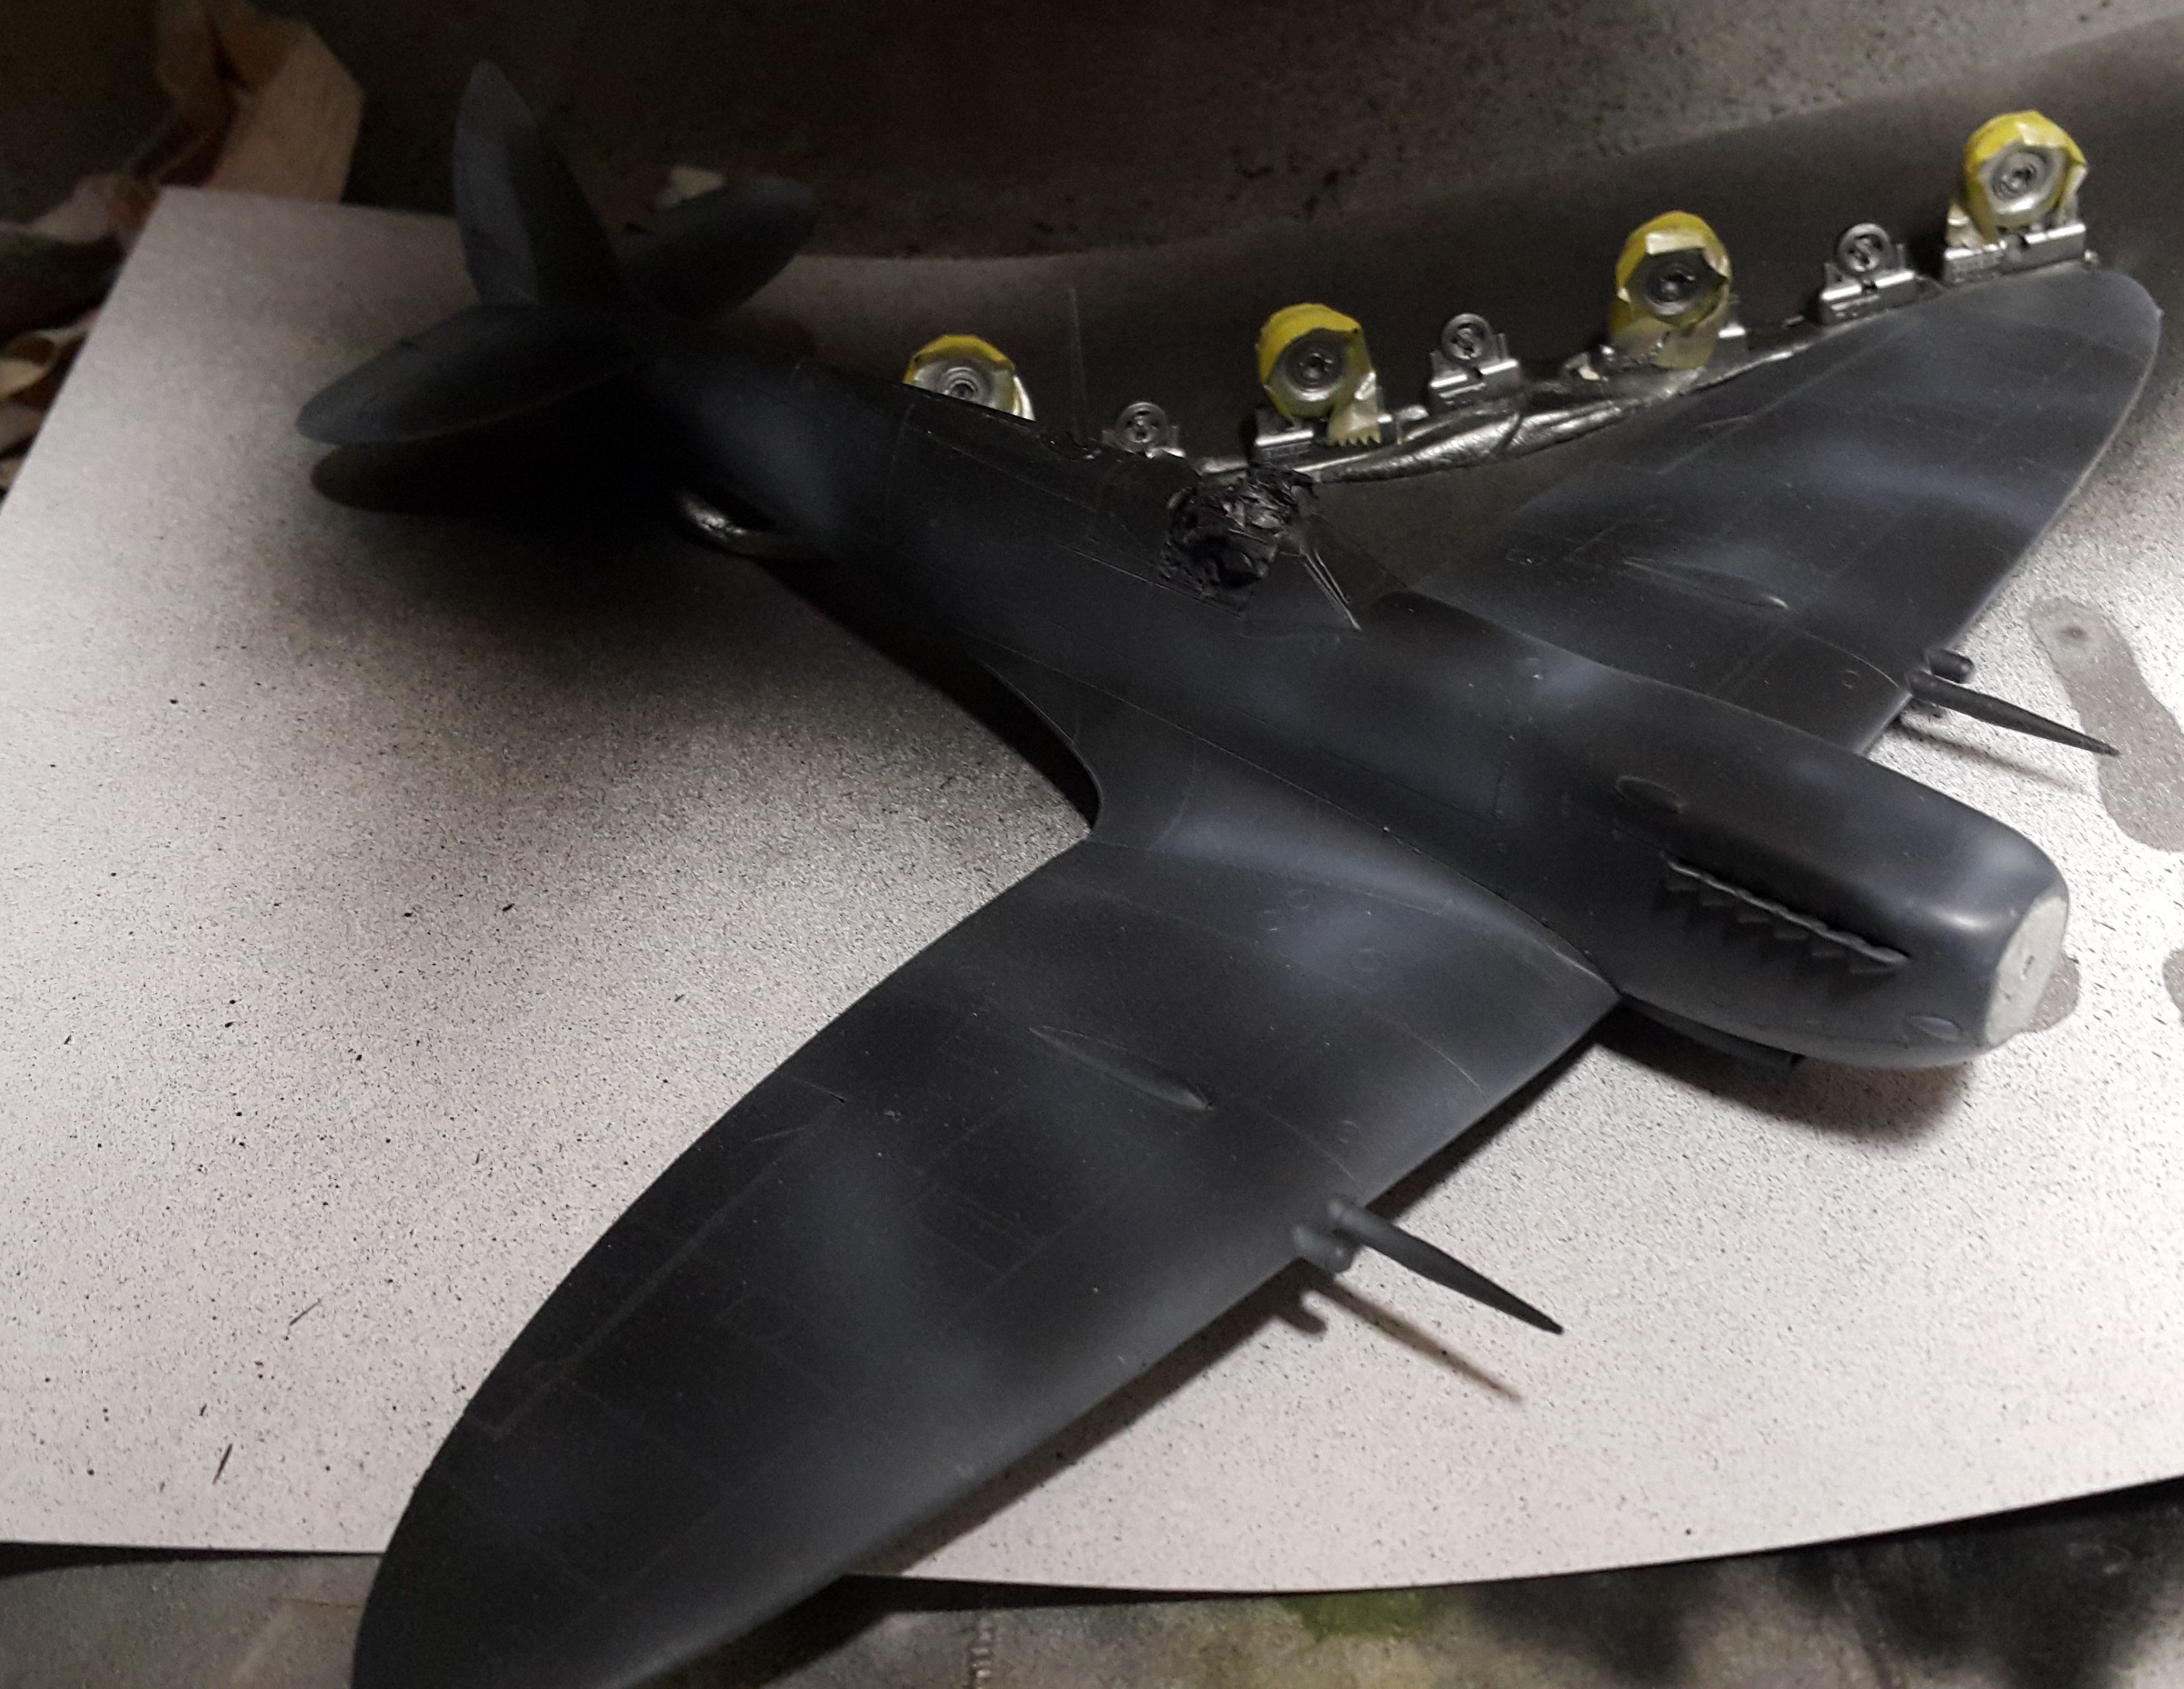
Posted: Sunday, May 21, 2017 - 01:35 PM UTC
Primed and ready for paint
Don't you feel more like you do now than you did when you came in?
#392
Hessen, Germany
Joined: January 09, 2013
KitMaker: 696 posts
AeroScale: 608 posts
Posted: Monday, May 22, 2017 - 10:08 PM UTC

Tractor for the Komet is ready and waiting for his load
On the bench:
EE(BAC) Lightning F.2A (Airfix 1:72)
New York, United States
Joined: March 08, 2010
KitMaker: 3,662 posts
AeroScale: 174 posts
Posted: Tuesday, May 23, 2017 - 04:28 PM UTC
All primed up and ready for paint

Cant see how these pontoons attach anybody built this kit before and have a suggestion

Active Campaigns on the bench:
Operation Fall Gelb - Pz.Kpfw. IV Ausf. C
Engineering the Future - M-26 Recovery Vehicle
115 Campaigns completed


