

Mike - Thanks for the compliments! As I have stated before I really enjoy all the interchange between like minded folks . Regarding the oil cooler I sent you a PM
Cheers - Richard
Hosted by Rowan Baylis
1/48 Hasegawa Ki 43 Hayabusa build

rdt1953

Joined: February 06, 2015
KitMaker: 1,098 posts
AeroScale: 900 posts
Posted: Sunday, March 05, 2017 - 12:00 AM UTC
rdt1953
Joined: February 06, 2015
KitMaker: 1,098 posts
AeroScale: 900 posts
Posted: Friday, March 10, 2017 - 02:34 AM UTC
Progress update-
I've built up the photo etch gear doors from Eduard - after several failed attempts with both thin and medium C/A I cleaned all off and used 5 minute epoxy for the 3 brackets on each door.
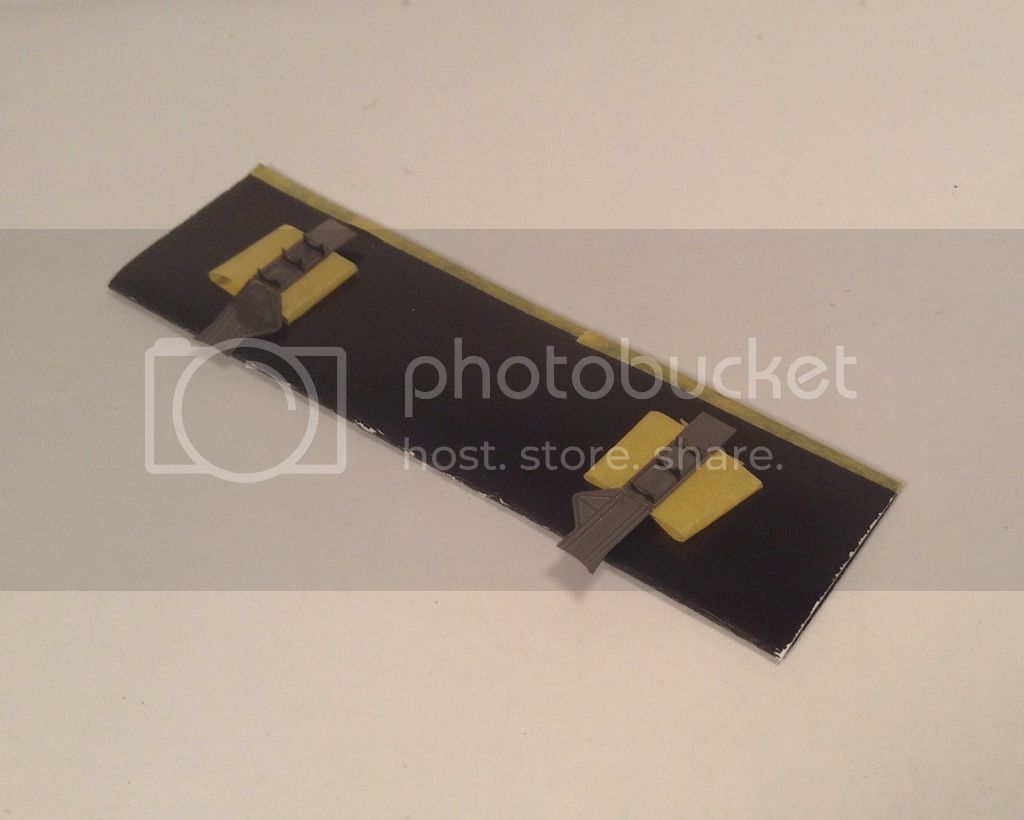
shot the yellow on the rudder/elevators with Tamiya flat yellow cut with a little Tamiya flat white then dusted over with a highly thinned mix of Vallejo ModelAir Insignia White to tone the yellow down a bit.
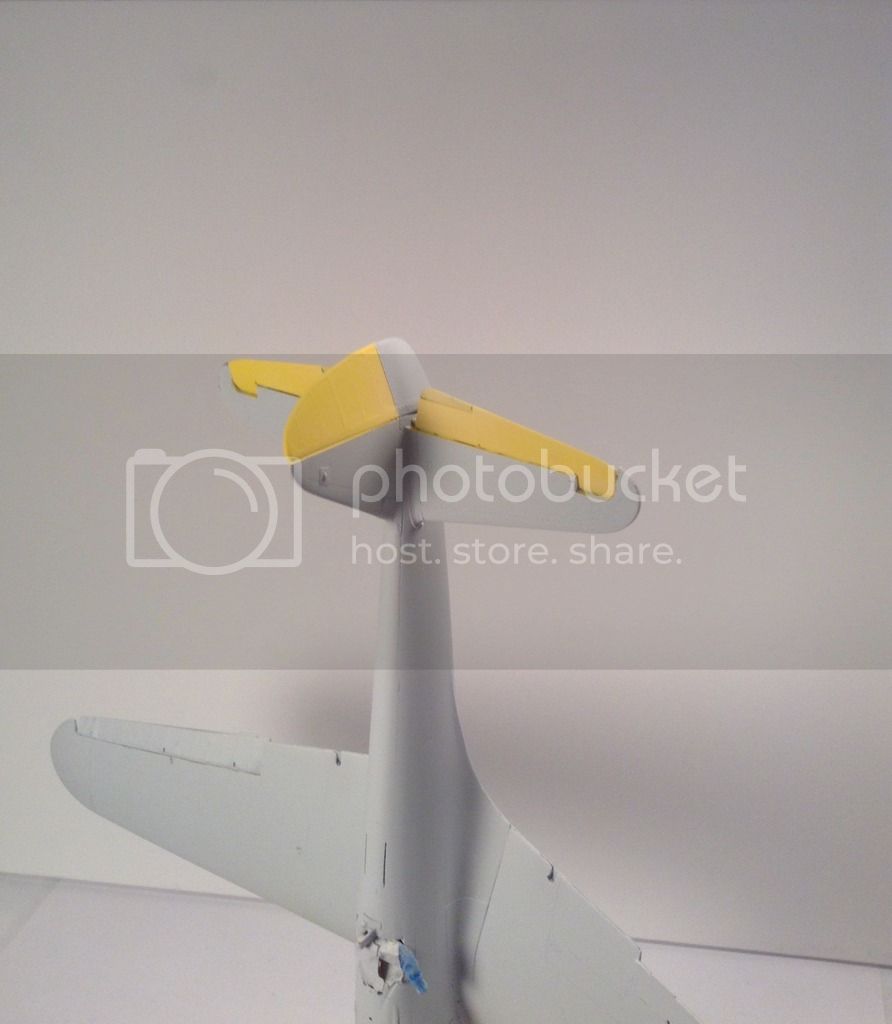
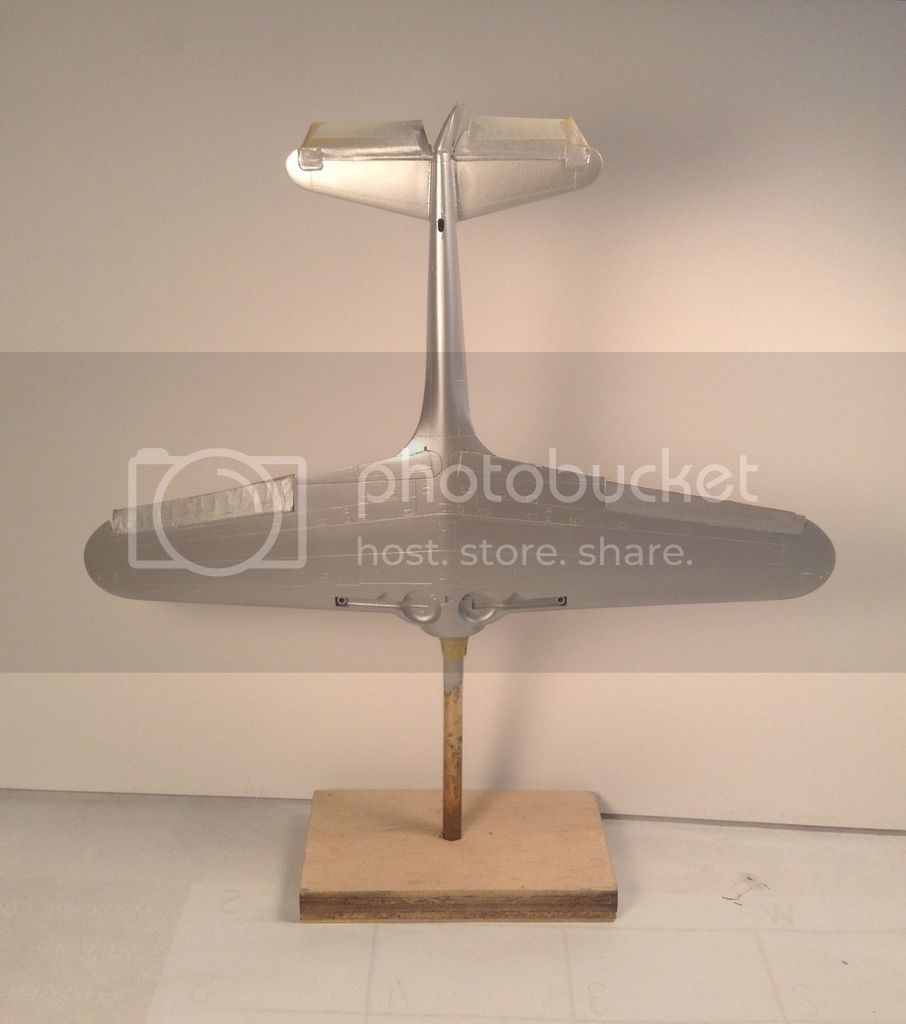
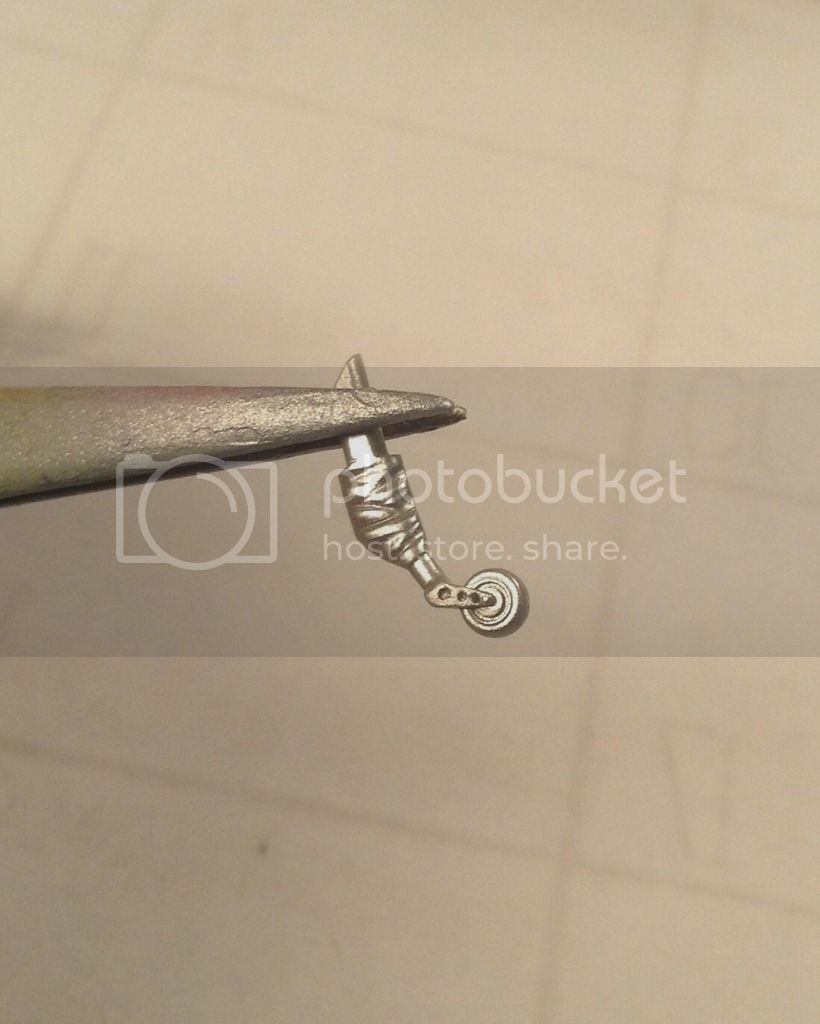
After masking out the control surfaces the fuselage was shot with Vallejo MetalColor White Aluminum.
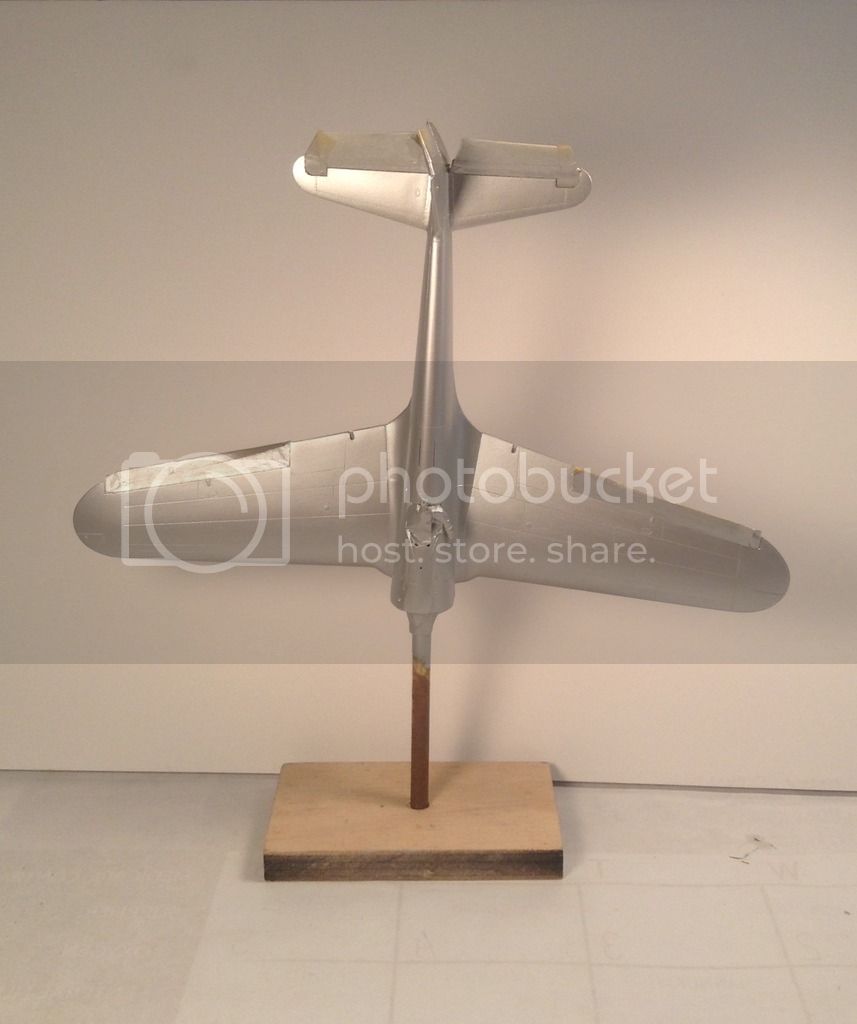
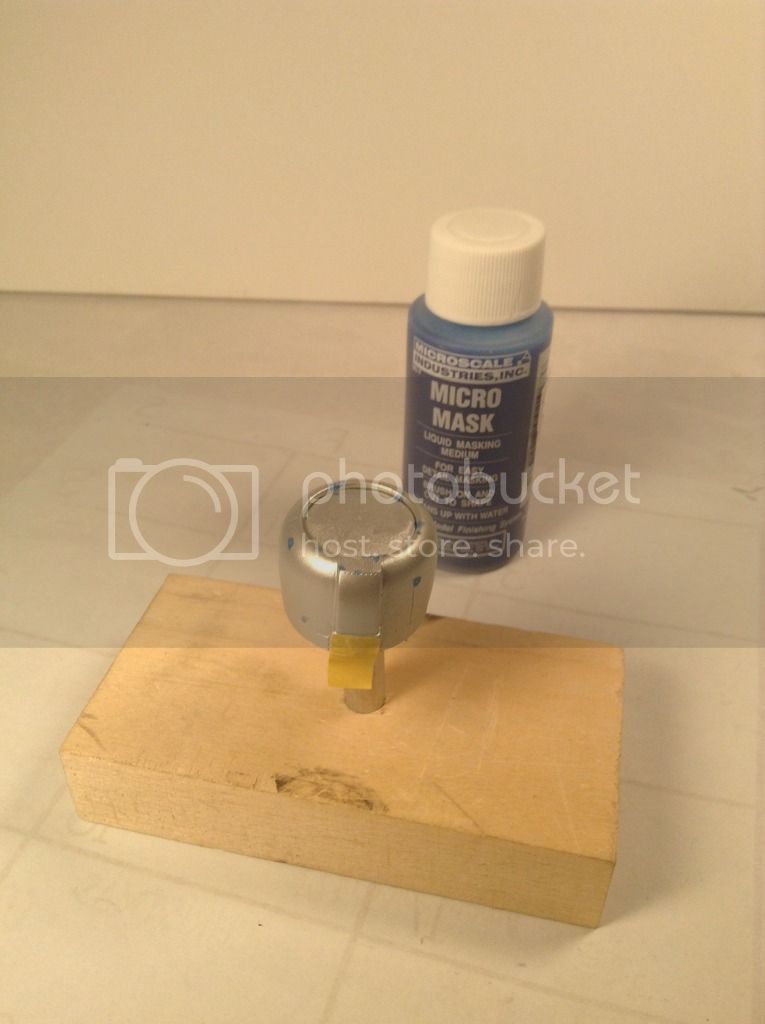
here is tail wheel in white aluminum-
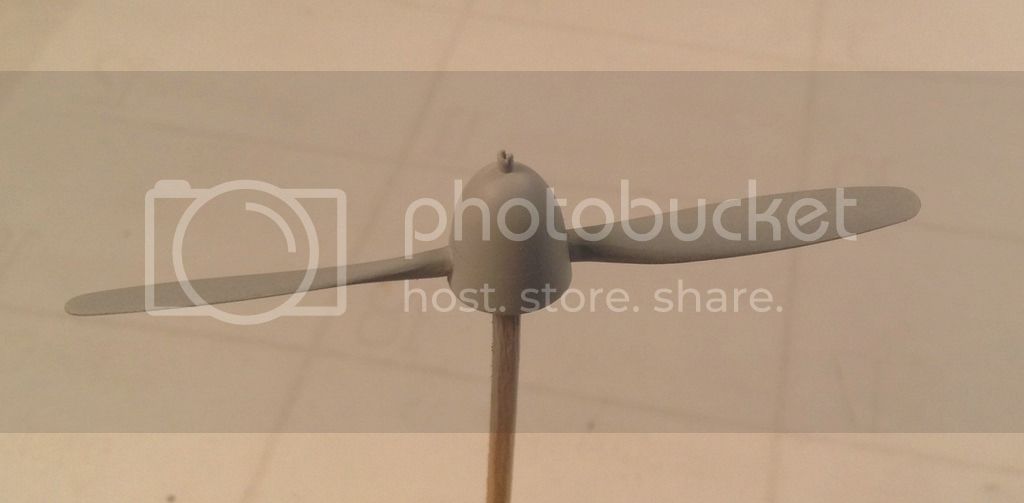
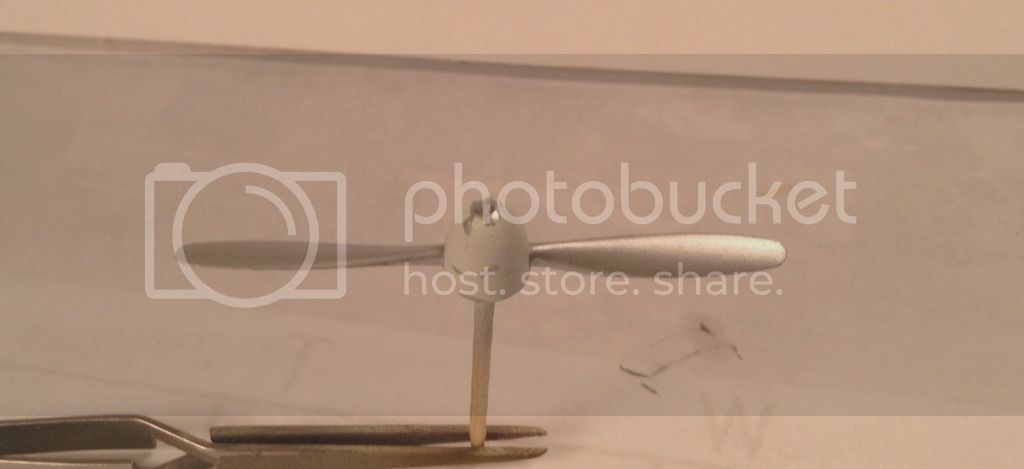
and prop/spinner in primer-
I hope to shoot a few panels here and there on the underside in a few aluminum shades to break it up a bit and paint chipped areas on the upper surface with liquid mask before proceeding with the IJAAF Dark Green. I don't have much luck with acrylics and the salt method as the salt leaches into the paint and leaves white marks- I've actually had more success using ground pepper from a pepper mill although it does not adhere as well.
Thanks for looking in - Richard
I've built up the photo etch gear doors from Eduard - after several failed attempts with both thin and medium C/A I cleaned all off and used 5 minute epoxy for the 3 brackets on each door.
shot the yellow on the rudder/elevators with Tamiya flat yellow cut with a little Tamiya flat white then dusted over with a highly thinned mix of Vallejo ModelAir Insignia White to tone the yellow down a bit.
After masking out the control surfaces the fuselage was shot with Vallejo MetalColor White Aluminum.
here is tail wheel in white aluminum-
and prop/spinner in primer-
I hope to shoot a few panels here and there on the underside in a few aluminum shades to break it up a bit and paint chipped areas on the upper surface with liquid mask before proceeding with the IJAAF Dark Green. I don't have much luck with acrylics and the salt method as the salt leaches into the paint and leaves white marks- I've actually had more success using ground pepper from a pepper mill although it does not adhere as well.
Thanks for looking in - Richard

thegirl

Joined: January 19, 2008
KitMaker: 6,743 posts
AeroScale: 6,151 posts
Posted: Friday, March 10, 2017 - 09:36 PM UTC
Moving along very nicely Richard , metal coat turned out super and will pop once the variations are added . Looking forward on the next up-date
Terri
Terri
rdt1953
Joined: February 06, 2015
KitMaker: 1,098 posts
AeroScale: 900 posts
Posted: Sunday, March 19, 2017 - 04:54 AM UTC
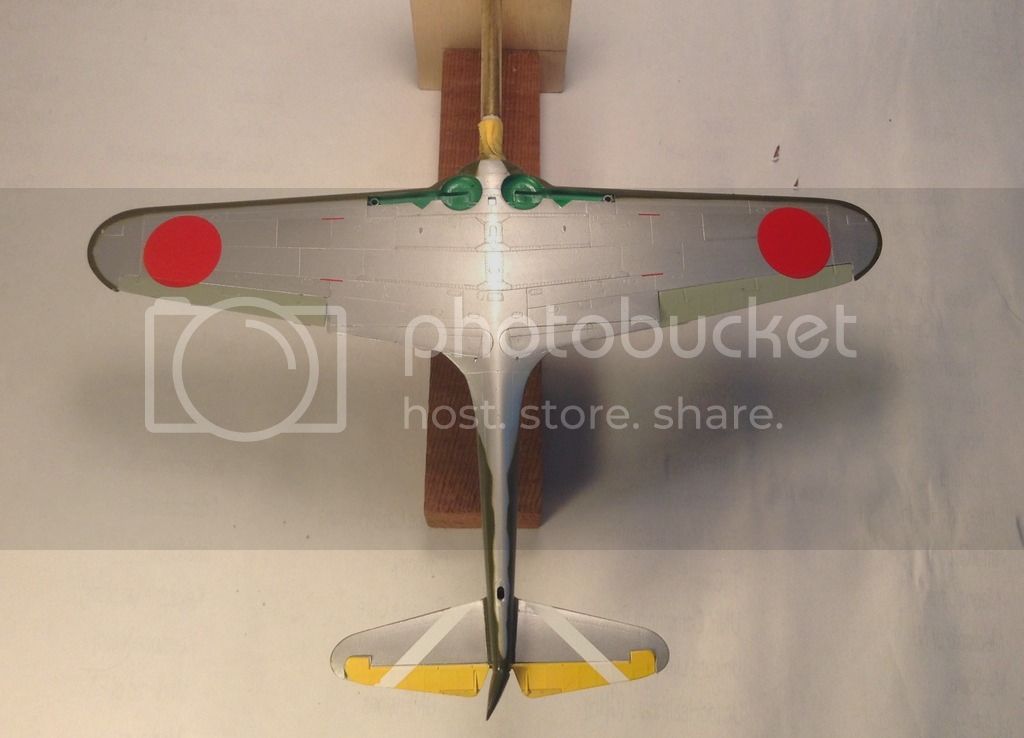
Progress in the paint dept. -
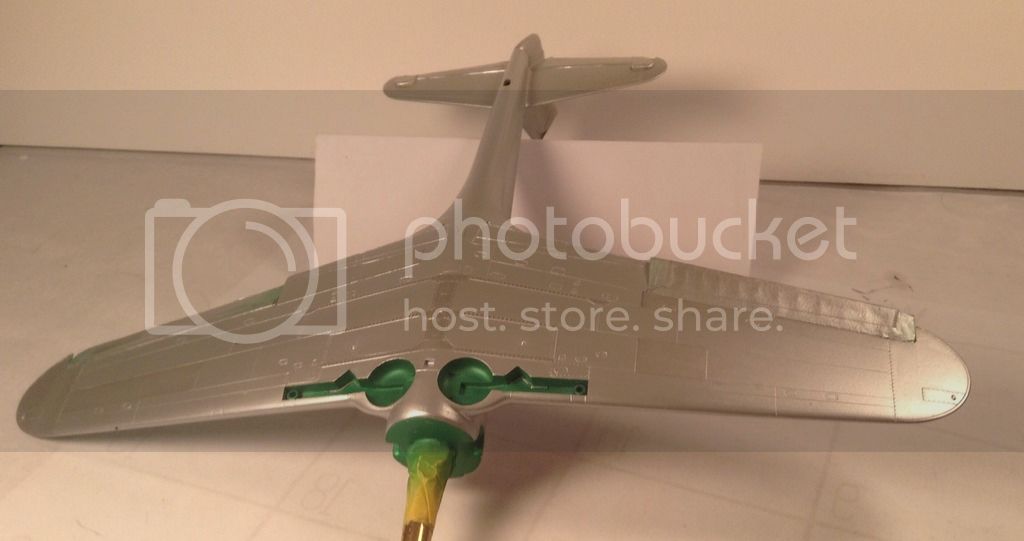
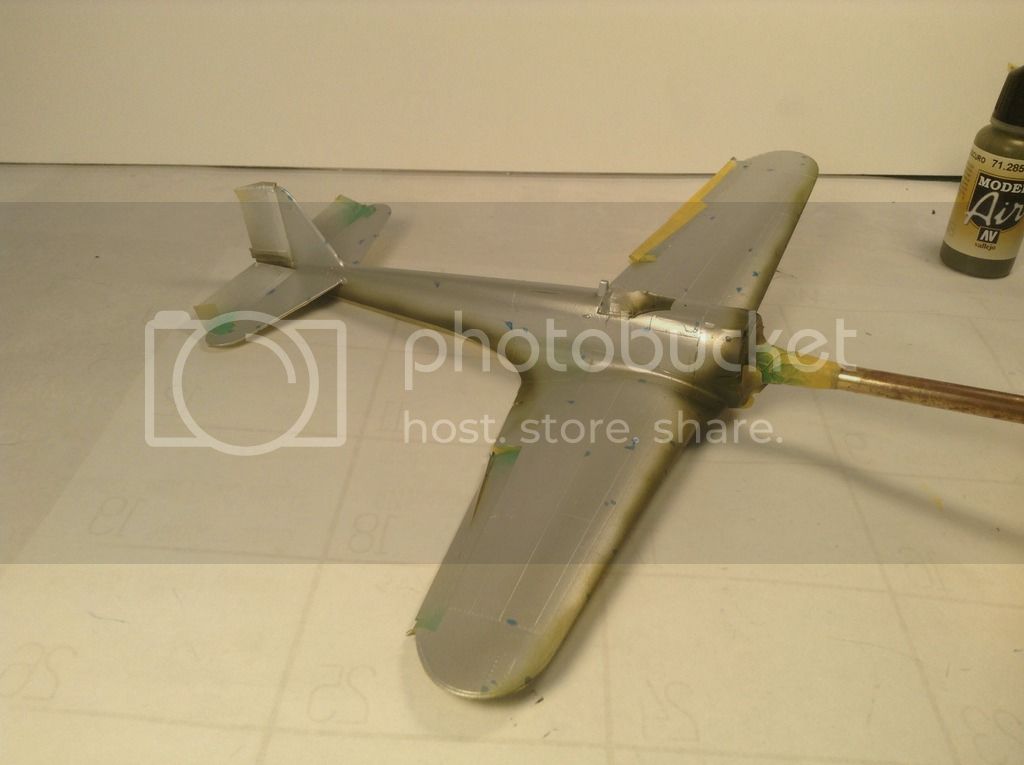
Random panels and strapping at spars on underside of wing shot in various tones and wheel wells and firewall shot in Aotake -
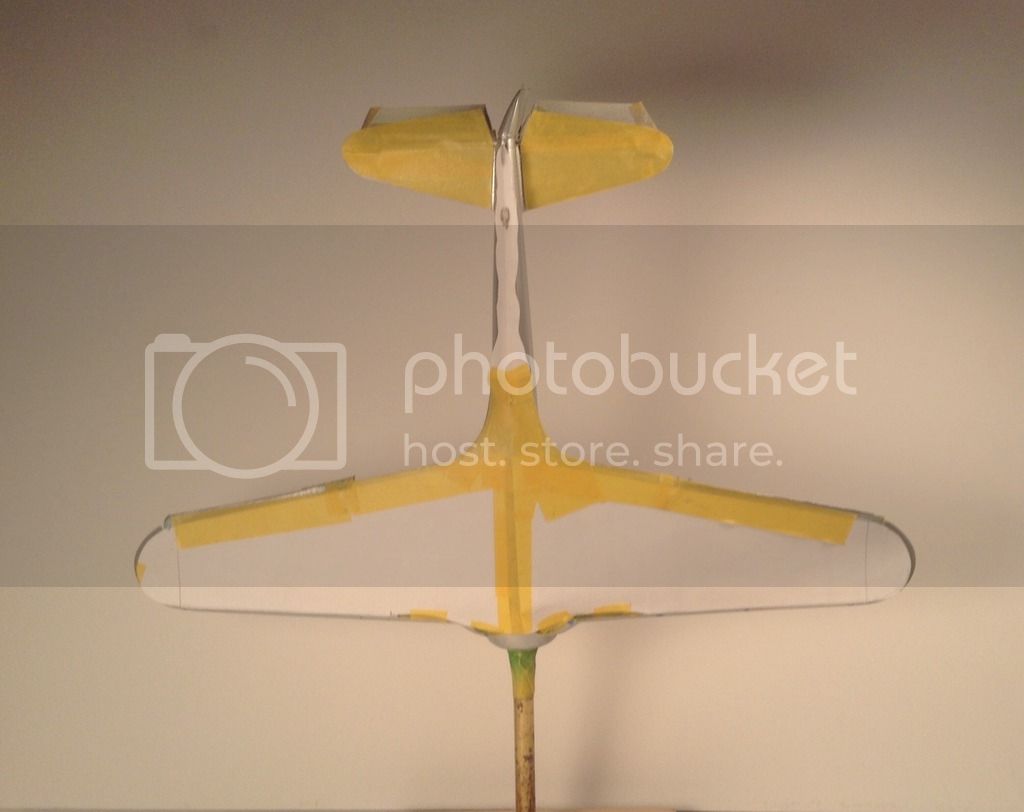
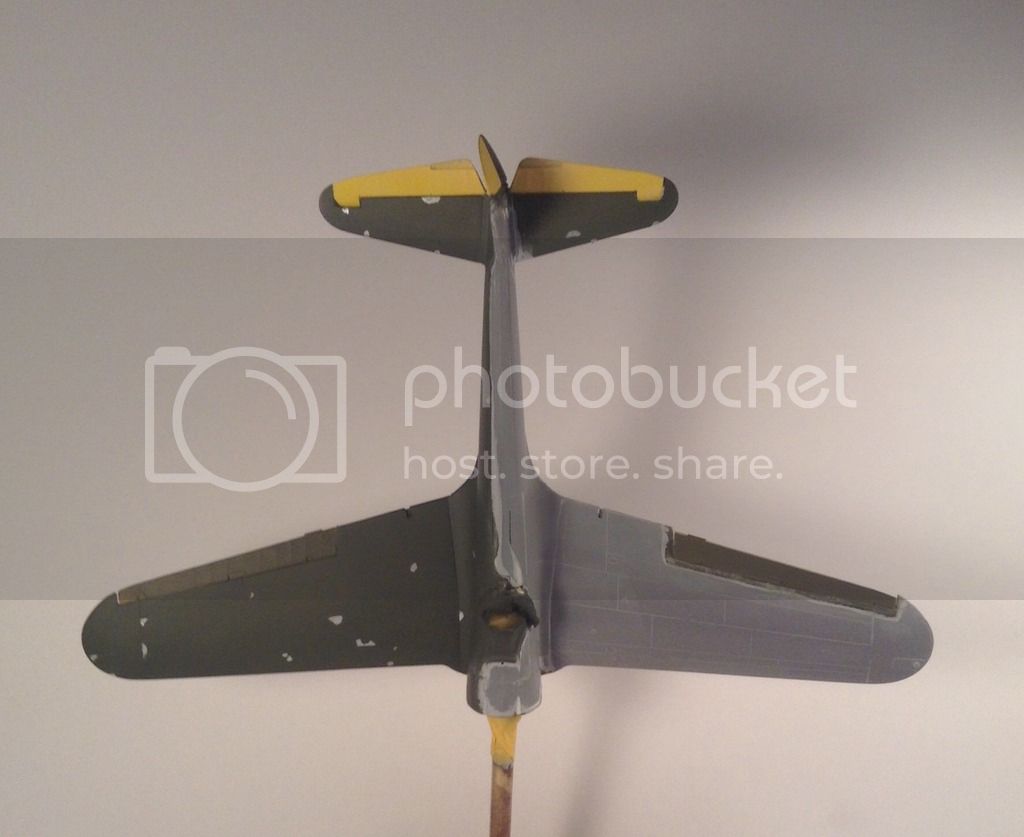
Bottom masked for IJAAF Dark Green that wraps around underside -
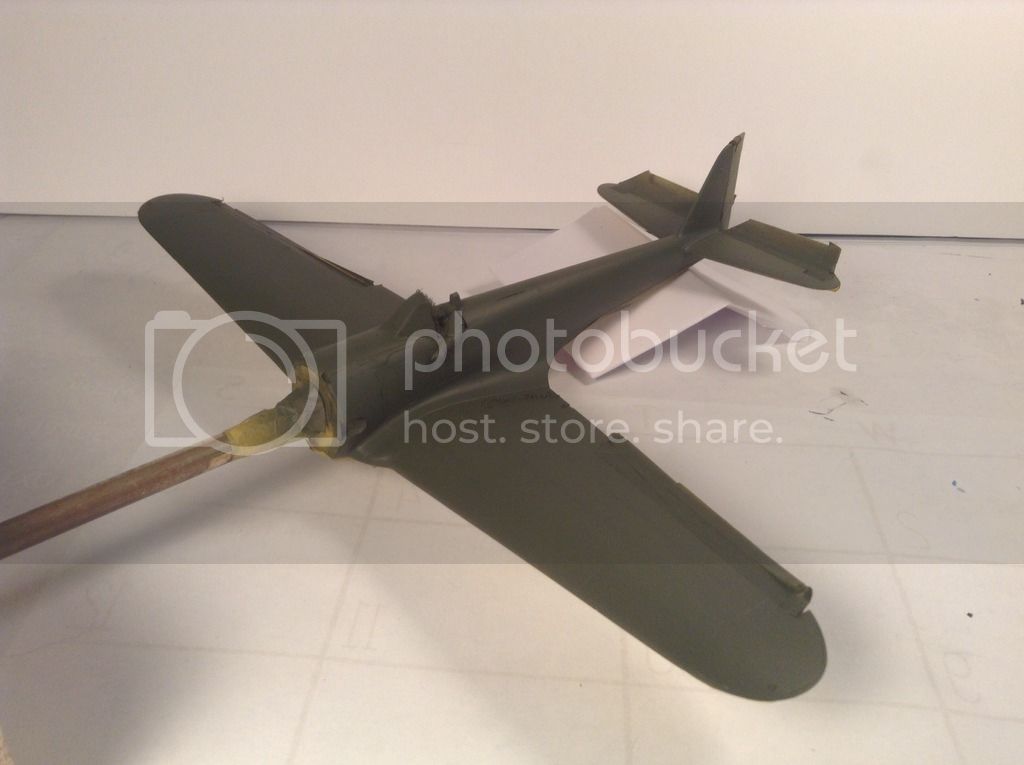
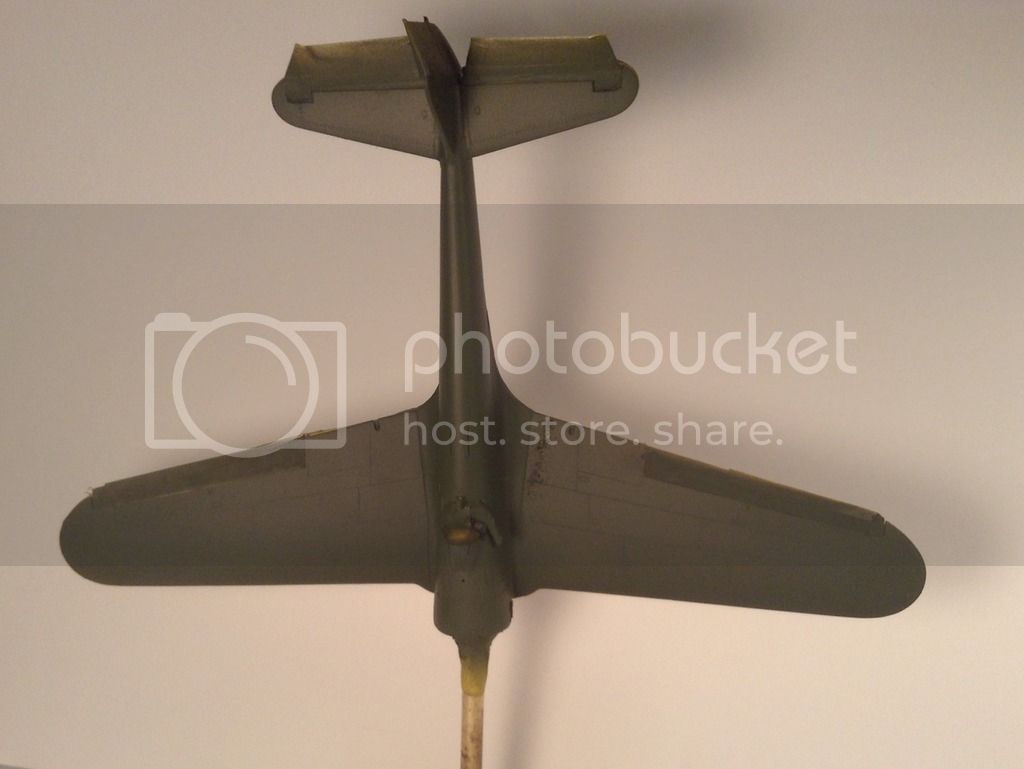
Cowl and upper surfaces given a case of measles with liquid mask for minor chipping-
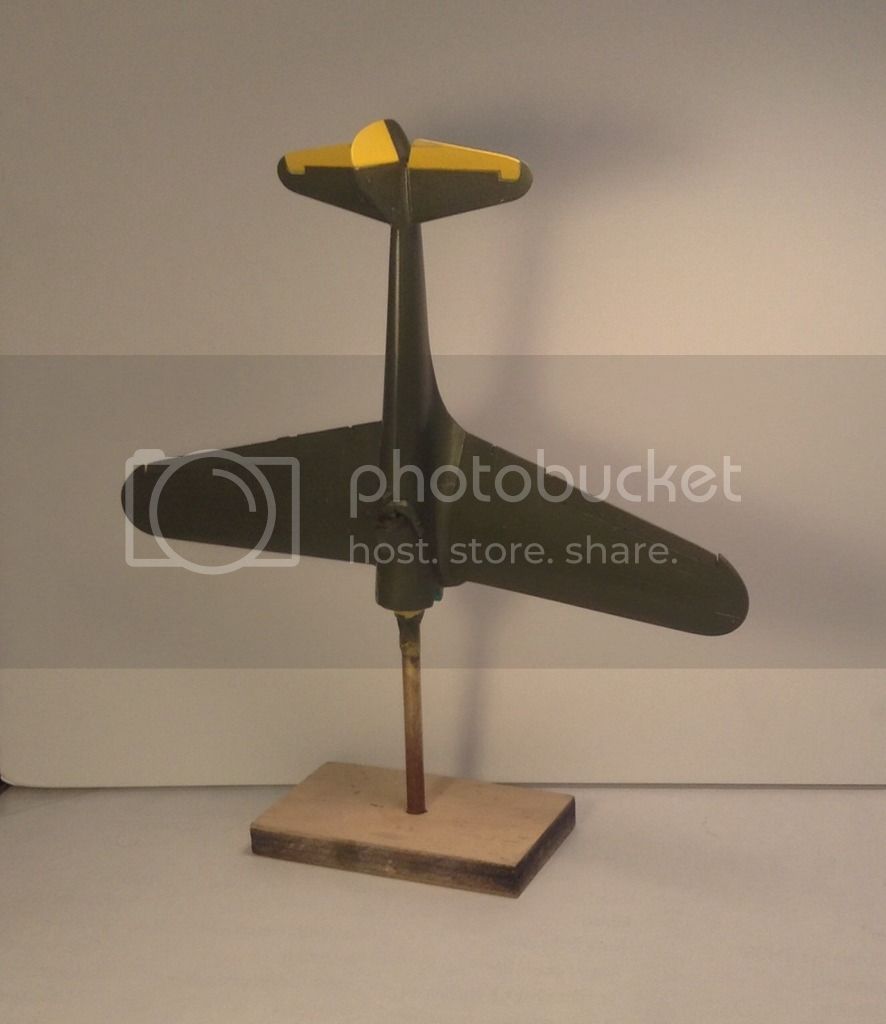
Upper surfaces preshaded in black and the shot in base IJAAF Dark Green-
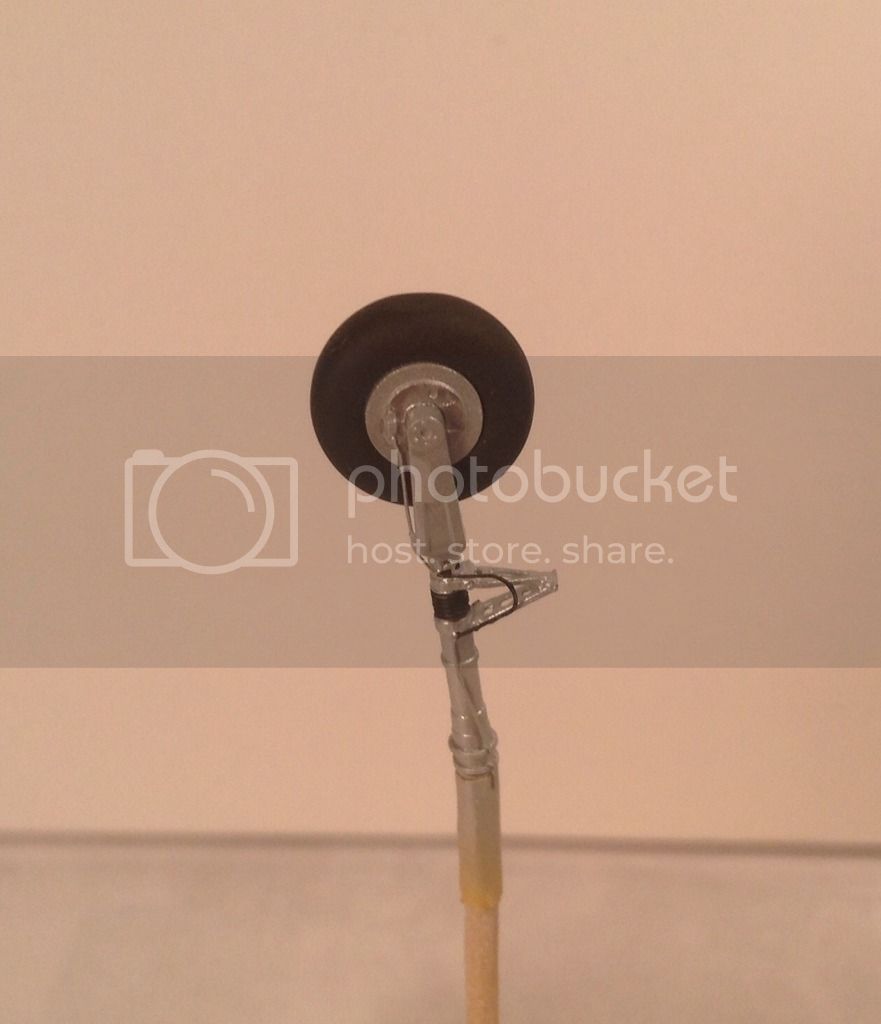
Main gear done and awaiting weathering and gear doors -
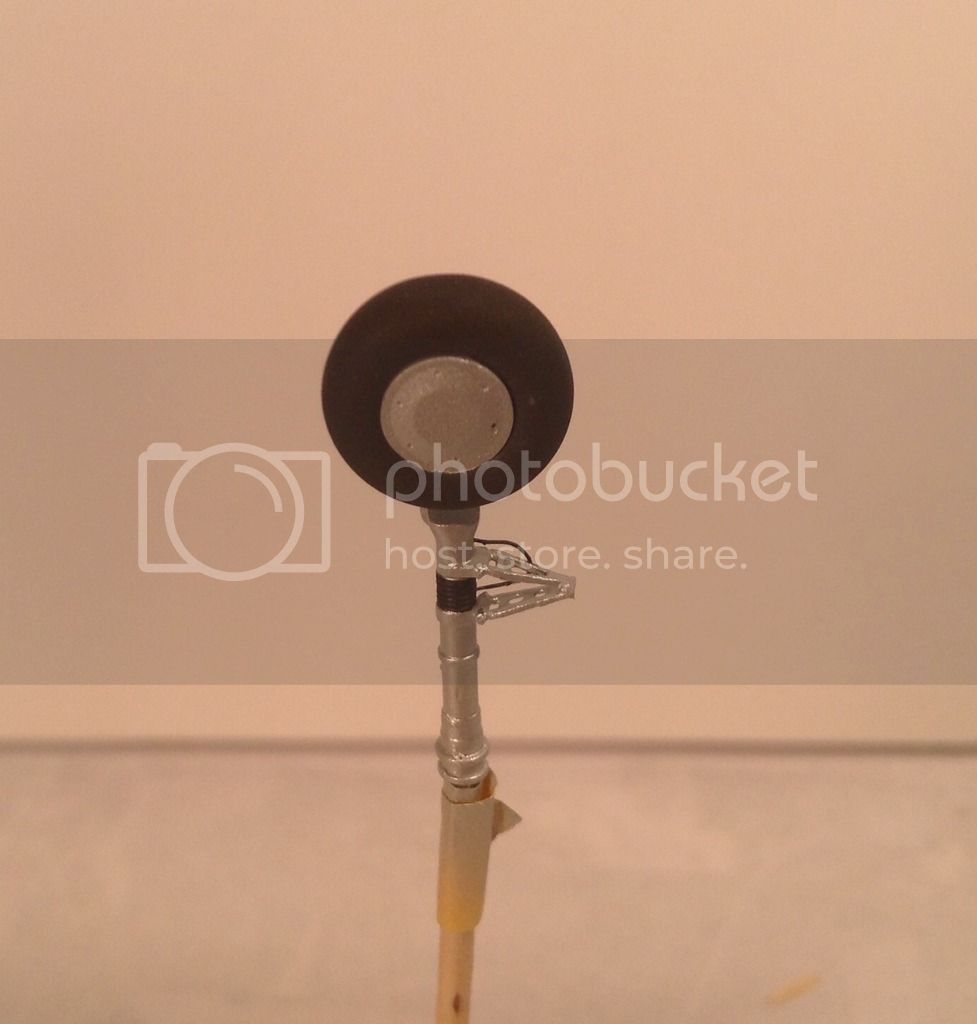
Tailwheel done -
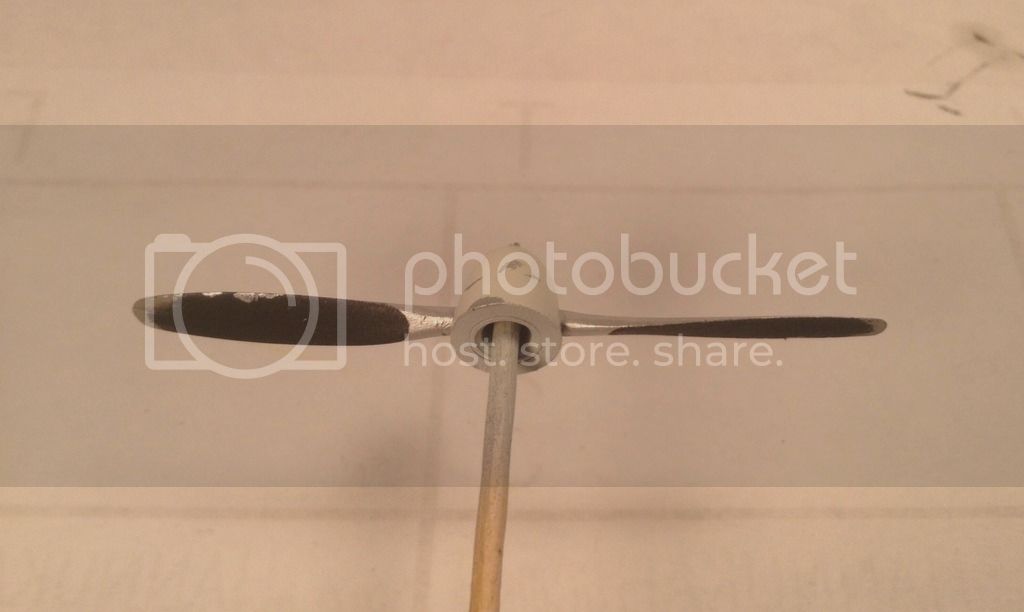
and prop/ spinner done-
Next up will be fading upper surfaces -
Thanks for looking and as always all input/comments welcome -
Cheers ! Richard
Random panels and strapping at spars on underside of wing shot in various tones and wheel wells and firewall shot in Aotake -
Bottom masked for IJAAF Dark Green that wraps around underside -
Cowl and upper surfaces given a case of measles with liquid mask for minor chipping-
Upper surfaces preshaded in black and the shot in base IJAAF Dark Green-
Main gear done and awaiting weathering and gear doors -
Tailwheel done -
and prop/ spinner done-
Next up will be fading upper surfaces -
Thanks for looking and as always all input/comments welcome -
Cheers ! Richard

Redhand

#522
Joined: January 20, 2013
KitMaker: 1,460 posts
AeroScale: 1,443 posts
Posted: Sunday, March 19, 2017 - 08:00 AM UTC
Really nice detail work here Richard. However I need some education from you and others about the rationale behind spraying a kit with a metal eyes are like this and then covering it with black, when the final product will be a camouflage scheme. I'm a lot more primitive in my approach to exterior painting, since I haven't yet attempted appreciating, and shy away from natural metal finishes.
So, your comments will be most welcome. The build is coming along very well.
So, your comments will be most welcome. The build is coming along very well.


Kendzior

Joined: January 29, 2016
KitMaker: 96 posts
AeroScale: 91 posts
Posted: Sunday, March 19, 2017 - 01:55 PM UTC
Hi, Richard
The prop looks very good indeed.
Vallejo MetalColor White Aluminum (and other paints of this range) is one of my favorite metalizers now. The good thing is that the finish is very smooth, almost like after a cote of surfacer. Therefore, another paint applied to this silver base (Gunze's H IJA Green for example) is not adhering very strongly, which is a disadvantage - when it comes to masking, for example when one is painting the markings using masks - but also an advantage, because one can recreate chipping the paint with pieces of adhesive tape (by sticking and peeling it off in a desired place), which gives a very nice effect of randomness.
Keep it up, best regards
Hubert
rdt1953
Joined: February 06, 2015
KitMaker: 1,098 posts
AeroScale: 900 posts
Posted: Sunday, March 19, 2017 - 03:26 PM UTC
Quoted Text
Really nice detail work here Richard. However I need some education from you and others about the rationale behind spraying a kit with a metal eyes are like this and then covering it with black, when the final product will be a camouflage scheme. I'm a lot more primitive in my approach to exterior painting, since I haven't yet attempted appreciating, and shy away from natural metal finishes.
So, your comments will be most welcome. The build is coming along very well.
Brian -
Thanks for looking in - I sprayed the airframe in aluminum first because the bottom finish is natural metal and the top surfaces will be chipped - hence the liquid mask.I originally thought I might do very heavy weathering with large amounts of the color flaked away so the entire upper surface was done in aluminum first. Ultimately I chose minimal chipping for a couple of reasons - the marking scheme I chose by Lifelike didn't evidence heavy deterioration of the finish and the Vallejo paint wasn't cooperating with the mask medium in the way I expected even though I made up a test sample on sheet styrene first .
The photos are a little misleading - what you are looking at is not the black preshading but the IJAAF Dark Green itself. I preshaded only the panel lines in black . I meant to take a picture of the preshading itself but got so involved in painting that I neglected to do so. I don't like strong panel lines showing through in a "checkerboard " fashion so I laid On enough green so only a hint of the preshading is there. It doesn't show well in the photos but in strong natural light it looks just right . I now need to start modulating the dark green with lighter shades here and there . Hope this answers your questions - Richard
rdt1953
Joined: February 06, 2015
KitMaker: 1,098 posts
AeroScale: 900 posts
Posted: Sunday, March 19, 2017 - 03:39 PM UTC
Hubert -
Thanks for the kind words. I love the Gunze acrylic paints and would still be using them today but they are basically unavailable in the USA . I have a few colors stashed away for future projects but no IJAAF colors unfortunately.
Nice to see your Hayabusa project moving forward .
Cheers ! Richard
Thanks for the kind words. I love the Gunze acrylic paints and would still be using them today but they are basically unavailable in the USA . I have a few colors stashed away for future projects but no IJAAF colors unfortunately.
Nice to see your Hayabusa project moving forward .
Cheers ! Richard
rdt1953
Joined: February 06, 2015
KitMaker: 1,098 posts
AeroScale: 900 posts
Posted: Friday, March 24, 2017 - 04:24 AM UTC
Two steps forward - one step back -
The paint woes continue -
The paint work was done to the point of being ready for the pre - decaling gloss coat as I wrestled with my dissatisfaction with the chipping effect.
I just was not happy with it as it looked too forced and unnatural to me.
Also, the liquid mask method was too inconsistent - some peeled away beautifully looking very good and others took the underlying silver paint away with the mask and others left raised green paint at the edges where the mask material was removed so after a bit of soul searching I have elected to try to strip the dark green on the upper surfaces and try to keep the undersurfaces which I am pleased with.

I am going to try to re-do the green without the the primer/ silver bit and and do minimal chipping with brush painting and/or color pencil -
Stay tuned for more drama - hobbies are fun, right ?
Richard
The paint woes continue -
The paint work was done to the point of being ready for the pre - decaling gloss coat as I wrestled with my dissatisfaction with the chipping effect.
I just was not happy with it as it looked too forced and unnatural to me.
Also, the liquid mask method was too inconsistent - some peeled away beautifully looking very good and others took the underlying silver paint away with the mask and others left raised green paint at the edges where the mask material was removed so after a bit of soul searching I have elected to try to strip the dark green on the upper surfaces and try to keep the undersurfaces which I am pleased with.
I am going to try to re-do the green without the the primer/ silver bit and and do minimal chipping with brush painting and/or color pencil -
Stay tuned for more drama - hobbies are fun, right ?
Richard
rdt1953
Joined: February 06, 2015
KitMaker: 1,098 posts
AeroScale: 900 posts
Posted: Saturday, April 08, 2017 - 11:24 PM UTC
Hi to all - still alive here and back to pre-strip status. while stripping I damaged the vac windscreen so I fitted a new one and I am much happier with the result. I re- primed and re-painted without the underlying silver.
I modulated the color with lighter shades of the base color and then put on two coats of Gunze clear gloss rubbed out with micro mesh pads in preparation for decals- the color modulation is difficult to see in the photo because of the now semi-gloss surface.
I've begun the decaling on the underside-
more to follow as the decaling progresses.
Thanks for looking - Richard
Redhand
#522
Joined: January 20, 2013
KitMaker: 1,460 posts
AeroScale: 1,443 posts
Posted: Sunday, April 09, 2017 - 02:30 AM UTC
Rich, one would never know you went through a "crisis" in paint given the way this looks now. I love the colored elevators.
thegirl
Joined: January 19, 2008
KitMaker: 6,743 posts
AeroScale: 6,151 posts
Posted: Sunday, April 09, 2017 - 02:56 AM UTC
This one is fighting you all the way with the painting the scheme . However , you seem to be winning the war .
Have you tried the salt method for doing the chipping ? Haven't tried it myself yet but it seems to give an excellent result .
Terri
Have you tried the salt method for doing the chipping ? Haven't tried it myself yet but it seems to give an excellent result .
Terri
rdt1953
Joined: February 06, 2015
KitMaker: 1,098 posts
AeroScale: 900 posts
Posted: Sunday, April 09, 2017 - 03:20 AM UTC
Quoted Text
Rich, one would never know you went through a "crisis" in paint given the way this looks now. I love the colored elevators.
Brian - Thanks for looking in - while the Vallejo paints have their plusses and minuses I long for the day when the Gunze acrylics were readily available here in the USA - far and away my fave.
Richard
rdt1953
Joined: February 06, 2015
KitMaker: 1,098 posts
AeroScale: 900 posts
Posted: Sunday, April 09, 2017 - 03:46 AM UTC
Quoted Text
This one is fighting you all the way with the painting the scheme . However , you seem to be winning the war .
Have you tried the salt method for doing the chipping ? Haven't tried it myself yet but it seems to give an excellent result .
Terri
Terri- a few years ago when I was a younger and apparently smarter man
I did a lot of experimenting with the salt technique BEFORE painting my Pete. What I found was the salt leached into the acrylic paint leaving white rings. I eventually used pepper from a pepper mill- it doesn't stick as well but it solved the leaching issues.
The only disappointment on this build was the yellow ID bands on the leading edges- I used the kit decals instead of painting and they did not behave well- I chipped away the bad spots with a knife and painted these spots aluminum to look like chips but they don't look as good as the others.
Thanks for looking in and looking forward to your Ki 61 build - Richard
rdt1953
Joined: February 06, 2015
KitMaker: 1,098 posts
AeroScale: 900 posts
Posted: Tuesday, April 11, 2017 - 03:32 AM UTC
Quickie here-
Decaling progress-
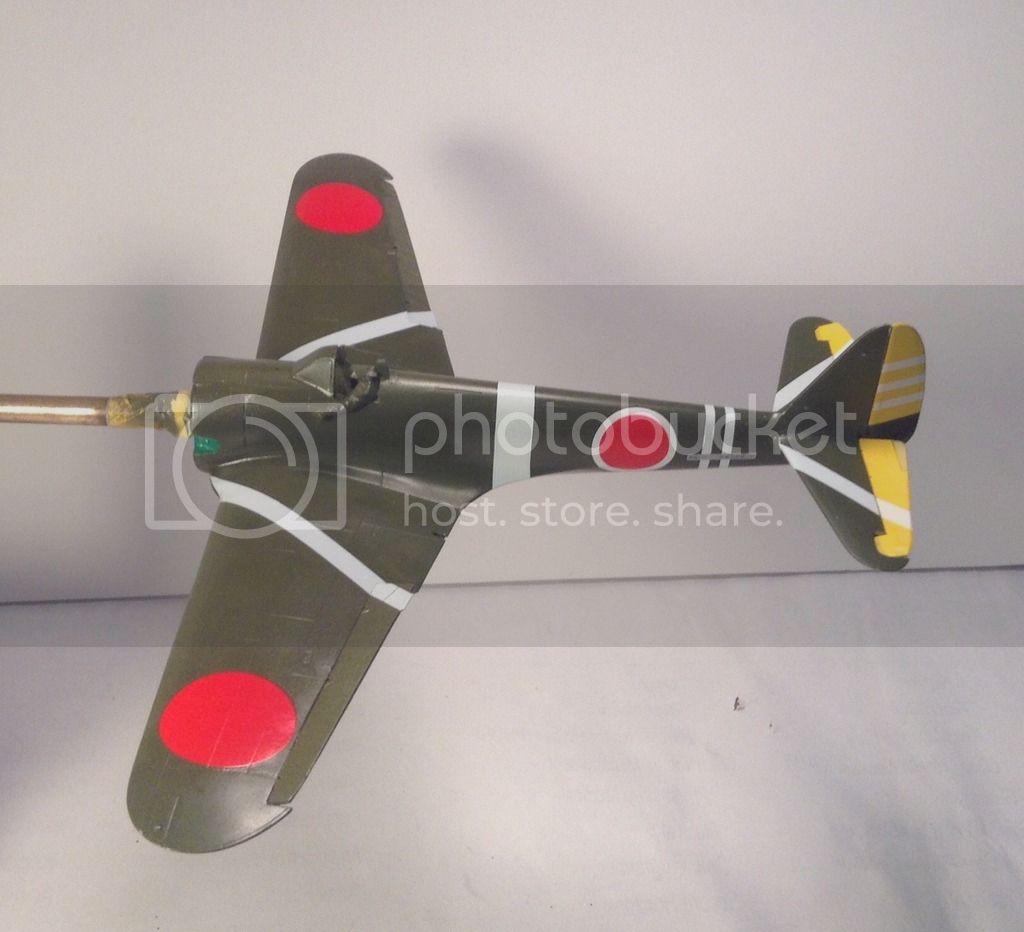
I think it needs a few more white stripes !
more to follow -
Richard
Decaling progress-
I think it needs a few more white stripes !
more to follow -
Richard
pnance26
Joined: January 22, 2016
KitMaker: 766 posts
AeroScale: 103 posts
Posted: Tuesday, April 11, 2017 - 10:06 PM UTC
Richard,
Great looking stuff!
As I am fairly new to advanced modeling skills (most of my youth was spent making glue bombs), I have not used any metallizers even though I have bought Testors a number of times.
Do the metallizers play well with Tamiya Acrylics? Which ones work best with acrylics, which all I used as they are water based and much easier to clean up from the airbrush. Also, what is the base for metallizers? What solvent do you use for thinning and then cleaning?
I have done a little of the salt method but would like to do more. Interesting about the use of pepper from the mill!
Thanks in advance for the info and it looks great!
rdt1953
Joined: February 06, 2015
KitMaker: 1,098 posts
AeroScale: 900 posts
Posted: Wednesday, April 12, 2017 - 03:50 AM UTC
Quoted Text
Richard,
Great looking stuff!
As I am fairly new to advanced modeling skills (most of my youth was spent making glue bombs), I have not used any metallizers even though I have bought Testors a number of times.
Do the metallizers play well with Tamiya Acrylics? Which ones work best with acrylics, which all I used as they are water based and much easier to clean up from the airbrush. Also, what is the base for metallizers? What solvent do you use for thinning and then cleaning?
I have done a little of the salt method but would like to do more. Interesting about the use of pepper from the mill!
Thanks in advance for the info and it looks great!
Patrick - My only experience with metal finishes is the Vallejo MetalColor
line. I use their Gloss Black Surface Primer 77.660 as a base.
I use 4 shades of aluminum :
77.701 Aluminum
77.702 Duraluminum
77.703 Dark Aluminum
77.706 White Aluminum
I also have their clear gloss over coat which they call MetalVarnish 77.657 but I have yet to try it.
These are all acrylic and very easy to use and seem to be compatable with Tamiya.
Here is a link to my Ka 14 build that offers some insight .
http://aeroscale.kitmaker.net/forums/250563&page=1
Read through - there is a post or two regarding Vallejo MetalColor.
Hope this helps - Richard
thegirl
Joined: January 19, 2008
KitMaker: 6,743 posts
AeroScale: 6,151 posts
Posted: Wednesday, April 12, 2017 - 06:13 AM UTC
Well , you know you can never have enough stripes Richard . She is definitely starting to look very colourful and will stand out in your collection . Thanks for sharing the pic of your Pete . Beautiful job done on the weathering . Will using pepper instead , nice tip 
Terri
Terri

MS406C

Joined: May 22, 2008
KitMaker: 100 posts
AeroScale: 85 posts
Posted: Wednesday, April 12, 2017 - 11:44 PM UTC
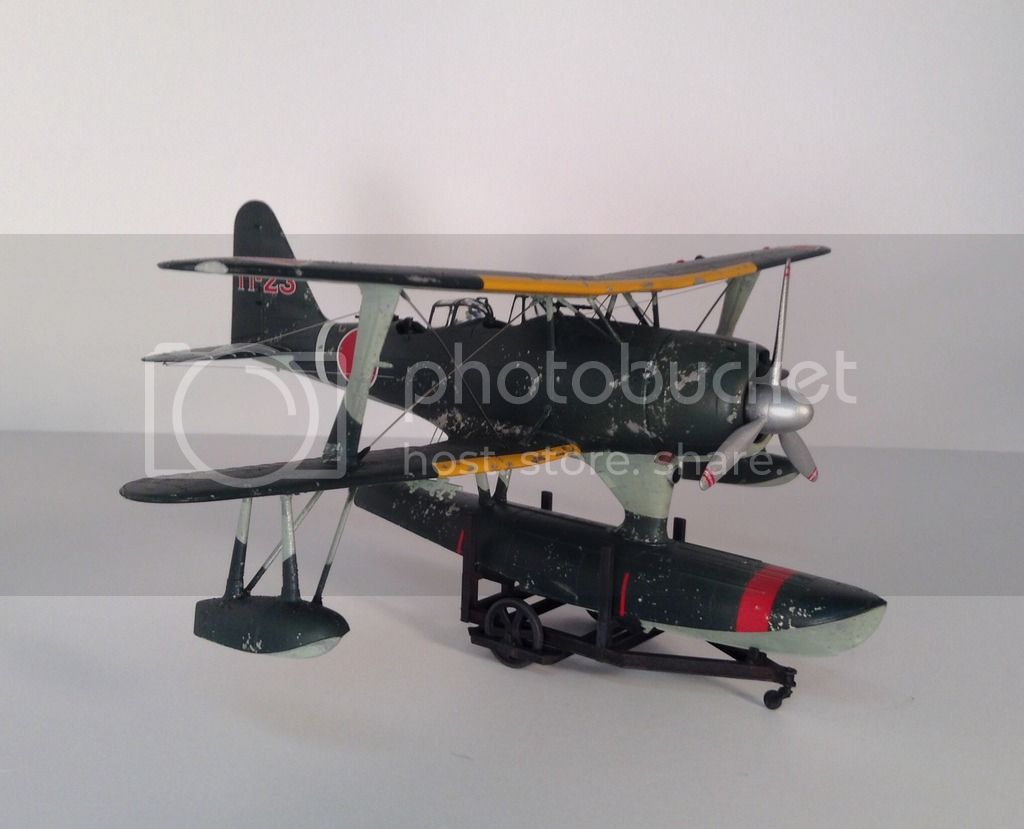
Hello Richard! Thumbs up for your work on the early Ki-43,but, I wander why you did not use the hairspray technic for your chipping as it is fairly easy to do and gives a much realistic result. I join a pic of my latest Ki-43 build to show you what I mean. I also have trouble with your Aotake shade, even if I am aware of such a color used on the restored Ki-43 in New Zealand! Anyway keep it up, cheers, jean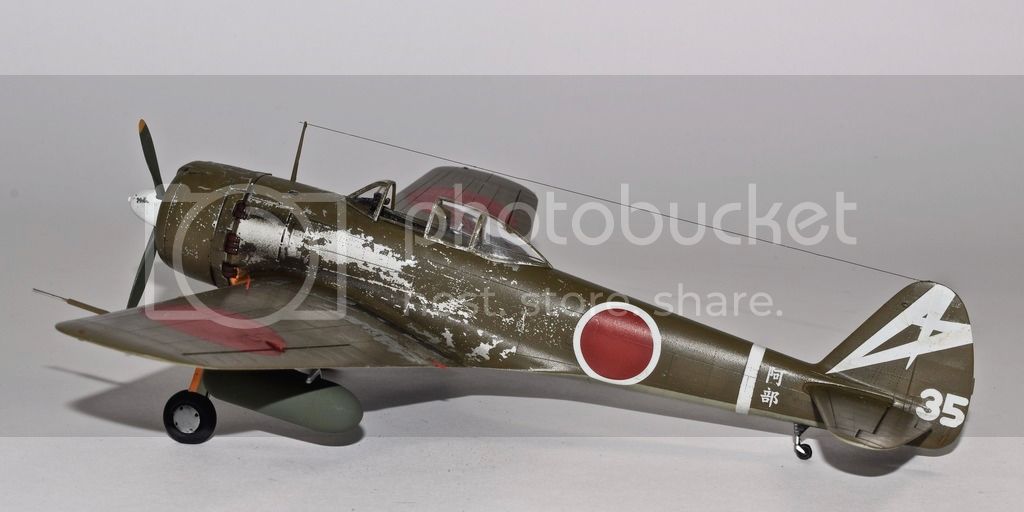


rdt1953
Joined: February 06, 2015
KitMaker: 1,098 posts
AeroScale: 900 posts
Posted: Thursday, April 13, 2017 - 01:51 AM UTC
Allo Jean mon ami !
Thanks for your interest and the kind words . Your Hayabusa looks tres bon. I have yet to try the hairspray technique but I think I should . I am also learning paint modulation and I'm afraid I may have been too timid on this build. What looked just right before gloss coating is now disappearing . I'm hoping some will come back with the flat coat. I am also leary of the Aotake shade - too emerald - and I plan to dust over it to make it more blue.
Merci & Au revoir - Richard
rdt1953
Joined: February 06, 2015
KitMaker: 1,098 posts
AeroScale: 900 posts
Posted: Sunday, April 16, 2017 - 01:42 AM UTC
More progress to report-
With the paint issues hopefully behind me now I've moved forward a bit -
Decaling done - Gunze clear gloss overcoat followed by two coats AK Utra Matte Varnish. All was dusted over lightly with a highly thinned mix of Tamiya Dessert Yellow with additional concentration on the white areas to tone down the brightness a bit. I modulated the Green colors but I may not have been bold enough with it - it looked just right before the first clear gloss coat but it gradually disappeared after each gloss coat.
Thankfully it came back a bit after the flat coat but not as much as I had hoped. I also dusted over the firewall and wheel wells with a bluer
blue/green mix to tone down the emerald color of the Vallejo IJAAF Aotake.
Here is one of the exhaust manifolds - Tamiya Linoleum Deck Brown followed by thin blue-black mist-
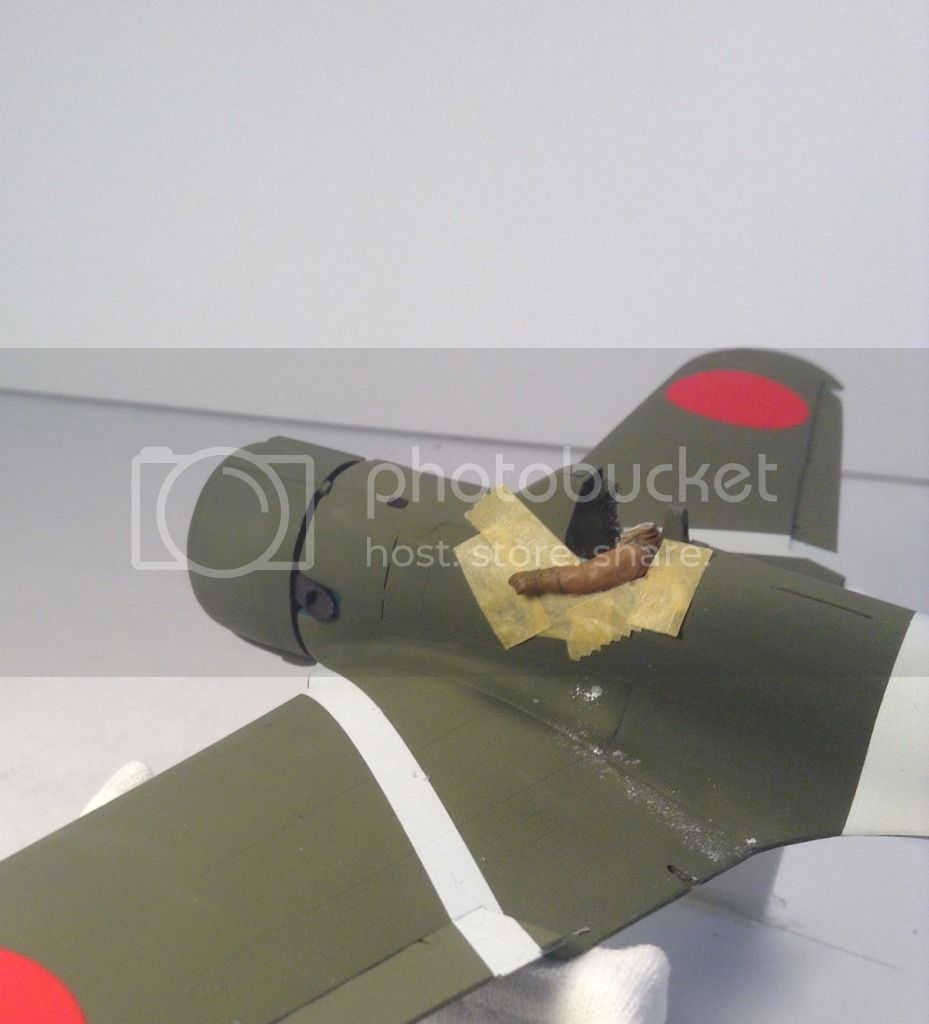
Began painting of pilot's arm and installed exhausts and power plant -
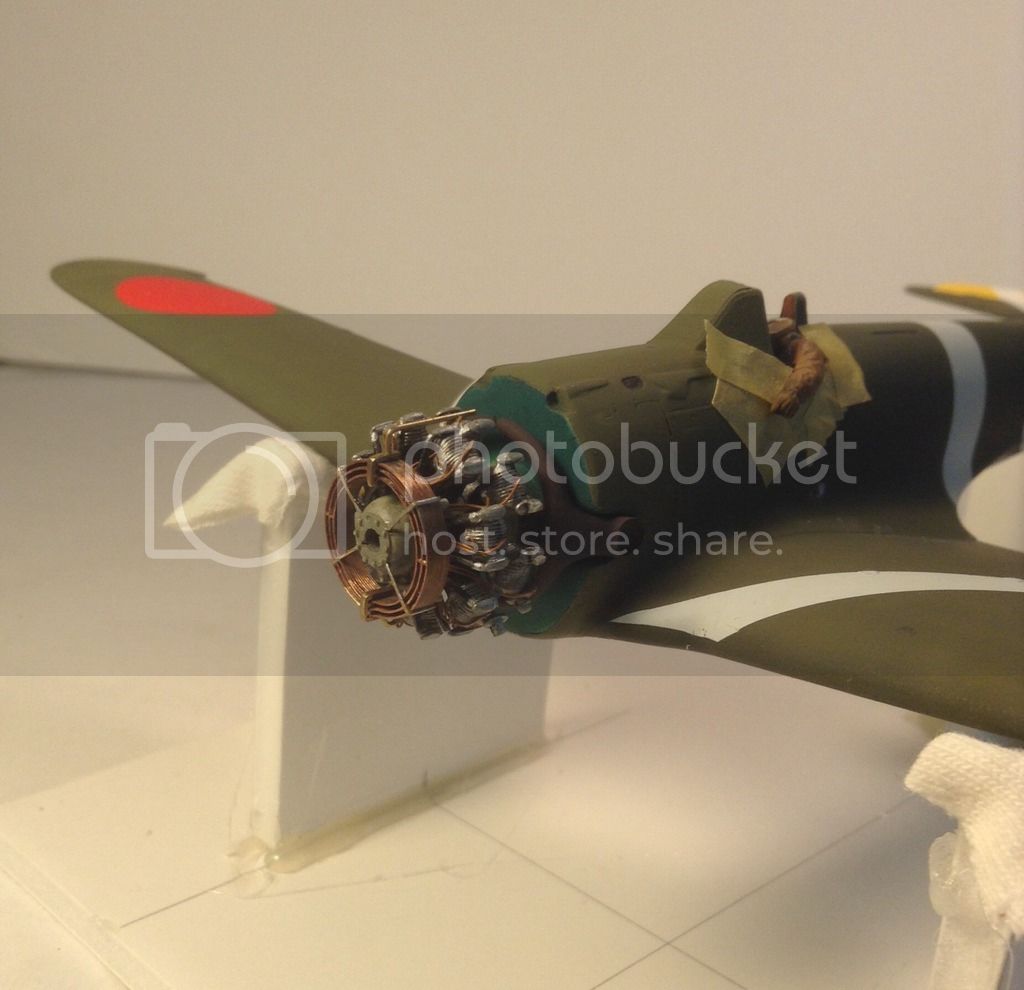
And a couple of shots with the cowl temporarily in place-

I've also begun hand painting some minor chipping.
Still to be made before the cowling can be attached is the small cabin air intake visible just inside the cowl opening at the 10 o'clock position.
Thanks for looking and Happy Easter to all - Richard
With the paint issues hopefully behind me now I've moved forward a bit -
Decaling done - Gunze clear gloss overcoat followed by two coats AK Utra Matte Varnish. All was dusted over lightly with a highly thinned mix of Tamiya Dessert Yellow with additional concentration on the white areas to tone down the brightness a bit. I modulated the Green colors but I may not have been bold enough with it - it looked just right before the first clear gloss coat but it gradually disappeared after each gloss coat.
Thankfully it came back a bit after the flat coat but not as much as I had hoped. I also dusted over the firewall and wheel wells with a bluer
blue/green mix to tone down the emerald color of the Vallejo IJAAF Aotake.
Here is one of the exhaust manifolds - Tamiya Linoleum Deck Brown followed by thin blue-black mist-
Began painting of pilot's arm and installed exhausts and power plant -
And a couple of shots with the cowl temporarily in place-
I've also begun hand painting some minor chipping.
Still to be made before the cowling can be attached is the small cabin air intake visible just inside the cowl opening at the 10 o'clock position.
Thanks for looking and Happy Easter to all - Richard
MS406C
Joined: May 22, 2008
KitMaker: 100 posts
AeroScale: 85 posts
Posted: Sunday, April 16, 2017 - 09:32 PM UTC
Hello again Richard. Now you know! One have to take care that each spray of varnish will slowly but surely kill the effects of faded paint if those are not contrasted enough. For this I use a trick: instead of lightning the base color I use another shade from a different shade (green, brown, Olive drab, whatever), and it works just fine when I spray the varnishes. If it is to light, then I use pure oil paint that I strech with a flat brush to blend the differences.Hope I've helped, best regards, Jean. 
rdt1953
Joined: February 06, 2015
KitMaker: 1,098 posts
AeroScale: 900 posts
Posted: Friday, April 21, 2017 - 04:52 AM UTC
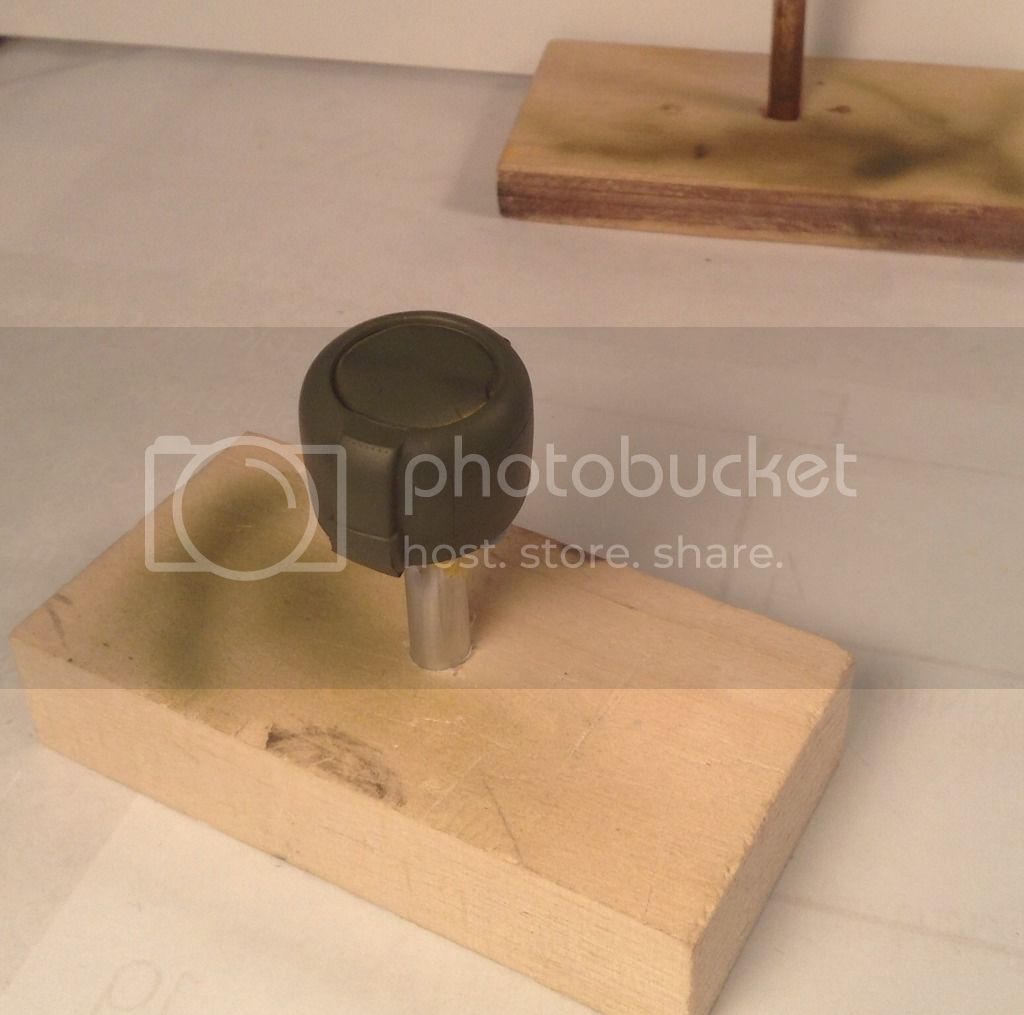
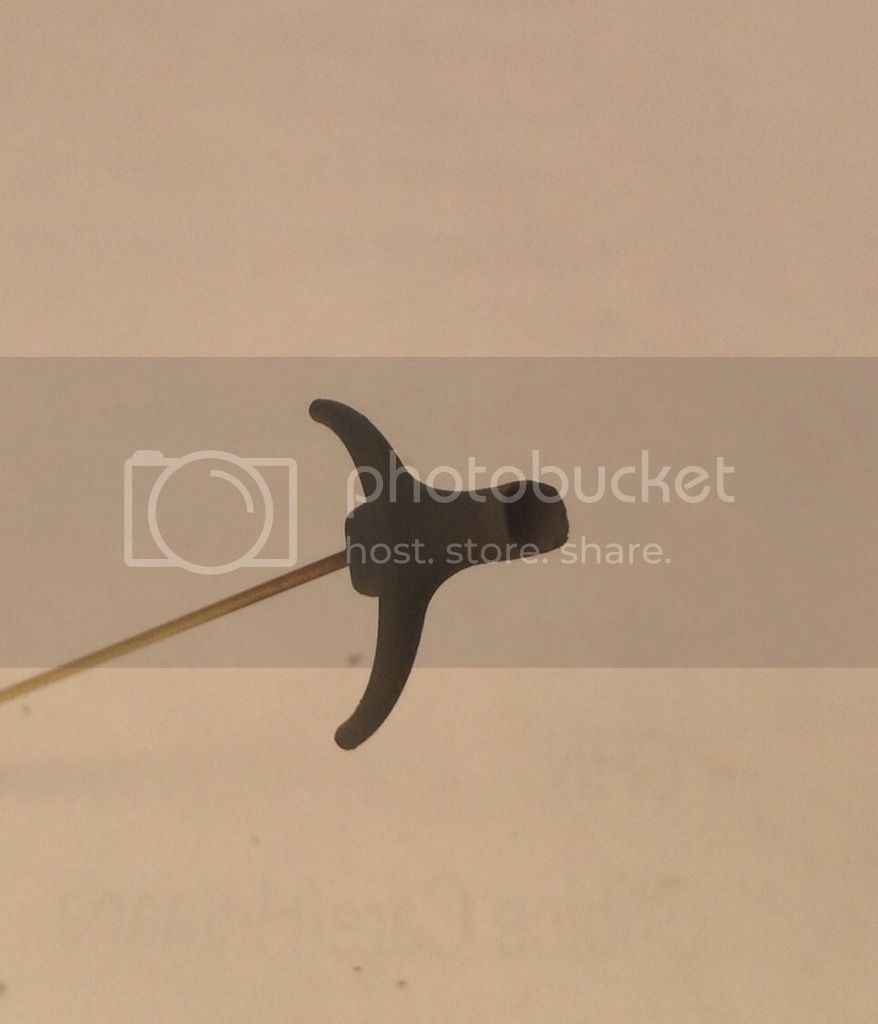
May I introduce our pilot - or at least another part of him -
Maj. Kinshiro Takeda , Commander 1st Sentai , Hanoi AB
/Indochina Oct 1942
More to follow - Richard
Maj. Kinshiro Takeda , Commander 1st Sentai , Hanoi AB
/Indochina Oct 1942
More to follow - Richard
rdt1953
Joined: February 06, 2015
KitMaker: 1,098 posts
AeroScale: 900 posts
Posted: Sunday, April 23, 2017 - 03:01 AM UTC
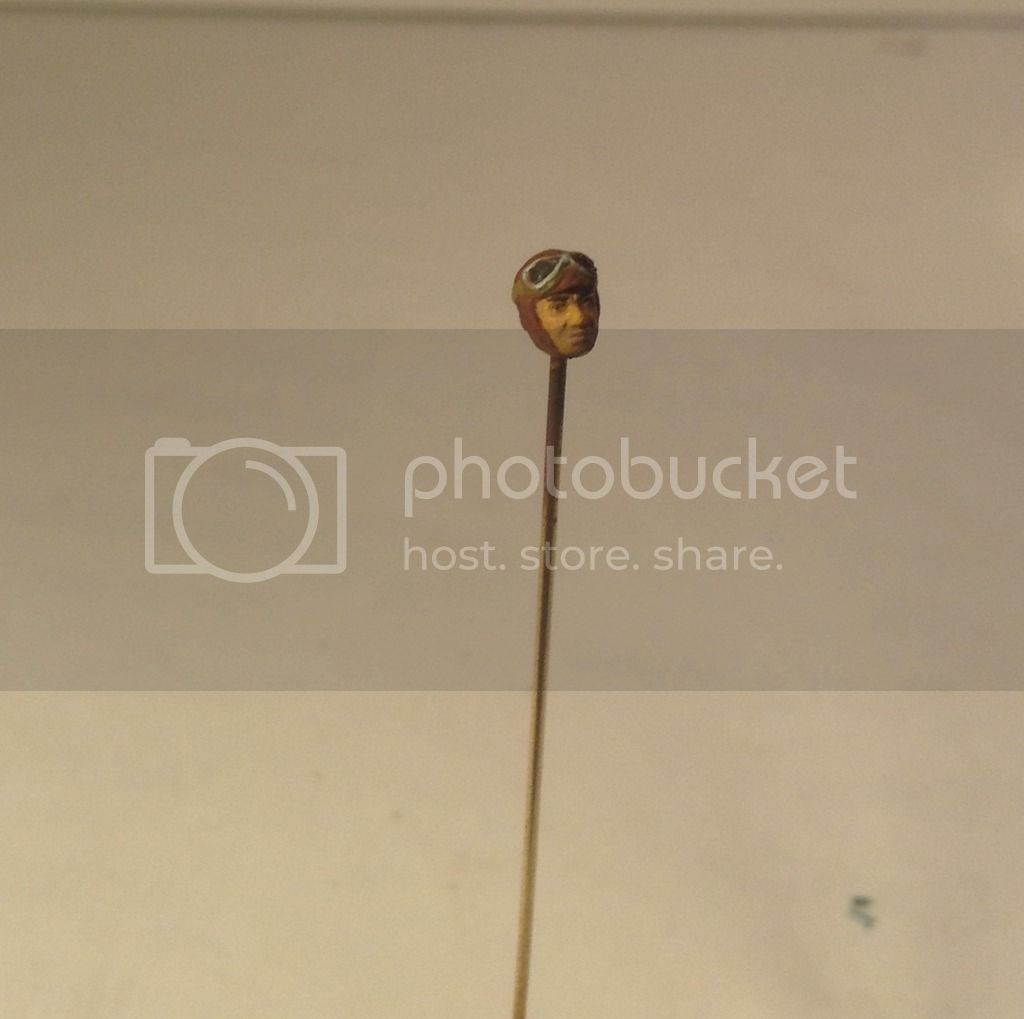
A little more progress-
Here is a shot for a sense of facial size-
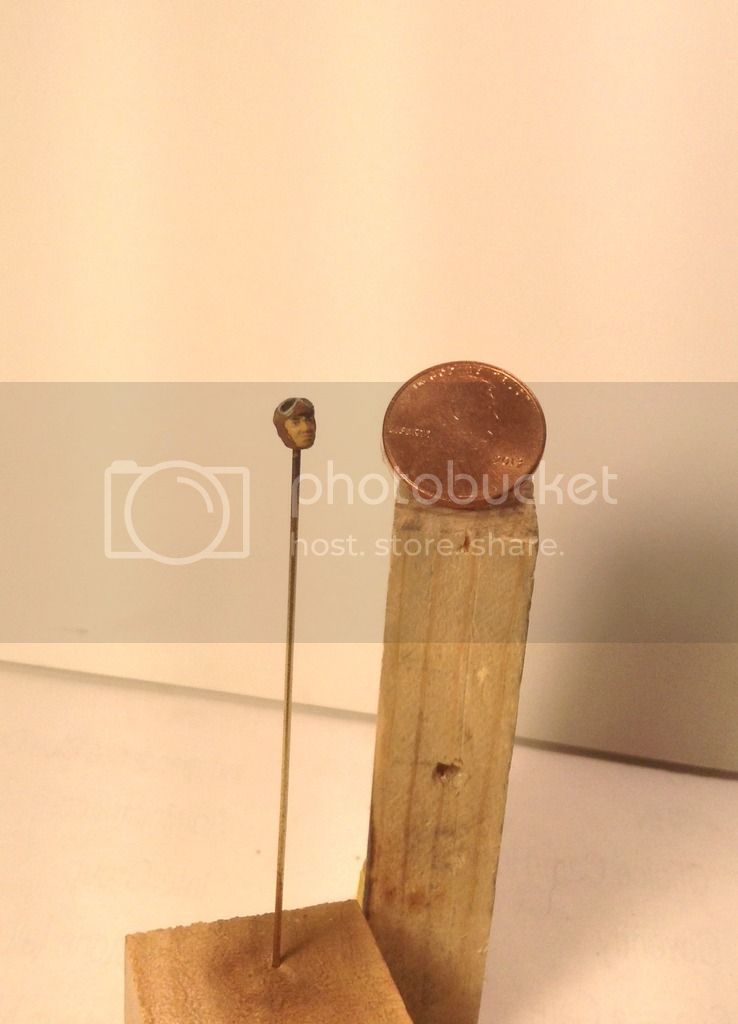
windsreen unmasked, tubular gunsight , prop and head installed-

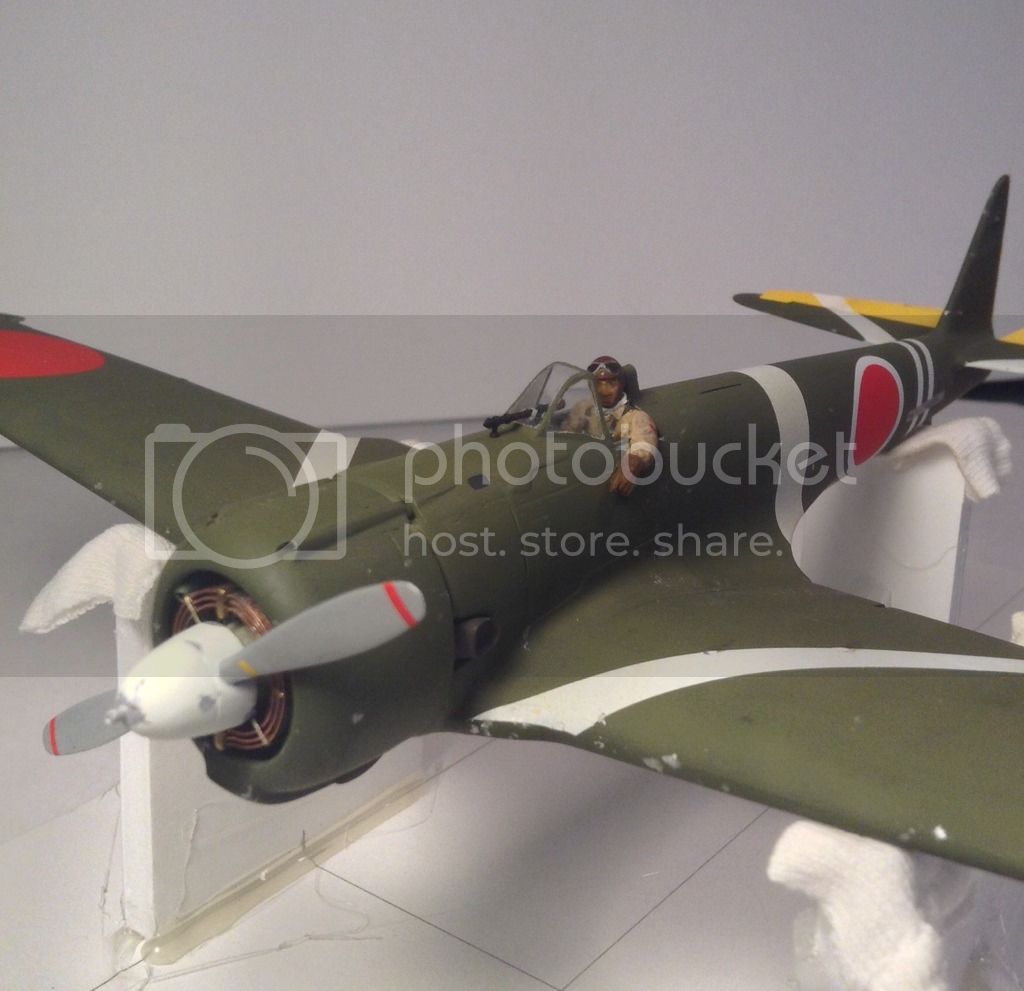
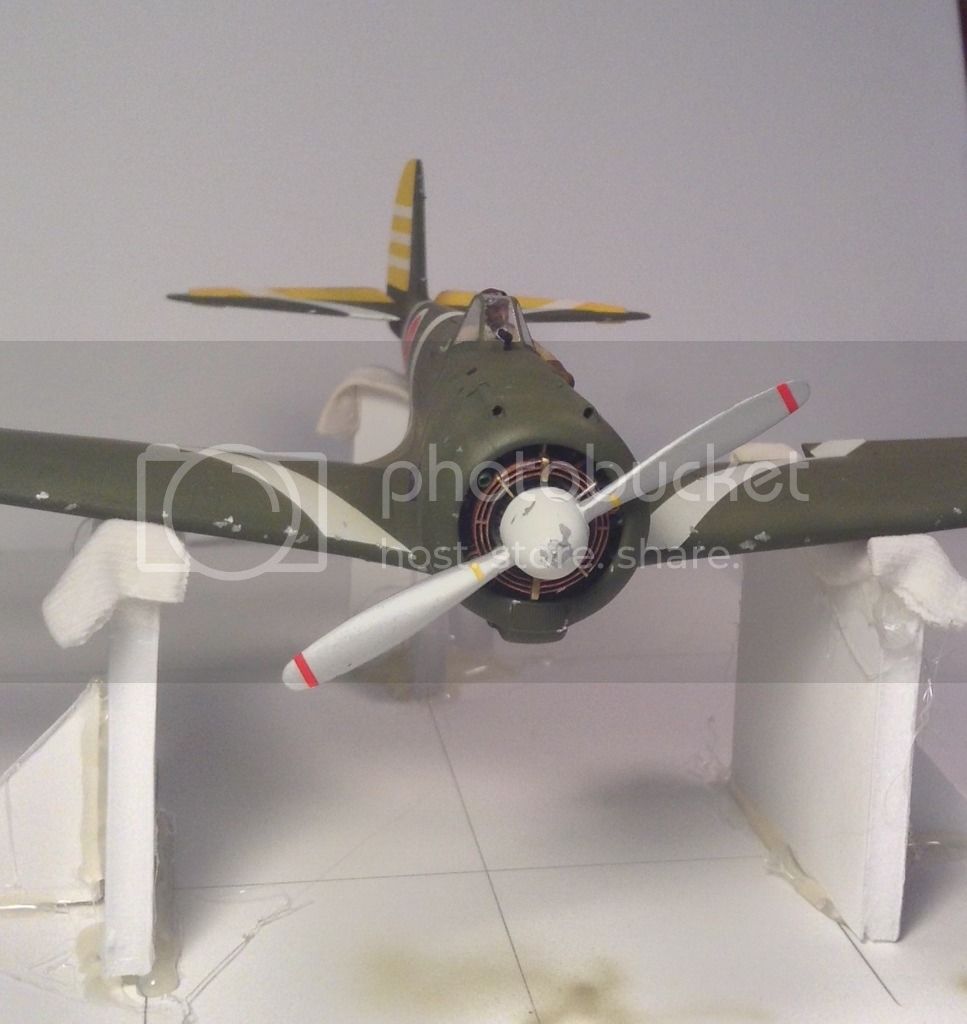
In this shot we can see the small cabin air intake just inside the cowl opening at the 9-10 o'clock position- this is missing from most kits including this one.
and here is a shot with the one I added -
I'm getting close to wrapping this one up - main gears and doors, canopy , pitot ,aerial mast and aerial to go. This will be part of a diorama with the Hucks starter truck so the mast and aerial, canopy, pitot etc. - all the fragile parts - will be left off until the model is on it's base and near completion.
Thanks for looking in and as always all comments/input welcome-
Cheers -Richard
Here is a shot for a sense of facial size-
windsreen unmasked, tubular gunsight , prop and head installed-
In this shot we can see the small cabin air intake just inside the cowl opening at the 9-10 o'clock position- this is missing from most kits including this one.
and here is a shot with the one I added -
I'm getting close to wrapping this one up - main gears and doors, canopy , pitot ,aerial mast and aerial to go. This will be part of a diorama with the Hucks starter truck so the mast and aerial, canopy, pitot etc. - all the fragile parts - will be left off until the model is on it's base and near completion.
Thanks for looking in and as always all comments/input welcome-
Cheers -Richard
thegirl
Joined: January 19, 2008
KitMaker: 6,743 posts
AeroScale: 6,151 posts
Posted: Wednesday, April 26, 2017 - 04:06 AM UTC
Coming along really well Richard and that scheme really stands out . Nice job on painting the facial features . Far better than what I come up with . Are you using acrylics for this ?
Terri
Terri
 |

WEB HOSTING BY


Copyright ©2021 AeroScale and Kitmaker Network, a subsidiary of Silver Star Enterprises
All Rights Reserved. Please read our Conditions of Use and Privacy Policy.
All Rights Reserved. Please read our Conditions of Use and Privacy Policy.