_GOTOBOTTOM
Pre-Flight Check
Constructive critique of your finished or in-progress photos.
1/48 Eduard Bf 109E-7 Trop. Libya, 1941
kahunaminor
_VISITCOMMUNITY
New South Wales, Australia
Joined: April 06, 2008
KitMaker: 151 posts
AeroScale: 141 posts
Posted: Sunday, October 09, 2016 - 08:12 AM UTC
Welcome back!

I was sitting there looking through the stash and contemplating my next project, the re-released Eduard Bf 109G-6, when I had one of those "Eureka" moments. The G went back into the shelf and out came an overtrees Bf 109E-7 Trop. Now as those of you familiar with the overtrees concept are aware, you get the bare bones plastic in a plain box. No PE, no decals, no masks, not even a set of instructions. It is designed to be used after you build up a Profipack kit and have some of those pesky decals left over:


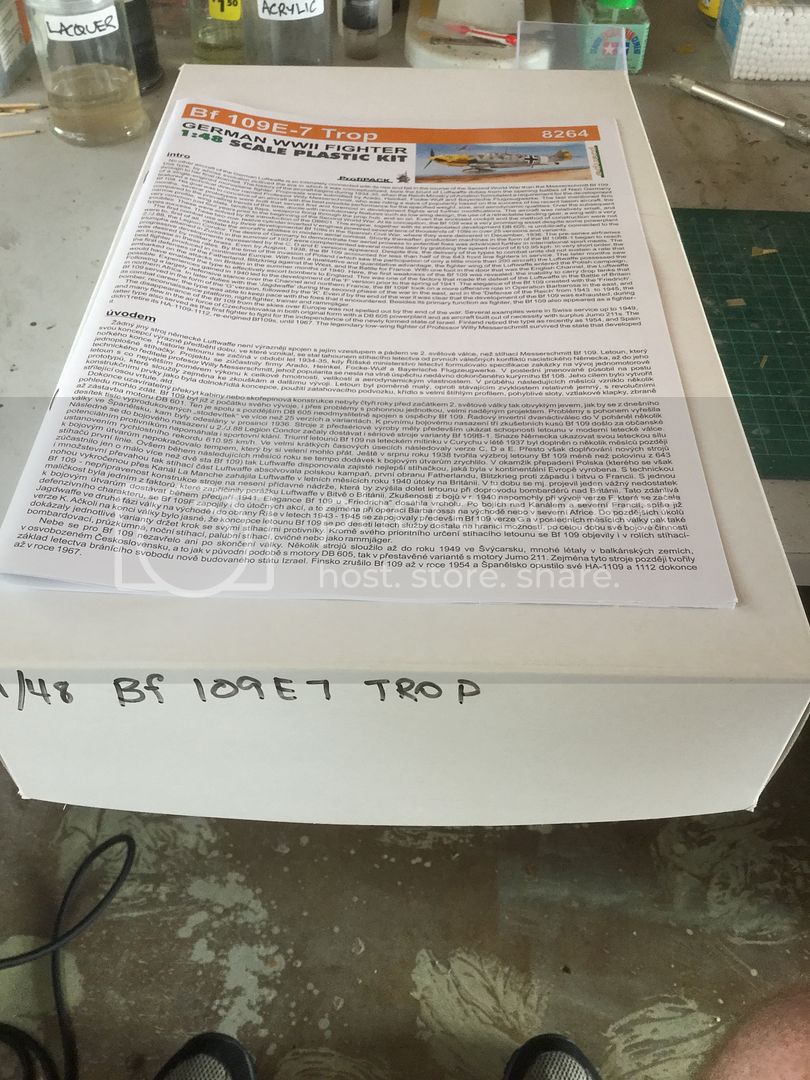
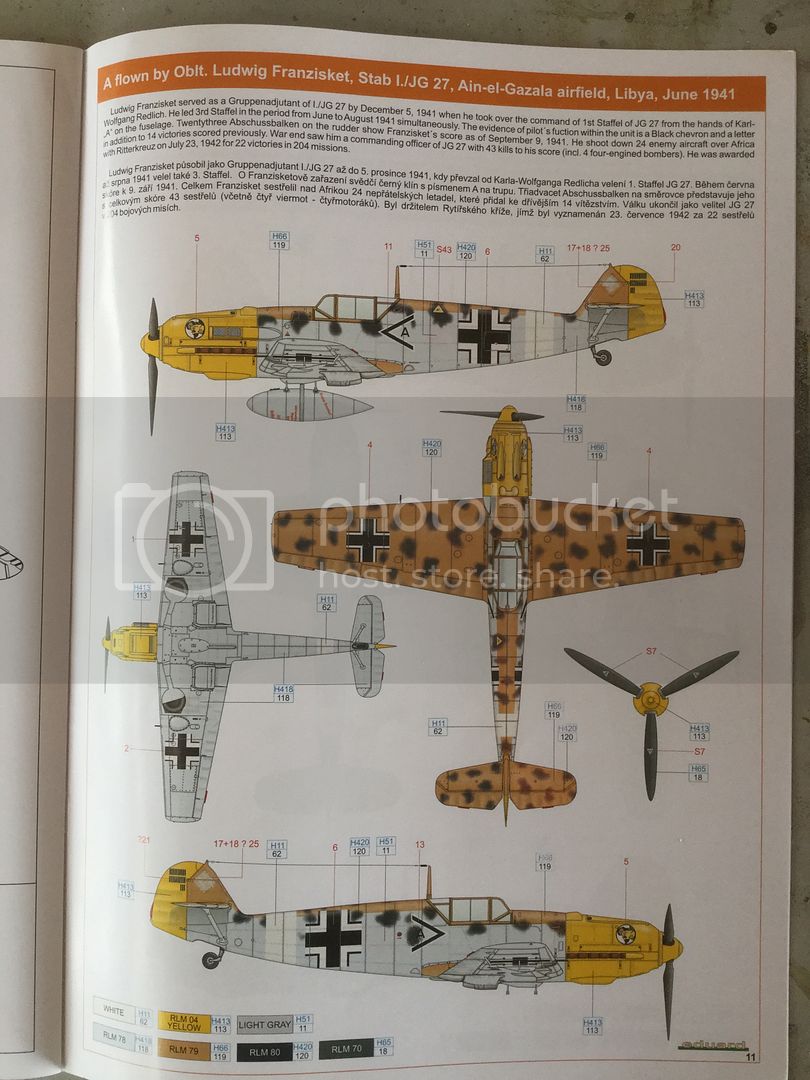
So I went to the stash and dug the instructions, decals and mask out of my Profipack kit and decided upon this scheme:


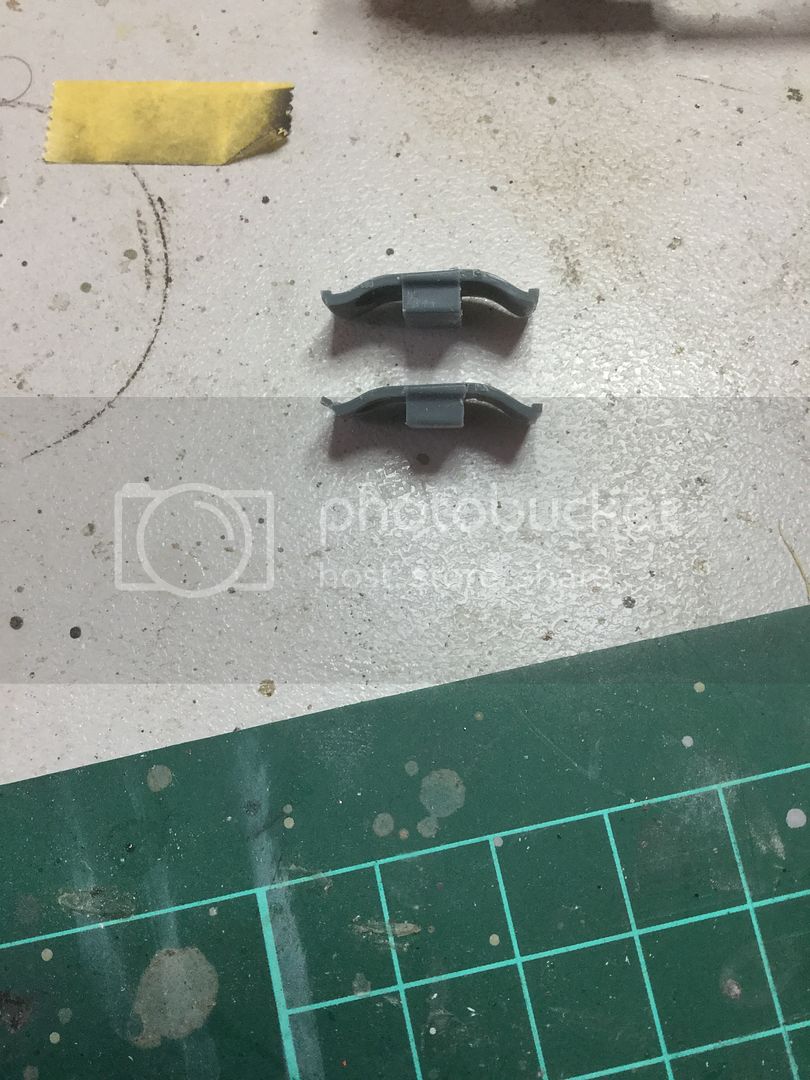
Here is the sprue shot:


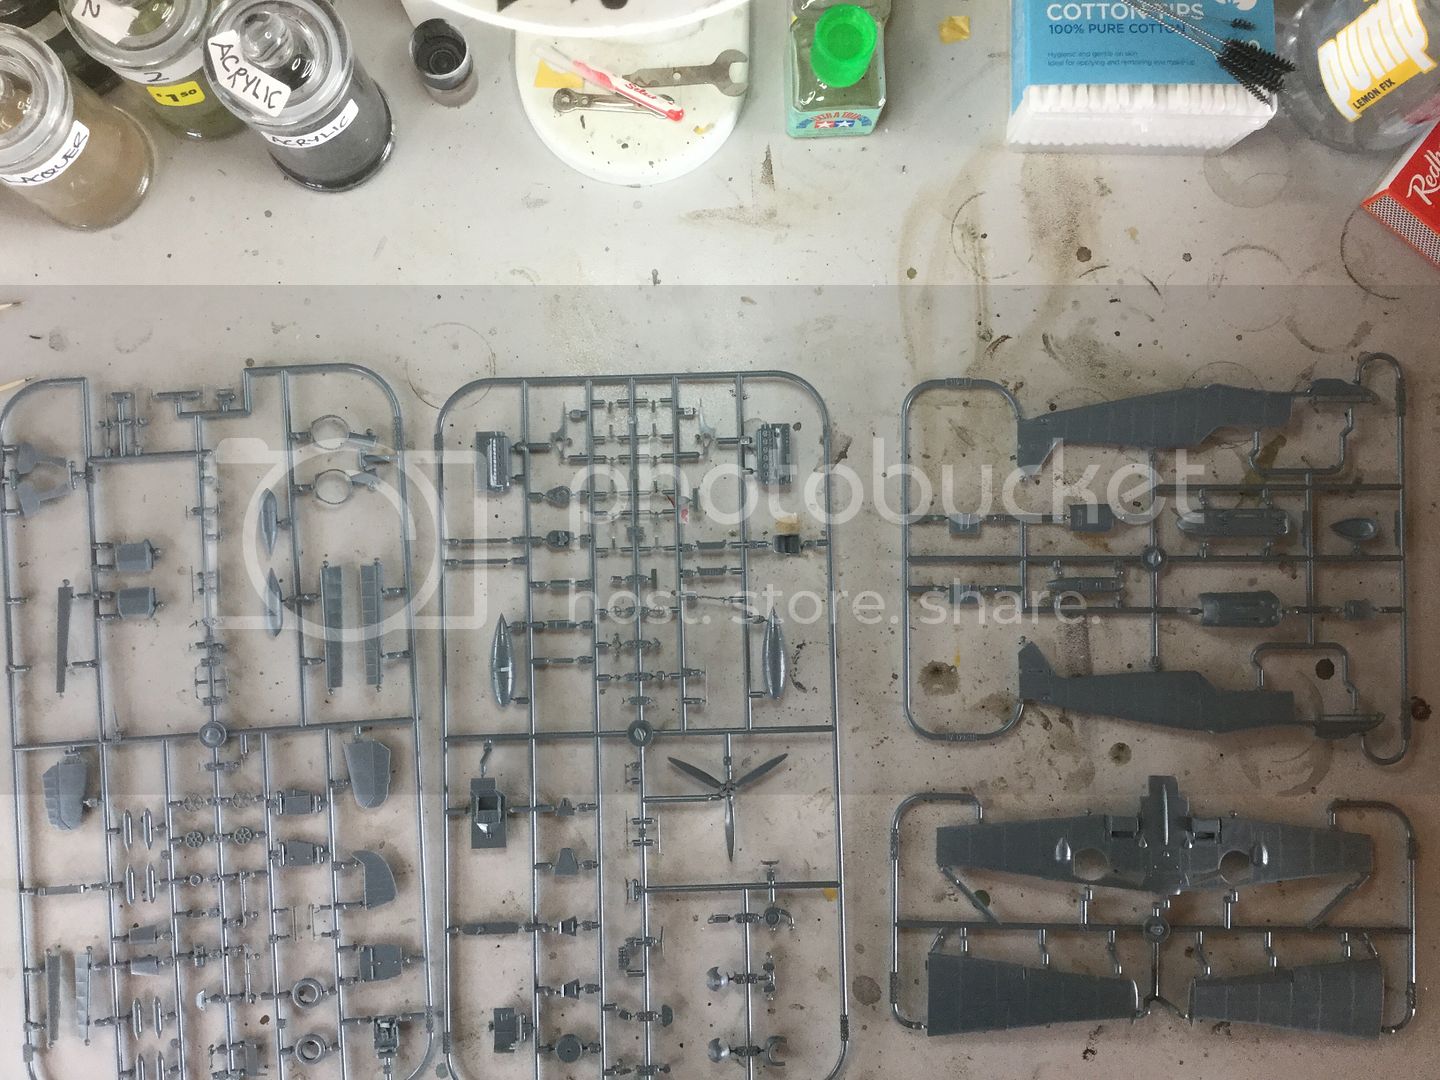
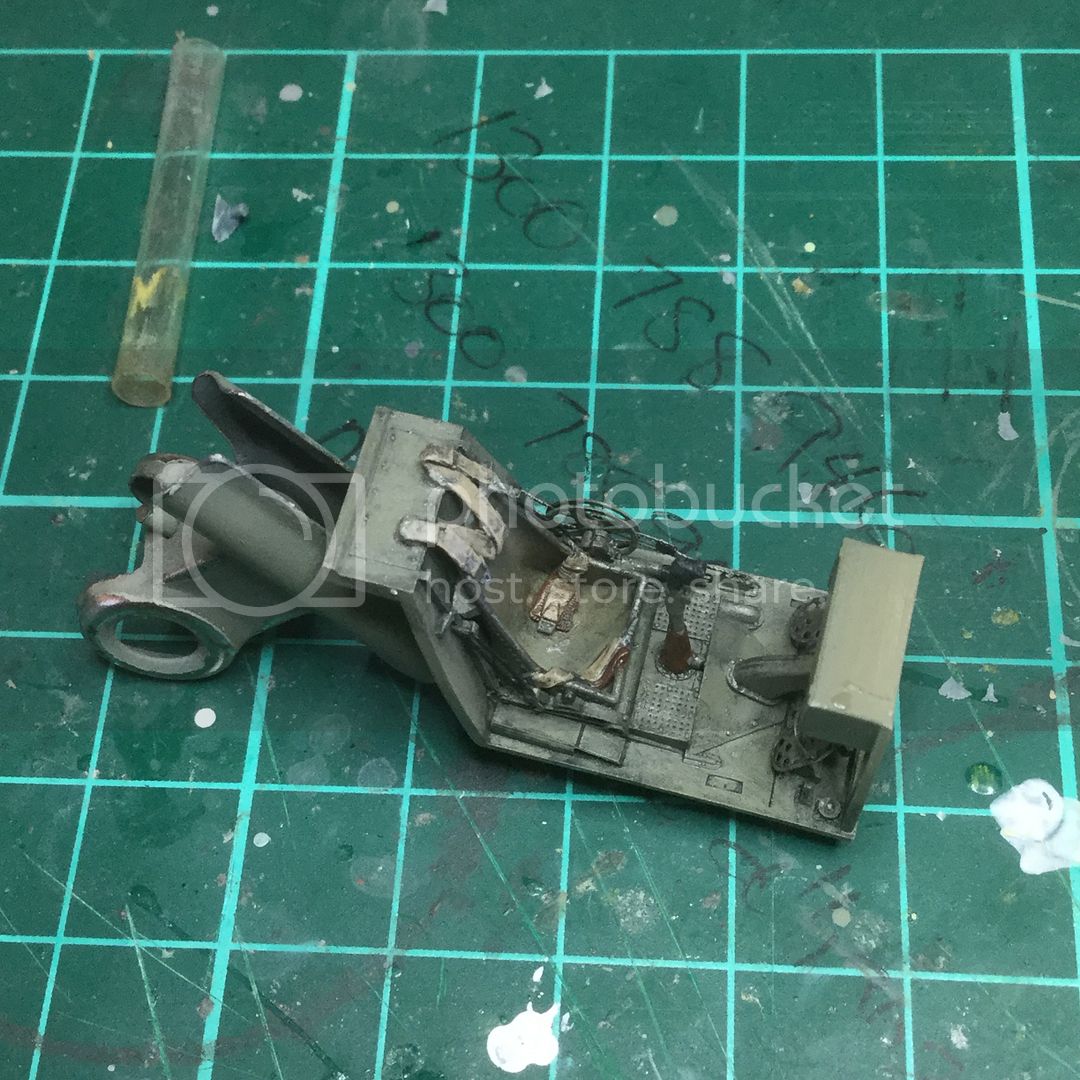
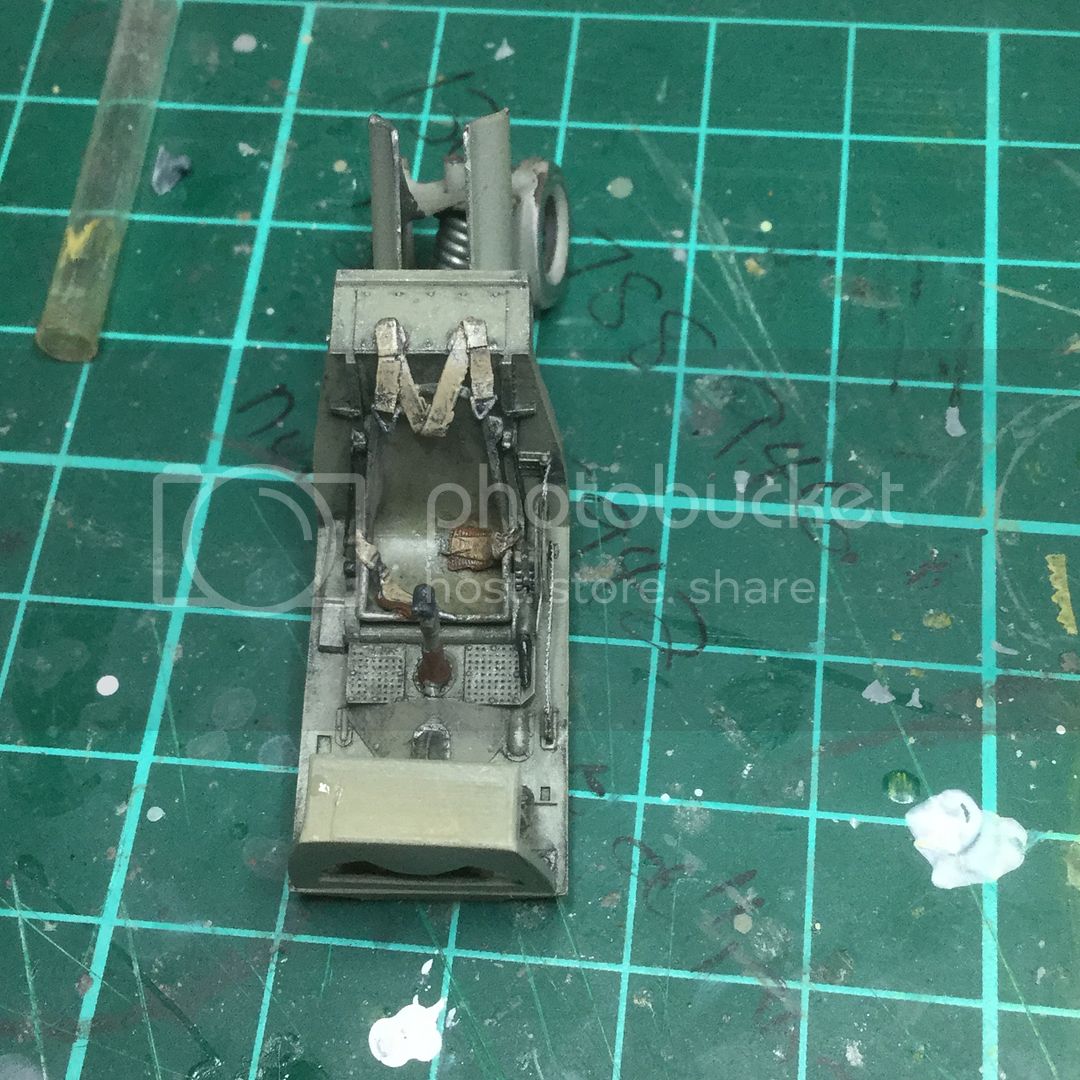
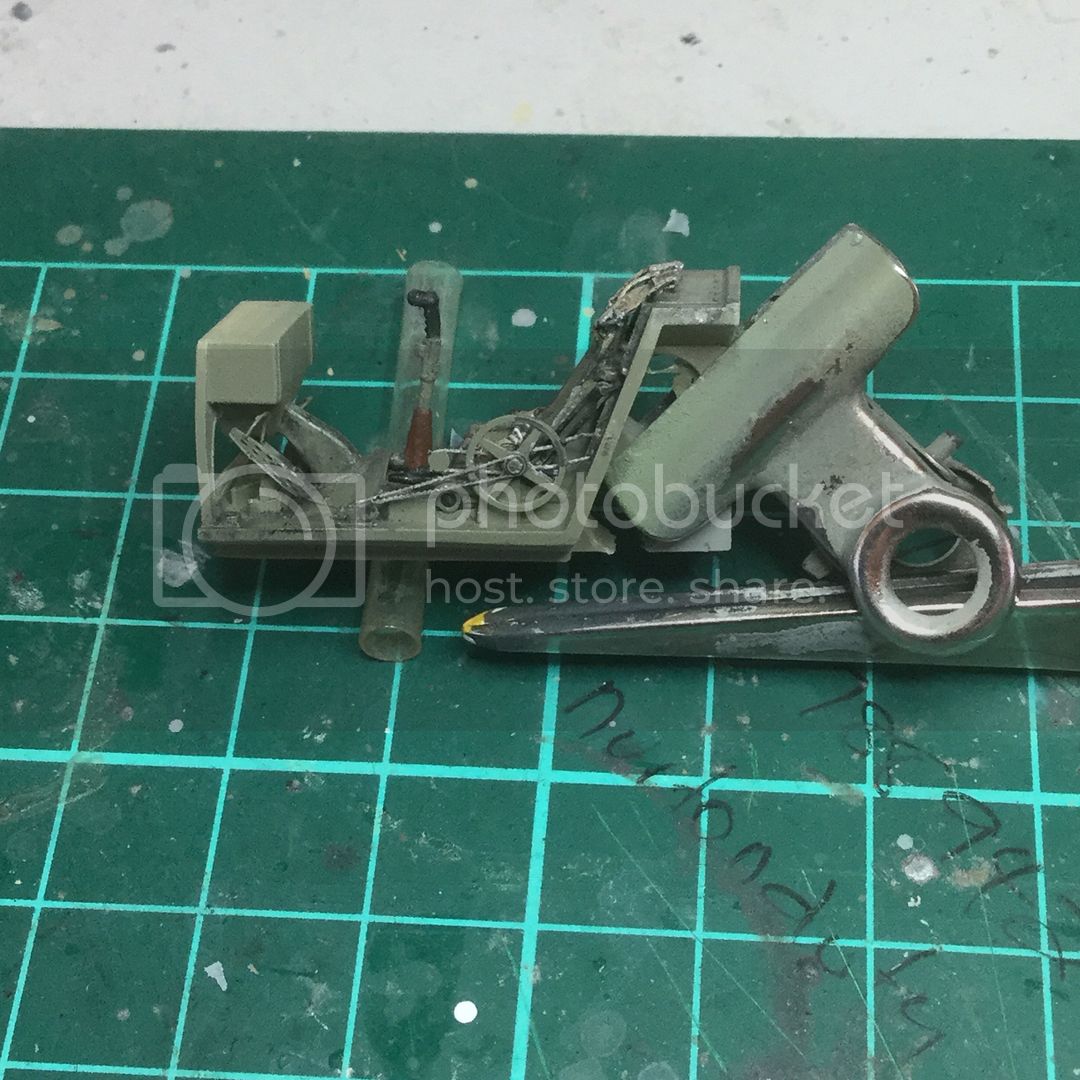
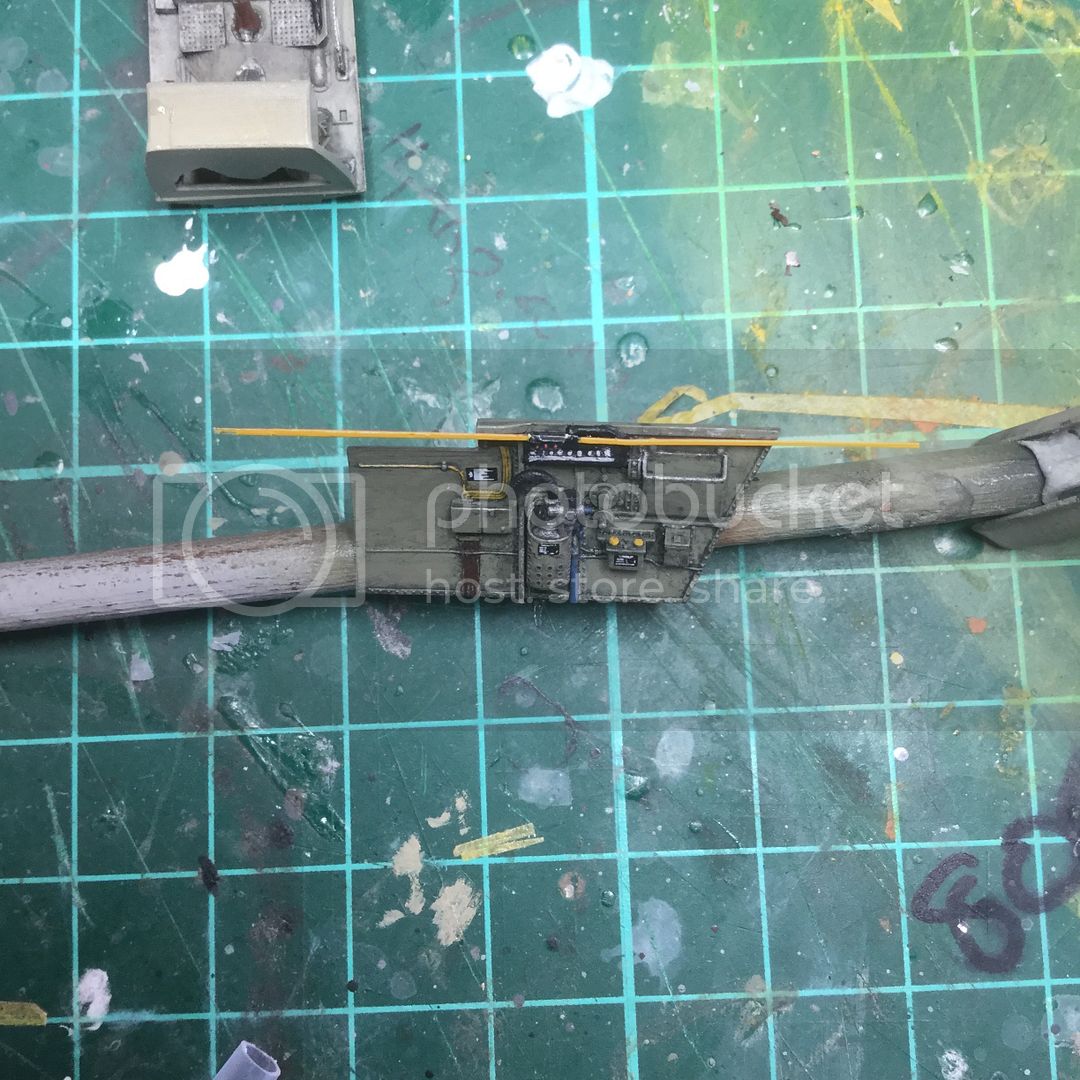
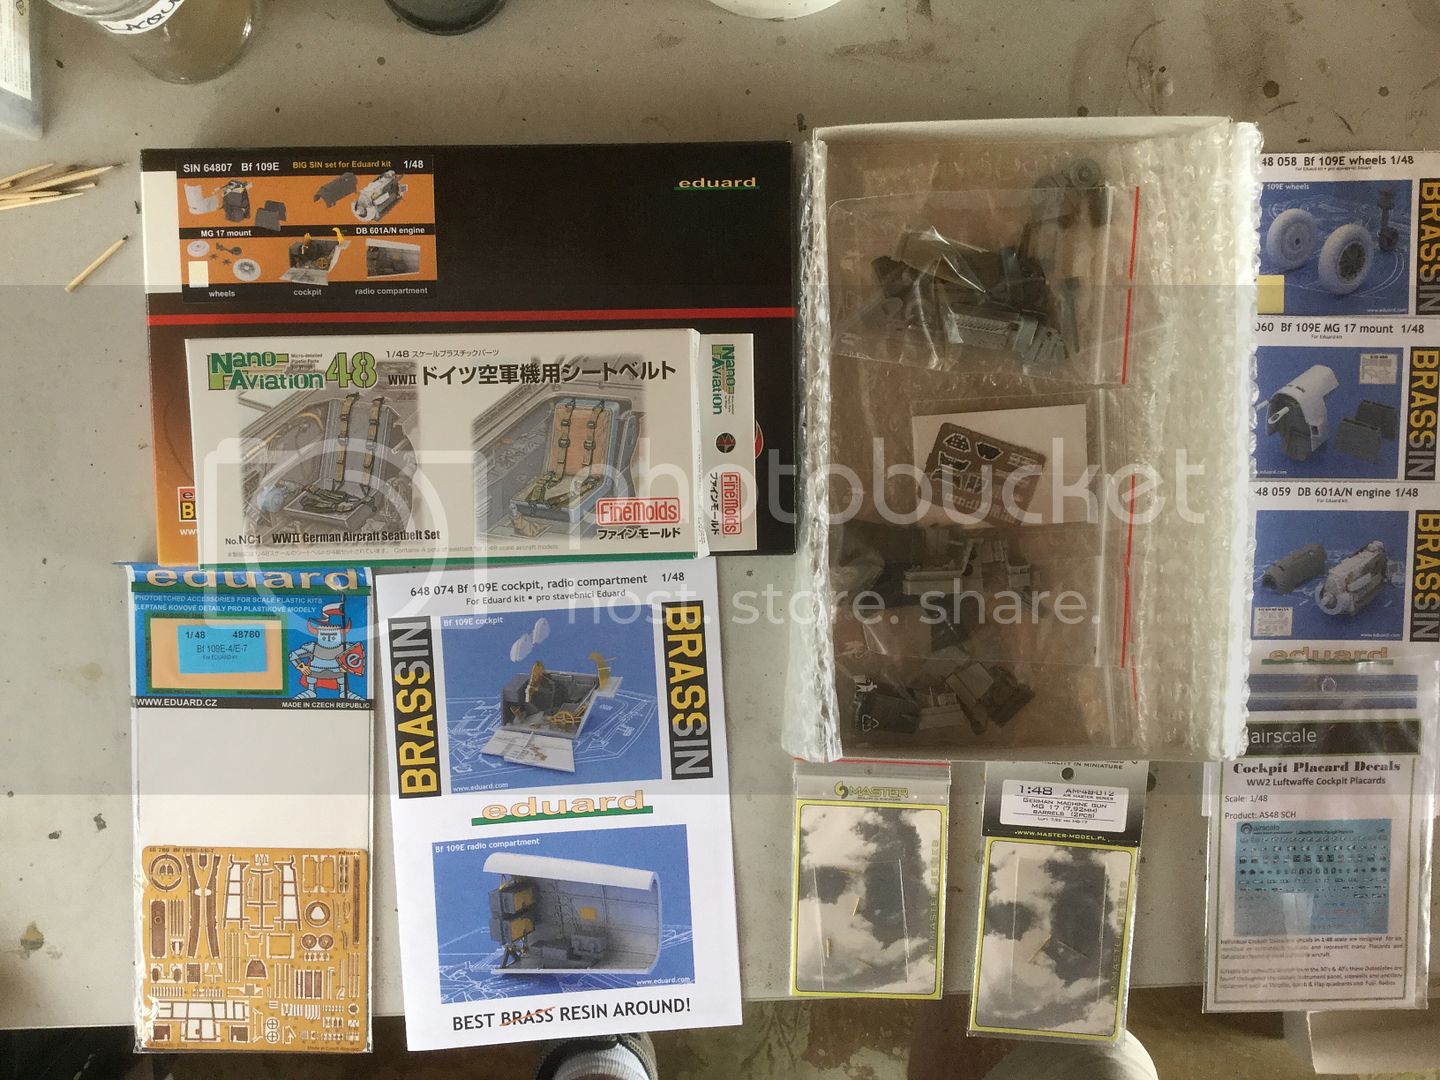
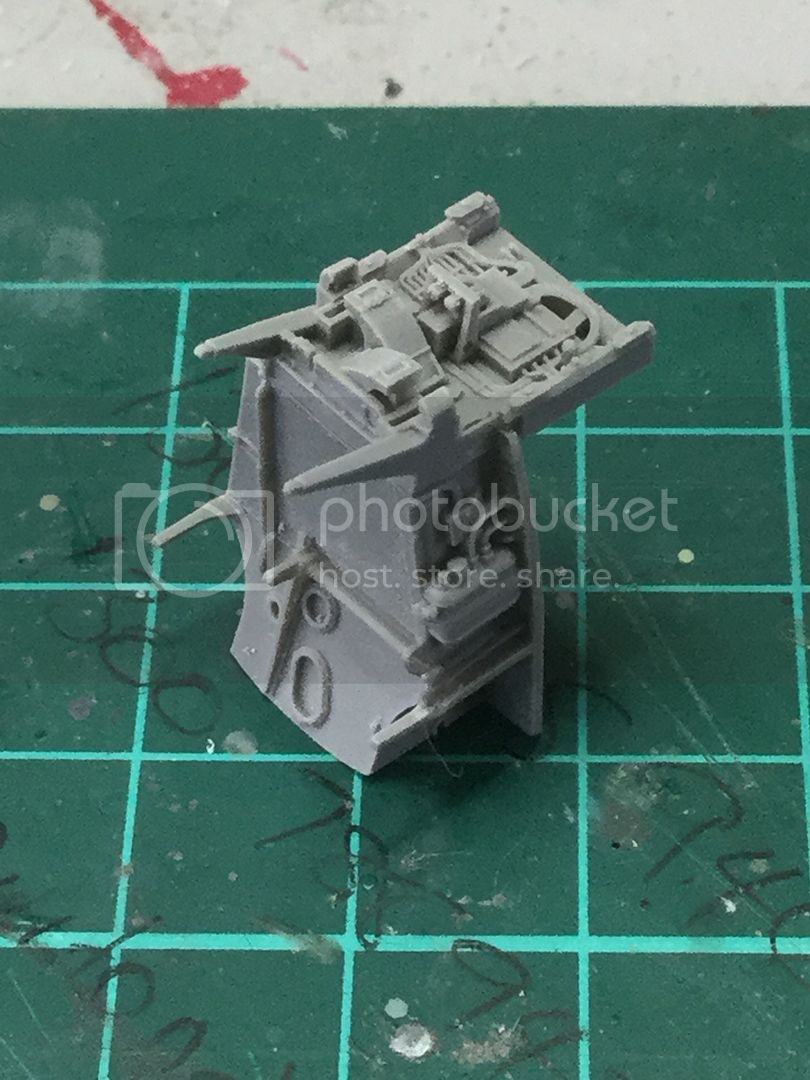
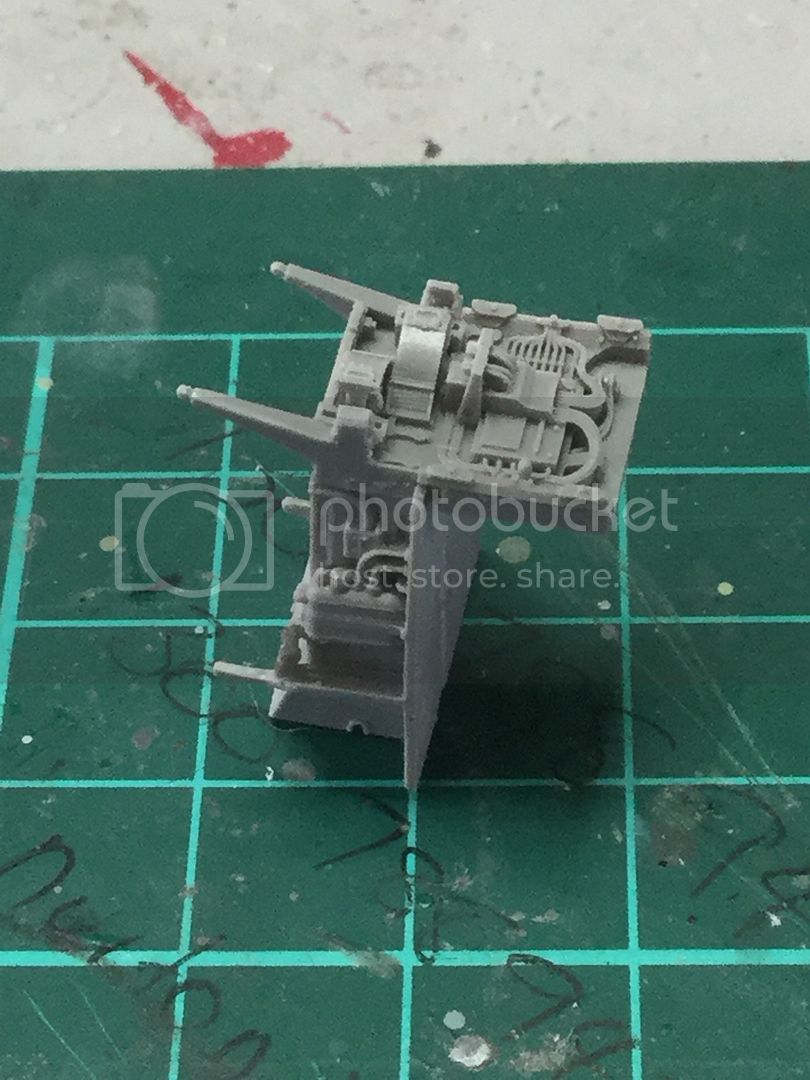
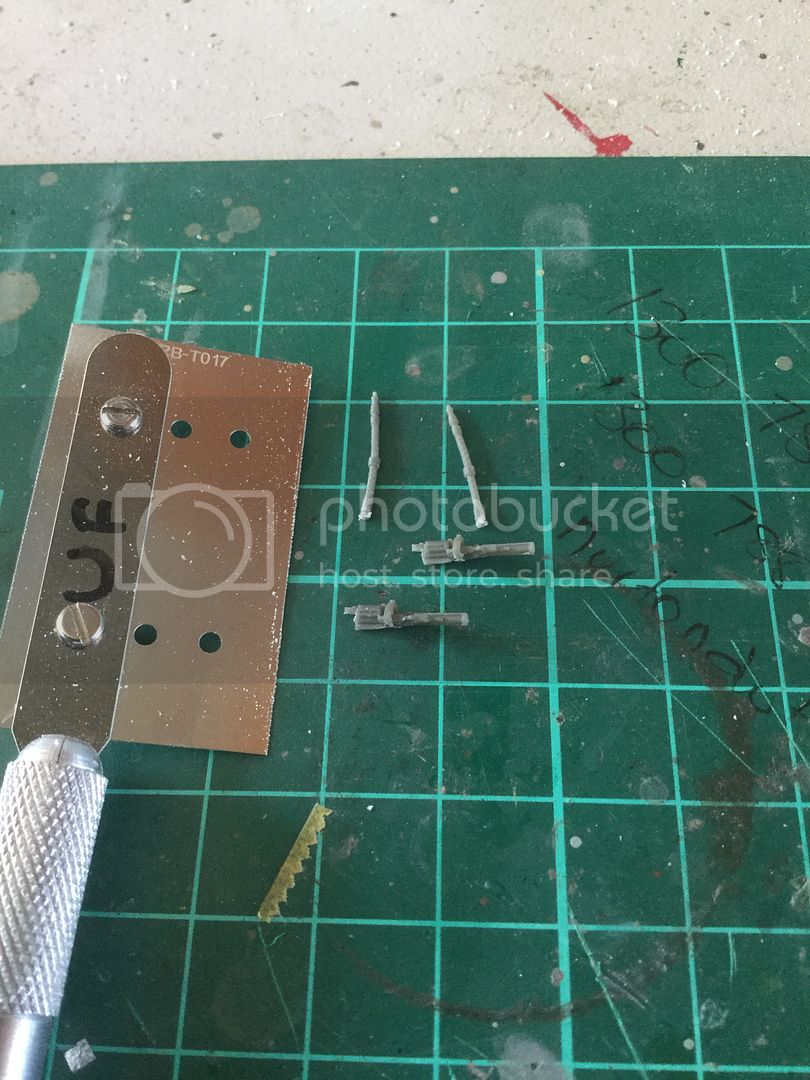
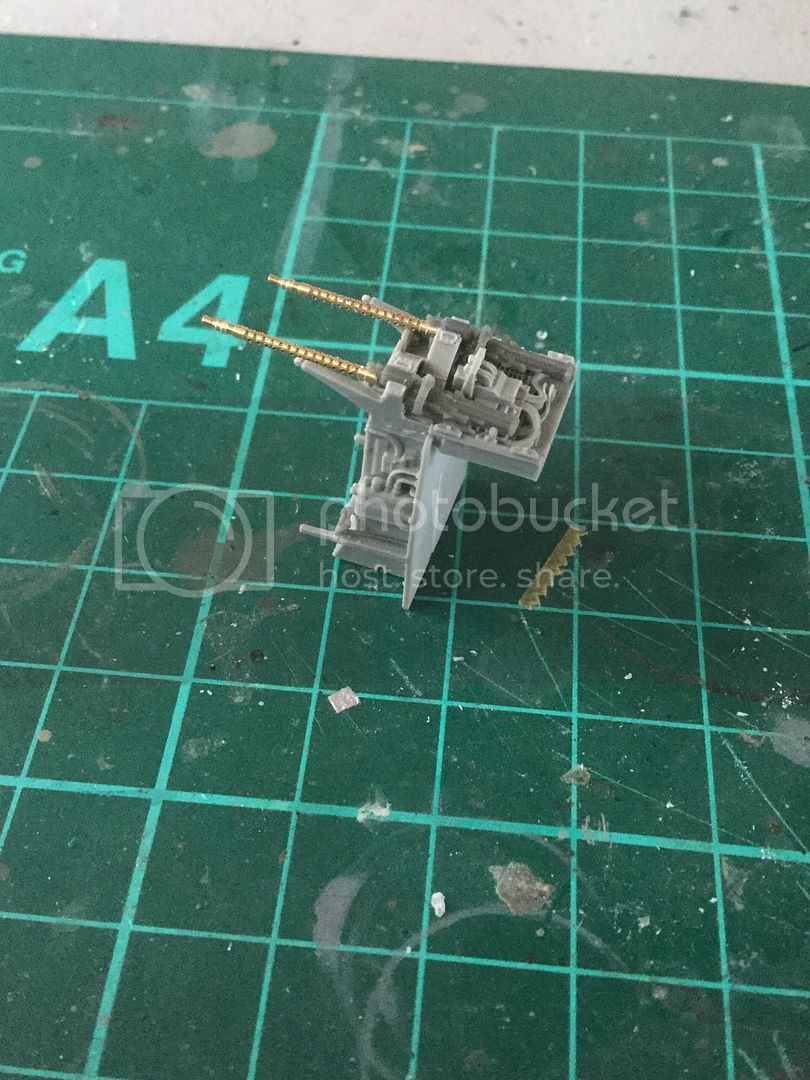
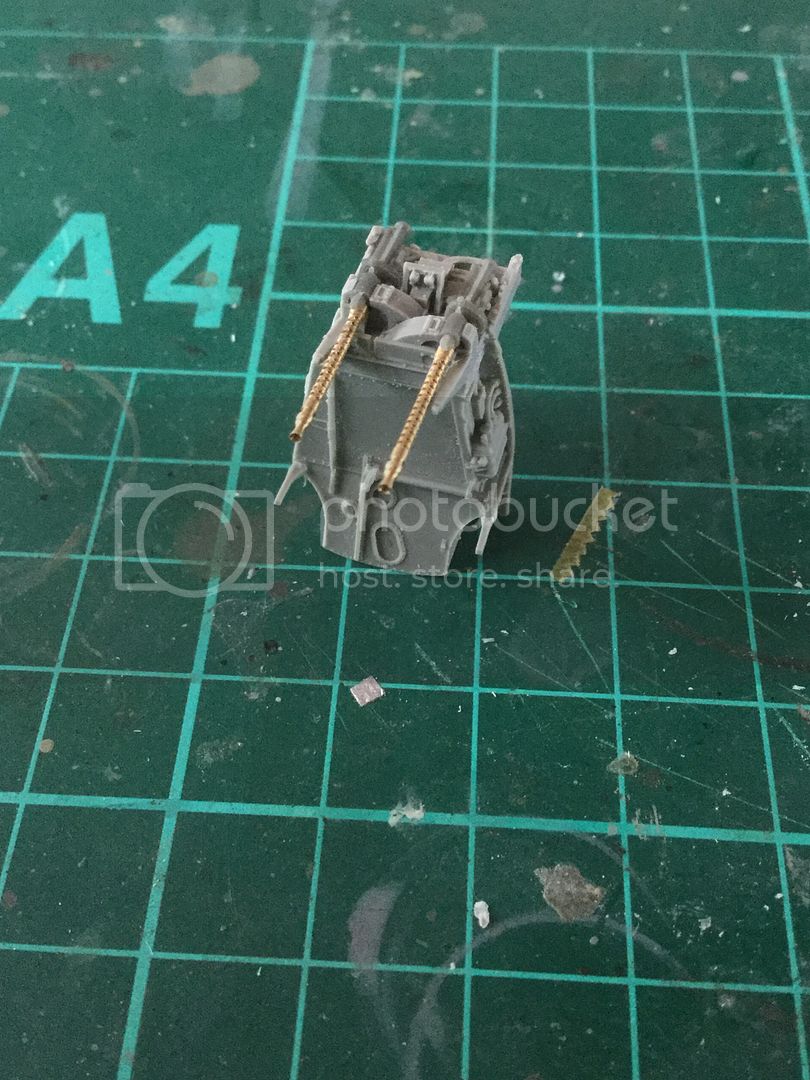
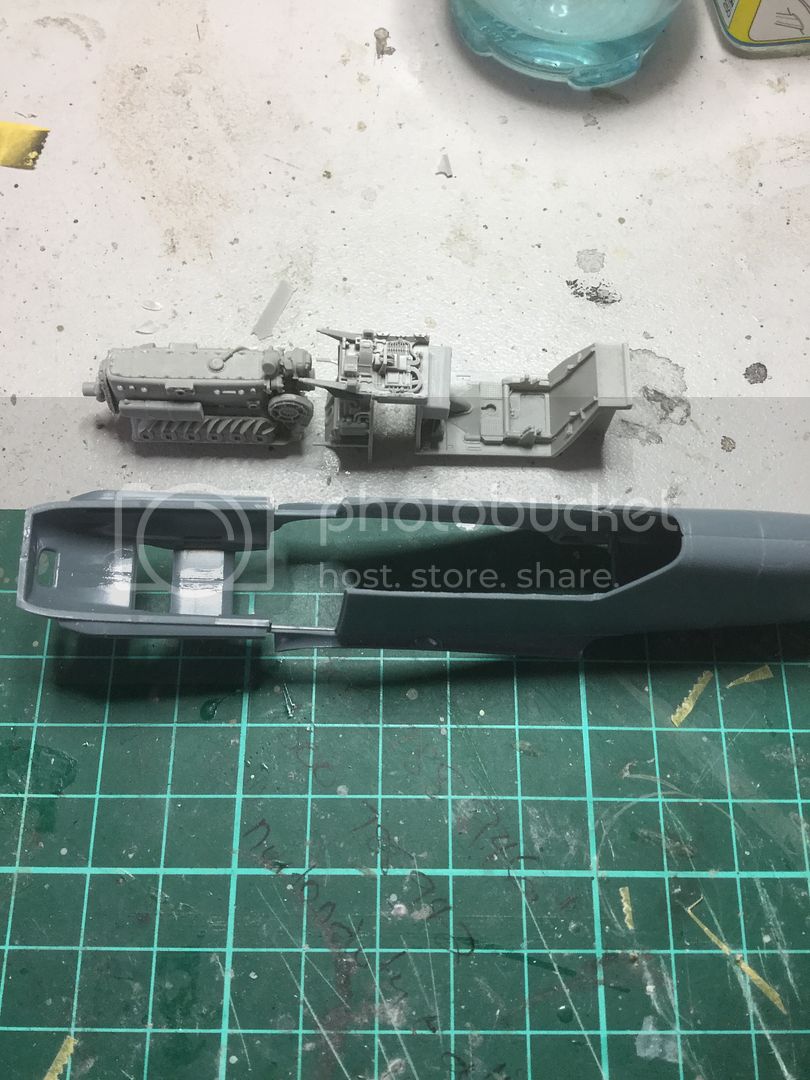
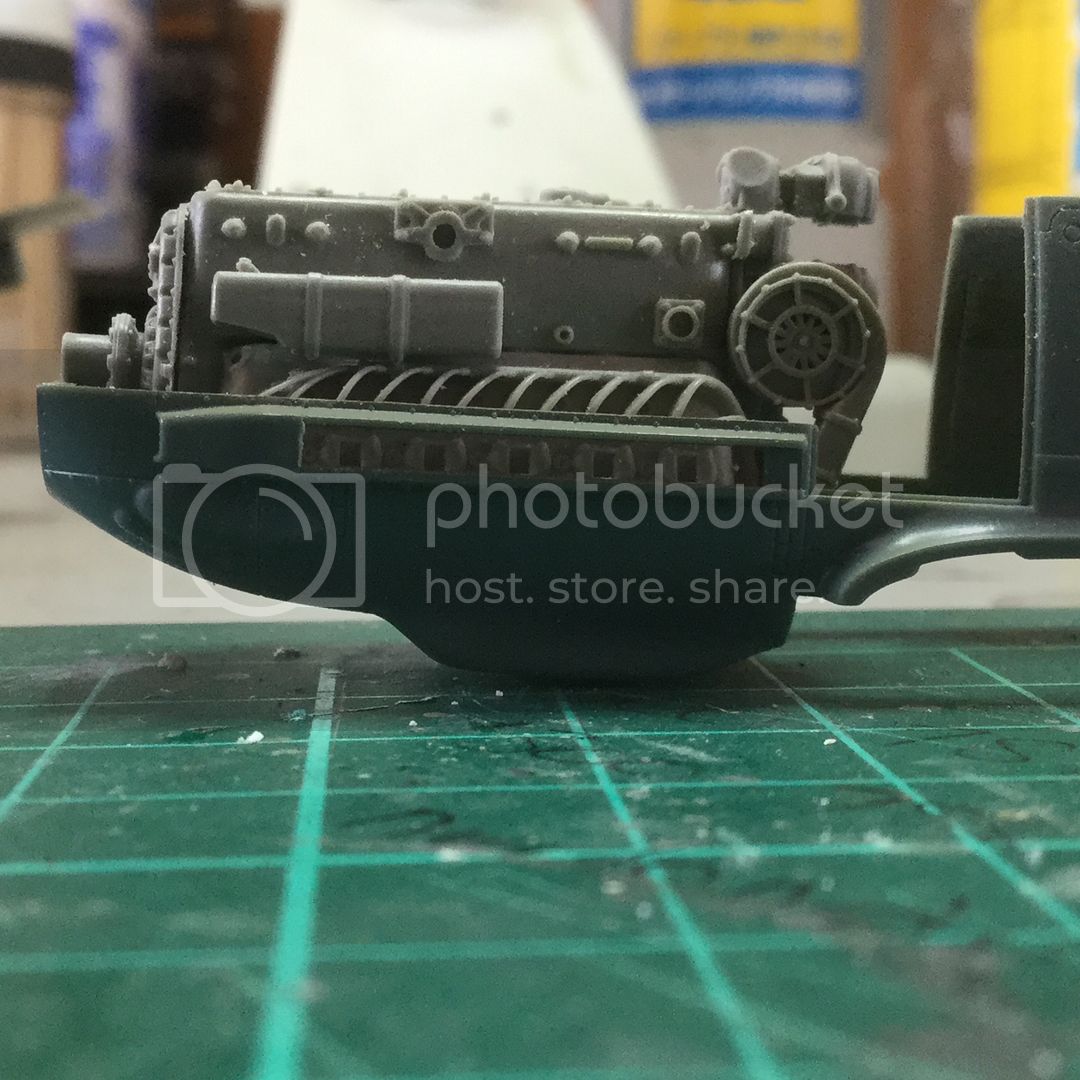
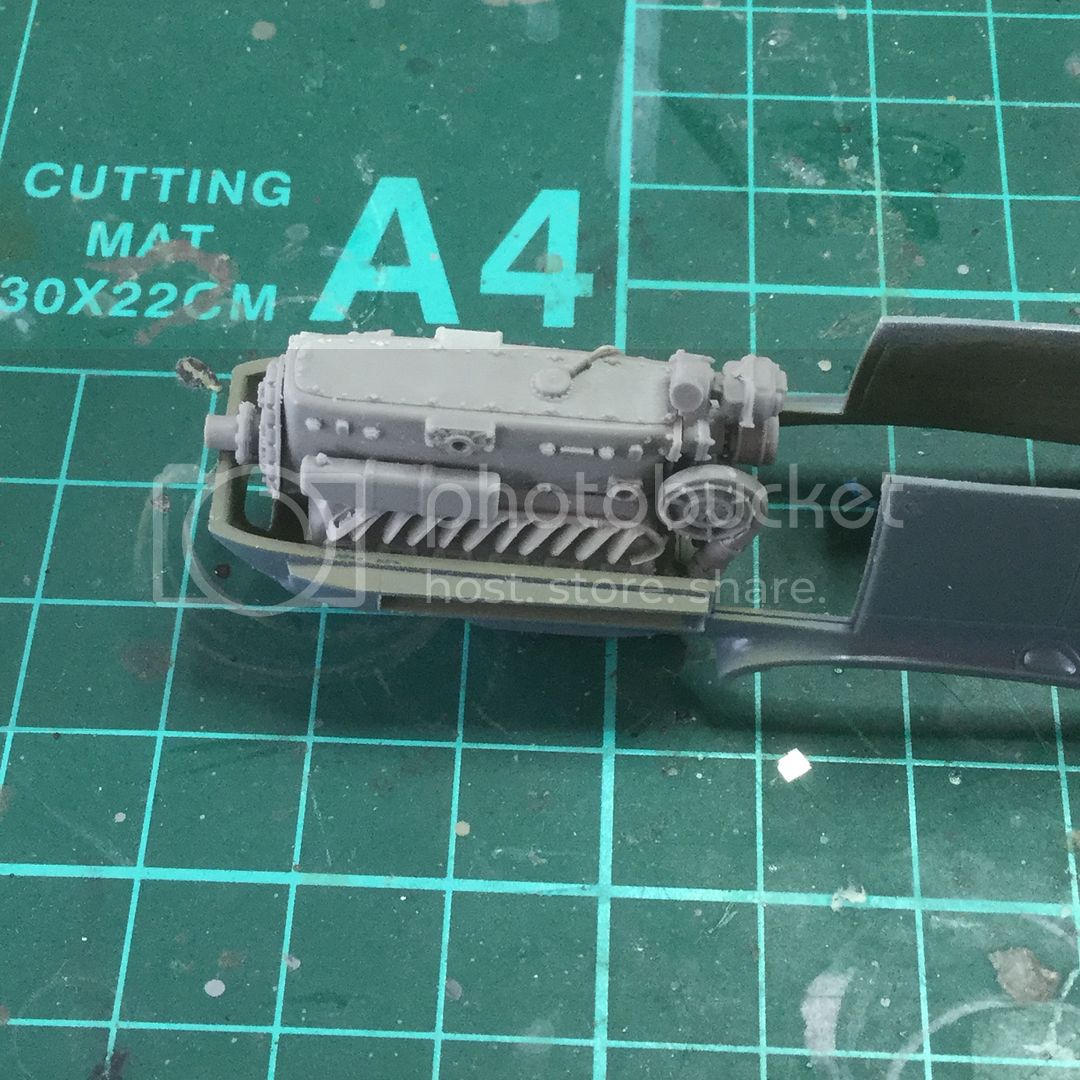
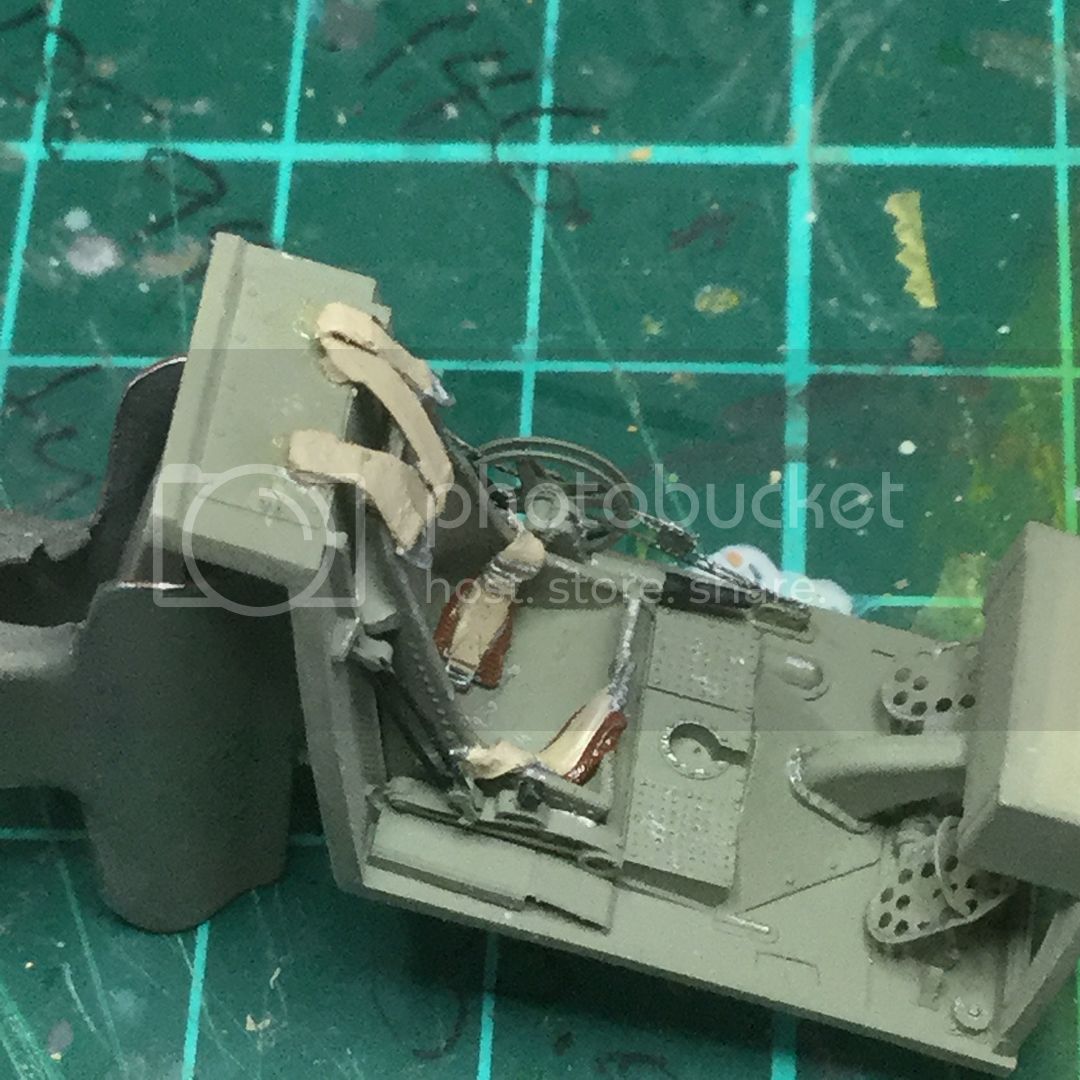
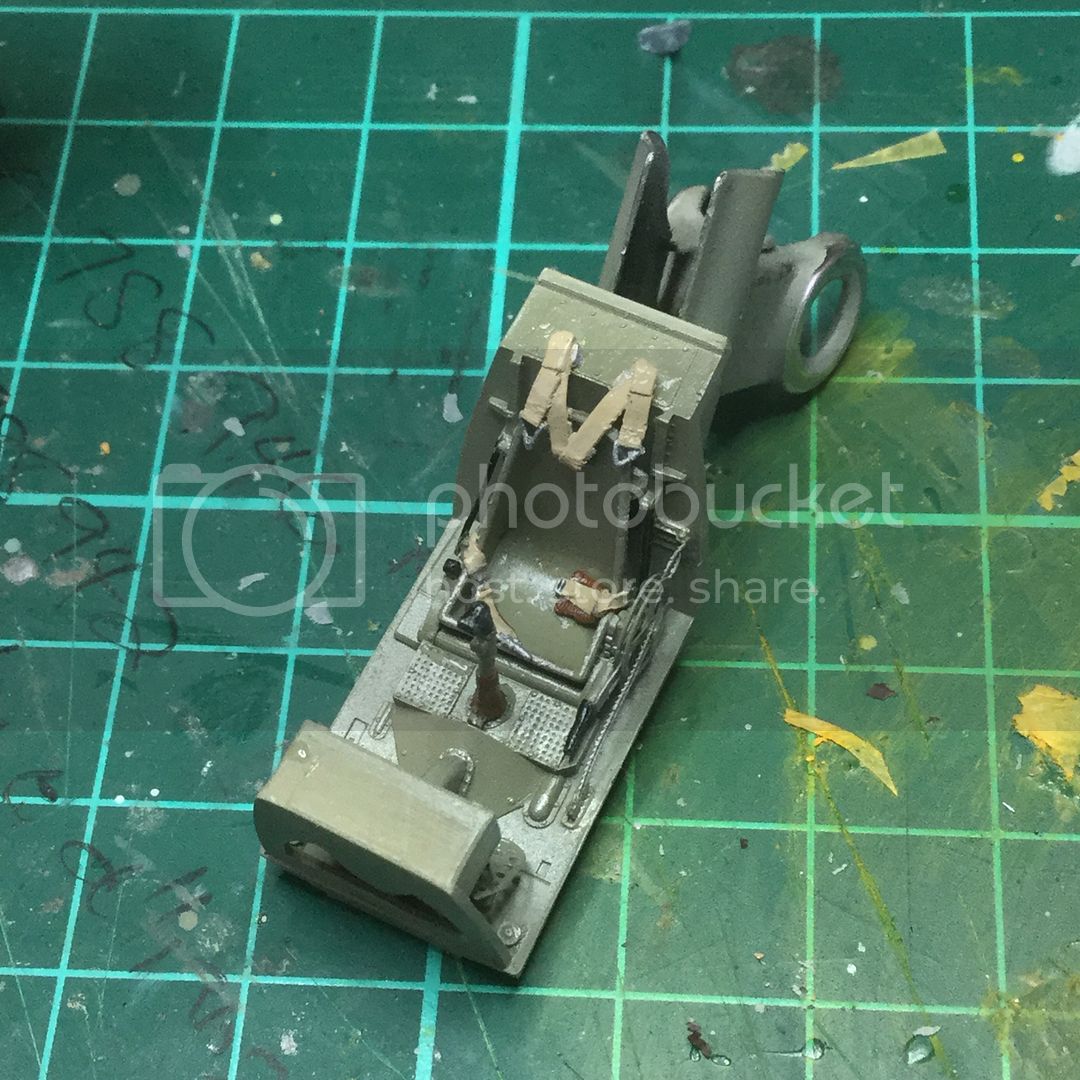
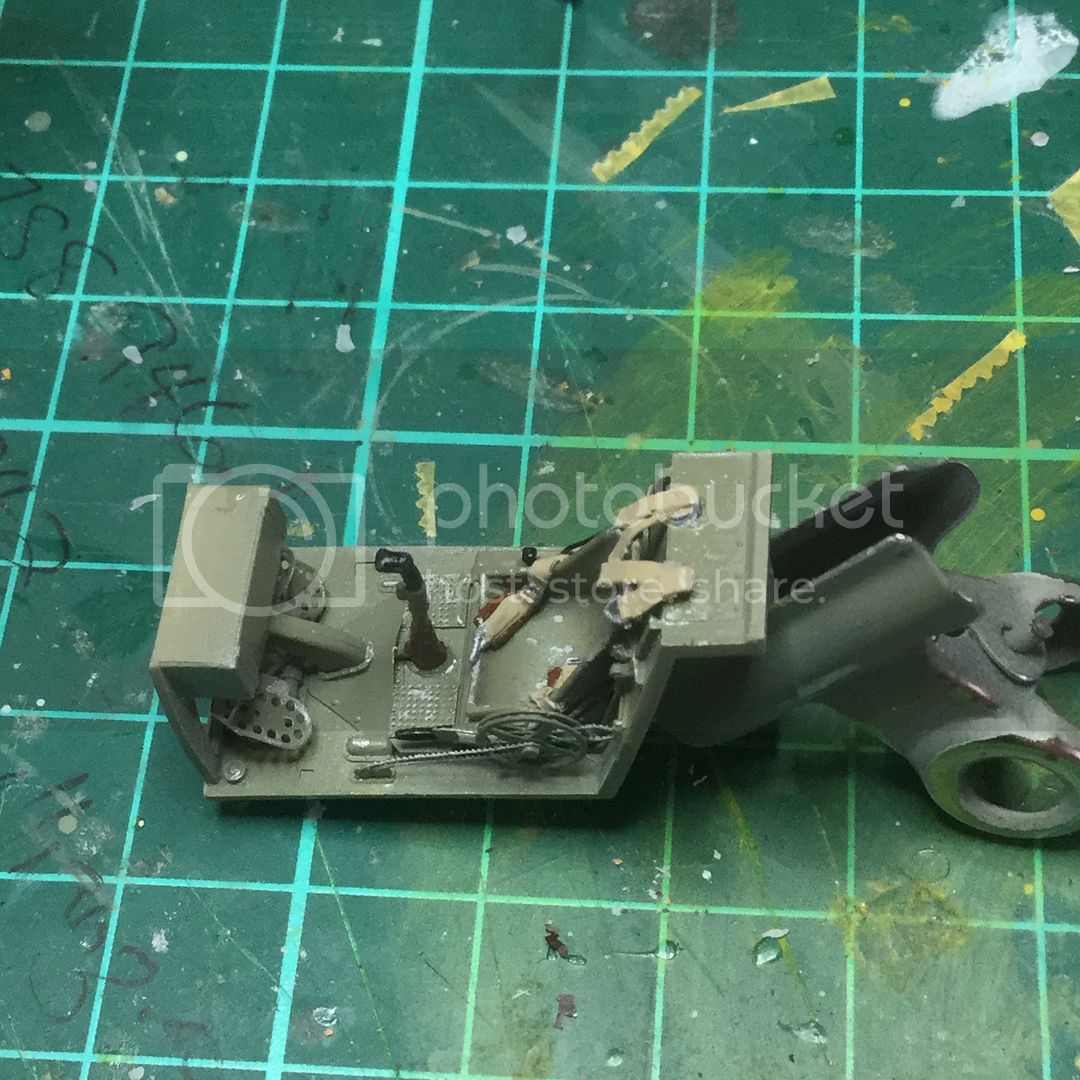
Very basic and probably stress free. But I ask where is the fun there? So I also dragged out the Bf 109E "Bigsin" box which contains almost absolutely everything in resin you could want to add to a basic build: cockpit, engine and radio, guns and wheels! Now we are talking! Throw in some extra Eduard PE, Master Barrels MG 17 and MGFF Barrels, Airscale LW cockpit placards and a set of Finemolds "Nano aviation" German aircraft seatbelts and we have a staggering amount of AM to test our mettle and frustration levels:


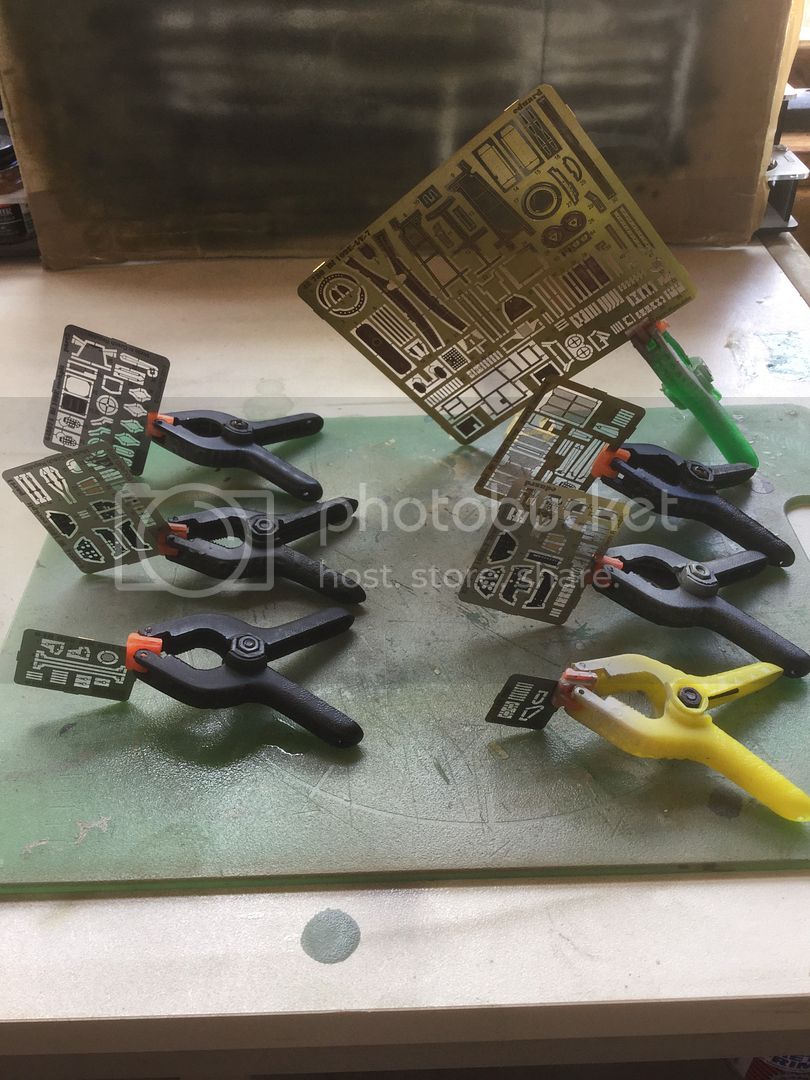
Let the games begin! I started by getting all the PE frets out and coating them with Tamiya Metal primer. I do this now so it is done and I don't forget a fret later on:


Regards,
kahunaminor
_VISITCOMMUNITY
New South Wales, Australia
Joined: April 06, 2008
KitMaker: 151 posts
AeroScale: 141 posts
Posted: Sunday, October 09, 2016 - 08:18 AM UTC
The build has seen me start at the most logical sequence....the Brassin MG 17 mounts:


Each piece was removed from the pour stub using one of my RB saws. It may not be as quick as some methods, but tried and true gets me there eventually. After about 30 minutes of sawing and cleaning, the three main pieces looked like this:


....and that is main construction complete. The MG 17 Barrels had suffered badly from warpage but they were to be removed to make way for the Master Barrel set anyway. Using my RB ultra fine saw, I first cut down the barrel to retain some detail, then a few swipes and the barrel was removed. It's important on these fine pieces to let the saw teeth do the work and don't be tempted to press hard or force the saw:


Almost ready to paint. The collars half way down the barrels will be removed,drilled and the Master Barrels passed through as they form part of the mounting points with some extra PE. Brass plus resin equals bliss. I have managed to graft the Master Barrels MG 17 Barrels onto the Eduard receivers. Not without a certain amount of trepidation and graduated drilling. The resin fore end covers, which butt against the cowling openings are solid and took almost an hour of drilling, checking, dropping, searching, finding, repeat until I was able to pass the barrels through them! I have secured them in a box, inside a vault until I need them later. The idea of drilling through the mounting brackets half way along the Barrels went pffft....I will use some BMF and the supplied PE:


I have also cracked open the engine baggies and done some basic prep work on the DB 601. I have also actually removed both sides of the fuselage from their sprues so I can test fit all these resin components.

Regards,
kahunaminor
_VISITCOMMUNITY
New South Wales, Australia
Joined: April 06, 2008
KitMaker: 151 posts
AeroScale: 141 posts
Posted: Sunday, October 09, 2016 - 08:23 AM UTC
Preparation continues as I have cleaned up the main resin components for the engine and cockpit so I cold get an idea how they fit into the fuselage:


I like Eduard kits. Apart from a few clangers, they generally have a level of detail that exceeds most other 1/48 offerings. However some of their engineering decisions occasionally leave me bemused. Such is the oil cooler of their Bf 109 series, both 1/32 and 1/48 scale. To be fair, building an aircraft fuselage had always followed a set pattern, i.e. both fuselage halves are molded in their entirety from front to rear and join at the top and bottom. Fair enough, except if the aircraft being built did not have seams at the top and bottom. Now the Bf 109 is a mixture, seams at the top and bottom of the rear fuselage and mainly one piece bits at the front end, particularly the oil cooler. I am sure the engineering carried over from their 1/32 series of aircraft and the oil cooler is just not quite up to standard. As previously mentioned, I have joined the front ends of the fuselage, leaving me with this:


By no means an insurmountable task to rectify the seam. However, it is when you add the interior parts of the oil cooler that it all goes a bit pear shaped. The four part styrene, two part PE oil cooler is a module that in theory just drops into the oil cooler fairing. However it isn't always as easy. I have not added all the styrene nor PE but in test fitting you get this:


From experience on the bigger scale, the rear end will be fine, however the front step is a definite flaw. The join from fuselage to oil cooler ramp should be an almost seamless one, not the gappy step here. Some modifications to the kit part were necessary. I removed some material from the centre section to lower the profile a tad from the front end to make it shallower:


This leave me with this result, which is much closer to seamless or at least easier to rectify:


I have also chamfered the mating joints to about 45 degrees of the rear fuselage area to preserve the longitudinal seams. It may be a little stark at the moment but it should look good when cemented, primed and painted:


I can report that Eduard have rectified the issue in both their 109G and 109F kits as the oil cooler assembly housing is now a single piece that drops in from below.

Regards,
kahunaminor
_VISITCOMMUNITY
New South Wales, Australia
Joined: April 06, 2008
KitMaker: 151 posts
AeroScale: 141 posts
Posted: Sunday, October 09, 2016 - 08:29 AM UTC
Welcome back,

The last two weeks have been school holidays, so entertaining (and being entertained by) the kids meant not much time at the bench. I did install the oil cooler, leaving off the horizontal splitter plate, and associated PE. My thoughts were that the splitter plate was probably removed upon arrival to get the maximum air flow in the hot conditions. They were mostly gone by late 1941 anyway. The final fit was quite good and only a thin smear of PPP to seal the join:


The front of the engine compartment has been marked in Sharpie in preparation for its removal at a later date:


Test fitting the engine, it sits well on the top of the oil cooler assembly. I am happy thus far with the exhaust alignment on both sides:


Whilst I had the AB loaded with Aeromaster RLM 02, I gave some of the other assemblies their base coats:


Hopefully a few more updates through the week.

Regards,
.
GazzaS
#424
_VISITCOMMUNITY
Queensland, Australia
Joined: April 23, 2015
KitMaker: 4,648 posts
AeroScale: 1,938 posts
Posted: Sunday, October 09, 2016 - 02:24 PM UTC
Kent,
Glad to see you working on this! Nice stuff so far, though I'm amazed at the amount of PE you have.

Gaz
BlackWidow
_VISITCOMMUNITY
European Union
Joined: August 09, 2009
KitMaker: 1,732 posts
AeroScale: 1,336 posts
Posted: Tuesday, October 11, 2016 - 12:44 AM UTC
Nice choice, Kent! I've built this aircraft a few years ago out of the Tamiya kit.
Ludwig Franzisket was quite famous within JG 27 and its last CO. If you scroll down this page of my Assembly Line Thread, you'll get some more informations about him incl. a nice photo. Have a look if you like.

Torsten
kahunaminor
_VISITCOMMUNITY
New South Wales, Australia
Joined: April 06, 2008
KitMaker: 151 posts
AeroScale: 141 posts
Posted: Tuesday, October 11, 2016 - 01:32 AM UTC

Quoted Text

Nice choice, Kent! I've built this aircraft a few years ago out of the Tamiya kit.
Ludwig Franzisket was quite famous within JG 27 and its last CO. If you scroll down this page of my Assembly Line Thread, you'll get some more informations about him incl. a nice photo. Have a look if you like.

Torsten


Thanks Torsten,

I shall do just that!

Regards,
kahunaminor
_VISITCOMMUNITY
New South Wales, Australia
Joined: April 06, 2008
KitMaker: 151 posts
AeroScale: 141 posts
Posted: Tuesday, October 11, 2016 - 06:17 AM UTC
Ever had this moments when you are just too damn clever for your own good? Cementing the forward sections of the fuselage meant that installing the radio insert in the back was more difficult. Not impossible, but just more trouble than I was prepared to give it. So the fuselage is now joined, with the Brassin rear wheel safely trapped between:


Added some PE to the cockpit area and fixed a small gap in the rear of the oil cooler insert where it meets the lower wing insert:


The excess styrene will be cut away and a more scale panel line will be scribed across the filled plastic.

Regards,
GazzaS
#424
_VISITCOMMUNITY
Queensland, Australia
Joined: April 23, 2015
KitMaker: 4,648 posts
AeroScale: 1,938 posts
Posted: Tuesday, October 11, 2016 - 09:38 AM UTC
Nice surface detail on this kit.
rochaped
_VISITCOMMUNITY
Lisboa, Portugal
Joined: August 27, 2010
KitMaker: 679 posts
AeroScale: 669 posts
Posted: Tuesday, October 11, 2016 - 03:31 PM UTC
Nice start.
Never made the E version of Eduard's 109 but it seems up to their usual standards.
Bit of advice, if posssible check and see if the plane you're making lacked the horizontal protection(or whatever that was called ) that most late version Emils had in their lower engine cooler. Otherwise it's a simple affair to added it.

Cheers
Pedro
kahunaminor
_VISITCOMMUNITY
New South Wales, Australia
Joined: April 06, 2008
KitMaker: 151 posts
AeroScale: 141 posts
Posted: Wednesday, October 12, 2016 - 01:58 AM UTC

Quoted Text

Nice start.
Never made the E version of Eduard's 109 but it seems up to their usual standards.
Bit of advice, if posssible check and see if the plane you're making lacked the horizontal protection(or whatever that was called ) that most late version Emils had in their lower engine cooler. Otherwise it's a simple affair to added it.

Cheers
Pedro


Thanks Pedro,

It is a very nice kit, despite some small pitfalls. The oil cooler splitter plate in the E was discontinued in late 1941 and in practice often removed in the field during maintenance. A safe bet in the MTO I think.

Regards,
kahunaminor
_VISITCOMMUNITY
New South Wales, Australia
Joined: April 06, 2008
KitMaker: 151 posts
AeroScale: 141 posts
Posted: Wednesday, October 19, 2016 - 10:42 AM UTC
Welcome back,
The last couple of weeks have been a bit of a mish mash. I have done a lot of little things but not much to show for it. I started on the MLG bays, cementing the kit pieces into the upper wing section and adding the PE. The PE instructions are a little ambiguous as far as the two strengthening strips on the inside. They show to just add the PE over the top of the moulded detail but looking at the cut outs on the wheel bay pieces, this would mean they interfere with the fit. My recommendation would be to sand the moulded detail off, fit the two inserts and then using the cut outs, slide the PE pieces into position and fix them in place. I say this as I didn't do it that way and had to remove the moulded detail after I had cemented the inserts. In the end you get something that should look like this:


The wing uppers have also been fixed in place here. What I have also done, but not yet photographed, is attach all the trailing edge pieces as well. I wanted the flaps level and Eduard has cast them with a downwards angle by default, so I had to remove the tabs from the front and just cement them in place with TXT. Essentially the construction of the wings is complete as I have also painted the MLG bays and radiator inner surfaces RLM 02 as well as the lower wing interior upper surface "just in case":


Regards,
kahunaminor
_VISITCOMMUNITY
New South Wales, Australia
Joined: April 06, 2008
KitMaker: 151 posts
AeroScale: 141 posts
Posted: Sunday, October 23, 2016 - 08:59 AM UTC
Welcome back,

More small progress, I have added the PE mesh pieces and radiator covers after removing the rear flaps of same in preparation of the PE replacements:


I found the rear pieces to be about two rows too tall so they were shortened appropriately. The forward PE mesh fit well:


I have removed the Fine Molds harnesses from their sprues, cleaned them up, test fitted the upper harnesses and attached the lower belts in place using TXT. These now need to be carefully shaped with a heat source and then painted:


I have started detail painting the cockpit sidewalls. The oil cooler innards was masked and undercoated the areas that will eventually be yellow around the nose area and with Tamiya Flat White as well as the theatre recognition strip around fuselage which will be masked as it remains white:


Regards,
simonn
_VISITCOMMUNITY
Australia
Joined: October 15, 2016
KitMaker: 62 posts
AeroScale: 36 posts
Posted: Sunday, October 23, 2016 - 10:08 AM UTC
Kent

You are a braver man than me taking on all those wonderful after market additions.
Watching your build with great interest

Simon
kahunaminor
_VISITCOMMUNITY
New South Wales, Australia
Joined: April 06, 2008
KitMaker: 151 posts
AeroScale: 141 posts
Posted: Thursday, October 27, 2016 - 10:29 AM UTC
Welcome back and thanks for the comments.

I progressed a little, working on the details on the cockpit sidewalls, floor and seat harnesses to apply base colours. Next is gloss coat, washes and some Airscale placards:


I was going to bend them first then paint but I got carried away and now they have their base colours on. I am experimenting on some scrap to get the method down of bending without melting. I may wait until after the gloss coat to provide a little protection. Anyway, the resin sections of the MG17's have been painted. The blued sections need a little touch up in the cooling jackets:


Those previously white sections have had their coats of Aeromaster RLM04 including the PE air filter. The oversized rudder linkage attachment points were also removed and the PE replacements prepped:


I am in a quandary as to the actual construction of the filter under the meshed areas. Eduard have given a solid piece with the two end pieces standing proud and the PE wraps around to form the exterior of three sides. Should I remove the majority of the solid plastic, leaving just the back face, effectively leaving the area under the mesh hollow? I shall have to have a closer look through my references but at first glance they provide no answer.

Regards,
kahunaminor
_VISITCOMMUNITY
New South Wales, Australia
Joined: April 06, 2008
KitMaker: 151 posts
AeroScale: 141 posts
Posted: Tuesday, November 01, 2016 - 10:17 AM UTC
Welcome back,

The Finemolds harnesses performed well but not entirely as I had hoped. Being ABS plastic, directed heat in the form of a carefully applied heat gun tends to cause them to contract a little. It makes them pliable but they lose that nice detail. Radiant heat from a soldering iron is just hard to not let other parts such as the seat take injury. My first plan was to have only one shoulder harness folded back upon itself and the other resting outside on the fuselage. It soon became obvious that would not fly, so both went up onto the rear deck:


[/url]

Work on the cockpit continues with Airscale LW cockpit placards, AK Neutral Grey wash and some highlights. The E-7 was the first of the Bf 109 lineage to have the fuel observation line running through the cockpit as it was the first to be plumbed for the 300l external fuel tank. The line became standard on the subsequent F, G and K series. The aircraft used the fuel from the external tank first and when dry, as observed by the pilot in the clear empty section of the tubing, it could be jettisoned. Damn clever those Germans! It isn't included in the kit so I made my own from clear stretched sprue, painted yellow and some BMF for the joins:


I have removed some of the forward edge detail on the port cockpit panel as it fouled the forward join:


Elsewhere, I have removed the plastic detail from the external fuel tank in preparation for the PE replacement and removed the forward half moon edge of the engine bay assembly. I was however a little over vigorous on the port side so that will need fixing:


The MLG internal PE covers have also been painted and set in place along with the external tank mounting hardware:


Next up is finishing the cockpit construction with flat coat and installation of the PE instrument panels. Once that is done and the cockpit assembly installed, I intend to attach the completed wing assembly to the fuselage. This should allow me to paint the undersides and fuselage sides in RLM78.

Regards,
Venko555
_VISITCOMMUNITY
Bulgaria
Joined: December 07, 2013
KitMaker: 908 posts
AeroScale: 206 posts
Posted: Tuesday, November 01, 2016 - 11:18 AM UTC
Nice work so far,
I'm building the Weekend "Black Eight" and the kit is excellent.
Waiting for the paintjob with interest.

Regards!
Venelin
simonn
_VISITCOMMUNITY
Australia
Joined: October 15, 2016
KitMaker: 62 posts
AeroScale: 36 posts
Posted: Tuesday, November 01, 2016 - 12:47 PM UTC
Kent

Lots of great detail work so far. Thanks for adding the info on the fuel line in the cockpit- an interesting feature of the 109 that I didn't know.

Simon.
kahunaminor
_VISITCOMMUNITY
New South Wales, Australia
Joined: April 06, 2008
KitMaker: 151 posts
AeroScale: 141 posts
Posted: Tuesday, November 01, 2016 - 02:28 PM UTC

Quoted Text

Kent

Lots of great detail work so far. Thanks for adding the info on the fuel line in the cockpit- an interesting feature of the 109 that I didn't know.

Simon.


Thanks Simon,
I am hesitant to quote it as the reference from Merrick is the only reference I have found and there is nothing to formally substantiate it. However, it makes sense as the following aircraft types had it and Merrick provides a schematic that appears to be from an original source, so in it goes. At this point, I am happy unless somebody can definitively cite a source that says they didn't have it.

Regards,
Scrodes
_VISITCOMMUNITY
Ontario, Canada
Joined: July 22, 2012
KitMaker: 771 posts
AeroScale: 763 posts
Posted: Tuesday, November 01, 2016 - 10:15 PM UTC
Looks good. But I really can't decide how I feel about the belts.
kahunaminor
_VISITCOMMUNITY
New South Wales, Australia
Joined: April 06, 2008
KitMaker: 151 posts
AeroScale: 141 posts
Posted: Wednesday, November 02, 2016 - 09:50 AM UTC
Hi Matt,

They have contracted a little due to the heat. In their pristine state they are well made with fantastic detail. I do know other modellers that have used them with great results in both 1/48 and 1/32. They take paint well and are certainly better than simple PE. In 1/48 I prefer them to PE but I think for 1/32 I will stick with the likes of RB or HGW for my harnesses. The jury is still out for me as well but it is a first effort.

Regards,
kahunaminor
_VISITCOMMUNITY
New South Wales, Australia
Joined: April 06, 2008
KitMaker: 151 posts
AeroScale: 141 posts
Posted: Thursday, November 03, 2016 - 07:16 AM UTC
Instrument panels. The PE panels from the E-7 kit are different to those in the Brassin cockpit set, being about a millimetre too wide for the resin they are to be attached to. You can just see the difference on the right side of the first picture with the E-7 underneath the Brassin:


The Brassin set does not have the additional panel for bomb/ fuel tank release. Minor surgery to graft from one to the other:


Various handles and bits added. Revi C12 from MDC had a lead wire power cable installed and plumbed to the appropriate port on the upper panel:


All laid out for inspection. Flat coat and then installations come next:


Regards,
kahunaminor
_VISITCOMMUNITY
New South Wales, Australia
Joined: April 06, 2008
KitMaker: 151 posts
AeroScale: 141 posts
Posted: Tuesday, November 08, 2016 - 08:27 AM UTC
Welcome back,

A few days ago, I completed the cockpit assembly as per instruction and fitted it through the lower opening into position within the fuselage. I had progressed to the point where the cockpit and gun deck assemblies were installed:


Well, I thought, that's that and got ready to move forward.

BUT.....You know sometimes the longer you try and ignore something, the more it plays on your mind until eventually it becomes the most prominent thing on your mind? Yeah those gaps around the cockpit tub. Thankfully the properties of CA allowed me to take the tub itself out. I then realigned the sidewalls to close the gaps. Not entirely successful, so I glued some 0.5 styrene strips to close the gaps on each side of the rear deck, followed by some 0.5 x 1mm strips along the top. I will sand these back flush but already happier:


Some 0.5 x 1mm along the gun bay sides will need sanding but should address the gaps too. I may need a spacer to widen the lower fuselage to wing join as at the moment dry fitting has a small gap or it may be solved with dihedral:


So, it would appear I had fallen foul of the alignment gods. Next time I will probably change the assembly so the sidewalls are attached to the fuselage sides first, something I couldn't do this time as the fuselage halves were joined. Or possibly I may take more time in my alignment of the resin tub parts because looking back, they were out of kilter slightly prior to my attempt to install.

Stay tuned!
kahunaminor
_VISITCOMMUNITY
New South Wales, Australia
Joined: April 06, 2008
KitMaker: 151 posts
AeroScale: 141 posts
Posted: Thursday, November 10, 2016 - 08:14 AM UTC
Welcome back,

Remedial work on the cockpit coatings continued. The areas were sanded down and repainted RLM 02. I could then fit the fuselage gun deck into position:


There are still some minor touch ups to follow up on. I then cemented the lower sections of the wing assembly to the fuselage and let them set overnight. This morning I joined the upper wings to the fuselage, one at a time and allowing time for the seams to set up befo.re continuing to the second wing. I then taped the wings to set dihedral and allow the joints to set up properly:


It looks a bit severe in this head on shot but after removing the tape, the wings have settled to a better angle:


I have also masked the lower engine and white theatre recognition band on the fuselage in preparation for further painting. I intend (at this stage) to complete the remainder of the build and then come back and do the engine as a final assembly:


Whilst waiting for the wings to settle, I attached the PE harness to the external fuel tank. I had to enlarge and square off the fuselage attachment point for the PE to allow the PE and tank to sit correctly:


Regards,
kahunaminor
_VISITCOMMUNITY
New South Wales, Australia
Joined: April 06, 2008
KitMaker: 151 posts
AeroScale: 141 posts
Posted: Thursday, December 01, 2016 - 12:57 PM UTC
Welcome back,

It has been almost a month since the last post but not really much to show for it. The cockpit has been finished and the fore and aft canopies attached, having been partially masked and sprayed RLM 02 beforehand. The Revi gunsight has been attached an initially fouled the front canopy. A small adjustment downwards of the sight and some material removed from the front canopy underside and all is good:


I have also increased the slat fixing points by opening them up to their full length. This is more correct and I can now temporarily fix the slats for painting, removing and repositioning them later:


The tail wheel broke but it is a blessing, as I have drilled the oleo and inserted a metal pin, with mounting drilled to accept it later


Hopefully some paint soon.

Regards,
 _GOTOTOP