OFFICIAL: R.A. Co-Belligerent A.F. Campaign
MichaelSatin
 Campaigns Administrator
Colorado, United States
Joined: January 19, 2008
KitMaker: 3,909 posts
AeroScale: 2,904 posts
Posted: Friday, September 30, 2016 - 04:05 AM UTC
Welcome to the Regia Aeronautica Co-Belligerent Air Force Campaign!
The campaign will run from October 1, 2016 through May 1, 2017.
If you haven't signed up yet, or want to see the rules, go
here.
Please post your initial and in-progress photos as well as campaign discussion in this thread. Please post your finished build photos in the
campaign gallery.
Looking forward to some awesome Italian birds!
Michael

On the bench:
Sorta depends on your definition of "on the bench"...

#305
Christchurch, New Zealand
Joined: February 01, 2006
KitMaker: 1,673 posts
AeroScale: 1,517 posts
Posted: Friday, September 30, 2016 - 07:40 AM UTC
Thanks Michael! Now I'm stuck with making a decision as to WHAT I'm going to build! LOL

#523
Idaho, United States
Joined: February 28, 2014
KitMaker: 342 posts
AeroScale: 250 posts
Posted: Friday, September 30, 2016 - 06:33 PM UTC
A-Men Chris, I think I will wait to most people make their choice. Then pick something different. I think I have a good stock to chose from.

#305
Christchurch, New Zealand
Joined: February 01, 2006
KitMaker: 1,673 posts
AeroScale: 1,517 posts
Posted: Saturday, October 01, 2016 - 05:55 AM UTC
I agree Jeff the more unusual and left field the better! LOL
Western Australia, Australia
Joined: March 21, 2016
KitMaker: 247 posts
AeroScale: 105 posts
Posted: Friday, October 07, 2016 - 01:16 PM UTC
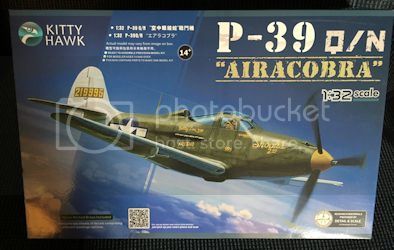
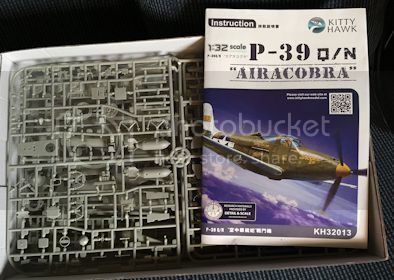
Here is my entry for the campaign


#305
Christchurch, New Zealand
Joined: February 01, 2006
KitMaker: 1,673 posts
AeroScale: 1,517 posts
Posted: Saturday, October 08, 2016 - 01:54 AM UTC
Oh hell yes! Great choice Linus not only in scale but in markings as well! I built the Eduard 1/48 scale kit and I liked how it turned out. Can't wait to see how this one builds and turns out!

#305
Christchurch, New Zealand
Joined: February 01, 2006
KitMaker: 1,673 posts
AeroScale: 1,517 posts
Posted: Sunday, October 16, 2016 - 11:52 PM UTC
Just to pique your interest I found this on the interwebs and thought I'd put it out there for those interested.


#305
Christchurch, New Zealand
Joined: February 01, 2006
KitMaker: 1,673 posts
AeroScale: 1,517 posts
Posted: Thursday, November 10, 2016 - 01:03 AM UTC

#523
Idaho, United States
Joined: February 28, 2014
KitMaker: 342 posts
AeroScale: 250 posts
Posted: Monday, November 14, 2016 - 08:42 PM UTC
Excellent choice Chris!
Fun to do a complete resin kit.
I am still trying to decide. But since there have not been to many people starting, I may just choose something a little out of the ordinary.

#305
Christchurch, New Zealand
Joined: February 01, 2006
KitMaker: 1,673 posts
AeroScale: 1,517 posts
Posted: Monday, November 14, 2016 - 11:53 PM UTC
Thanks Jeff! The kit while full of lovely details has it's fair share of issues. Major pin holes in the casting and the fuselage halves didn't line up particularly well. Which required remedial work and rescribing. Which has become a nightmare because of the pin holes. But I've been slowly filling them in with super glue and a fine wire to get into the pinhole. Some of the pinholes are over 1 mm in diameter and are located mainly on the upper fuselage where the major alignment issues were.
But it all adds to the fun pics to follow!

#305
Christchurch, New Zealand
Joined: February 01, 2006
KitMaker: 1,673 posts
AeroScale: 1,517 posts
Posted: Wednesday, November 16, 2016 - 01:08 PM UTC
Australia
Joined: October 15, 2016
KitMaker: 62 posts
AeroScale: 36 posts
Posted: Saturday, November 19, 2016 - 01:49 AM UTC
Chris
That's impressive progress on your resin kit. Have not come across that one before. How easy is it to find one for sale?
Simon

#305
Christchurch, New Zealand
Joined: February 01, 2006
KitMaker: 1,673 posts
AeroScale: 1,517 posts
Posted: Monday, November 21, 2016 - 02:39 AM UTC
Hi Simon I picked this kit up on New Zealand's local auction site Trademe for around $30.00 plus freight. In fact I'd never heard of Astrokit before purchasing this kit. But I researched it via uncle google. I've looked on eBay and there are a number of them on there for around $60.00 plus freight. I'm not even sure if Astrokit are still producing kits. So still available but not exactly common place, hope this helps.
Australia
Joined: October 15, 2016
KitMaker: 62 posts
AeroScale: 36 posts
Posted: Monday, November 21, 2016 - 03:46 AM UTC
Thanks Chris. I will watch your progress and keep a look out for one of these for myself.
Simon

#305
Christchurch, New Zealand
Joined: February 01, 2006
KitMaker: 1,673 posts
AeroScale: 1,517 posts
Posted: Thursday, December 15, 2016 - 11:12 AM UTC
AussieReg
 Associate Editor
#007
Victoria, Australia
Joined: June 09, 2009
KitMaker: 8,156 posts
AeroScale: 3,756 posts
Posted: Thursday, December 15, 2016 - 02:20 PM UTC
Looking good Chris, nice camo work!
I'd never seen one of these Astrokit kits either until you started this one, doesn't look too bad.
Cheers, D
ON the bench
Revell 1/24 '53 Corvette (building as '54)
Revell 1/24 BMW 507 Coupe and Cabrio
Italeri 1/48 Me262 B-1a/U1 Nightfighter
Monogram 1/24 '57 Chevy Nomad
Dragon 1/350 USS Frank Knox DD-742

#305
Christchurch, New Zealand
Joined: February 01, 2006
KitMaker: 1,673 posts
AeroScale: 1,517 posts
Posted: Thursday, December 15, 2016 - 10:52 PM UTC
Thanks D! The quality control had slipped a little on this kit from the reviews I've read the original casting was perfect no pinholes or any other issues. Some of the parts were broken but the kit was pre owned and were originally on sprues so I'm guessing in the removal they got damaged. But the detail is really nice and the kit actually goes together quite well with a minimum of fuss.

#305
Christchurch, New Zealand
Joined: February 01, 2006
KitMaker: 1,673 posts
AeroScale: 1,517 posts
Posted: Friday, December 16, 2016 - 11:43 AM UTC

#523
Idaho, United States
Joined: February 28, 2014
KitMaker: 342 posts
AeroScale: 250 posts
Posted: Monday, December 19, 2016 - 12:14 AM UTC
Chris,
Really nice. I like the paint job and the wheel wells look really good.
I am still trying to decide.
I am down to 4.......
1/72 Special Hobby IMAM Ro 57, Fiat CR 25, and Caproni Ca 310-311
Or
1/72 MPM Breda Ba 88B
Decisions, decisions.......


#305
Christchurch, New Zealand
Joined: February 01, 2006
KitMaker: 1,673 posts
AeroScale: 1,517 posts
Posted: Monday, December 19, 2016 - 02:24 AM UTC
Thanks Jeff just about done with this build got the wheel covers, prop and spinner on. Just need to put on the inner gear doors and fabricate the closing mechanism which Astrokit haven't supplied which is strange as they supplied pretty much everything else! Fairly simple system just figuring out how to replicate it.
One question Jeff which one has the most outrageous camo? I suggest you do that one! LOL
Indre-et-Loire, France
Joined: May 23, 2011
KitMaker: 651 posts
AeroScale: 181 posts
Posted: Monday, December 19, 2016 - 12:37 PM UTC
Hi,
well done Chris with your camo

nico

#305
Christchurch, New Zealand
Joined: February 01, 2006
KitMaker: 1,673 posts
AeroScale: 1,517 posts
Posted: Monday, December 19, 2016 - 02:31 PM UTC
Merci! Thanks Nico I appreciate the compliment.

#523
Idaho, United States
Joined: February 28, 2014
KitMaker: 342 posts
AeroScale: 250 posts
Posted: Tuesday, December 20, 2016 - 07:57 PM UTC
Gee, Thanks Chris!
I guess that means the IMAM Ro.57 with the dot on spot scheme (My name for it) Maronne-Giallo over Verde base.
Forza Italia!

#305
Christchurch, New Zealand
Joined: February 01, 2006
KitMaker: 1,673 posts
AeroScale: 1,517 posts
Posted: Wednesday, December 21, 2016 - 12:03 PM UTC
You're more than welcome Jeff don't mention it!

#305
Christchurch, New Zealand
Joined: February 01, 2006
KitMaker: 1,673 posts
AeroScale: 1,517 posts
Posted: Sunday, December 25, 2016 - 04:13 PM UTC
Now while I've been concentrating on my P-47 build I haven't neglected (too much) My Astrokit Mc.200 Saetta. The tubing I got was to build the pitot tubes for the kit as the kit ones were either missing or so ill formed that they didn't look the part. Here's a pic of the fabricated items it has not one but TWO of them.


