

wanted to build a SOB model so here is what I chose, this is such a great model, it fits so well and has great detail, I love the Battle of Britain Spits with the brown and green paint and the large yellow surround on the fuse insignia. I will try hard not to do too much extra stuff on it.
World War II
Discuss WWII and the era directly before and after the war from 1935-1949.
Discuss WWII and the era directly before and after the war from 1935-1949.
Hosted by Rowan Baylis
Tamiya 1/48th scale Spitfire Mk I

DougCohen

Joined: May 27, 2009
KitMaker: 1,293 posts
AeroScale: 1,072 posts
Posted: Saturday, July 02, 2016 - 03:25 AM UTC

DougCohen
Joined: May 27, 2009
KitMaker: 1,293 posts
AeroScale: 1,072 posts
Posted: Saturday, July 02, 2016 - 04:32 AM UTC
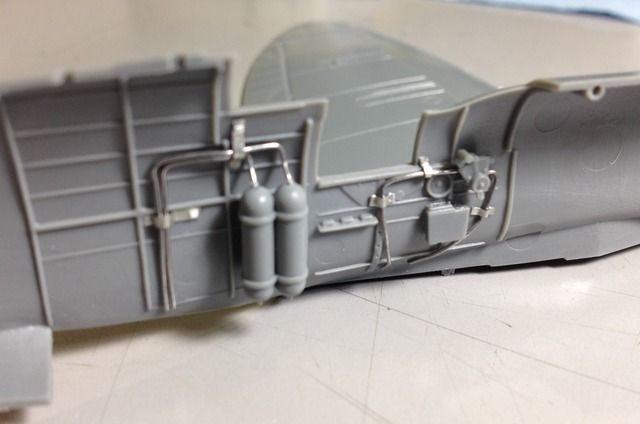
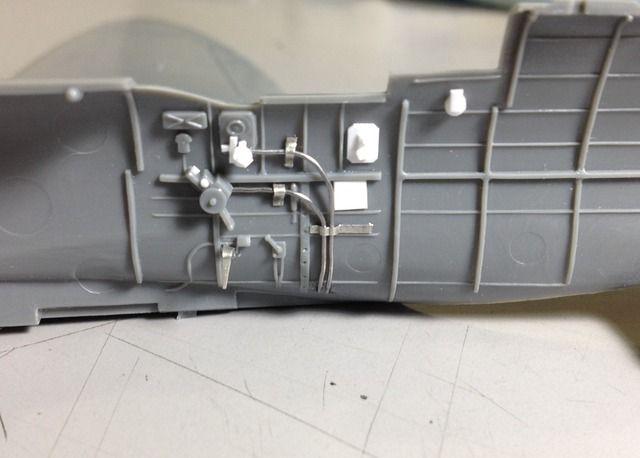
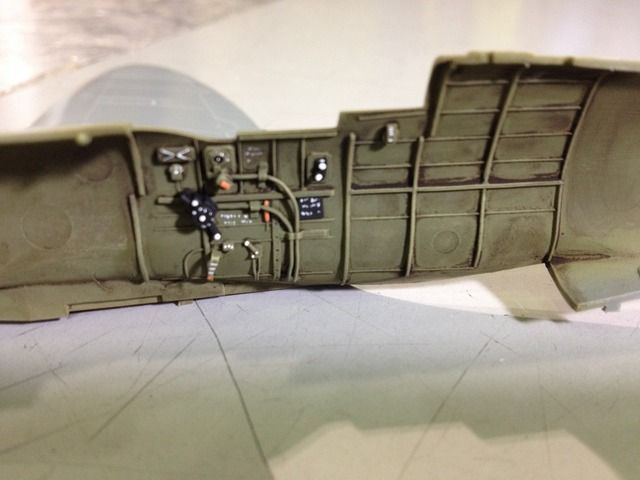
here is the cockpit so far, I know I added a little but not too much just some small enhancements.


DougCohen
Joined: May 27, 2009
KitMaker: 1,293 posts
AeroScale: 1,072 posts
Posted: Saturday, July 02, 2016 - 04:34 AM UTC
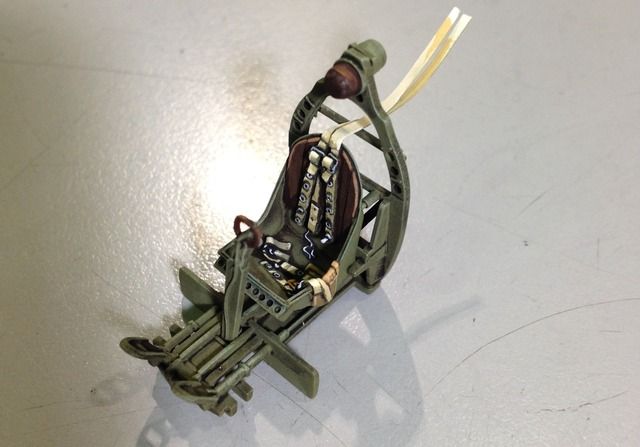
I am using an Ultracast seat but that is it no more enhancements, this will be SOB from now on
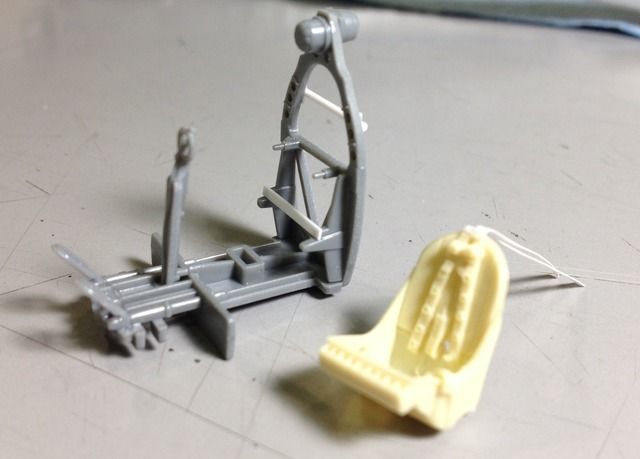
I added some paper extensions to the seat belts just to bring them back where they belong.

I added some paper extensions to the seat belts just to bring them back where they belong.
DougCohen
Joined: May 27, 2009
KitMaker: 1,293 posts
AeroScale: 1,072 posts
Posted: Sunday, July 03, 2016 - 02:27 AM UTC
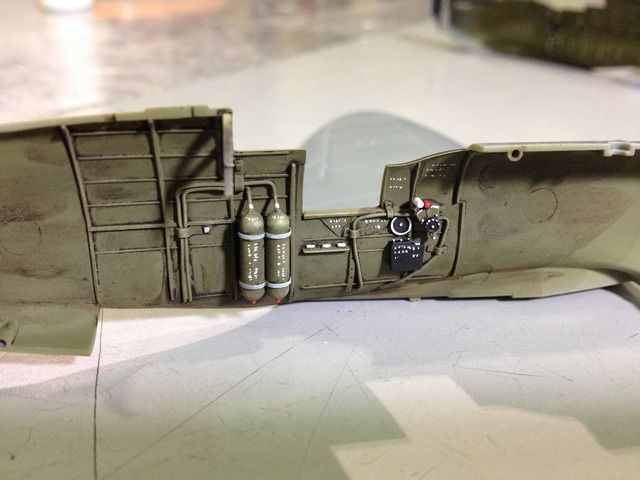
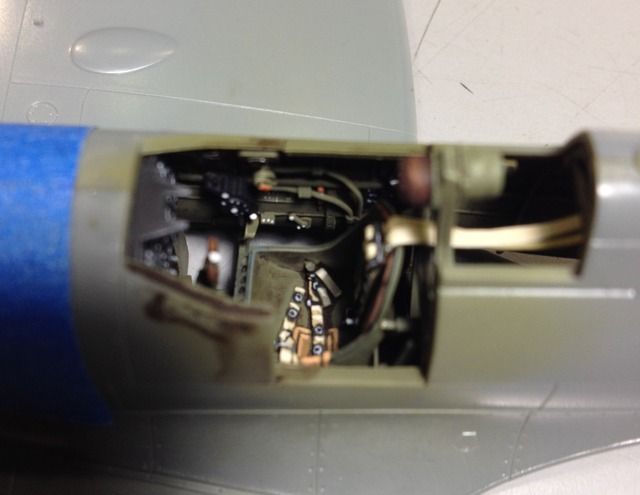
interior painted and ready to go inside.


Redhand

#522
Joined: January 20, 2013
KitMaker: 1,460 posts
AeroScale: 1,443 posts
Posted: Sunday, July 03, 2016 - 02:54 AM UTC
This is looking REALLY good.

macotra4
Joined: January 25, 2010
KitMaker: 110 posts
AeroScale: 88 posts
Posted: Sunday, July 03, 2016 - 03:14 AM UTC
I have this one planned for Tamiya Campaign, so i will follow you build very closely. so far i can say that your build will be better then mine 
Inside look excellent!!!
Inside look excellent!!!

AussieReg

#007

Joined: June 09, 2009
KitMaker: 8,156 posts
AeroScale: 3,756 posts
Posted: Sunday, July 03, 2016 - 03:33 AM UTC
Very nice detail work Doug, looking good.
Cheers, D
Cheers, D


Jessie_C


Joined: September 03, 2009
KitMaker: 6,965 posts
AeroScale: 6,247 posts

Posted: Sunday, July 03, 2016 - 04:23 AM UTC
Before you close it up, you need to paint some bare metal behind the cockpit. It was only painted in cockpit green up to frame 11 (the one the seat goes on) and then only had clear protective coating from there back to the tailcone. This is visible through the canopy behind the seat. Take a look at the Spitfire site for reference.
This picture shows what I'm talking about best. Frame No. 11 is on the left, seat belt ends are self explanatory, and the rear edge of the fixed canopy section is on the right.
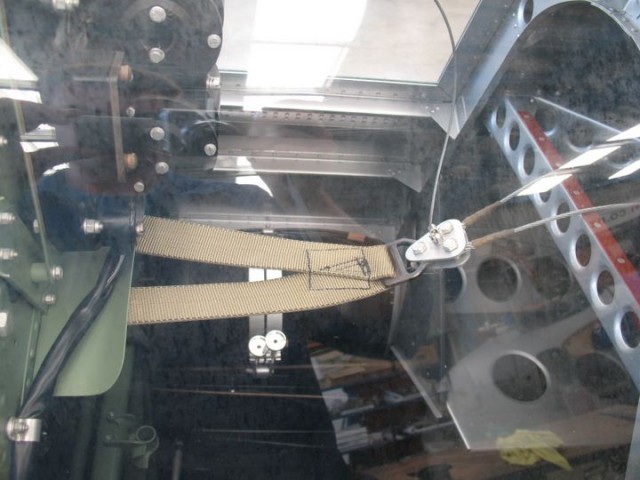
This picture shows what I'm talking about best. Frame No. 11 is on the left, seat belt ends are self explanatory, and the rear edge of the fixed canopy section is on the right.
DougCohen
Joined: May 27, 2009
KitMaker: 1,293 posts
AeroScale: 1,072 posts
Posted: Sunday, July 03, 2016 - 08:21 PM UTC
dang it! too late again, already glued it together, but it will be good info for the 1/32nd Revell kit I have in my closet to build soon, thanks Jess.
you can't see too much of the rear area anyway.
you can't see too much of the rear area anyway.

Redhand
#522
Joined: January 20, 2013
KitMaker: 1,460 posts
AeroScale: 1,443 posts
Posted: Sunday, July 03, 2016 - 08:32 PM UTC
Quoted Text
Before you close it up, you need to paint some bare metal behind the cockpit. It was only painted in cockpit green up to frame 11 (the one the seat goes on) and then only had clear protective coating from there back to the tailcone. This is visible through the canopy behind the seat. Take a look at the Spitfire site for reference.
This picture shows what I'm talking about best. Frame No. 11 is on the left, seat belt ends are self explanatory, and the rear edge of the fixed canopy section is on the right.
Whoa, you know your Spitfires Jessica. Good one to file away!

lespauljames

Joined: January 06, 2007
KitMaker: 3,661 posts
AeroScale: 369 posts

Posted: Monday, July 04, 2016 - 04:19 AM UTC
Doug, really nice paintwork so far, I'm looking forward to seeing her built and painted !

Jessie_C
Joined: September 03, 2009
KitMaker: 6,965 posts
AeroScale: 6,247 posts
Posted: Monday, July 04, 2016 - 05:15 AM UTC
At least it's not too late to paint the electrical accumulator behind the headrest black 
stonar

Joined: August 15, 2008
KitMaker: 337 posts
AeroScale: 309 posts
Posted: Monday, July 04, 2016 - 10:30 PM UTC
Voltage regulator, accumulator is 'old speak' for a rechargeable battery
Steve
Steve

Joel_W
Joined: December 04, 2010
KitMaker: 11,666 posts
AeroScale: 7,410 posts
Posted: Monday, July 04, 2016 - 11:22 PM UTC
Doug,
Your detailing of the Spit Pit really looks quite convincing. I'll be signing on to follow your build.
As Mal would say: "One can't have enough Spitfires"
Joel
Your detailing of the Spit Pit really looks quite convincing. I'll be signing on to follow your build.
As Mal would say: "One can't have enough Spitfires"
Joel

DougCohen
Joined: May 27, 2009
KitMaker: 1,293 posts
AeroScale: 1,072 posts
Posted: Tuesday, July 05, 2016 - 05:21 AM UTC
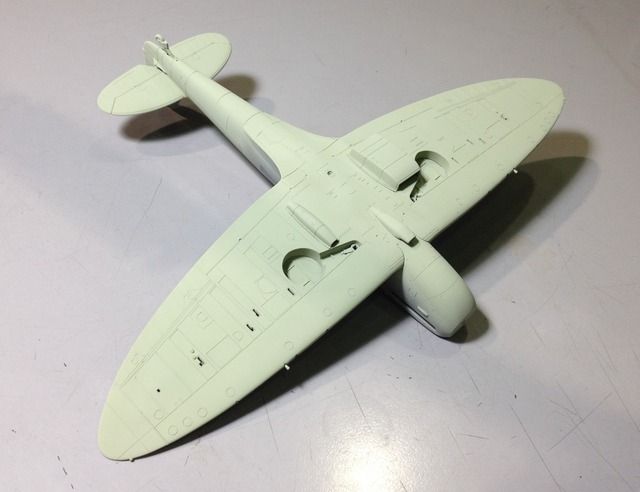
sky bottom of plane painted

Jessie_C
Joined: September 03, 2009
KitMaker: 6,965 posts
AeroScale: 6,247 posts
Posted: Tuesday, July 05, 2016 - 09:05 AM UTC
Quoted Text
Voltage regulator, accumulator is 'old speak' for a rechargeable battery
Steve
Well, it's some kind of electrickery box...

Twentecable

Joined: September 13, 2003
KitMaker: 339 posts
AeroScale: 244 posts
Posted: Tuesday, July 05, 2016 - 10:14 PM UTC
Really nice interior Doug!
gr TC
gr TC
DougCohen
Joined: May 27, 2009
KitMaker: 1,293 posts
AeroScale: 1,072 posts
Posted: Wednesday, July 06, 2016 - 03:48 AM UTC
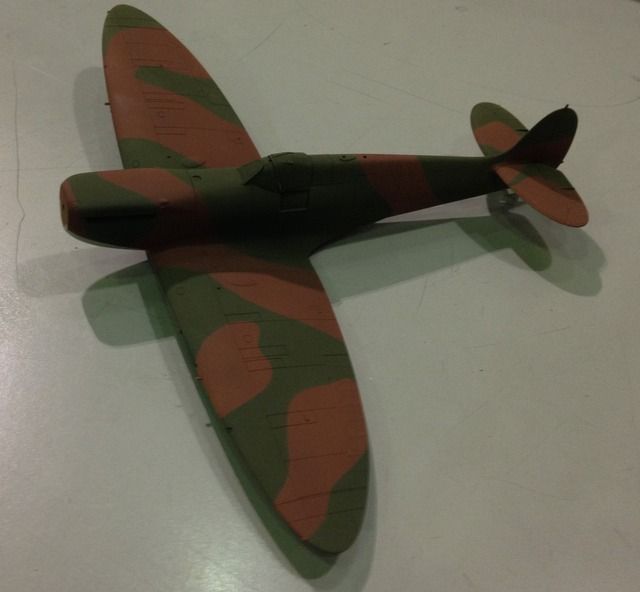
upper camo colors applied, hard mask and a little dark so I can lighten them up while weathering.

Joel_W
Joined: December 04, 2010
KitMaker: 11,666 posts
AeroScale: 7,410 posts
Posted: Wednesday, July 06, 2016 - 11:07 PM UTC
Doug,
The Basic camo pattern looks quite good.
Joel
The Basic camo pattern looks quite good.
Joel
DougCohen
Joined: May 27, 2009
KitMaker: 1,293 posts
AeroScale: 1,072 posts
Posted: Sunday, July 10, 2016 - 02:24 AM UTC
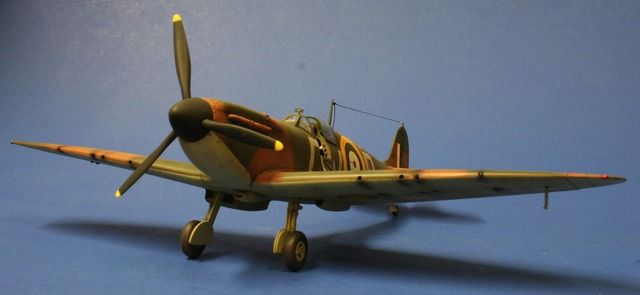
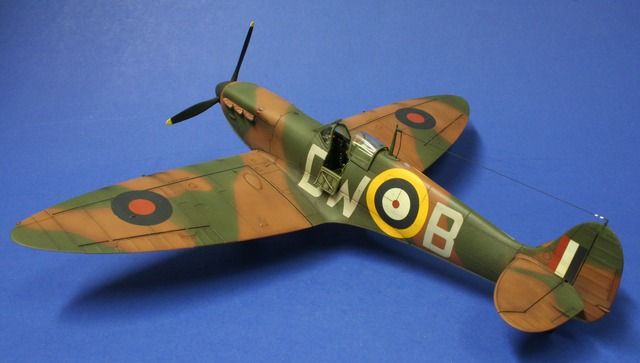
i took a bunch of pictures of the steps of the paint but they were all so dark they don't show any real progress so anyway here is the final result of my build.

DougCohen
Joined: May 27, 2009
KitMaker: 1,293 posts
AeroScale: 1,072 posts
Posted: Sunday, July 10, 2016 - 02:25 AM UTC
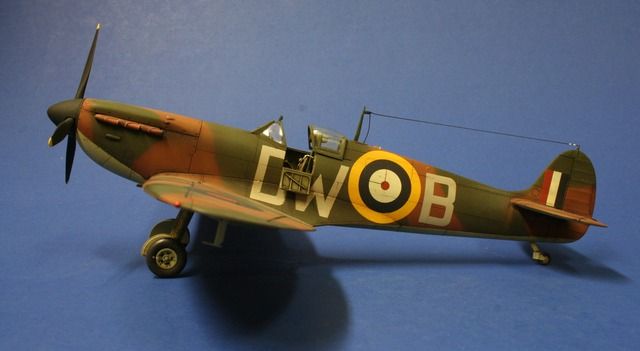
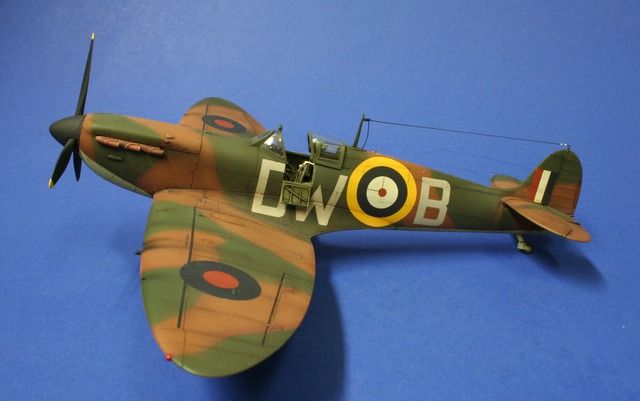
side view

DougCohen
Joined: May 27, 2009
KitMaker: 1,293 posts
AeroScale: 1,072 posts
Posted: Sunday, July 10, 2016 - 02:25 AM UTC
three quarter view

DougCohen
Joined: May 27, 2009
KitMaker: 1,293 posts
AeroScale: 1,072 posts
Posted: Sunday, July 10, 2016 - 02:36 AM UTC
one last shot
after the first coat of darker green and brown was applied with hard masking i free hand sprayed lighter shades of both colors then a gloss coat of Pledge Floor Shine. Then the decals from the kit were cut out close to the edges, even the letters and they were applied with Solvoset and allowed to cure. A coat of Pledge Floor Shine was applied over the decals and allowed to dry over night. I then painted all the panel lines with oil paints of dark brown and after it dried for about 20 minutes it was wiped off leaving only the panel lines and some residue looking like dirt flowing in the direction of flight. Then a dull coat of Testors was sprayed on and the final powder and exhaust stains were done with very thin dark brown and black behind the guns and the exhaust pipes. All the last minute parts like the pitot tube, antenna wire and lights were done and that was it.
even with all the little stumbles that I did to this kit I must say that it was a pleasure to build, the decals from Tamiya went on without a hitch and the color mixes they recommended with Tamiya paint really look right to me. Thanks Jess for all the advise, and when I do the 1/32nd Revell I will do better to get it right.
AussieReg
#007
Joined: June 09, 2009
KitMaker: 8,156 posts
AeroScale: 3,756 posts
Posted: Sunday, July 10, 2016 - 08:43 AM UTC
Lovely job Doug, looks great.
Cheers, D
Cheers, D
Jessie_C
Joined: September 03, 2009
KitMaker: 6,965 posts
AeroScale: 6,247 posts
Posted: Sunday, July 10, 2016 - 11:05 AM UTC
That turned out very well indeed! Now all you need is an Airfix Hurricane to sit beside it
 |

WEB HOSTING BY


Copyright ©2021 AeroScale and Kitmaker Network, a subsidiary of Silver Star Enterprises
All Rights Reserved. Please read our Conditions of Use and Privacy Policy.
All Rights Reserved. Please read our Conditions of Use and Privacy Policy.