_GOTOBOTTOM
World War II
Discuss WWII and the era directly before and after the war from 1935-1949.
Hosted by Rowan Baylis
Monogram's Classic Fw-190
GazzaS
#424
_VISITCOMMUNITY
Queensland, Australia
Joined: April 23, 2015
KitMaker: 4,648 posts
AeroScale: 1,938 posts
Posted: Saturday, June 11, 2016 - 05:25 PM UTC
Hi everyone,
My other build has been occasionally held up by poor lighting, so when I could escape from the Honey-do list, I bent my energies toward styrene.

One of the first kits I ever built was Monogram's Fw-190 in 1/48 scale. Back then I thought the kit was awesome with heaps of detail and great fit. Of course, I was thirteen. What did I know?

When I saw it at my LHS last year, I don't know if it was madness or nostalgia that made me seize it with crazed hands and carry it home with glee.


When I was thirteen I only had Testor's glue (the good, smelly original one), Testors paints, and some dull scissors. Usually I just twisted the parts from the sprue.

This little blog will be more about painting than anything else. Les, AKA Matrixone has given me a few ideas, so I want to try them out.

The current state of affairs:


Yes, there is no wheel well detail to mess with!


One of the focus points of this build was to avoid erasing any of the raised detail.


Thanks for looking!

Gaz
AussieReg
Staff MemberAssociate Editor
AUTOMODELER
#007
_VISITCOMMUNITY
Victoria, Australia
Joined: June 09, 2009
KitMaker: 8,156 posts
AeroScale: 3,756 posts
Posted: Saturday, June 11, 2016 - 05:30 PM UTC
I'm on board with this one Gaz, very keen to see what you have in store for us!

Cheers, D
Bink123
_VISITCOMMUNITY
Quebec, Canada
Joined: June 23, 2008
KitMaker: 414 posts
AeroScale: 364 posts
Posted: Saturday, June 11, 2016 - 06:14 PM UTC
Despite the kits shortcomings, by today's standards, it was the best 'back in the day' I remember building this kit and the Hurricane IIc way back 50 years ago (!!)

In my opinion back then, Monogram kits were #1, Revell #2, then in 3rd was Auroraa, Airfix and Frog.

I'm looking forward to see how this turns out.
Redhand
#522
_VISITCOMMUNITY
New Jersey, United States
Joined: January 20, 2013
KitMaker: 1,460 posts
AeroScale: 1,443 posts
Posted: Saturday, June 11, 2016 - 06:29 PM UTC
I remember this one! State of the art when it came out and depressing because I knew with my child-like modeling skills I could "never" master the detail it had.

Hey, tell me more about this "modeling paste" you use!!
Bigrip74
_VISITCOMMUNITY
Texas, United States
Joined: February 22, 2008
KitMaker: 5,026 posts
AeroScale: 2,811 posts
Posted: Saturday, June 11, 2016 - 06:36 PM UTC

Quoted Text

Hey, tell me more about this "modeling paste" you use!!


I would like to know about the paste also.

Bob
bzak
_VISITCOMMUNITY
California, United States
Joined: June 07, 2006
KitMaker: 264 posts
AeroScale: 87 posts
Posted: Saturday, June 11, 2016 - 08:22 PM UTC
I love this kit! You're off to a good start, keep us posted.

Here's one of my builds using the parts and pieces from other kits that were replaced with aftermarket stuff.


 photo fw-1902-3_zpsf4e44b57.jpg

Brian Riedel
rdt1953
_VISITCOMMUNITY
New Jersey, United States
Joined: February 06, 2015
KitMaker: 1,098 posts
AeroScale: 900 posts
Posted: Sunday, June 12, 2016 - 01:27 AM UTC
Gaz - One of my fondest boyhood memories centers around Christmas and these Monogram 1/48 aircraft kits . I had one or two on my wish list- I know one was the Avenger but I can't recall the other. Come Christmas morning I wound up with not one or two but all of them . My folks ( er , I mean Santa Clause ) must have had a good year or they mistakenly thought I was a good lad -I'm sure my sister thought otherwise- but either way I struck gold !
Looks like fun and I'll be sure to follow along. Thanks for sharing and bringing back the good memories .
Cheers! Richard
Szmann
_VISITCOMMUNITY
Netherlands Antilles
Joined: September 02, 2014
KitMaker: 1,977 posts
AeroScale: 295 posts
Posted: Sunday, June 12, 2016 - 01:56 AM UTC
Gaz, that model must have as much emotional load as raised detail. I am sure under your hand will turn in a little gem (forget 'bout swine!).

Really interested to see the progress.

Gabriel
GazzaS
#424
_VISITCOMMUNITY
Queensland, Australia
Joined: April 23, 2015
KitMaker: 4,648 posts
AeroScale: 1,938 posts
Posted: Sunday, June 12, 2016 - 04:48 AM UTC
Hi Everyone!
Thank you for all of the kind responses! I guess that I am not alone in fondly remembering these old Monogram gems. I know I also built the Hurricane IIC, the Zero (twice), the Bf109E (my first model ever!), and an early Mark of Spitfire...though I'm not sure if it was a I or II.

Mr Riedel,
Your Focke Wulf is a beauty! That is a very striking paint scheme!

Mr. ONeill and Bob R.,
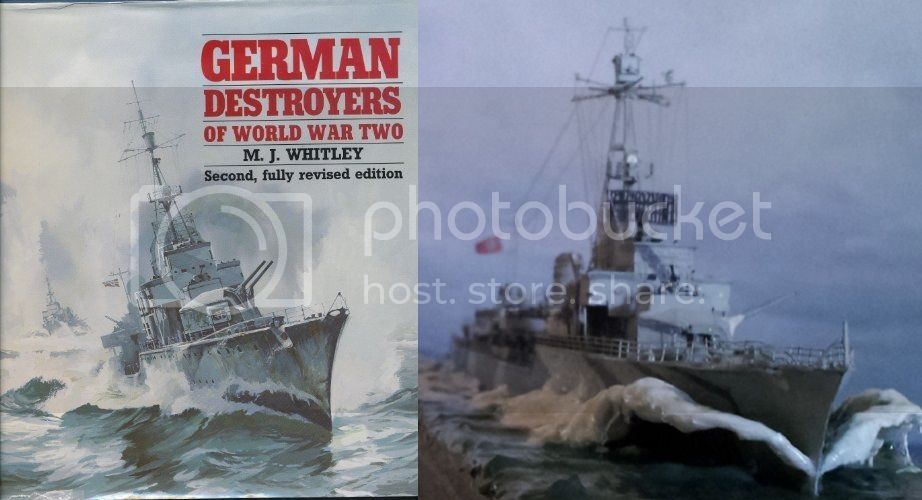
I first bought the modelling paste to put water and wave detail on this Dragon Destroyer in 1/350 scale:

Then it sat in a drawer for over a year before I dragged it out to attempt Zimmerit paste on a Tiger Tank.

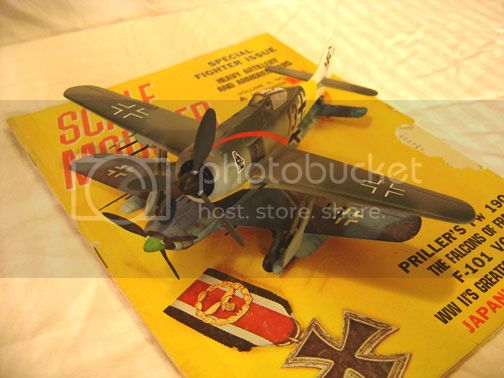
I got it at an arts and crafts area of a discount store. You can see the large tub of it in this photo along with some early Zimmerit:

This stuff has a generous working time yet dries solid in only a few hours. Many putties form a skin quickly that prevents you from altering the shape before it's cured.
As long as it hasn't dried solid, it can be removed with water.
It sands well, but up to this point, I'm not too sure about shrinkage. (I guess I'll find that out when I get some paint on this 190)
It is a bit too flaky for scribing.

For Zimmerit it's the best I've ever tried. It can be spread thick or thin and you can see that in many places below I've gone down to the base plastic. So, it's not as grippy (I know...making up words here) as solvent based fillers. It won't do any damage to the styrene. It chips just like zimmerit, too. It doesn't take plastic with it if chipped when dry.


It has almost no scent, and claims to be non toxic. It has a creamy consistency but doesn't run if placed perpendicular to the pull of gravity.

I have a large number of fillers acquired in the last two years. They all seem to have some perfect usage except for the solvent based fillers. I imagine that all of my solvent based fillers will solidify before I use them again.


Best Wishes,

Gaz
GazzaS
#424
_VISITCOMMUNITY
Queensland, Australia
Joined: April 23, 2015
KitMaker: 4,648 posts
AeroScale: 1,938 posts
Posted: Tuesday, June 14, 2016 - 06:03 AM UTC
Hi Everyone,
Often, I'll be reading a book, or looking at photos on the web, I'll run into a striking scheme and set to researching the pilot.
Usually, typing in his name brings me to images of his aircraft... which is good, yes? All the while I'm considering modelling this aircraft until I see that quite a few people have already turned out models of my intended ...which kills my fervor to model that certain machine.
Perhaps it's a personal flaw. Despite having decals for any number of aces, I find myself looking for the road less traveled. The plane that looks alright, even different from standard issue, but hasn't been modelled by everyone.

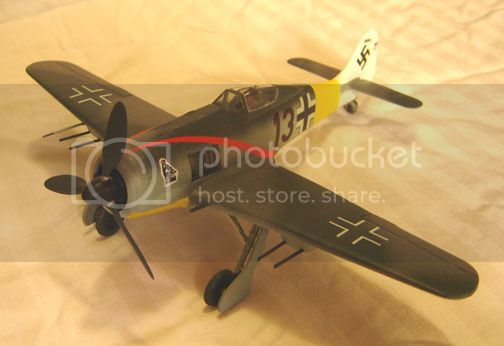
For this model, I'll be walking down the path of semi-fictional. My model will hopefully look something like this:

Different fuselage number, and without unit markings blotted out.

Yesterday I painted the underside of the plane, and today, the main fuselage topcoat.

I know the color looks kinda light. It's a RLM 70 that I've lightened for scale and lightened for an upcoming painting effect. I'm going to bring over an effect I've just learned for armor to see how it translates to aircraft.

Hopefully it won't make the aircraft too heavy to fly.

It looks like an accident victim bound up to heal. All that's missing is traction. I', using three kinds of masking techniques: Sponge, Tape, and Liquid mask.

As you can see, the filling effect didn't work out as planned. If you can't fill it proud, to leave room for shrinkage, it's very difficult to get a pretty seam.

Still, it's nice to build with slight sandpaper usage instead of spending weeks sanding and checking.

Thank you for looking!

Gaz
matrixone
_VISITCOMMUNITY
Oregon, United States
Joined: February 07, 2004
KitMaker: 869 posts
AeroScale: 862 posts
Posted: Tuesday, June 14, 2016 - 07:58 AM UTC
That old kit is looking good!

Considering the age of this kit it does have some nice surface detail.
Many newer kits have little or no surface detail aside from panel lines...I prefer the surface detail on the Monogram kit, sure it might be slightly overstated but at least it can be sanded off is so desired.

If I find the pictures of the last Monogram Fw 190 I built I will show how I modified the propeller and spinner.

Matrixone
JPTRR
Staff MemberManaging Editor
RAILROAD MODELING
#051
_VISITCOMMUNITY
Tennessee, United States
Joined: December 21, 2002
KitMaker: 7,772 posts
AeroScale: 3,175 posts
Posted: Tuesday, June 14, 2016 - 09:24 AM UTC
I like!
GazzaS
#424
_VISITCOMMUNITY
Queensland, Australia
Joined: April 23, 2015
KitMaker: 4,648 posts
AeroScale: 1,938 posts
Posted: Tuesday, June 14, 2016 - 12:50 PM UTC
Guys,
Thank you!

Les,
I'd be interested to see your modified prop and spinner.

Gaz
GazzaS
#424
_VISITCOMMUNITY
Queensland, Australia
Joined: April 23, 2015
KitMaker: 4,648 posts
AeroScale: 1,938 posts
Posted: Wednesday, June 15, 2016 - 02:41 PM UTC
Hi everyone,
Painting continues...


Thanks for looking!

Gaz
goodn8
_VISITCOMMUNITY
Berlin, Germany
Joined: October 12, 2008
KitMaker: 709 posts
AeroScale: 651 posts
Posted: Wednesday, June 15, 2016 - 04:10 PM UTC
Aaaah..., the big Blob eating this "Shrike"
Nice build, Gary! Good choice using enamels for this
old styrene - will definetely work. Camo masking's cool, courious how this will turn out. Thank's for showing us your efforts.
Thomas
lespauljames
_VISITCOMMUNITY
England - South West, United Kingdom
Joined: January 06, 2007
KitMaker: 3,661 posts
AeroScale: 369 posts
Posted: Wednesday, June 15, 2016 - 04:45 PM UTC
Gary, I'm really excited to see the camo when its all done ! Never used a putty mask so I'm intrigued. Looking good keep up the great work.
James
Szmann
_VISITCOMMUNITY
Netherlands Antilles
Joined: September 02, 2014
KitMaker: 1,977 posts
AeroScale: 295 posts
Posted: Wednesday, June 15, 2016 - 08:53 PM UTC
Gaz, the whole project is a joy to behold, even for the watchers. I have two close future projects that might require your techniques - the most complex a Bf 109 of II/JG 54 (crazy paving sides).

I surprised myself also with a "return to enamels" over the last period, even on detail painting. The other day I went into a DIY store and ran into a very intriguing sand color (oil based enamel) - just good to slap it over a VW 82E...

Very interested further,

Gabriel
matrixone
_VISITCOMMUNITY
Oregon, United States
Joined: February 07, 2004
KitMaker: 869 posts
AeroScale: 862 posts
Posted: Thursday, June 16, 2016 - 03:01 AM UTC
Gary,
Here are two pictures of the last Monogram Fw 190 I built.


The spinner on the Monogram kit looks to be undersized and this badly affects the overall appearance of the finished model. After looking at the problem I decided to move the propeller blades reward on the spinner and mount the spinner not as deep inside the cowl. I did this by heating up a new razor blade and slicing the prop blades off the spinner and gluing them back on further back, use a razor blade for this job and NOT an X-acto knife blade, the razor blade is much thinner and will give a clean cut.

Another quick and very easy thing to do for improving the look of this Monogram kit is adjusting the angle of the landing gear legs, if built O.O.B. the landing gear legs are too far to the rear giving the airplane a look as if its standing on its tip toes. I carved some plastic off of the landing gear legs where they mount in the wings so they can be glued in with a little more forward rake to them. Compare other builds of the Monogram Fw 190 with photographs of the full size aircraft and you will see what I mean.

Matrixone
GazzaS
#424
_VISITCOMMUNITY
Queensland, Australia
Joined: April 23, 2015
KitMaker: 4,648 posts
AeroScale: 1,938 posts
Posted: Thursday, June 16, 2016 - 04:01 AM UTC
Hi Gentlemen,
Thank you for your replies and compliments!

Thomas,
Although I prefer acrylics for many reasons I keep some enamels on hand. Sometimes you just need a more robust paint than acrylic.

James,
I've used rolls of bluetack to hold up paper, but bluetack can sometimes lift paint with it on a really warm day. Bluetack can't be sliced and if it ends up in the carpet is no fun to get out. This stuff has a few more possibilities because of it's stretch and it's lower level of tackiness.

Gabriel,
Eventually I'll build a 109 that requires some of JG 52's interesting cowling paint schemes. I'm hoping that this putty will be up to the task.
I often find things for modelling at the hardware store. I even get most of my acrylics there because they have a crafts section.

Les,
When I got to your reply it took a few seconds to realize I was looking at a model and not a picture taken during the period. Wow! I'm impressed! Thank you for sharing those pics!
Your propeller mod does look a lot better. I know that somewhere in the production of the bird they switched to a larger spinner and that Monogram didn't catch that change.
I just don't know if I'm up for that much labor. The B-29 that I'm working on is one labor intensive beast, and I already have the cooling fan and oil ring glued into place on to the FW. I think I'll just live with it and be happy with all of the nostalgia.

Best Wishes,

Gaz
matrixone
_VISITCOMMUNITY
Oregon, United States
Joined: February 07, 2004
KitMaker: 869 posts
AeroScale: 862 posts
Posted: Thursday, June 16, 2016 - 04:13 AM UTC
Gary,
The procedure with changing the position of the prop blades sounds worse than it really was to do...before I tried it I was a bit concerned I that I was going to muck it up but it went surprisingly trouble free. The key to it was using a new razor blade and a nearby candle to heat the razor blade enough for a clean cut.

Matrixone
GazzaS
#424
_VISITCOMMUNITY
Queensland, Australia
Joined: April 23, 2015
KitMaker: 4,648 posts
AeroScale: 1,938 posts
Posted: Thursday, June 16, 2016 - 04:59 AM UTC
Les,
Cutting of the blades doesn't scare me, its more aligning them.

Biggest of all is the work required by this Superfort I'm doing. Now that I've learned a lot more about scribing, I'm spending a few hours everyday filling and rescribing tiny errors that I find using glare and shadow. I hope to start foiling next week.

Gaz
GazzaS
#424
_VISITCOMMUNITY
Queensland, Australia
Joined: April 23, 2015
KitMaker: 4,648 posts
AeroScale: 1,938 posts
Posted: Thursday, June 16, 2016 - 02:12 PM UTC
Hi everyone...
I rarely do detailed camo. Even doing a standard 74/75/76 on a 109 is time consuming with masking tape. But this putty makes it really fast.

Adding the final layer of putty took under half an hour.


I've never been too picky about getting my paint color just right...too much effort with too few color pictures for reference.


It's all about fun, really, ain't it?


Thanks for looking!

Gaz
GazzaS
#424
_VISITCOMMUNITY
Queensland, Australia
Joined: April 23, 2015
KitMaker: 4,648 posts
AeroScale: 1,938 posts
Posted: Friday, June 17, 2016 - 04:51 PM UTC
Hi everyone!
I lay in bed during the dark hours this morning with modeller's insomnia. That is when this modeller wakes up for some other reason and instead of emptying his mind when he lays back down, he thinks about models even though it is way to dark and he still needs more sleep.

I found myself thinking about Les' (aka Matrixone) modified propeller spinner. ...and how I could do mine with a minimum of irritation.

And in the dark, it came to me...

See, I have a spare part that will enable me to lengthen the spinner without having to remove the propeller blades. All I had to do was reduce the thickness on the inside of the 'new' spinner and reduce the outside of the 'old' spinner.

I'd forgotten that I have a filler just right for this job.


So, after less than an hour's labor and minimal swearing, she's done. I had to wait for the Milliput to dry...but it was worth it!


Thanks Les!

And thank you for looking!

Gaz
matrixone
_VISITCOMMUNITY
Oregon, United States
Joined: February 07, 2004
KitMaker: 869 posts
AeroScale: 862 posts
Posted: Saturday, June 18, 2016 - 09:44 PM UTC
The spinner looks much better after your modification to it.

However, by only re-shaping the front part of the spinner the problem with the cooling fan blades remains. I.I.R.C. if built O.O.B. the fan blades ended up too far back in the cowl.
By simply relocating the prop blades on the spinner like I did not only improved the look of the spinner but also fixed the issue with the cooling fan blades at the same time.

Another mod that can easily be done to improve the look of this old kit is fixing the angle of the landing gear legs so they are raked forward a few degrees. Look at some profile drawings of the various marks of Fw 190's and you will see what I mean.

Your model is looking great so far!

Matrixone
GazzaS
#424
_VISITCOMMUNITY
Queensland, Australia
Joined: April 23, 2015
KitMaker: 4,648 posts
AeroScale: 1,938 posts
Posted: Sunday, June 19, 2016 - 03:12 AM UTC
Hi Les,
Thanks for your kind words and helpful information. I've got an Eduard A8 that I can definitely apply it toward.... When I get to it. Funnily, it's the kind of thing that gets past my radar all of the time.

This one is a little too far along. The fan and landing gear legs are already in place. So I'm stuck with it. Not that I mind, really. It's an old kit with a small price. And I'm doing a lot of experimental stuff when it comes to painting and weathering.

Gaz
 _GOTOTOP