

Hi all,
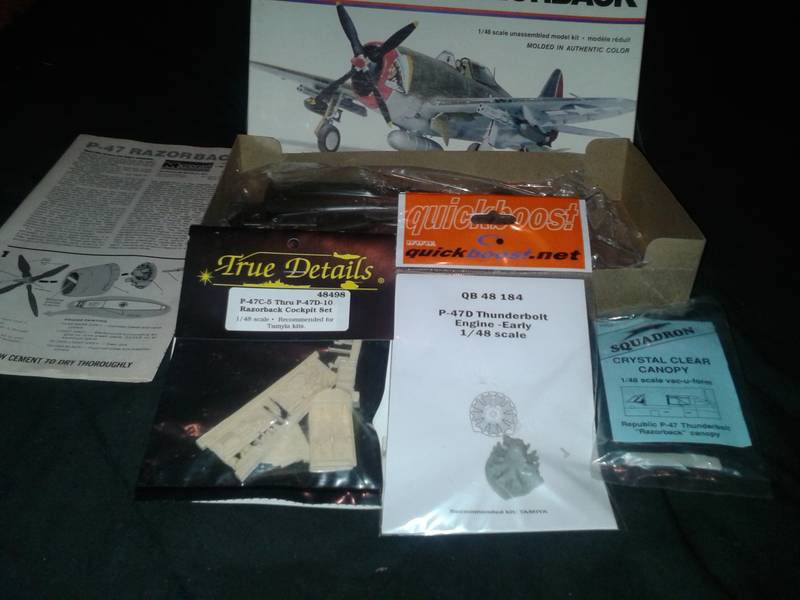
This will be my first campaign build. I'm planning on building a 1/48 Monogram, with a True Details resin cockpit, Quickboost engine and other scratch built odds and ends. This should be quite a bit of fun!
Air Campaigns
Want to start or join a group build? This is where to start.
Want to start or join a group build? This is where to start.
Hosted by Frederick Boucher, Michael Satin
56th FG P-47 Operation - john41492

john41492

#442

Joined: July 20, 2015
KitMaker: 363 posts
AeroScale: 335 posts
Posted: Monday, March 07, 2016 - 10:33 AM UTC

AussieReg

#007

Joined: June 09, 2009
KitMaker: 8,156 posts
AeroScale: 3,756 posts
Posted: Monday, March 07, 2016 - 05:27 PM UTC
Welcome to the Kitmaker network John, I have no doubt that you will enjoy your time here, and hopefully make some new friends and learn some new techniques. Thanks for joining in with our Group Build here, I look forward to following your progress. Can you give us some more detail? Razorback or Bubbletop? Have you selected a particular aircraft?
Cheers, D
Cheers, D

john41492
#442
Joined: July 20, 2015
KitMaker: 363 posts
AeroScale: 335 posts
Posted: Friday, March 11, 2016 - 03:43 AM UTC
Removed by original poster on 03/12/16 - 00:02:30 (GMT).
john41492
#442
Joined: July 20, 2015
KitMaker: 363 posts
AeroScale: 335 posts
Posted: Friday, March 11, 2016 - 05:03 AM UTC
After much deliberation I'm going with the Monogram's venerable 1/48 P-47D (1977 issue) dressed up as David Schilling's first "Hairless Joe". Granted this won't be your routine OOB build!
AussieReg
#007
Joined: June 09, 2009
KitMaker: 8,156 posts
AeroScale: 3,756 posts
Posted: Saturday, March 12, 2016 - 07:38 PM UTC
Great to see you got a grip on the photo posting procedures John, and an excellent choice for your build subject matter.
I am looking forward to seeing how these AM goodies fit and how they change to look of the build.
Cheers, D
I am looking forward to seeing how these AM goodies fit and how they change to look of the build.
Cheers, D
john41492
#442
Joined: July 20, 2015
KitMaker: 363 posts
AeroScale: 335 posts
Posted: Saturday, March 19, 2016 - 07:50 AM UTC
Hi all,
Had a little time and thought I'd add a bit more information on the build. Below is the plane that I'll trying to make a realistic rendition of. While all of you at P-47 Heaven are the inspiration! Thanks John
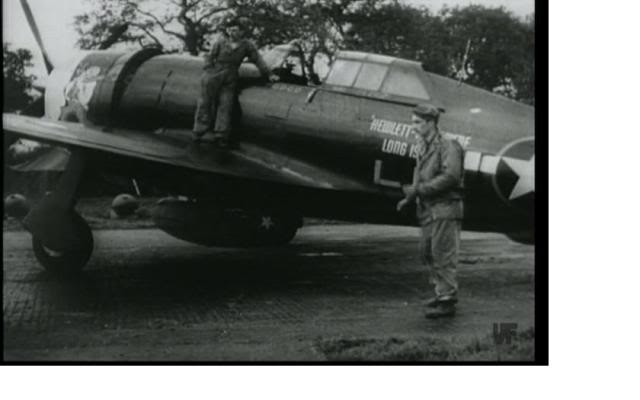
Had a little time and thought I'd add a bit more information on the build. Below is the plane that I'll trying to make a realistic rendition of. While all of you at P-47 Heaven are the inspiration! Thanks John
john41492
#442
Joined: July 20, 2015
KitMaker: 363 posts
AeroScale: 335 posts
Posted: Tuesday, March 22, 2016 - 07:44 AM UTC
And so it begins... the long road of scribing the raised panel lines.
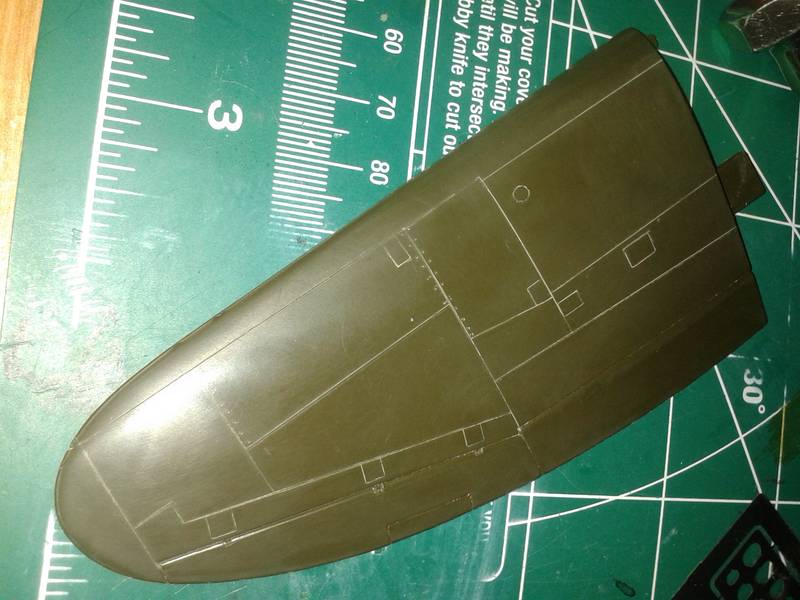
And yet another opportunity to practice the superglue filling process... An inadvertent line below the gun bay. Argggh!
And yet another opportunity to practice the superglue filling process... An inadvertent line below the gun bay. Argggh!
AussieReg
#007
Joined: June 09, 2009
KitMaker: 8,156 posts
AeroScale: 3,756 posts
Posted: Tuesday, March 22, 2016 - 08:44 AM UTC
Hi John.
Great to see some progress on your build, and really great to see another rescribe project in action!
I'm not sure if you use Tamiya Extra Thin solvent cement, as a lot of us do, but you might like to try out making your own filler using this cement and sprue from your kit. I did a little tutorial in my recent Me262 Group Build on THIS PAGE with the post dated August 12, a bit over half way down the page.
Keep up the great work.
Cheers, D
john41492
#442
Joined: July 20, 2015
KitMaker: 363 posts
AeroScale: 335 posts
Posted: Wednesday, March 23, 2016 - 02:14 AM UTC
Hey Darian, thanks for the idea. I've used this technique with Testors liquid cement, but not with Tamiya. The results have been good. I'm just now converting over to Tamiya liquid for lots of stuff and really like it. For this type of work though, I've found that thin super glue seems to work best, primarily due to the fast dry time. Granted I've only a 10 min window to do what needs to be done, so it's done in little steps. Kind of like this project!
john41492
#442
Joined: July 20, 2015
KitMaker: 363 posts
AeroScale: 335 posts
Posted: Wednesday, March 23, 2016 - 02:22 AM UTC
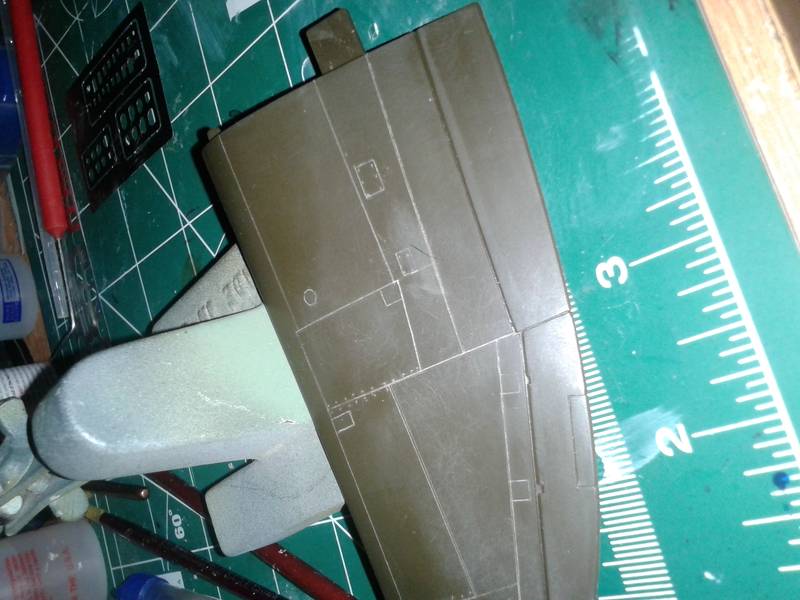
Case and point, last night I filled the top part of the 'inadvertent' panel line. took all of 5 mins. The wing is starting to shape up, though the lower half will push my limits as it involves the removal of the rack! Still better than a good day at work! 
john41492
#442
Joined: July 20, 2015
KitMaker: 363 posts
AeroScale: 335 posts
Posted: Tuesday, April 05, 2016 - 09:14 AM UTC
The scribing job continues, though I find myself second guessing if I'm going deep enough, argh! So I opted to do a diversion and work on the Quickboost R-2800 early version engine. This is a model unto itself! First it was washed and then given a shot of Model Masters(MM) Stainless, followed by sealer. Then a little wash of burnt umber (MM acrylic mixed with 70% IPA) Then the real fun! Stretching sprue. My original intent was to use 0.51 mm dia piano wire cut to 5.25 mm. Working with this was a challenge, so I went with sprue. Cut to length and given a gloss black of Tamiya mixed with lacquer thinner. The black will need to be touched up a bit.

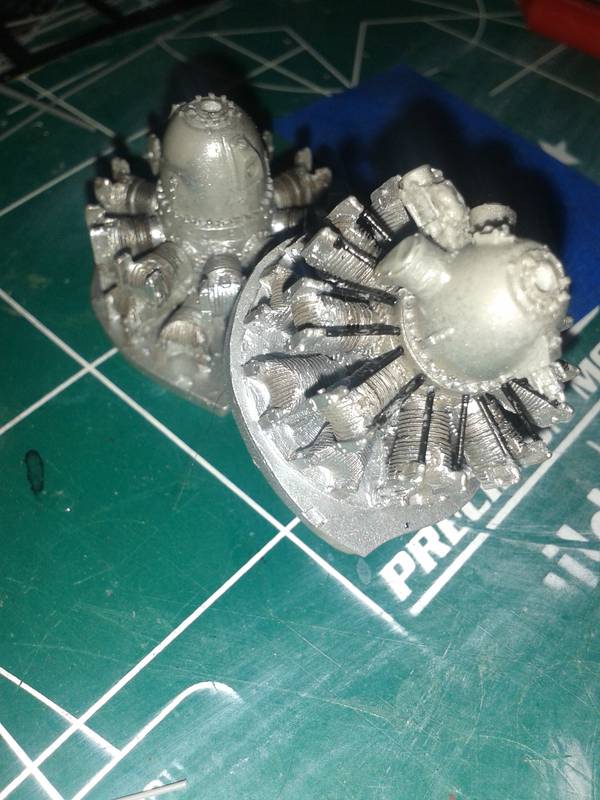
Next up is painting the gear box. Any thoughts on this color? I've seen a nice blue/grey and not sure of the FS number, have used neutral grey in the past, though always felt it was missing a bit of blue...
Next up is painting the gear box. Any thoughts on this color? I've seen a nice blue/grey and not sure of the FS number, have used neutral grey in the past, though always felt it was missing a bit of blue...
AussieReg
#007
Joined: June 09, 2009
KitMaker: 8,156 posts
AeroScale: 3,756 posts
Posted: Tuesday, April 05, 2016 - 10:08 AM UTC
Looking good John, neat work on the pushrods! A lick of paint will finish them off nicely.
Cheers, D
Cheers, D
Removed by original poster on 04/28/16 - 02:48:25 (GMT).
Removed by original poster on 04/28/16 - 02:51:54 (GMT).
Removed by original poster on 04/28/16 - 02:53:03 (GMT).
john41492
#442
Joined: July 20, 2015
KitMaker: 363 posts
AeroScale: 335 posts
Posted: Wednesday, April 27, 2016 - 07:56 AM UTC
Hi all,
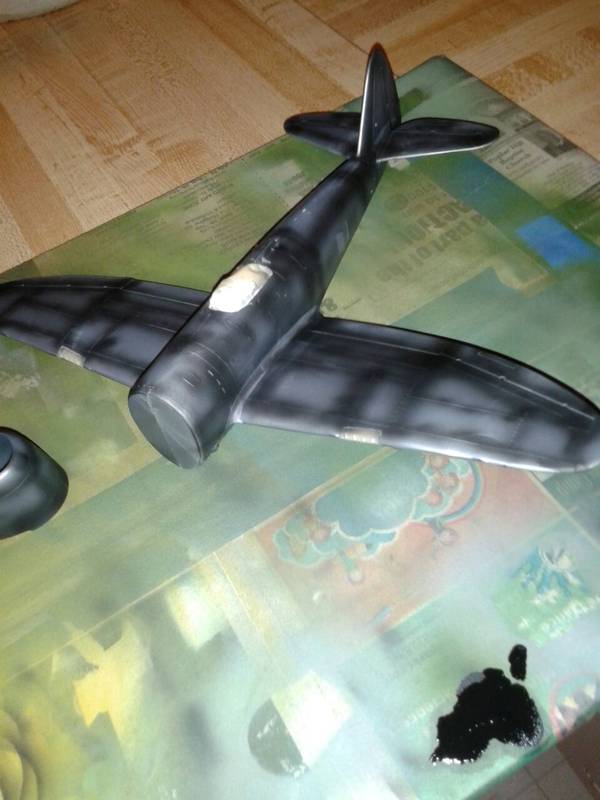
Apparently I'm still not too good with this whole upload photo thing. Here's an update. The scribing continues on the wings. Here the pylon has been cut off using Mean Mr Razor Saw, along with his buddies Mr File and Big freaking sanding stick! Once smoothed out the hole was filled with cardstock and then filled with Tamiya putty.
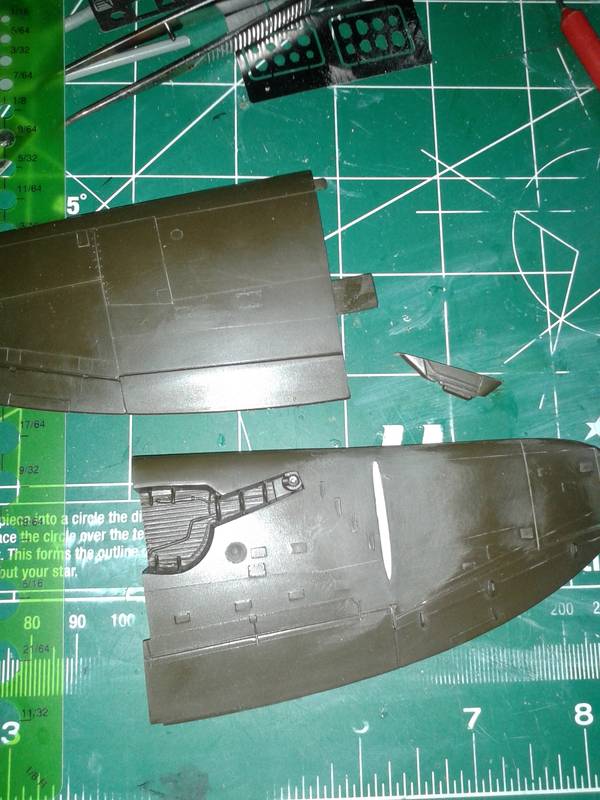
Apparently I'm still not too good with this whole upload photo thing. Here's an update. The scribing continues on the wings. Here the pylon has been cut off using Mean Mr Razor Saw, along with his buddies Mr File and Big freaking sanding stick! Once smoothed out the hole was filled with cardstock and then filled with Tamiya putty.
john41492
#442
Joined: July 20, 2015
KitMaker: 363 posts
AeroScale: 335 posts
Posted: Wednesday, April 27, 2016 - 08:21 AM UTC
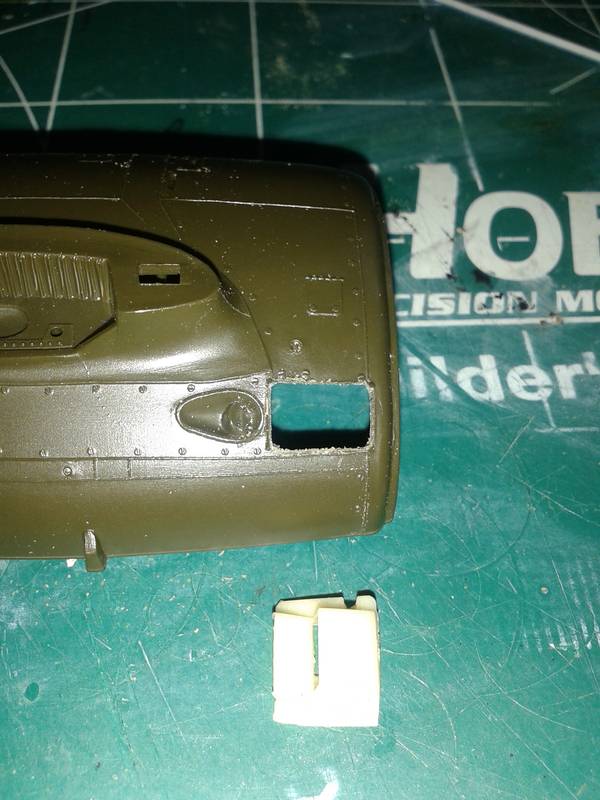
I also got the pushrods on the engine cleaned up, and have made the ring harness as well as started the job of redoing the cowl flaps. First was to replace the curved ones and then carve out the kit part to allow for angled cowl replacements. Hopefully this works, if not there is a set of open D-5/6 cowls on the way (Quickboost for Tamiya). Currently the replacement flaps are tacked on with white glue for test fitting...
Another note, is that the resin motor is not to scale. My guess is it's about 6" scale too small. On the bright side it is the same size as the kit's motor, so it shouldn't be too noticeable. This was a disappointment, though I won't complain as I have 4 now and snagged at 6 USD each (with shipping!). If you haven't guessed there are 4 more in hangar. Yay me!
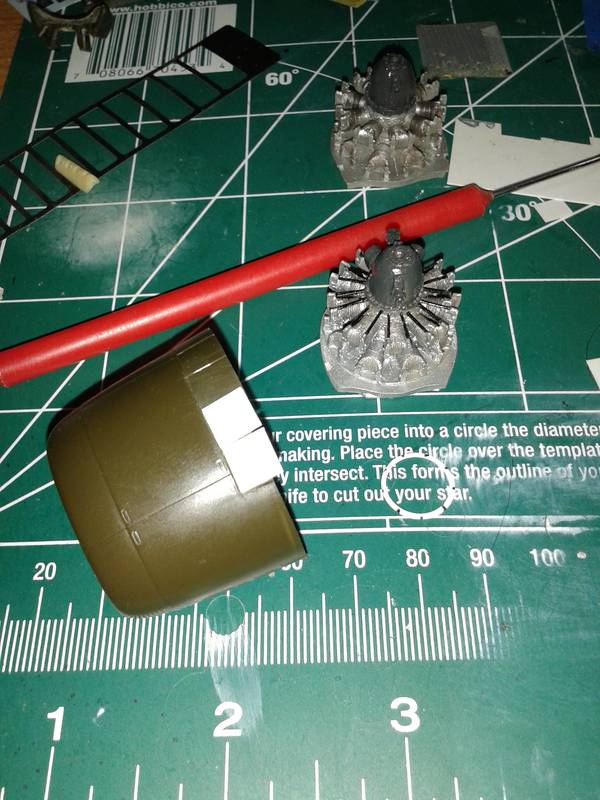
I've also cut out the intake from the kit and am cleaning it up to house all this stuff! The resin bits to the side are cast from my test bed Tamiya kit. Specifically the gun ports soon to be added to the wings, and the oil cooler vents. these little bits really do enhance the overall appearance of the kit.
Next up will be the wire harness, though in the future I'm really going to rethink this, as one can't really see it and it doesn't seem worth all the work. Though the skill gained will pay off on other projects. I'm very much enjoying this project so far, and that is what it's all about!
Another note, is that the resin motor is not to scale. My guess is it's about 6" scale too small. On the bright side it is the same size as the kit's motor, so it shouldn't be too noticeable. This was a disappointment, though I won't complain as I have 4 now and snagged at 6 USD each (with shipping!). If you haven't guessed there are 4 more in hangar. Yay me!
I've also cut out the intake from the kit and am cleaning it up to house all this stuff! The resin bits to the side are cast from my test bed Tamiya kit. Specifically the gun ports soon to be added to the wings, and the oil cooler vents. these little bits really do enhance the overall appearance of the kit.
Next up will be the wire harness, though in the future I'm really going to rethink this, as one can't really see it and it doesn't seem worth all the work. Though the skill gained will pay off on other projects. I'm very much enjoying this project so far, and that is what it's all about!
Removed by original poster on 06/01/16 - 03:02:21 (GMT).
Removed by original poster on 06/01/16 - 03:09:46 (GMT).
john41492
#442
Joined: July 20, 2015
KitMaker: 363 posts
AeroScale: 335 posts
Posted: Tuesday, May 31, 2016 - 08:30 AM UTC
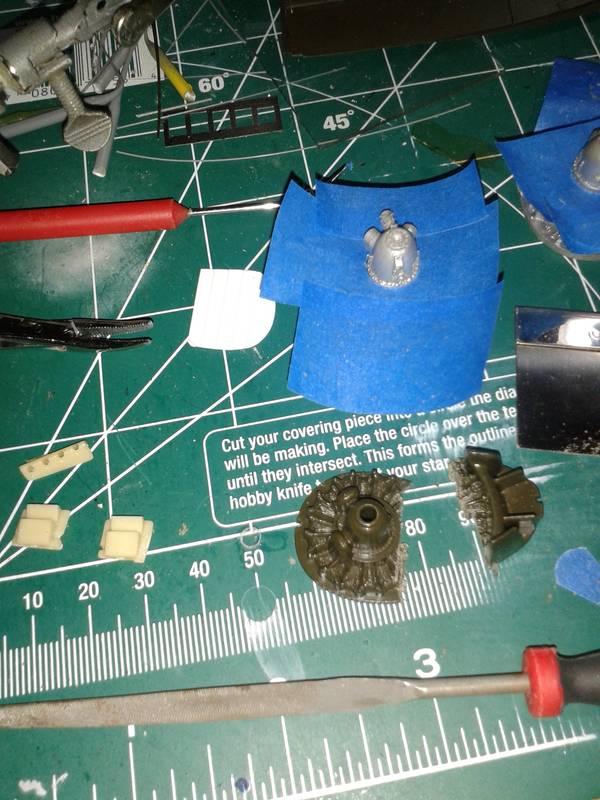
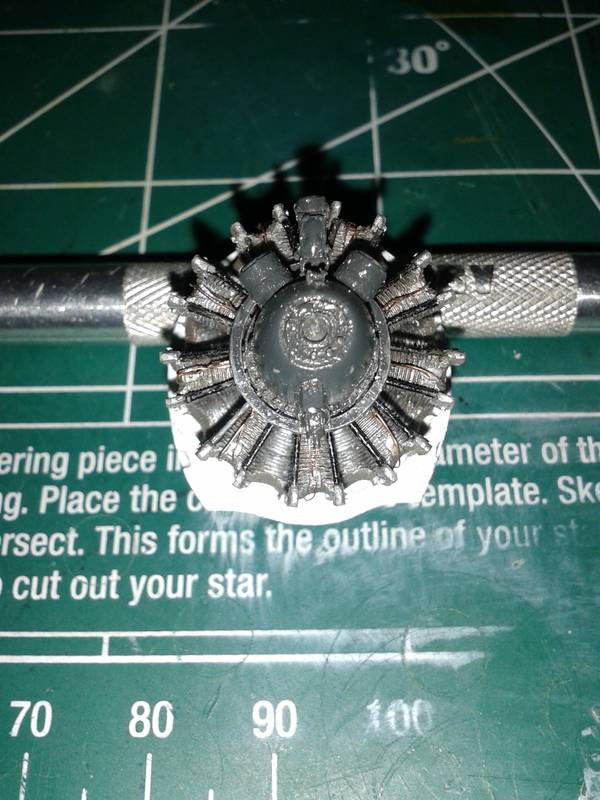
Hi all, almost missed my self imposed monthly update! Work continues on the airframe and motor! I made a wire harness from 0.01 inch plastic stock and then super glued on wires to the their respective places. I felt the need to only do the outer cylinders as the back row won't really be seen.
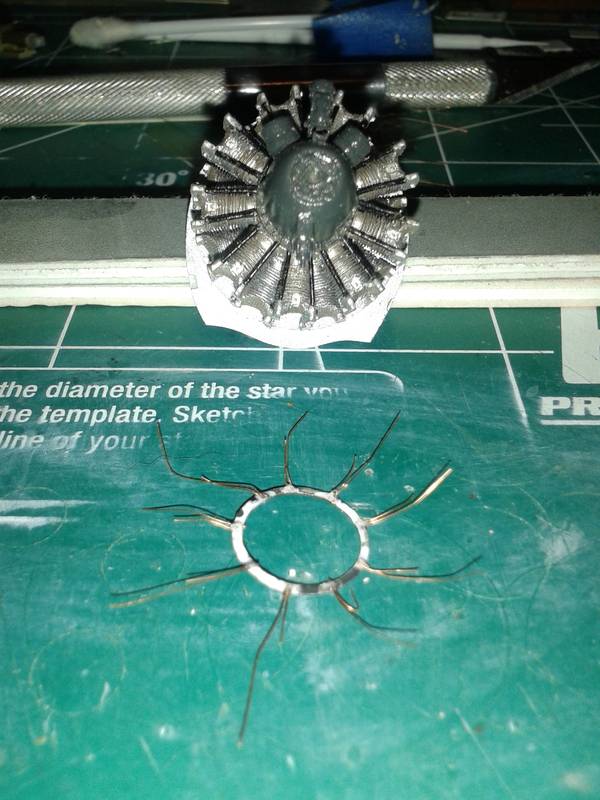
Getting the ring to go behind the magneto's was a challenge, but turned out ok. Now a bit of touch up and figure out how to drill the hole for the prop.
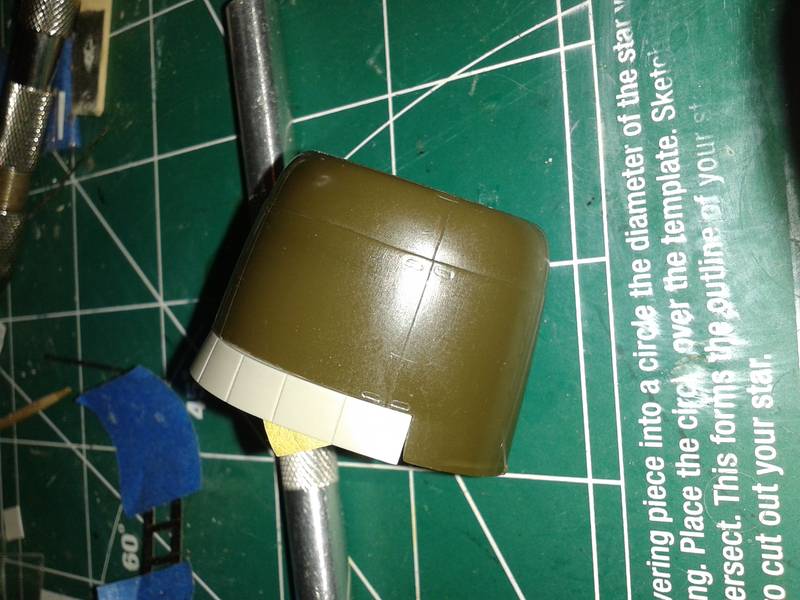
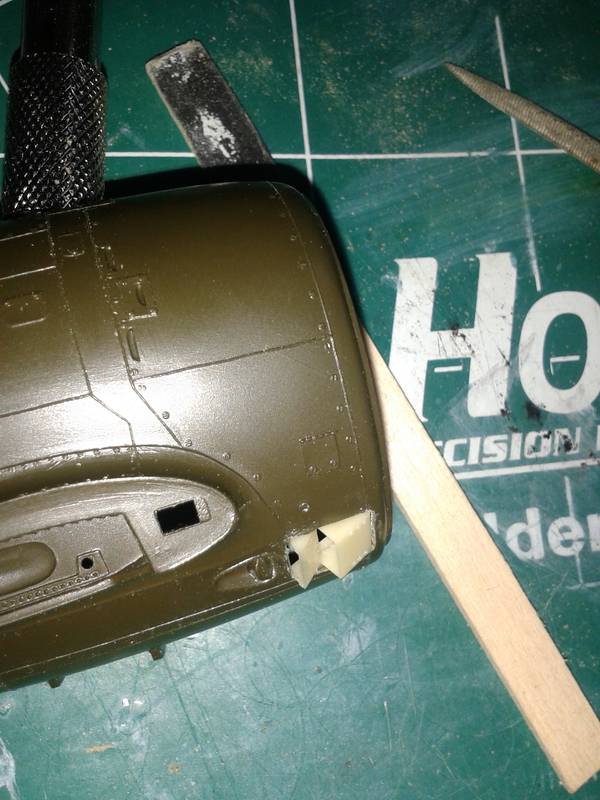
Work on the cowl flaps was going smooth albeit tedious when the resin set from Quickboost came (I'm a bit of a sucker for good resin). Needless to say I opted to stop scraping and cut off the kit flaps and replace them with the new resin.... Monogram plastic from back in the day is pretty thick! I'd forgotten that!
After much scraping I was able to get a nice fit. Here it's loosely taped in place.
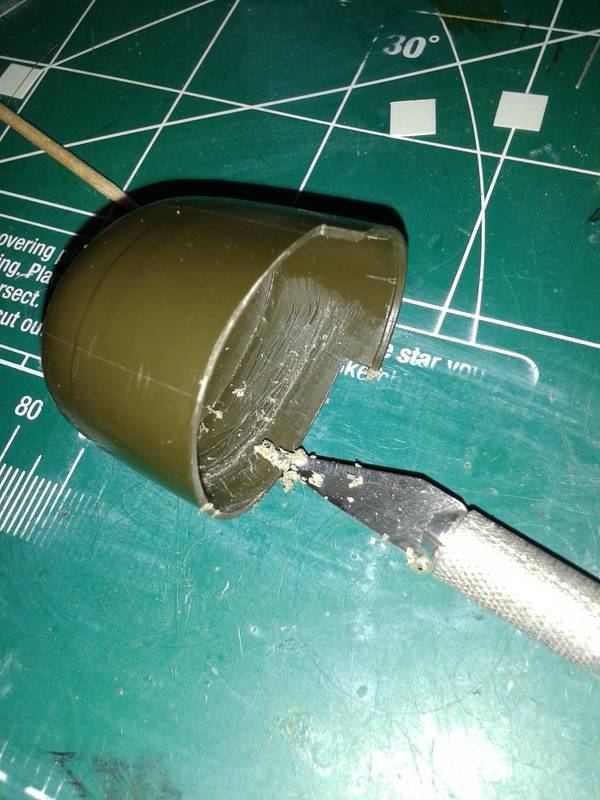
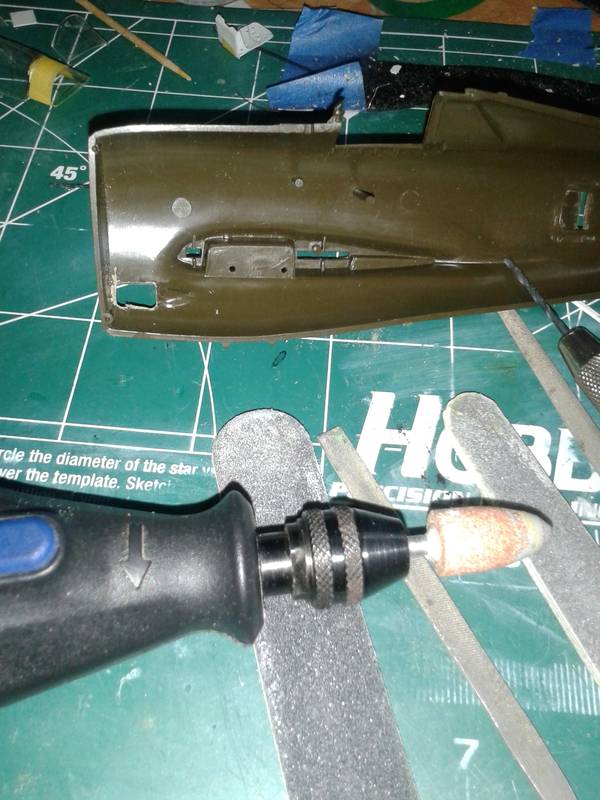
Since scraping was the order, I continued on with the oil cooling vents. First drilling out and filing the molded in detail away, and then thin from the inside. The Dremel tool made quick work of the thick plastic, and within an hour the vent fit fine!
Up next will be more scribing! Oh boy...
Getting the ring to go behind the magneto's was a challenge, but turned out ok. Now a bit of touch up and figure out how to drill the hole for the prop.
Work on the cowl flaps was going smooth albeit tedious when the resin set from Quickboost came (I'm a bit of a sucker for good resin). Needless to say I opted to stop scraping and cut off the kit flaps and replace them with the new resin.... Monogram plastic from back in the day is pretty thick! I'd forgotten that!
After much scraping I was able to get a nice fit. Here it's loosely taped in place.
Since scraping was the order, I continued on with the oil cooling vents. First drilling out and filing the molded in detail away, and then thin from the inside. The Dremel tool made quick work of the thick plastic, and within an hour the vent fit fine!
Up next will be more scribing! Oh boy...
AussieReg
#007
Joined: June 09, 2009
KitMaker: 8,156 posts
AeroScale: 3,756 posts
Posted: Tuesday, May 31, 2016 - 09:07 AM UTC
Great to see you making progress there John, your modifications to take the resin parts are working beautifully.
Looking forward to the next update.
Cheers, D
Looking forward to the next update.
Cheers, D
john41492
#442
Joined: July 20, 2015
KitMaker: 363 posts
AeroScale: 335 posts
Posted: Tuesday, May 31, 2016 - 01:45 PM UTC
Thanks Damian, I've been kind of busy with spring here, and clearing some bench space. Completed one finally! Now to figure out how you all get the nice photos. Not so good so far, there must be a trick to the backgrounds. It is not using a sheet!
AussieReg
#007
Joined: June 09, 2009
KitMaker: 8,156 posts
AeroScale: 3,756 posts
Posted: Sunday, June 19, 2016 - 08:34 AM UTC
Quoted Text
Thanks Damian, I've been kind of busy with spring here, and clearing some bench space. Completed one finally! Now to figure out how you all get the nice photos. Not so good so far, there must be a trick to the backgrounds. It is not using a sheet!
Hi John. Almost monthly update time? I find that having a couple of lights from different directions slightly behind you when taking the photos will give a clearer image and take away the glare spots. I don't have any fancy equipment, in fact right now I am using my iPad to take my photos.
Cheers, D
john41492
#442
Joined: July 20, 2015
KitMaker: 363 posts
AeroScale: 335 posts
Posted: Sunday, July 03, 2016 - 04:22 AM UTC
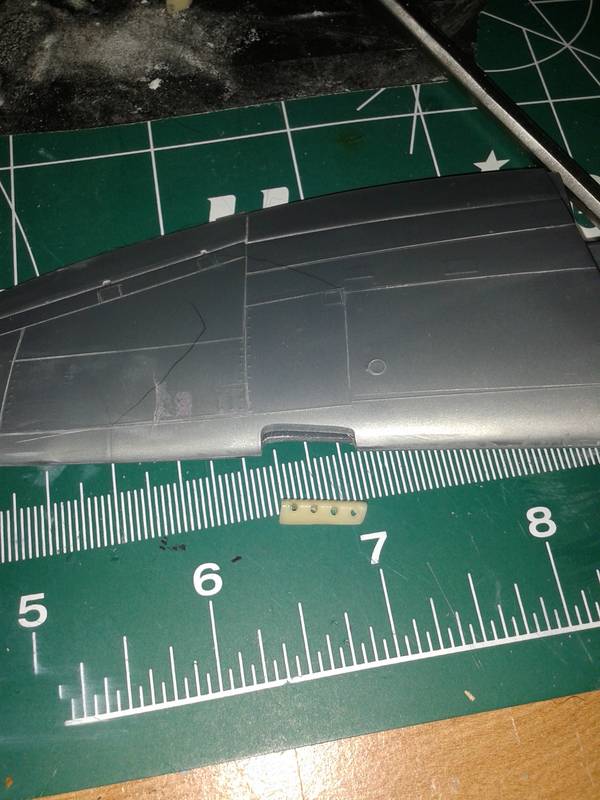
Hi all, sorry for the delay, although there is a reason. My build has had a minor setback, of which I'll explain. Some time back I did a "Proof of Concept" on Monogram's D-25 looking at 7 specific items of which the gun ports were the primary focus. I addressed this via casting Tamiya's D-25 gun ports in resin and then mated them into the Monogram kit. The results were very nice...
 |

WEB HOSTING BY


Copyright ©2021 AeroScale and Kitmaker Network, a subsidiary of Silver Star Enterprises
All Rights Reserved. Please read our Conditions of Use and Privacy Policy.
All Rights Reserved. Please read our Conditions of Use and Privacy Policy.