

Matt,
I really like your method for making and duplicating ignition wires which usually drives me crazy doing a twin bank cylinder engine in 1/48 scale.
Joel
World War II
Discuss WWII and the era directly before and after the war from 1935-1949.
Discuss WWII and the era directly before and after the war from 1935-1949.
Hosted by Rowan Baylis
1/32 A6M2N Rufe & A6M5
Joel_W

Joined: December 04, 2010
KitMaker: 11,666 posts
AeroScale: 7,410 posts
Posted: Saturday, July 23, 2016 - 12:34 AM UTC


Scrodes

Joined: July 22, 2012
KitMaker: 771 posts
AeroScale: 763 posts
Posted: Saturday, July 23, 2016 - 05:46 AM UTC
Thanks Joel.
It's something that I probably picked up from Chuck at some point in time. Fast and efficient.
As I was looking at my reference photo, I noticed the wiring did not go at all like I thought it did - and ended up needing twice as many made up - in three variations. We'll see how it all works out - if I don't like it, I'll just rip 'em out and redo it.
The poor A6M5 is getting tired of being my test bed lol. C'est la vie!
Joel_W
Joined: December 04, 2010
KitMaker: 11,666 posts
AeroScale: 7,410 posts
Posted: Sunday, July 24, 2016 - 03:59 AM UTC
Quoted Text
Thanks Joel.
It's something that I probably picked up from Chuck at some point in time. Fast and efficient.
As I was looking at my reference photo, I noticed the wiring did not go at all like I thought it did - and ended up needing twice as many made up - in three variations. We'll see how it all works out - if I don't like it, I'll just rip 'em out and redo it.
The poor A6M5 is getting tired of being my test bed lol. C'est la vie!
Matt,
I'm a expert at ripping out 1/48 scale ignition wiring and redoing them. Most of the redoes weren't much better then what I ripped out.
Joel
Scrodes
Joined: July 22, 2012
KitMaker: 771 posts
AeroScale: 763 posts
Posted: Sunday, July 24, 2016 - 04:31 AM UTC
Yeah - but you feel better about it because you put the effort in. 
Scrodes
Joined: July 22, 2012
KitMaker: 771 posts
AeroScale: 763 posts
Posted: Wednesday, August 10, 2016 - 07:13 AM UTC
Hey folks
I have been neglecting this thread, but not the planes, I promise.
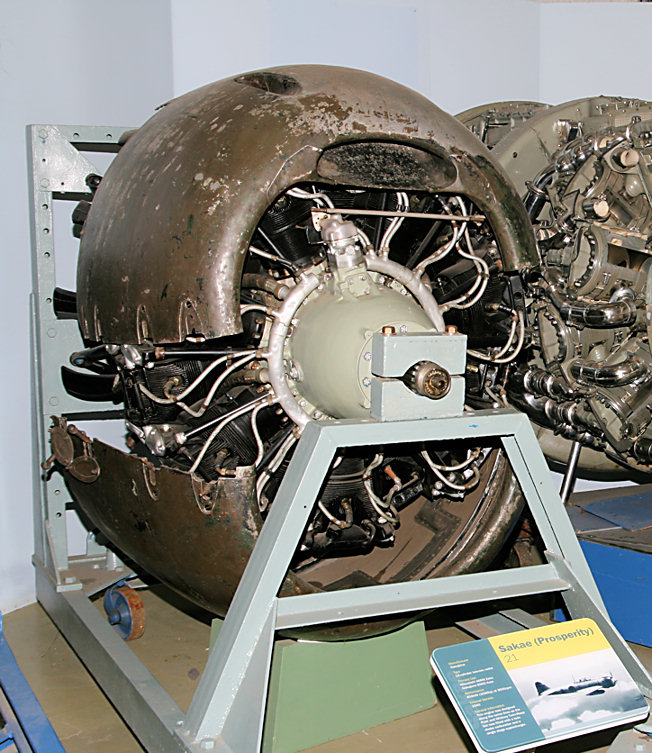
I know it doesnt look like much progress, but I have been busy. There are very few really good photos of the Sakae engine and I had been using the Wright Cyclones on the B-25 we have at the Canadian Warplane Heritage Museum as a general guide. Then I stumbled on a decent photo of the Sakae and discovered I had to redo everything that I had done.
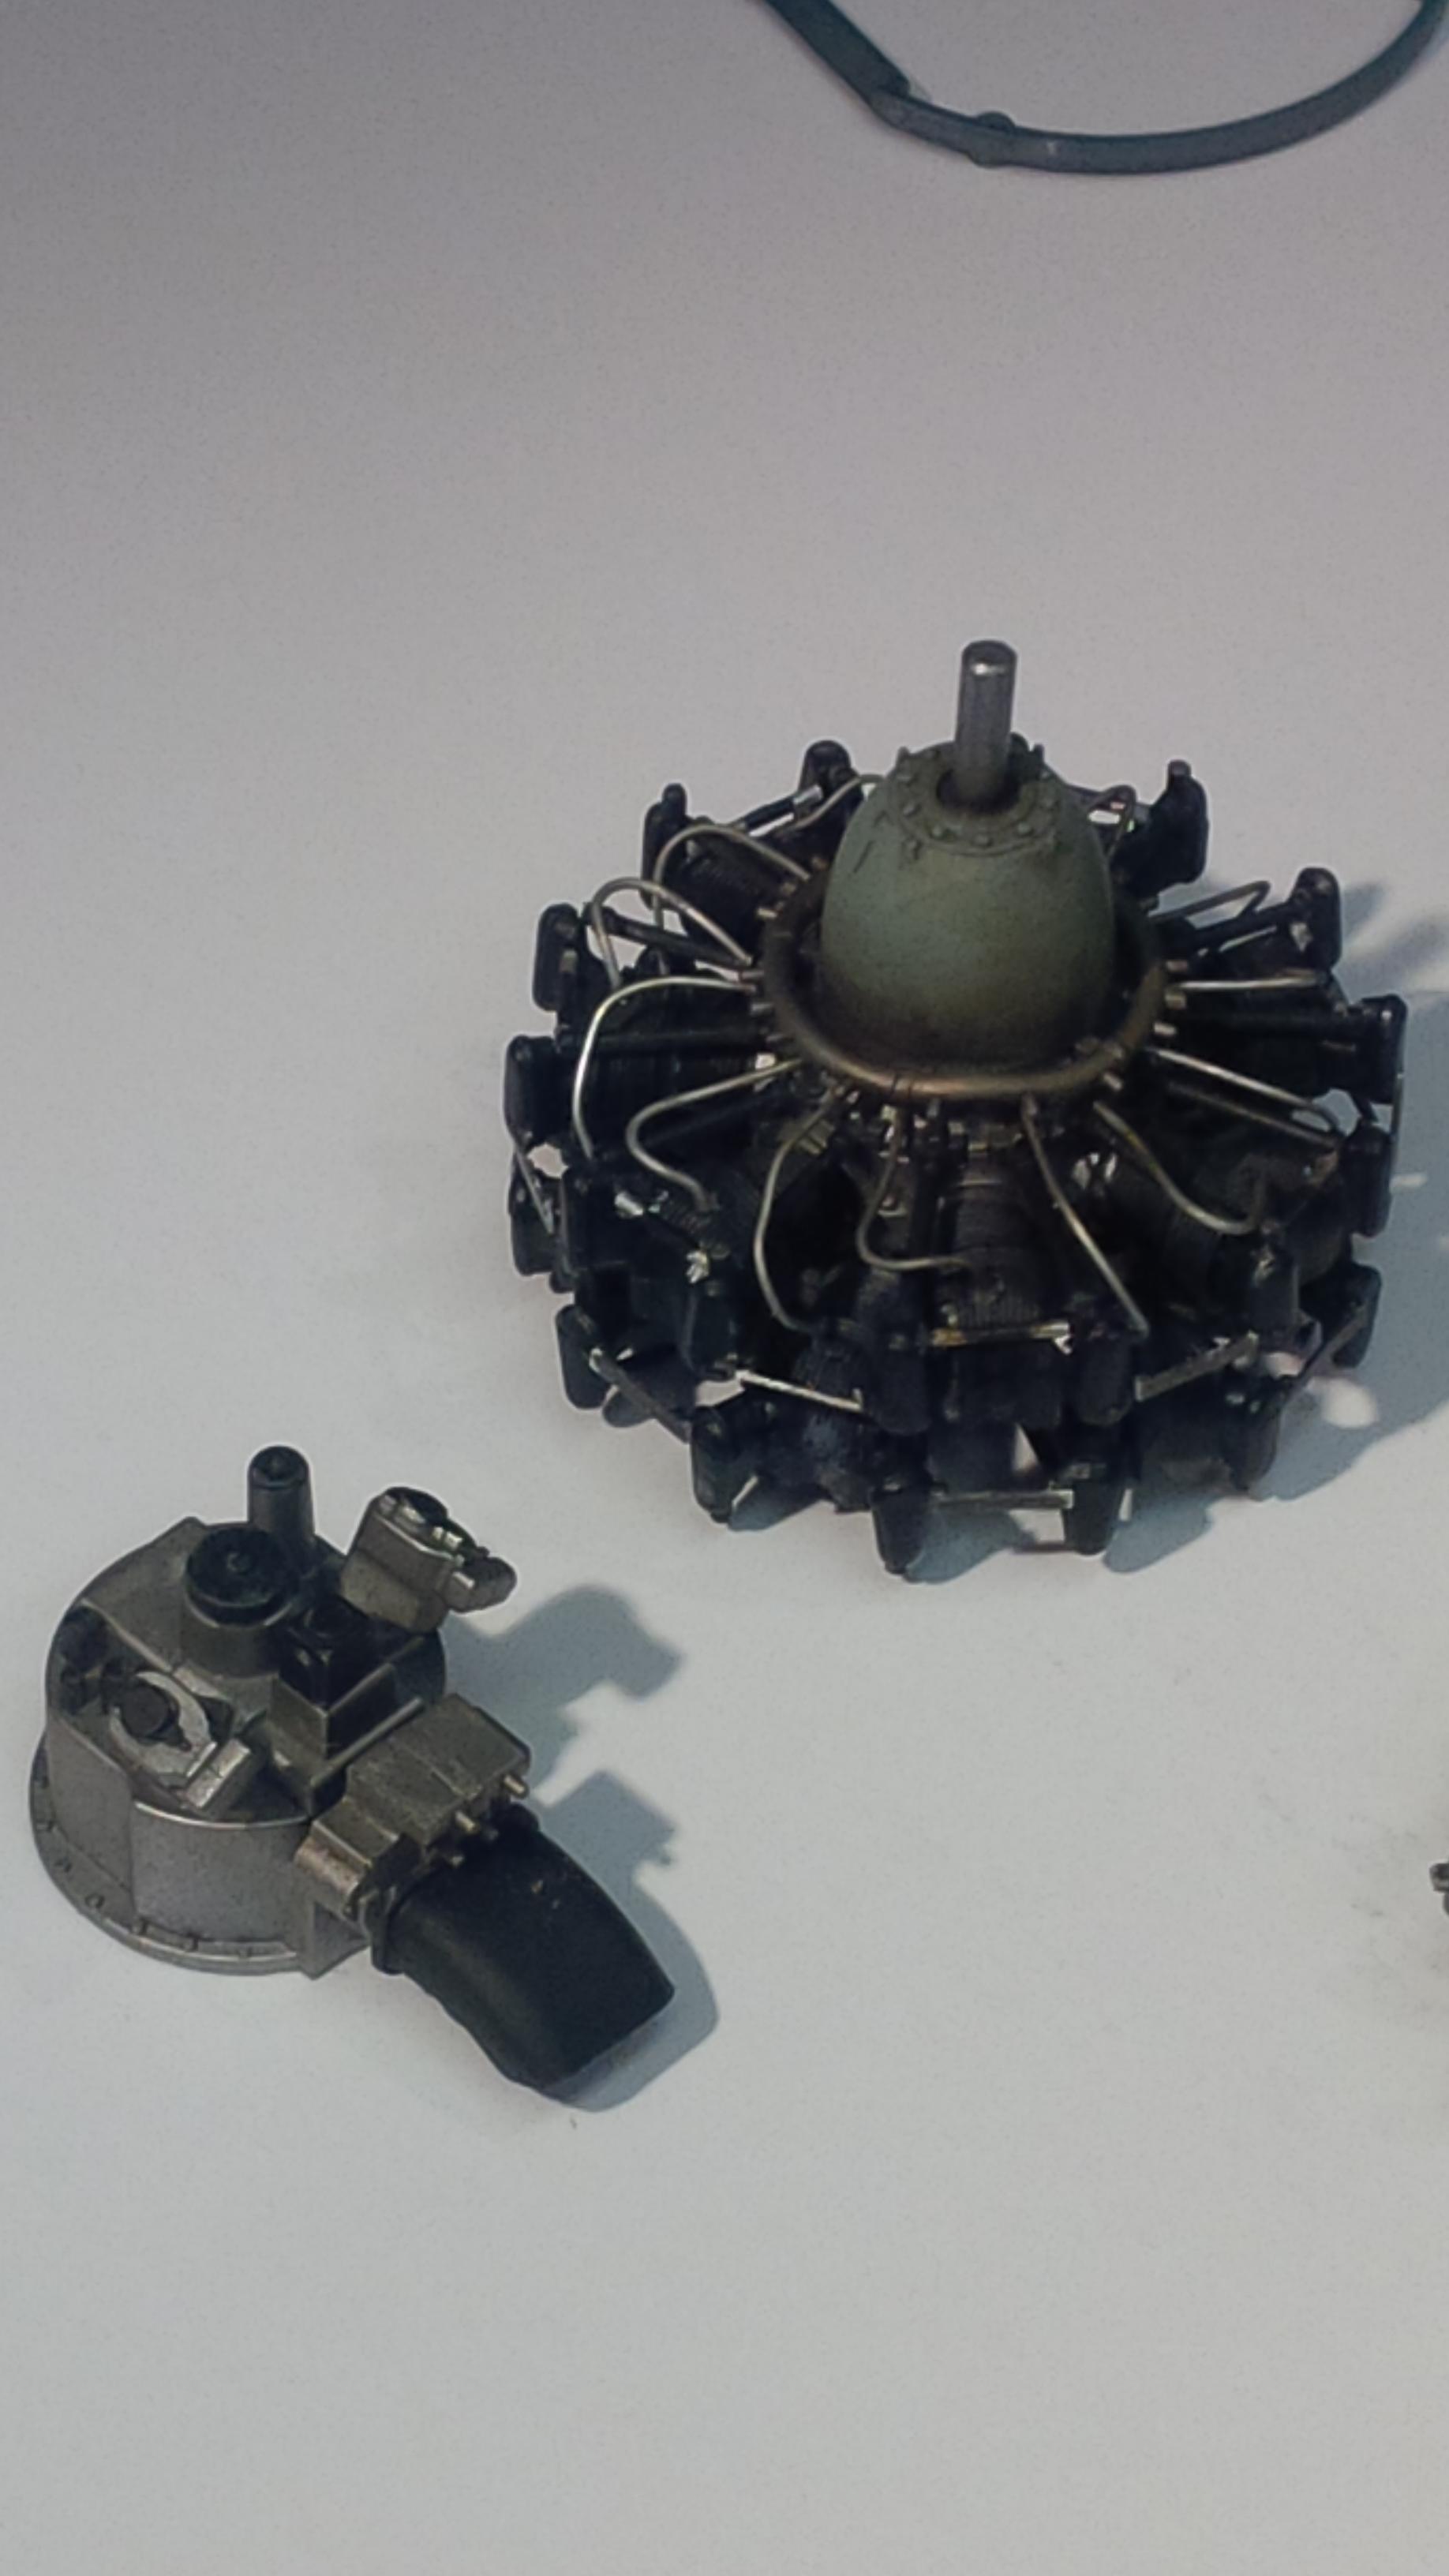
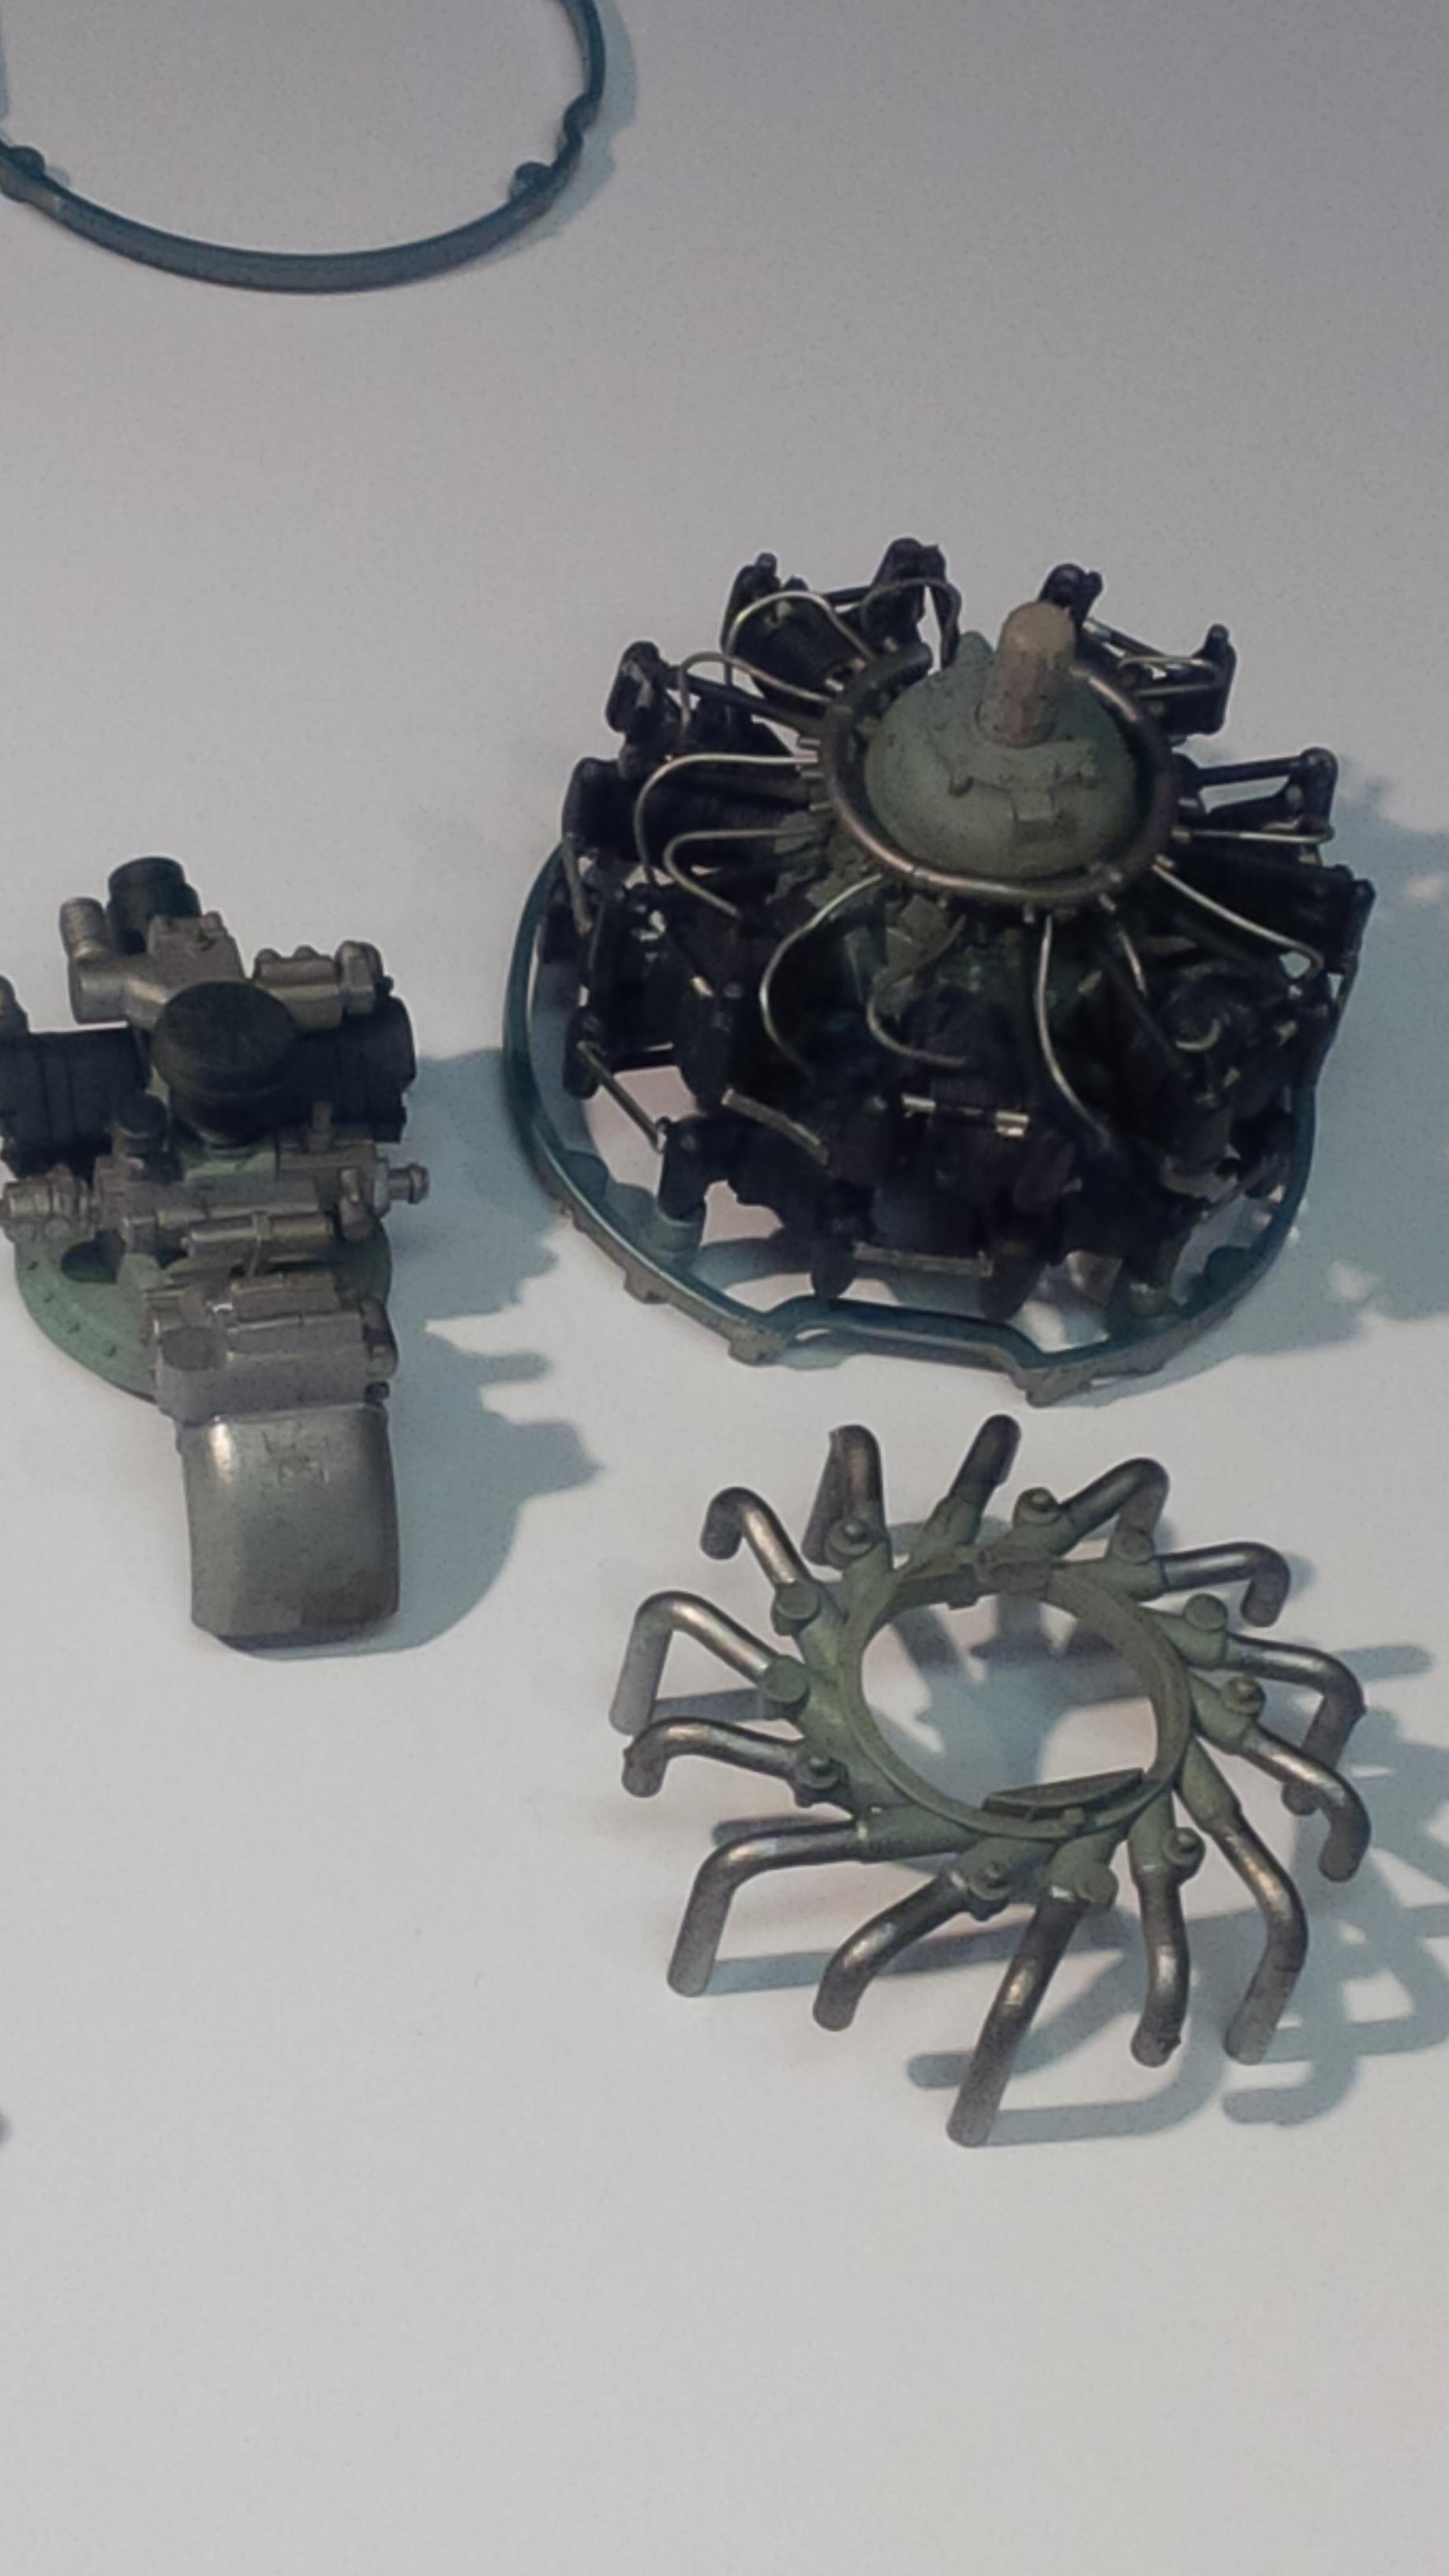
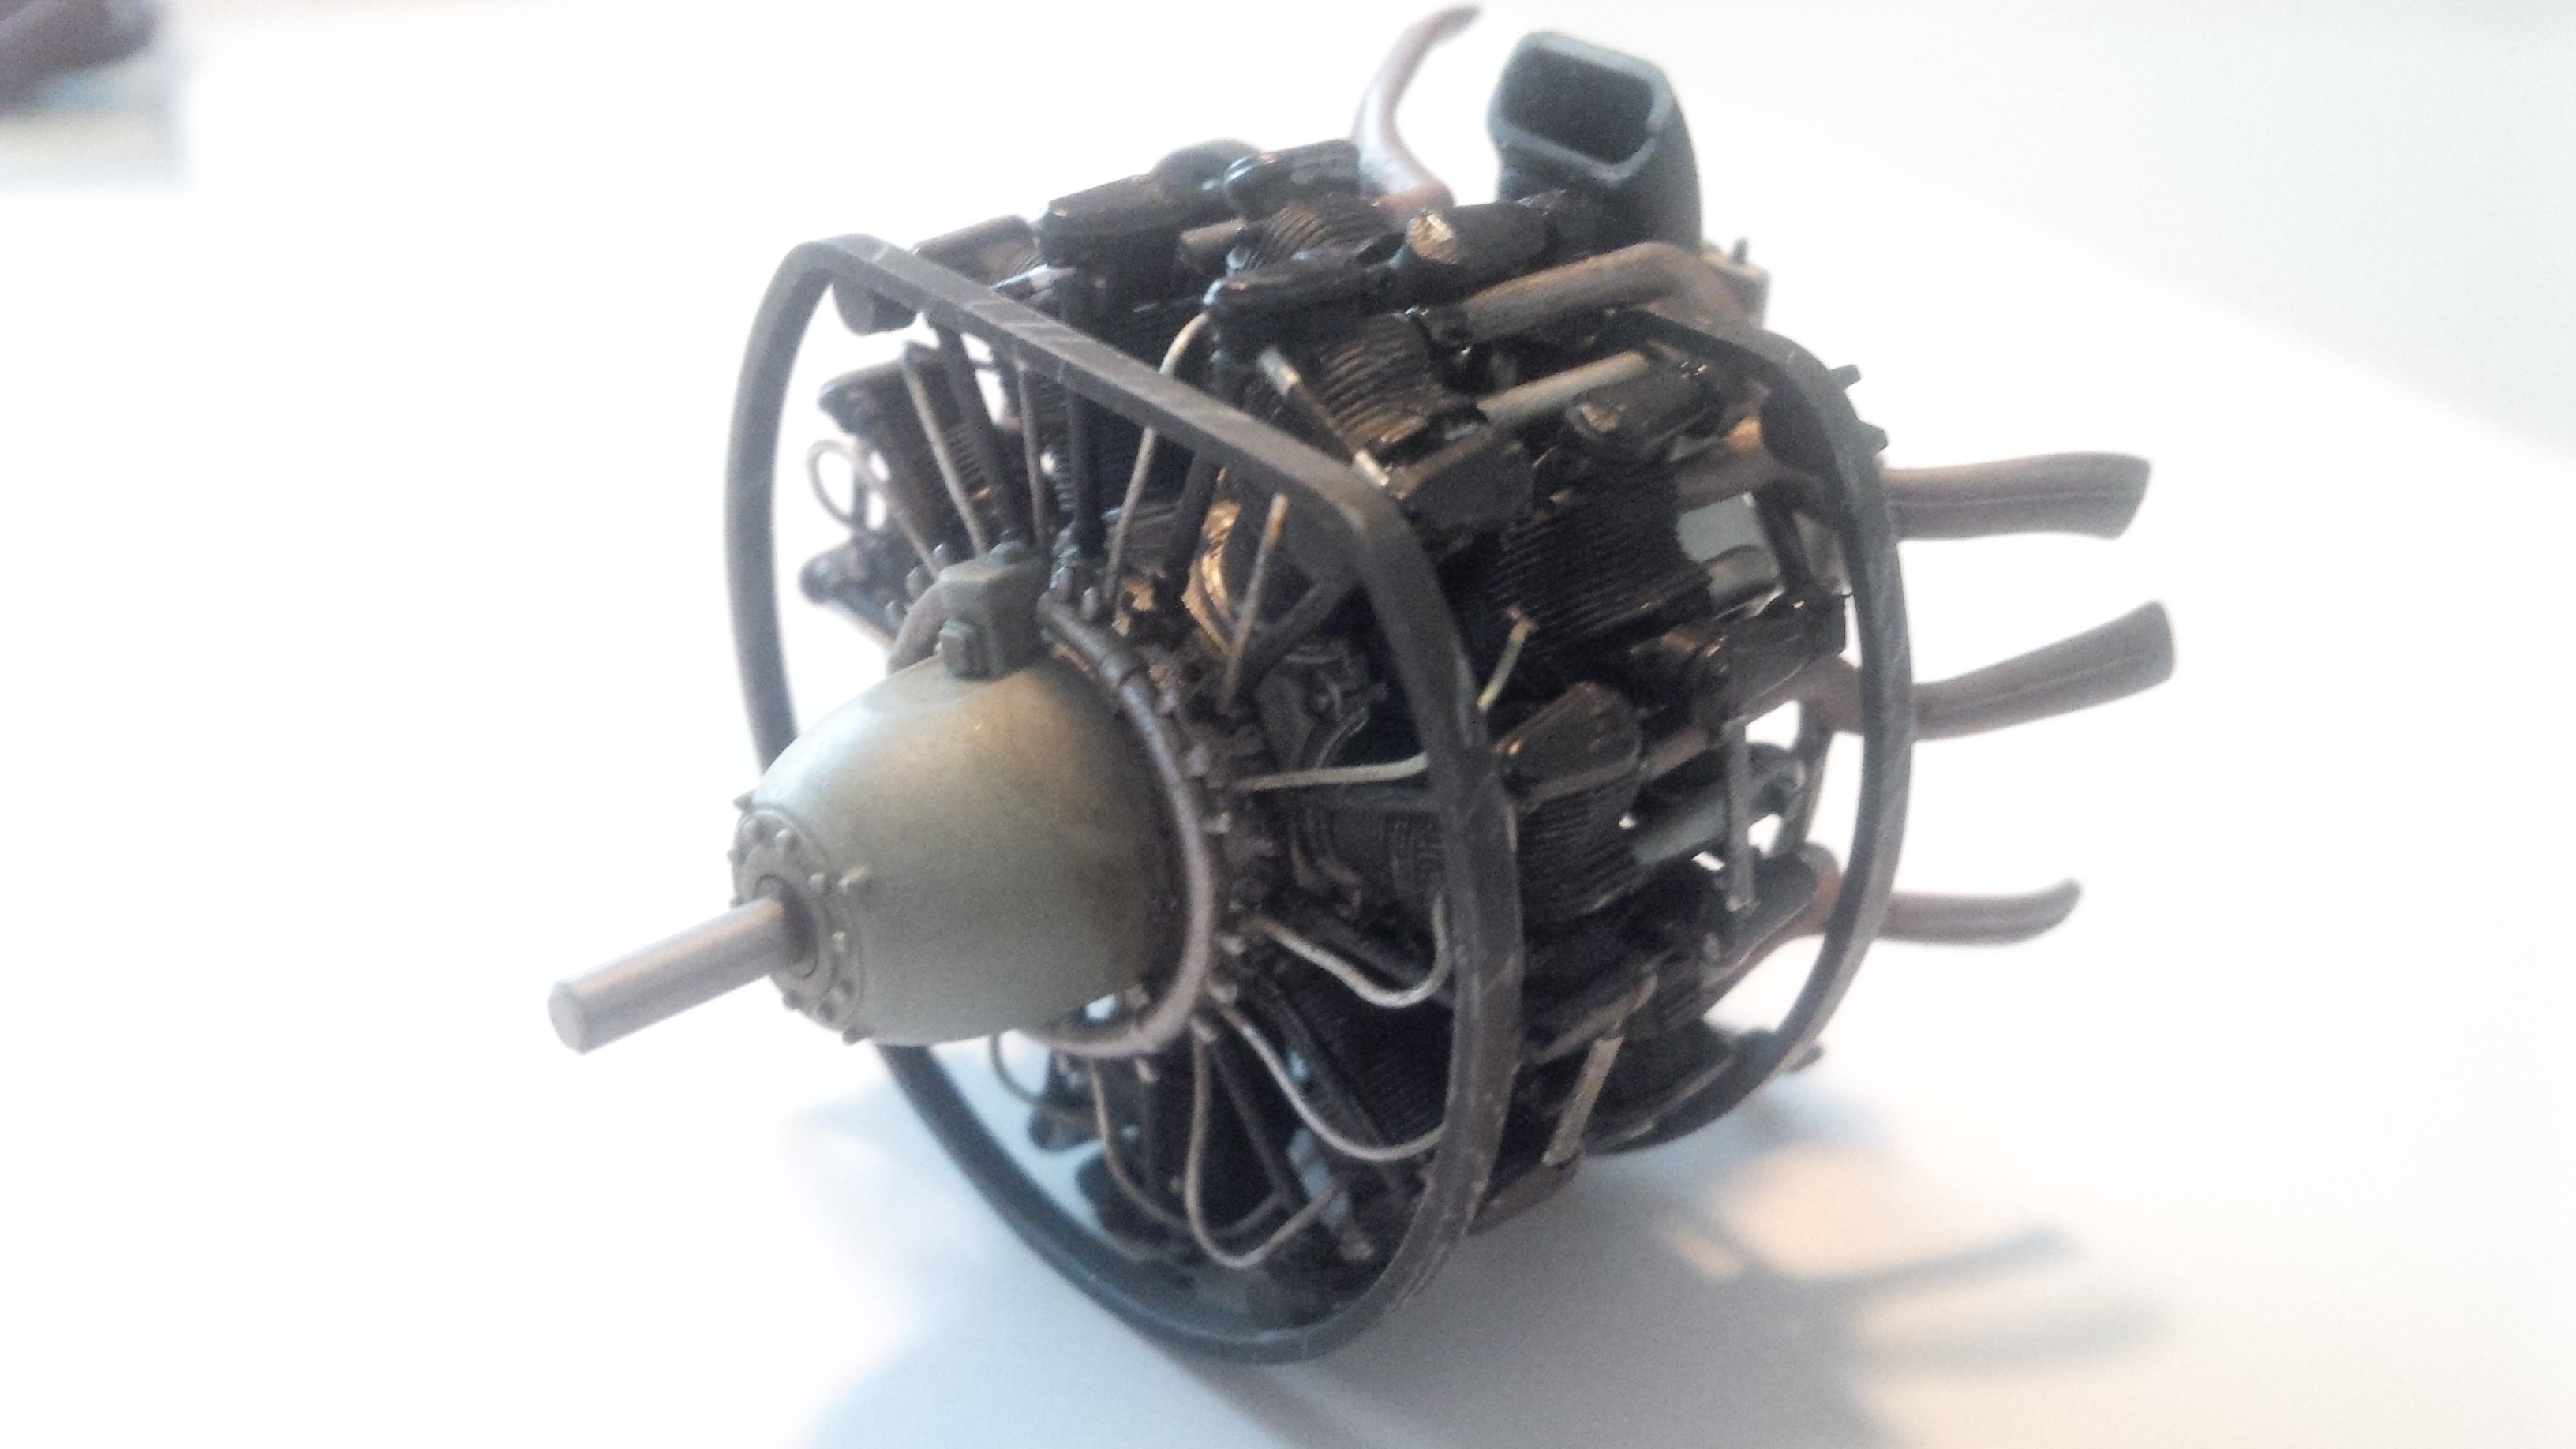
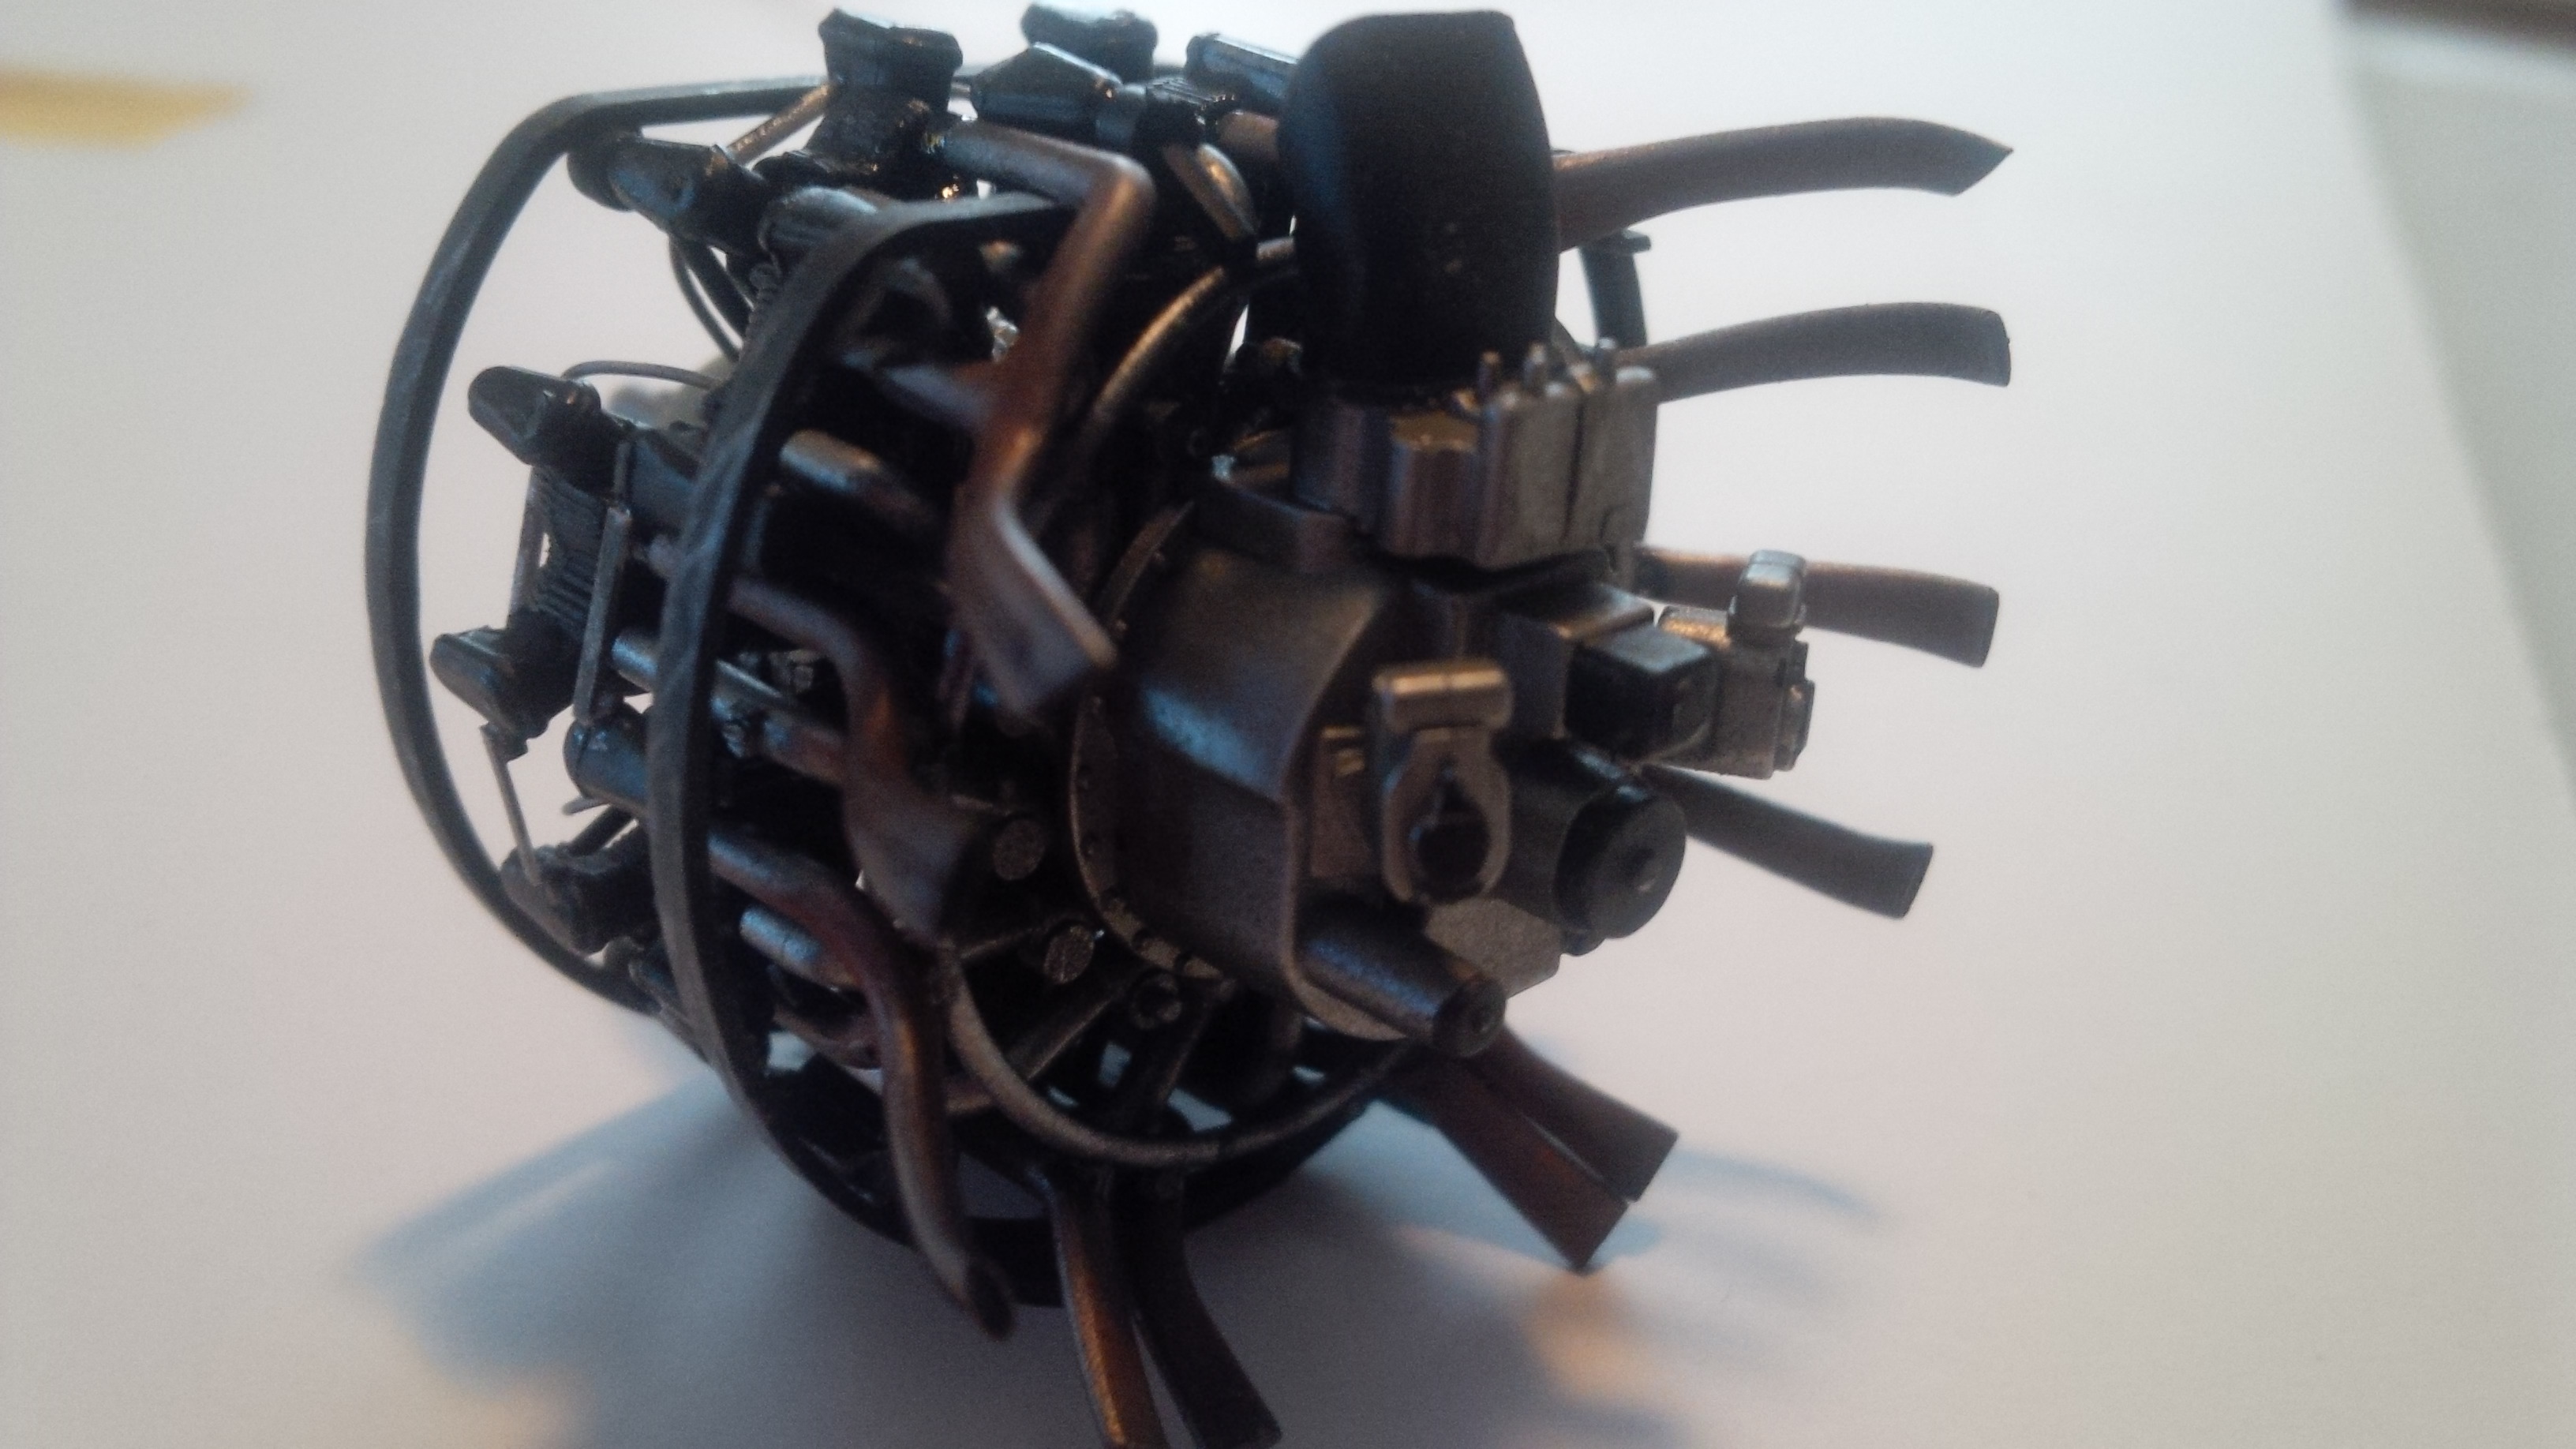
Here are the engines theyre mostly assembled and wired, but the ignition wires still have to go to the ignition ring, which has yet to be installed.(yes, I know the pushrods aren't all lined up yet) The balance tubes and cylinder braces have yet to be painted. That WILL all be done tomorrow, then I have to add the accessories and do some weathering.

I'm not especially happy with how these engines assemble - There seems to only be one way that they will all fit together (for alignment purposes) but it proved to be a little fiddly and I wish it was explained a little better in the instructions.
I have been neglecting this thread, but not the planes, I promise.
I know it doesnt look like much progress, but I have been busy. There are very few really good photos of the Sakae engine and I had been using the Wright Cyclones on the B-25 we have at the Canadian Warplane Heritage Museum as a general guide. Then I stumbled on a decent photo of the Sakae and discovered I had to redo everything that I had done.
Here are the engines theyre mostly assembled and wired, but the ignition wires still have to go to the ignition ring, which has yet to be installed.(yes, I know the pushrods aren't all lined up yet) The balance tubes and cylinder braces have yet to be painted. That WILL all be done tomorrow, then I have to add the accessories and do some weathering.
I'm not especially happy with how these engines assemble - There seems to only be one way that they will all fit together (for alignment purposes) but it proved to be a little fiddly and I wish it was explained a little better in the instructions.
Joel_W
Joined: December 04, 2010
KitMaker: 11,666 posts
AeroScale: 7,410 posts
Posted: Thursday, August 11, 2016 - 08:50 PM UTC
Matt,
Both engines really do look quite good. Your rewiring is exceptional.
Joel
Both engines really do look quite good. Your rewiring is exceptional.
Joel
Scrodes
Joined: July 22, 2012
KitMaker: 771 posts
AeroScale: 763 posts
Posted: Friday, August 12, 2016 - 02:02 AM UTC
Thanks Joel. I wish I had used a wire with of a finer gauge, but I'm not rewiring them a third time dammit! I have to get these suckers completed soon so I can actually build something else.
I keep thinking my next build should be OOB and relaxing, but we all know how good I am at sticking to that plan, so perhaps I will just build a single model for a change....enough of this "Well, it will be faster, I'll be using all of the same colours anyway...." nonsense.
I keep thinking my next build should be OOB and relaxing, but we all know how good I am at sticking to that plan, so perhaps I will just build a single model for a change....enough of this "Well, it will be faster, I'll be using all of the same colours anyway...." nonsense.
Joel_W
Joined: December 04, 2010
KitMaker: 11,666 posts
AeroScale: 7,410 posts
Posted: Friday, August 12, 2016 - 03:16 AM UTC
Matt,
Could there be a Tamiya Mossie in your future?
Joel
Could there be a Tamiya Mossie in your future?
Joel
Scrodes
Joined: July 22, 2012
KitMaker: 771 posts
AeroScale: 763 posts
Posted: Friday, August 12, 2016 - 06:53 AM UTC
Quoted Text
Matt,
Could there be a Tamiya Mossie in your future?
Joel
After the 24th Airfix one, you couldn't give me another Mosquito of any kind in any scale.

Joel_W
Joined: December 04, 2010
KitMaker: 11,666 posts
AeroScale: 7,410 posts
Posted: Friday, August 12, 2016 - 10:11 PM UTC
Quoted Text
Quoted TextMatt,
Could there be a Tamiya Mossie in your future?
Joel
After the 24th Airfix one, you couldn't give me another Mosquito of any kind in any scale.
Matt,
My brother is building it, and keeps on telling me that it's the best kit that Tamiya ever kited.
Joel
Scrodes
Joined: July 22, 2012
KitMaker: 771 posts
AeroScale: 763 posts
Posted: Saturday, August 13, 2016 - 08:25 AM UTC
Quoted Text
Matt,
My brother is building it, and keeps on telling me that it's the best kit that Tamiya ever kited.
Joel
Oh I don't doubt it - but I just can't stand the sight of another Mosquito lol.
There are just so many great models coming out and only a finite time to build them.
I'm eager to see what they release next....now that they have that wright cyclone from the Corsair and no one has ever really done a superb Hellcat....
Joel_W
Joined: December 04, 2010
KitMaker: 11,666 posts
AeroScale: 7,410 posts
Posted: Sunday, August 14, 2016 - 06:05 PM UTC
Quoted Text
Quoted Text
Matt,
My brother is building it, and keeps on telling me that it's the best kit that Tamiya ever kited.
Joel
Oh I don't doubt it - but I just can't stand the sight of another Mosquito lol.
There are just so many great models coming out and only a finite time to build them.
I'm eager to see what they release next....now that they have that wright cyclone from the Corsair and no one has ever really done a superb Hellcat....
Matt,
My guess is that Tamiya will ride the popularity wave of their Mosquito Mk VI and just add the sprue trees needed for the simple conversion to a Mk IV, as even the fuselage has a separate nose clip, something like the one on the 1/48 scale kit I'm currently building.
Joel
Scrodes
Joined: July 22, 2012
KitMaker: 771 posts
AeroScale: 763 posts
Posted: Sunday, August 14, 2016 - 10:51 PM UTC
Oh I don't doubt it. but eventually they will release yet another subject, I just hope they make the most of the new engine they just molded for the Corsair.
Scrodes
Joined: July 22, 2012
KitMaker: 771 posts
AeroScale: 763 posts
Posted: Monday, September 12, 2016 - 04:06 AM UTC
A quick sneak peek of some photos which will appear in my review of volume 4 from the MiG series on weathering aircraft.
A6M5
A6M2N
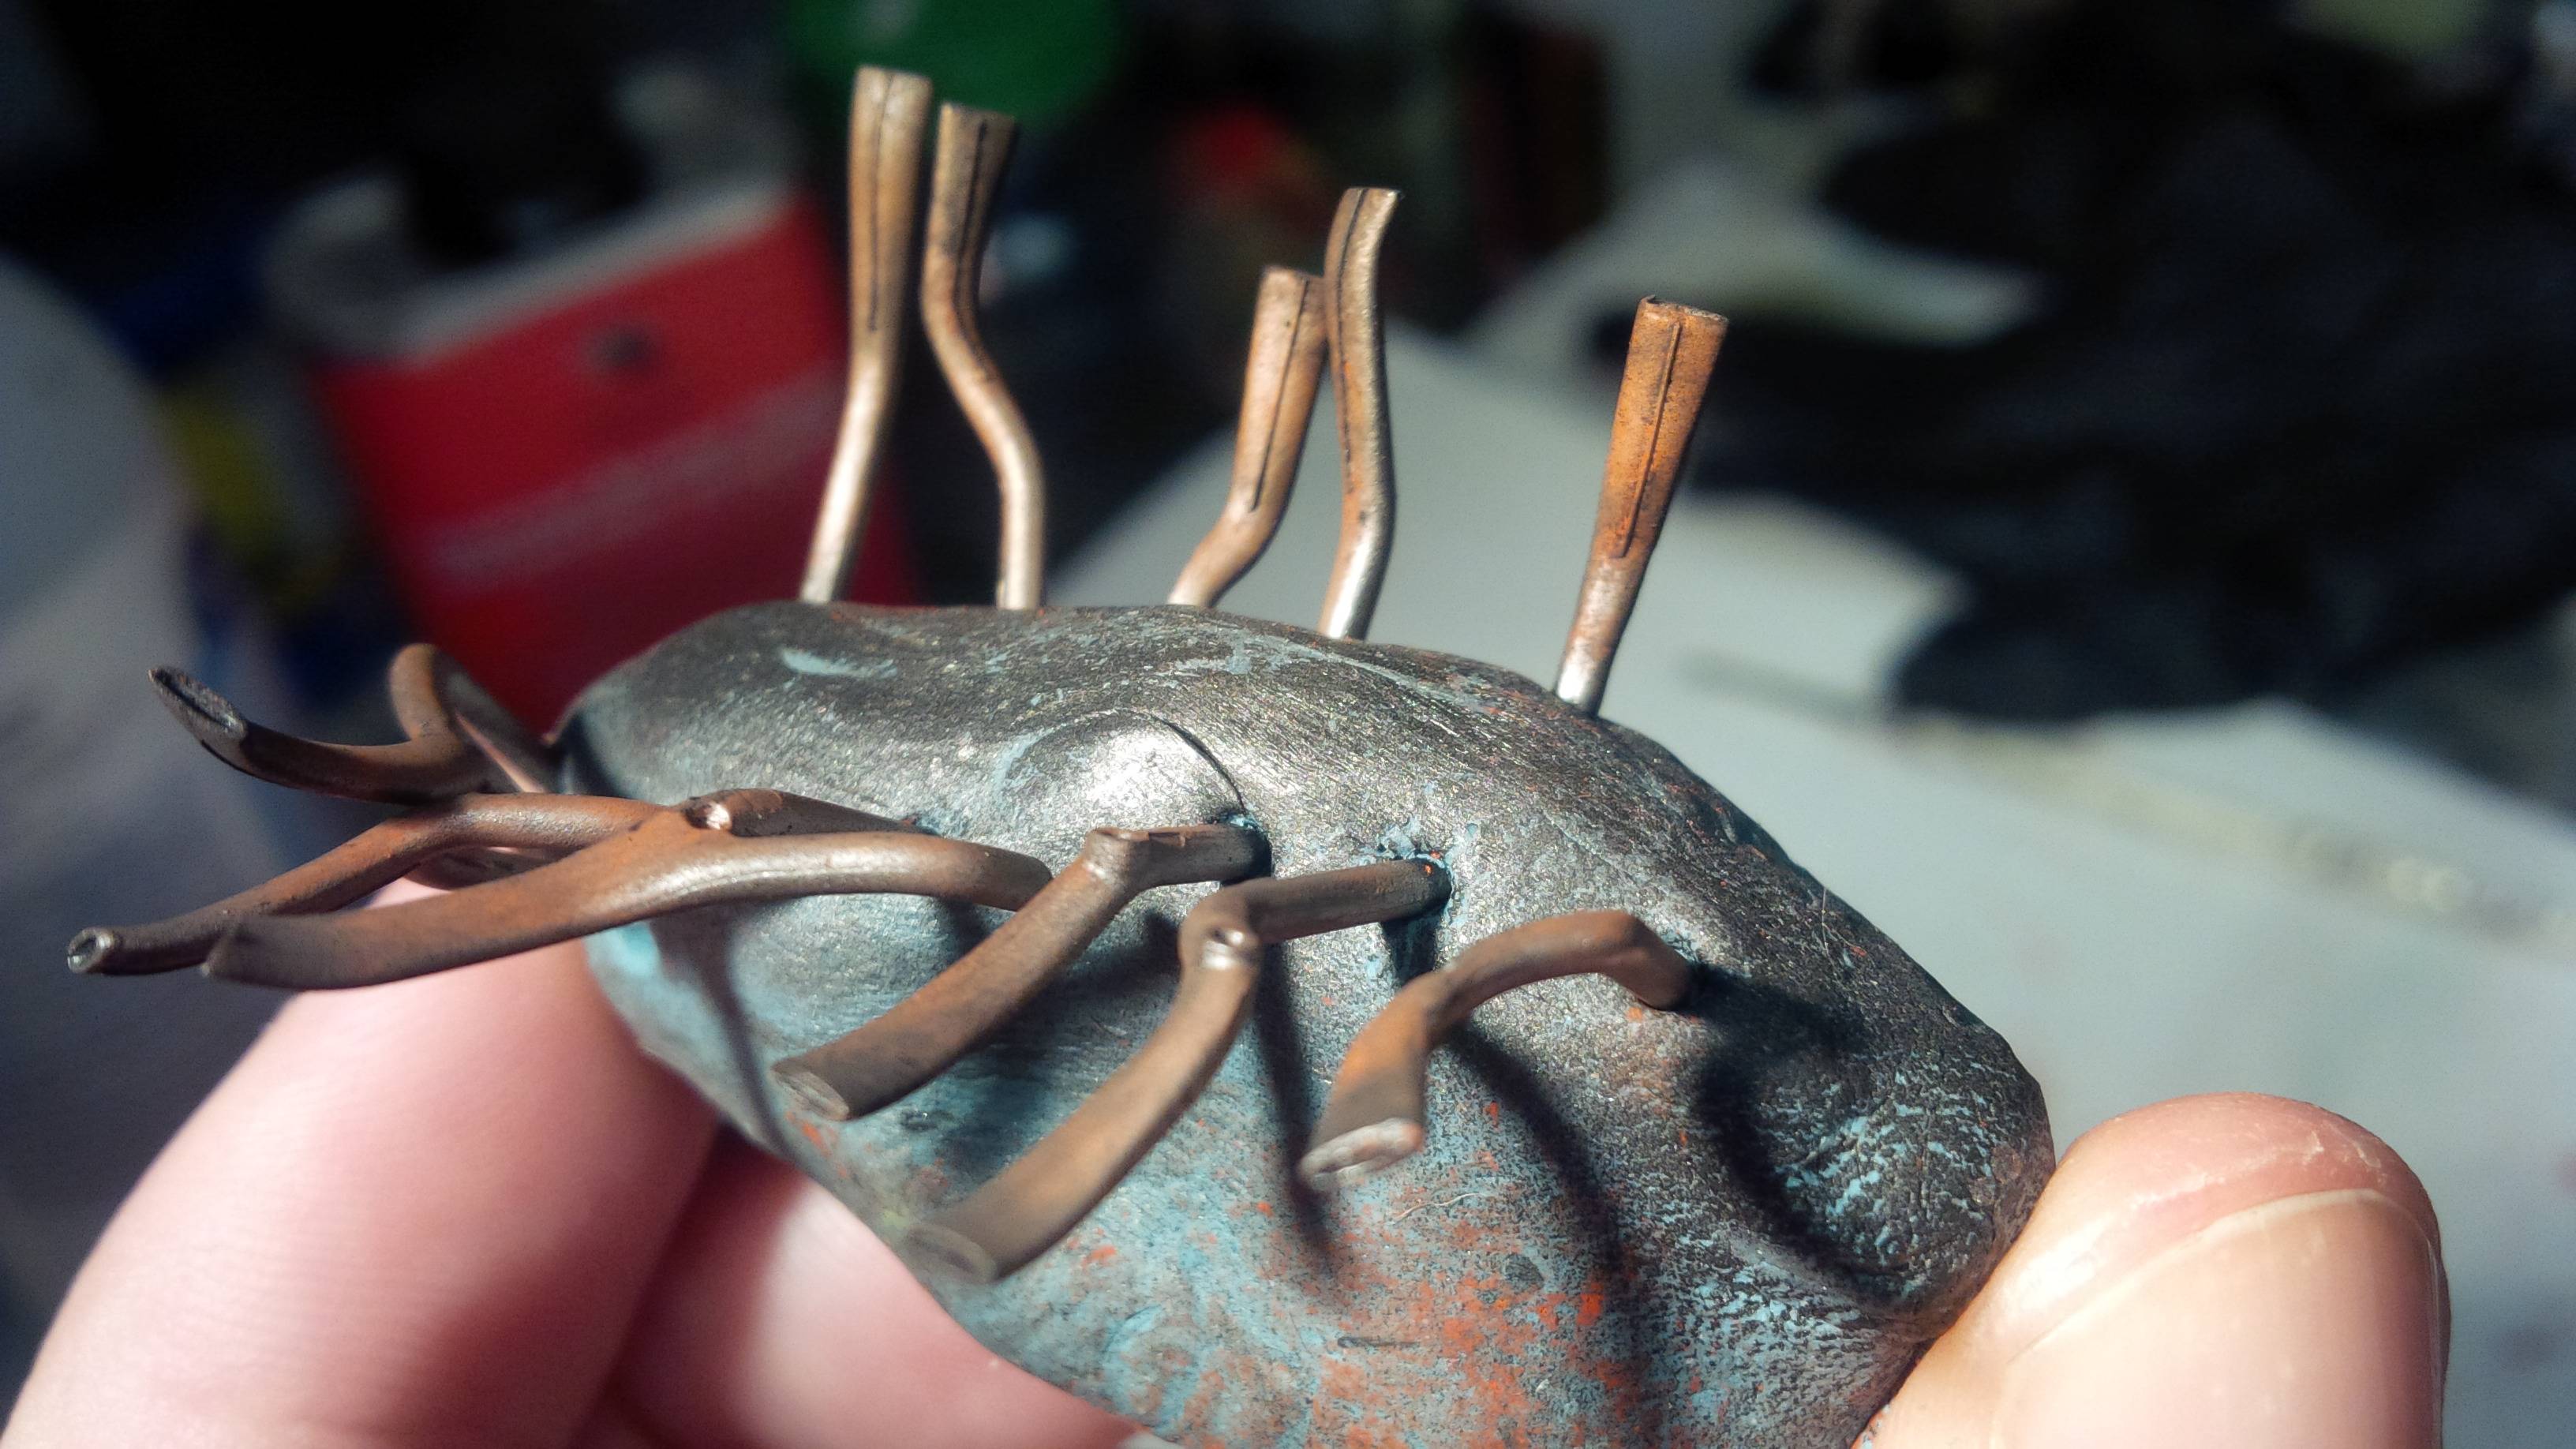
and the beautiful resin exhaust pipes for the A6M5 from Quickboost
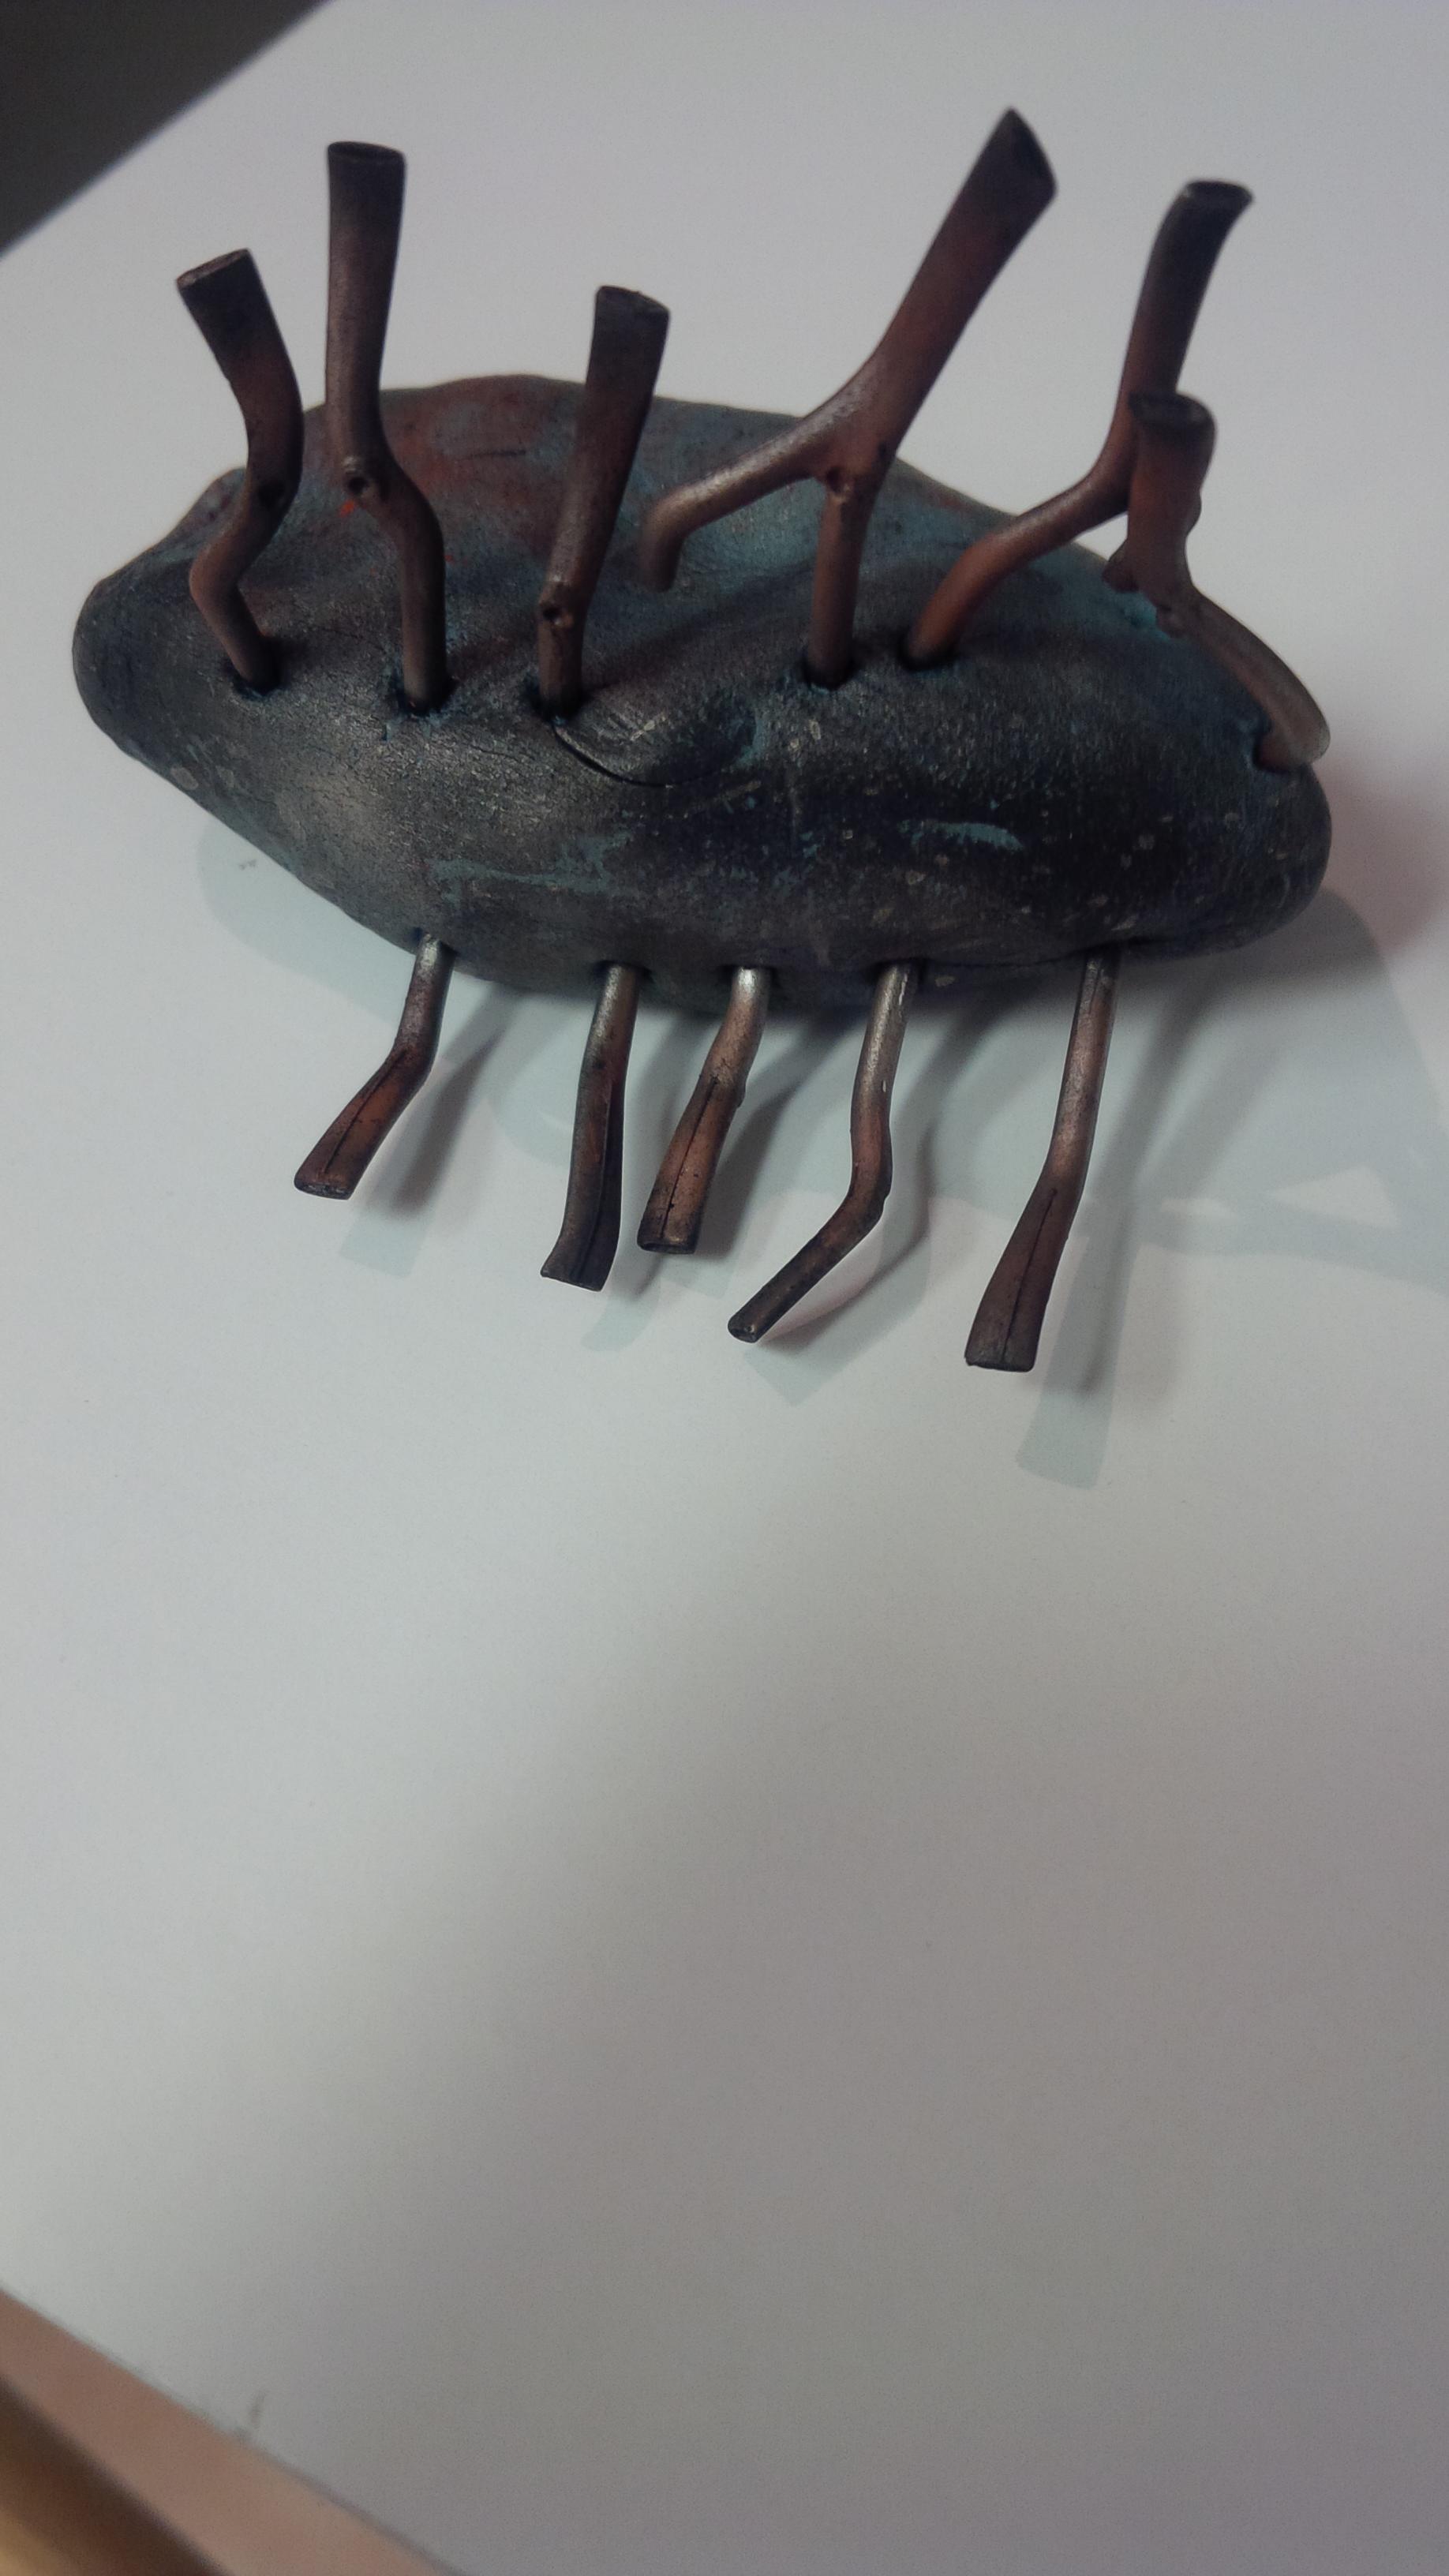
These are my worst crappy cell phone photos to date, but it's faster for me to do that and have them automatically upload to drop box. Which translates into; I actually get around to updating this thread.
Cowls are painted, engines are ready - airframes are preshaded, time for my favorite step! Paint the airframes!
A6M5
A6M2N
and the beautiful resin exhaust pipes for the A6M5 from Quickboost
These are my worst crappy cell phone photos to date, but it's faster for me to do that and have them automatically upload to drop box. Which translates into; I actually get around to updating this thread.
Cowls are painted, engines are ready - airframes are preshaded, time for my favorite step! Paint the airframes!

GazzaS

#424

Joined: April 23, 2015
KitMaker: 4,648 posts
AeroScale: 1,938 posts

Posted: Monday, September 12, 2016 - 06:08 AM UTC
Matt,
Great looking exhausts and engine parts. The finishes look quite believable.
Gaz
Great looking exhausts and engine parts. The finishes look quite believable.
Gaz

wing_nut
Joined: June 02, 2006
KitMaker: 1,212 posts
AeroScale: 468 posts
Posted: Monday, September 12, 2016 - 06:03 PM UTC
Had to do some catch up on this one but glad i did. Nice.
Joel_W
Joined: December 04, 2010
KitMaker: 11,666 posts
AeroScale: 7,410 posts
Posted: Monday, September 12, 2016 - 06:54 PM UTC
Matt,
Your weathering on those exhausts is really quite realistic, as is the rest of the engine sub assemblies.
BTW, I've finally made my 1st two 1/32 scale purchases:
Trumpeter's SBD-2, & P-47D razorback.
Joel
Your weathering on those exhausts is really quite realistic, as is the rest of the engine sub assemblies.
BTW, I've finally made my 1st two 1/32 scale purchases:
Trumpeter's SBD-2, & P-47D razorback.
Joel
Scrodes
Joined: July 22, 2012
KitMaker: 771 posts
AeroScale: 763 posts
Posted: Monday, September 12, 2016 - 09:10 PM UTC
Gary/Marc - thanks guys. I'm sorry, I didn't realize how dark those photos were. The phone used it's flash for the last photo, so the exhausts look a little blown out (colourwise) in the photo - they're much better looking in person!
Thanks Joel! They're really starting to come together. They were a lot of work. You can really tell they were Tamiya's earlier effort into the the 1/32 scale market (as far as their 'super kits' are concerned). I'm really worried about how the cowlings are going to fit.
You're a brave man starting out in 32nd with Trumpey kits. I have a build article for the SBD kicking around here somewhere.
Found it!;
http://hyperscale.com/2012/galleries/sbd532mo_1.htm
Heads up - I didn't notice it until an IPMS judge pointed it out to me, the engine and therefore cowling didn't fit on straight. It's a nasty bit of engineering.
Quoted Text
Matt,
Your weathering on those exhausts is really quite realistic, as is the rest of the engine sub assemblies.
BTW, I've finally made my 1st two 1/32 scale purchases:
Trumpeter's SBD-2, & P-47D razorback.
Joel
Thanks Joel! They're really starting to come together. They were a lot of work. You can really tell they were Tamiya's earlier effort into the the 1/32 scale market (as far as their 'super kits' are concerned). I'm really worried about how the cowlings are going to fit.
You're a brave man starting out in 32nd with Trumpey kits. I have a build article for the SBD kicking around here somewhere.
Found it!;
http://hyperscale.com/2012/galleries/sbd532mo_1.htm
Heads up - I didn't notice it until an IPMS judge pointed it out to me, the engine and therefore cowling didn't fit on straight. It's a nasty bit of engineering.
Joel_W
Joined: December 04, 2010
KitMaker: 11,666 posts
AeroScale: 7,410 posts
Posted: Monday, September 12, 2016 - 10:24 PM UTC
Quoted Text
Gary/Marc - thanks guys. I'm sorry, I didn't realize how dark those photos were. The phone used it's flash for the last photo, so the exhausts look a little blown out (colourwise) in the photo - they're much better looking in person!Quoted TextMatt,
Your weathering on those exhausts is really quite realistic, as is the rest of the engine sub assemblies.
BTW, I've finally made my 1st two 1/32 scale purchases:
Trumpeter's SBD-2, & P-47D razorback.
Joel
Thanks Joel! They're really starting to come together. They were a lot of work. You can really tell they were Tamiya's earlier effort into the the 1/32 scale market (as far as their 'super kits' are concerned). I'm really worried about how the cowlings are going to fit.
You're a brave man starting out in 32nd with Trumpey kits. I have a build article for the SBD kicking around here somewhere.
Found it!;
http://hyperscale.com/2012/galleries/sbd532mo_1.htm
Heads up - I didn't notice it until an IPMS judge pointed it out to me, the engine and therefore cowling didn't fit on straight. It's a nasty bit of engineering.
Matt,
Thanks for the link, but I already bookmarked it for reference.
I'm going up in scale just in single engine props at this point because of my failing eyesight. I know that the Trumpy kits aren't in the Tamiya class, but their offerings are on the top of my interest/build list. Tamiya's F4U-1A is also on my gotta buy now list. I figure that will be almost two years worth of builds, as I'm also getting back into 1/20 scale cars, and plan on two aircraft, then one race car at this point. My 1st car build is already in my stash: Ebbro's 1/20 Lotus 49C with IndyCal decals.
Joel
Scrodes
Joined: July 22, 2012
KitMaker: 771 posts
AeroScale: 763 posts
Posted: Tuesday, September 13, 2016 - 10:59 PM UTC
Quoted Text
I know that the Trumpy kits aren't in the Tamiya class, but their offerings are on the top of my interest
Joel
That's precisely what keeps them afloat.
Now if only they would finally make that 1/32nd Devastator they promised us a decade ago

Scrodes
Joined: July 22, 2012
KitMaker: 771 posts
AeroScale: 763 posts
Posted: Wednesday, September 14, 2016 - 02:09 AM UTC
I wasn't all that diligent in updating this thread through the summer, so now I will drown you with tiny little tidbits.
First, a quick SBS on using a canopy mask - I'm going to submit this as a SBS article too.
------------------------------------------------------------
I was doing my usual circuit of modelling forums recently and I came across a review for a set of canopy masks from Eduard. I did a little hunting around and I came to realize that there are actually still modellers that paint their canopies by hand!! (Heaven forfend right?).
This gave me pause for thought - these masks are so readily available and it's hard to find a subject that there isn't a mask for and best of all - they're cheap, so why would anyone not use them? The only answer I could think of is that perhaps some people find them intimidating.
With that in mind, I thought I would do a really quick step-by-step on how *I* apply the masks. I will submit this as a feature article and place it in my build thread for the 32nd scale A6M5 and A6M2N as well.
So, why use these masks? Because, in my opinion, the canopy is often the make or break of any scale model. The masks make canopy painting faster and easier. Did I mention that they're cheap? The Tamiya Zero is currently pushing $150ish, the masks are several bucks. Try them once and I doubt you'll build another model without at least searching for a set of masks.
I should note that there are several makers of such masks - Eduard, Miracle Masks, Montex - just to name a few.
The trick to using the masks is entirely in the application.
I hold the paper containing the masks in one hand - with my finger pushing up slightly on the particular piece I want. (These sets come with a 'map' showing you how the sheet is laid out and where each piece goes). You can gently rub the face of the mask with a pastel powder, graphite etc to make the individual pieces easier to see. I don't bother.
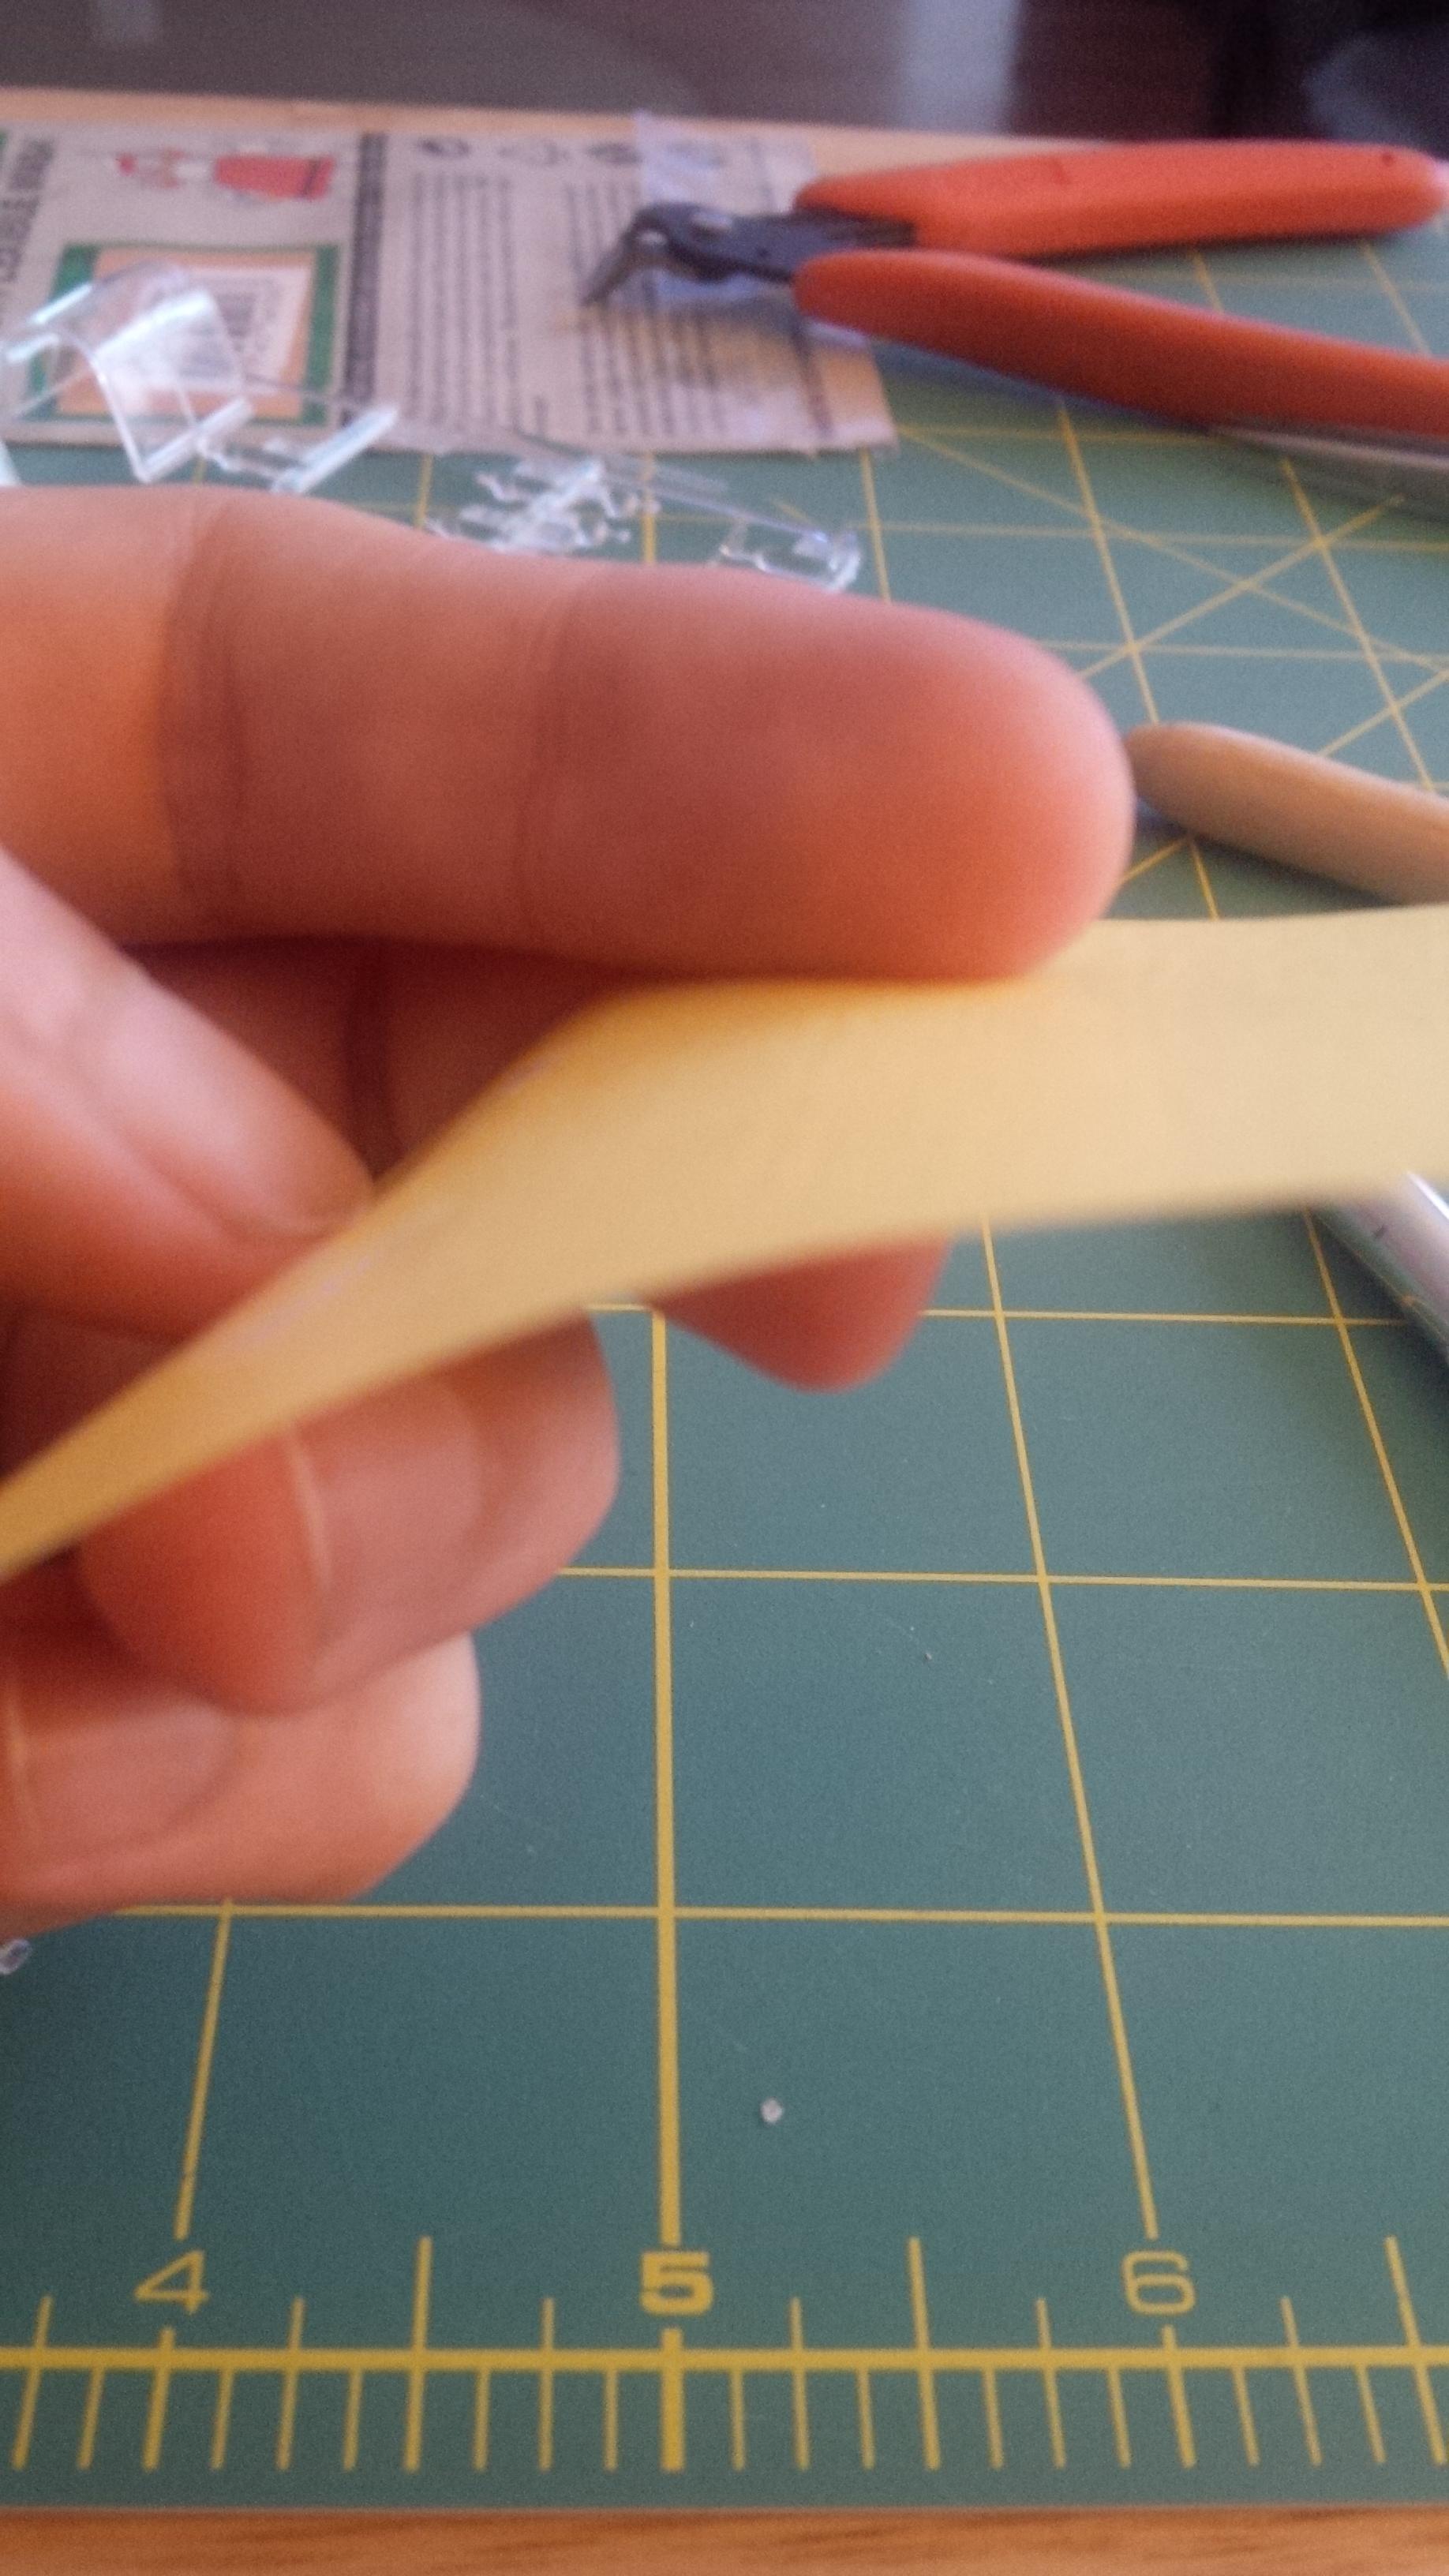
Now I take a knife with a #11 blade, I lay the blade on its side and slide the tip towards the edge of the mask in an arcing motion. The blade doesn't have to be sharp. You'll find the tip of the blade easily slips in behind the mask where they have been precut.
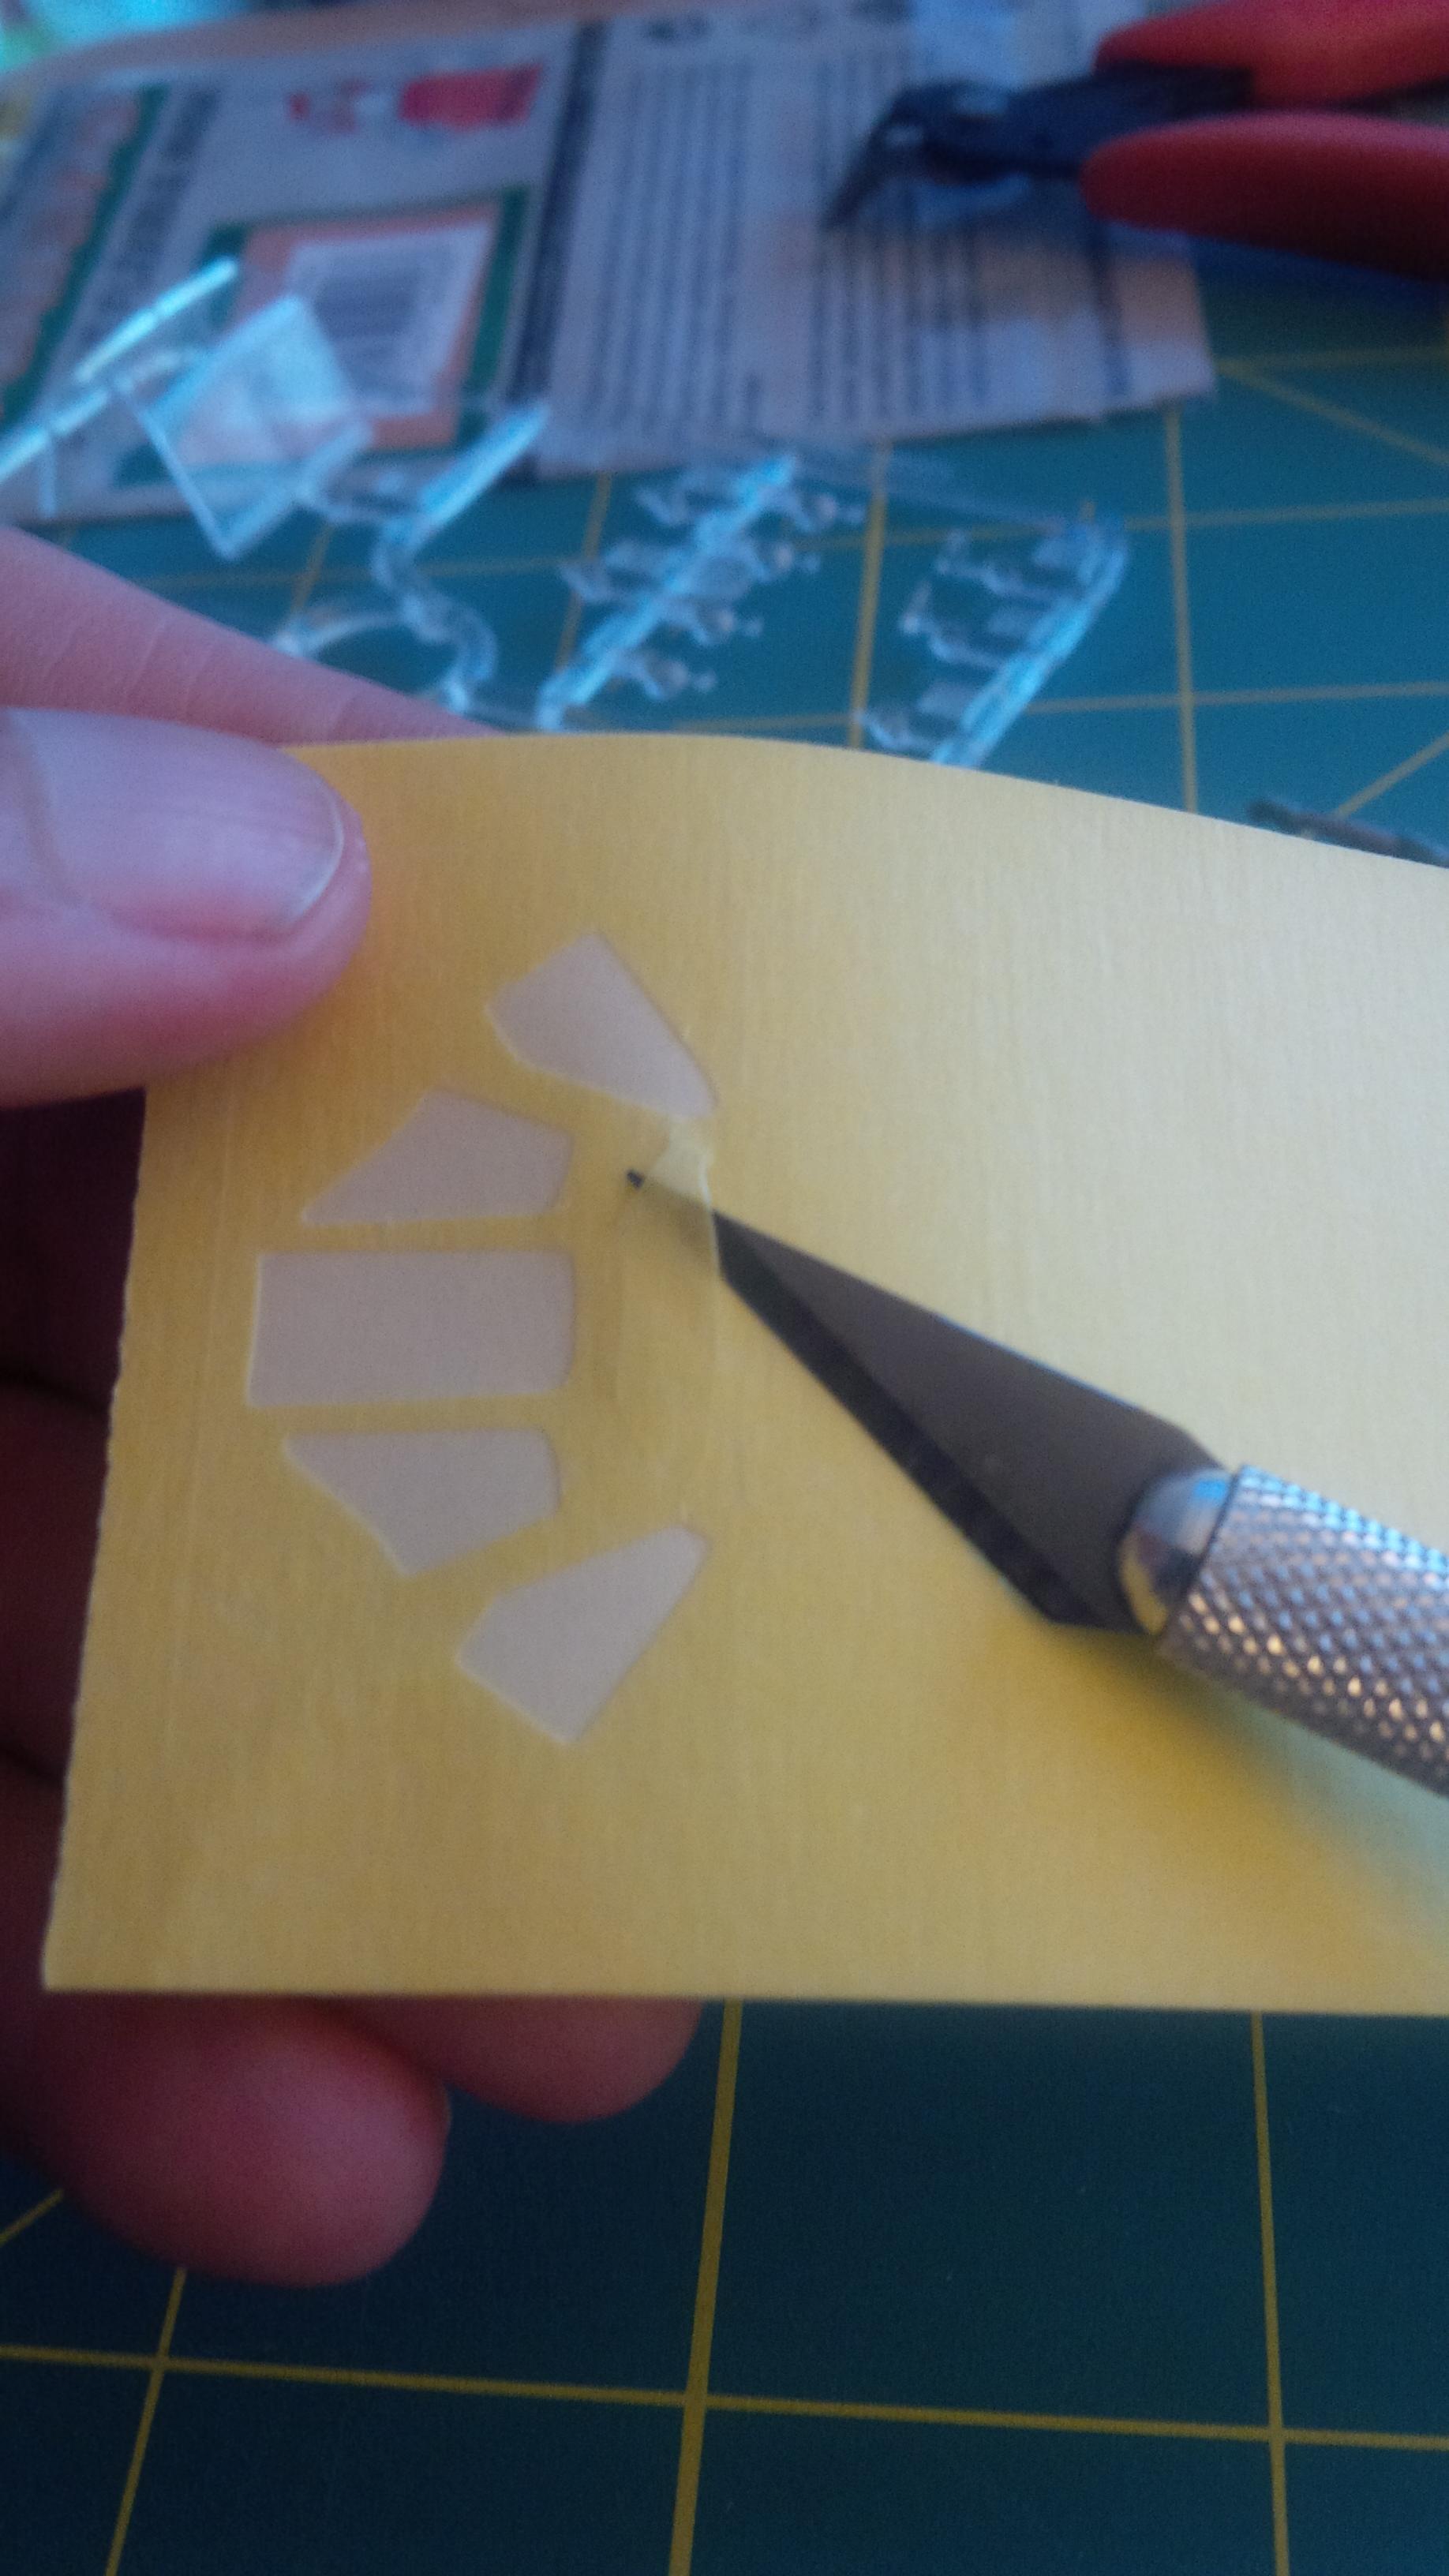
I usually try to do this at a corner (if there is one). Preferrably opposite from another corner for the sake of placement. Now, with the tip of the blade under the piece you want, pinch the mask between the face of the blade and your finger. Simply lift the mask off the sheet, peeling it from the side to lifted to the other.
Placing the mask
This is the trickiest part. Tilt or rotate the canopy until you can clearly see the framing. I find it easiest to do with a dark coloured background.
Pick a distinctive corner - but not necessarily an intricate one. carefully align the corner on the mask to the corner on the canopy. You only need to touch the mask down, then you can fold the knife out from the mask. In the case below, I will align the corner at the bottom of the photo. I'll ensure it's straight using the rear edge, and tack the curve at the bottom down. If you miss, you simply have to pull lift it back up and try again.
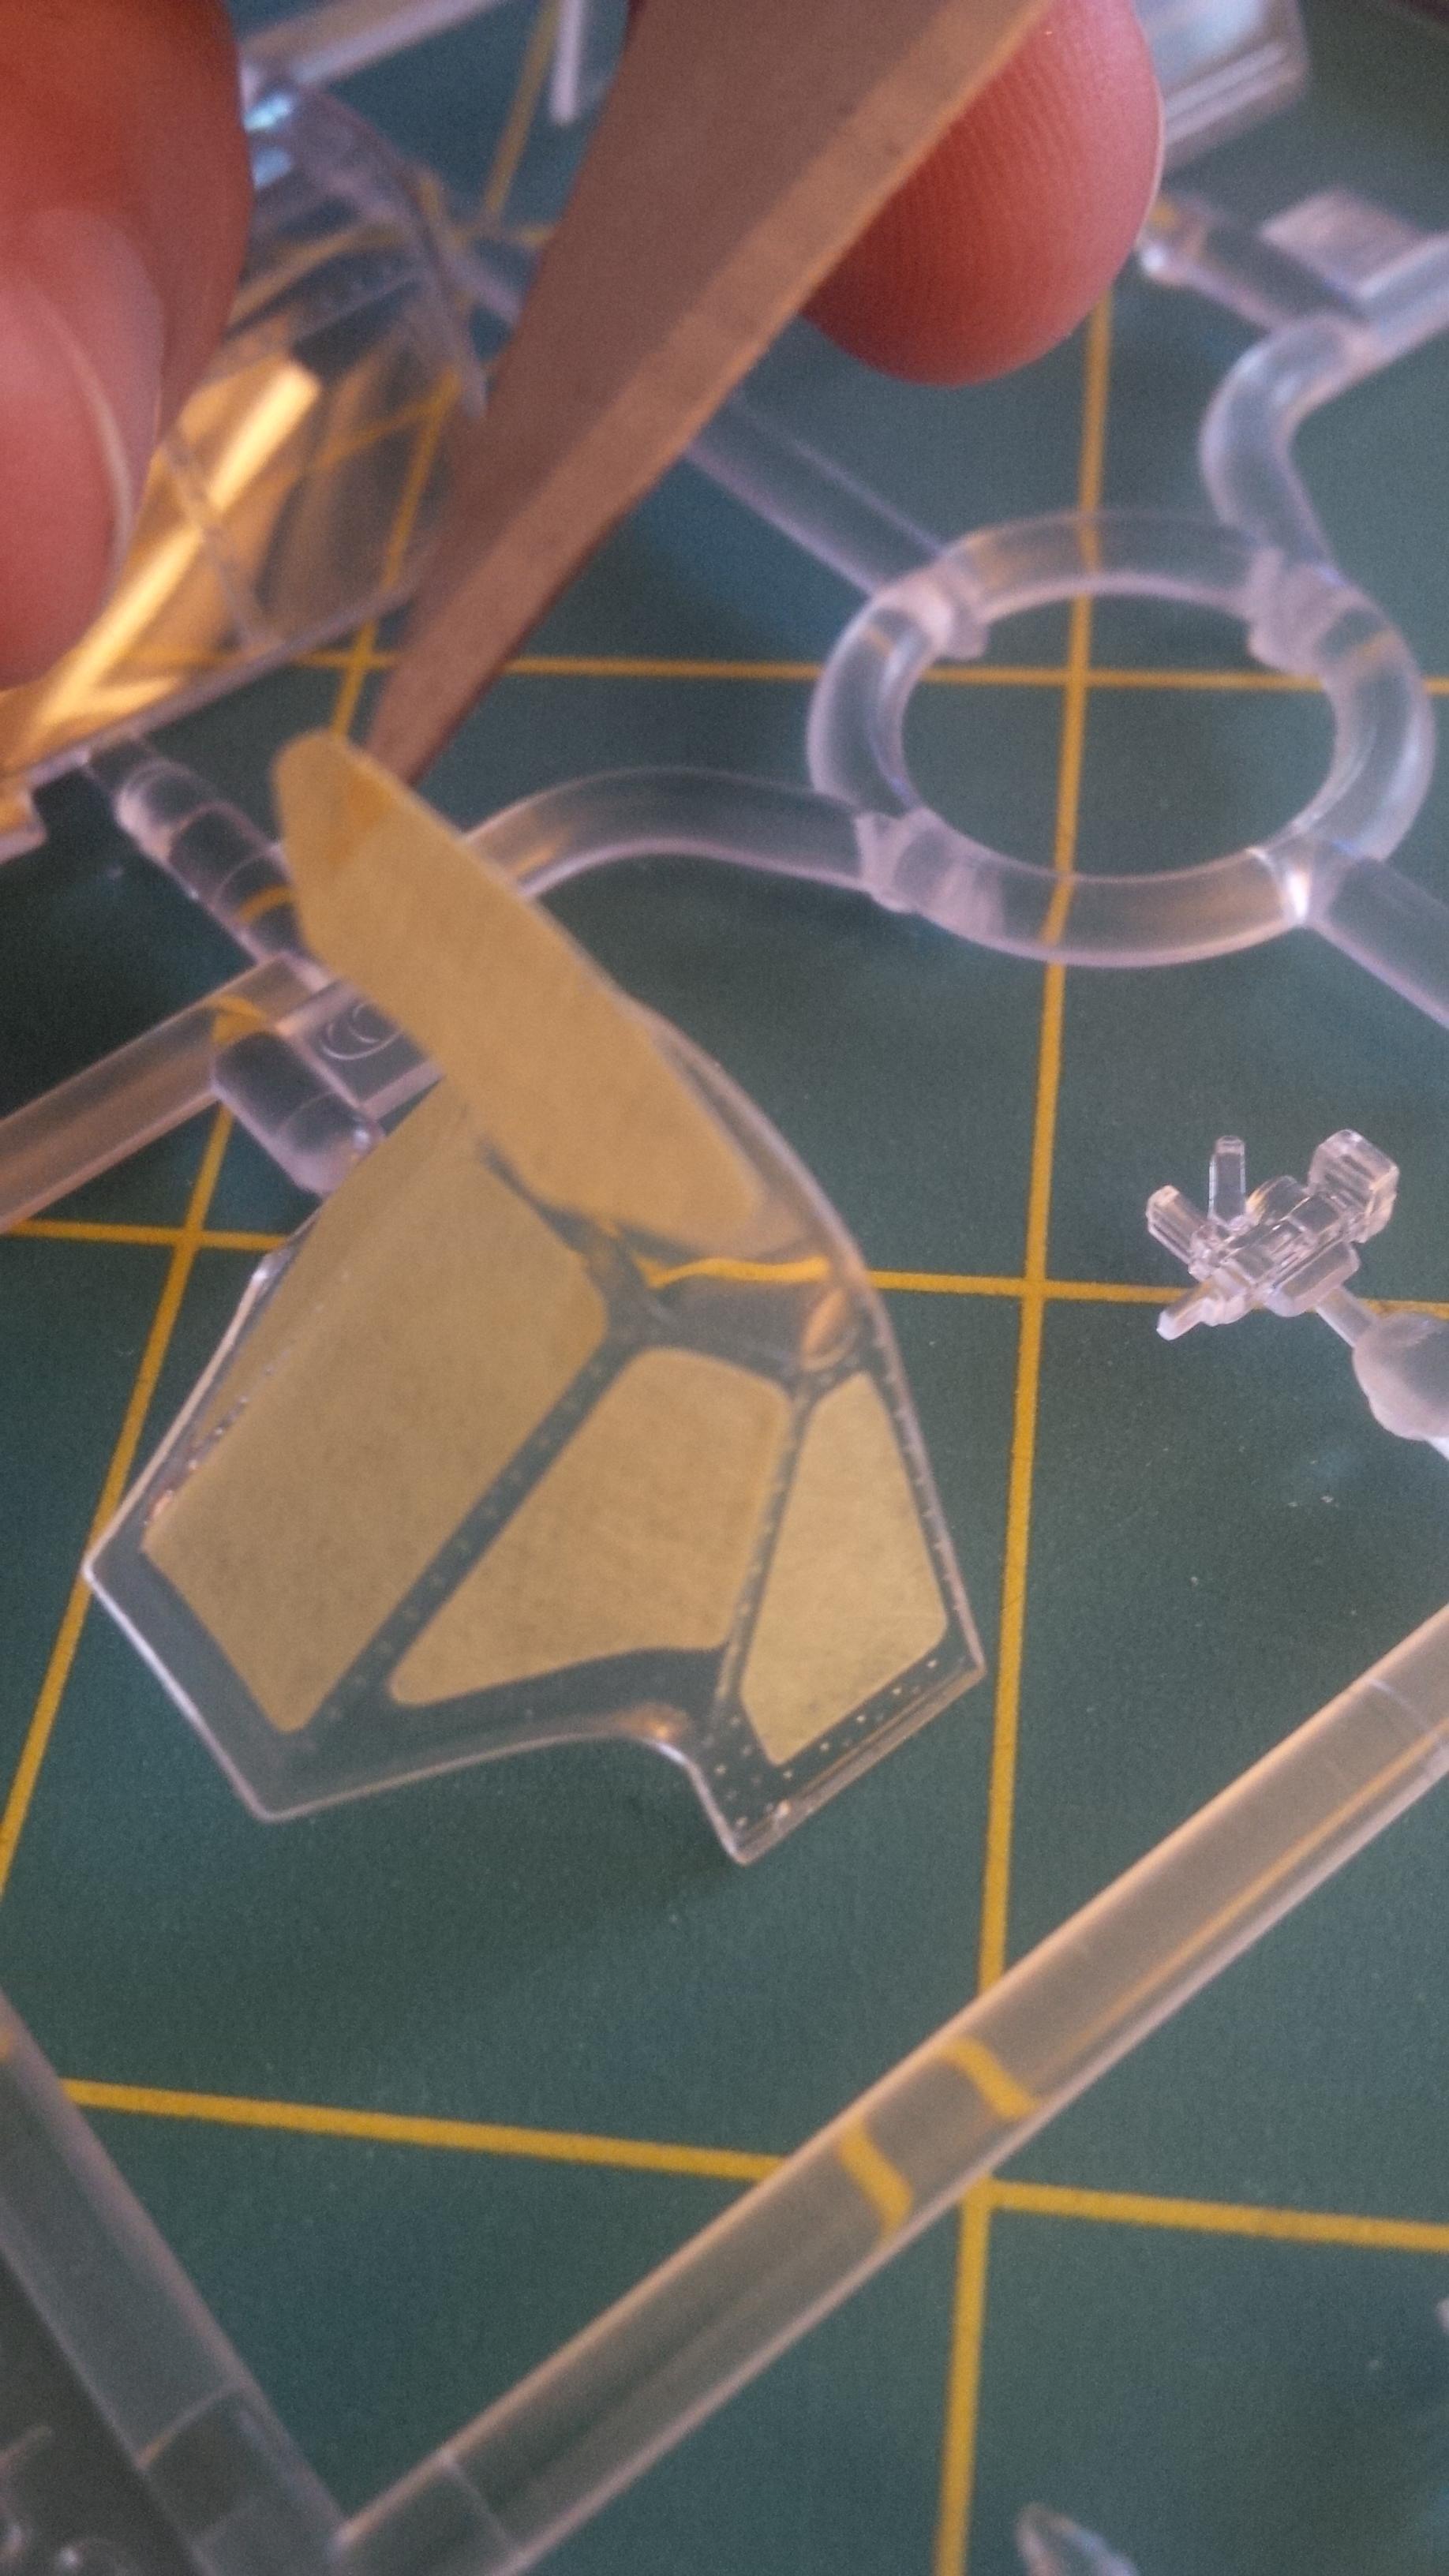
Lastly, burnish the mask down. The adhesive is generally fairly strong so you wont need much pressure. I roll the larger burnisher back and forth from the part I've placed onto the canopy to the other side (similar to mowing a lawn). It you aligned it properly, the entire piece will settle perfectly onto the section it's intended for.
I will then use the smaller burnisher to make sure the edges have been seated.

The beauty of these products is how quickly you'll get the entire glazing masked. And if you end up with a set that stretches out slightly or just isn't quite the right size - you can trim that edge the same way that you would if you were masking your own canopy to begin with!
Now go buy that Avenger or He-111 you've always wanted.
------------------------------------------------------------
Oh - hey! An engine!
First, a quick SBS on using a canopy mask - I'm going to submit this as a SBS article too.
------------------------------------------------------------
I was doing my usual circuit of modelling forums recently and I came across a review for a set of canopy masks from Eduard. I did a little hunting around and I came to realize that there are actually still modellers that paint their canopies by hand!! (Heaven forfend right?).
This gave me pause for thought - these masks are so readily available and it's hard to find a subject that there isn't a mask for and best of all - they're cheap, so why would anyone not use them? The only answer I could think of is that perhaps some people find them intimidating.
With that in mind, I thought I would do a really quick step-by-step on how *I* apply the masks. I will submit this as a feature article and place it in my build thread for the 32nd scale A6M5 and A6M2N as well.
So, why use these masks? Because, in my opinion, the canopy is often the make or break of any scale model. The masks make canopy painting faster and easier. Did I mention that they're cheap? The Tamiya Zero is currently pushing $150ish, the masks are several bucks. Try them once and I doubt you'll build another model without at least searching for a set of masks.
I should note that there are several makers of such masks - Eduard, Miracle Masks, Montex - just to name a few.
The trick to using the masks is entirely in the application.
I hold the paper containing the masks in one hand - with my finger pushing up slightly on the particular piece I want. (These sets come with a 'map' showing you how the sheet is laid out and where each piece goes). You can gently rub the face of the mask with a pastel powder, graphite etc to make the individual pieces easier to see. I don't bother.
Now I take a knife with a #11 blade, I lay the blade on its side and slide the tip towards the edge of the mask in an arcing motion. The blade doesn't have to be sharp. You'll find the tip of the blade easily slips in behind the mask where they have been precut.
I usually try to do this at a corner (if there is one). Preferrably opposite from another corner for the sake of placement. Now, with the tip of the blade under the piece you want, pinch the mask between the face of the blade and your finger. Simply lift the mask off the sheet, peeling it from the side to lifted to the other.
Placing the mask
This is the trickiest part. Tilt or rotate the canopy until you can clearly see the framing. I find it easiest to do with a dark coloured background.
Pick a distinctive corner - but not necessarily an intricate one. carefully align the corner on the mask to the corner on the canopy. You only need to touch the mask down, then you can fold the knife out from the mask. In the case below, I will align the corner at the bottom of the photo. I'll ensure it's straight using the rear edge, and tack the curve at the bottom down. If you miss, you simply have to pull lift it back up and try again.
Lastly, burnish the mask down. The adhesive is generally fairly strong so you wont need much pressure. I roll the larger burnisher back and forth from the part I've placed onto the canopy to the other side (similar to mowing a lawn). It you aligned it properly, the entire piece will settle perfectly onto the section it's intended for.
I will then use the smaller burnisher to make sure the edges have been seated.
The beauty of these products is how quickly you'll get the entire glazing masked. And if you end up with a set that stretches out slightly or just isn't quite the right size - you can trim that edge the same way that you would if you were masking your own canopy to begin with!
Now go buy that Avenger or He-111 you've always wanted.
------------------------------------------------------------
Oh - hey! An engine!
Joel_W
Joined: December 04, 2010
KitMaker: 11,666 posts
AeroScale: 7,410 posts
Posted: Wednesday, September 14, 2016 - 06:42 AM UTC
Matt,
Thanks for tutorial on how to best work with and apply masks. My procedures are about the same, but in smaller scales a toothpick works very well for burnishing.
Every time I see one of your two engines, I just marvel at you realistic weathering.
Joel
Thanks for tutorial on how to best work with and apply masks. My procedures are about the same, but in smaller scales a toothpick works very well for burnishing.
Every time I see one of your two engines, I just marvel at you realistic weathering.
Joel
Scrodes
Joined: July 22, 2012
KitMaker: 771 posts
AeroScale: 763 posts
Posted: Wednesday, September 14, 2016 - 06:54 AM UTC
Quoted Text
Matt,
Thanks for tutorial on how to best work with and apply masks. My procedures are about the same, but in smaller scales a toothpick works very well for burnishing.
Every time I see one of your two engines, I just marvel at you realistic weathering.
Joel
I forgot to mention that - if you don't have a burnishing tool - the back end of a paint brush works perfectly.
Thanks for the feedback - I'm very happy with how they turned out. Chuck gave me a lot of grief over an earlier build when the engines weren't weathered enough (in his defense, I asked his opinion on the matter
)Joel_W
Joined: December 04, 2010
KitMaker: 11,666 posts
AeroScale: 7,410 posts
Posted: Wednesday, September 14, 2016 - 08:46 PM UTC
Matt,
Honestly, using the back of a paint brush never occurred to me. Great idea. Naturally, I just put it my "toolbox" for future use.
And speaking of Chuck, he hasn't posted on his Mig build for quite some time.
Joel
Honestly, using the back of a paint brush never occurred to me. Great idea. Naturally, I just put it my "toolbox" for future use.
And speaking of Chuck, he hasn't posted on his Mig build for quite some time.
Joel
chukw1
Joined: November 28, 2007
KitMaker: 817 posts
AeroScale: 729 posts
Posted: Wednesday, September 14, 2016 - 11:31 PM UTC
I am such a rat bastard! ;D Beautiful work, Matt- as I need to remind everyone. Those exhaust pipes look perfect- I wouldn't change a thing. Are you finished with the wiring? I did a quick look on the web:
I'm sure you have all that in hand!
Nice work with the masks- I'm going to give Mal Mayfield's technique of "weeding out" the background tape all at once so only the masks themselves are left on the carrier. It should relieve some frustration at the relative invisibilty of the darned things and make them a bit easier to peel 'em off.
Joel, I've put the MiG aside to do a build and article for TMMI- wish me luck! I'm still lurking around- nice work thus far on your Mossie!

 |

WEB HOSTING BY


Copyright ©2021 AeroScale and Kitmaker Network, a subsidiary of Silver Star Enterprises
All Rights Reserved. Please read our Conditions of Use and Privacy Policy.
All Rights Reserved. Please read our Conditions of Use and Privacy Policy.