

Air Campaigns
Want to start or join a group build? This is where to start.
Want to start or join a group build? This is where to start.
Hosted by Frederick Boucher, Michael Satin
OFFICIAL: Lifesavers Campaign

KelticKnot

Joined: May 11, 2015
KitMaker: 768 posts
AeroScale: 656 posts
Posted: Monday, November 16, 2015 - 04:14 PM UTC
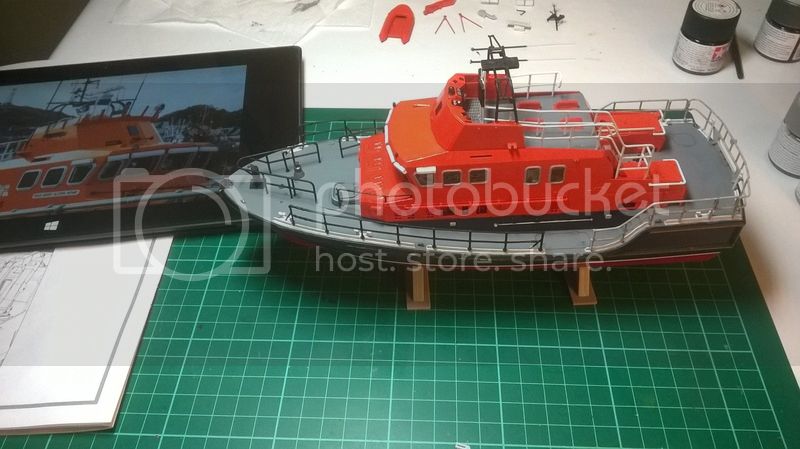
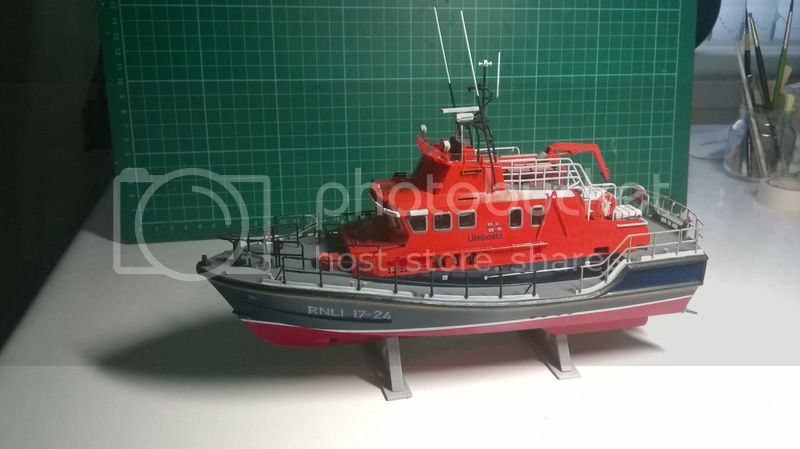
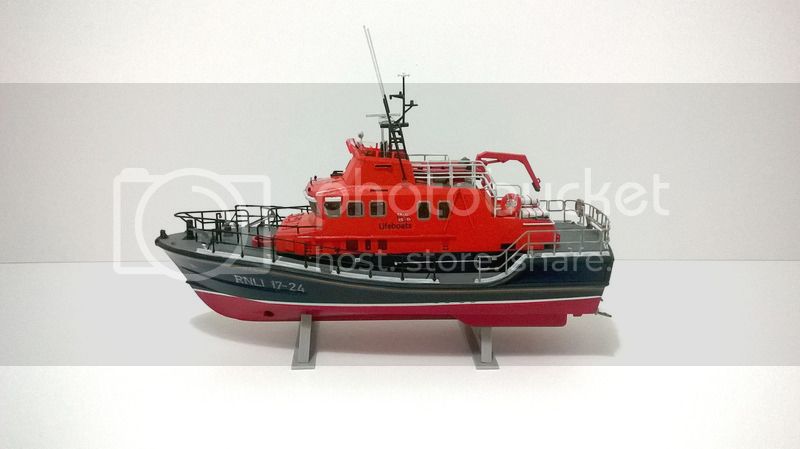
More work on the railings... satisfying to see it coming together nicely now that the deck looks busier.


tatbaqui

#040

Joined: May 06, 2007
KitMaker: 2,713 posts
AeroScale: 65 posts

Posted: Monday, November 16, 2015 - 04:47 PM UTC
She's looking good Paul!
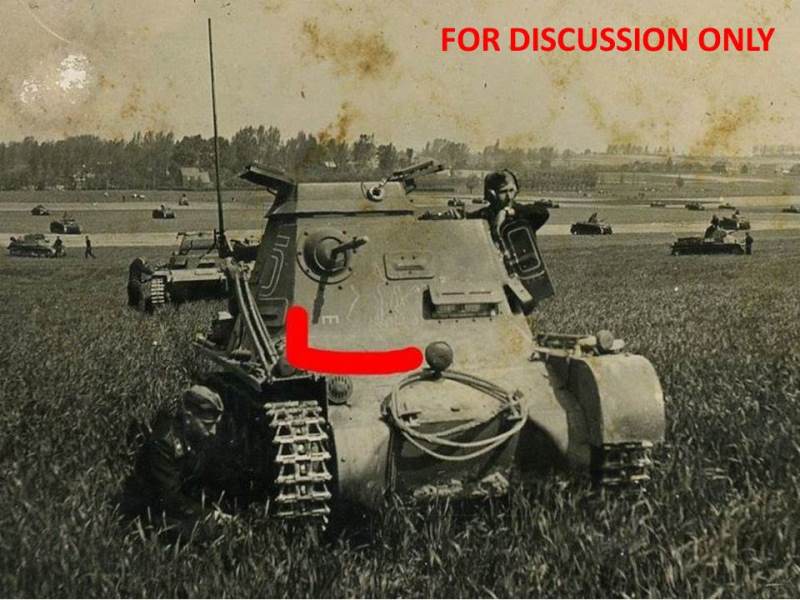
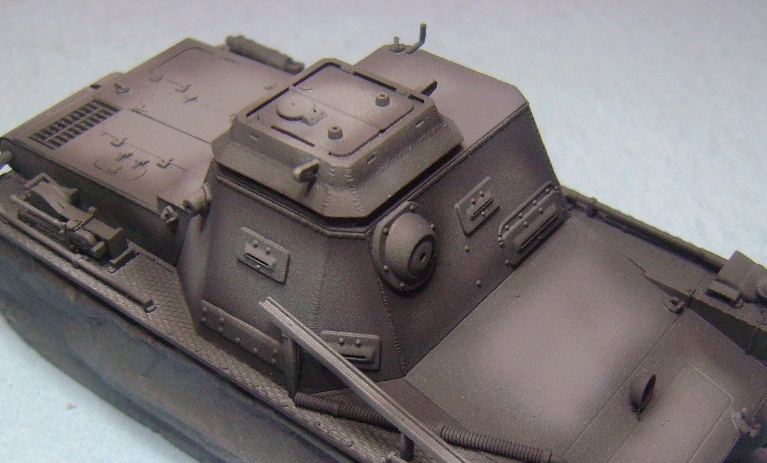
I've put on the base coat today:
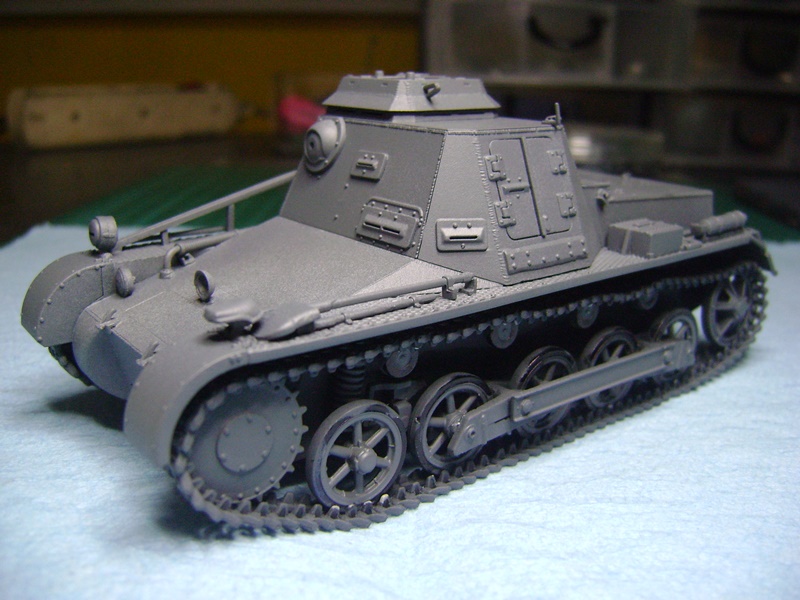
I guess having a bent antenna tray has basis after all!

Cheers,
Tat
I've put on the base coat today:
I guess having a bent antenna tray has basis after all!
Cheers,
Tat

Antilles

Joined: March 22, 2015
KitMaker: 671 posts
AeroScale: 614 posts
Posted: Monday, November 16, 2015 - 07:01 PM UTC
Paul: Excellent work on the railing.
Tat: Nice progress. If I were You, I would leave the bent tray. So it is more authentic as Your picture proves
Oliver
Tat: Nice progress. If I were You, I would leave the bent tray. So it is more authentic as Your picture proves
Oliver
KelticKnot
Joined: May 11, 2015
KitMaker: 768 posts
AeroScale: 656 posts
Posted: Tuesday, November 17, 2015 - 09:43 PM UTC
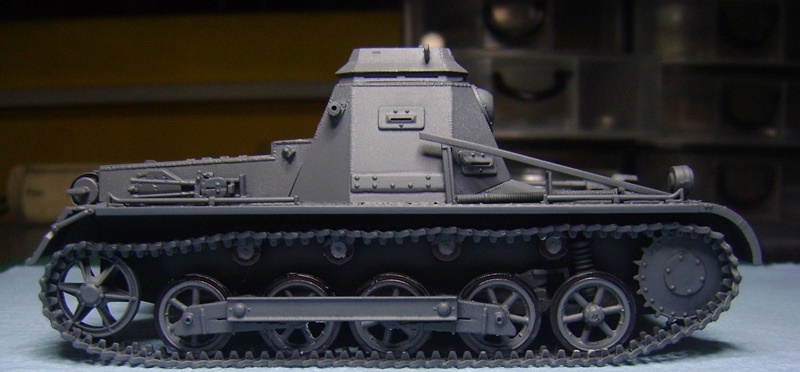
Tat, your tank has a great sense of weight about it. It feels like it should weigh a lot when you pick it up. Can't "weight" to see your painting!
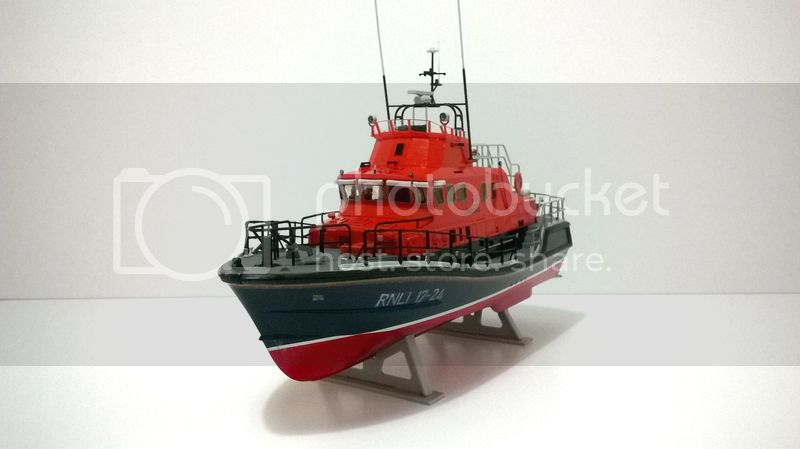
Also thanks guys, more railing progress today and getting near the finish of plastic. It's a great feeling to see so few parts left to attach.
Also thanks guys, more railing progress today and getting near the finish of plastic. It's a great feeling to see so few parts left to attach.
KelticKnot
Joined: May 11, 2015
KitMaker: 768 posts
AeroScale: 656 posts
Posted: Thursday, November 19, 2015 - 06:23 PM UTC
I'm on a roll!
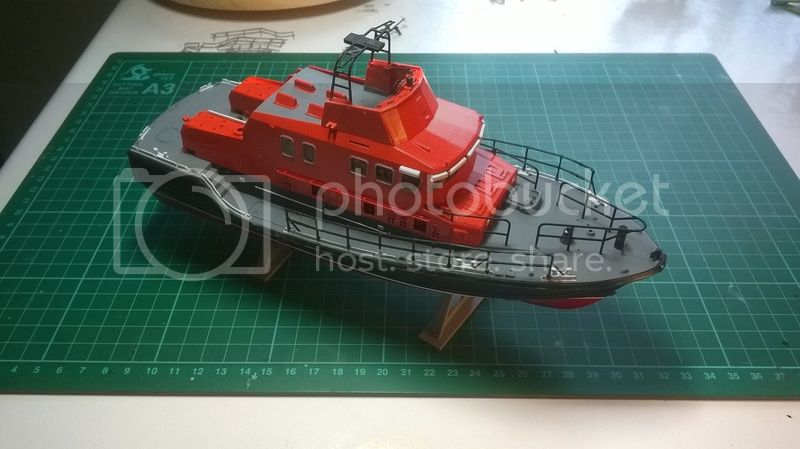
Added a little a detail to the front of the deck in the shape of the bracket which supports the anchor arm, as well as the rivet detail around the bollard.
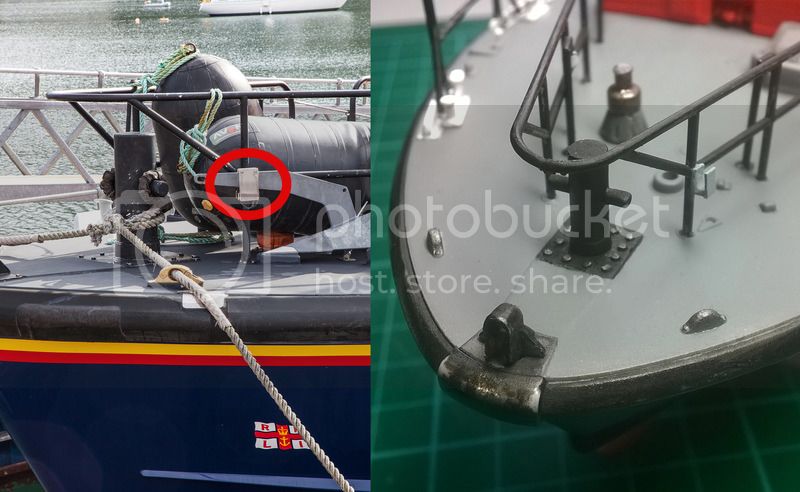
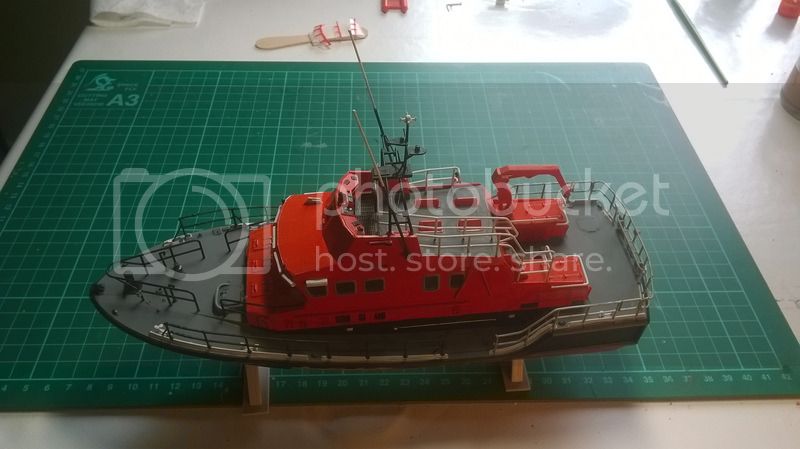
Apologies for the poor lighting in this shot but here is how she stands currently. All of the railing detail is complete but needs a touch up of paint, the mast and antenna are fitted (making this model extremely delicate to handle!) and a few other details painted and added. I noticed from my reference that the grey hatch at the front should actually be orange so i'll change that next.
Added a little a detail to the front of the deck in the shape of the bracket which supports the anchor arm, as well as the rivet detail around the bollard.
Apologies for the poor lighting in this shot but here is how she stands currently. All of the railing detail is complete but needs a touch up of paint, the mast and antenna are fitted (making this model extremely delicate to handle!) and a few other details painted and added. I noticed from my reference that the grey hatch at the front should actually be orange so i'll change that next.
tatbaqui
#040
Joined: May 06, 2007
KitMaker: 2,713 posts
AeroScale: 65 posts
Posted: Friday, November 20, 2015 - 05:36 AM UTC
Thanks for your comments Oliver, Paul.
Paul, those small bits sure add to the overall look of your build, keep it coming! Now that you mentioned weight -- while it looks the part, I was reminded how light it was as yesterday a strong wind blew it off my table and brought it to the floor upside down! Reminded me of those Tigers hit by Typhoons.
No major damage, just one headlamp that need to be put back.
Cheers,
Tat

Delbert
#073

Joined: October 05, 2002
KitMaker: 2,659 posts
AeroScale: 209 posts
Posted: Saturday, November 21, 2015 - 11:54 PM UTC
Howdy
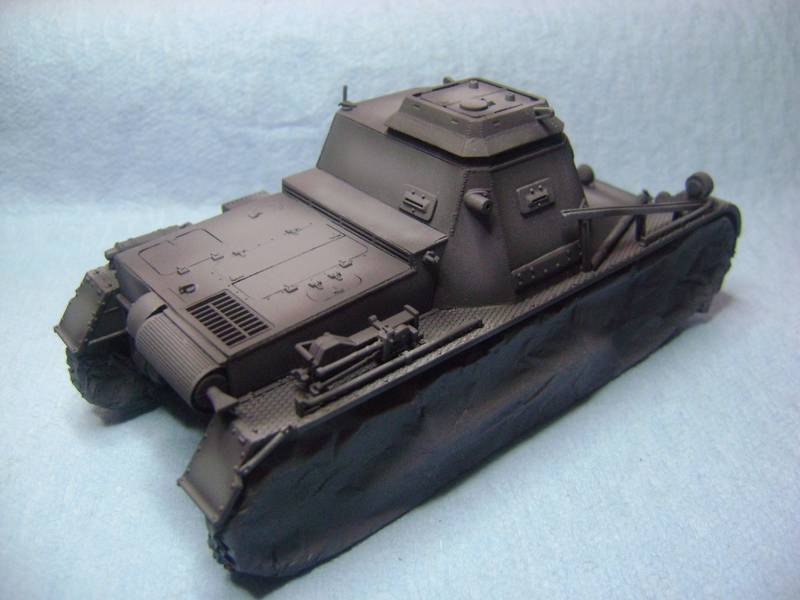
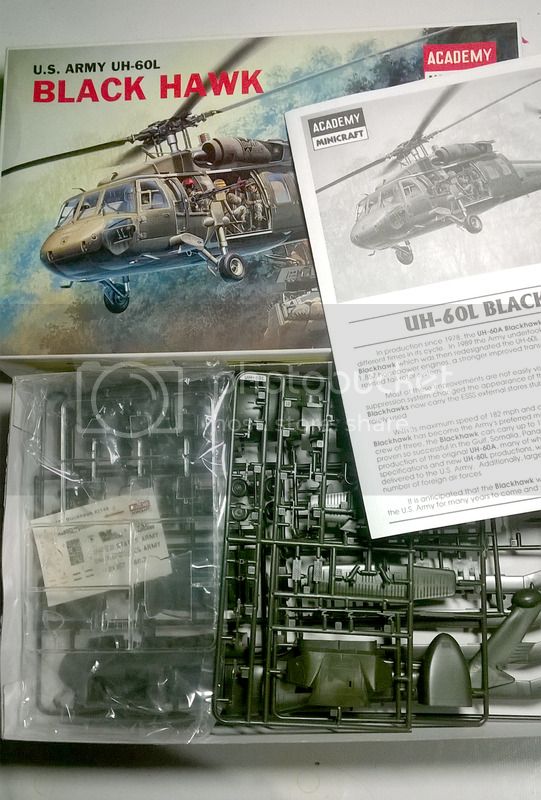
Just thought I'd post a quick pic to show that I've started on this.. Here is first painted parts in black.. LOL
I'm a little disappointed in this kit, I am pretty sure it started out life as a SnapTite kit and it shows, as I can almost snap the entire thing together (see 2nd photo)


later
Delbert
Just thought I'd post a quick pic to show that I've started on this.. Here is first painted parts in black.. LOL
I'm a little disappointed in this kit, I am pretty sure it started out life as a SnapTite kit and it shows, as I can almost snap the entire thing together (see 2nd photo)
later
Delbert

windysean
Joined: September 11, 2009
KitMaker: 1,917 posts
AeroScale: 563 posts
Posted: Thursday, November 26, 2015 - 09:18 PM UTC
Delbert, that just means there's more room for you to improve the kit!
As was mentioned before, it's neat to see the range of subjects in this campaign!
As for me, I'm well along on my current project, and switching to this campaign soon. See you then!
Have a happy "Black Friday"! (For those not in the US, the last Thursday of November is Thanksgiving, and since most people don't go back to work the following day, it's a crazy shopping day for Christmas presents. The crowds can get rough on particular sale items, so the term "Black Friday" was coined.)
-Sean H.
KelticKnot
Joined: May 11, 2015
KitMaker: 768 posts
AeroScale: 656 posts
Posted: Sunday, November 29, 2015 - 03:27 AM UTC
Great to see you starting Delbert! Are you planning on adding any extras to make your build unique?
Sean, it'll be good to see you in here once you're ready to go. I don't recall you mentioning in the proposal thread what you might be building. Any hints ?
I've been busy in the last few days but started a second build.
Just joking ! That blackhawk is still in the wings though
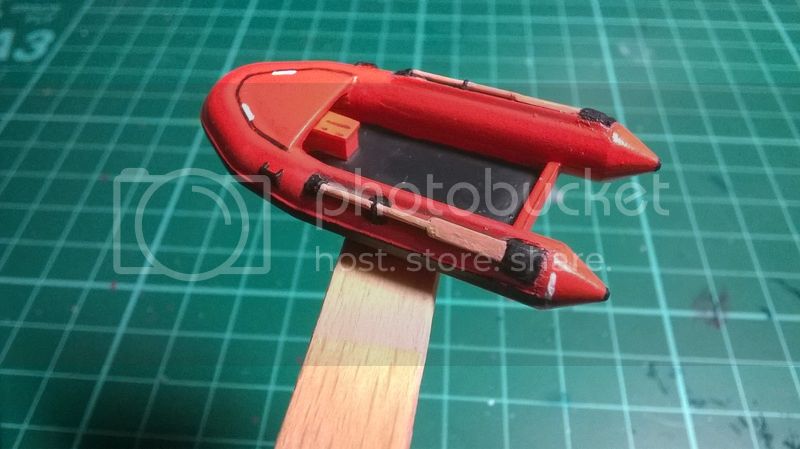
I've decided to detail the little RIB that's carried by the lifeboat (it's classed by the RNLI as a Y-boat)
Here it is as the basic kit build:
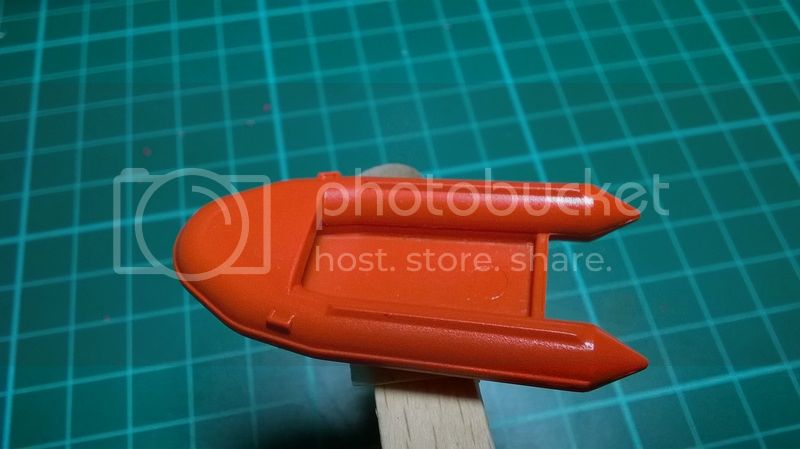
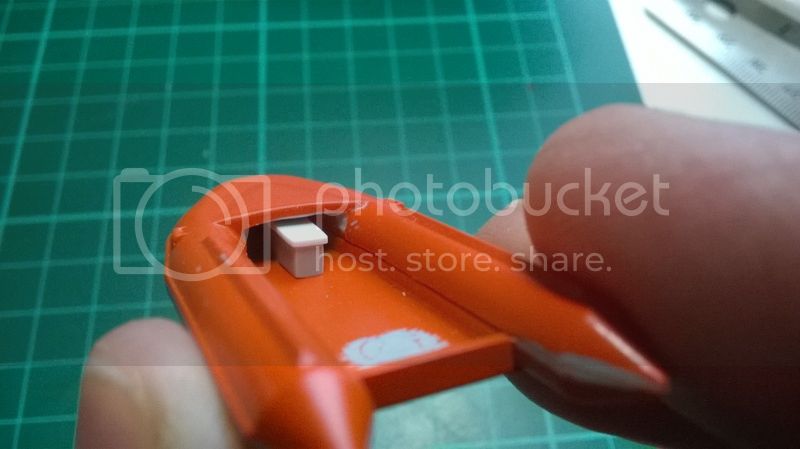
I've added a stowage box (at least that's what it looks like to me from reference):
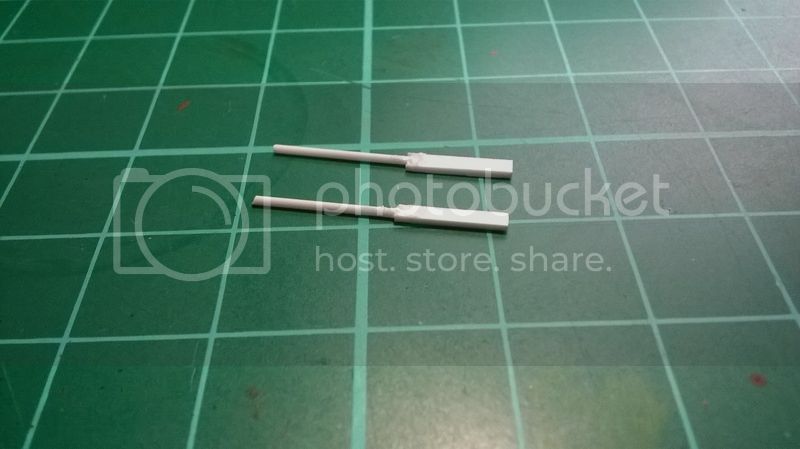
And scratched some TINY oars from stock plastic:
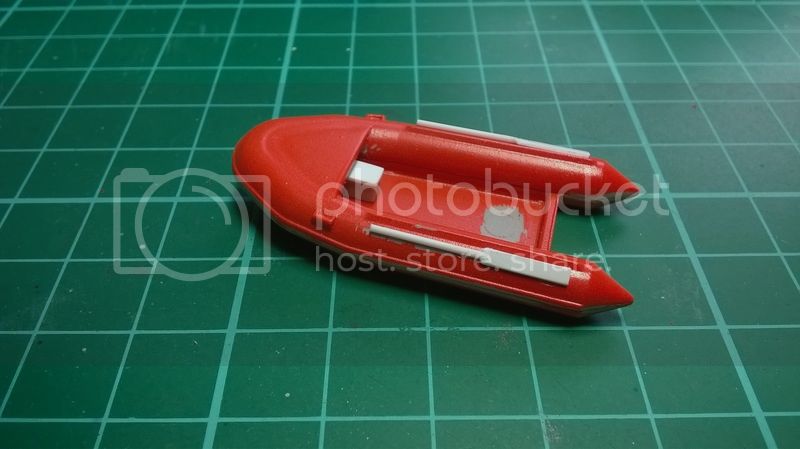
A bit of cleaning up and glueing has got me to this point :
Sean, it'll be good to see you in here once you're ready to go. I don't recall you mentioning in the proposal thread what you might be building. Any hints ?
I've been busy in the last few days but started a second build.
Just joking ! That blackhawk is still in the wings though
I've decided to detail the little RIB that's carried by the lifeboat (it's classed by the RNLI as a Y-boat)
Here it is as the basic kit build:
I've added a stowage box (at least that's what it looks like to me from reference):
And scratched some TINY oars from stock plastic:
A bit of cleaning up and glueing has got me to this point :
windysean
Joined: September 11, 2009
KitMaker: 1,917 posts
AeroScale: 563 posts
Posted: Sunday, November 29, 2015 - 09:05 AM UTC
I'll be jumping in with an early Chicago fire engine on a Thomas Flyer chassis. My dad and I planned this build about 30 years ago, but neither of us got too far on it. It starts with the MPC Thomas Flyer racer kit. There aren't too many prototype photos from 100 years ago, but several similar rigs that I can extrapolate from.
There's no way to finish this by Christmas for him, but definitely Fathers Day in June.
You guys are really doing well, so I intend to keep this group's momentum going soon!
Cheers,
Sean H.
There's no way to finish this by Christmas for him, but definitely Fathers Day in June.
You guys are really doing well, so I intend to keep this group's momentum going soon!
Cheers,
Sean H.
KelticKnot
Joined: May 11, 2015
KitMaker: 768 posts
AeroScale: 656 posts
Posted: Sunday, November 29, 2015 - 02:10 PM UTC
Sean, that sounds like a really interesting project and should be an excellent gift for your Dad. 😊
KelticKnot
Joined: May 11, 2015
KitMaker: 768 posts
AeroScale: 656 posts
Posted: Wednesday, December 02, 2015 - 09:25 PM UTC
Here's the (mostly) finished Y-boat. There are a few more details I could add but it seems like enough going on in a small area. I hope you agree it improves the look of the kit part a lot


Aurora-7

#360
Joined: June 18, 2003
KitMaker: 1,020 posts
AeroScale: 125 posts

Posted: Wednesday, December 02, 2015 - 09:47 PM UTC
Definitely looks much better.

Antilles
Joined: March 22, 2015
KitMaker: 671 posts
AeroScale: 614 posts
Posted: Thursday, December 03, 2015 - 01:27 AM UTC
Quoted Text
I hope you agree it improves the look of the kit part a lot
Paul, the boat seems really to be more "alive" now! Nice work!
Oliver
tatbaqui
#040
Joined: May 06, 2007
KitMaker: 2,713 posts
AeroScale: 65 posts
Posted: Thursday, December 03, 2015 - 01:59 PM UTC
Looking good Paul
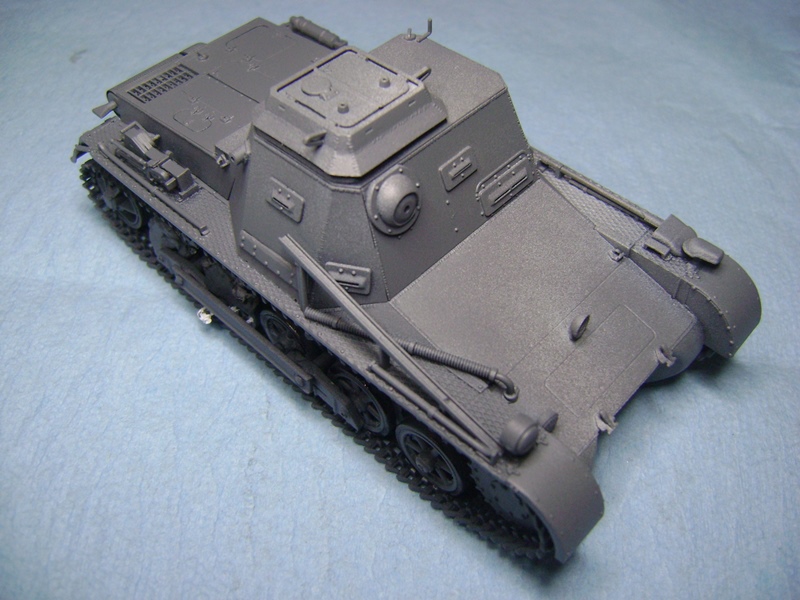
I've put in a bit of post-shadow. Next will be paint on the on-board tools and other bits.
Cheers,
Tat
I've put in a bit of post-shadow. Next will be paint on the on-board tools and other bits.
Cheers,
Tat
Aurora-7
#360
Joined: June 18, 2003
KitMaker: 1,020 posts
AeroScale: 125 posts
Posted: Friday, December 04, 2015 - 01:10 AM UTC
Add a nice amount of depth, Tat. Man, that's one heavy ambulance.
KelticKnot
Joined: May 11, 2015
KitMaker: 768 posts
AeroScale: 656 posts
Posted: Friday, December 04, 2015 - 03:25 PM UTC
Agreed! Looks great Tat.
I'm getting so close to completion. It's all the small five minute jobs that are building up. Decals are going on quite well but....
There is a thin film seemingly over the entire sheet of decals. I don't know if this is common but when a decal is removed from the backing paper the film curls around all over the place. On a couple of decals it has curled under so that it's visible as a silvered area. Most annoying.
I'm trying to cut the sheet close to the decals too.
windysean
Joined: September 11, 2009
KitMaker: 1,917 posts
AeroScale: 563 posts
Posted: Saturday, December 05, 2015 - 01:43 AM UTC
Paul, it sounds like you're doing it right. It just tests your patience! I hope it's work out well.
Tat, the shading seems heavy at this stage, but really lends some realism. I'm sure it'll tone down with the decals and other colors.
Cheers!
-Sean H.
Tat, the shading seems heavy at this stage, but really lends some realism. I'm sure it'll tone down with the decals and other colors.
Cheers!
-Sean H.
tatbaqui
#040
Joined: May 06, 2007
KitMaker: 2,713 posts
AeroScale: 65 posts
Posted: Saturday, December 05, 2015 - 05:37 AM UTC
Thanks Michael, Paul, and Sean
Paul, I find that decal-curling odd, but hopefully cutting it close will help.
Sean, indeed it does look a bit heavy. Will keep that in check as I go thru the weathering work.
Cheers,
Tat
Paul, I find that decal-curling odd, but hopefully cutting it close will help.
Sean, indeed it does look a bit heavy. Will keep that in check as I go thru the weathering work.
Cheers,
Tat
KelticKnot
Joined: May 11, 2015
KitMaker: 768 posts
AeroScale: 656 posts
Posted: Thursday, December 10, 2015 - 02:48 PM UTC
Good news guys, i've finished decals and most of the little odd jobs. One or two touch ups and a couple of coats of clear and i think she's done.
Sadly no more modelling time till next week as the in-laws are coming for the weekend
Sadly no more modelling time till next week as the in-laws are coming for the weekend
KelticKnot
Joined: May 11, 2015
KitMaker: 768 posts
AeroScale: 656 posts
Posted: Tuesday, December 15, 2015 - 03:58 PM UTC
Finally complete ! The last few stages seemed to take forever.
But i'm pretty pleased with the final result. Very little weathering but i think the quality of the kit speaks for itself. Highly recommended for aquatic fans.
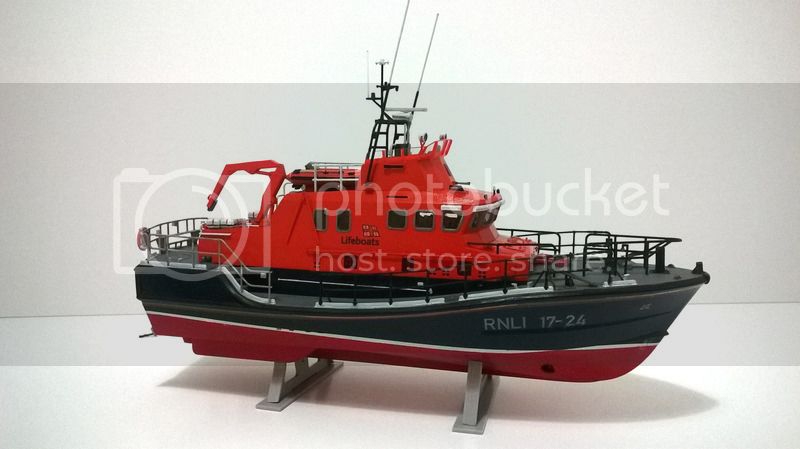
Now to get started on the next entry! I've only left a little over two months for this one.
But i'm pretty pleased with the final result. Very little weathering but i think the quality of the kit speaks for itself. Highly recommended for aquatic fans.
Now to get started on the next entry! I've only left a little over two months for this one.
Antilles
Joined: March 22, 2015
KitMaker: 671 posts
AeroScale: 614 posts
Posted: Tuesday, December 15, 2015 - 06:01 PM UTC
Paul, fantastic model, You built there. Congratulation to this one. I really like it  , and I am curious about Your next project!
Oliver
, and I am curious about Your next project!Oliver
KelticKnot
Joined: May 11, 2015
KitMaker: 768 posts
AeroScale: 656 posts
Posted: Wednesday, December 16, 2015 - 05:42 PM UTC
Many thanks Oliver
Luckily you dont have to wait long as i have had a burst of enthusiasm over starting a new kit
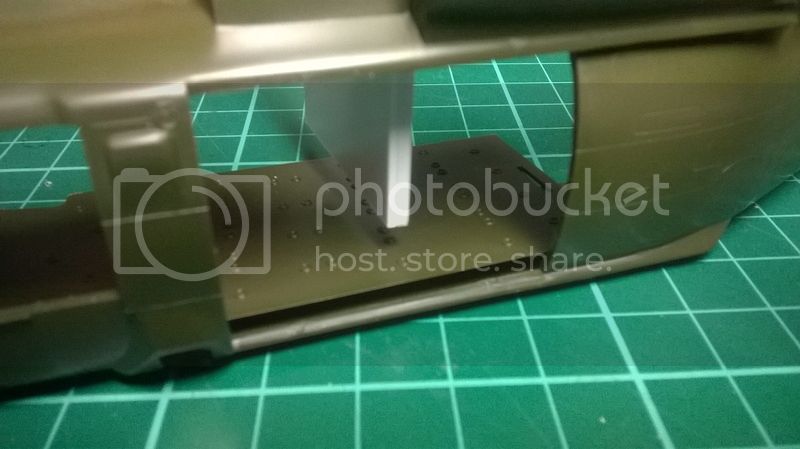
This is me trying to eyeball the size of the stretcher carousel for the Medevac bay.
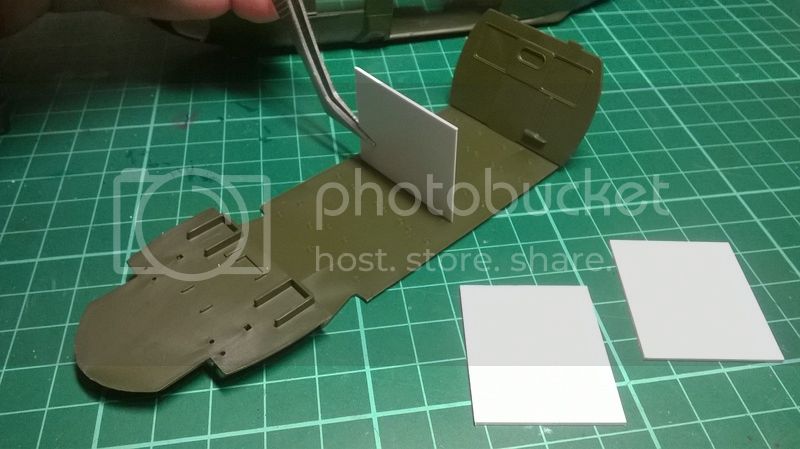
I'm using a sandwich of two thick pieces of evergreen with a thin piece in the middle. You'll see why in the following shots. (actually i think i made this a little too thin but i'm going with it now)
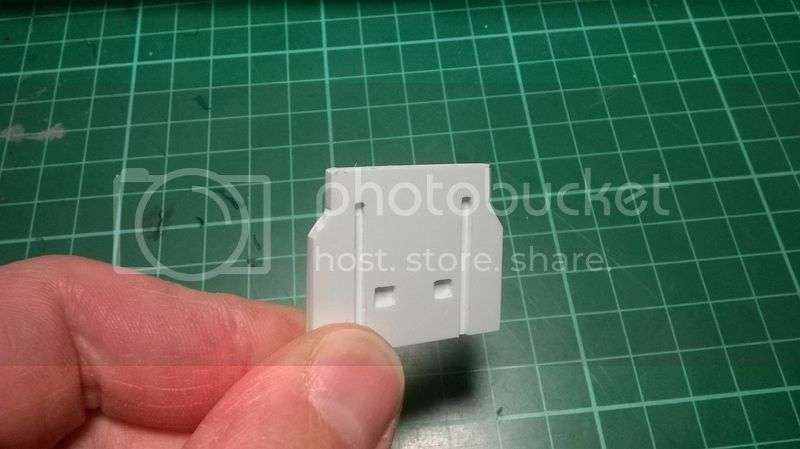
So i cut out some basic shapes in the two thick pieces...

And sandwiched them together with cement....
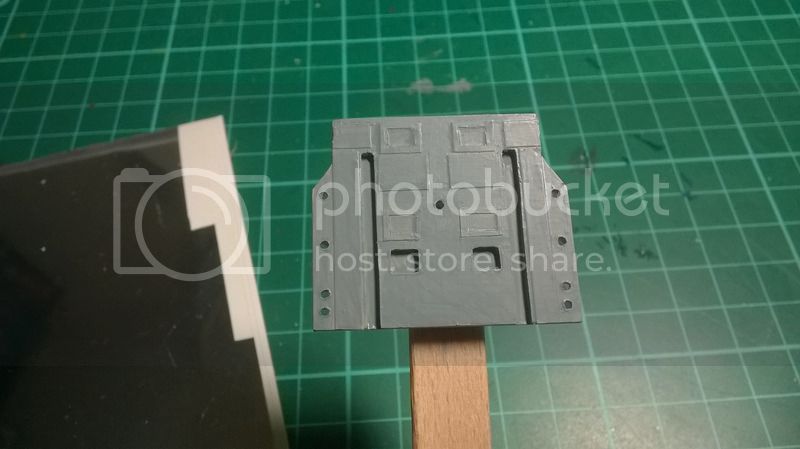
Stuck on a few panels using adhesive foil and drilled out a few holes. After a coat of primer it looks like this.
I should point out immediately that i am aware of Floyd Werner's excellent conversion for this very subject but it's near Christmas and my budget demands that i do the work myself.
Luckily you dont have to wait long as i have had a burst of enthusiasm over starting a new kit
This is me trying to eyeball the size of the stretcher carousel for the Medevac bay.
I'm using a sandwich of two thick pieces of evergreen with a thin piece in the middle. You'll see why in the following shots. (actually i think i made this a little too thin but i'm going with it now)
So i cut out some basic shapes in the two thick pieces...
And sandwiched them together with cement....
Stuck on a few panels using adhesive foil and drilled out a few holes. After a coat of primer it looks like this.
I should point out immediately that i am aware of Floyd Werner's excellent conversion for this very subject but it's near Christmas and my budget demands that i do the work myself.
KelticKnot
Joined: May 11, 2015
KitMaker: 768 posts
AeroScale: 656 posts
Posted: Wednesday, December 16, 2015 - 05:49 PM UTC
Oh, credit must also go to Gino Quintiliani for his great walkaround photos too
http://www.primeportal.net/hangar/gino_quintiliani/uh-60a_med_walk.htm
http://www.primeportal.net/hangar/gino_quintiliani/uh-60a_med_walk.htm
Aurora-7
#360
Joined: June 18, 2003
KitMaker: 1,020 posts
AeroScale: 125 posts
Posted: Wednesday, December 16, 2015 - 07:06 PM UTC
Fine looking boat, Paul!
And glad to see another Sikorsky in the Campaign (I live in the town where they build the real ones).
Waiting for the Christmas break to really dive into mine.
And glad to see another Sikorsky in the Campaign (I live in the town where they build the real ones).
Waiting for the Christmas break to really dive into mine.
 |

WEB HOSTING BY


Copyright ©2021 AeroScale and Kitmaker Network, a subsidiary of Silver Star Enterprises
All Rights Reserved. Please read our Conditions of Use and Privacy Policy.
All Rights Reserved. Please read our Conditions of Use and Privacy Policy.