OFFICIAL: Lifesavers Campaign
MichaelSatin
 Campaigns Administrator
Colorado, United States
Joined: January 19, 2008
KitMaker: 3,909 posts
AeroScale: 2,904 posts
Posted: Monday, August 31, 2015 - 05:27 AM UTC
Welcome to the Lifesavers Campaign!
The campaign will run from 1 September, 2015 through 1 March, 2016.
If you haven't signed up yet, or want to see the rules, go
here.
Please post your initial and in-progress photos as well as campaign discussion in this thread. Please post your finished build photos in the
campaign gallery.
Looking forward to some great models of emergency vehicles!
Michael

On the bench:
Sorta depends on your definition of "on the bench"...
Ontario, Canada
Joined: February 04, 2008
KitMaker: 2,507 posts
AeroScale: 1,814 posts
Posted: Monday, August 31, 2015 - 06:08 AM UTC
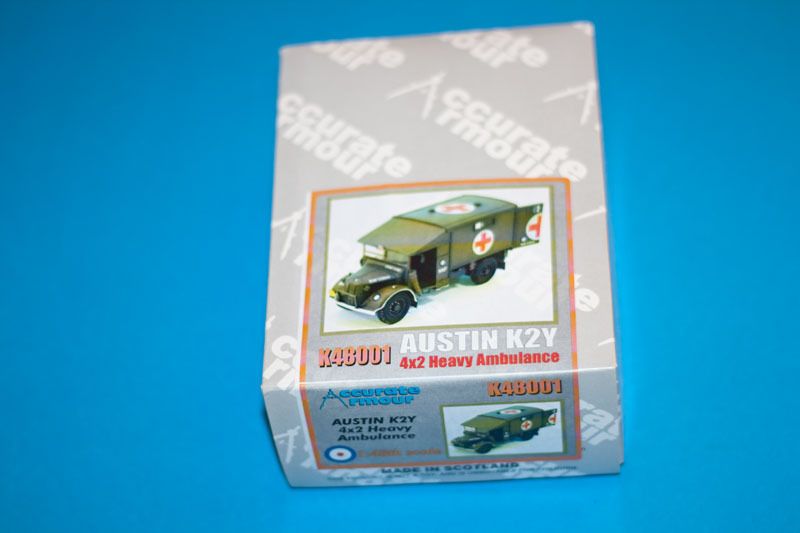
" The Die Hards"
43rd MIDDLESEX REGIMENT
MACHINE GUN CORPS
XXX CORP
The most effective way to do it, is to do it.
- Amelia Earhart
Scotland, United Kingdom
Joined: May 11, 2015
KitMaker: 768 posts
AeroScale: 656 posts
Posted: Monday, August 31, 2015 - 01:11 PM UTC
Here's Airfix's RNLI lifeboat in 1/72.
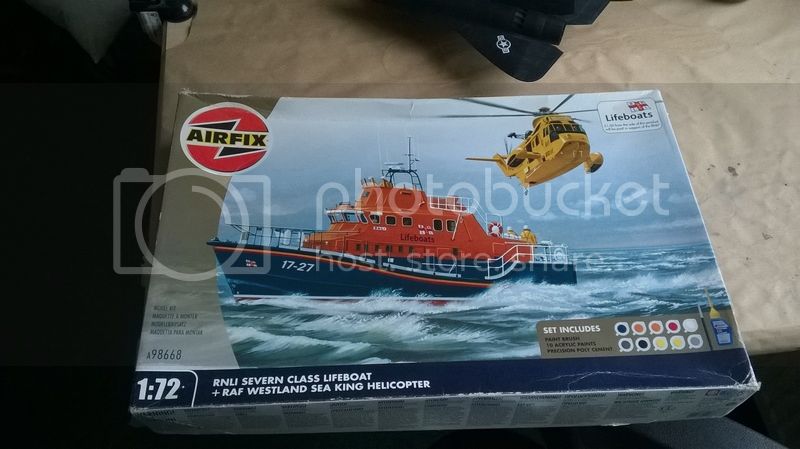
(the sea king was literally finished the other day for the Rotor RPM campaign

)
It's a dull and dreary 1'st September; the first day of Autumn and i'm on holiday for the rest of the week with no plans. Well, aside from the obvious
*edit* I should note that i've never built a ship before. Eeek
Pax & Pallets: Revell 1/48 Dakota
Terrible Teens : Revell 1/48 F15E Strike Eagle
Airfix IV : Airfix 1.72 Vulcan
Scotland, United Kingdom
Joined: May 11, 2015
KitMaker: 768 posts
AeroScale: 656 posts
Posted: Tuesday, September 01, 2015 - 03:25 AM UTC
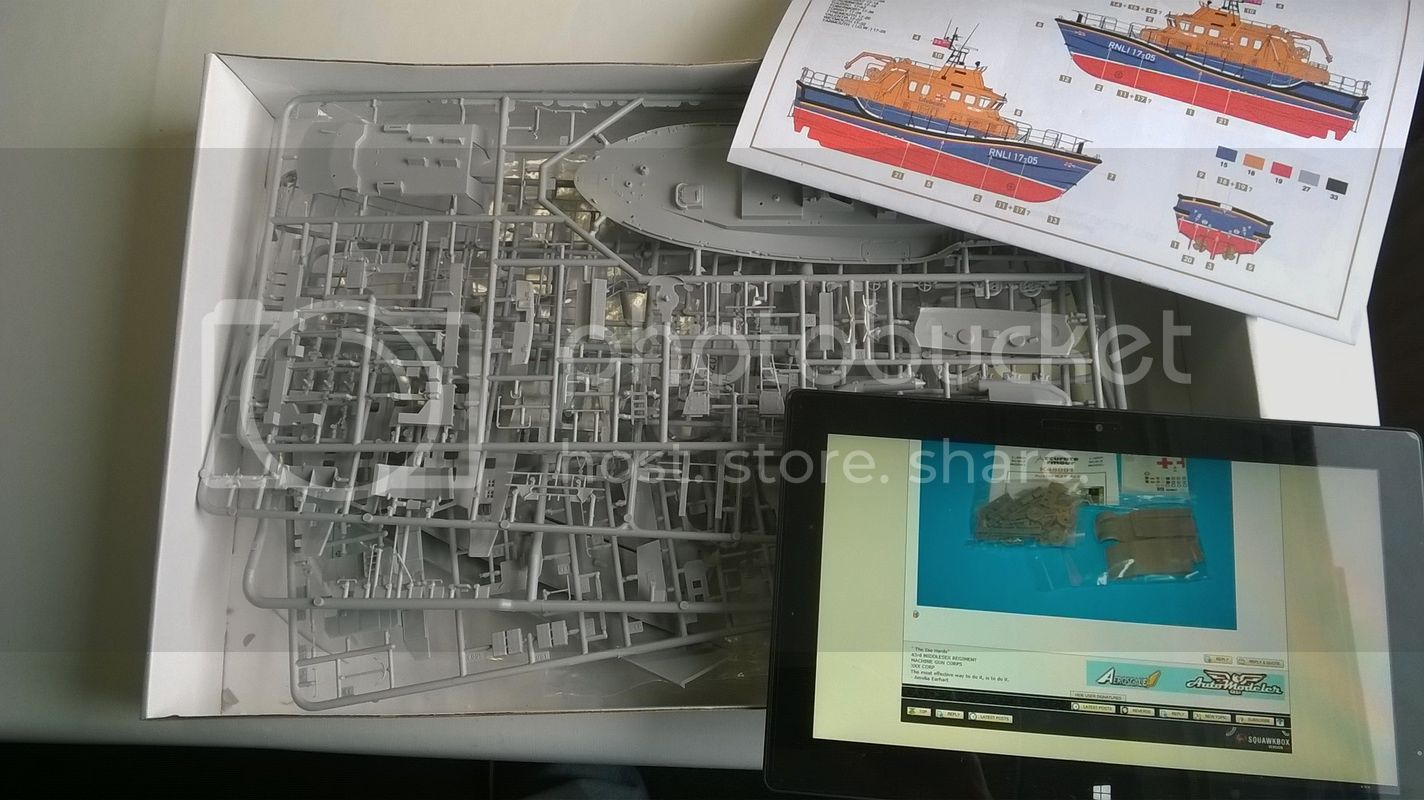
Made a solid start. Test fitted all the hull parts and decided to begin gluing the transom (check me out with my nautical terminology - its the flat end not the pointy end

) to the hull sides where the fit was really snug.
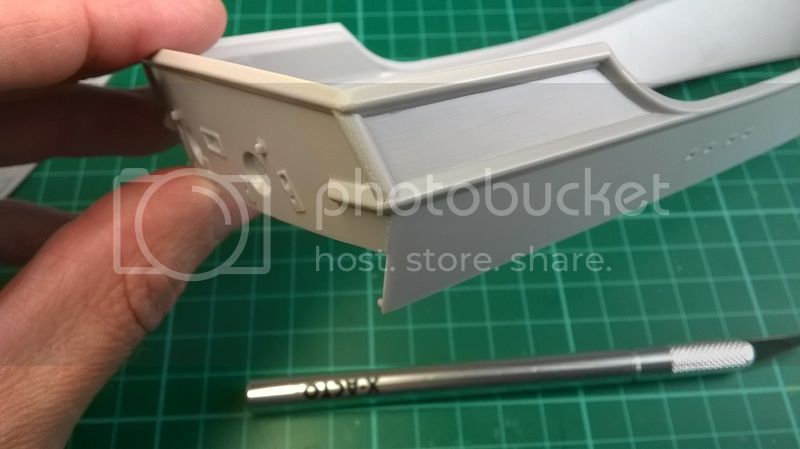
Gluing the pointy ends together
was next and once that had dried I fitted and glued the rear of the deck. Again a really nice fit.
A bit of sanding round the front of the deck and it popped right in too although the fit wasn't 100% and pulled the prow apart a tiny bit. No worries, a bit of filler and it's a good job.
The Keel was attached and we've got something that might float!
Pax & Pallets: Revell 1/48 Dakota
Terrible Teens : Revell 1/48 F15E Strike Eagle
Airfix IV : Airfix 1.72 Vulcan
New York, United States
Joined: August 25, 2006
KitMaker: 2,539 posts
AeroScale: 231 posts
Posted: Wednesday, September 02, 2015 - 07:35 AM UTC
So, here is my entry into the Lifesavers Campaign. It is the Revell 1/35 Bell H-13H:

I will be doing this as a MASH evacuation helicopter. I'm hoping to start this in the next few weeks after I finish up my Revell 1/48 Stearman PT-17.
Jim
"Socialism is a philosophy of failure, the creed of ignorance, and the gospel of envy, its inherent virtue is the equal sharing of misery." ---- Winston Churchill
Scotland, United Kingdom
Joined: May 11, 2015
KitMaker: 768 posts
AeroScale: 656 posts
Posted: Wednesday, September 02, 2015 - 01:11 PM UTC
Nice choice

I'm particularly interested in seeing how the tail assembly goes together. Is it a few long pieces or many smaller struts?
Also, it's good that an Aeroscale hosted campaign has an aircraft in it
Pax & Pallets: Revell 1/48 Dakota
Terrible Teens : Revell 1/48 F15E Strike Eagle
Airfix IV : Airfix 1.72 Vulcan
Removed by original poster on 09/03/15 - 10:05:14 (GMT).

#159
Massachusetts, United States
Joined: April 07, 2008
KitMaker: 803 posts
AeroScale: 42 posts
Posted: Wednesday, September 02, 2015 - 03:07 PM UTC
that is most of the hard part of that kit!!! I did not have the same simple results you offered.. mine was fraught with swears, blood, and ALOT of filler LOL... looks fantastic sofar!
Membership Secretary
www.amps-armor.org
Scotland, United Kingdom
Joined: May 11, 2015
KitMaker: 768 posts
AeroScale: 656 posts
Posted: Wednesday, September 02, 2015 - 03:35 PM UTC
Thanks Brian.
I have to say i gave it a bit of thought before starting and it seemed to me to be key that the three parts making the middle section needed to be joined first. The idea was that the visible joins would be glued as snugly as possible and would give enough flex to allow the "top" and "bottom" to be gently forced into place .
Had I started glueing the sides to the hull one at a time i think gaps would have been much more of a problem.
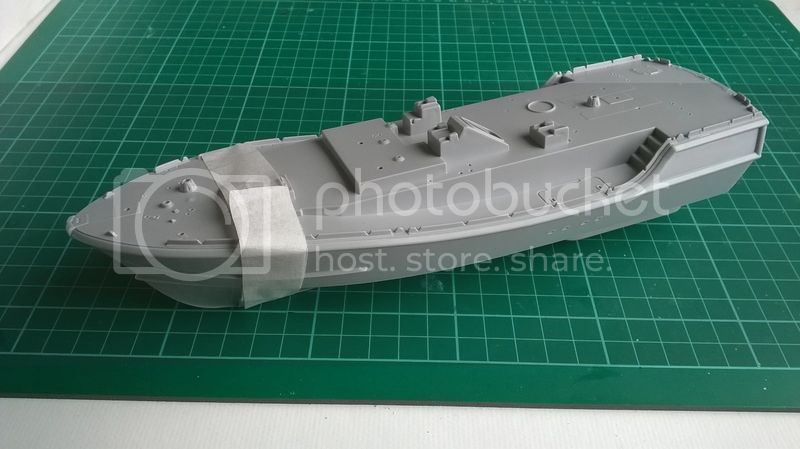
My major headache right now (and maybe something other boatbuilders can help with?) is masking the hull.
Trying to achieve a straight line along a hull curving away from the line which also has a step in it is tricky enough. Trying to then match the same curve a few millimetres apart for the white strip seems fiddly beyond belief.
Pax & Pallets: Revell 1/48 Dakota
Terrible Teens : Revell 1/48 F15E Strike Eagle
Airfix IV : Airfix 1.72 Vulcan
#159
Massachusetts, United States
Joined: April 07, 2008
KitMaker: 803 posts
AeroScale: 42 posts
Posted: Wednesday, September 02, 2015 - 04:25 PM UTC
Quoted Text
Thanks Brian.
I have to say i gave it a bit of thought before starting and it seemed to me to be key that the three parts making the middle section needed to be joined first. The idea was that the visible joins would be glued as snugly as possible and would give enough flex to allow the "top" and "bottom" to be gently forced into place .
Had I started glueing the sides to the hull one at a time i think gaps would have been much more of a problem.
My major headache right now (and maybe something other boatbuilders can help with?) is masking the hull.
Trying to achieve a straight line along a hull curving away from the line which also has a step in it is tricky enough. Trying to then match the same curve a few millimetres apart for the white strip seems fiddly beyond belief.
I feel your pain! the simplest solution IMO is to prime the whole hull white, let it dry really well, then find the right size line tape and just tape off the white line. Then when you shoot the top, put a strip of bigger tape or sticky notes on the line, and do the reverse for the bottom.

Sadly, my kit didnt get alot further along than this... as I broke some critical parts in transferring the superstructure and let my frustrations out on the whole thing... but have no fear... I bought another one LOL
Membership Secretary
www.amps-armor.org
New York, United States
Joined: August 25, 2006
KitMaker: 2,539 posts
AeroScale: 231 posts
Posted: Thursday, September 03, 2015 - 12:34 AM UTC
Paul,
The tail assembly comes as a single piece from Revell. The tubing probably isn't to scale, but it's a lot easier than assembling it!

You do have to add on the tail rotor & rotor guard; but for the most part it's all one piece.
Jim
"Socialism is a philosophy of failure, the creed of ignorance, and the gospel of envy, its inherent virtue is the equal sharing of misery." ---- Winston Churchill
Scotland, United Kingdom
Joined: May 11, 2015
KitMaker: 768 posts
AeroScale: 656 posts
Posted: Thursday, September 03, 2015 - 01:32 AM UTC
Aha, that makes things simpler huh? That would be challenging to put together from individual parts
Pax & Pallets: Revell 1/48 Dakota
Terrible Teens : Revell 1/48 F15E Strike Eagle
Airfix IV : Airfix 1.72 Vulcan
New York, United States
Joined: August 25, 2006
KitMaker: 2,539 posts
AeroScale: 231 posts
Posted: Thursday, September 03, 2015 - 05:18 AM UTC
Yes, it would be more difficult to build from individual pieces, but I'm sure someone with better soldering skills than I could make one more to scale with brass rod. I'll stick with the plastic cage!
Jim
"Socialism is a philosophy of failure, the creed of ignorance, and the gospel of envy, its inherent virtue is the equal sharing of misery." ---- Winston Churchill
Scotland, United Kingdom
Joined: May 11, 2015
KitMaker: 768 posts
AeroScale: 656 posts
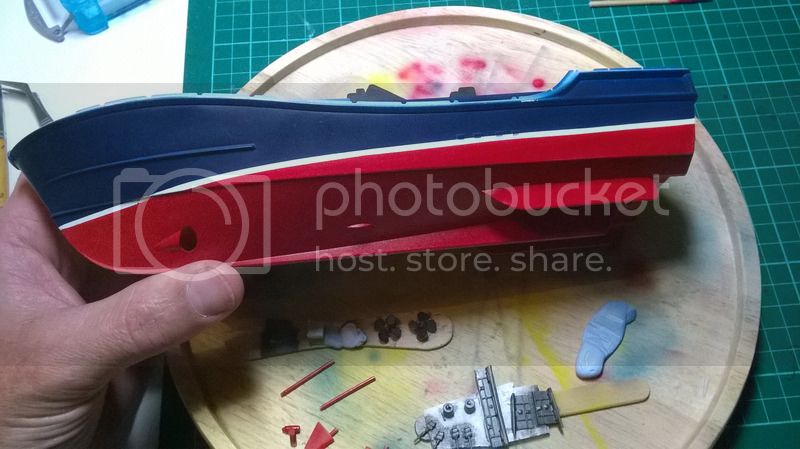
Posted: Friday, September 04, 2015 - 12:44 AM UTC
Quoted Text
the simplest solution IMO is to prime the whole hull white, let it dry really well, then find the right size line tape and just tape off the white line. Then when you shoot the top, put a strip of bigger tape or sticky notes on the line, and do the reverse for the bottom.
Seems obvious after the fact doesn't it? Heh, oh well I wish i'd read your comment before cracking open the paint!
Shooting red:
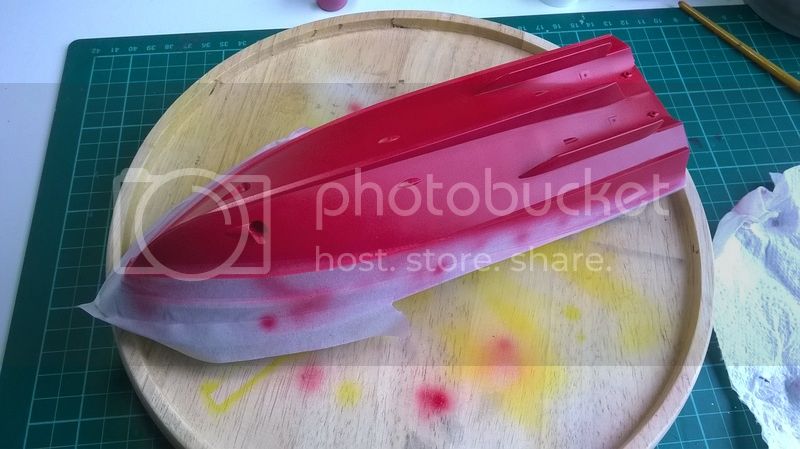
And
then white :
Lots of waiting around while paint dries. I see the attraction of having a second kit on the bench

Pax & Pallets: Revell 1/48 Dakota
Terrible Teens : Revell 1/48 F15E Strike Eagle
Airfix IV : Airfix 1.72 Vulcan
Nordrhein-Westfalen, Germany
Joined: March 22, 2015
KitMaker: 671 posts
AeroScale: 614 posts
Posted: Friday, September 04, 2015 - 01:14 AM UTC
Hello fellow modelers, now, here is my entry. I will do the KV-107II-5 Shirasagi, formerly known as Boeing Vertol.

I will try this one straight from the box. Hopefully it will work!
Oliver

On the desk: Probably a Panzer III.
British Columbia, Canada
Joined: September 03, 2009
KitMaker: 6,965 posts
AeroScale: 6,247 posts
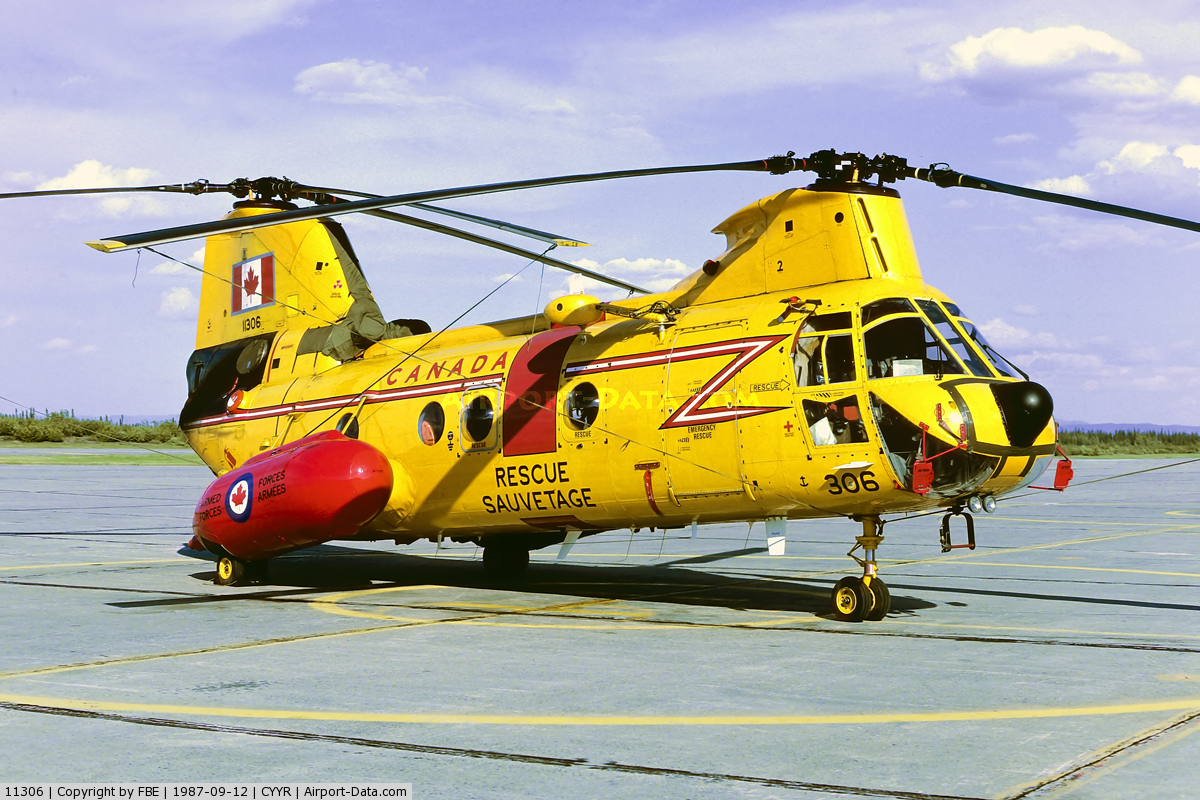
Posted: Friday, September 04, 2015 - 02:41 AM UTC
Quoted Text
Hello fellow modelers, now, here is my entry. I will do the KV-107II-5 Shirasagi, formerly known as Boeing Vertol.
That's a truly excellent kit. Much better than the hobbycrap knockoff. It needs to have this paintjob though...
When once you have tasted flight you will walk the Earth with your eyes turned skyward.
For there you have been, and there you will always long to return.
-Leonardo Da Vinci
Scotland, United Kingdom
Joined: May 11, 2015
KitMaker: 768 posts
AeroScale: 656 posts
Posted: Friday, September 04, 2015 - 01:42 PM UTC
Hahaha, welcome to the campaign Oliver !
Pax & Pallets: Revell 1/48 Dakota
Terrible Teens : Revell 1/48 F15E Strike Eagle
Airfix IV : Airfix 1.72 Vulcan
Nordrhein-Westfalen, Germany
Joined: March 22, 2015
KitMaker: 671 posts
AeroScale: 614 posts
Posted: Friday, September 04, 2015 - 05:17 PM UTC
Hi Paul, good to be here!
Hi Jessie,
that´s really a fine color for the chopper. But, the last one of the rotor rpm campaign was already a canadian-one. Okay, you can´t enough planes in canadian style, but the japanese paint is more...
how can I say...
...more individual.
Oliver
On the desk: Probably a Panzer III.
Nordrhein-Westfalen, Germany
Joined: March 22, 2015
KitMaker: 671 posts
AeroScale: 614 posts
Posted: Tuesday, September 08, 2015 - 02:55 PM UTC
Started yesterday with some cockpit work. First, the pilots seats were cushioned to make them more comfortabel.

After this I turned to the cockpits pedals. These are rather roughly done in the kit. As the whole area will be rather well visible, I cut of the old pedals and scratched some new. Additionally I did some wiring and drilling in the front area.


I guess, this will be enough in this scale. Next comes painting of these parts.
Oliver
On the desk: Probably a Panzer III.
Scotland, United Kingdom
Joined: May 11, 2015
KitMaker: 768 posts
AeroScale: 656 posts
Posted: Wednesday, September 09, 2015 - 10:51 AM UTC
All those extra details should look really nice when painted up. Are you going to decorate the chopper in the scheme you showed?
Pax & Pallets: Revell 1/48 Dakota
Terrible Teens : Revell 1/48 F15E Strike Eagle
Airfix IV : Airfix 1.72 Vulcan
Nordrhein-Westfalen, Germany
Joined: March 22, 2015
KitMaker: 671 posts
AeroScale: 614 posts
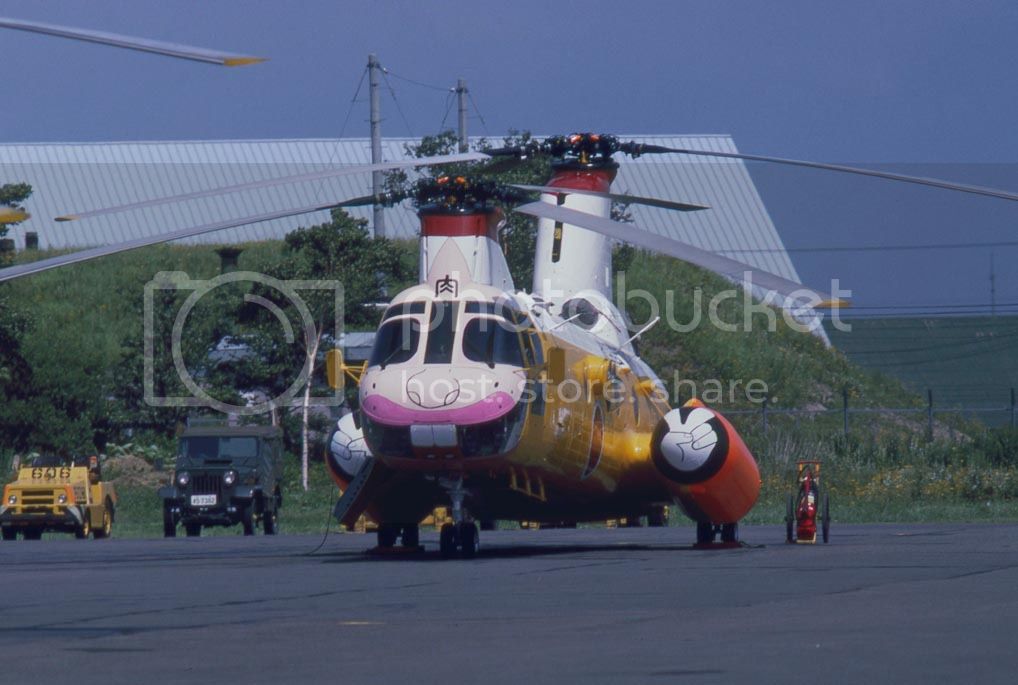
Posted: Wednesday, September 09, 2015 - 08:02 PM UTC
Paul: The Fujimi kit has not exactly the decals of the chopper, that I posted. But, they are very similar

.
I searched the net for more information about those funny cartoon faces, but I found nothing. Probably it was only a temporary decoration.
Oliver
On the desk: Probably a Panzer III.
#159
Massachusetts, United States
Joined: April 07, 2008
KitMaker: 803 posts
AeroScale: 42 posts
Posted: Wednesday, September 09, 2015 - 08:41 PM UTC
[quote]
Quoted Text
Lots of waiting around while paint dries. I see the attraction of having a second kit on the bench
I am watching with baited breath!!! I had the itch to do the red too... after my first pink (white)line came out, I removed all the paint and did it white first.... hopefully no bleed through!!!
Membership Secretary
www.amps-armor.org
Nordrhein-Westfalen, Germany
Joined: March 22, 2015
KitMaker: 671 posts
AeroScale: 614 posts
Posted: Thursday, September 10, 2015 - 02:08 PM UTC
Paul: These are the options of the Fujimi kit. But, I found nothing about these markings in the net.


Oliver
On the desk: Probably a Panzer III.
Scotland, United Kingdom
Joined: May 11, 2015
KitMaker: 768 posts
AeroScale: 656 posts
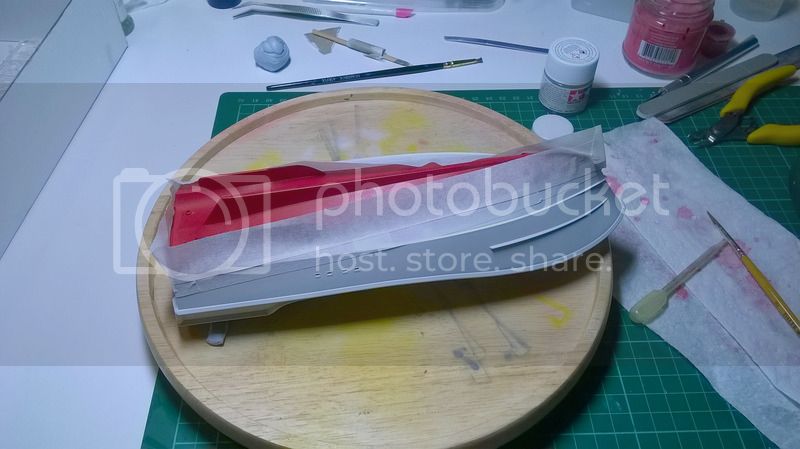
Posted: Friday, September 11, 2015 - 01:34 AM UTC
Those are some really fun markings and it's no surprise that they are used because the look of the helicopter just begs to have a face on the front.
So here is my current state of paint. It's coming out not too bad so far but the masking has been annoying. I realised after shooting the white line that my red area was not high enough on the hull. I corrected this but i've had to put on a few extra coats of red to cover the white paint showing underneath.
Needs a couple of touch ups where the step in the hull spoiled my mask but overall i'm happy.
Pax & Pallets: Revell 1/48 Dakota
Terrible Teens : Revell 1/48 F15E Strike Eagle
Airfix IV : Airfix 1.72 Vulcan
Scotland, United Kingdom
Joined: May 11, 2015
KitMaker: 768 posts
AeroScale: 656 posts
Posted: Friday, September 11, 2015 - 01:41 AM UTC
Quoted Text
Sadly, my kit didnt get alot further along than this... as I broke some critical parts...
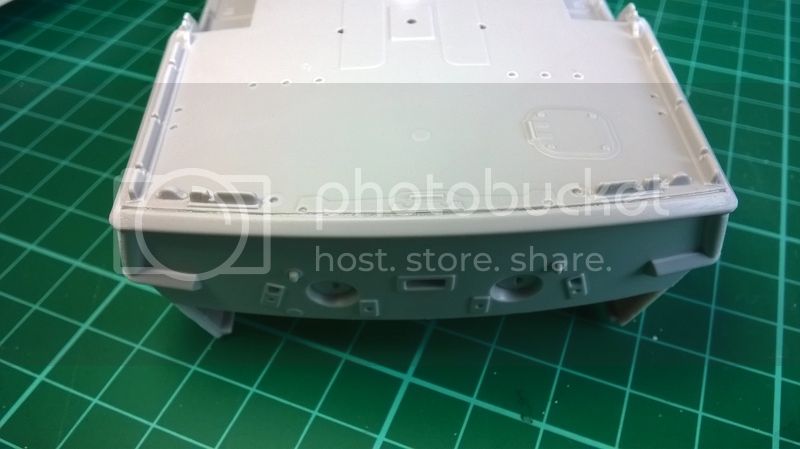
I'm seeing where this could be a problem Brian. Some of the parts are extremely thin and delicate. I invested in a razor saw as soon as i broke both of the tiny silver (actuator rods?) on the stern.
Pax & Pallets: Revell 1/48 Dakota
Terrible Teens : Revell 1/48 F15E Strike Eagle
Airfix IV : Airfix 1.72 Vulcan