50 Years ago over Vietnam (1/48 A-4C Skyhawk)
Slovakia
Joined: October 15, 2010
KitMaker: 825 posts
AeroScale: 476 posts
Posted: Thursday, January 22, 2015 - 04:26 PM UTC
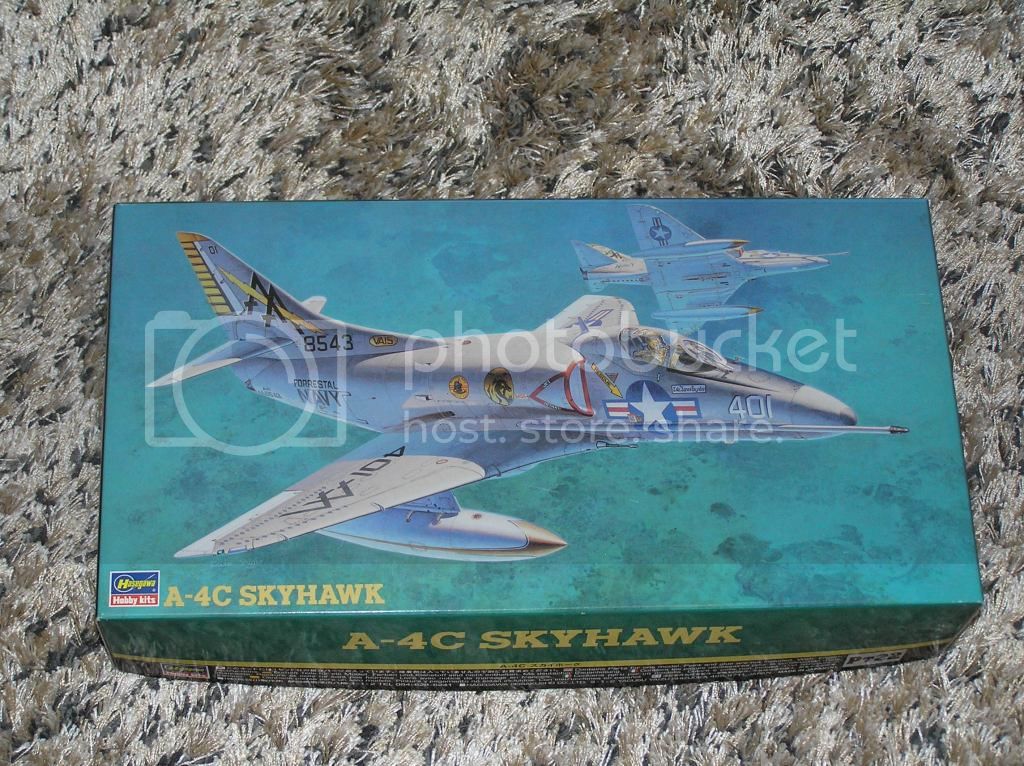
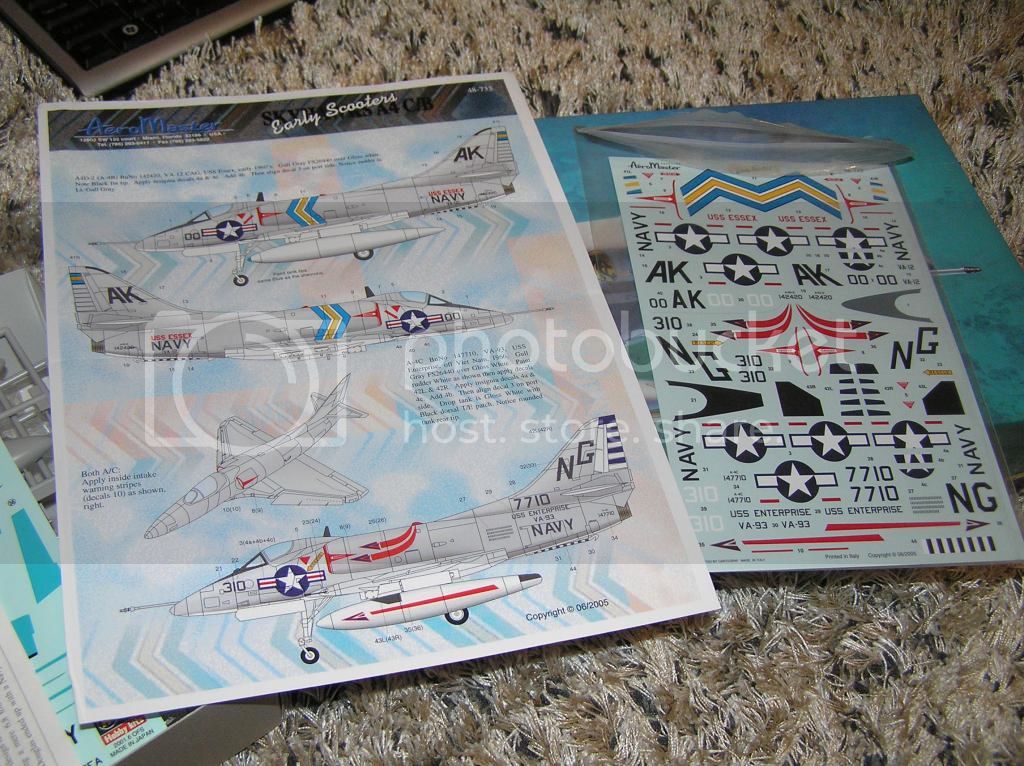
This Year we will mark the 50th Annyversary of the escalation of Air and Ground war in Vietnam. One of the main protagonist of the early stages of the war was the A-4 Skyhawk. Being a fan of the USN and its planes I decided to commemorate this with the next project. The best kit of this plane in 1/48 scale is from Hasegawa. The only deficiency is with the decals, which will be replaced by AM decals from Aero Master.
The plane I have chosen to portrait is A-4C No147710 from VA-93 on board of USS Enterprise in early 1966. As far as I know this was the first combat deployment of a nuclear powered vessel ih history and VA-93s Skyhawks were the first planes operaing from a nuclear carrier in combat.
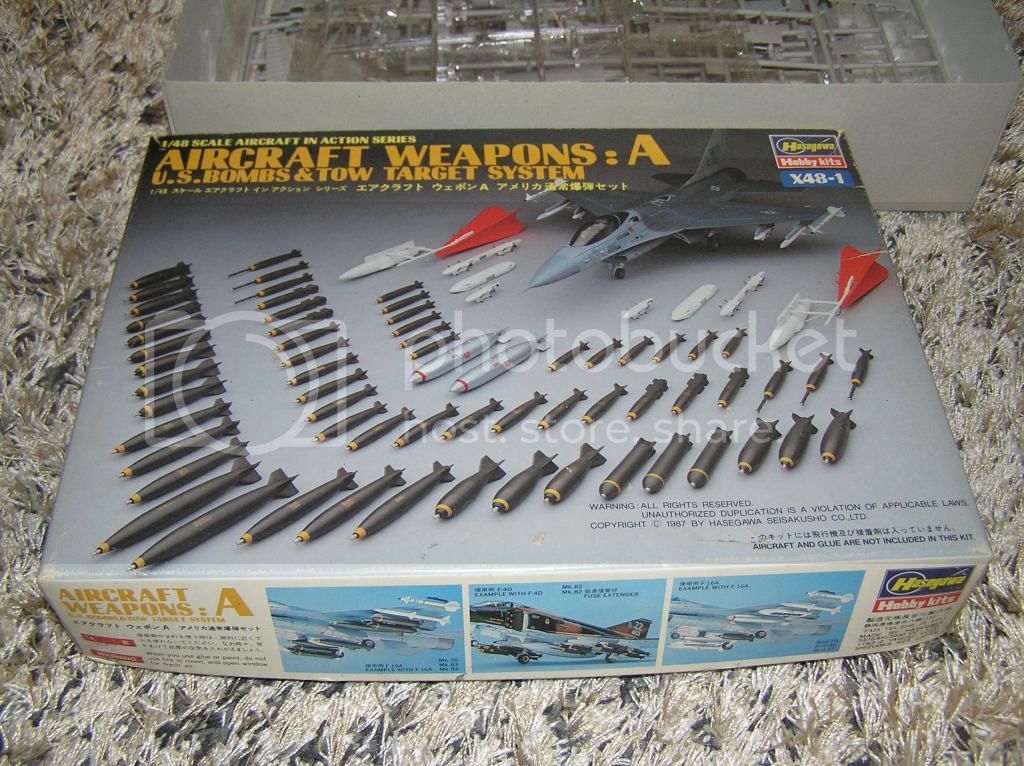
Another problem with the Hasegawa kit is the lack of any armament, which is a huge deficiency given how much payload the Skyhawks usualy carried into combat. I will be therefore using Hasegawas Weapon Set "A". Im however dissapointed with the quality of the bombs, espacially the Mk.82 which are only a bit better then the ones offered by Trumpeter, and are far worse then the ones from Tamiya.
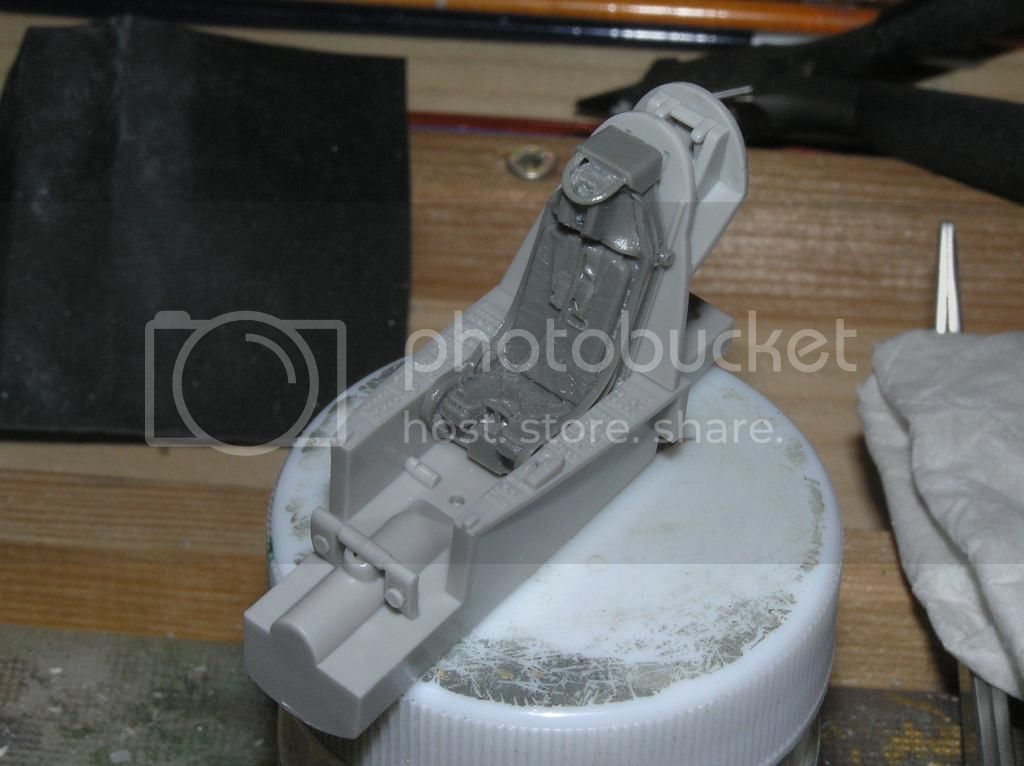
I started the work Yesterday with the cockpit. This will be an out of the box build, with the exception of the Ejection Seat which I replaced with a Resin one from Pavla Models.
Slovakia
Joined: October 15, 2010
KitMaker: 825 posts
AeroScale: 476 posts
Posted: Saturday, January 24, 2015 - 09:15 PM UTC
Joel_W
 Associate Editor
New York, United States
Joined: December 04, 2010
KitMaker: 11,666 posts
AeroScale: 7,410 posts
Posted: Sunday, January 25, 2015 - 05:31 AM UTC
Hard to believe it's been 50 years since the start of the Vietman war. Heck, I was a senior in high back then.
Certainly an excellent choice of Naval air power since the Scooter has always been one of my personal favorites. Just a mean lean fightin' machine.
Nice start to the cockpit. With the AM seat it looks great. IP really has been done well.
Excellent choice of markings will really add to the final presentation.
Naturally, I'll be following your build with a great deal of interest.
Joel
On my Workbench:
Monogram 1/24 scale 427 Shelby Cobra
Just Completed:
Beemax 1/24 scale BMW M3 E30 1992 Evolution II
Slovakia
Joined: October 15, 2010
KitMaker: 825 posts
AeroScale: 476 posts
Posted: Sunday, January 25, 2015 - 04:04 PM UTC
Hi Joel,thanks for the comment. I have a few other planes from VN in the stash in 1/48, Skyraider, Thud and also the Crusader, but the Skyhawk seemed like a natural choise since the first sorties in 1965 were flown mainly by these machines. I have assembled the fuselage Yesterday, so a few pictures will follow. Still havent decided about the payload. I would like to portrait a plane going on long range strike mission, with two fuel tanks on the wing pylons (C-version only had two wing pylon) and a couple of Mk.83s on the center MER. It seems that most sorties were flown with a single fuel tank under the fuselage and more bombs were carried under the wings, but I like the two-tanks cofiguration better.
Joel_W
Associate Editor New York, United States
Joined: December 04, 2010
KitMaker: 11,666 posts
AeroScale: 7,410 posts
Posted: Sunday, January 25, 2015 - 10:08 PM UTC
Naseby,
Like I said, I'll be following right along, as this is going to be a really interesting build.
Joel
On my Workbench:
Monogram 1/24 scale 427 Shelby Cobra
Just Completed:
Beemax 1/24 scale BMW M3 E30 1992 Evolution II
Slovakia
Joined: October 15, 2010
KitMaker: 825 posts
AeroScale: 476 posts
Posted: Saturday, January 31, 2015 - 01:55 PM UTC
Joel_W
Associate Editor New York, United States
Joined: December 04, 2010
KitMaker: 11,666 posts
AeroScale: 7,410 posts
Posted: Sunday, February 01, 2015 - 08:48 PM UTC
The cockpit looks great. Most impressive.
One question, the air intakes. They're white, so I'm assuming that you made them. I guess that just with the kit parts you can see past the sides of the intake fans.
Joel
On my Workbench:
Monogram 1/24 scale 427 Shelby Cobra
Just Completed:
Beemax 1/24 scale BMW M3 E30 1992 Evolution II
Slovakia
Joined: October 15, 2010
KitMaker: 825 posts
AeroScale: 476 posts
Posted: Monday, February 02, 2015 - 12:27 AM UTC
Hi Joel. Thanks for the comments. As for the intakes, when the outer parts are in place, there will be barely something visible, thats why I opted for the contrasting dark fan and white tunnel wals.
Ontario, Canada
Joined: March 29, 2010
KitMaker: 1,151 posts
AeroScale: 985 posts
Posted: Monday, February 02, 2015 - 01:37 AM UTC
Always liked the scooter. Very nice so far.
Could never wrap my head around the name though. Skyhawk? As opposed to landhawk?
Slovakia
Joined: October 15, 2010
KitMaker: 825 posts
AeroScale: 476 posts
Posted: Friday, February 20, 2015 - 08:43 PM UTC
Joel_W
Associate Editor New York, United States
Joined: December 04, 2010
KitMaker: 11,666 posts
AeroScale: 7,410 posts
Posted: Saturday, February 21, 2015 - 03:33 AM UTC
Nasby,
The fit certainly may be less then you expected, but your putty work looks like it's taken care of all those issues. Looking forward to seeing your Scooter with a coat of primer on real soon.
Joel
On my Workbench:
Monogram 1/24 scale 427 Shelby Cobra
Just Completed:
Beemax 1/24 scale BMW M3 E30 1992 Evolution II
France
Joined: March 20, 2008
KitMaker: 1 posts
AeroScale: 1 posts
Posted: Saturday, February 21, 2015 - 03:22 PM UTC
Slovakia
Joined: October 15, 2010
KitMaker: 825 posts
AeroScale: 476 posts
Posted: Saturday, February 21, 2015 - 09:19 PM UTC
Wow what a great set of pictures, a lot of details and great inspiration. Thanks.
Slovakia
Joined: October 15, 2010
KitMaker: 825 posts
AeroScale: 476 posts
Posted: Saturday, June 06, 2015 - 11:19 PM UTC
Joel_W
Associate Editor New York, United States
Joined: December 04, 2010
KitMaker: 11,666 posts
AeroScale: 7,410 posts
Posted: Sunday, June 07, 2015 - 06:24 PM UTC
Naseby,
Nice to see that the Scooter is still alive a well. Base paint and shading looks quite nice.
Joel
On my Workbench:
Monogram 1/24 scale 427 Shelby Cobra
Just Completed:
Beemax 1/24 scale BMW M3 E30 1992 Evolution II
Slovakia
Joined: October 15, 2010
KitMaker: 825 posts
AeroScale: 476 posts
Posted: Monday, August 31, 2015 - 11:02 PM UTC
Joel_W
Associate Editor New York, United States
Joined: December 04, 2010
KitMaker: 11,666 posts
AeroScale: 7,410 posts
Posted: Tuesday, September 01, 2015 - 03:02 AM UTC
Naseby,
Once again, it's nice to see your A4 build back on track. The repaint looks great, but you could have opted to just overcoat the topside with a lighter gray wash, and achieved about the same results.
Joel
On my Workbench:
Monogram 1/24 scale 427 Shelby Cobra
Just Completed:
Beemax 1/24 scale BMW M3 E30 1992 Evolution II
United States
Joined: February 01, 2009
KitMaker: 1,233 posts
AeroScale: 663 posts
Posted: Tuesday, September 01, 2015 - 04:24 AM UTC
That's really a beautiful Scooter. Your work on the cockpit and wheel bays is really outstanding as well. I will be looking forward to more photos. What squadron is that, BTW?
Best wishes,
Ian

It is a fact that under equal conditions, large-scale battles and whole wars are won by troops which have a strong will for victory, clear goals before them, high moral standards, and devotion to the banner under which they go into battle.
-Georgy Zhukov
Slovakia
Joined: October 15, 2010
KitMaker: 825 posts
AeroScale: 476 posts
Posted: Wednesday, September 02, 2015 - 01:51 AM UTC
@Joel Thanks for the comment, I have watched Your build of the Skyhawk and You have done a very good job and in a very short time!
@Ian its the VA-93 Blue Blazers. I used AM decals from Aero Master. The machine is A-4C No147710 on board of USS Enterprise in early 1966. Heres the link to a picture of the actual machine im building :
http://a4skyhawk.org/content/147710-va-93-d-kasulka-1453I will be making some changes however. I believe this picture was taken after a refit or before deployment since the plane is obviousely too clean. I will use plain white Fuel tanks because I dont think they would use these specially painted ones while deployed on Yankee Station.
United States
Joined: February 01, 2009
KitMaker: 1,233 posts
AeroScale: 663 posts
Posted: Wednesday, September 02, 2015 - 04:24 AM UTC
Good pick for the markings! I can't wait to see the finished product. Lots of Scooters on Aeroscale....love it.
Best wishes,
Ian
It is a fact that under equal conditions, large-scale battles and whole wars are won by troops which have a strong will for victory, clear goals before them, high moral standards, and devotion to the banner under which they go into battle.
-Georgy Zhukov
Joel_W
Associate Editor New York, United States
Joined: December 04, 2010
KitMaker: 11,666 posts
AeroScale: 7,410 posts
Posted: Friday, September 04, 2015 - 12:48 AM UTC
Naseby,
I did the same on the wing tanks for my Scooter, even though I still haven't installed them. I would think that once on Station, gas tanks are brought up for fitting per mission without much thought given to which exact aircraft will be getting them. One would think that the crews have more then enough to do without trying to match up custom paint jobs.
Joel
On my Workbench:
Monogram 1/24 scale 427 Shelby Cobra
Just Completed:
Beemax 1/24 scale BMW M3 E30 1992 Evolution II
Slovakia
Joined: October 15, 2010
KitMaker: 825 posts
AeroScale: 476 posts
Posted: Sunday, September 20, 2015 - 12:31 AM UTC
Niedersachsen, Germany
Joined: March 26, 2014
KitMaker: 844 posts
AeroScale: 630 posts
Posted: Sunday, September 20, 2015 - 03:23 AM UTC
A very nice A-4, beautiful scheme and great details. Well done so far.
United States
Joined: February 01, 2009
KitMaker: 1,233 posts
AeroScale: 663 posts
Posted: Sunday, September 20, 2015 - 06:41 AM UTC
Beautiful work on the A-4. I love your choice of markings. The flashes on the fuselage look great too.
Best wishes,
Ian
It is a fact that under equal conditions, large-scale battles and whole wars are won by troops which have a strong will for victory, clear goals before them, high moral standards, and devotion to the banner under which they go into battle.
-Georgy Zhukov
Joel_W
Associate Editor New York, United States
Joined: December 04, 2010
KitMaker: 11,666 posts
AeroScale: 7,410 posts
Posted: Sunday, September 20, 2015 - 06:55 PM UTC
Naseby,
You're certainly making slow but steady progress. Decaling really looks like it was painted, with no flash to be seen anywhere. Very nicely done. Just one question. Did you gloss coat over the decals, or go directly to a Matt coat? From what you wrote, it sounds like the later.
Joel
On my Workbench:
Monogram 1/24 scale 427 Shelby Cobra
Just Completed:
Beemax 1/24 scale BMW M3 E30 1992 Evolution II


