Dragon 1/32 P-51K Mustang
Ontario, Canada
Joined: October 11, 2012
KitMaker: 141 posts
AeroScale: 139 posts
Posted: Tuesday, January 06, 2015 - 03:01 AM UTC
With the F104 barely cold and in the ground, it's time to crack on with the next build. It seems that my immediate modelling future will be 1/32 flavoured and so, for my sins (if you believe the hype), I have started work on the Dragon P-51 K. You will have heard tell of the awful surface texture, the bizarre tyres, the less than stellar fit in places and the hap-hazard engineering. But apart from that..... how does it build. I'm about to find out.
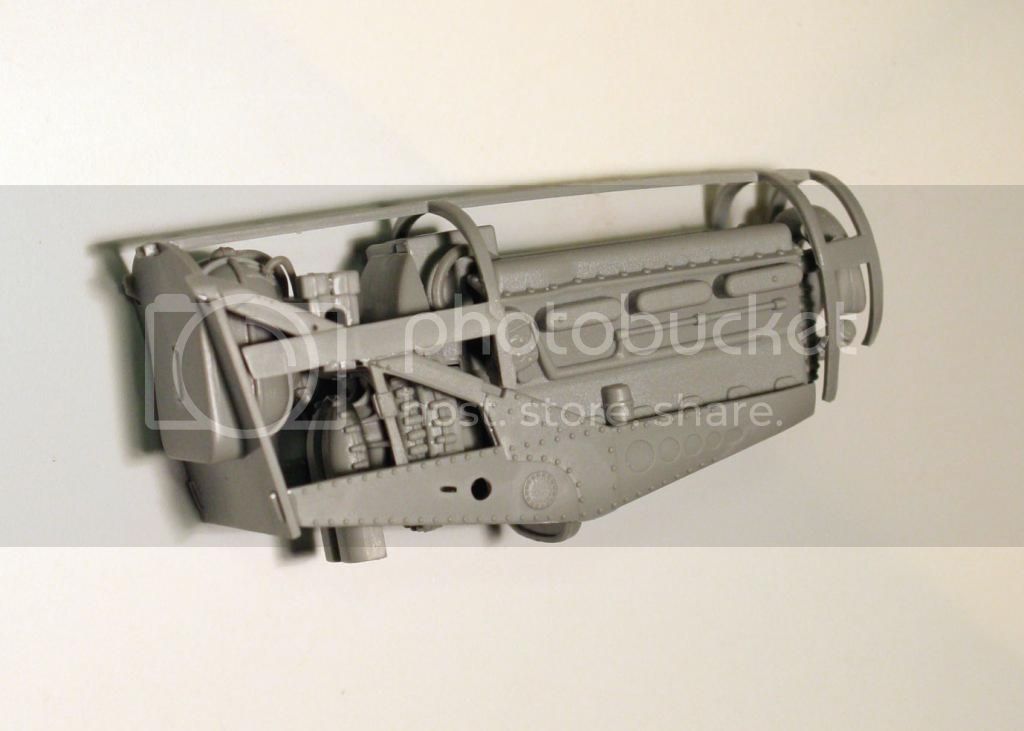
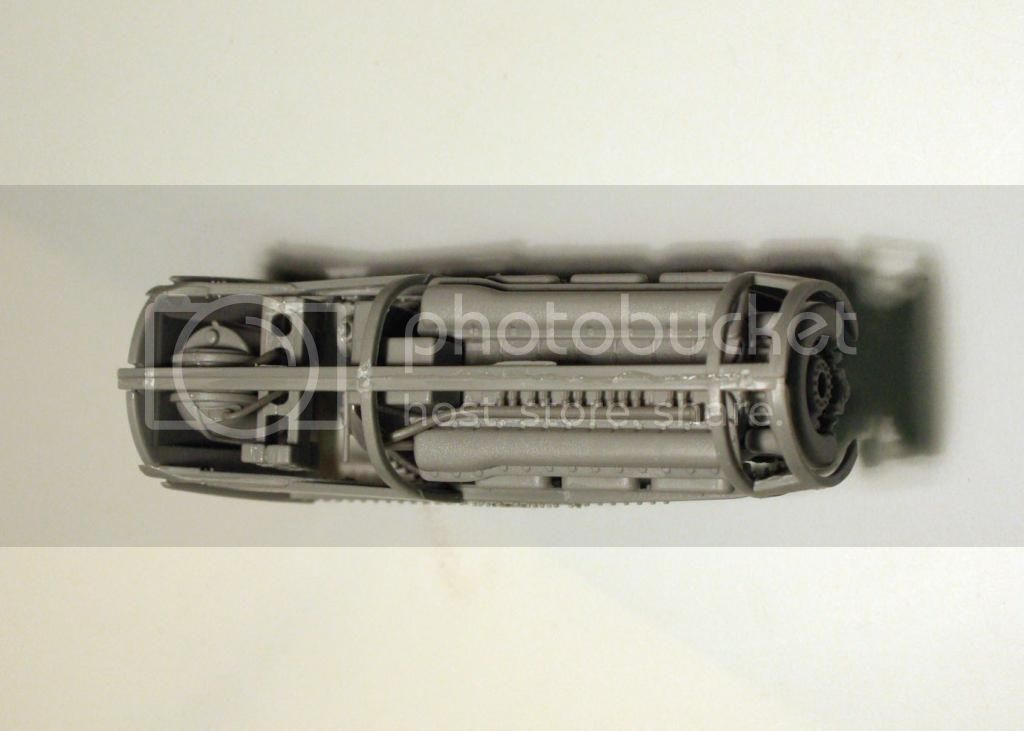
I am not going to be displaying the engine (under-sized, fire wall that does not fit) so am just building it and not bothering to paint it. The instructions, in true Dragon style omit to tell you to enclose the prop shaft in the engine when you glue the two halves together, so thats fail number one. The engine goes together OK but the engine bearer assembly is all a bit loosey goosey with no real positive alignment. I decided to glue things together as best I could and then offer it up to one of the fuselage halves to check alignment while the glue was still setting. Not sure if I have everything in the right spot but there is scope for adjustment if necessary.
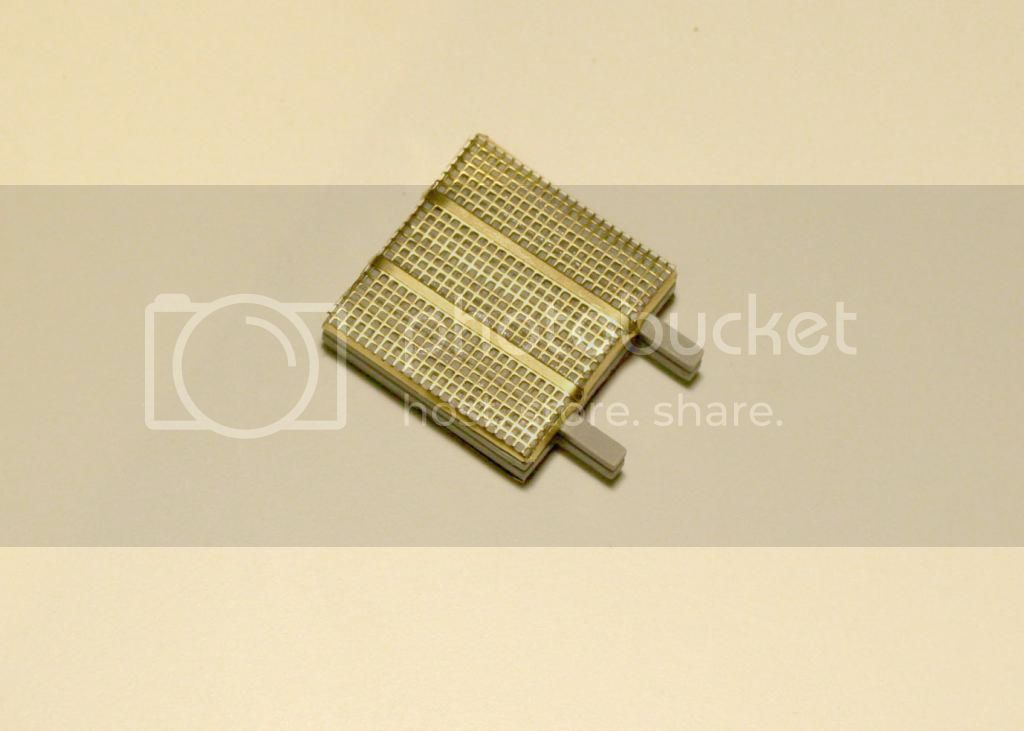
There are PE faces for the radiator but these are over sized so I took a leaf out of Jean-Luc Formerys book and snipped the corners off before bending the edges to fit. Jean-Lucs
build of the P-51D is a good reference for anyone tackling this kit.
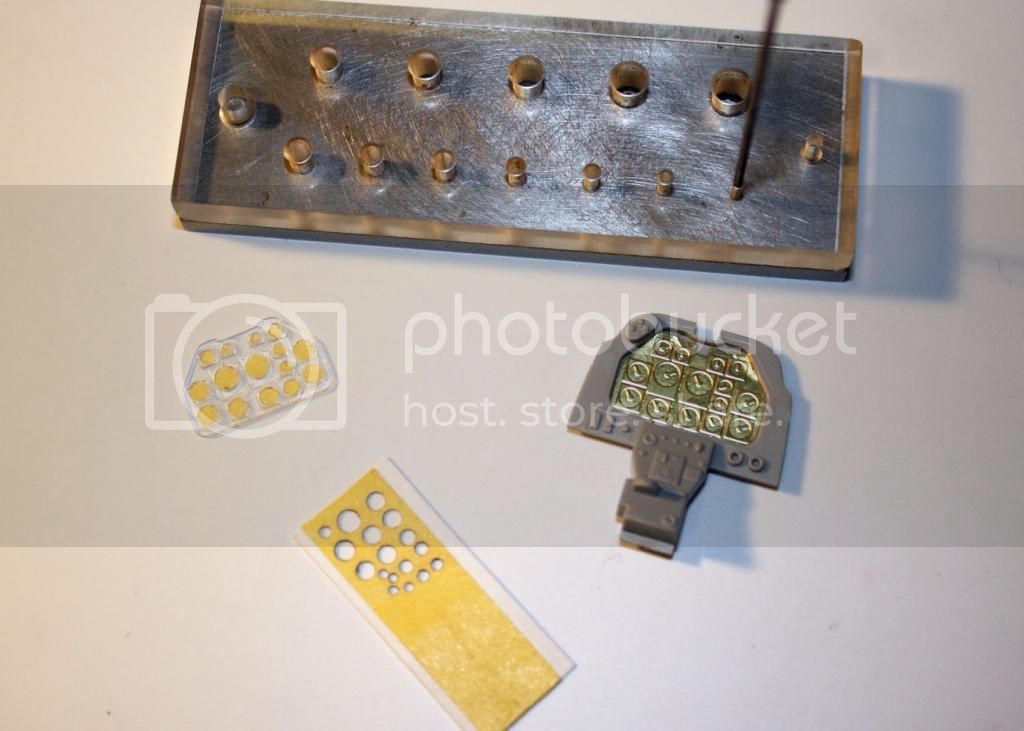
Work then commenced on the cockpit. The instrument panel is a multi media affair consisting of a PE backing on which the instrument decals are applied which is sandwhiched between a grey plastic backing and a clear plastic layer. I punched discs of Tamiya tape to mask the individual instrument glasses and this part is now ready for painting.
More soon.
Cheers, Mike.
"The music business is a cruel and shallow money trench,
a long plastic hallway where thieves run free,
and good men die like dogs. There's also a negative side."
Hunter S Thompson
Ontario, Canada
Joined: October 11, 2012
KitMaker: 141 posts
AeroScale: 139 posts
Posted: Sunday, February 08, 2015 - 08:15 AM UTC
Continuing on with the IP, the instrument decals were applied to the PE insert after first painting gloss black. Then the clear panel with the previously masked dial glasses was attached and the whole panel was sprayed gloss black. To dress up the interior a bit I applied placards and stencils from Roy Sutherlands sheet designed for the Tamiya P 51. These do not fit exactly, so had to be trimmed, chopped up and generally manipulated into position. When all was complete, the panel was given a spray of Dullcote before removing the masking.

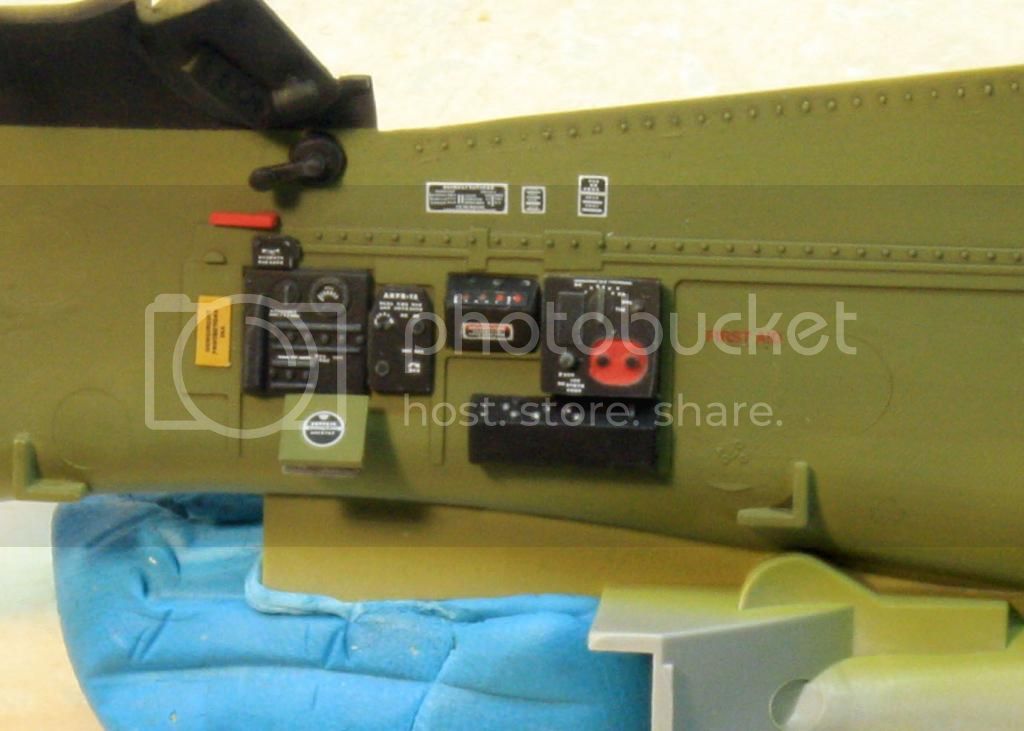
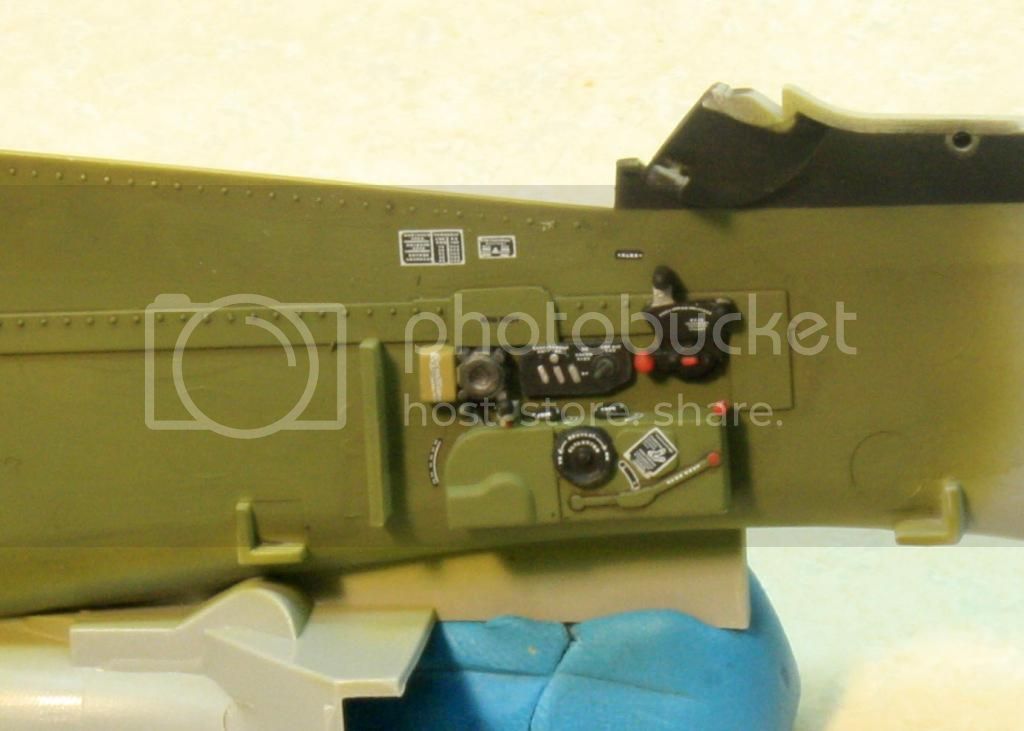
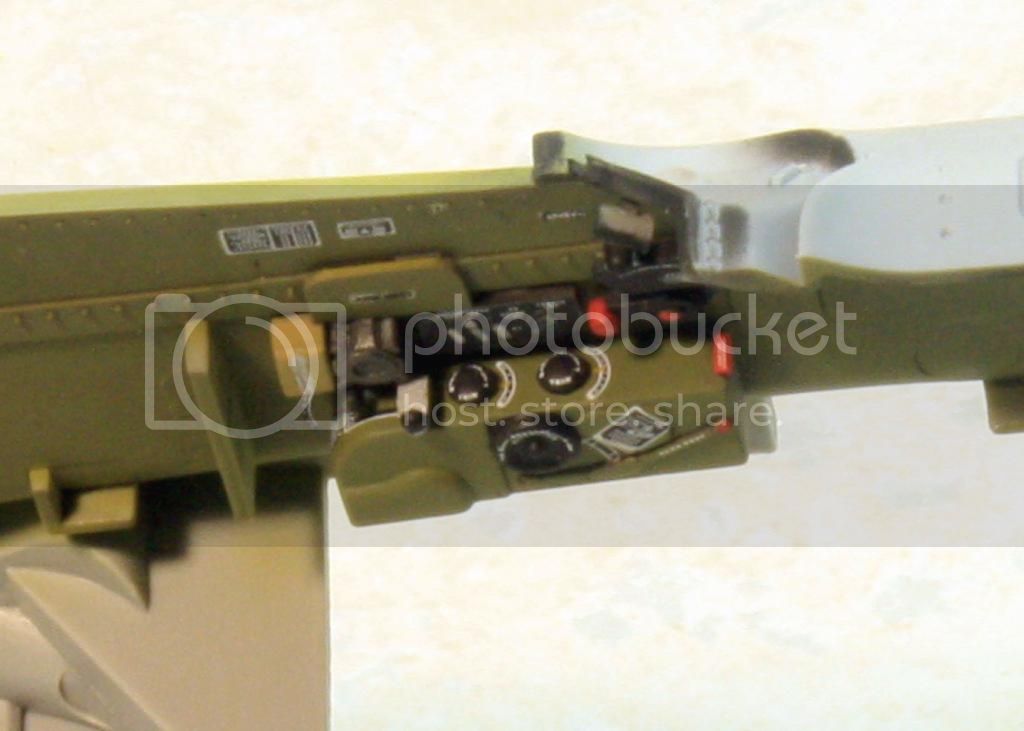
The interior side walls were first sprayed with Mr Color Zinc Chromate Type 1. Then all the various boxes and panels were painted before being added. The Dragon interior is pretty basic and partially accurate. I added the arm rest and some detail to the flare pistol hatch as well as the knobs for the cockpit heater controls on the floor. I used the Barracudecal interior stencils again on the sidewalls, battery, radio and floor.
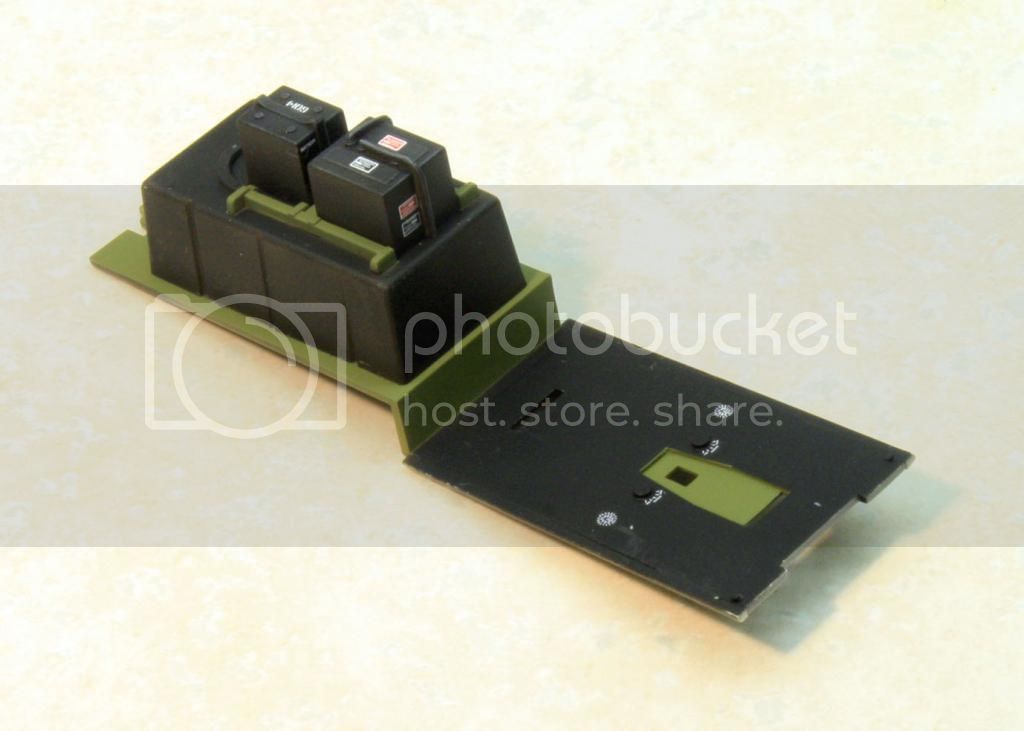
When the cockpit floor is offered up to its locating tabs, there is a gap so in order to achieve a more secure fit, I glued 1mm styrene strip to the sides. I then sprayed the floor and fuel tank assembly gloss black The areas to remain black were then masked before applying Zinc Chromate. After the masking was removed, I attached the battery and radio, before clearcoating with dullcote.
The cockpit is not as well detailed or accurate as the Tamiya P 51, but the addition of a few bits of scratch, careful painting and the stencils certainly improve things.
"The music business is a cruel and shallow money trench,
a long plastic hallway where thieves run free,
and good men die like dogs. There's also a negative side."
Hunter S Thompson
Alberta, Canada
Joined: April 07, 2010
KitMaker: 1,028 posts
AeroScale: 939 posts
Posted: Sunday, February 08, 2015 - 09:18 AM UTC
I really do like snooping in on your skilled workmanship, Mike.
That cockpit is looking grand.

To prevent being called an 'expert', screw something up good every now and again.
Joel_W
 Associate Editor
New York, United States
Joined: December 04, 2010
KitMaker: 11,666 posts
AeroScale: 7,410 posts
Posted: Sunday, February 08, 2015 - 09:06 PM UTC
Mike,
I was wondering when you were going to start another build, and what it would be, now we all know. I've got to hand it to you, with the Tamiya P-51Ds out there, opting for the Dragon kit is certainly looking to take the bumpier road to the finish line, but I suspect it's going to be a really interesting journey. I've seen a few of the Dragon kits' built up, and they can be made into quite striking presentations.
I must say I'm really impressed with how you went about building and detailing the IP. Looks as good as the Tamiya one.
The cockpit to date really does look quite well detailed with all the added on PE place cards. Looking forward to seeing the cockpit finished and buttoned up.
Joel
On my Workbench:
Monogram 1/24 scale 427 Shelby Cobra
Just Completed:
Beemax 1/24 scale BMW M3 E30 1992 Evolution II
Ontario, Canada
Joined: October 11, 2012
KitMaker: 141 posts
AeroScale: 139 posts
Posted: Sunday, February 08, 2015 - 10:15 PM UTC
Thanks Ben and Joel.
Joel, no PE was harmed in the making of this cockpit

.
The sidewalls were painted, drybrushed and glossed, before applying Barracudacals stencil decals set. This was how it looked before application.

The only PE used in the IP was the plain brass panel 'backing' onto which the kit supplied dials were applied before sandwhiching between the plastic IP and the clear insert.
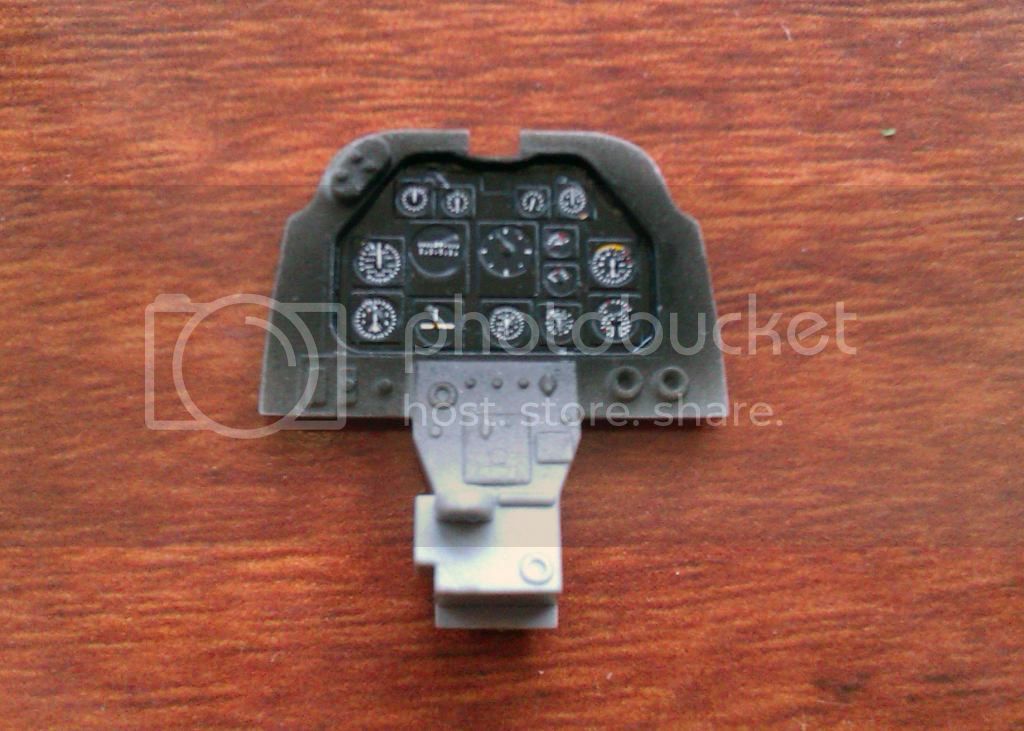
The IP has a number of dials represented just by raised circles. I punched out discs of plastic of the same diameter and covered them up before applying some similar looking 1/48 scale dials from an Airscale sheet. I also added some of their placards (also 1/48). This was obviously a lot more 'labour intensive' than applying pre-painted etched parts, but the result is quite impressive and satisfying knowing you achieved it by merit of your own skills and patience. By the way, I am in no way a modelling 'Luddite'

and have absolutely nothing against using coloured PE. I have used it in the past and will use it again, as it can give stunning results.
"The music business is a cruel and shallow money trench,
a long plastic hallway where thieves run free,
and good men die like dogs. There's also a negative side."
Hunter S Thompson
Joel_W
Associate Editor New York, United States
Joined: December 04, 2010
KitMaker: 11,666 posts
AeroScale: 7,410 posts
Posted: Monday, February 09, 2015 - 12:39 AM UTC
Mike,
I'm most impressed with how you went about detailing that IP. Simply outstanding.
Joel
On my Workbench:
Monogram 1/24 scale 427 Shelby Cobra
Just Completed:
Beemax 1/24 scale BMW M3 E30 1992 Evolution II
Ontario, Canada
Joined: October 11, 2012
KitMaker: 141 posts
AeroScale: 139 posts
Posted: Monday, February 09, 2015 - 10:02 PM UTC
had a couple of hours to myself this morning, before work, so managed to do a bit more on the P-51K. The kits seat back looks odd to me with what looks like a big flat pad moulded in place. I decided to build a new one from card so traced the contour of the kit seat and after cutting out, bent slightly inwards at the sides to give it the right contour. I carefully cut the rail from the kit part and glued to the top of my new seat back. I then attached the seat pan and strengthening bars. I faffed around for ages trying to get the supplied etched belts to drape realistically but ended up breaking the two lap belts. I decided to make a completely new set from Tamiya tape. I stuck two bits of tape together with the sticky side on the inside and then cut strips from this. I removed the hardware from the kit belts and glued this to these strips before attaching to the seat.
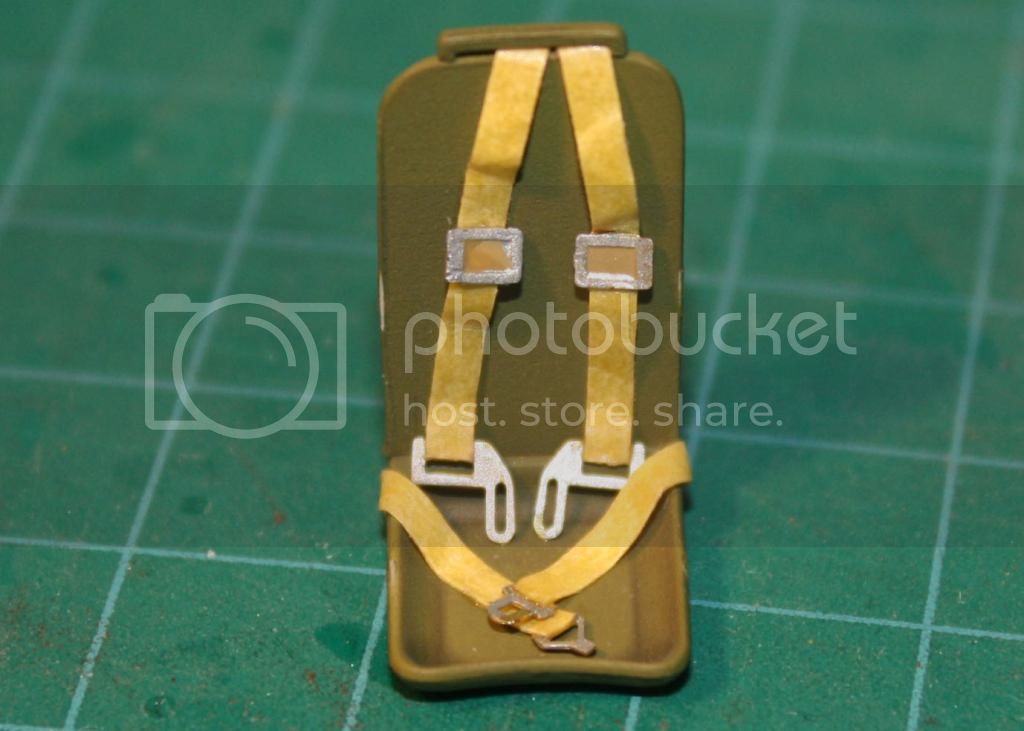
I used Tamiya buff to paint the straps and will follow up with a gloss coat, wash and a touch up of the metal parts.
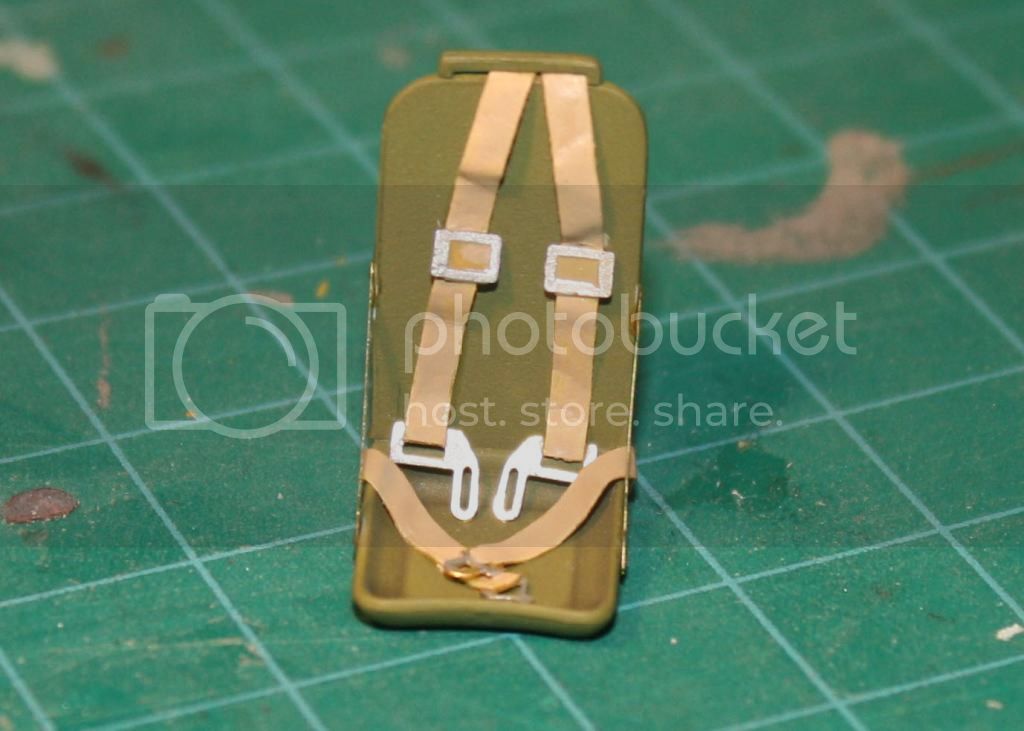
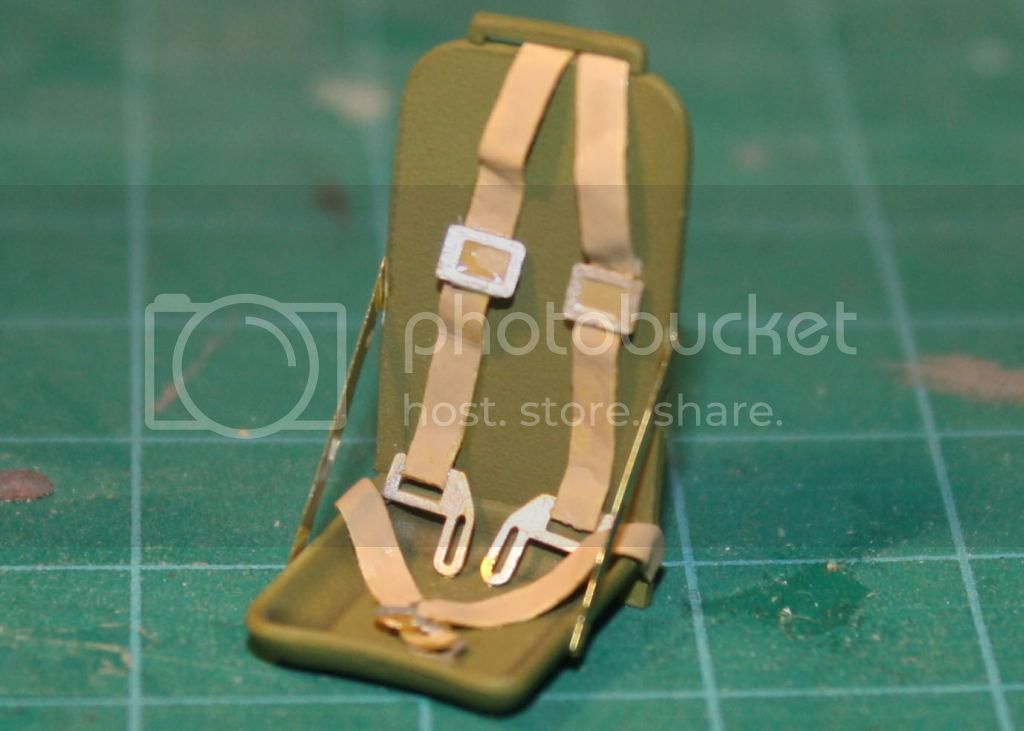
They are not entirely accurate but will be passable when dirtied up a bit.
Cheers,
Mike
"The music business is a cruel and shallow money trench,
a long plastic hallway where thieves run free,
and good men die like dogs. There's also a negative side."
Hunter S Thompson
Joel_W
Associate Editor New York, United States
Joined: December 04, 2010
KitMaker: 11,666 posts
AeroScale: 7,410 posts
Posted: Tuesday, February 10, 2015 - 08:17 PM UTC
Mike,
Nice scratched out seat. Your seatbelts and harness really do look quite nice. Once they're viewed in scale with the rest of the cockpit, they'll look perfect.
Joel
On my Workbench:
Monogram 1/24 scale 427 Shelby Cobra
Just Completed:
Beemax 1/24 scale BMW M3 E30 1992 Evolution II
Ontario, Canada
Joined: October 11, 2012
KitMaker: 141 posts
AeroScale: 139 posts
Posted: Wednesday, February 11, 2015 - 07:30 AM UTC
Yes I thought they looked over-scale in these close-ups, especially the metal hardware. Maybe the seat is under-scale? Anyway, they should look OK when firmly ensconced in the cockpit.
"The music business is a cruel and shallow money trench,
a long plastic hallway where thieves run free,
and good men die like dogs. There's also a negative side."
Hunter S Thompson
Ontario, Canada
Joined: October 11, 2012
KitMaker: 141 posts
AeroScale: 139 posts
Posted: Friday, February 27, 2015 - 07:54 AM UTC
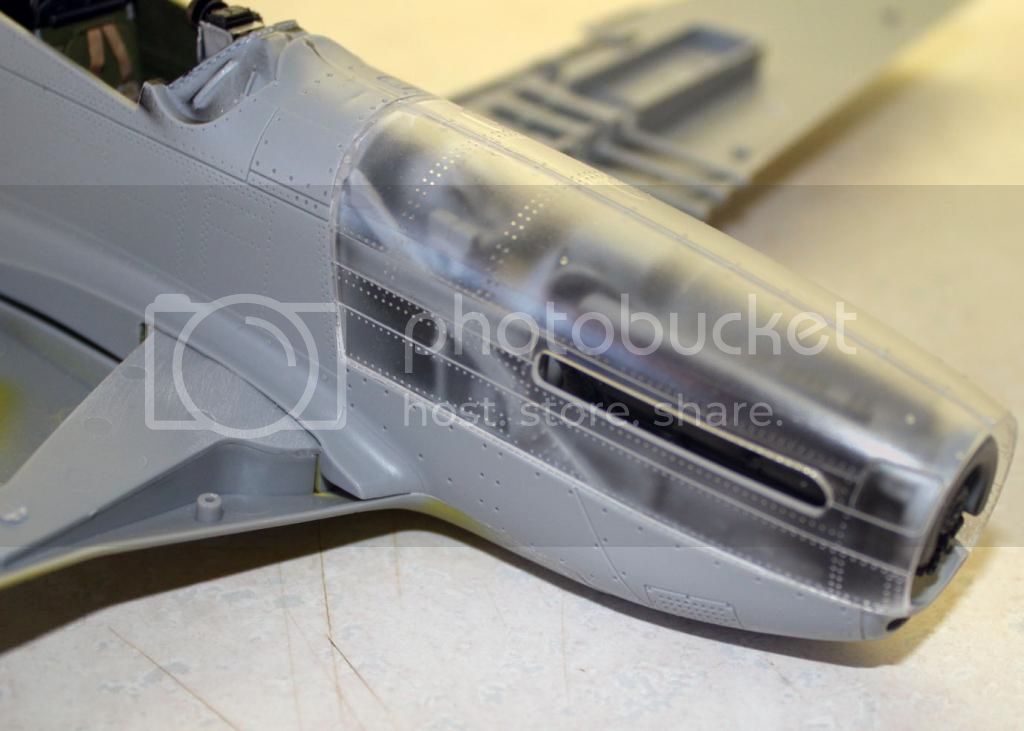
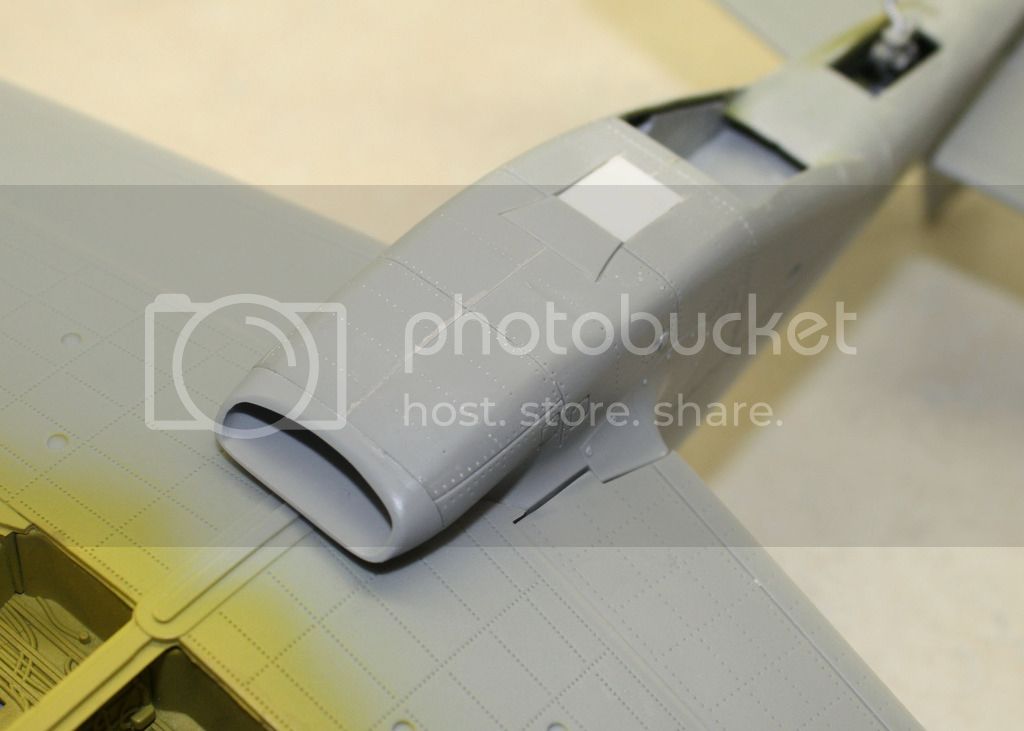
Continuing on! After weathering the seat belts, the cockpit components were given a squirt of Dullcote before cementing everything into one side of the fuselage. The seat appeared to me to be raked too far forward, so I cut away a 'V' of plastic from the rear underneath of the seat so I could position it tipped back a bit. I placed the engine loose in its mountings, before glueing the two fuselage halves together with Tamiya Extra Thin. I then offered up the spinner to the engine and positioned the engine in its bearers in the optimal position, before glueing in place. Once this had set, the clear upper cowlings were added along with the chin intake. I anticipated that the cowlings would be a struggle to line up, after having difficulty dry-fitting them, but they actually went on quite easily.
I then offered up the lower wing and found that this would just not fit without surgery to the fuselage. The top of the gear bay fouls on the underside of the wing root. I had to carefully remove plastic from the wing root and where the cockpit floor attaches to the fuselage until I got it to fit.
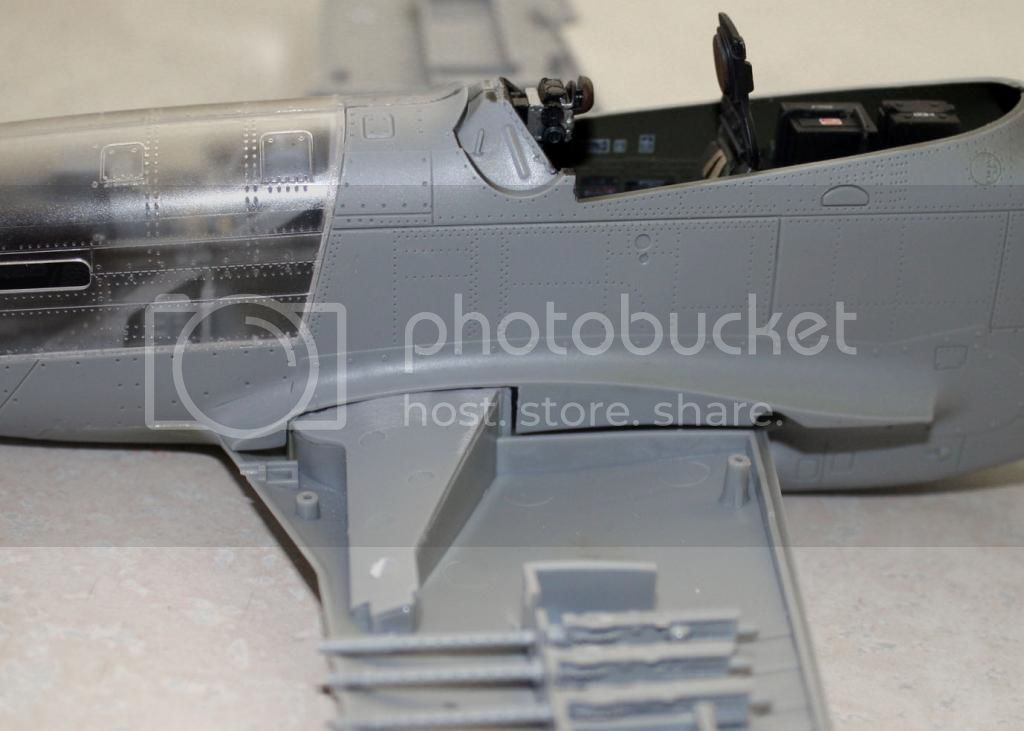
I then attached the front centre section of the lower wing and waited for the glue to dry. This left a nasty seam which will need cleaning up later on.
I dry fitted the upper wings and used these as a guide before flexing the lower wing assembly into position and glueing in place. I am not opening the gun bays so I only attached the parts necessary to attach the guns.
The rudder was assembled after removing some prominent bumps caused by ejector pins in the mouldings which prevent you from getting the two halves of this assembly together. I found the same issue when assembling the flaps. Didn't know this was a short run kit! I am wondering which section of the market Dragon aimed this kit at. The heavy surface detail puts off the 'serious' modeler and the idiosyncracies of the fit would render it un-buildable to the casual modeller. Oh well, onwards and upwards!
"The music business is a cruel and shallow money trench,
a long plastic hallway where thieves run free,
and good men die like dogs. There's also a negative side."
Hunter S Thompson
Joel_W
Associate Editor New York, United States
Joined: December 04, 2010
KitMaker: 11,666 posts
AeroScale: 7,410 posts
Posted: Friday, February 27, 2015 - 07:11 PM UTC
Mike,
You're certainly fighting the good fight, and winning every round with this build.
I've often wondered if anyone actually builds these kits prior to final production. If so, why in the world would they accept the top of the wheel well hitting the top section of the wing preventing it from properly fitting, or such a rough fit of the lower wing to the fuselage nose section?
Looking forward to your next update.
Joel
On my Workbench:
Monogram 1/24 scale 427 Shelby Cobra
Just Completed:
Beemax 1/24 scale BMW M3 E30 1992 Evolution II
Ontario, Canada
Joined: October 11, 2012
KitMaker: 141 posts
AeroScale: 139 posts
Posted: Saturday, April 04, 2015 - 07:31 PM UTC
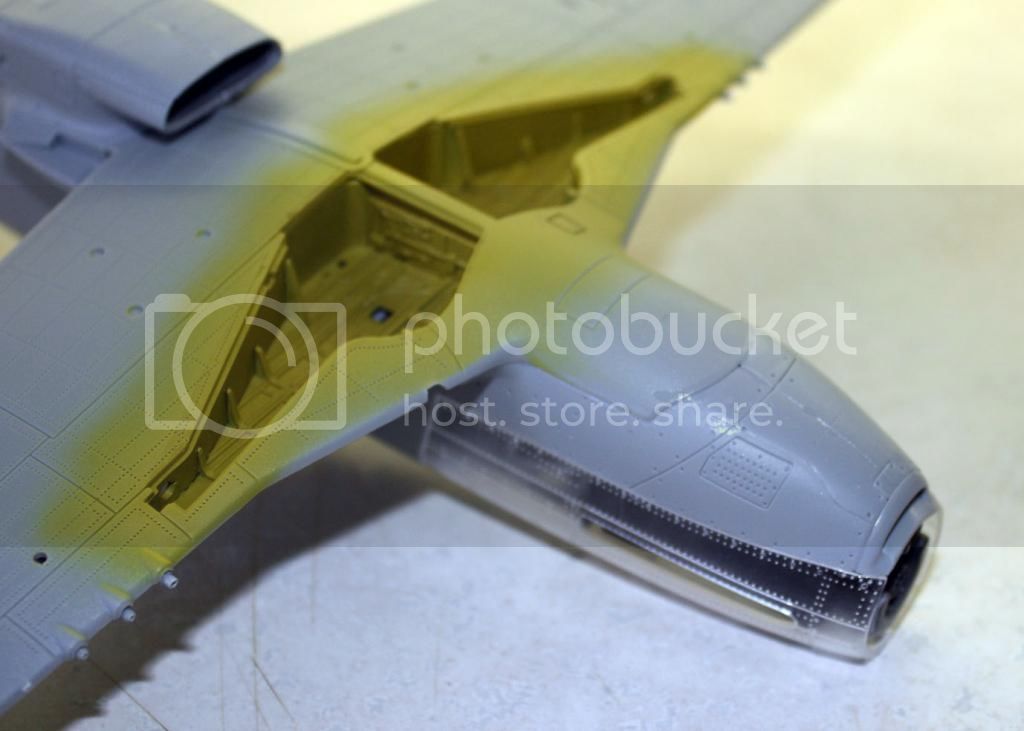
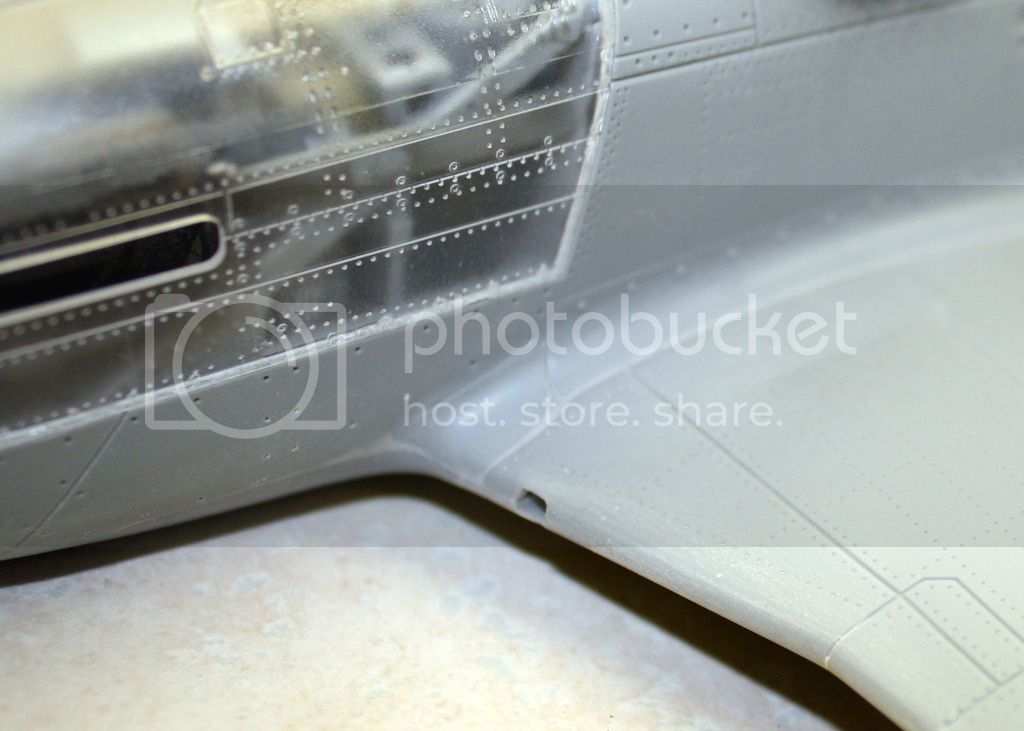
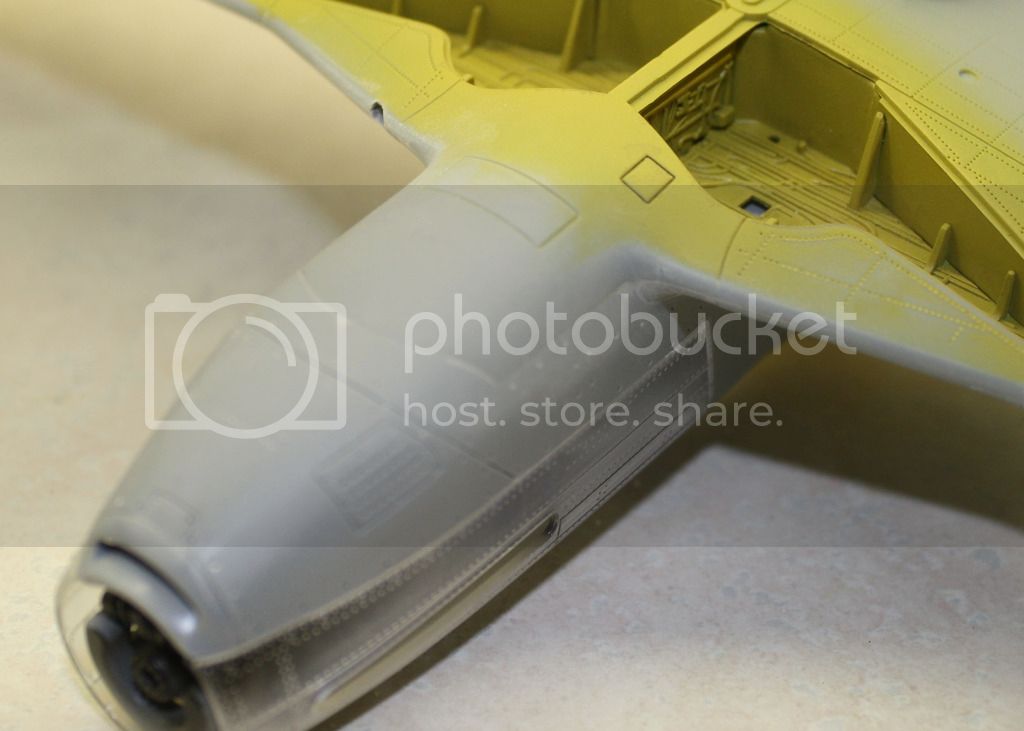
So after a longer than anticipated hiatus, mainly down to making a trip to England to visit relatives and friends, I have made some progress on the 'K'. Glueing on the top halves of the wings revealed a number of issues. Gaps at the wing root, around the gun ports and a general need for filling and tidying up. The gun ports were particularly ugly, being slightly short-shot and generally mis-aligned. Thinking it would be a nightmare to try and fill and re-shape this area, I decided to cut off the protruding part and replace with circles punched out of card.

I also covered over an awkward seam in the recessed area to the rear of the radiator with some thin card and faired this in toward the rear.
The wing roots were lined with tape pre-cut to the contour of the wing joint and filled. I will re-use the tape to make a template from Dymo tape to aid with re-scribing this joint
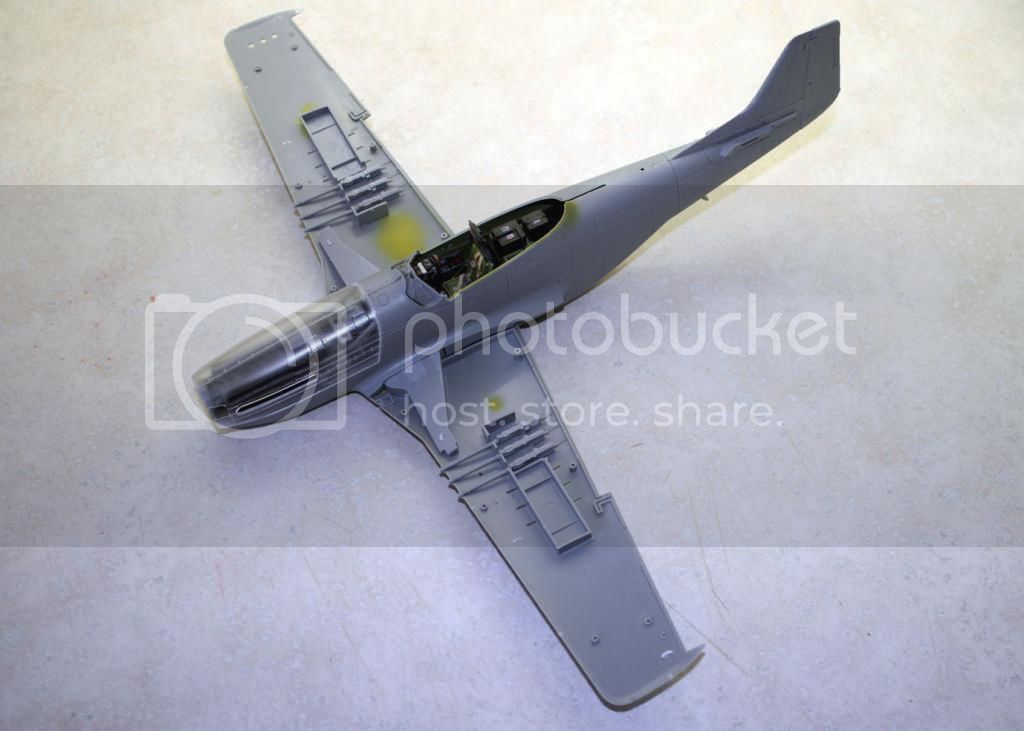
I also dealt with the horrible joint between the lower wing and nose.
I foresee many hours of sanding, re-filling and polishing the airframe before even attempting the N.M.F. The surface of the plastic is very rough and pebbly and will look awful under a metal coat in its present state. Happy happy, joy joy.
"The music business is a cruel and shallow money trench,
a long plastic hallway where thieves run free,
and good men die like dogs. There's also a negative side."
Hunter S Thompson
Ontario, Canada
Joined: October 11, 2012
KitMaker: 141 posts
AeroScale: 139 posts
Posted: Monday, April 13, 2015 - 01:49 AM UTC
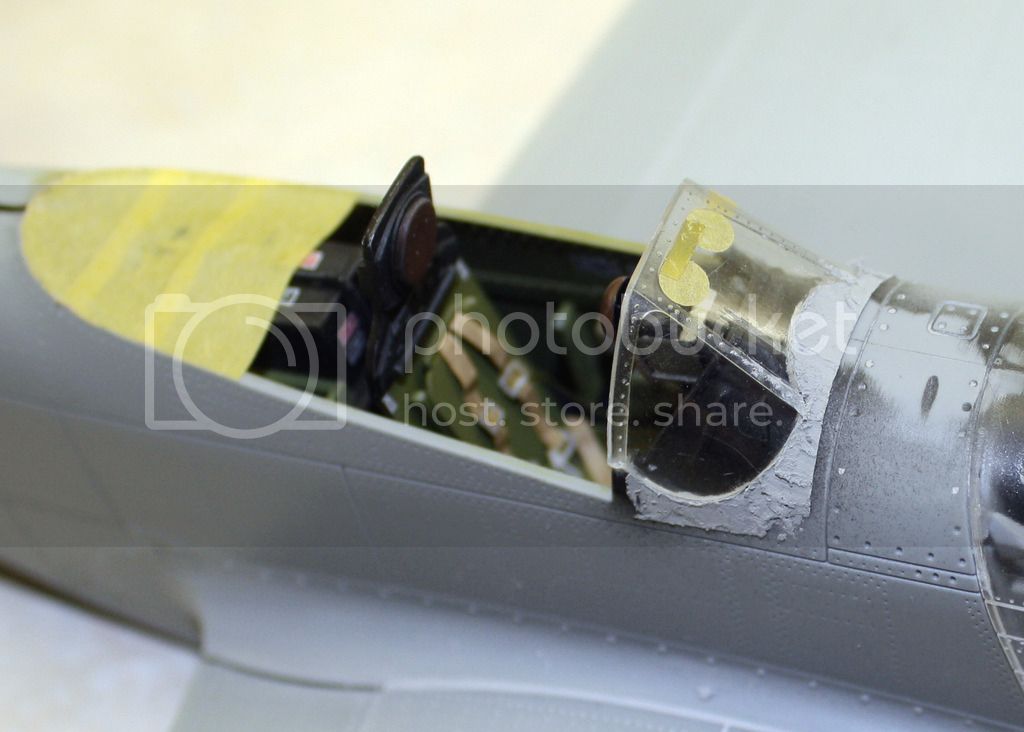
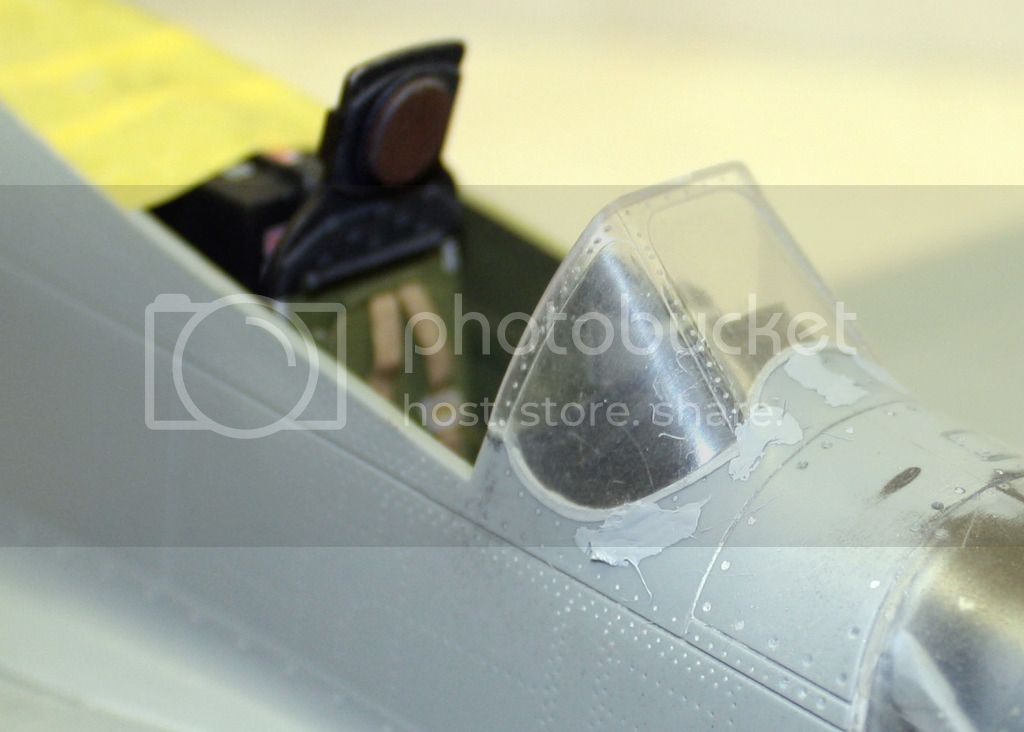
After masking the front, fixed part of the canopy, I offered it up to the airframe only to find out that this part just does not fit. Also, it's impossible to get it to sit any where near where it should without removing material from the clear part and the fuselage. On checking Jean Lucs build of the P-51D it seems that this issue has been carried over from that earlier release (why, Dragon??). After much fettling and creative swearing, I managed to get it to sort of sit right, but this left a big gap at the sides and step at the front which would have to be filled and faired in. It was at this point that I seriously considered binning the damn thing and moving on to a more enjoyable project, but in the words of Magnus Magnusson, "I've started so I'll finish" so I'm sticking with it for now, mainly due to the fact that I've put so much effort into it already. I filled the resulting gaps and then sanded down the putty and began polishing out the clear parts.
After a while, I noticed a couple of pits where the filler hadn't properly taken, so filled these with some thick Mr Surfacer.
And this is where I am right now, with the prospect of many hours of my favourite modelling task ahead of me. Sanding and polishing. Ho hum!
"The music business is a cruel and shallow money trench,
a long plastic hallway where thieves run free,
and good men die like dogs. There's also a negative side."
Hunter S Thompson
Joel_W
Associate Editor New York, United States
Joined: December 04, 2010
KitMaker: 11,666 posts
AeroScale: 7,410 posts
Posted: Monday, April 13, 2015 - 03:06 AM UTC
Mike,
You've certainly made some excellent progress. I really like you go about solving those fit issues. The gun barrels discs is a no brainer, yet I can attest to the fact that I would never have thought of it. Same with the recessed cover in the bottom intake.
I'm most impressed with your careful putty work around the windshield, as it looks extremely well done.
Joel
On my Workbench:
Monogram 1/24 scale 427 Shelby Cobra
Just Completed:
Beemax 1/24 scale BMW M3 E30 1992 Evolution II
Ontario, Canada
Joined: October 11, 2012
KitMaker: 141 posts
AeroScale: 139 posts
Posted: Monday, April 13, 2015 - 08:37 PM UTC
Hi Joel.
I masked off the area to be puttied before applying. I hate sanding so wanted to get as little putty as possible on the model.
I have learned so much off the forum, and it makes me happy, sharing my problem solving ideas with others.
"The music business is a cruel and shallow money trench,
a long plastic hallway where thieves run free,
and good men die like dogs. There's also a negative side."
Hunter S Thompson
Joel_W
Associate Editor New York, United States
Joined: December 04, 2010
KitMaker: 11,666 posts
AeroScale: 7,410 posts
Posted: Tuesday, April 14, 2015 - 06:34 PM UTC
Mike,
That's what communities like Aeroscale are all about. Without the two forums I belong to, my modeling skills would at best be what they were back in the 70's when I thought I was a real hot shot on the IPMS regional circuit. By today's standards I was a hacker at best

Looking at the putty work around the windshield, I would have 1st tried Vallejo White Acrylic putty. The stuff for certain applications is fantastic as you just apply it, wait 10 seconds then with a damp Qtip wipe across to clean off the excess. Two or three applications is usually needed, but there is no sanding, and thus no damage to clear parts, and no loss of detail. It's also great for decreasing the depth or width of recessed panel lines that look more like canyons. As you can see, I love the stuff.
For major putty work, I've gone to Bondo, which is automotive body filler in a tube. Dries rock hard, doesn't shrink, and sands to a feathered edge much easier and quicker then Green Stuff.
Joel
On my Workbench:
Monogram 1/24 scale 427 Shelby Cobra
Just Completed:
Beemax 1/24 scale BMW M3 E30 1992 Evolution II
Ontario, Canada
Joined: October 11, 2012
KitMaker: 141 posts
AeroScale: 139 posts
Posted: Wednesday, April 15, 2015 - 03:18 AM UTC
Hi Joel, thanks for the info. I normally use Miliput as my filler of choice. You can use the wet finger treatment on this as well. Unfortunately, when I opened the pack to use it, it had gone off, so I had to use Humbrol putty instead. I am interested in trying out the Vallejo stuff and will have to see if my LHS has some in stock.
"The music business is a cruel and shallow money trench,
a long plastic hallway where thieves run free,
and good men die like dogs. There's also a negative side."
Hunter S Thompson
Haute-Vienne, France
Joined: August 15, 2011
KitMaker: 57 posts
AeroScale: 55 posts
Posted: Thursday, April 30, 2015 - 02:56 PM UTC
I feel your pain! I have been fighting with the P-51D for a couple of years off and on (more off than on). I used the Aires cockpit which fitted very well and their wheel wells which didn't!
I see that you are keeping the flaps up, a wise move as there is quite a lot of surgery involved to correctly depict them lowered, ask me how I know?
Will you fill in the wing panels and rivets? I used Mr Surfacer 500 followed by several coats of Halfords Grey plastic Primer,all rubbed down then painted Zinc Chromate Yellow, I cannot decide what to use for the silver coat yet.
It's nice to see someone else has accepted the challenge.
Keep it up,I think you'll be finished before me
Cheers
John


Ontario, Canada
Joined: October 11, 2012
KitMaker: 141 posts
AeroScale: 139 posts
Posted: Thursday, April 30, 2015 - 05:50 PM UTC
Hi John, glad to see it's not just me!! I don't have plans right now to fill the wing detail but this could change. From what I've read, not all P-51's wings were puttied. An Aeries cockpit that fitted well?? Wonders will never cease! I'm a bit stalled myself with this one and have taken some light relief from the Revell 1/32 Spitfire mk 2 (which to be honest, has its own issues) but am hoping to get back to the K and get it done real soon.
"The music business is a cruel and shallow money trench,
a long plastic hallway where thieves run free,
and good men die like dogs. There's also a negative side."
Hunter S Thompson
Ontario, Canada
Joined: October 11, 2012
KitMaker: 141 posts
AeroScale: 139 posts
Posted: Sunday, June 28, 2015 - 07:33 PM UTC
I've decided to make the effort to get this one done and so have written a small update just to show this thread isn't completely dead. I have been taking light relief from building the Revell Spitfire Mk 2, progress on which can be found here-
http://forum.largescalemodeller.com/topic/3651-revell-new-tool-spitfire-mk2/I have been working on restoring the surface detail after much filling and sanding. I used a pin to restore rivets. The wing joint panel line had completely disappeared after dealing with the gaps at the root. I saved the tape I used to mask the area before filling the gap. The tape had been cut to follow the contour of the wing joint. I place this tape over some 'Dymo' tape and used this to cut a scribing template.
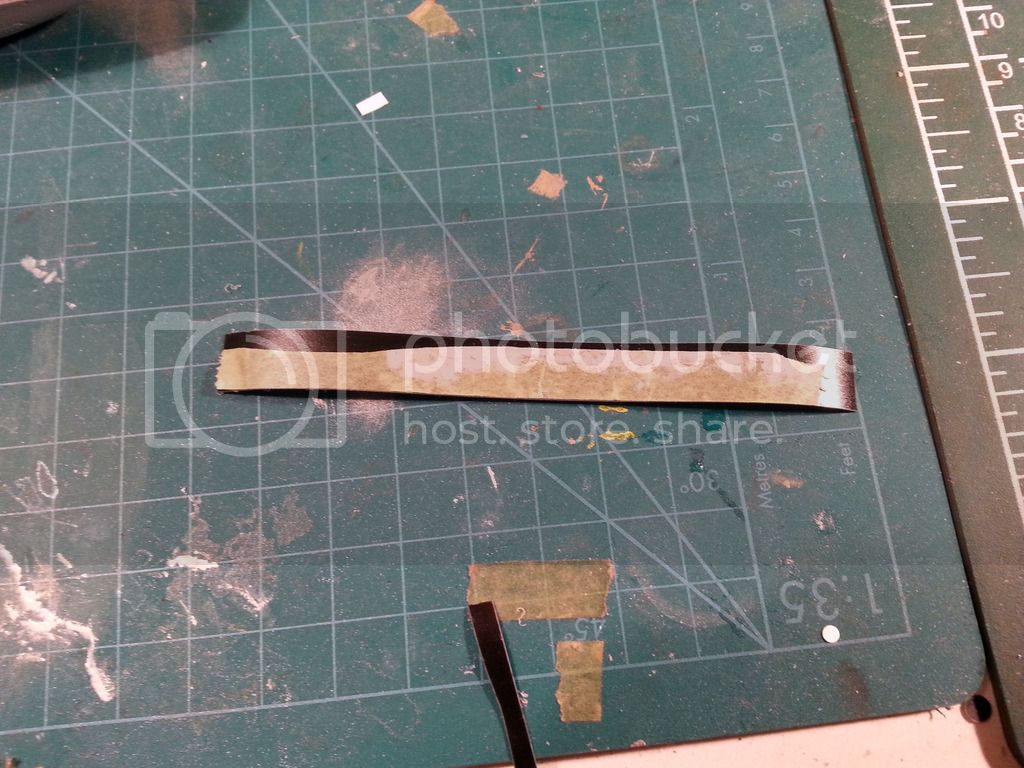
This tape was then attached to the wing root and used to re-scribe the joint line.

Next tasks are to re-mask the canopy and get some primer on, before tackling the NMF.
"The music business is a cruel and shallow money trench,
a long plastic hallway where thieves run free,
and good men die like dogs. There's also a negative side."
Hunter S Thompson
Alberta, Canada
Joined: January 19, 2008
KitMaker: 6,743 posts
AeroScale: 6,151 posts
Posted: Sunday, June 28, 2015 - 09:06 PM UTC
Coming along very well so far Mike
Terri
Joel_W
Associate Editor New York, United States
Joined: December 04, 2010
KitMaker: 11,666 posts
AeroScale: 7,410 posts
Posted: Sunday, June 28, 2015 - 11:25 PM UTC
Mike,
Nice to see that you're back at the bench with the P-51K. Looking forward to seeing it with some primer on in the near future.
Joel
On my Workbench:
Monogram 1/24 scale 427 Shelby Cobra
Just Completed:
Beemax 1/24 scale BMW M3 E30 1992 Evolution II
Pennsylvania, United States
Joined: June 17, 2009
KitMaker: 566 posts
AeroScale: 507 posts
Posted: Monday, June 29, 2015 - 05:17 AM UTC
Mike, your mustang is coming along nicely! Ive not checked out a build of the Dragon kit yet, I doesnt look too bad but ill still wait for a tamiya to come by at the right price or in a trade. I like how you used the punch set and tape to help mask the rounded canopy corners, Id not seen that before, learning occured! I definitely need to get one of them punch sets!
"...Fat, drunk, and stupid is no way to go through life son"
Ontario, Canada
Joined: October 11, 2012
KitMaker: 141 posts
AeroScale: 139 posts
Posted: Wednesday, July 01, 2015 - 06:31 AM UTC
Mike, my punch set is one of my more useful tools. My set is made by CB Model Products. I'm glad to be able to pass on any useful tips as I have benefited from others being generous with their knowledge along the way.
Terri and Joel, thanks for the much needed support.
"The music business is a cruel and shallow money trench,
a long plastic hallway where thieves run free,
and good men die like dogs. There's also a negative side."
Hunter S Thompson
Ontario, Canada
Joined: October 11, 2012
KitMaker: 141 posts
AeroScale: 139 posts
Posted: Sunday, August 09, 2015 - 02:57 AM UTC
Bad time of year for modelling for me. Kids off school and demanding my attention. I did however manage to get the canopy masked and primer on the P-51. Primed with Alclad grey primer, this went on a bit thick in places and was not behaving, so will need a good polish. There are a few flaws to deal with but so glad to see the back of that clear cowling!

"The music business is a cruel and shallow money trench,
a long plastic hallway where thieves run free,
and good men die like dogs. There's also a negative side."
Hunter S Thompson