_GOTOBOTTOM
Early Aviation
Discuss World War I and the early years of aviation thru 1934.
"I wish I had the new Fokker" Dual Build blog
StukaJr
_VISITCOMMUNITY
California, United States
Joined: April 26, 2010
KitMaker: 346 posts
AeroScale: 292 posts
Posted: Monday, November 17, 2014 - 03:59 AM UTC
Have unintentionally started a dual-build of two Central Powers Late War scouts, quite different in their build and appearance, but united by one (probably the only similarity)... Both planes remained in frontline service only until arrival of the Fokker D.VII's in adequate numbers and surely provided a cause for disappointment with being armed with anything else but...

The players are:

Ernst Udet's Albatros D.Va, Jasta 37


Kits are 1/32 Wingnut Wings OAW Albatros DVa (free lozenge) built with Johannisthal Albatros options and WnW's "Black Beauties" decal set.

and

Ltn Josef Raesch's Pfalz DXII, with Jasta 43


Wingnut Wings 1/32 Pfalz D.XII kit with markings provided by Pheon Decals.

StukaJr
_VISITCOMMUNITY
California, United States
Joined: April 26, 2010
KitMaker: 346 posts
AeroScale: 292 posts
Posted: Monday, November 17, 2014 - 05:30 AM UTC
A bit of a disclaimer - I've been working on the both planes for the past 6 weeks, so pictures posts are not representative of the speed with which I pop these out

We begin with the Albatros D.Va - WingNut Wings kit 32047, OAW version. The trick is to build it with 32015 instructions in hand and recognition of Johannistahl VS OAW parts differences - the payout is "free" set of 5 color lozenge (upper and lower) + ribtapes. Sesquiplane design makes for spare use of lozenge - 2 and a half lengths of lozenge per side are added to the spares box


180Hp Mercedes D.IIIa engine powering such a heavy aircraft may have been lacking


The fuselage builds the "classic" style - frame and controls are pre-painted and attached to the fuselage halves painted and sealed over woodgrain. Constantly check for fit and open up grooves on the fuselage that are meant to mesh with the frame elements - the fit is tight and does not accommodate for thickness of the paint. Since I paint with acryl - this becomes a noticeable problem if not countered early.


I have foregone making sparkplugs for the engine or control lines inside the cockpit - building on one half of the fuselage half would make for some tricky set up of the lines that run through the lower wings... Wanted to get to painting before getting bogged down in super detailing, so result is no lines (this time around)


Varnished wood, choice of naked brass for fuel / oil tanks, even a touch of lozenge - Albatros is not shy in competition for most flamboyant of aircraft. More of the details to be covered up when fuselage halves are joined.


No frills opposite side of the fuselage
StukaJr
_VISITCOMMUNITY
California, United States
Joined: April 26, 2010
KitMaker: 346 posts
AeroScale: 292 posts
Posted: Friday, November 28, 2014 - 12:18 AM UTC
Quite different model design of the Pfalz D.XII - here we have frame that assembled with all interior / engine components and then "sandwiched" by two bare fuselage halves... This is a more preferred method to that of Albatros "on fuselage half" assembly (in my opinion), but it's easy to spend too much time fussing over elements that are invisible post fuselage assembly


200hp Mercedes D.IIIau with red stripes signifying over-compressed cylinders, fictional engine number and otherwise classic German recon single seater config.


seatbelts don't quite reach the frame, but this is invisible upon fuselage assembly and drapes better in final look.


Rather diffuse look of most wood overpainted gray-blue (my choice may be a little light) and only floor is varnished wood (most of what you see in assembled cockpit


Compared to proportions of Albatros, DXII appears incredibly compact and optimized - sign of the coming times


Merlin
Staff MemberSenior Editor
AEROSCALE
#017
_VISITCOMMUNITY
United Kingdom
Joined: June 11, 2003
KitMaker: 17,582 posts
AeroScale: 12,795 posts
Posted: Friday, November 28, 2014 - 02:38 AM UTC
Hi Ivan

Really nice! I can see a frontpage duo looming already!:)

All the best

Rowan
thegirl
_VISITCOMMUNITY
Alberta, Canada
Joined: January 19, 2008
KitMaker: 6,743 posts
AeroScale: 6,151 posts
Posted: Friday, November 28, 2014 - 06:00 AM UTC
Following with interest Ivan


Terri
StukaJr
_VISITCOMMUNITY
California, United States
Joined: April 26, 2010
KitMaker: 346 posts
AeroScale: 292 posts
Posted: Tuesday, December 02, 2014 - 06:12 AM UTC
Terri, Rowan - thank you, very much!

Albatros happened to run ahead, mostly because I'm a lot more familiar with building a few of these in 1/48 and 1/32, safety in familiarity winning over curiosity.

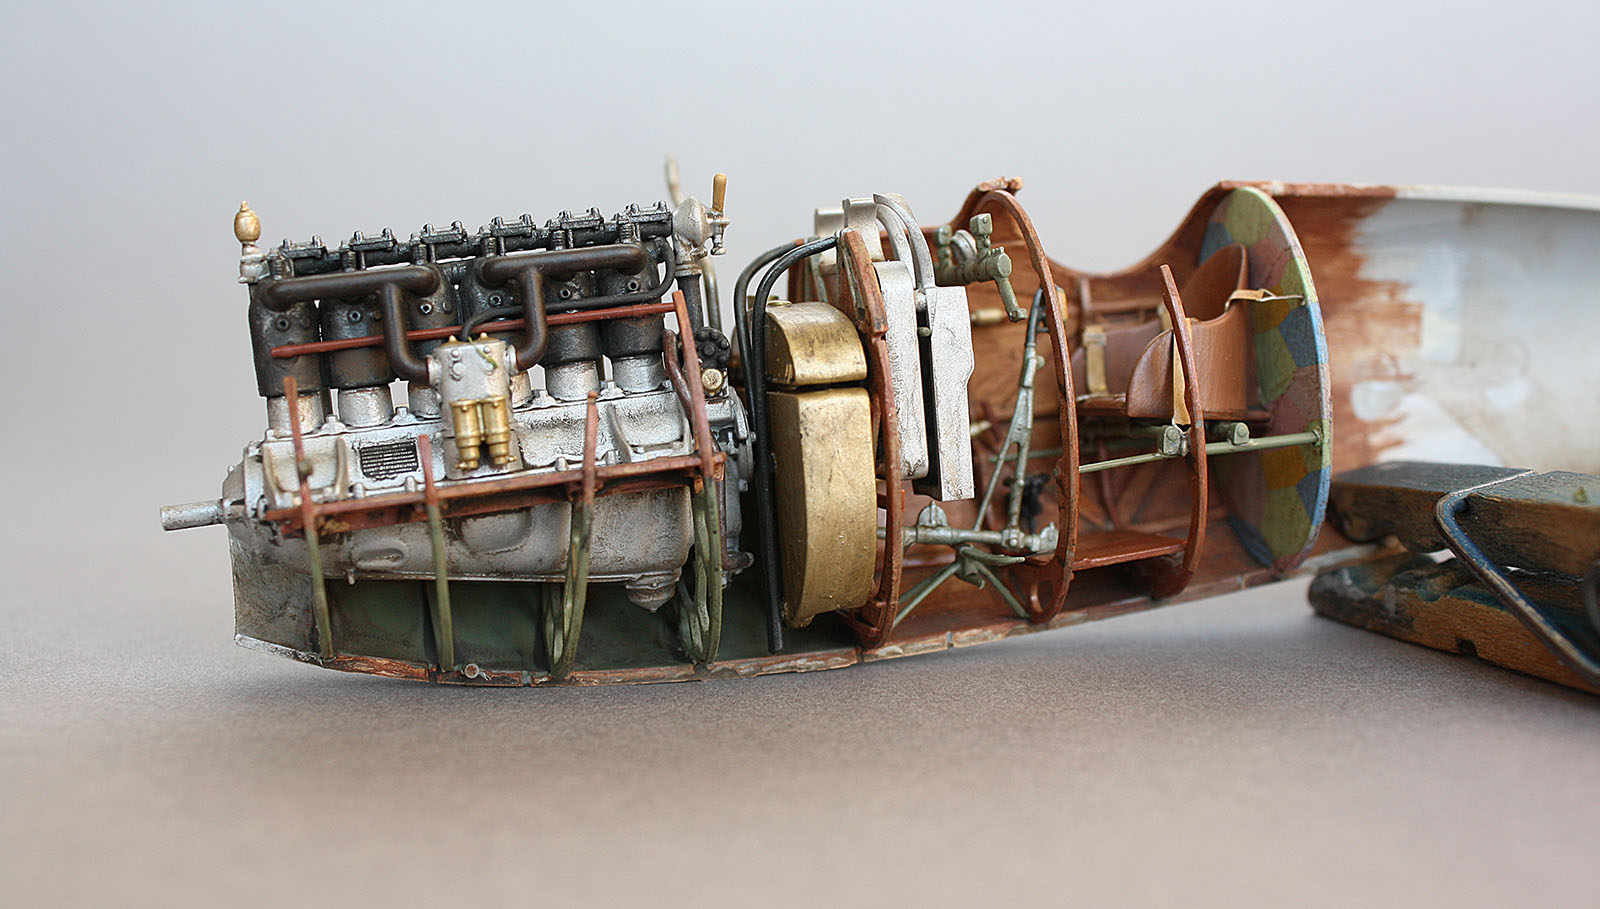
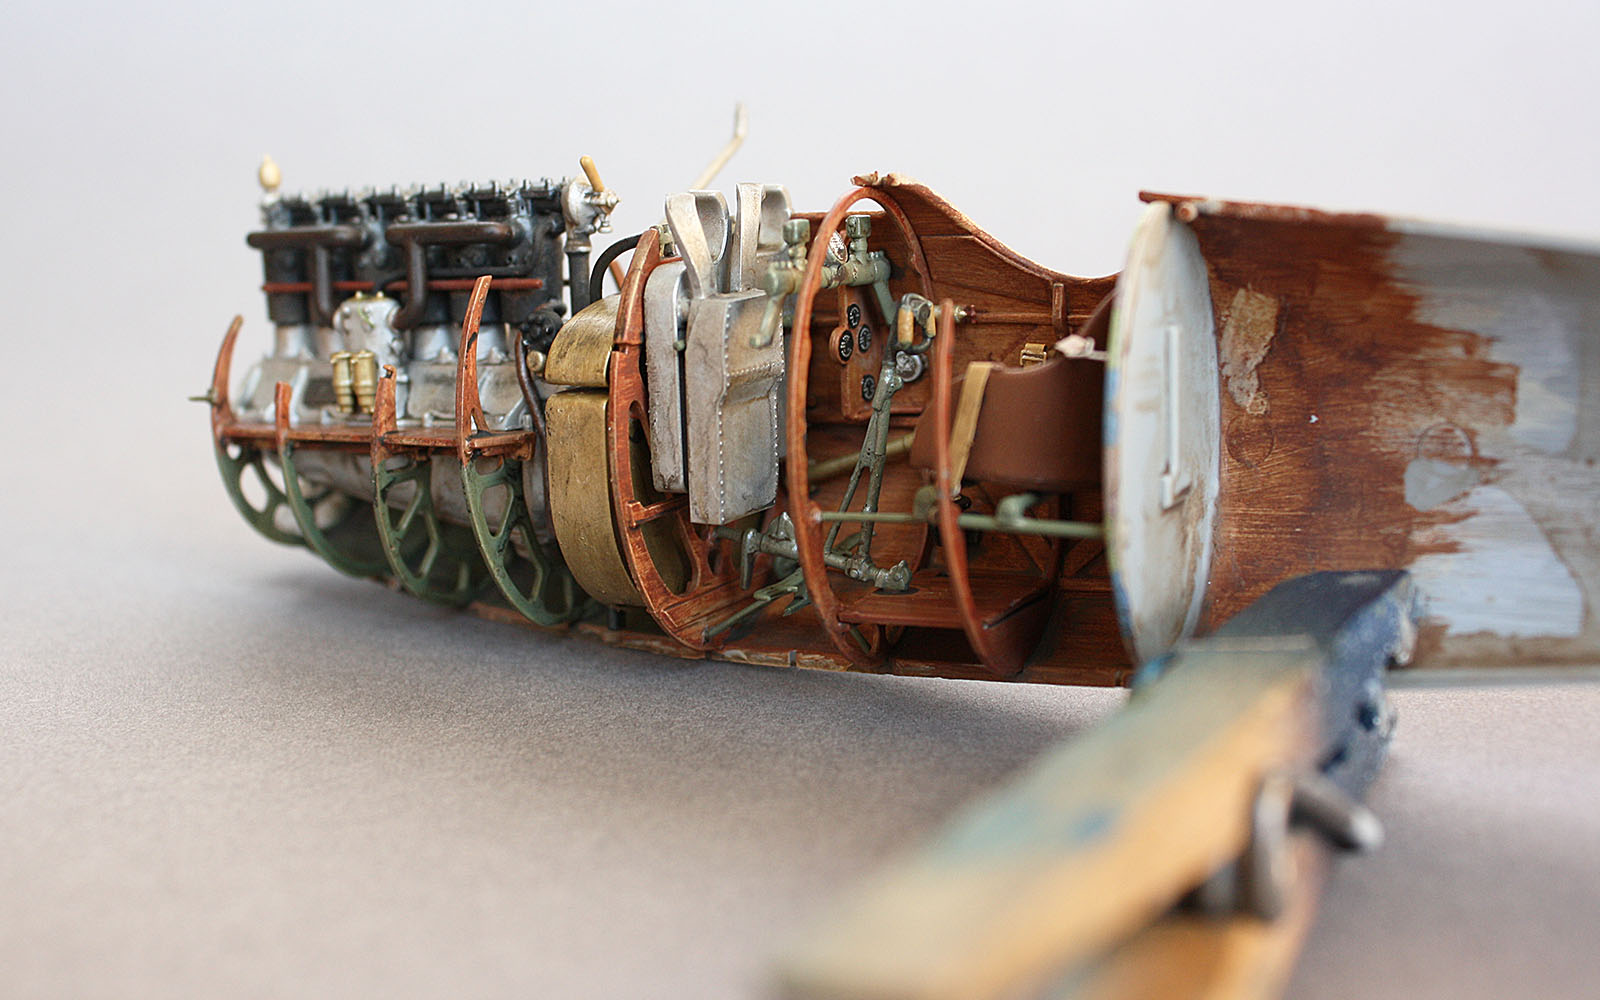
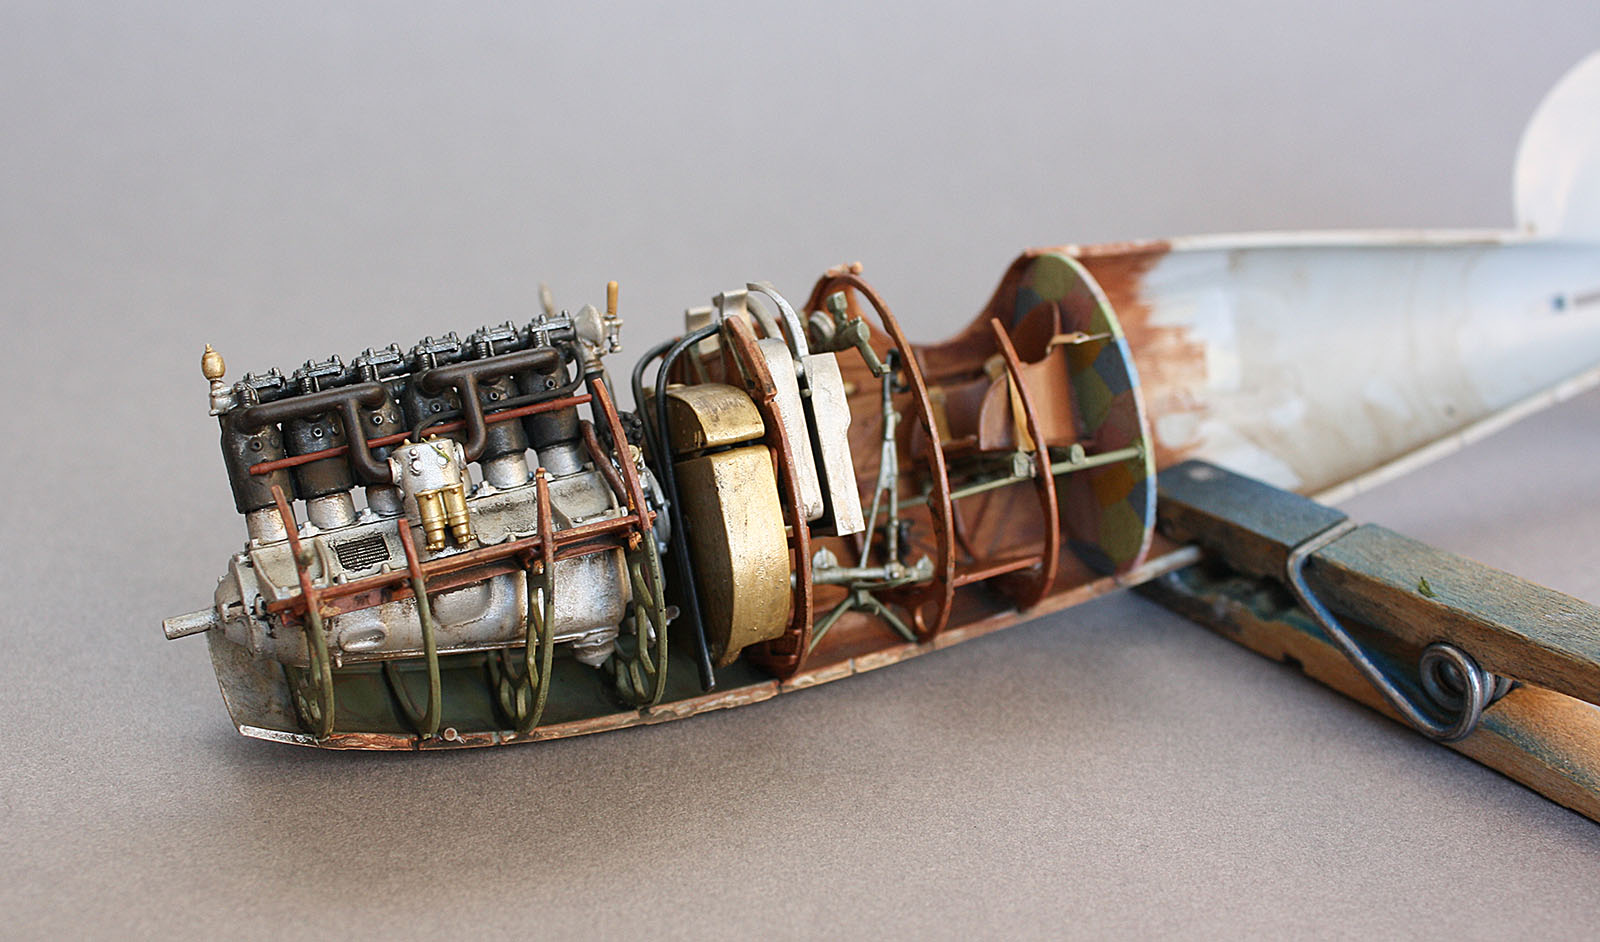
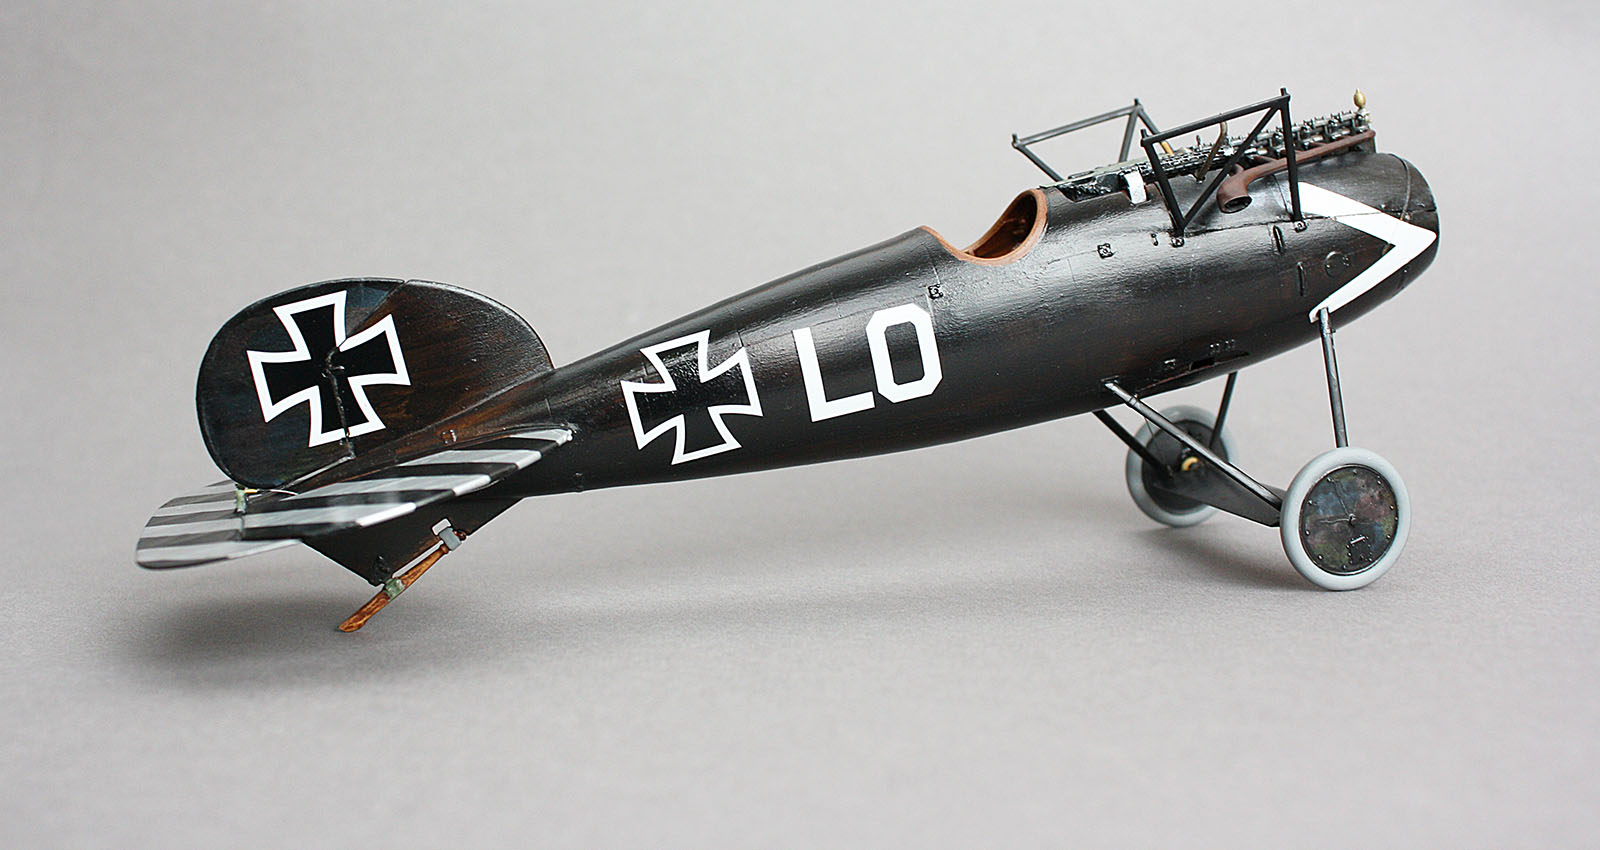
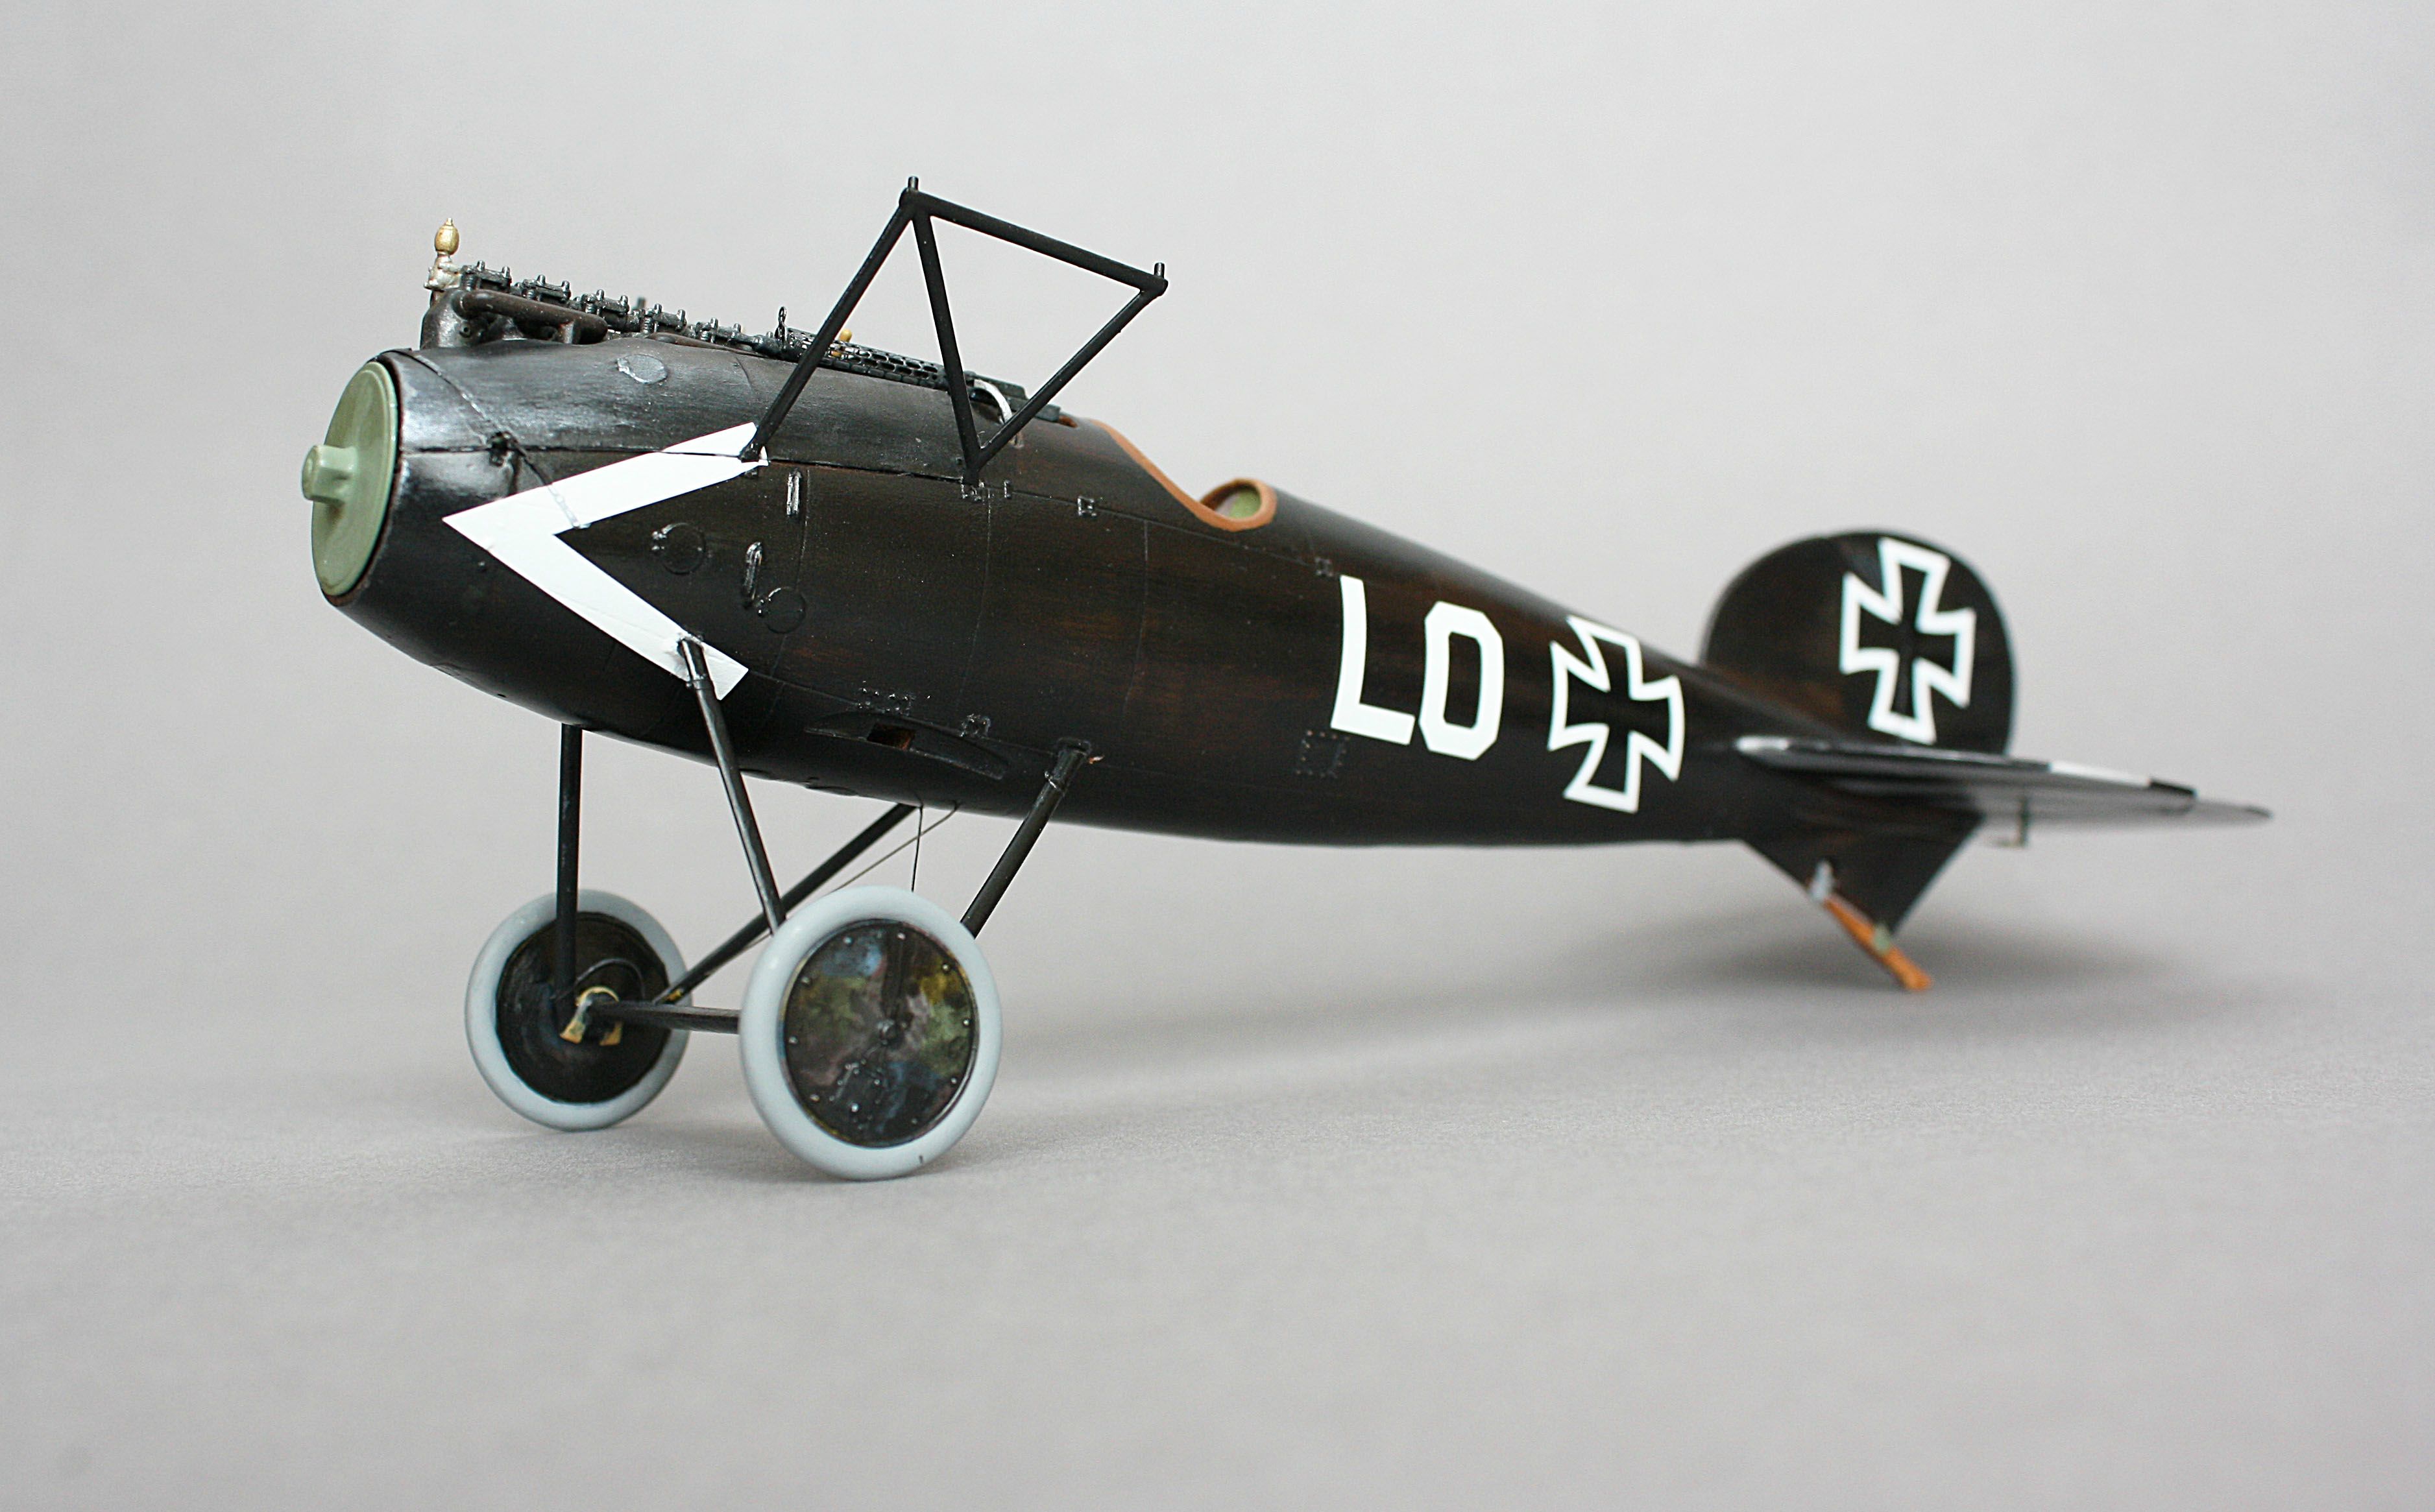
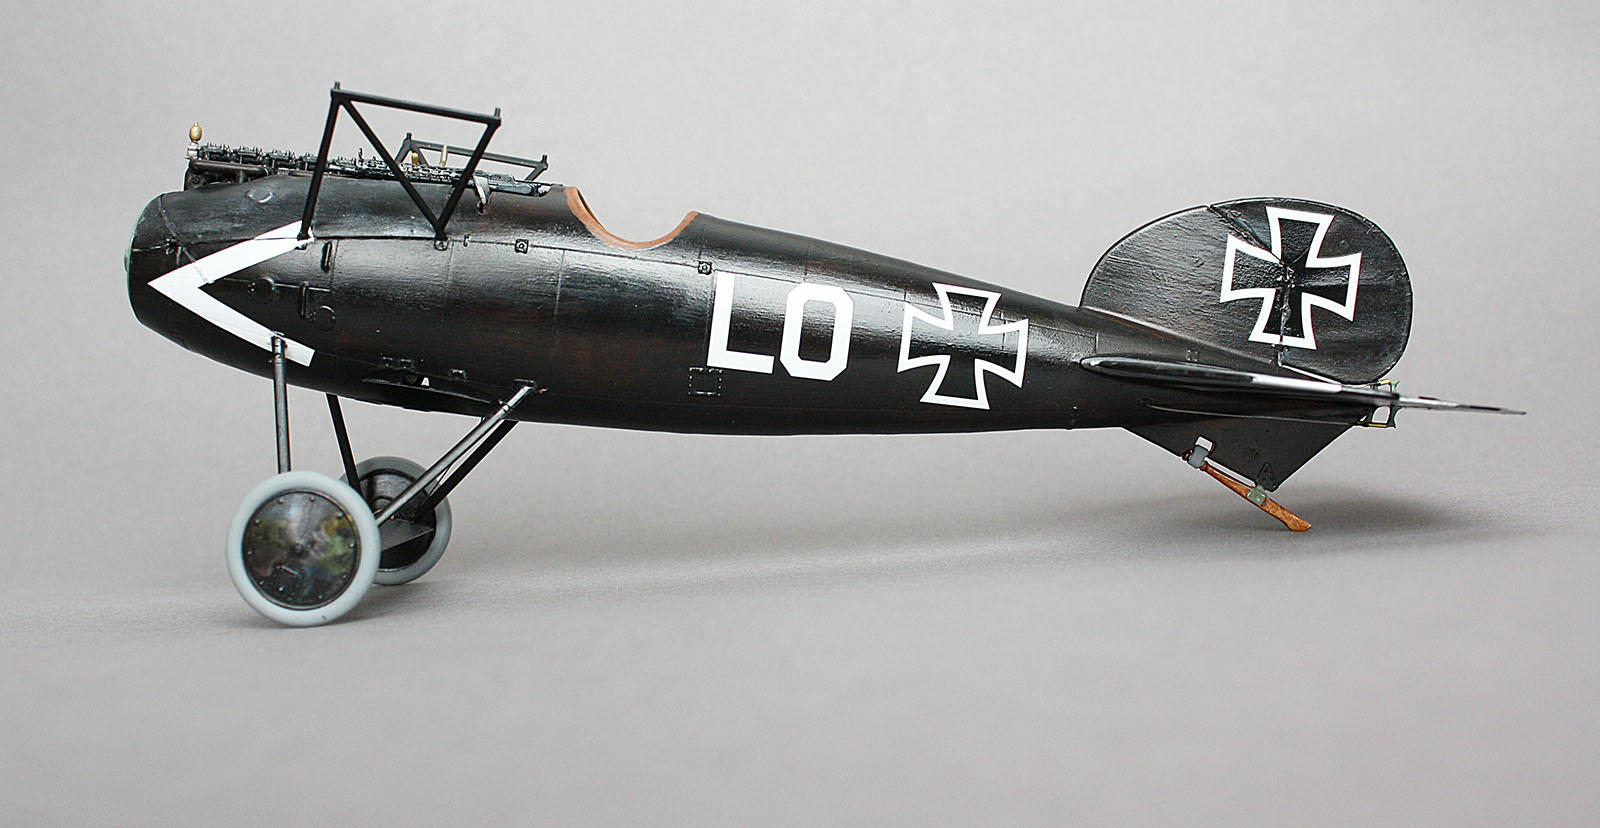
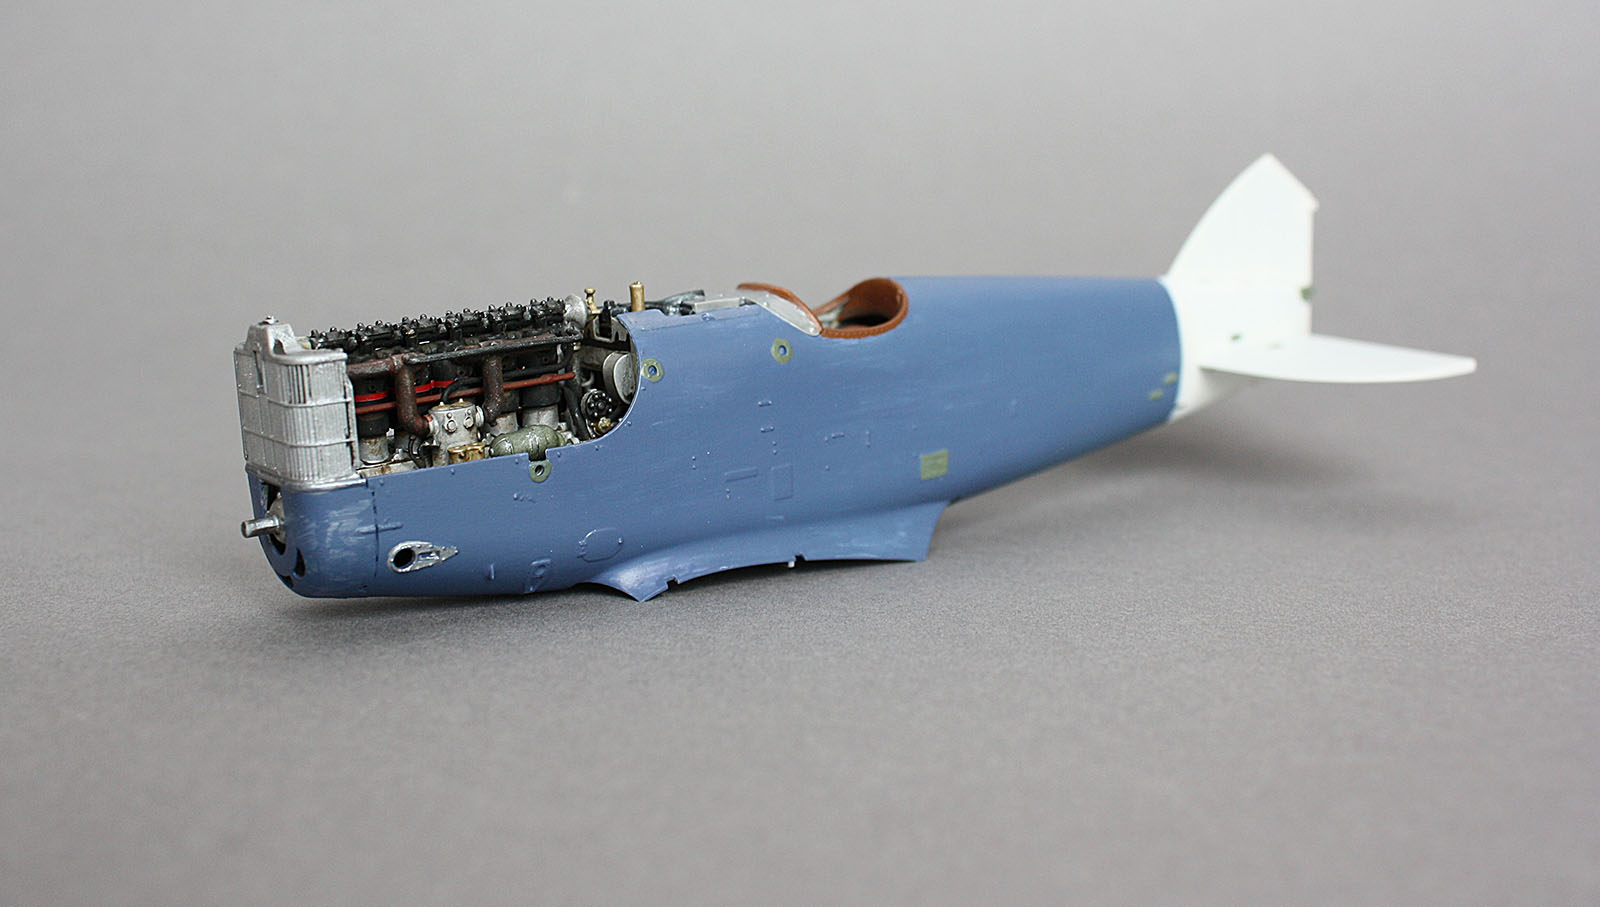
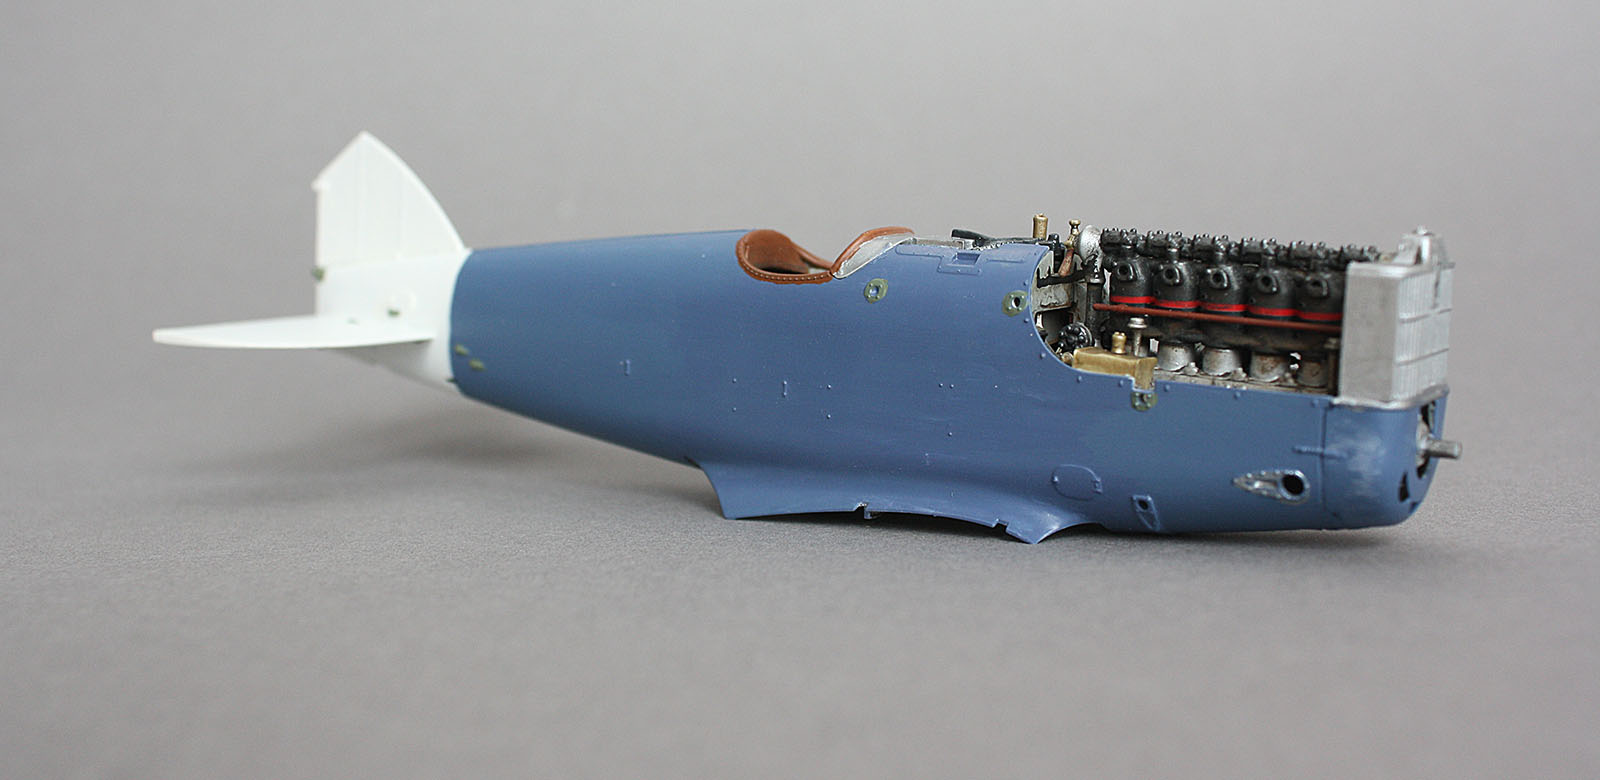
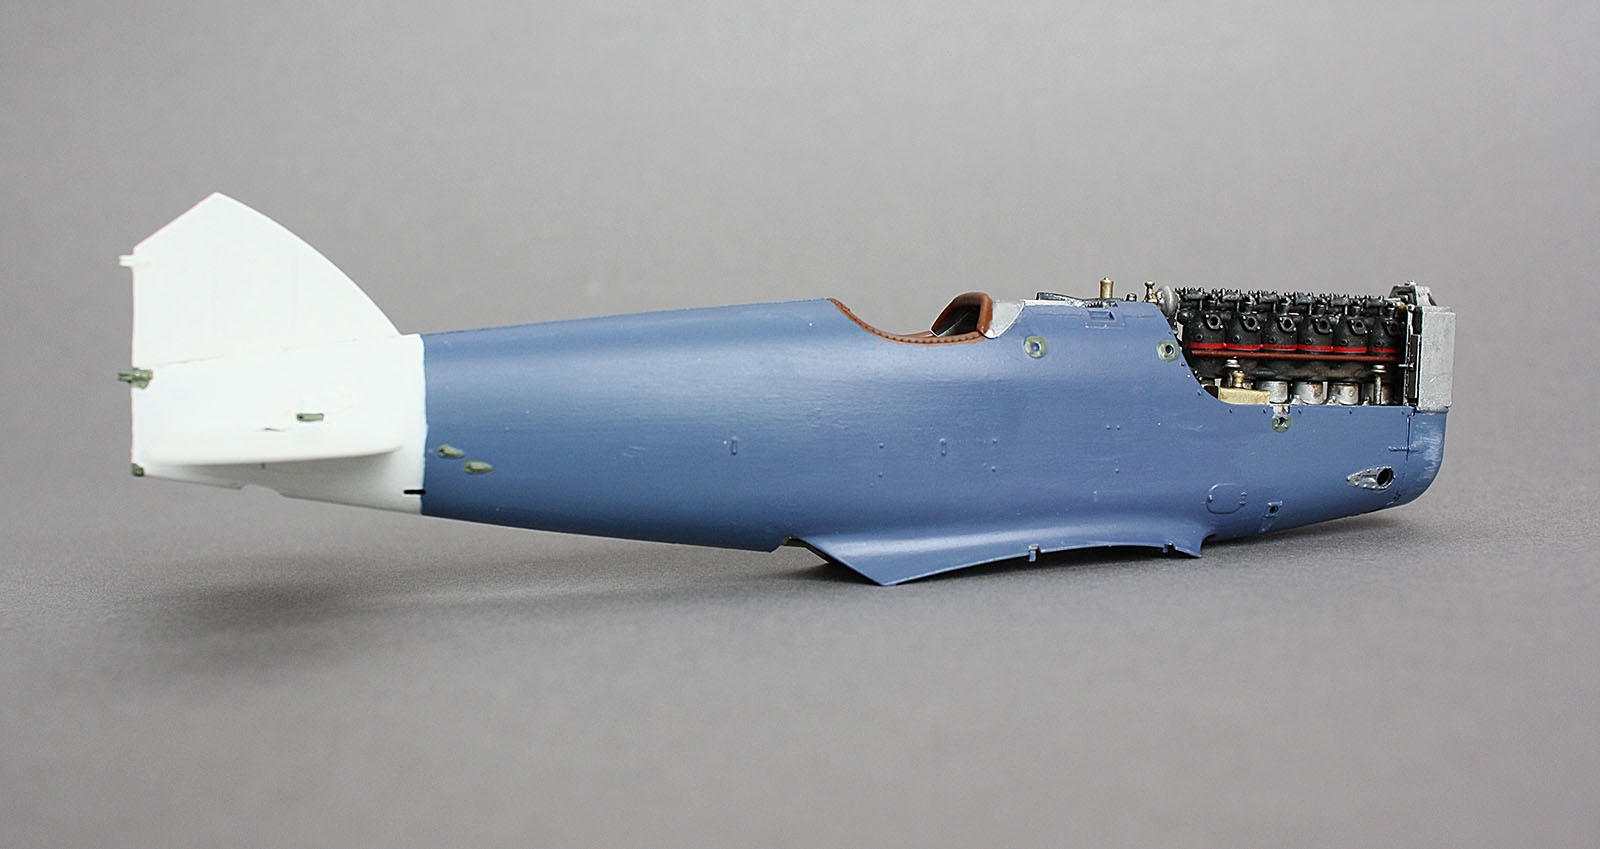
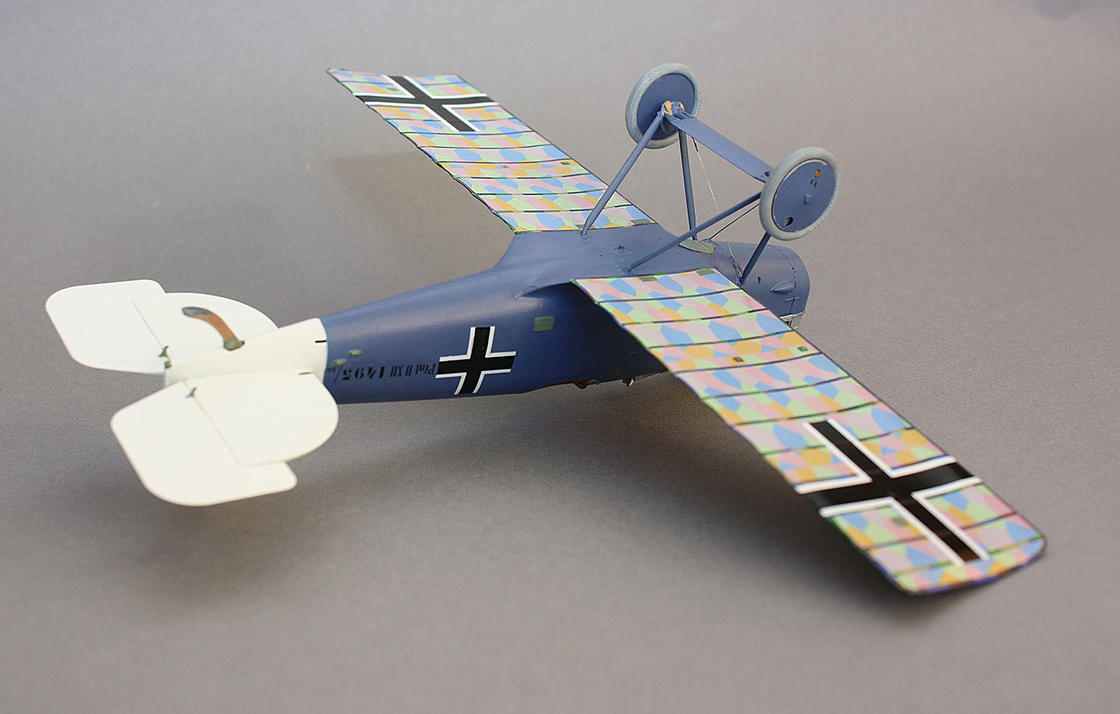
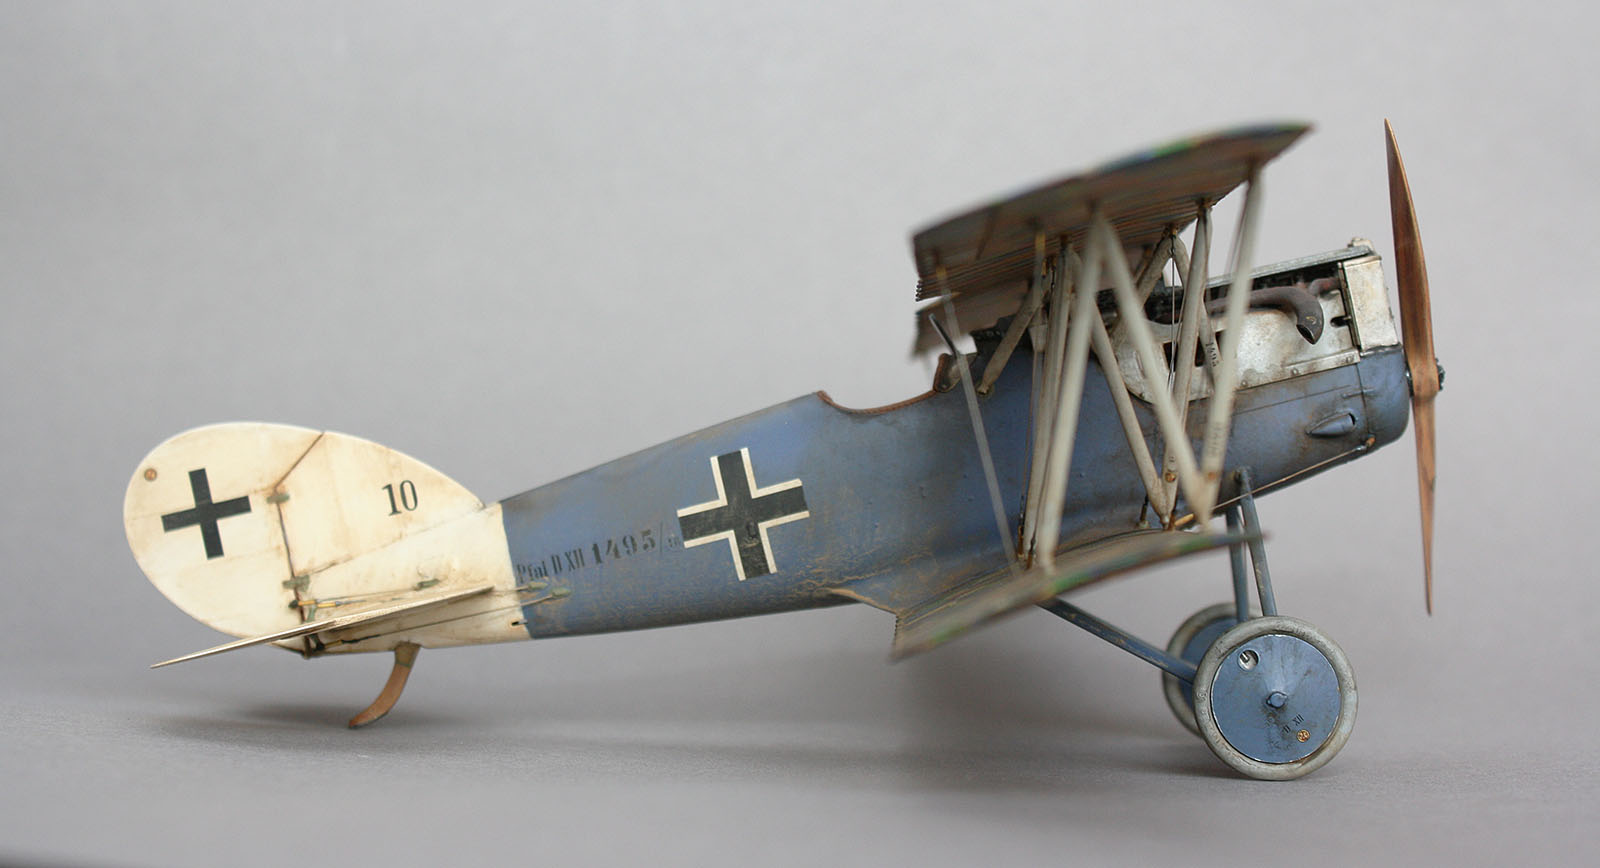
Fuselage halves around the interior and engine. Rudder is installed, but otherwise the fuselage is void of details.


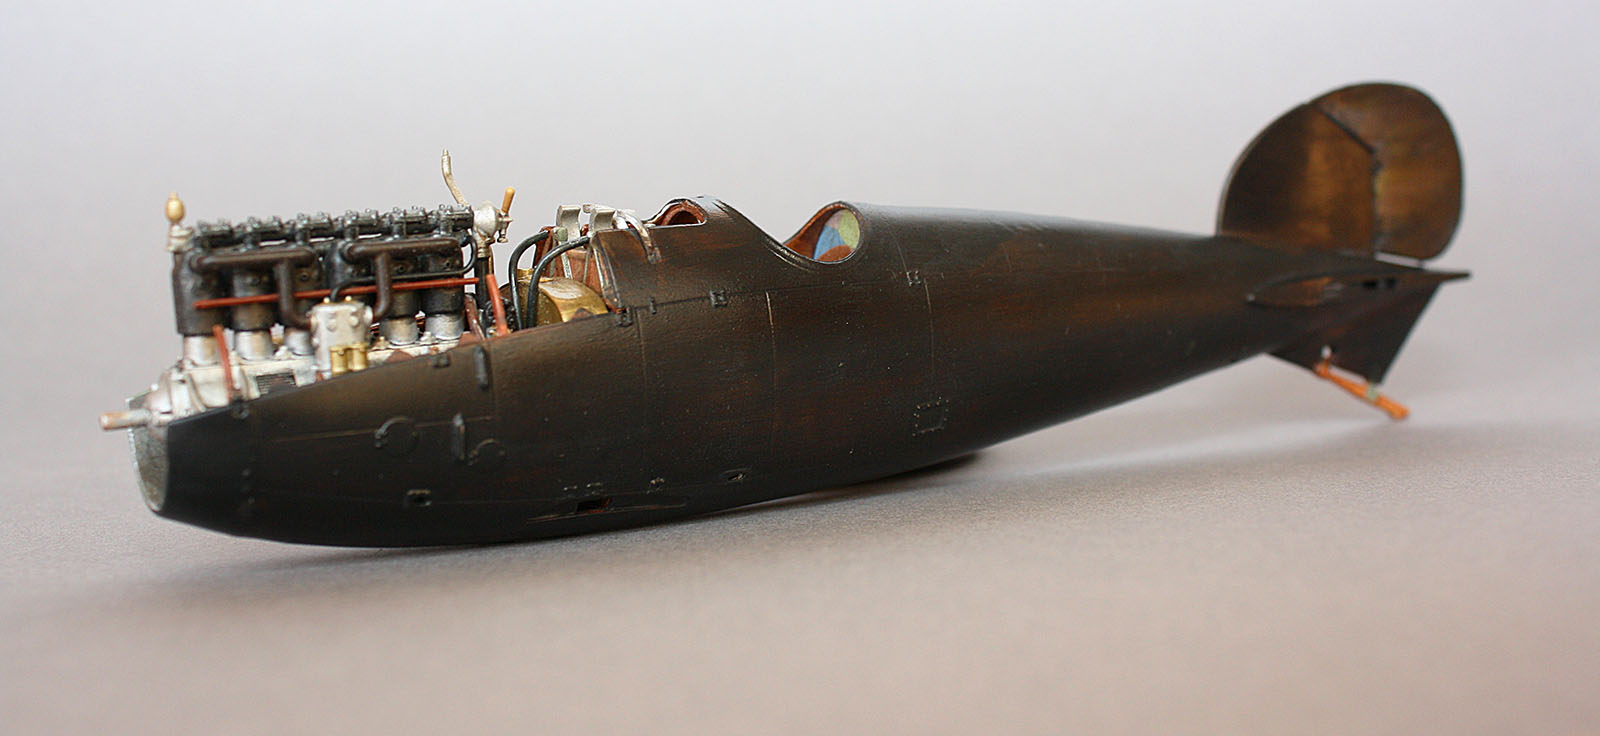
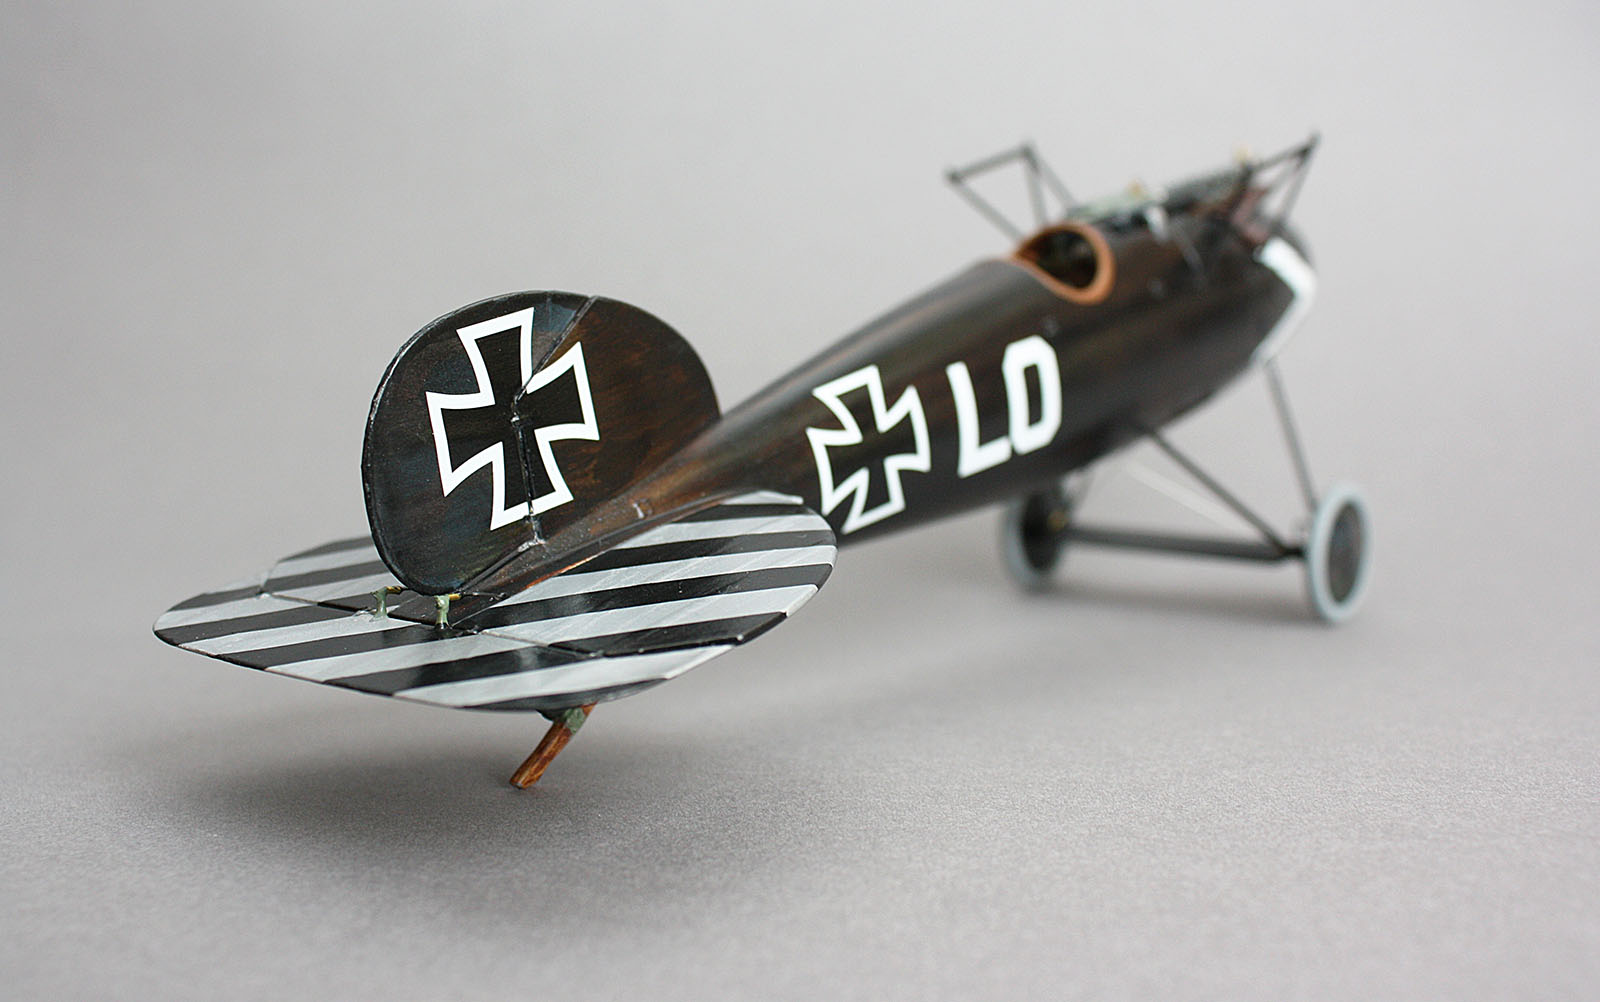
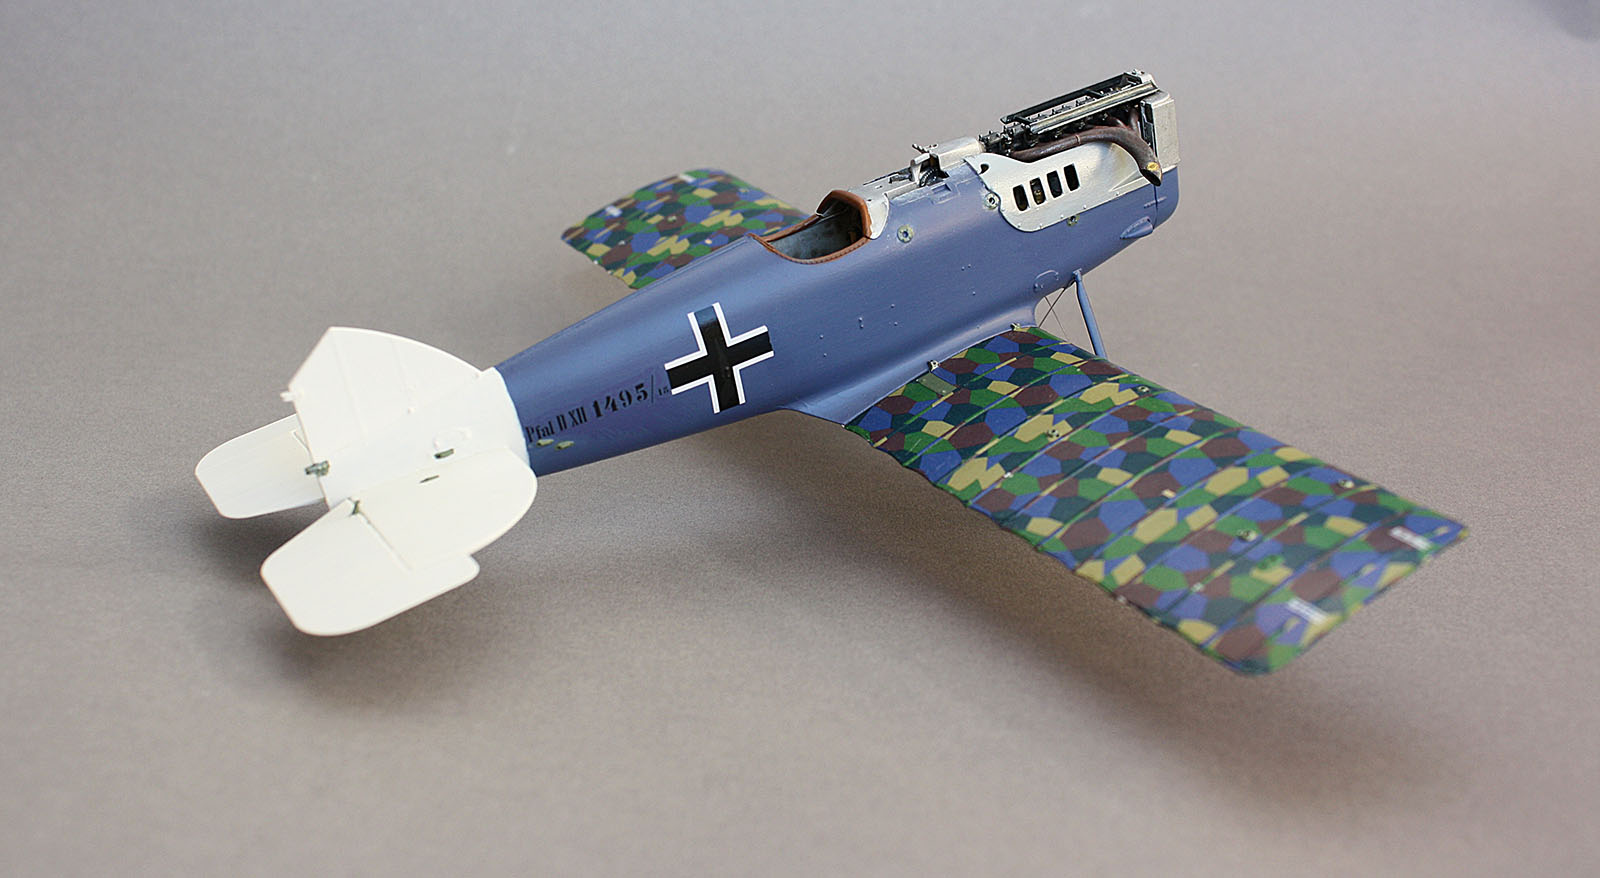
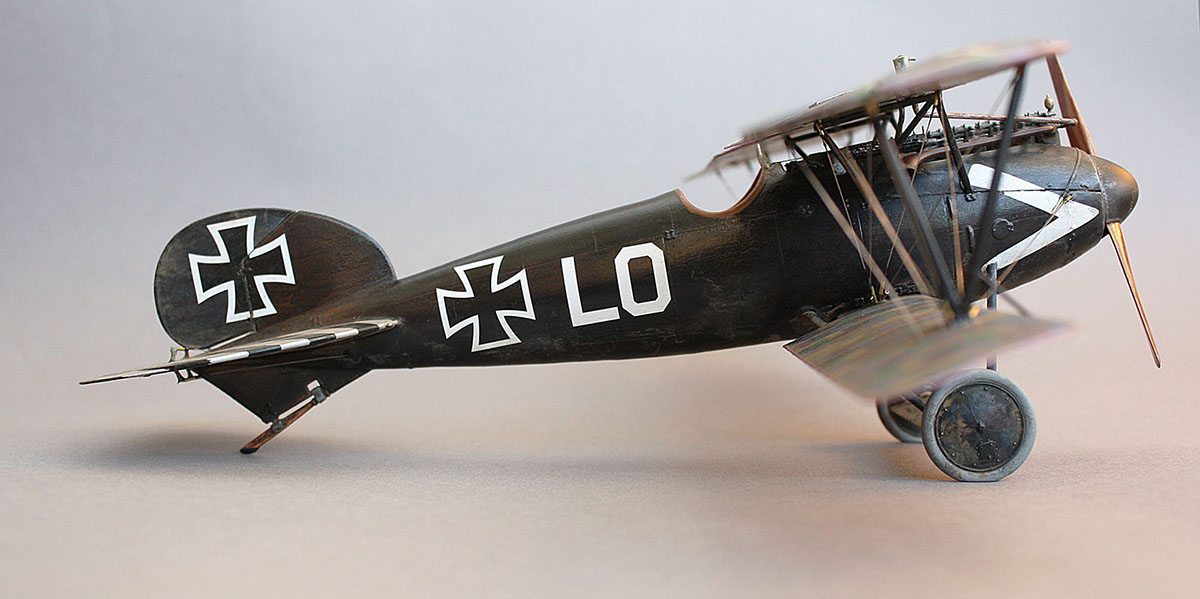
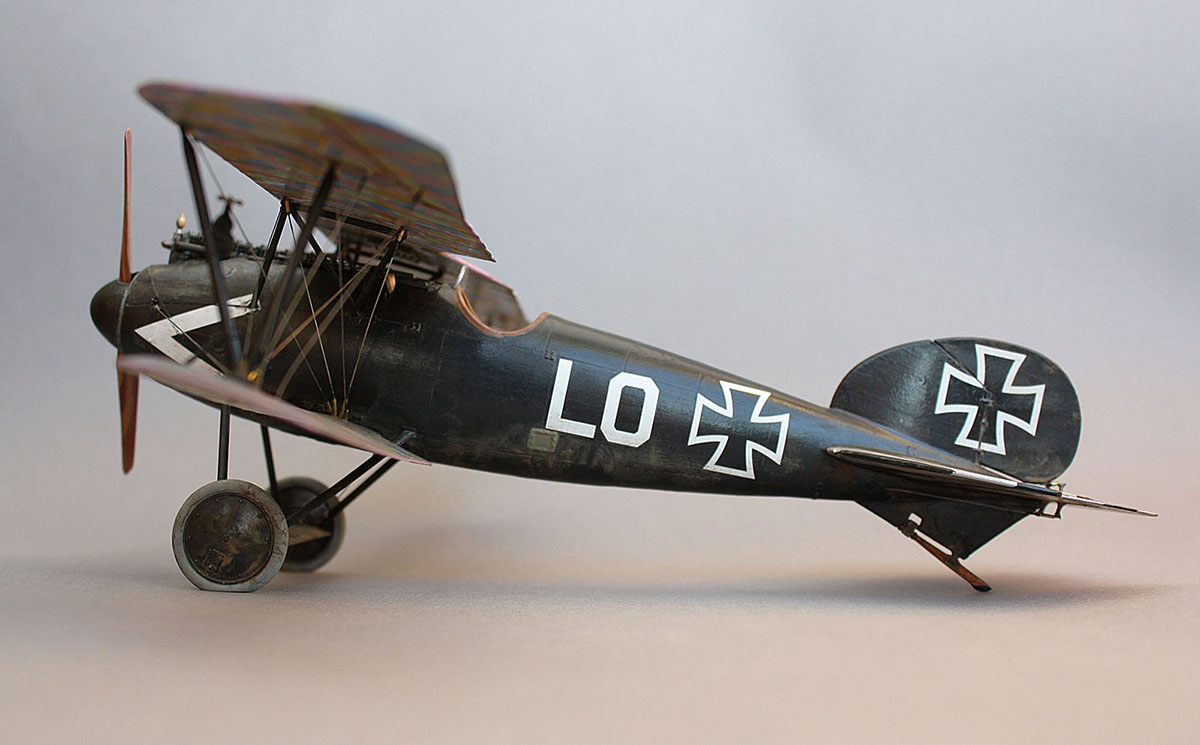
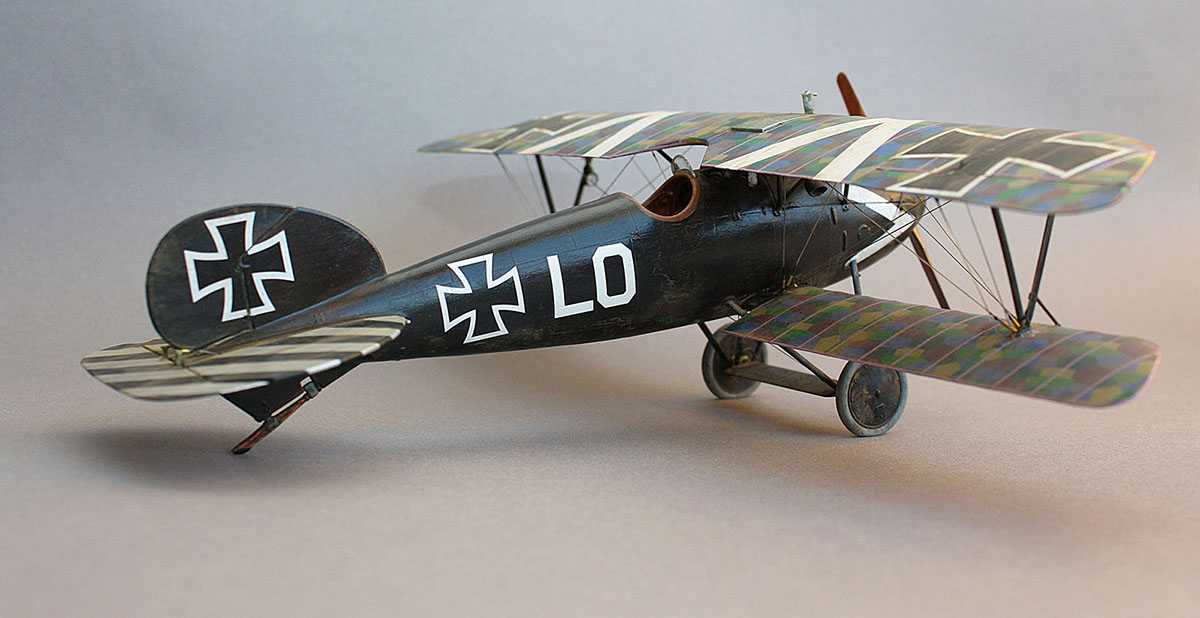
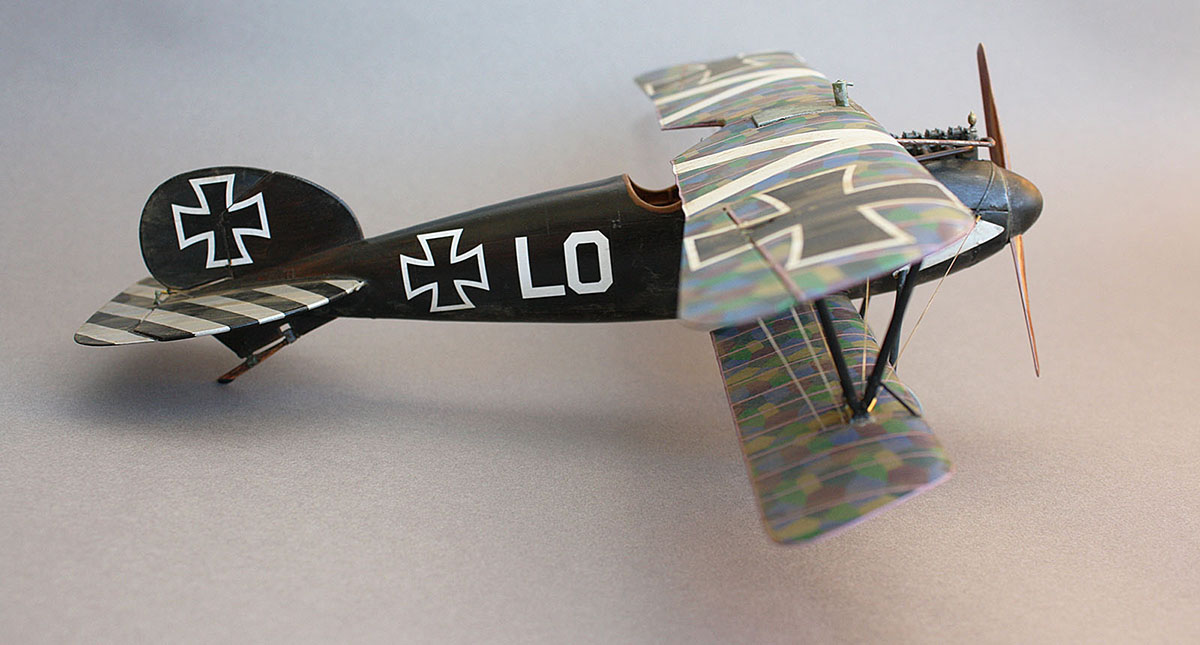
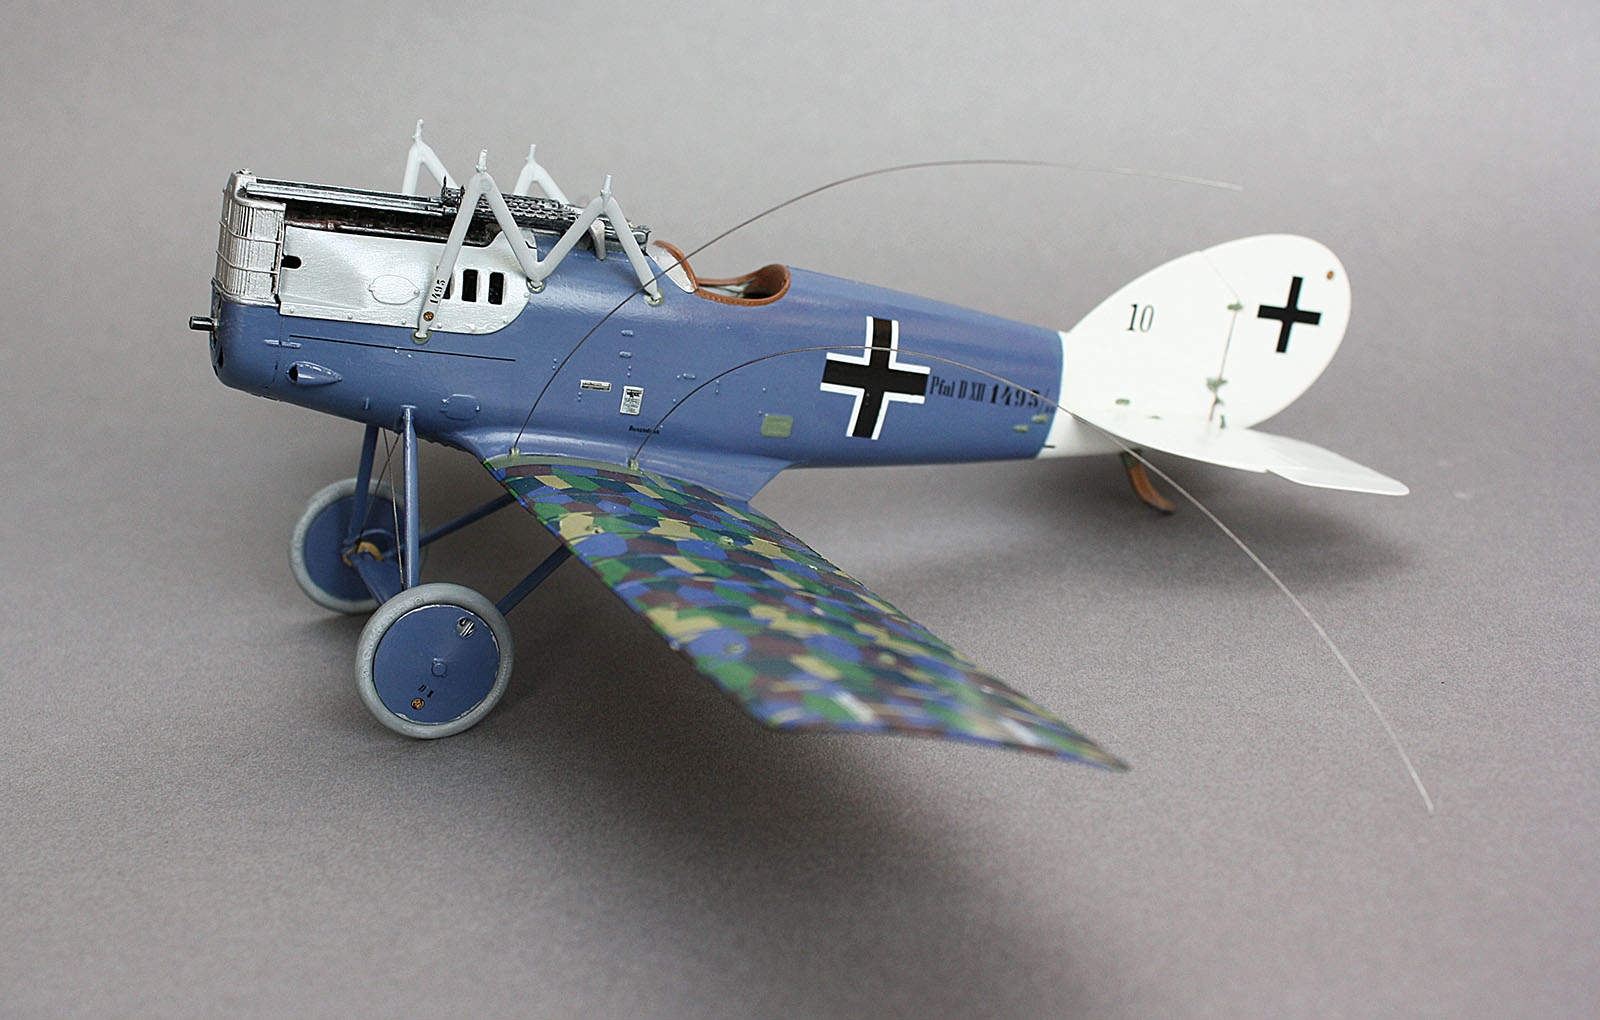
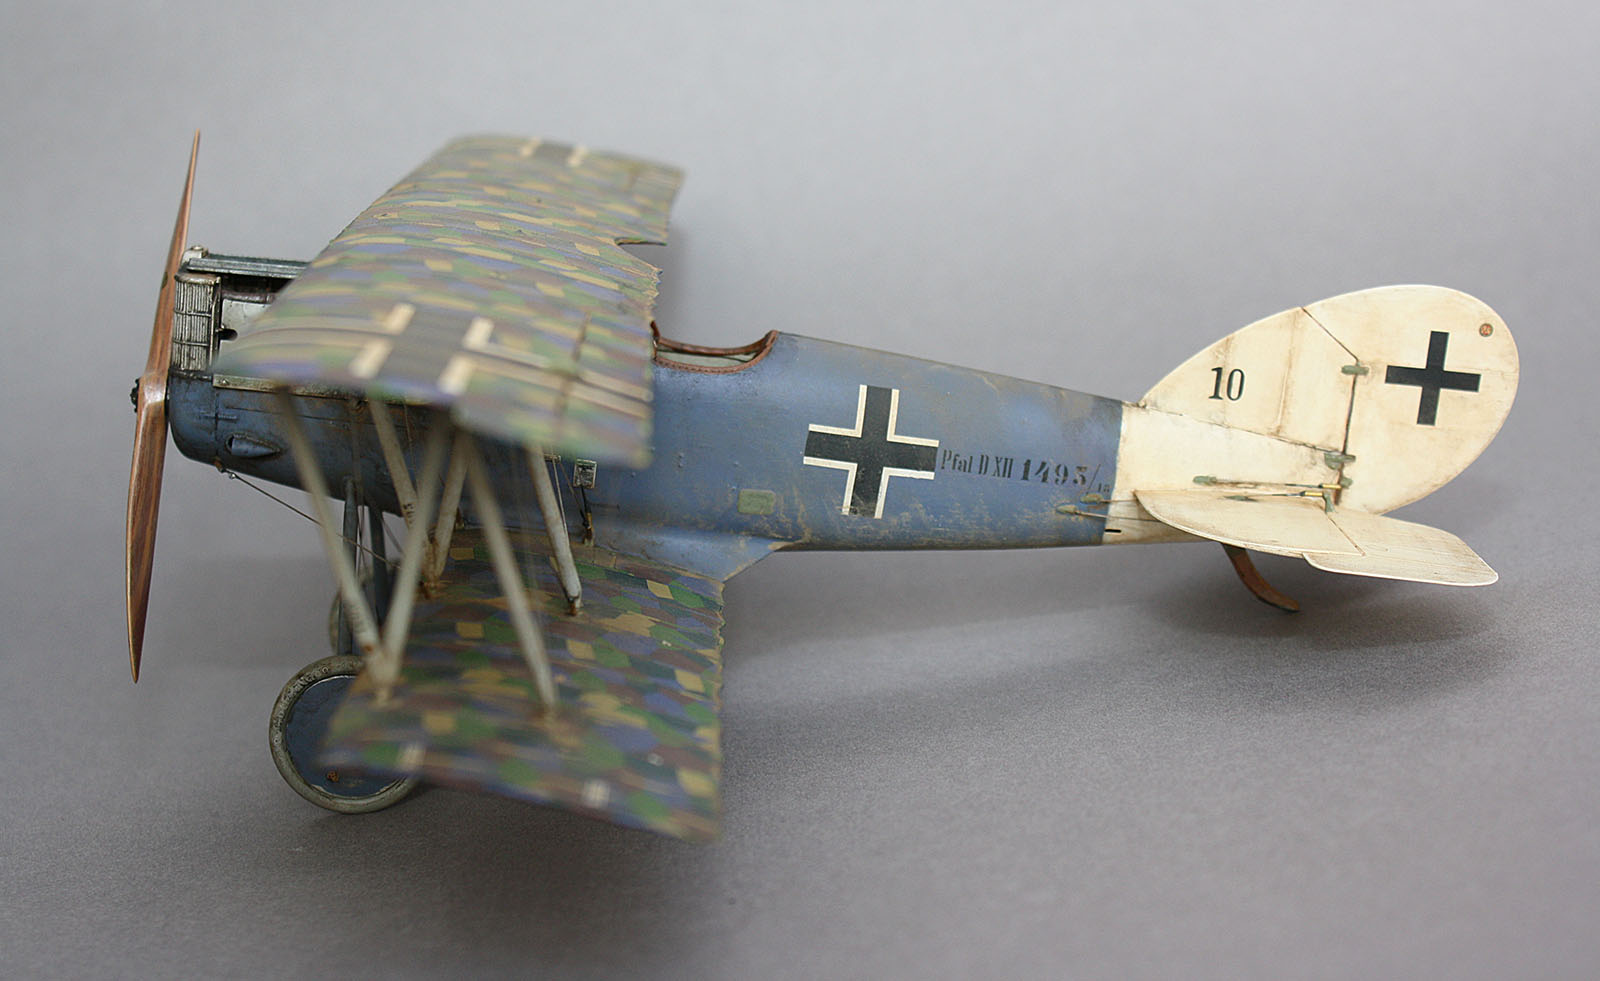
The woodgrain was painted as if I were doing clear varnished plane, though I did go more noticeable on streaks and coloration. Semi-transparent black glazing was applied until wood is almost all but covered - wood shows through with strong light and/or at certain angles.


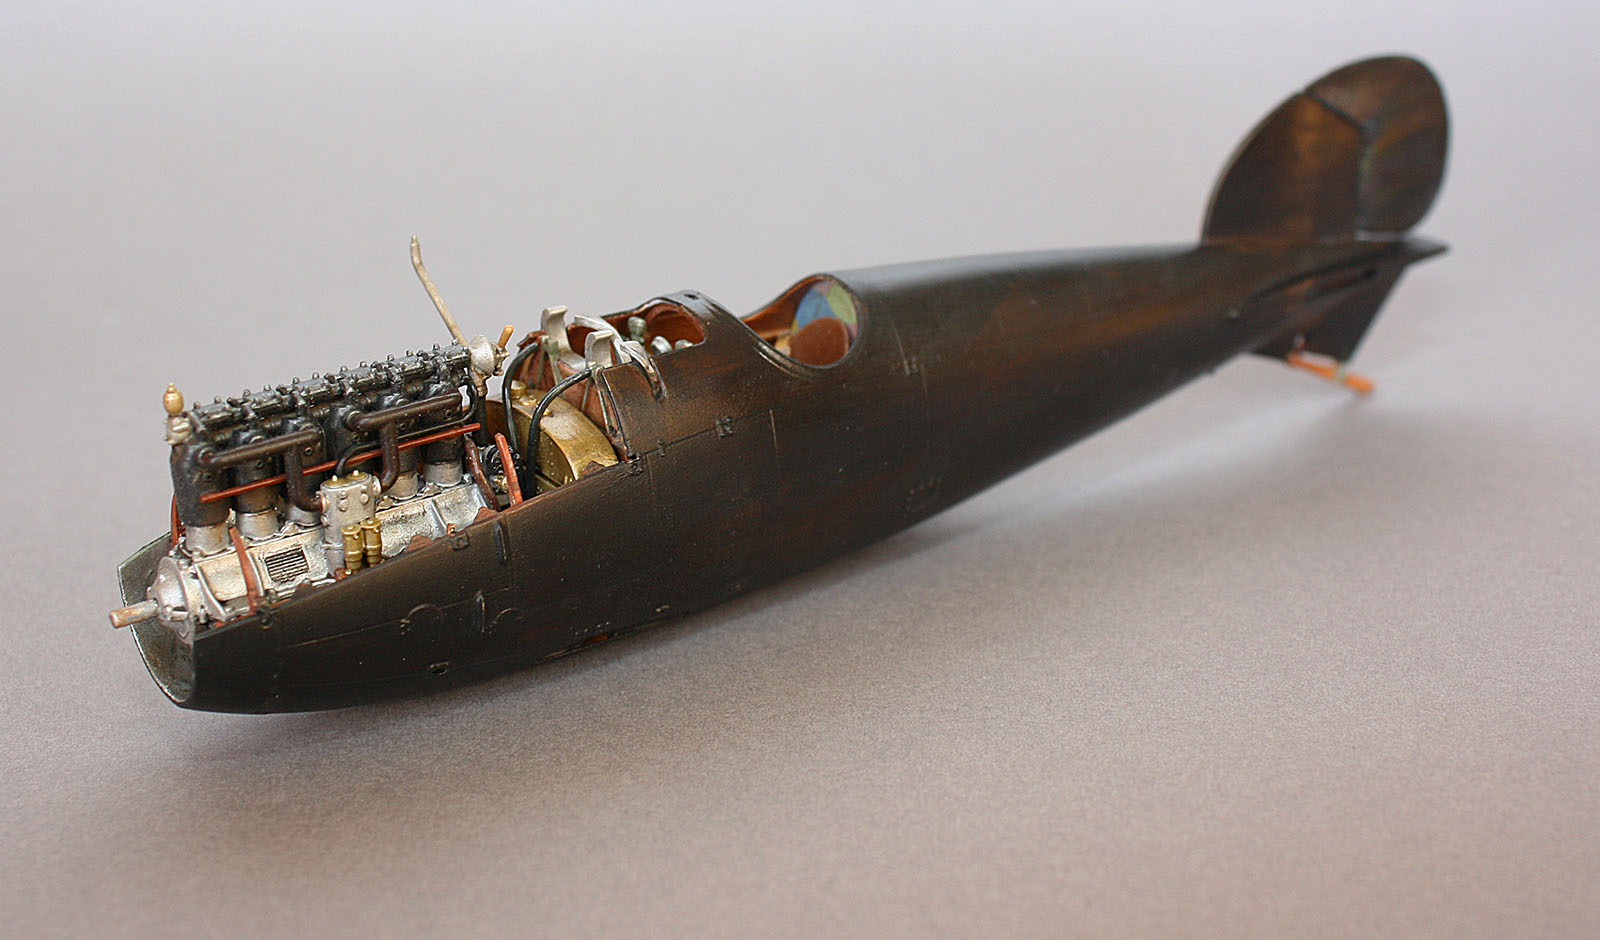
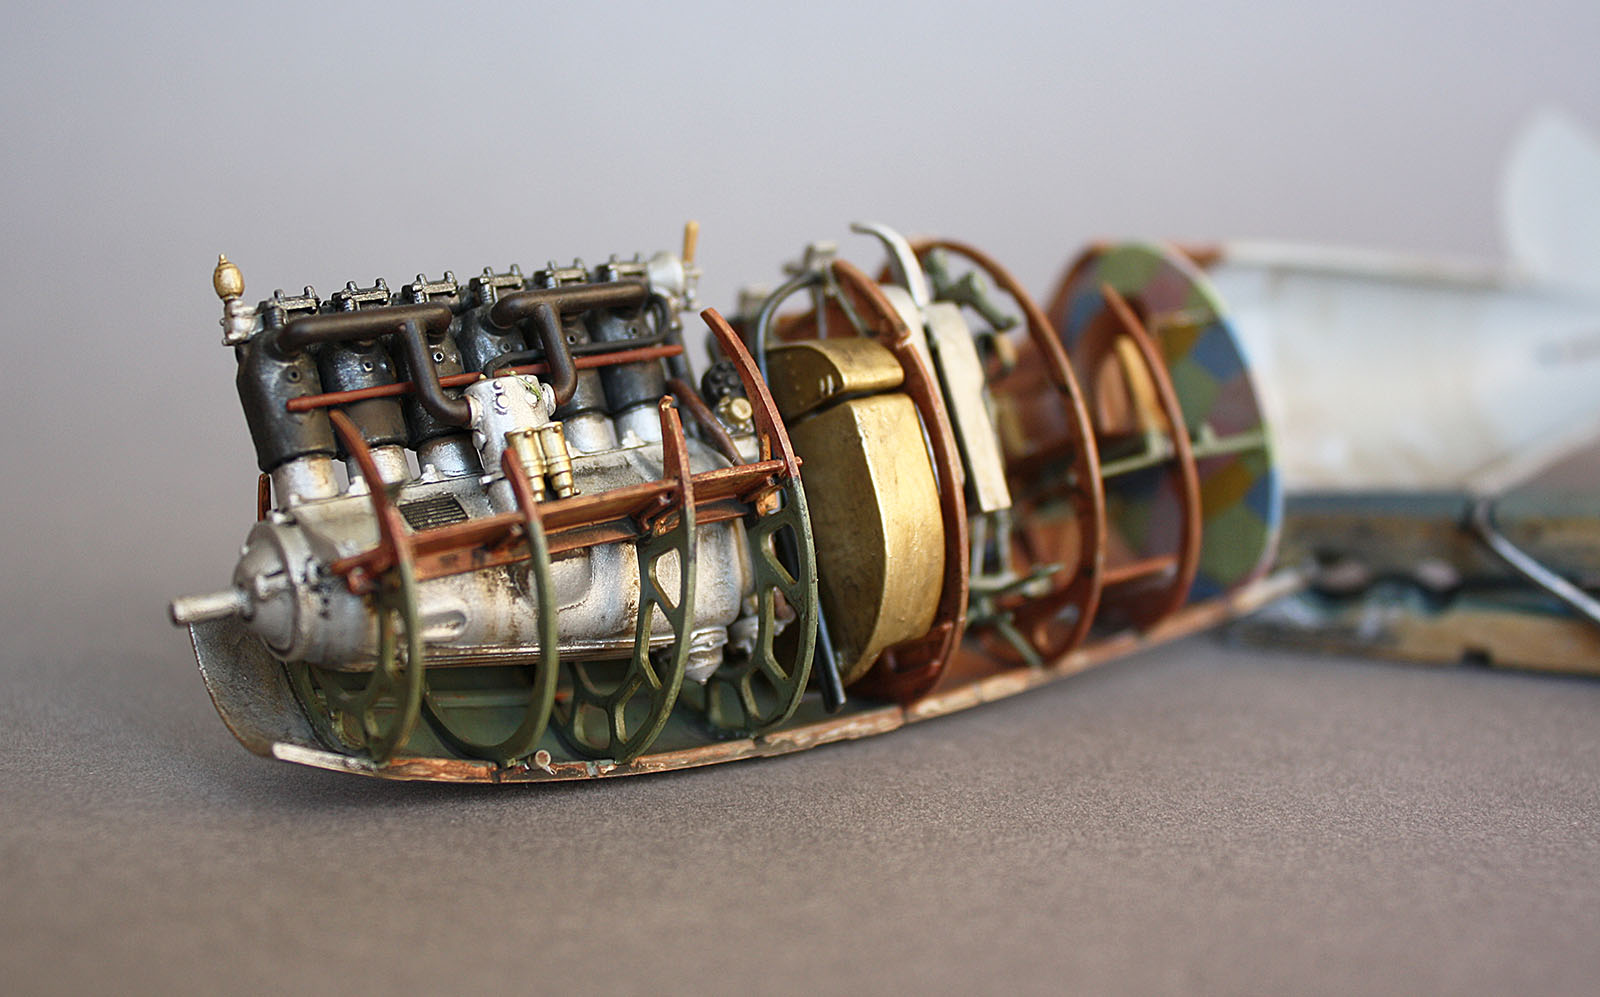
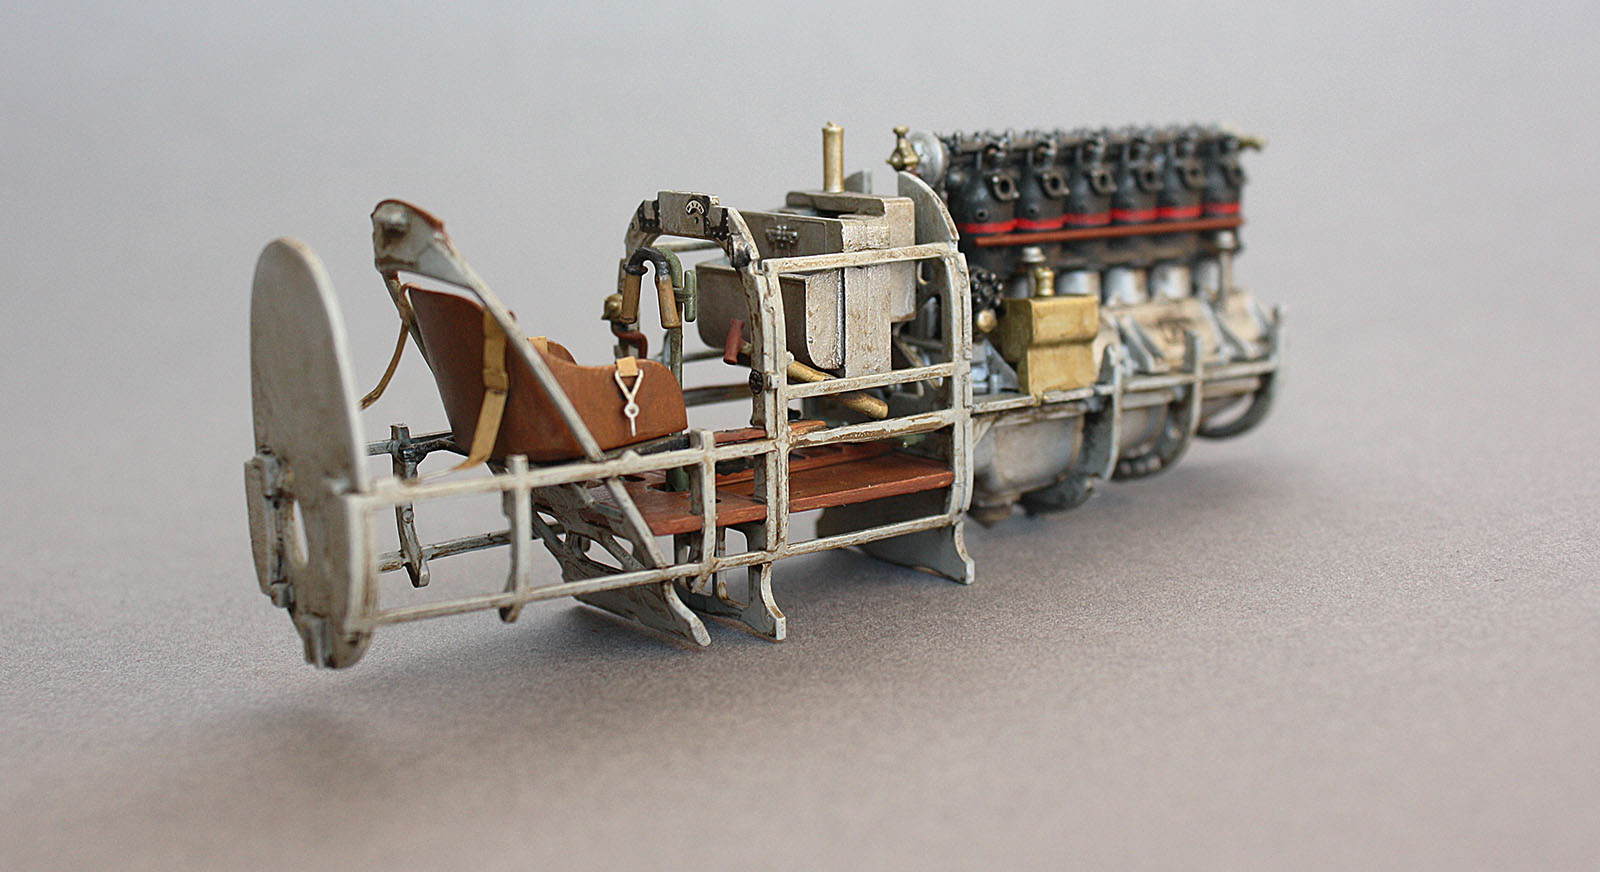
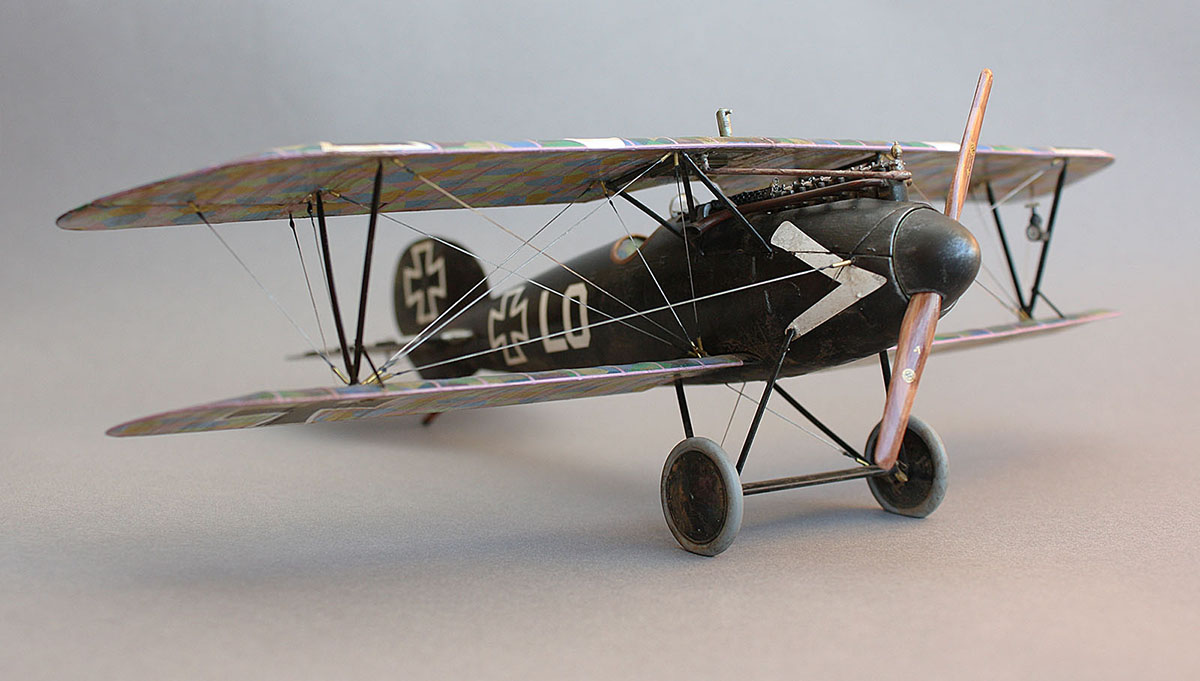
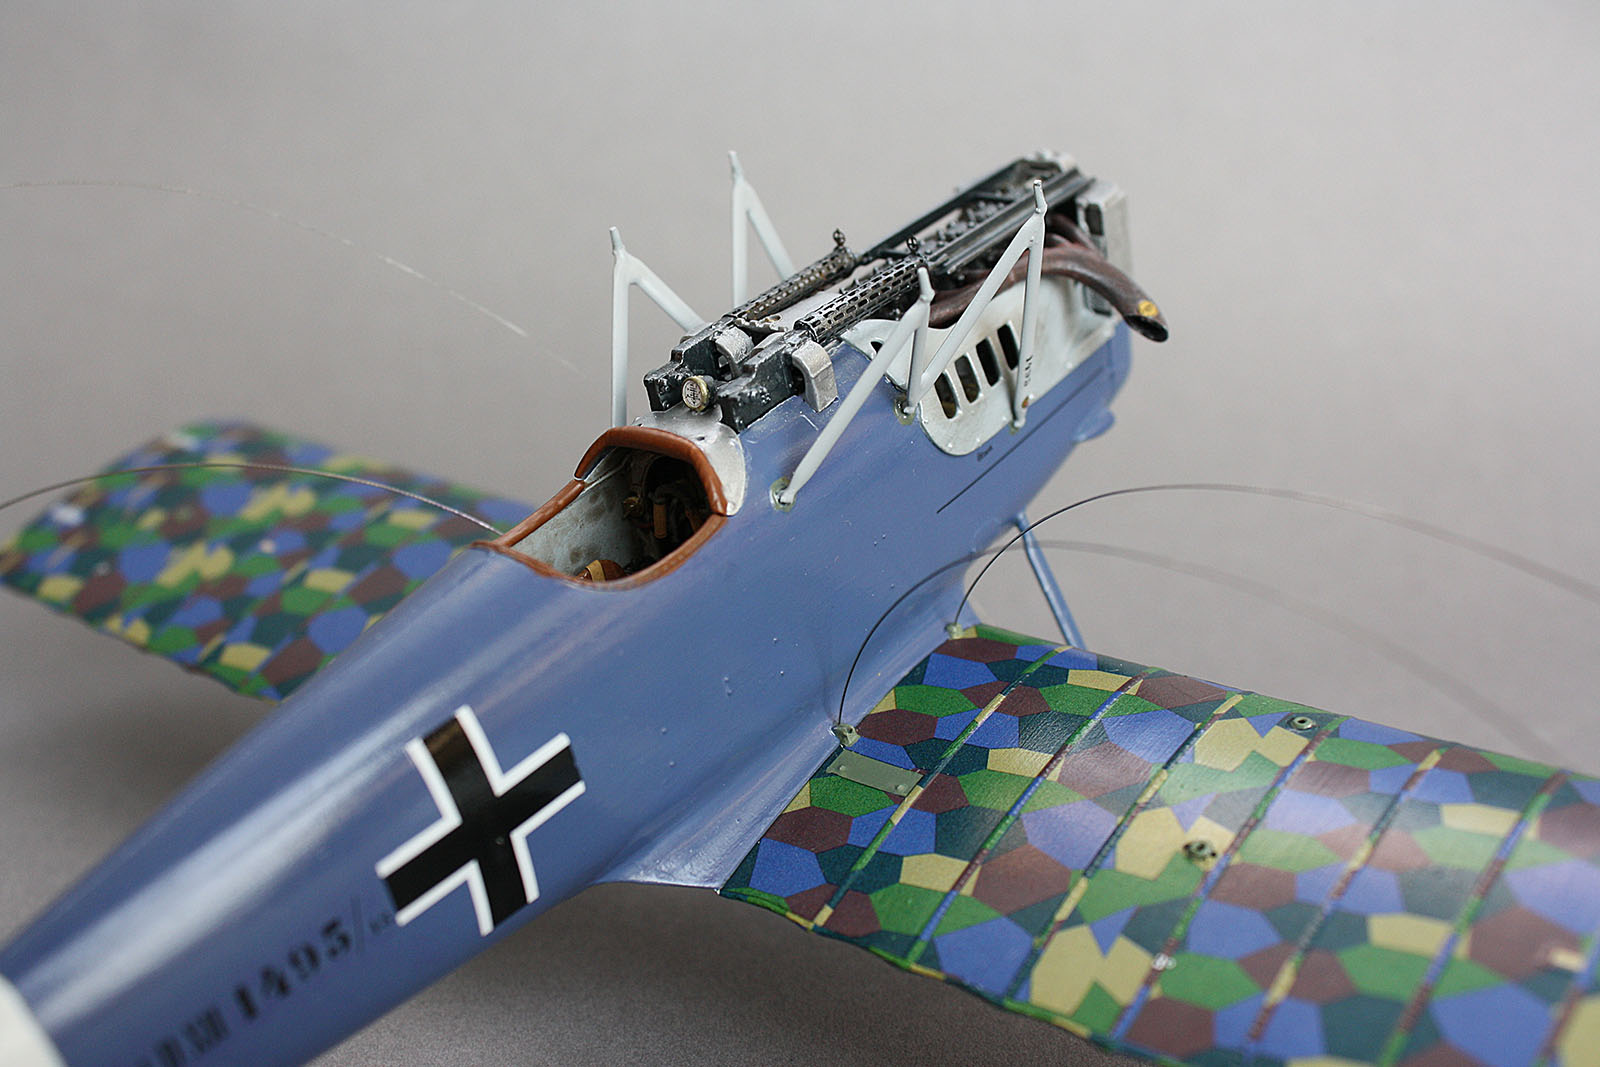
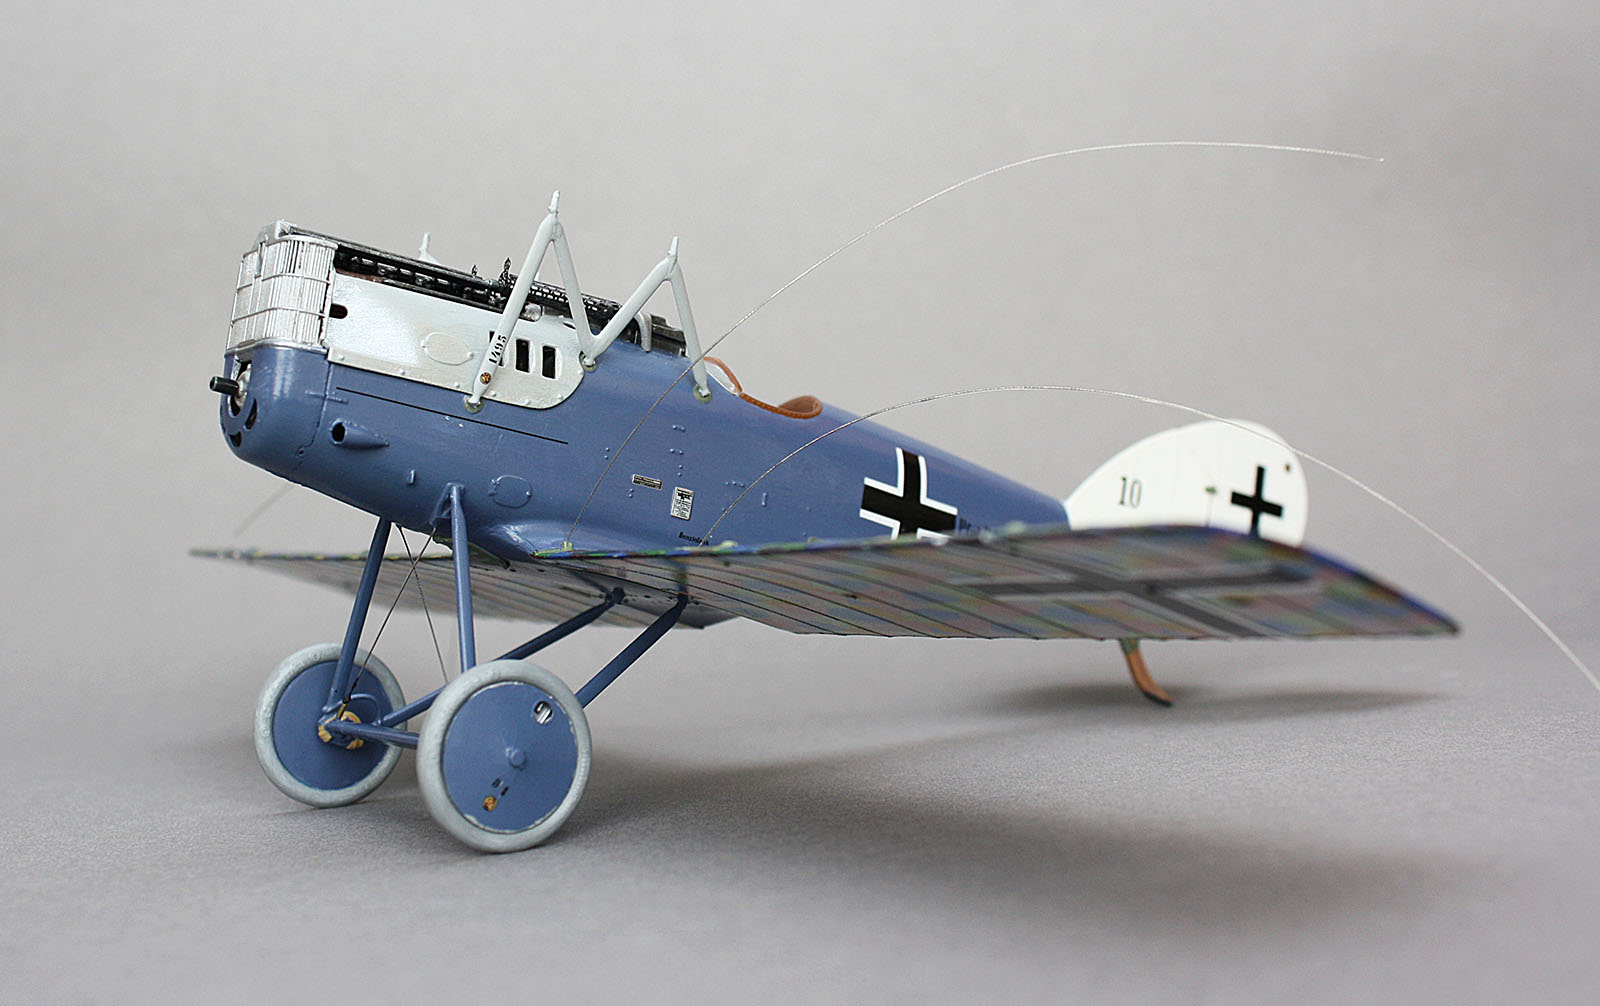
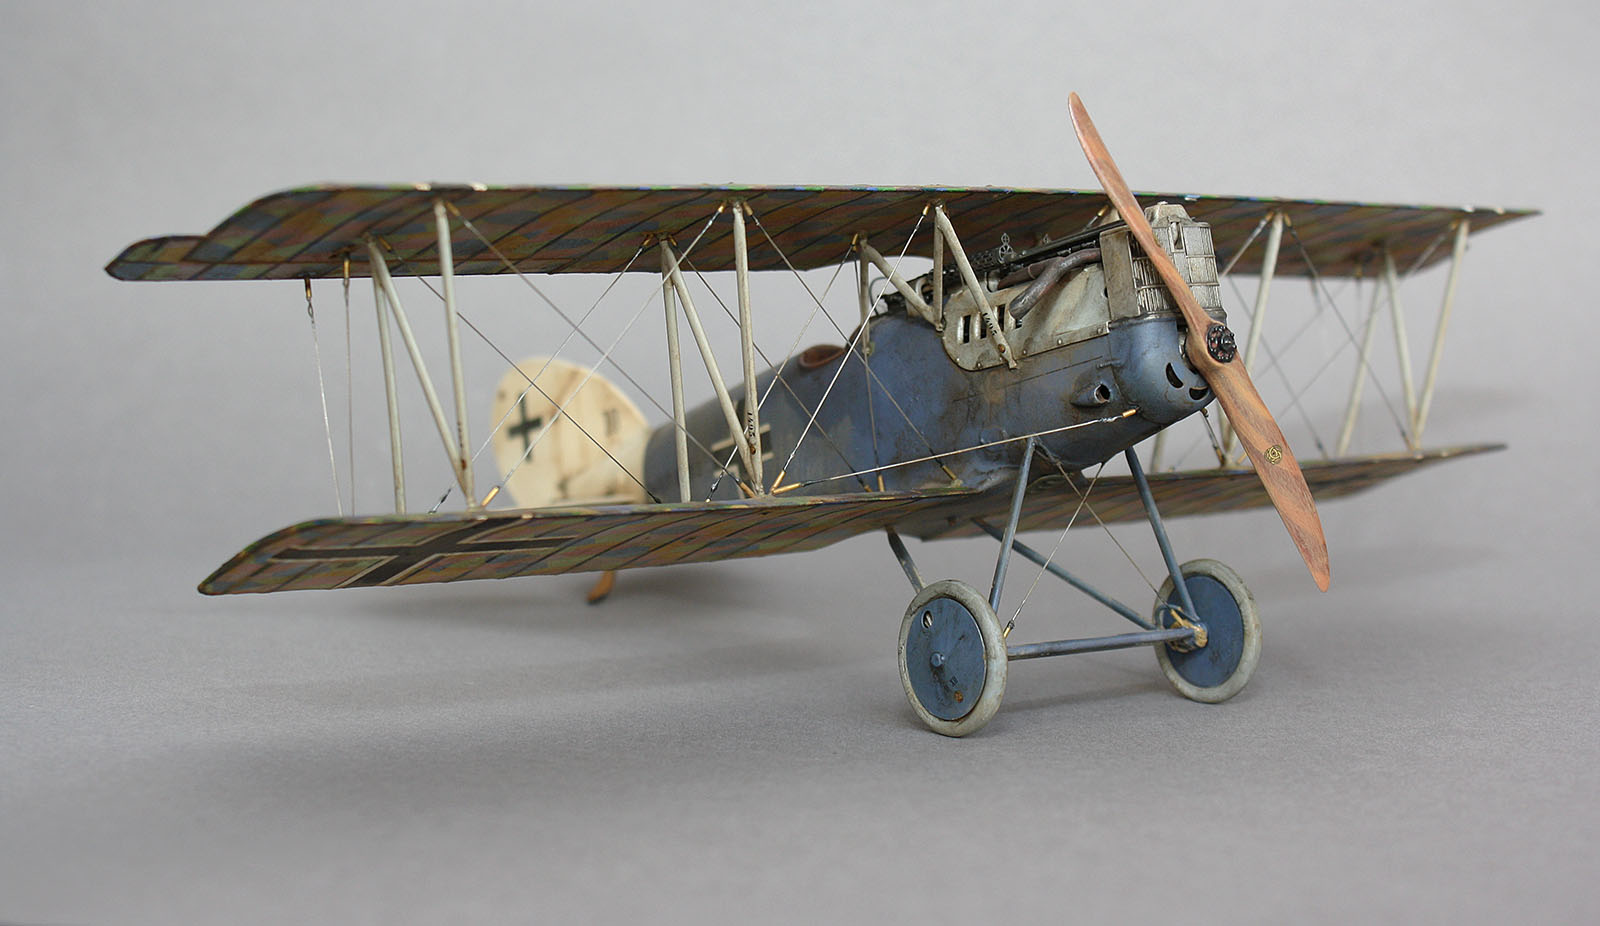
Engine offers nice contrast to the wood - making an Albatros in maintenance mode (cowling off) a sure probability for near future.


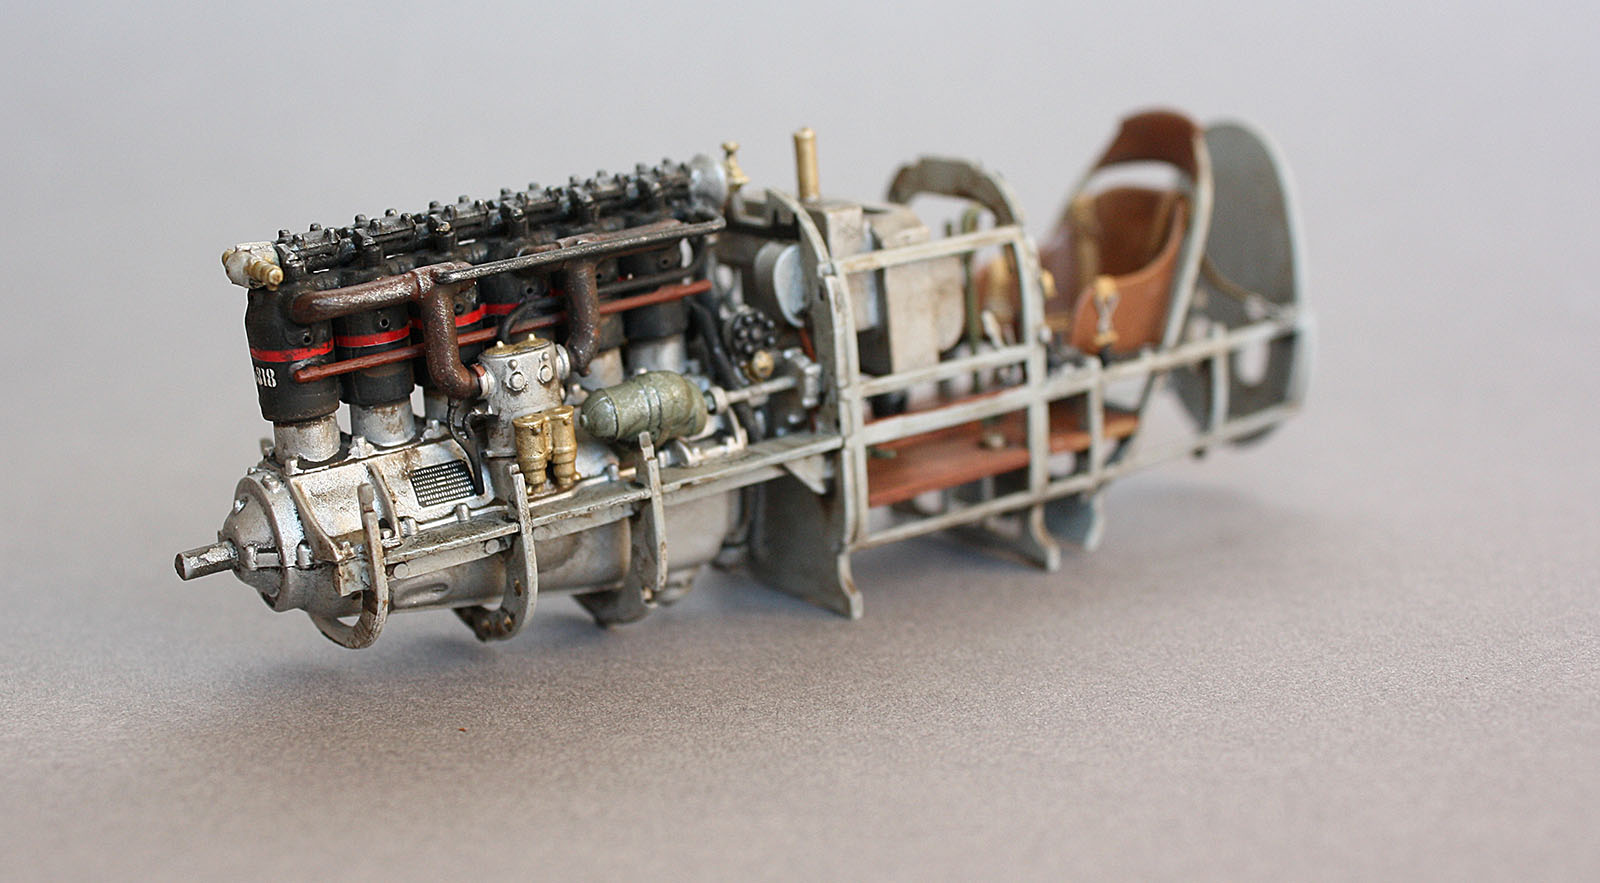
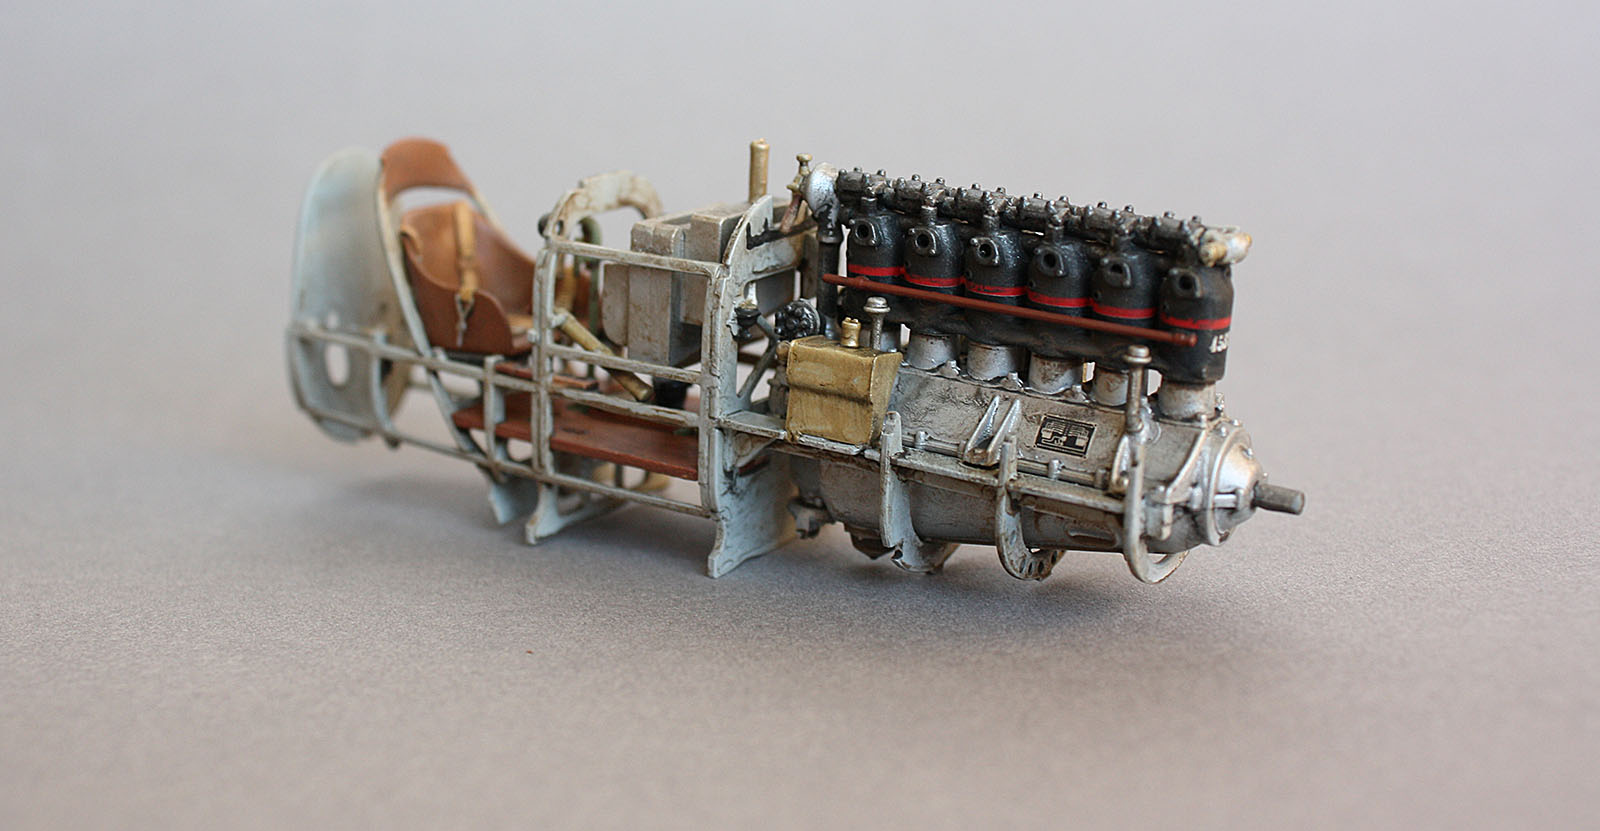
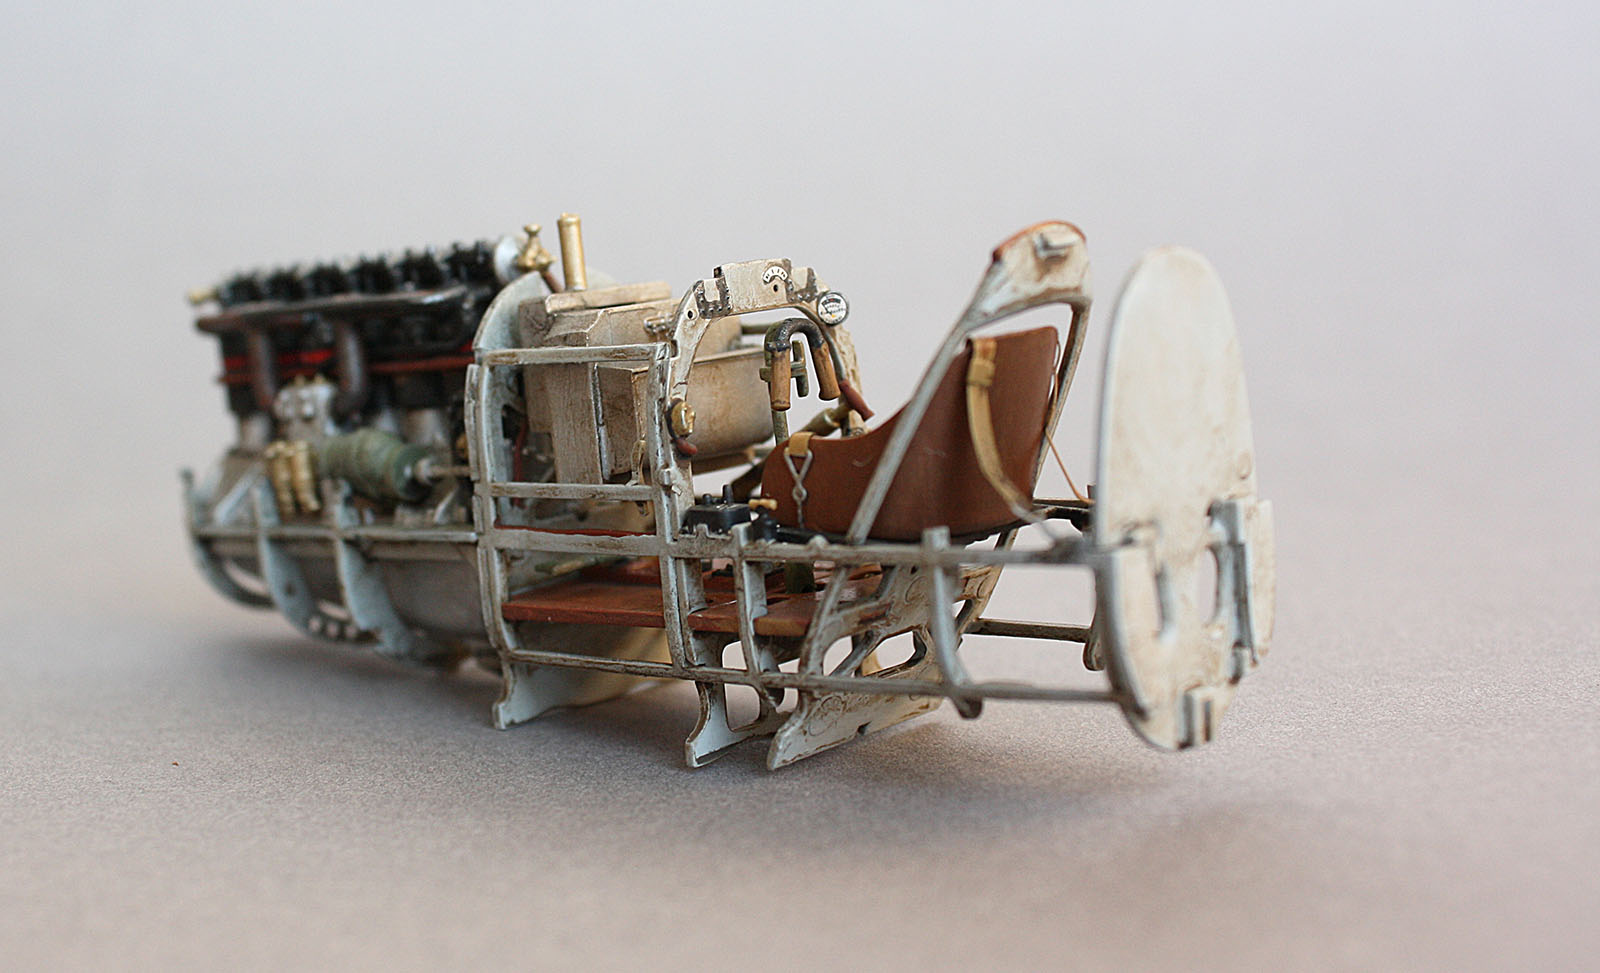
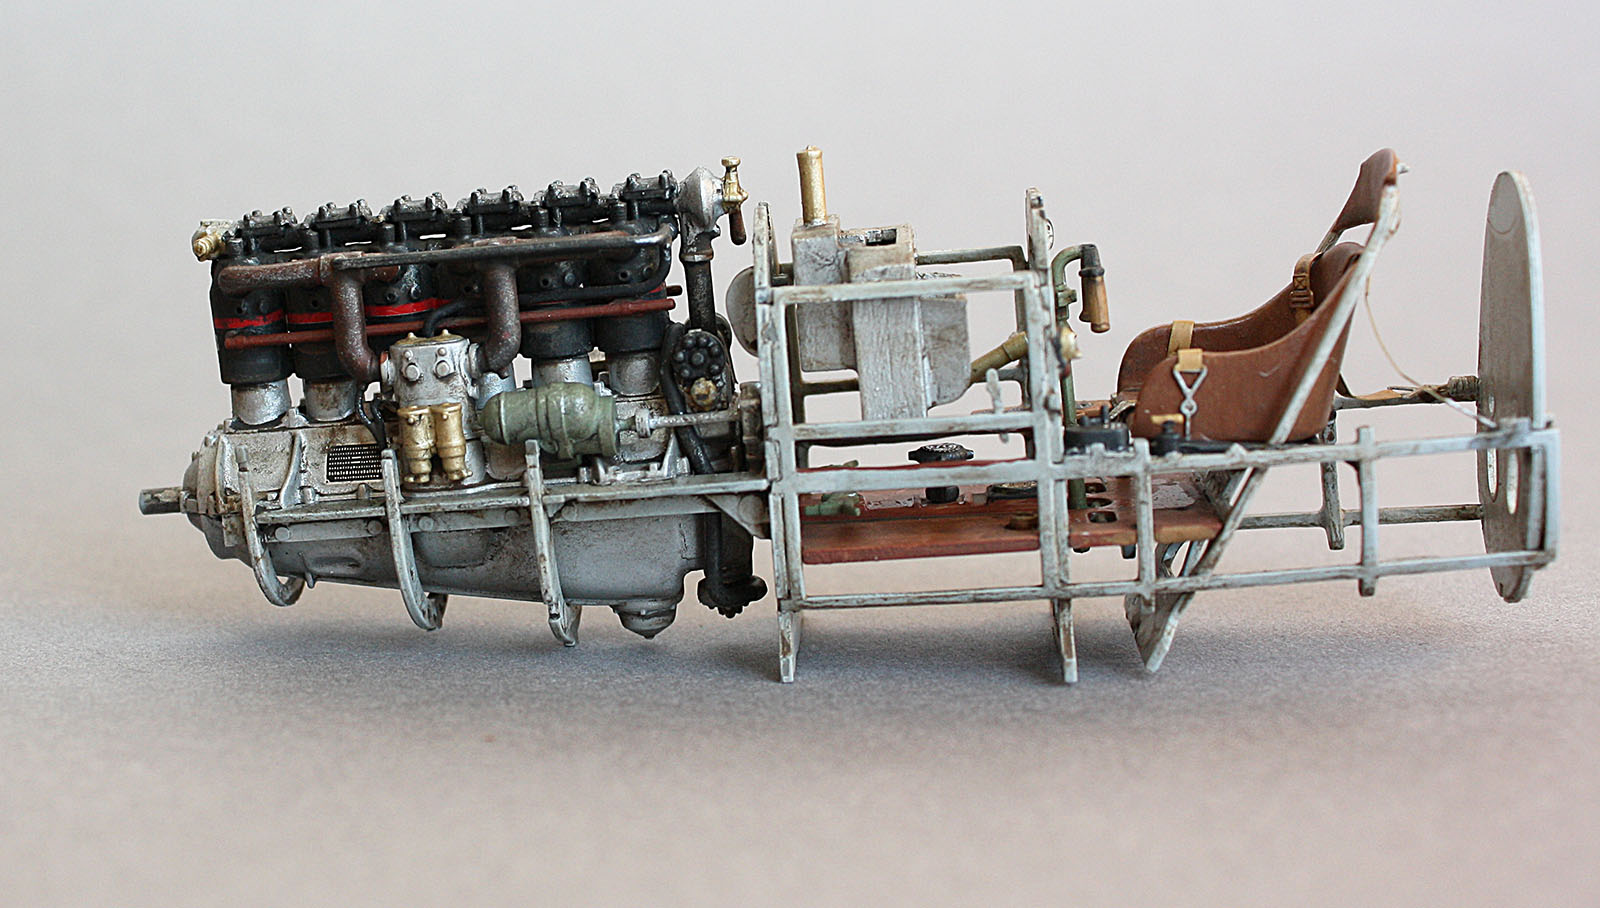
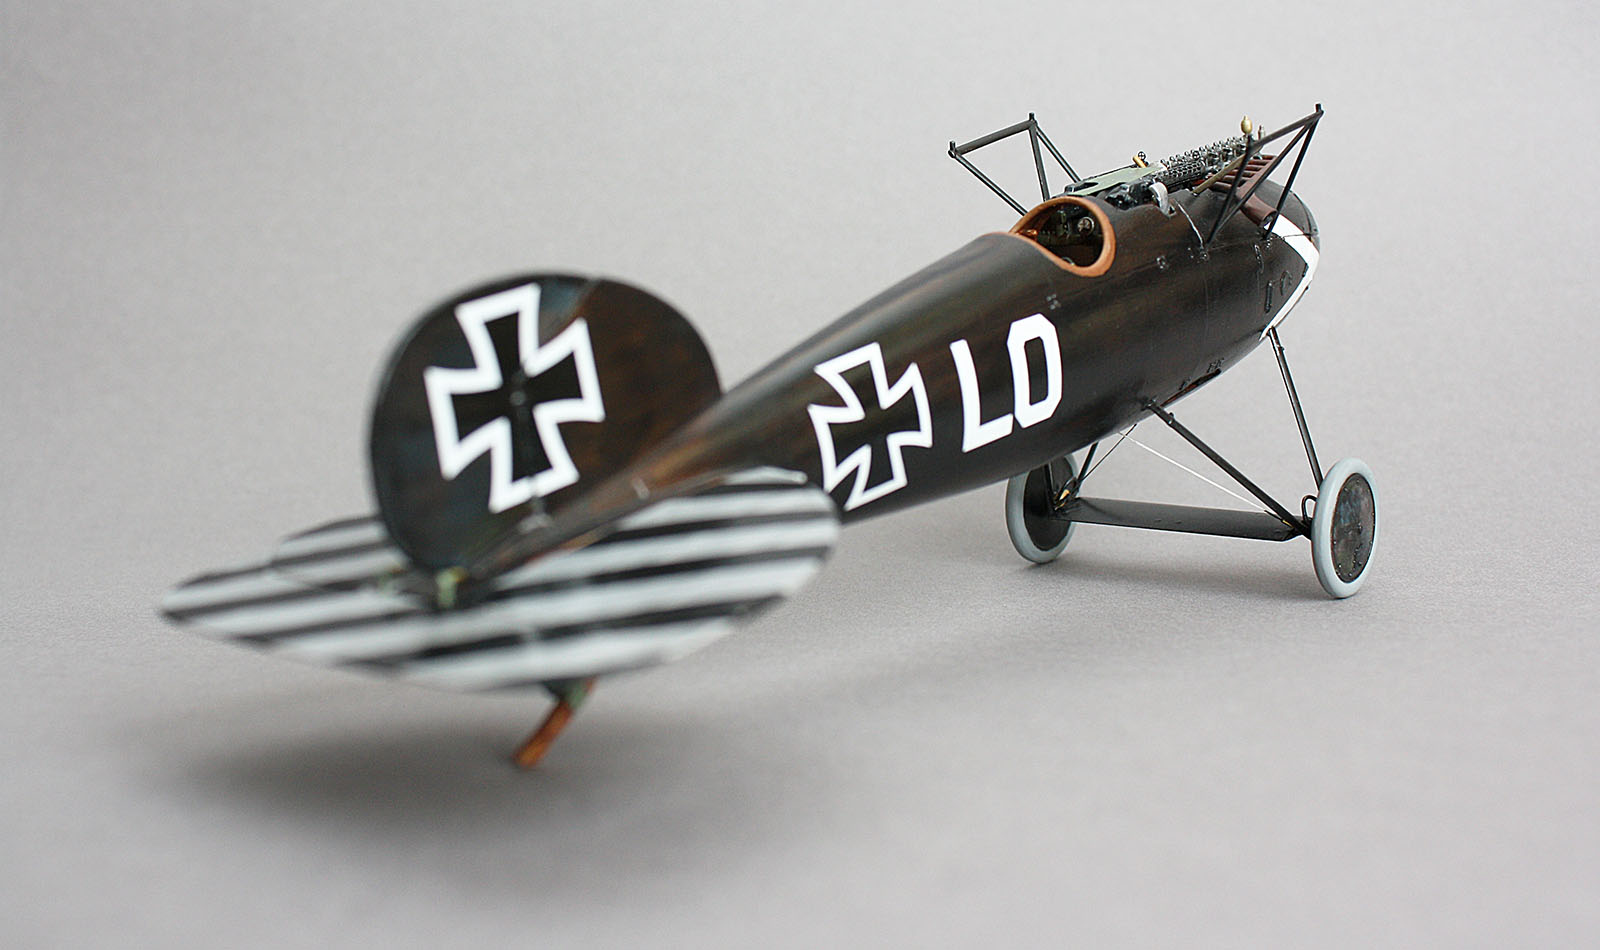
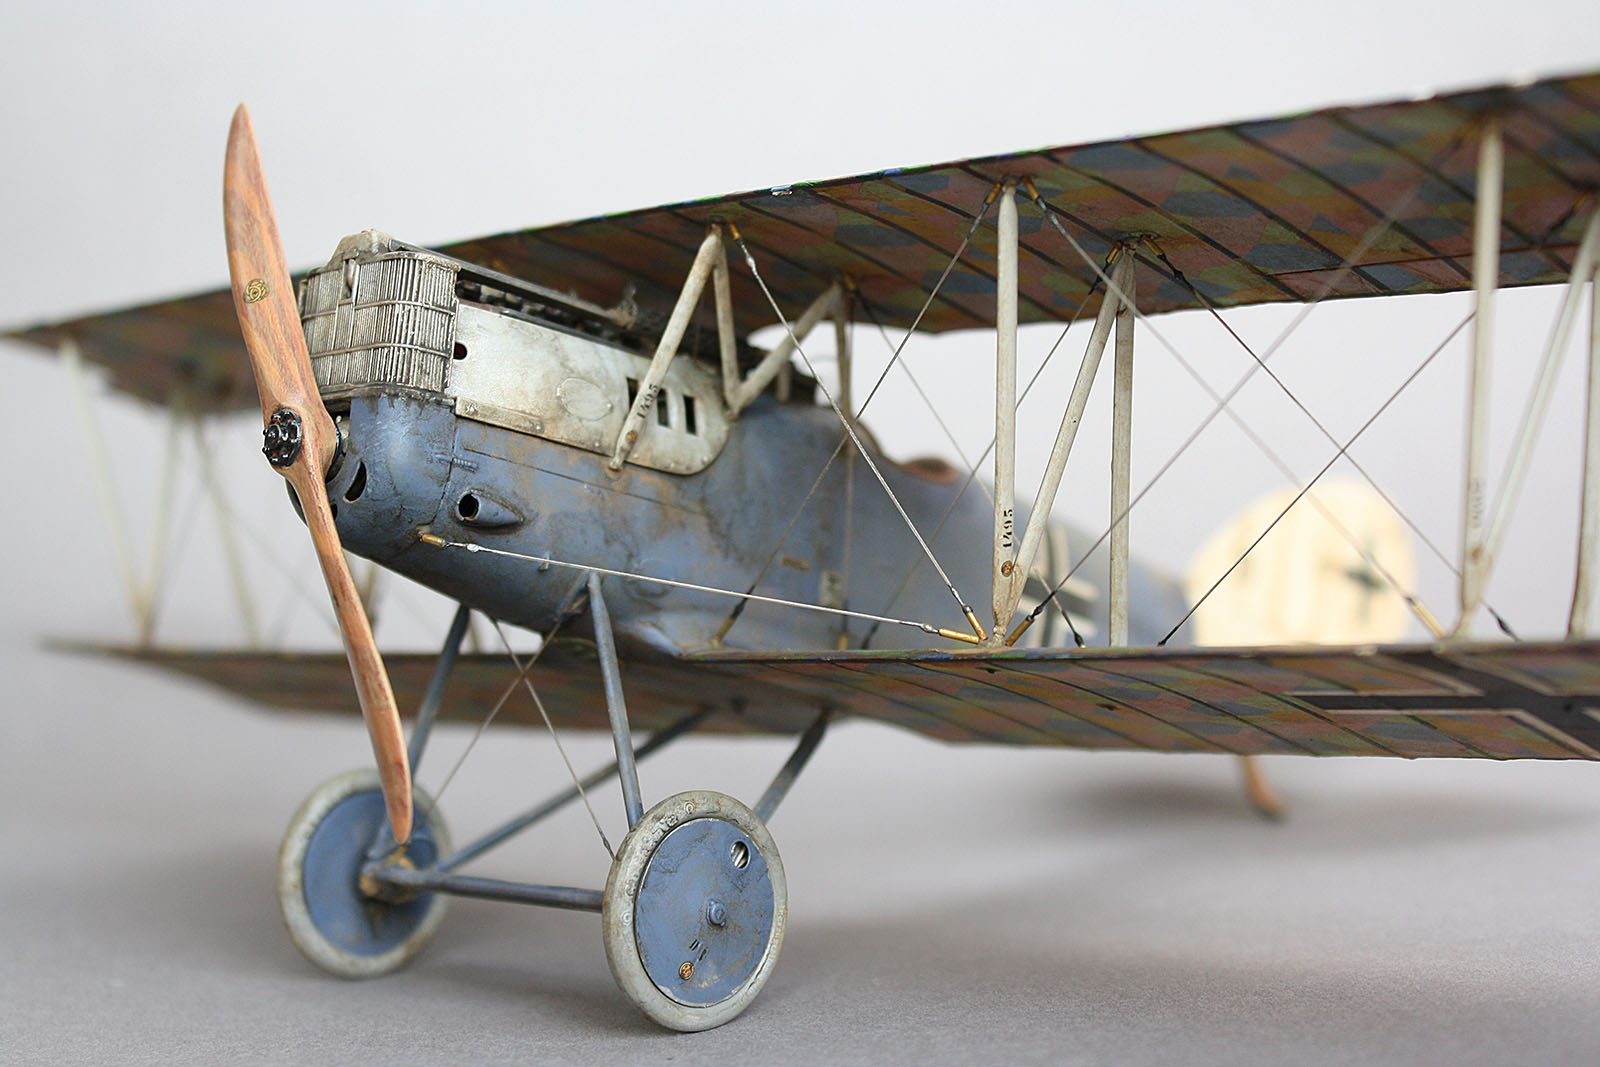
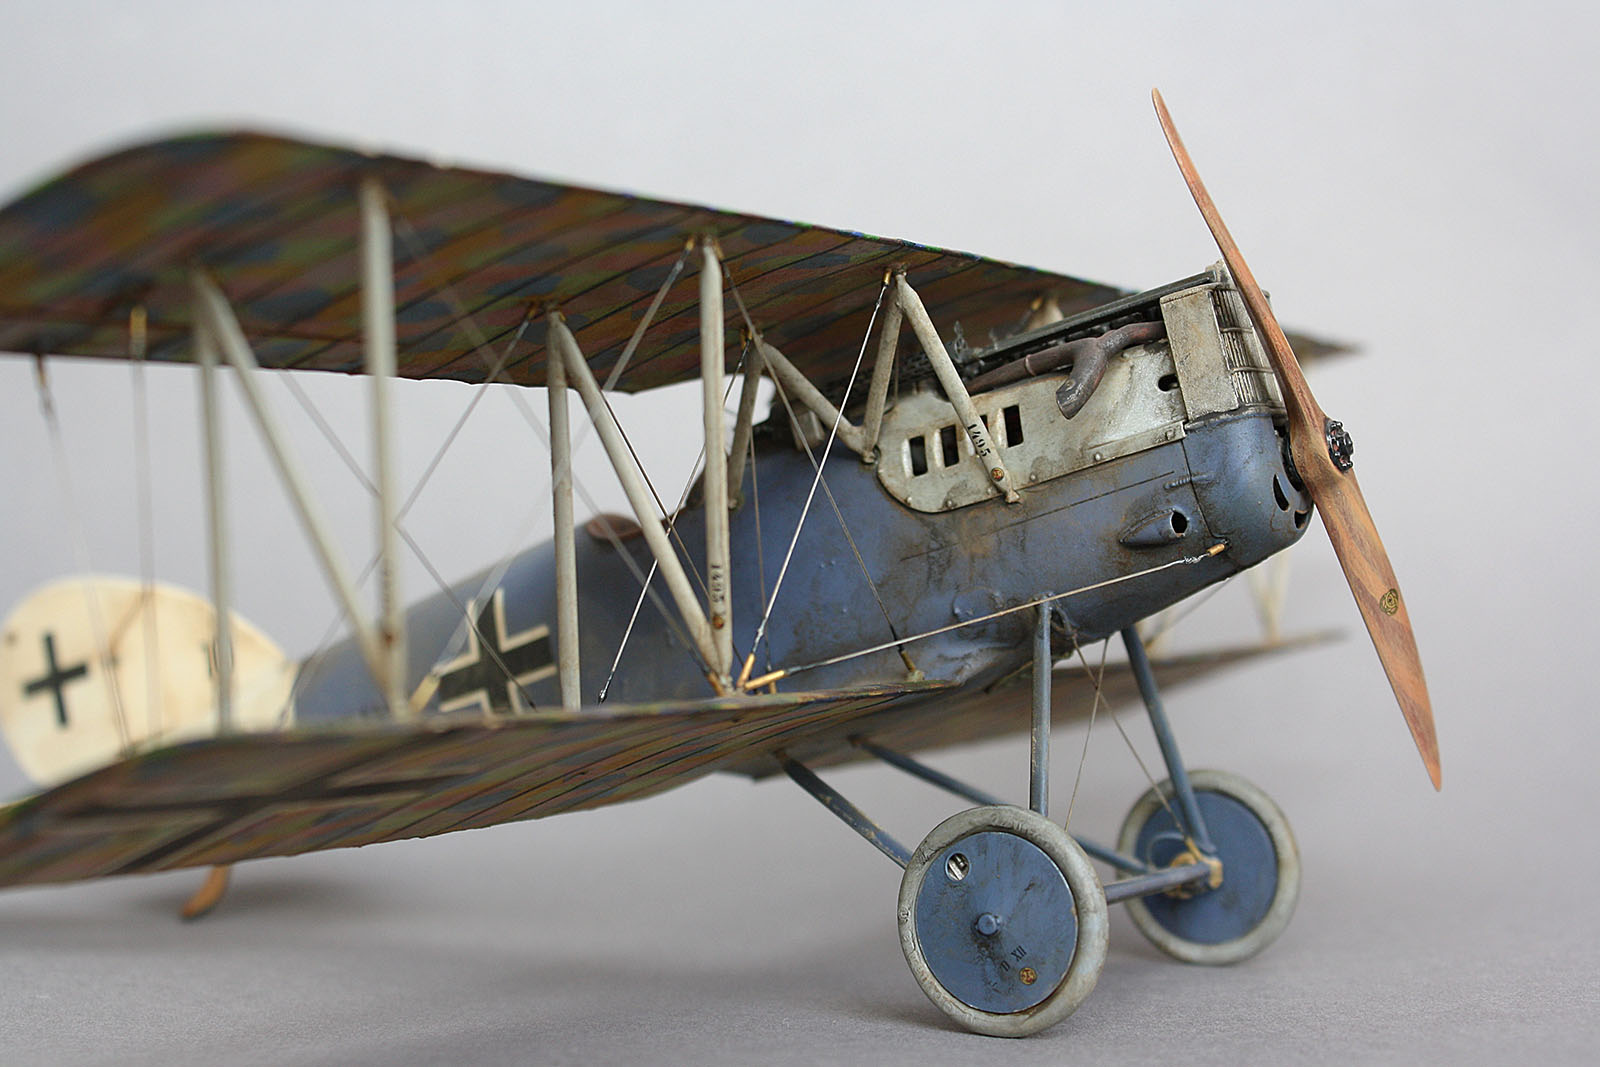
Engine receives a fair amount of oil wash to simulate grime - this is pre-mixed wash that's been sitting around in a jar for weeks, so the resulting mix dries like crud and heavy soot.


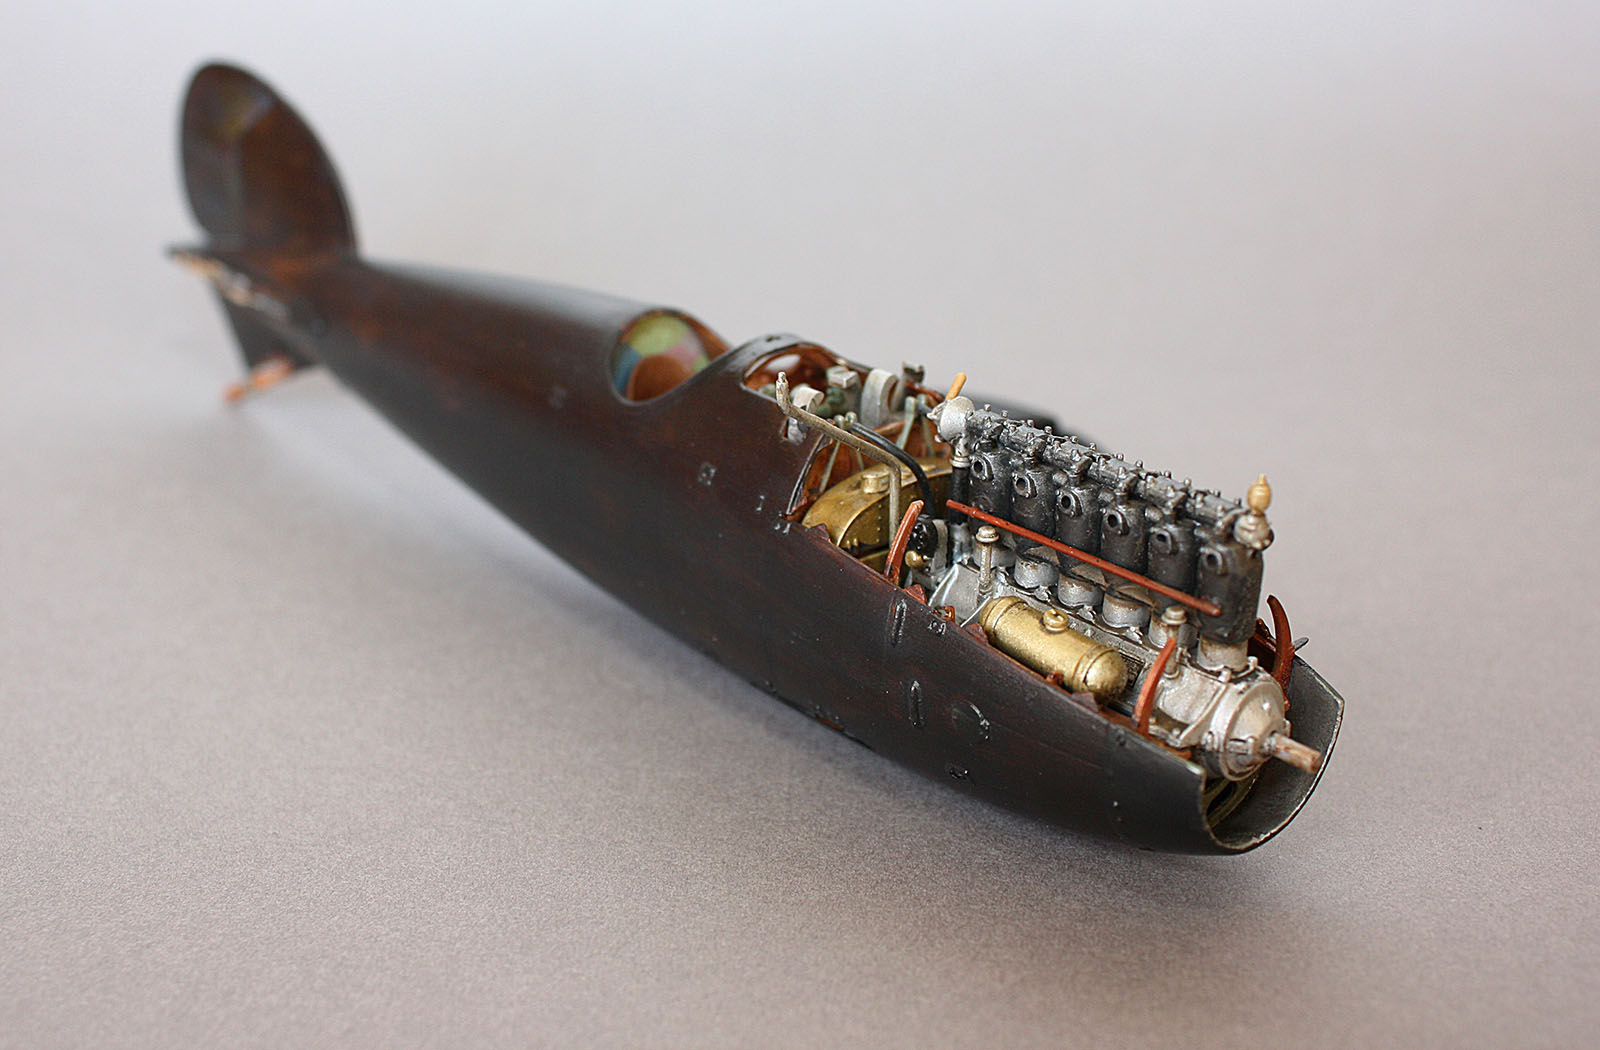
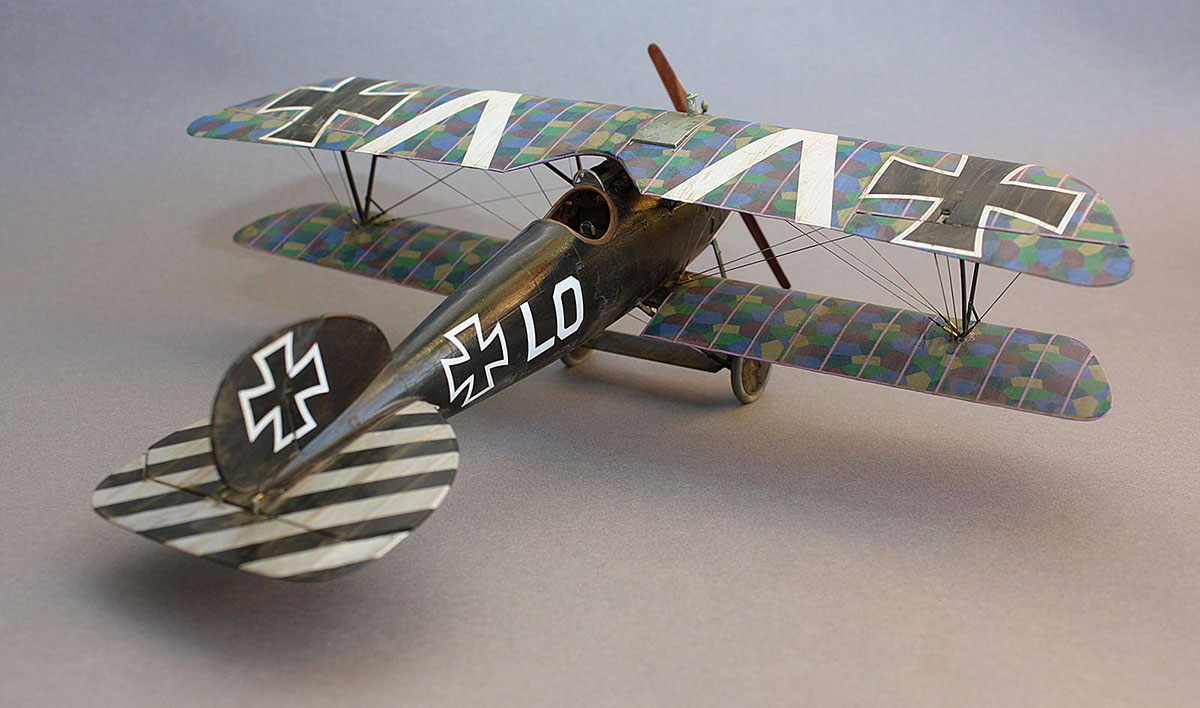
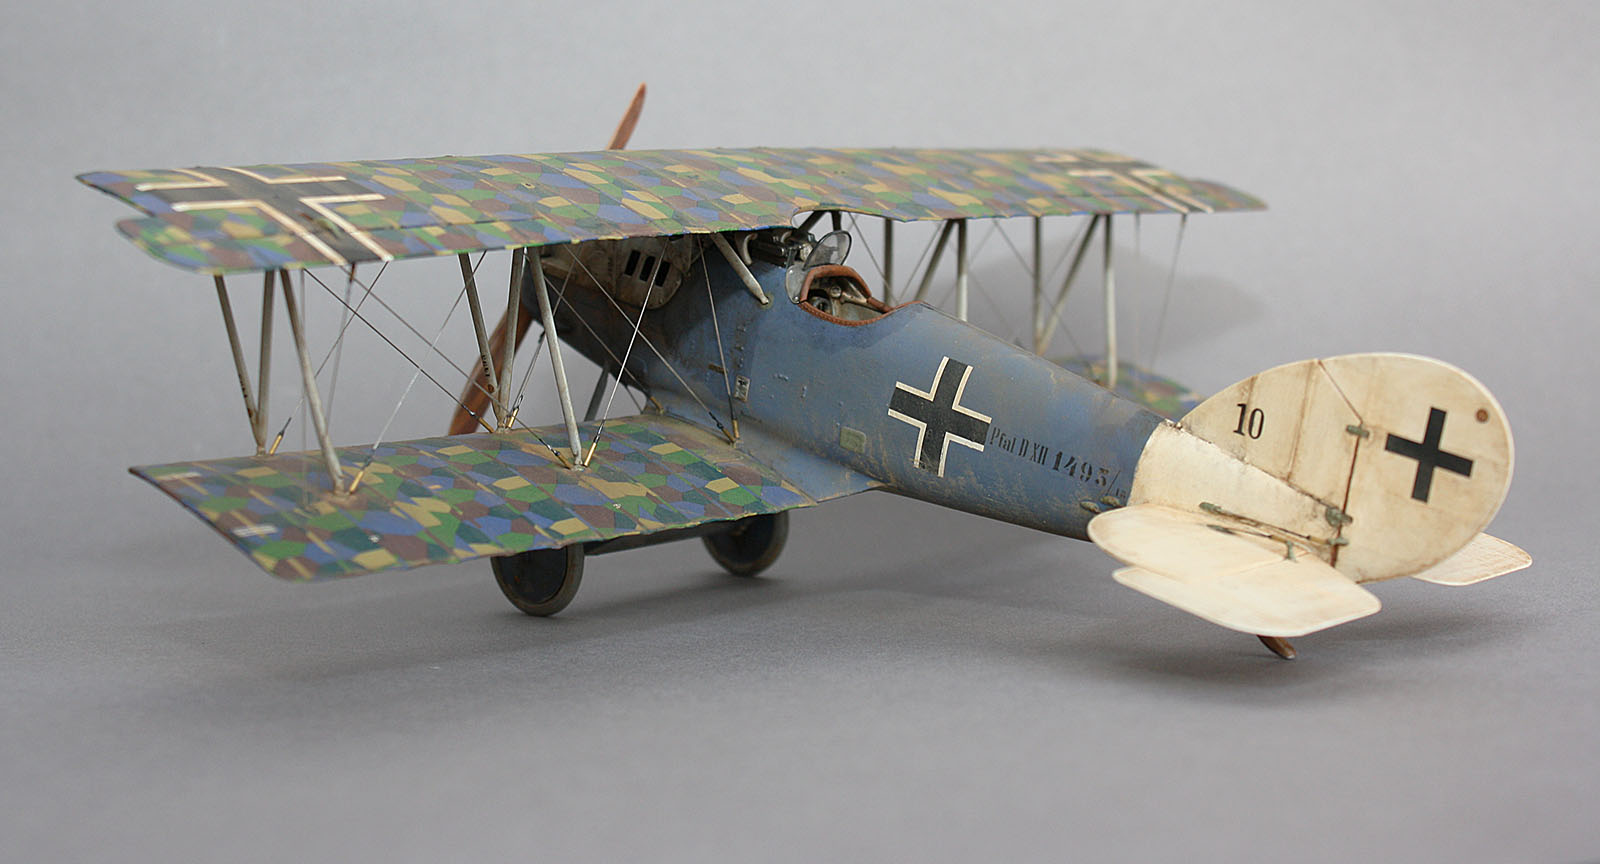
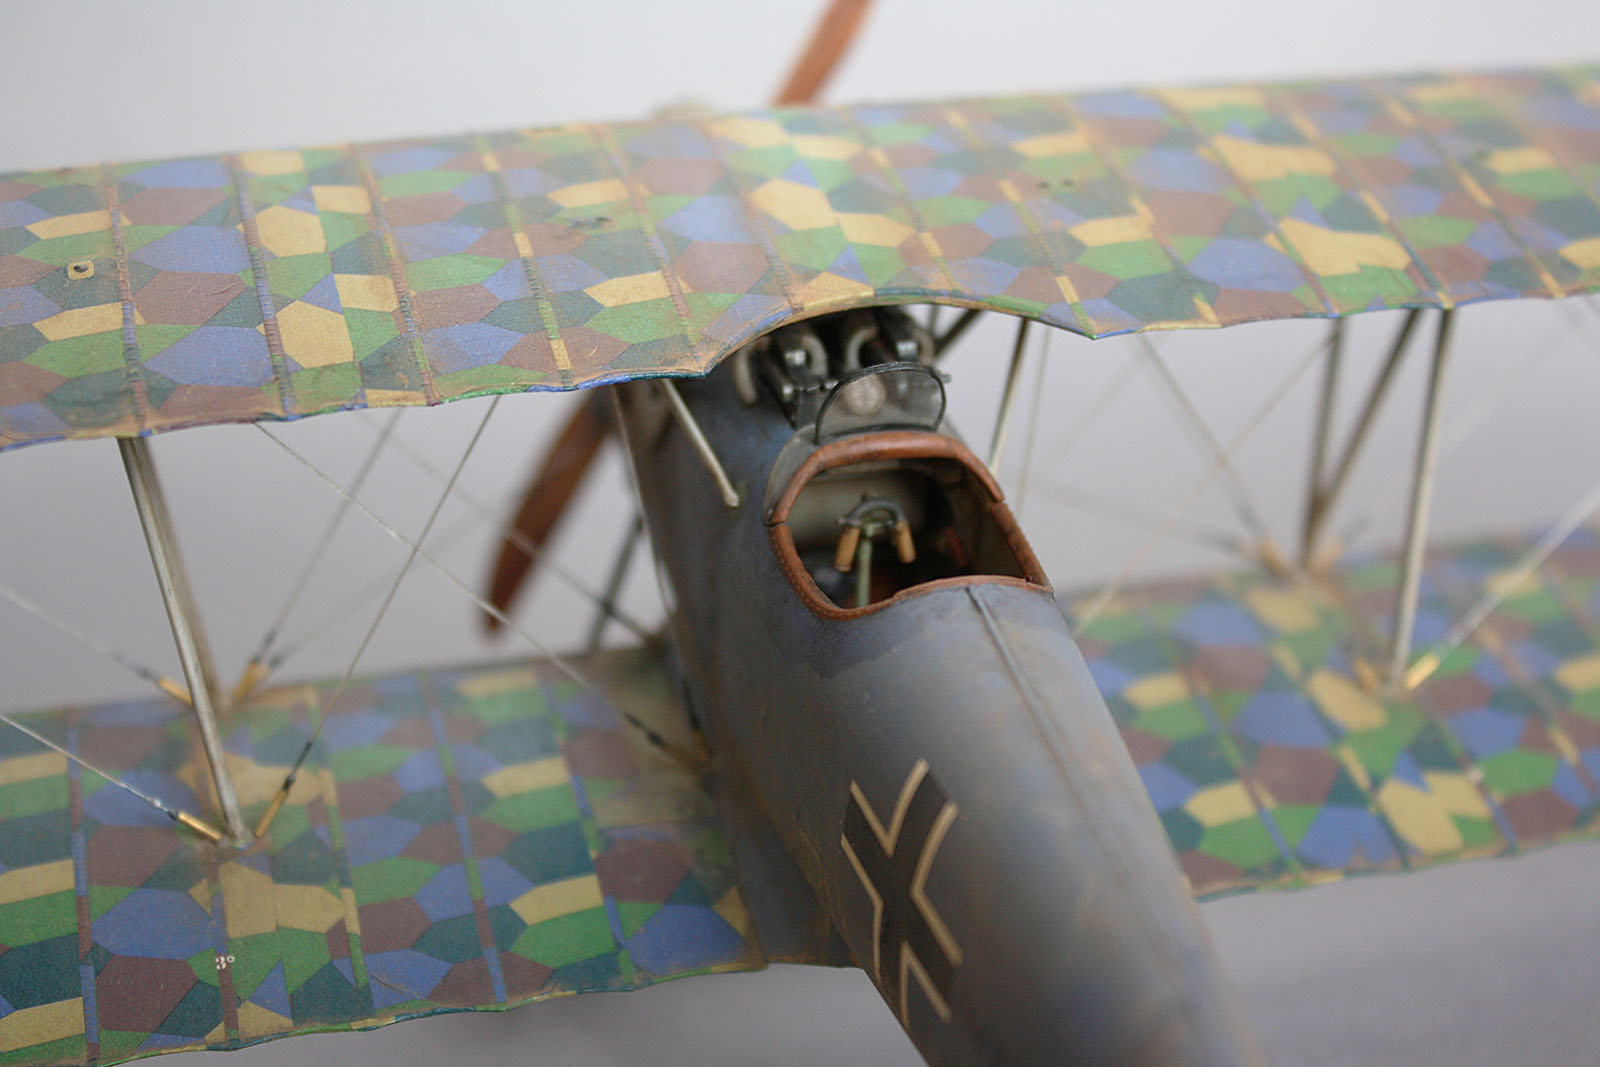
The overall joy of building Early Aviation aircraft is demonstrated here - jumble of steel and aluminum, next to bare brass, both varnished and glazed wood, leather and even a touch of silk-screened fabric...

StukaJr
_VISITCOMMUNITY
California, United States
Joined: April 26, 2010
KitMaker: 346 posts
AeroScale: 292 posts
Posted: Tuesday, December 02, 2014 - 06:36 AM UTC
It was natural to keep piling on the Albatros, to keep the momentum going:


Note that the black glaze color has not changed, other than application of white decals (auto white balance setting on the camera) and more applications of gloss coat - the fuselage looking a lot more black than brown, with wood showing barely and in between.

Lozenge on wheels and rudder, followed subtle application of black paint over it. Got the idea from seeing it on Terri's SSD.III (also Udet) - props where it's due. Since I'm painting with Acryl, it helps to seal lozenge decal with either gloss or flat prior to "glazing" - acryl appears to hate the surface of set decal and curdles in all the wrong ways.

Spandau guns, inner wing struts, cowling and most of fuselage coloring are done - landing gear and wheels are set and rigged.

Historical note - I've jumbled up the dates in my head and now should hedge that Udet is possibly waiting for the New Fokker, but DR.I rather than a D.VII

StukaJr
_VISITCOMMUNITY
California, United States
Joined: April 26, 2010
KitMaker: 346 posts
AeroScale: 292 posts
Posted: Thursday, December 04, 2014 - 04:08 AM UTC
Onto Pfalz D.XII - the fuselage closed around the interior frame rather nicely - thickness of paint did not interfere with parts fit as much as on other kits. This is partially due to fuselage halves having very little detail that actually needs to mesh with interior.


Color came out a lot more baby blue in the picture and more of a night blue on the real model.
StukaJr
_VISITCOMMUNITY
California, United States
Joined: April 26, 2010
KitMaker: 346 posts
AeroScale: 292 posts
Posted: Thursday, December 04, 2014 - 05:47 AM UTC
Some decals are applied, lower wing with pre-cut and rib-taped lozenge, early engine cowlings, tail control surfaces waiting for the rudder...


Mcleod
_VISITCOMMUNITY
Alberta, Canada
Joined: April 07, 2010
KitMaker: 1,028 posts
AeroScale: 939 posts
Posted: Thursday, December 04, 2014 - 09:31 AM UTC
Very impressive builds, Ivan. I'm glad you are posting as you go, the work is so interesting and I'm looking forward to more. Well done
thegirl
_VISITCOMMUNITY
Alberta, Canada
Joined: January 19, 2008
KitMaker: 6,743 posts
AeroScale: 6,151 posts
Posted: Friday, December 05, 2014 - 05:25 AM UTC
Hey , you been a very busy boy here Ivan . Wasn't expecting such a high out put


I really like how your effect turned out on ( LO ) .
You pulled it off beautifully !

Now the Pfalz , oh my that is looking really sharp ! How did you find the kit decals ? Little surprised that you did use after mark like must folks .

Are you going to tone them down ?


Terri
StukaJr
_VISITCOMMUNITY
California, United States
Joined: April 26, 2010
KitMaker: 346 posts
AeroScale: 292 posts
Posted: Friday, December 05, 2014 - 06:21 AM UTC
Ben - you are welcome, thanks for following!

Hi Terri,

I'm posting progress shots of the build(s) not in real time - I've been backlogged on time to process photographs I took, sacrificing the former to get more build time So I'm now compressing about 2 months worth of hobby time into a couple of weeks of posts - Udet's bird is currently done and Pfalz D.XII is nearing upper wing installation.

Pheon Decals provides just the specific markings for this particular scheme - serials and such. The rest of decals are kit's own, including the national markings, plates, badges, instruments and the lozenge. WnW decals are Cartograf, so these work as expected (as in very well) - they adhere and form nicely with MicroSet / MicroSol combo, but strong enough when handling and positioning them early on... Usual precautions (gloss undersurface, warm water etc) go without saying.

I think the Lozenge will stay "factory fresh", though I will seal it with Flat and give it a light dusty wash, so it will be slightly toned down (but not much). Overall wash will also bring overall saturation down a tad.

This is my first time building the DXII and I didn't think I'd enjoy it as much as I do - it looks a lot simpler from afar, but a lot of details go into the build and construction is quite fun.

StukaJr
_VISITCOMMUNITY
California, United States
Joined: April 26, 2010
KitMaker: 346 posts
AeroScale: 292 posts
Posted: Friday, December 05, 2014 - 06:33 AM UTC
Enrst Udet's Albatros DVa has been completed late November - I've been unable to capture more in-progress images. Night time allows for build time, but not photo time - I photograph mostly in day light.

Here's are final pictures, if it looks familiar - you probably voted for one of the November MoM models


The Decal Kit gives options for white lines or chevrons options (which I chose) for top of wings markings - the latter felt less common and more in-line with chevron / arrows painted on fuselage... I don't believe this aircraft has been photographed to show tops of the wings.

Colors and elements of the scheme live up to the "beauty" moniker - 5 color lozenge with pink tapes, black fuselage with white markings and everything else that Albatros has to offer.

Flat and clear coats are applied with a hairy stick (aka the brush) on surfaces, so to further contrast varnished fuselage against the duller surfaces and fabric.

At this stage of the post, I've caught on to events following in real-time - latest progress of the D.XII captured today.
StukaJr
_VISITCOMMUNITY
California, United States
Joined: April 26, 2010
KitMaker: 346 posts
AeroScale: 292 posts
Posted: Sunday, December 07, 2014 - 11:50 PM UTC
Latest shots of the Pfalz D.XII:


This is the stage of assembly where everything (minus the windscreen) is ready for anchoring rigging and installation of struts / top wing... The guns are up, neatly aligned with the flash shields.
StukaJr
_VISITCOMMUNITY
California, United States
Joined: April 26, 2010
KitMaker: 346 posts
AeroScale: 292 posts
Posted: Wednesday, December 10, 2014 - 12:08 AM UTC
My Udet's "Black Beauty" officially made the WnW's "Model Images" for the Decals Set order page...

Edited the images kind of dark, though - still a minor celebrity in my own mind
thegirl
_VISITCOMMUNITY
Alberta, Canada
Joined: January 19, 2008
KitMaker: 6,743 posts
AeroScale: 6,151 posts
Posted: Thursday, December 11, 2014 - 06:07 AM UTC
Hi Ivan ,

Well I must say a very impressive job on Lo !

Your pfalz is progressing nicely . Makes me want to break out Special Hobby's kit .

Congrats as well on having your build on WNW site


Terri
JPTRR
Staff MemberManaging Editor
RAILROAD MODELING
#051
_VISITCOMMUNITY
Tennessee, United States
Joined: December 21, 2002
KitMaker: 7,772 posts
AeroScale: 3,175 posts
Posted: Thursday, December 18, 2014 - 04:23 AM UTC
Loving every picture and sentence, Ivan!

Gosh, the Pfalz XII was a beautiful bird.
StukaJr
_VISITCOMMUNITY
California, United States
Joined: April 26, 2010
KitMaker: 346 posts
AeroScale: 292 posts
Posted: Thursday, December 18, 2014 - 07:18 AM UTC
And the Pfalz D.XII is done! Just in time for the new WnW deliveries


I'll post conclusion / conclusions to summarize both builds.
JackFlash
_VISITCOMMUNITY
Colorado, United States
Joined: January 25, 2004
KitMaker: 11,669 posts
AeroScale: 11,011 posts
Posted: Sunday, December 21, 2014 - 01:36 AM UTC

Quoted Text

It was natural to keep piling on the Albatros, to keep the momentum going. . .


Note: There is a generator on the pilot's right front leg of the under carriage. It was for the electric flight suit he used during the winter of 1917-1918.


Nice completions on both builds!
StukaJr
_VISITCOMMUNITY
California, United States
Joined: April 26, 2010
KitMaker: 346 posts
AeroScale: 292 posts
Posted: Monday, December 22, 2014 - 12:46 AM UTC

Quoted Text


Note: There is a generator on the pilot's right front leg of the under carriage. It was for the electric flight suit he used during the winter of 1917-1918.


Nice completions on both builds!


Thanks for feedback and for pointing out the missing detail... Didn't know that generators were used to power heating suits at that time, so didn't think they belonged on anything but the two seaters... Electric heating suit sounds pretty advanced technology for the time!

 _GOTOTOP