_GOTOBOTTOM
World War II: Great Britain
Aircraft of Great Britain in WWII.
Hosted by Rowan Baylis
When an armor guy builds aircraft
AndyMcHun
_VISITCOMMUNITY
Scotland, United Kingdom
Joined: November 27, 2010
KitMaker: 47 posts
AeroScale: 4 posts
Posted: Tuesday, November 04, 2014 - 10:49 AM UTC
Hi all!

Apart from a few disastrous attempts in my early teens I exclusively build 1:35 scale armor so this blog is going to be very special. For me at least.

The guys at my local modelling club (http://www.sdpmc.uk/) convinced me to build one aircraft to celebrate the 80th anniversary of the first flight of the legendary Spitfire. The model should be finished by 2016 but due to lack of time on my hands I decided to start building the bird soon as.

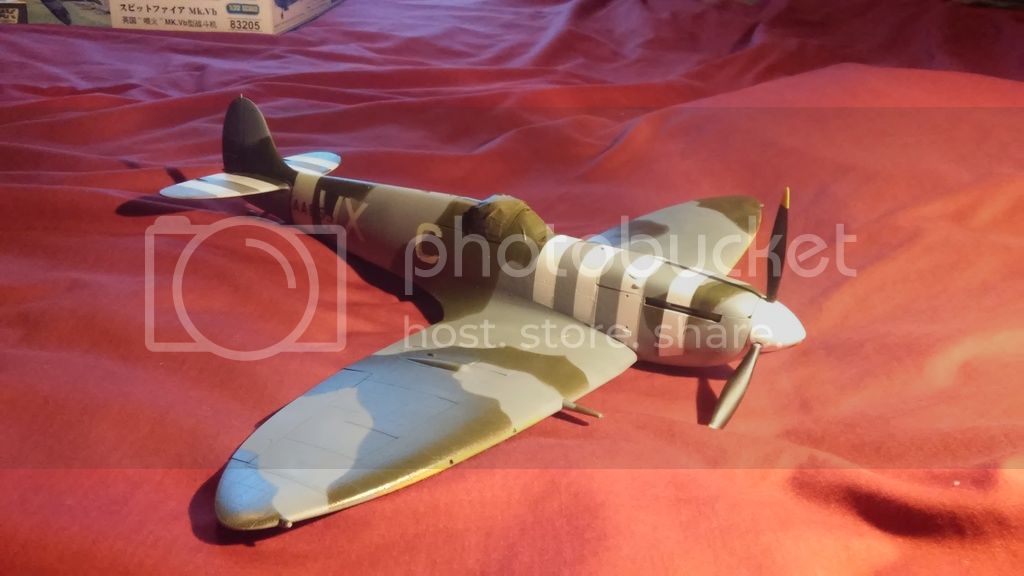
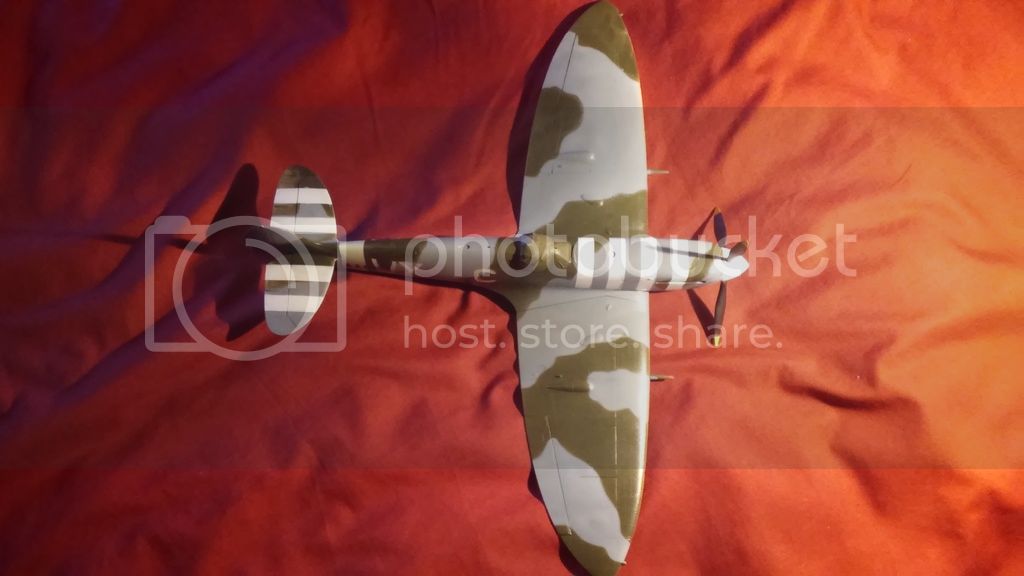
I picked a 1:32 scale (just to stay in my comfort zone) Mk.Vb from HobbyBoss. Great kit, I am very pleased. Crisp details, fantastic fit, not too complicated assembly. I try to work on it as much as I can.

The progress so far:


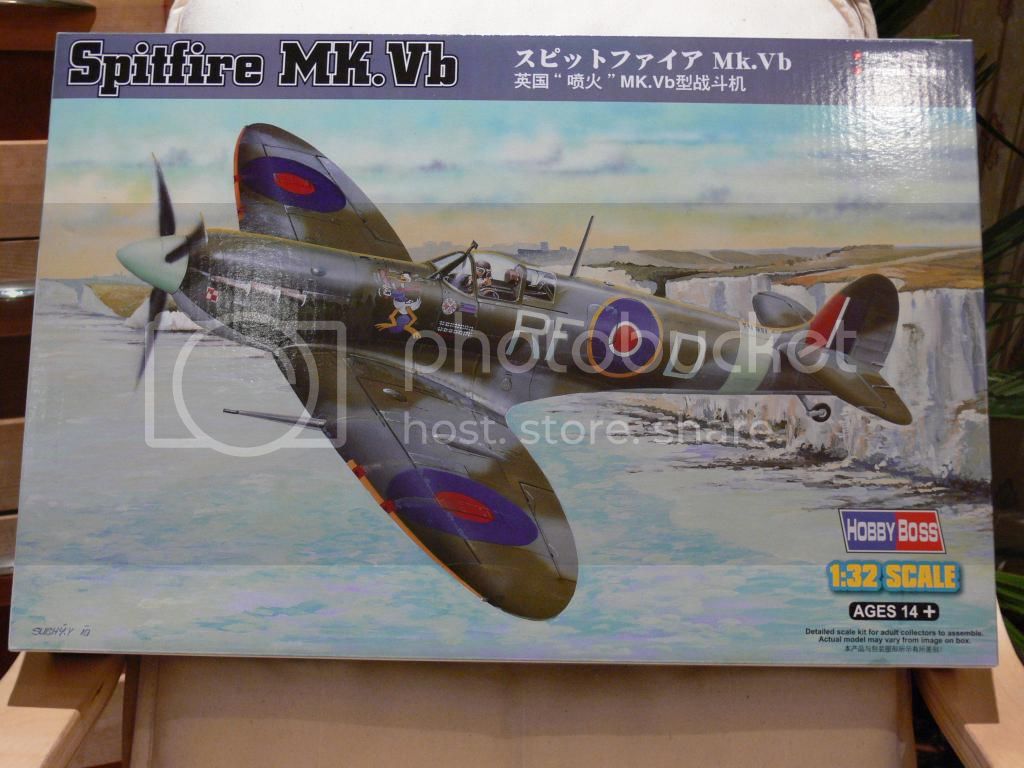
Nice artwork. I am going to build the very same aircraft for I wanted to represent a fighter from the famous 303rd squadron.


The most difficult part so far. According to the assembly instructions I was supposed to transfer the decal onto a heavily textured surface. 
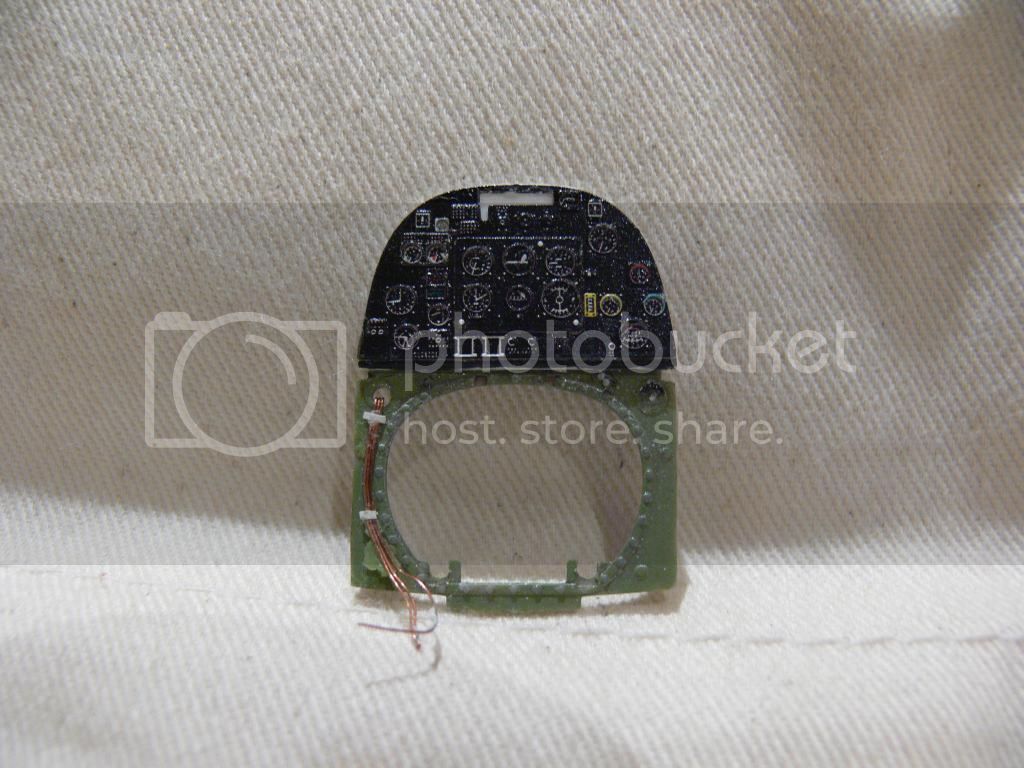
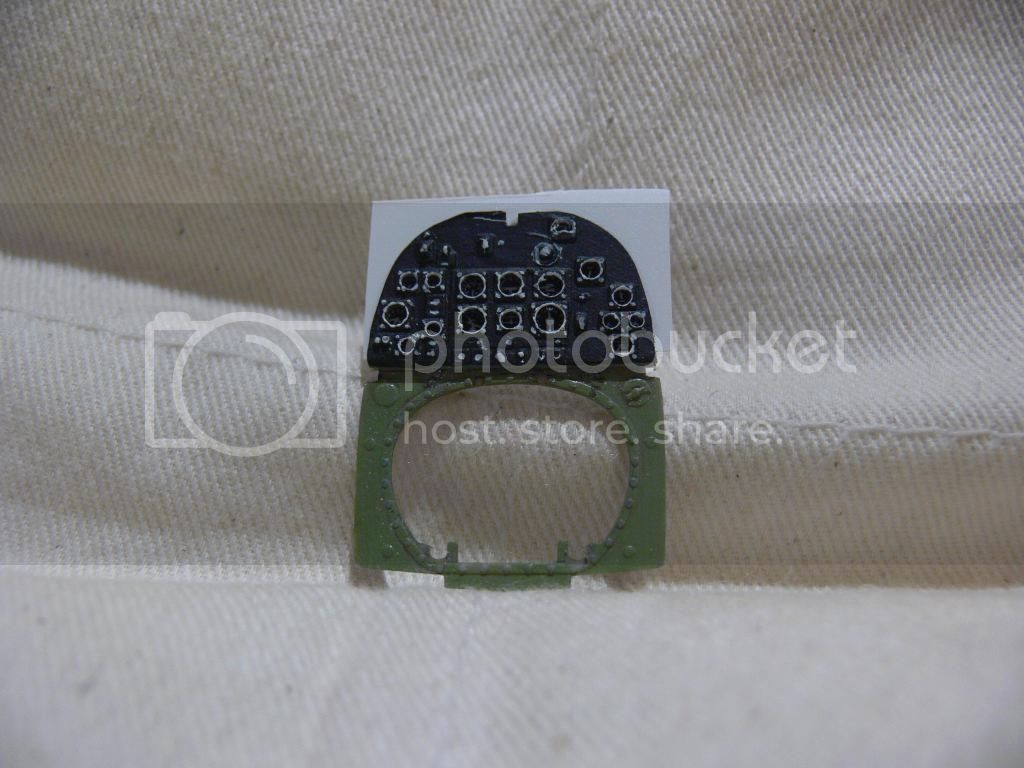
I decided to drill the holes for the dials but realised the instrument panel was way too thick and the dials were barely visible. I grabbed my Xacto saw and my Dremel tool and made the panel thinner.


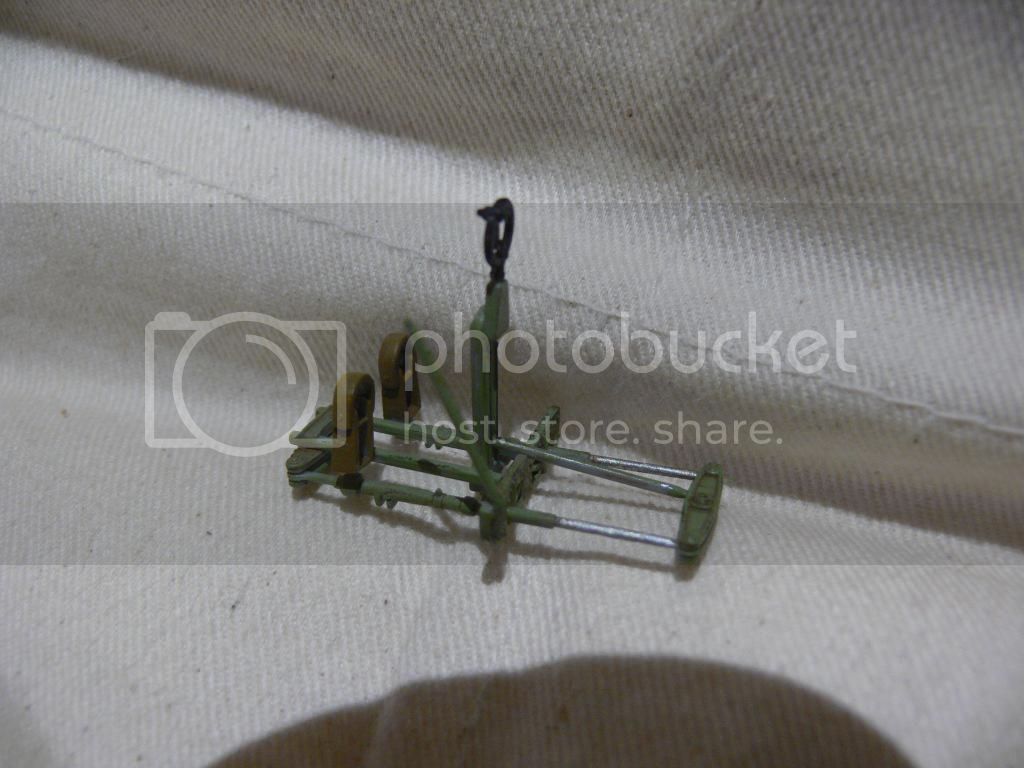
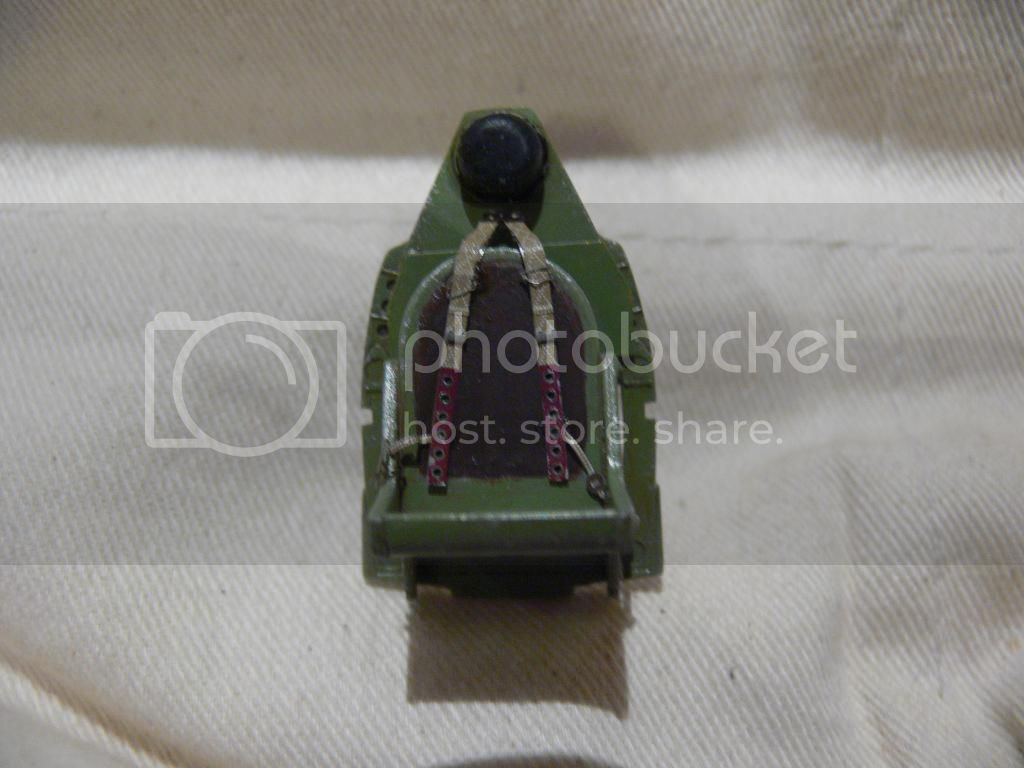
The rudder pedals need to be repainted.


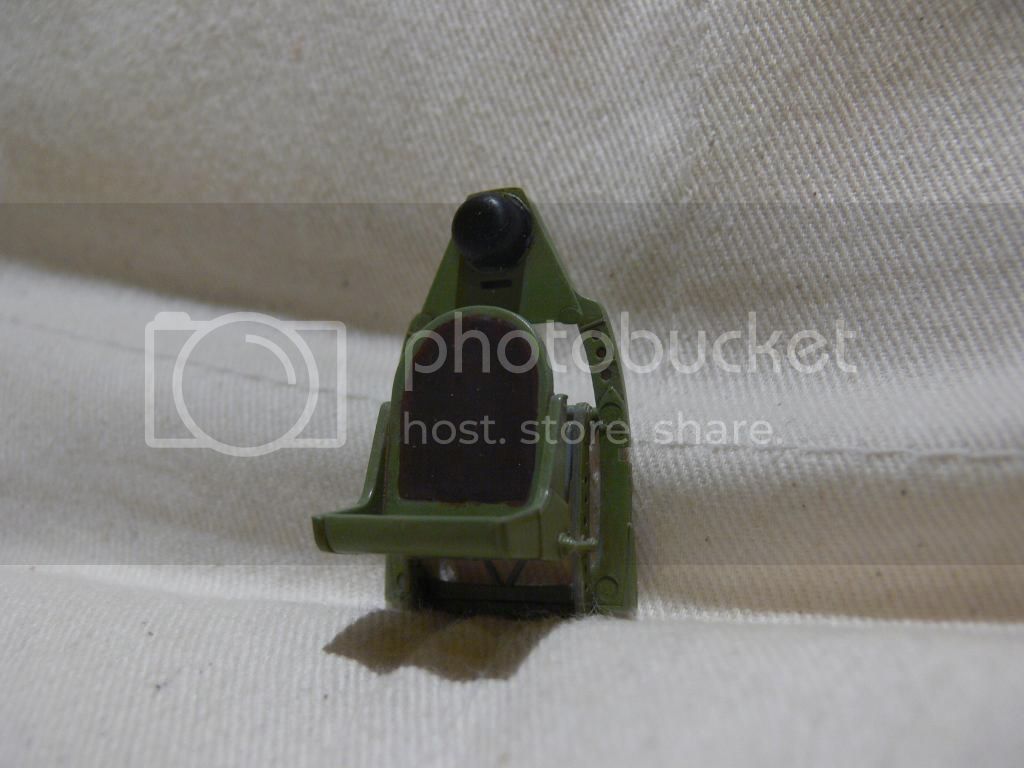
The armor plate and the seat belt (am I calling it right?) are missing.


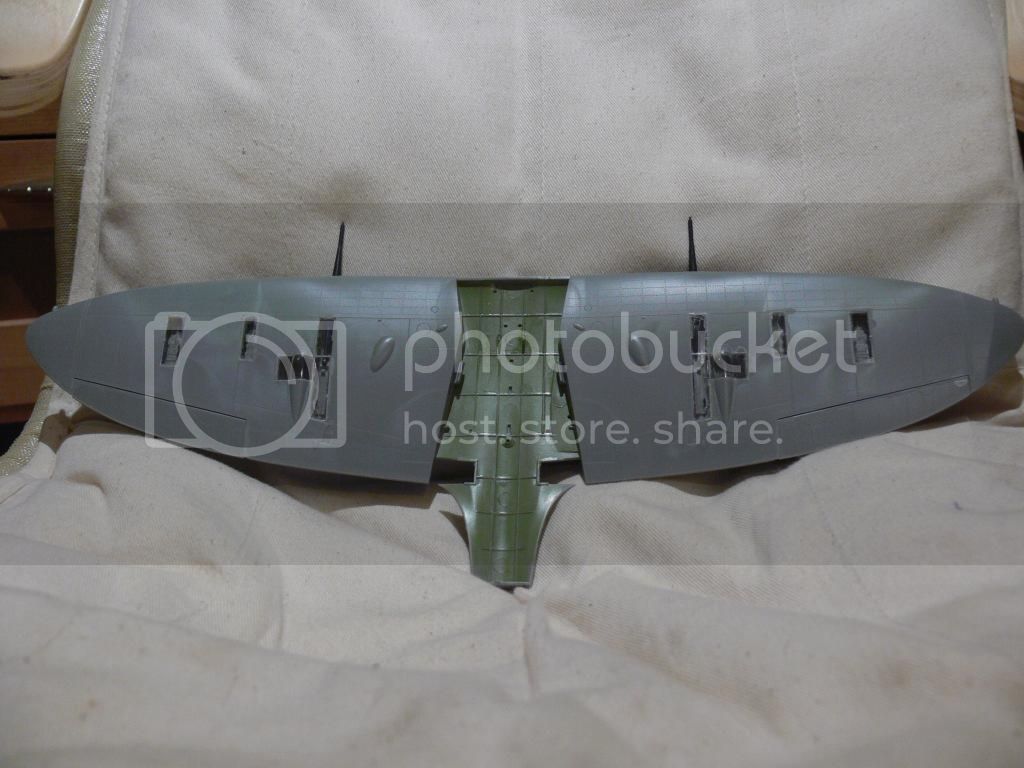
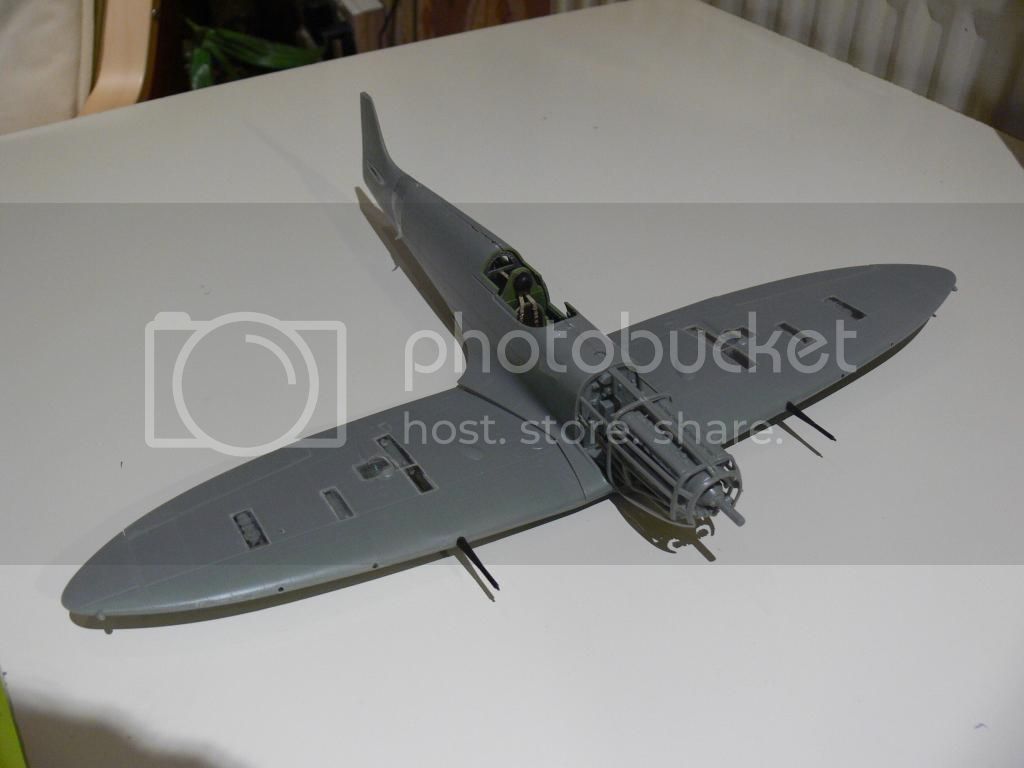
A foot long wingspan. Awesome details. Perfect fit. Very impressed.


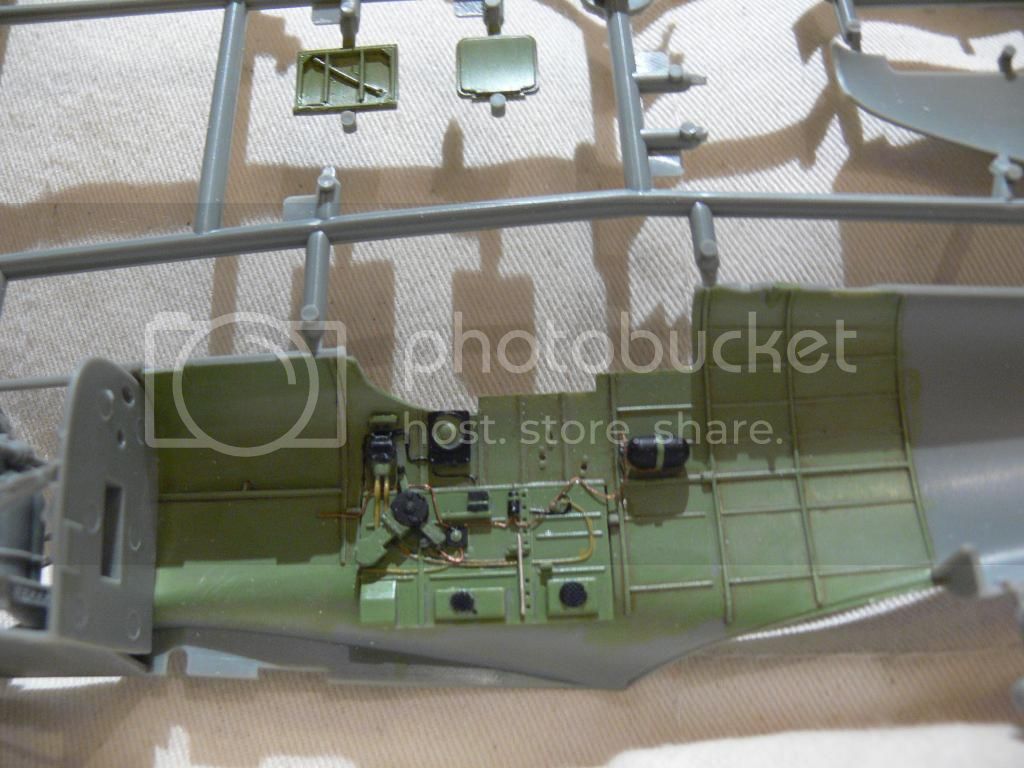
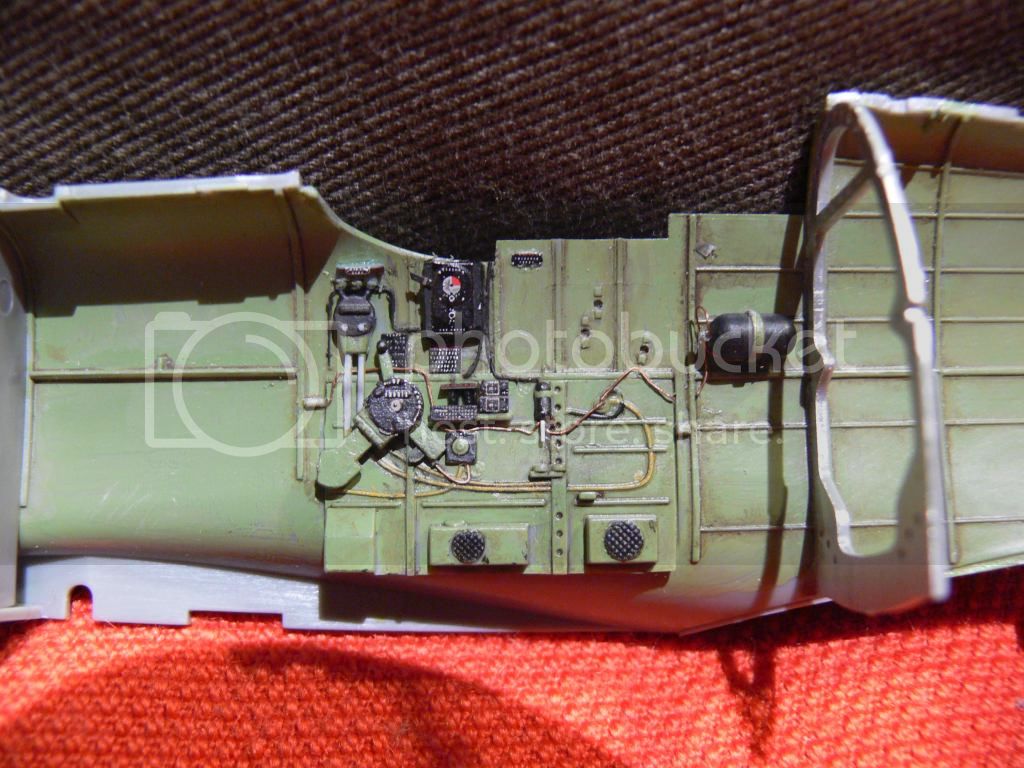
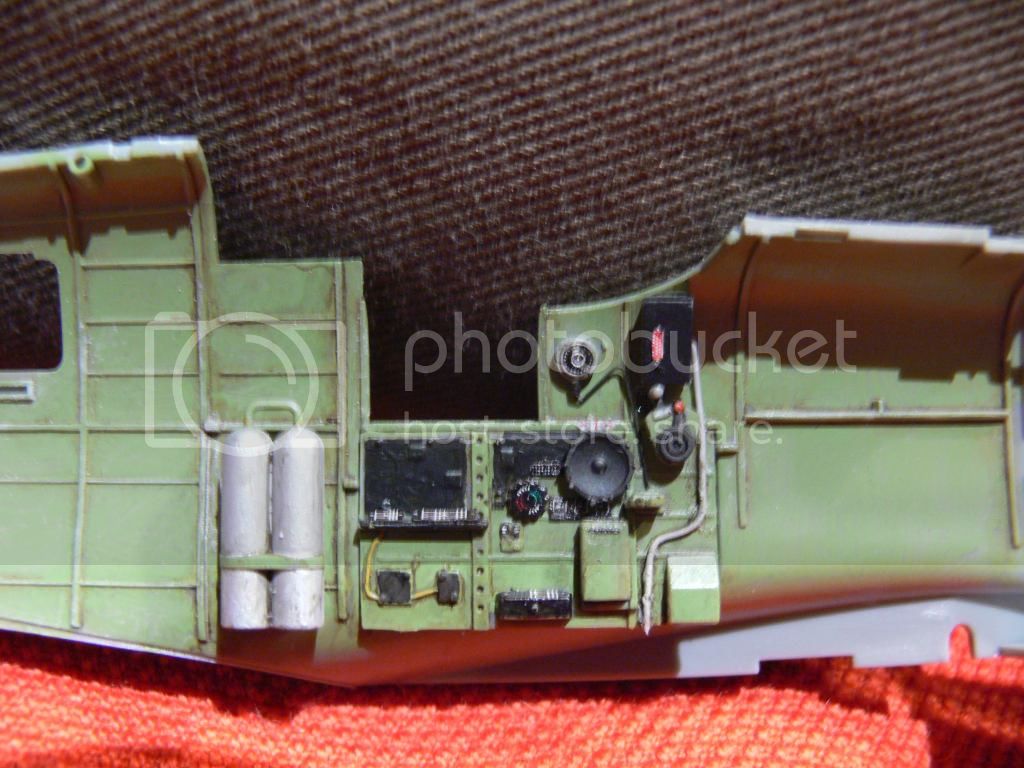
The side panels in the cockpit looked a wee bit vague so I added a few more wires to represent pipes a wires. More just coming.


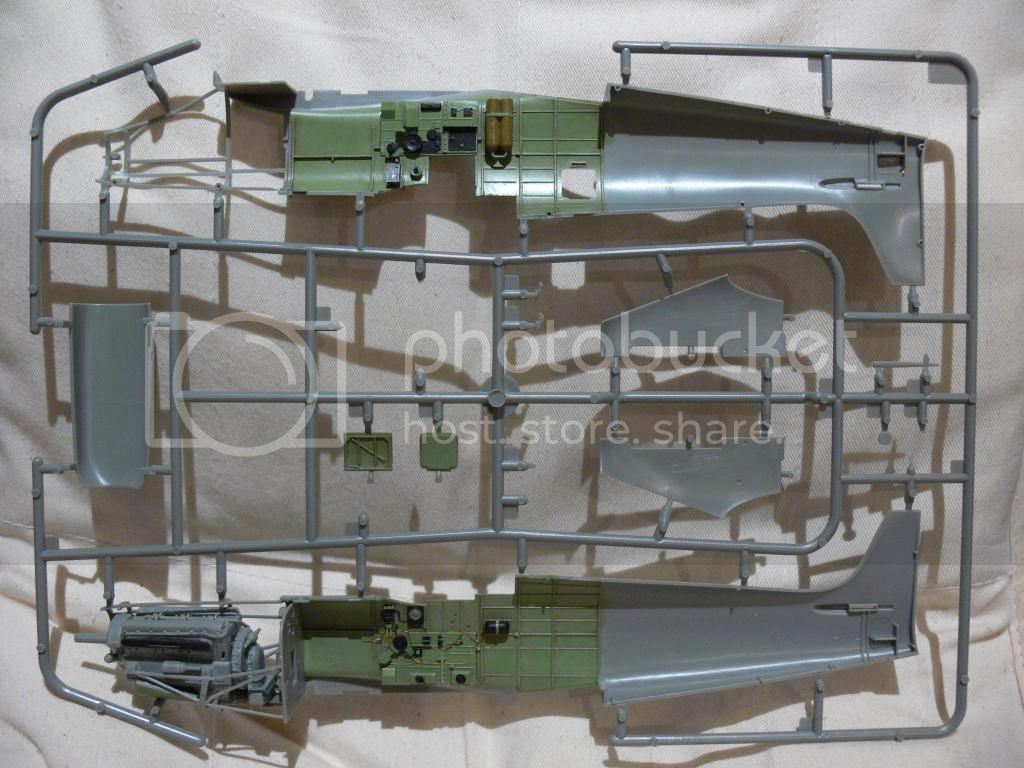
The Merlin in the nose is going to be fully covered so I did not even bother to paint it.

That's it for now.

Thanks for watching

Andy
tinbanger
_VISITCOMMUNITY
Ontario, Canada
Joined: February 04, 2008
KitMaker: 2,507 posts
AeroScale: 1,814 posts
Posted: Tuesday, November 04, 2014 - 11:03 AM UTC
Welcome to the dark side Andy!
Nice work.
Jessie_C
_VISITCOMMUNITY
British Columbia, Canada
Joined: September 03, 2009
KitMaker: 6,965 posts
AeroScale: 6,247 posts
Posted: Tuesday, November 04, 2014 - 01:20 PM UTC
Before you get that cockpit zipped up, take a look around The Anatomy of a Spitfire's Cockpit. It's by far the most accurate Spitfire since Supermarine stopped building them

The missing armour plate may be cut from flat plastic card, and the seat belts fabricated from masking tape and wire following the evidence provided in the pictures.

I'm looking forward to the rest of your build
JPTRR
Staff MemberManaging Editor
RAILROAD MODELING
#051
_VISITCOMMUNITY
Tennessee, United States
Joined: December 21, 2002
KitMaker: 7,772 posts
AeroScale: 3,175 posts
Posted: Tuesday, November 04, 2014 - 03:02 PM UTC
I'll be watching this thread.
berndm
_VISITCOMMUNITY
Niedersachsen, Germany
Joined: March 26, 2014
KitMaker: 844 posts
AeroScale: 630 posts
Posted: Tuesday, November 04, 2014 - 07:44 PM UTC
Hi Andy, nice start, have a lot of fun, building aircrafts, from time to time building something different is good.

I am an aircraft modeller building AFVs in 1/72 currently

Cheers
Bernd
AndyMcHun
_VISITCOMMUNITY
Scotland, United Kingdom
Joined: November 27, 2010
KitMaker: 47 posts
AeroScale: 4 posts
Posted: Wednesday, November 05, 2014 - 12:24 AM UTC
Thank You for the kind words and the warm welcome.

@Jessie: I am actually using that site for reference. It's a brilliant source of information indeed. However I don't want to super detail the cockpit because most of them won't be visible and I don't have much time either.

@Bernd: It's good fun indeed doing something completely different once in a while. Maybe in the future I will build more warbirds. Who knows?

Thank for reading me

Andy
berndm
_VISITCOMMUNITY
Niedersachsen, Germany
Joined: March 26, 2014
KitMaker: 844 posts
AeroScale: 630 posts
Posted: Wednesday, November 05, 2014 - 03:05 AM UTC
Hi Andy, believe me, if you have build one, you will have a second one.
Its good to mix up the interests

Bernd
Joel_W
Staff MemberAssociate Editor
AUTOMODELER
_VISITCOMMUNITY
New York, United States
Joined: December 04, 2010
KitMaker: 11,666 posts
AeroScale: 7,410 posts
Posted: Wednesday, November 05, 2014 - 03:07 AM UTC
Andy,
Welcome to our Dark Side of Wingy things. I stopped by several years ago from Armorama, and still haven't left.

Nice choice of scale and kit. Your interior is coming along quite nicely. As for your IP, that was an excellent decision not to try and use the decal on top. Never looks good as it's almost impossible to get the decal to settle down around all the faces and in the correct position. Don't forget to add a few drops of Future/Pledge on to each instrument. Once dried you have a perfect glass lens.

Check Jessica's reference site for the correct color of the rudder pedals.

Joel

AndyMcHun
_VISITCOMMUNITY
Scotland, United Kingdom
Joined: November 27, 2010
KitMaker: 47 posts
AeroScale: 4 posts
Posted: Monday, November 24, 2014 - 04:08 AM UTC
Hello!

I have managed to work some more on the warbird in the past couple of weeks, so here is the progress:


After studying the reference pictures long enough I have convinced myself, that I needed to buy the cockpit upgrade set from Eduard's Zoom range. Awesome details, happy modeller.


The details on the seat belts are far superior to the kit's PE set.


I have purchased the placard set also, in order to add some more details.


The other side.


Dry fitting. Looks almost like an aircraft.

That's for now.

Thanks for watching,

Andy
Berwickboy
_VISITCOMMUNITY
England - East Midlands, United Kingdom
Joined: April 27, 2013
KitMaker: 450 posts
AeroScale: 387 posts
Posted: Monday, November 24, 2014 - 04:43 AM UTC
Hi Andy. That is a superb looking instrument panel.

You might like to read this review from Modelling Madness http://www.modelingmadness.com/review/allies/gb/lundspit5.htm I suggest this as it points out an inaccuracy in the tail. I wouldn't worry too much about the other 'faults; as it looks like a Spitfire Vb and you're building it for your satisfation
Joel_W
Staff MemberAssociate Editor
AUTOMODELER
_VISITCOMMUNITY
New York, United States
Joined: December 04, 2010
KitMaker: 11,666 posts
AeroScale: 7,410 posts
Posted: Monday, November 24, 2014 - 07:35 PM UTC
Andy,
That's a huge improvement to the IP and bulkhead. The seat harness really looks quite good. Are you planning on having all those gun bays open?
Joel
drabslab
_VISITCOMMUNITY
European Union
Joined: September 28, 2004
KitMaker: 2,186 posts
AeroScale: 1,587 posts
Posted: Monday, November 24, 2014 - 08:05 PM UTC
Armor guys build quite nice aircraft, I have to say
AndyMcHun
_VISITCOMMUNITY
Scotland, United Kingdom
Joined: November 27, 2010
KitMaker: 47 posts
AeroScale: 4 posts
Posted: Thursday, November 27, 2014 - 10:05 PM UTC
Hello all!

Thank You for the kind words.

@Mike: Thanks for the link. Much appreciated. I can see the problem with the tail and the wrong radius in front of the canopy, but I think I can live with these inaccuracies.

@Joel: Thanks for Your comment. I am not going to leave those gun bays open. The "lids" are actually clear parts but I am going to paint them.

Thanks for reading.

Andy
Removed by original poster on 02/21/16 - 21:42:39 (GMT).
AndyMcHun
_VISITCOMMUNITY
Scotland, United Kingdom
Joined: November 27, 2010
KitMaker: 47 posts
AeroScale: 4 posts
Posted: Sunday, February 21, 2016 - 02:51 AM UTC
Hi all,

It's been a long time since I was working on the old bird. I started working on it again. Well, mostly because of the deadline at the end of April (not entirely true)

The building phase was almost done so nothing really had to be done. The painting however...

I have changed my mind on the camouflage scheme. Instead of the 303rd sq. I went for the 302nd. I just love the invasion stripes.

Hope you like them:


Cheers,

Andy
 _GOTOTOP