_GOTOBOTTOM
World War II
Discuss WWII and the era directly before and after the war from 1935-1949.
Hosted by Rowan Baylis
pin was to spitfire panel lines
nick_pal
_VISITCOMMUNITY
South Australia, Australia
Joined: July 09, 2014
KitMaker: 327 posts
AeroScale: 41 posts
Posted: Monday, October 20, 2014 - 09:45 AM UTC
As I don't regularly make.model.planes, I was wondering of what methods I could use to get a wash through my panel lines, preferably using acyrlics.


Here is the intended victim..
SgtRam
Staff MemberEditor-at-Large
AEROSCALE
#197
_VISITCOMMUNITY
Ontario, Canada
Joined: March 06, 2011
KitMaker: 3,971 posts
AeroScale: 511 posts
Posted: Monday, October 20, 2014 - 10:26 AM UTC
For panel lines, I use Mig Dark Wash over a coat of Future. I apply it to the panel lines, allow it to dry a little, then rub off in the direction of the air flow. If it is a little thick or too dry in spots, you can use a q-tip dipped in thinner.

Hope that helps.

stooge
_VISITCOMMUNITY
South Australia, Australia
Joined: June 20, 2013
KitMaker: 210 posts
AeroScale: 210 posts
Posted: Monday, October 20, 2014 - 10:38 AM UTC
Not the Utube I was looking for but still covers the ground.

https://www.youtube.com/watch?v=QrCueONhuko
nick_pal
_VISITCOMMUNITY
South Australia, Australia
Joined: July 09, 2014
KitMaker: 327 posts
AeroScale: 41 posts
Posted: Monday, October 20, 2014 - 06:54 PM UTC
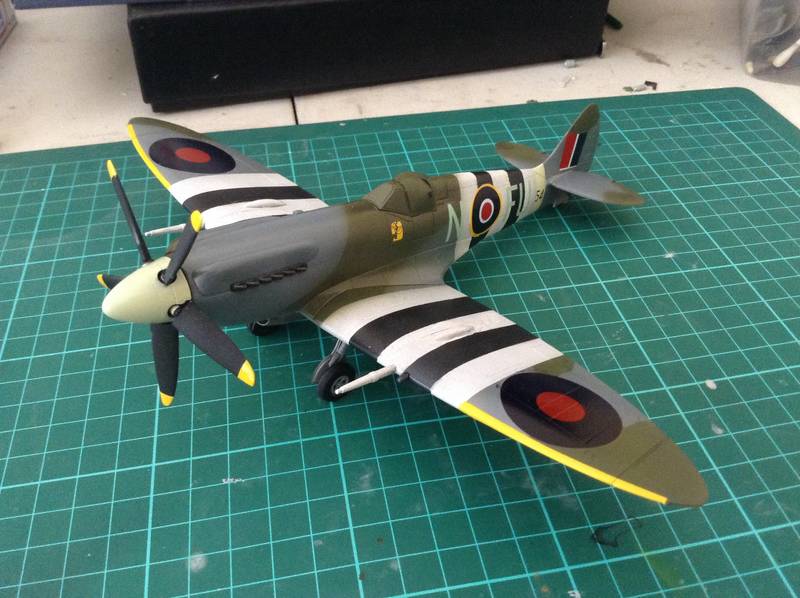
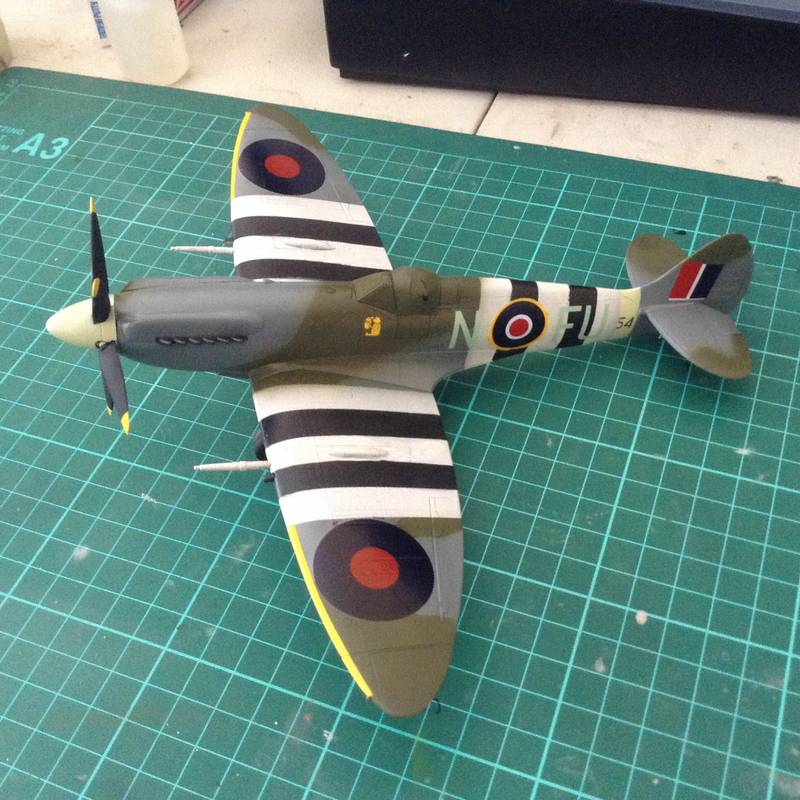
So after a few hours I have managed to paint the leading edge on the wing yellow, as well as the prop tips. I also painted the spinner and rear I.d band sky.

Thanks to the 37oC day and the dry air temp the paint dried in no time at all, so I moved on with the decals. I used the kit roundels, which are way to thick, so I set them down with some mr hobby mr mark softer. Then for the letters i used the Ventura decal set as seen in my starting pic. After reading a few reviews and a test of a spares decal...I agreed with the reviews, that these are thin fragile decals..maximum care needed.

I feel as though I should have bought different roundels, but as I wanted to build this kit OOB as much as possible I went with the kit ones.has it let the model down??


nick_pal
_VISITCOMMUNITY
South Australia, Australia
Joined: July 09, 2014
KitMaker: 327 posts
AeroScale: 41 posts
Posted: Monday, October 20, 2014 - 08:36 PM UTC
If I've read a few other forums correctly, is it always an enamel wash over acrylic paint and vice versa??
Joel_W
Staff MemberAssociate Editor
AUTOMODELER
_VISITCOMMUNITY
New York, United States
Joined: December 04, 2010
KitMaker: 11,666 posts
AeroScale: 7,410 posts
Posted: Tuesday, October 21, 2014 - 02:01 AM UTC
Nick,

A pin wash is the 1st step in weathering. 1st seal your paint with a gloss medium like Pledge or Glosscoat. Then polish smooth. Then decal, then seal the decals in the same medium.

Now you can start your weathering process. I start with a pin wash. For this I use Model Master enamel paints thinned to a India ink consistency with Odorless Mineral Spirits. The color varies according to the base color, or to almost black for flying surface separations. Using a small 5/0 brush you just touch the point to the panel line and the paint will run a inch or two. Move and repeat till your done. Let it dry, then go back over the panel line with a damp Qtip/Mineral Spirits, and lightly wipe across the line to remove the excess. Go lightly or you'll just remove the pin wash. Then with a clean soft rag, gently buff along both sides of the line. when dry, seal with more of the gloss medium, then the next step in your weathering process.
Joel
nick_pal
_VISITCOMMUNITY
South Australia, Australia
Joined: July 09, 2014
KitMaker: 327 posts
AeroScale: 41 posts
Posted: Thursday, October 23, 2014 - 10:36 AM UTC
I ended up picking up Tamiyas pin wash for panel lines (black). It's amazing, tha capillary action works a treat on a gloss coat..will post photos shortly
 _GOTOTOP