

Hi all
I've been wondering if it is just me doing something wrong or do other people have problems with Roden kits?
I have just given up on an SE5a 1/48 scale which went haywire at the rigging stage. The wings warped out of line while it was being rigged using Invisible mending thread and trying to correct it the struts started to buckle seeming to be too soft and flexible to take the tension that the nylon requires to avoid sagging. Throughout the build I found it more hassle than I could really be bothered with in regard of fit and I found the plastic to be very soft with an odd texture when carving and trimming. To be honest I have been avoiding working on this one for some time as it just didn't feel right and building was more of a chore than anything else.
This is only the second Roden kit I have ever attempted, the last being a 1/48 Fokker D.V11 which was a nuisance to get fitted together properly and which had Lozenge that seemed to explode on contact.
I have only been back at modelling for a few months although I built a huge number of models (Mainly airfix, matchbox and Revell) when I was a kid some 30 plus years ago and never in the past have I had these problems and of late I have built about fourteen or so Eduard bipes with little problem plus a few Revell's and a Lindberg SE5a which by comparison to the Roden was a joy to build and rig albeit with less detail than the Roden.
All advice tricks to make these kits work will be greatly appreciated.
Early Aviation
Discuss World War I and the early years of aviation thru 1934.
Discuss World War I and the early years of aviation thru 1934.
Hosted by Jim Starkweather
Roden failure

highlandflinger

Joined: September 04, 2014
KitMaker: 53 posts
AeroScale: 53 posts
Posted: Sunday, September 14, 2014 - 12:50 PM UTC

Mcleod

Joined: April 07, 2010
KitMaker: 1,028 posts
AeroScale: 939 posts
Posted: Sunday, September 14, 2014 - 01:20 PM UTC
Hi Martyn
I have about 18 Roden kits in the stash, from 1/144 thru 1/32. Many of these kits have that rough, grainy Roden feel to the plastic. Also, as you have observed, the plastic can be very soft. The new C-123B I'm building now has these characteristics, as do the 2- 1/48 Staggerwings I have.
That being said; I still very much like all my Roden kits. I always think of Roden as making models for the modeller as opposed to making models for the kid with a tube of glue.
Roden kits are not shake-and-bake. They demand patience and often require thoughtful upgrades (such as real wood for the struts). However, I always find Roden kits detailed, fairly accurate, and worthy.
Just my 2-cents though. Ben
highlandflinger
Joined: September 04, 2014
KitMaker: 53 posts
AeroScale: 53 posts
Posted: Sunday, September 14, 2014 - 01:39 PM UTC
HI there I can quite understand your points. I think that I was spoilt by building the Eduard kits first on coming back to WWI modelling which do just about build themselves with a few exceptions like the Spad XIII(early) which took some headscratching and close examinationn in order to figure out why the fuselage deck didn't fit followed by some careful work to correct.
I was an out of the box builder as a kid and so I am not anywhere close to the league of the guys on here who only seem to stop short of getting their kites airborne or re-animating Manfred Von Richthofen to make it that little bit more authentic
I think that I will possibly leave the Roden kits until I have had a wee bit more practice. I can't really avoid them forever though as I am trying to build myself as close to a complete set of 1/48 scale WWI frontline aircraft as possible and Eduard just don't produce a lot of them.

CMOT


Joined: May 14, 2006
KitMaker: 10,954 posts
AeroScale: 290 posts

Posted: Sunday, September 14, 2014 - 01:55 PM UTC
Don't make the nylon tight when doing the rigging, just use heat to remove any sag when you are done.

Jessie_C
Joined: September 03, 2009
KitMaker: 6,965 posts
AeroScale: 6,247 posts

Posted: Sunday, September 14, 2014 - 02:05 PM UTC
It is possible to rig Roden kits without buckling the struts but it takes a little doing. Here's a How To I wrote a short while back to explain how I manage it.
Meanwhile, returning to your kit, perhaps it may be salvaged. Can you get your hands on a supply of wooden cooking skewers and brass wire? Cut and sand the skewers to the proper shape, drill the ends to fit short sections of the wire and then drill the wings so that you may pin the replacement struts in place.
Et voilà! replacement struts which are much stronger than Roden's softish plastic.
highlandflinger
Joined: September 04, 2014
KitMaker: 53 posts
AeroScale: 53 posts
Posted: Sunday, September 14, 2014 - 09:53 PM UTC
Thanks very much for the advice, It might be saveable as it is only the struts on one wing that are needing sorted and the double control lines from above the undercarriage are still to be done and with a little care these might work to remedy the skew in the rigging.

redcap

Joined: November 06, 2005
KitMaker: 753 posts
AeroScale: 311 posts

Posted: Sunday, September 14, 2014 - 10:58 PM UTC
I have no personal experience of 1/48 Roden kits however the Roden kit I have built looked great in the box ...until one started to build it. Dreadful instructions, vague fit especially in cockpit areas and as for the decals - well thats what they said they were - the less said the better.I built their 1/32 Fokker Dr1 and I doubt I would ever tackle another Roden kit anytime soon as I just could not wait to finish it ..but for all the wrong reasons.
If they were cheap I could excuse these issues but they are priced (here in the UK anyway)at WNW prices and often even more expensive!
YES there are some fabulous builds on the net and especially on this site of Roden 1/32 WW1 models, but IMHO, that is a testament to the skill of the modeller him/herself rather than the kit(s)in question.
Gary

Familyman

Joined: January 11, 2007
KitMaker: 88 posts
AeroScale: 87 posts
Posted: Monday, September 15, 2014 - 04:04 AM UTC
Martyn!
If you have problems with fishing line, try rigging with some elastic thread, like EZ. I'm just finishing my second efford with Roden 1/48 SE5a and I used elastic thread with reasonable good results. The main reason I use it is because it is flat, like the rigging in RFC planes should be. Using elastic thread has its own tricks, but it sure won't warp the wings or struts. Then again, it won't give the wing cellule extra strenght like fishing´line rigging would.
I'm sad to hear that people have such bad experiences with Roden kits. I think Roden is a cool company. They offer such a great variety of well detailed and accurate ww1 subjects. I know the kits are more challenging than Eduard or WNW kits, but reasonably buildable after all.
The only thing going beyond my moderate skills are the decals, which are widely known to be the real week point of Roden kits. There are quite a few aftermarket sheets suitable for Roden kits, but for many of their interesting types there is still no choice but the kit decal.
yours Mikko

phantom_phanatic309

#372

Joined: March 10, 2010
KitMaker: 2,568 posts
AeroScale: 1,619 posts

Posted: Monday, September 15, 2014 - 04:35 AM UTC
I think the likes of Eduard and Wingnut Wings have really spoiled us in recent times. They are brilliant kits and sometimes a kit by the likes of Roden can be a bit of a shock to the system. They're just in different leagues to each other.
At the minute I'm working on Eduard's Fokker E.III, Albatross D.V and a Roden Albatross D.II all in 1/72. The Eduard kits are falling together with no fuss and are much more cleanly molded. The Roden D.II is proving to be a bit more trickier but I do like how it's turning out. For starter's it has a complete engine instead of just the top of the cylinders as in the Eduard D.V, and a huge choice of finishing options on the decal sheet. Time will tell how they behave themselves.
They do need a lot more work than other manufacturers but good results can be had. I wouldn't write them off too soon. In a lot of ways Roden and Eduard are responsible for reinvigorating interest in WW1 aircraft with modelers and competitor companies over the last decade. Until they came along, there were only the old stuff by Airfix, Revell and a few limited run kits to choose from. If you think they are tough try something by Pegasus or Blue Max. With those, you had to make the struts yourself!
Another thing I'm loving about Roden kits is the huge amount of spare parts that the generic sprues in most of the kits include. Great for improving older kits!

StukaJr

Joined: April 26, 2010
KitMaker: 346 posts
AeroScale: 292 posts

Posted: Monday, September 15, 2014 - 09:18 AM UTC
Can't really add much, other than SE5a is especially hard to align wings / struts as the latter is at extreme angle - the difficulty of fit and inferior styrene do not help...
Roden kits are difficult, in the best of days - I've made a D.VII in 1/48 and SSD.III in 1/32... As I remember the D.VII received "lacquer" of CA glue to strengthen the "buttery" struts and SSD.III had inner struts pinned with steel (broken pinwise drill bits I saved). I've spent twice the amount of time than working Eduard or WnW and spent equal or more cash to get the results.
Roden decals, especially lozenge decals, should be a warning label.
Try and rectify the situation - I have brought many kits from total destruction and you'll be surprised how well pieces can be salvaged. Or call it a lesson learned and move on... It's up to you.

highlandflinger
Joined: September 04, 2014
KitMaker: 53 posts
AeroScale: 53 posts
Posted: Monday, September 15, 2014 - 09:49 AM UTC
Fortunately I haven't followed my initial desire and smashed it into little pieces and with re-evaluation I think it may well be salveageable.
I think one of my mistakes was trying to be too clever and drilling 0.2mm holes through the struts for rigging (as far away as possible from the line through which the loading would pass). As the kit has a good representation of the rigging mounts on the end of the struts I wanted the rigging to attach at these points and while this didn't seem to affect the strength of the strut in the vertical axis I think it meant that, unless the tension was balanced at all points it caused a bow in the strut which allowed it to flex sideways under the tension which in turn caused the wings to go out of true.
CMOT what is the best method to apply heat to shrink the rigging lines?
Jessie_C
Joined: September 03, 2009
KitMaker: 6,965 posts
AeroScale: 6,247 posts
Posted: Monday, September 15, 2014 - 10:32 AM UTC
Quoted Text
CMOT what is the best method to apply heat to shrink the rigging lines?
I'm not Fred, but I can help with this. A just blown-out match holds sufficient heat to shrink the line taught. Be careful not to get it too close or you'll end up with two curly lines and nothing in the middle

Smokers can use their cagarette ends but we non-smokers are cofined to things like incenese sticks (which smell much nicer anyway). You can also very carefuly try a soldering iron. Experiment on a few scrap lines to get the feel for how the heat behaves.
highlandflinger
Joined: September 04, 2014
KitMaker: 53 posts
AeroScale: 53 posts
Posted: Monday, September 15, 2014 - 10:54 AM UTC
Thanks very much I will give that a try and see how I get on with it 

JackFlash
Joined: January 25, 2004
KitMaker: 11,669 posts
AeroScale: 11,011 posts
Posted: Tuesday, September 16, 2014 - 01:53 AM UTC
Quoted Text
Hi all
I've been wondering if it is just me doing something wrong or do other people have problems with Roden kits?
I have just given up on an SE5a 1/48 scale which went haywire at the rigging stage. The wings warped out of line while it was being rigged using Invisible mending thread and trying to correct it the struts started to buckle seeming to be too soft and flexible to take the tension that the nylon requires to avoid sagging. Throughout the build I found it more hassle than I could really be bothered with in regard of fit and I found the plastic to be very soft with an odd texture when carving and trimming. To be honest I have been avoiding working on this one for some time as it just didn't feel right and building was more of a chore than anything else.
This is only the second Roden kit I have ever attempted, the last being a 1/48 Fokker D.V11 which was a nuisance to get fitted together properly and which had Lozenge that seemed to explode on contact.
I have only been back at modelling for a few months although I built a huge number of models (Mainly airfix, matchbox and Revell) when I was a kid some 30 plus years ago and never in the past have I had these problems and of late I have built about fourteen or so Eduard bipes with little problem plus a few Revell's and a Lindberg SE5a which by comparison to the Roden was a joy to build and rig albeit with less detail than the Roden.
All advice tricks to make these kits work will be greatly appreciated.
Try checking out some of the past articles & reviews on your subjects. Most often the types of "heads up" Commentaries are there. The older kits from Roden have decals that can be a challenge but can easily be dealt with. Usually a 70/30 mix of water & white poly (school) glue works ok. The water need to be more than warm.
Roden SE 5a notes

Merlin

#017
Joined: June 11, 2003
KitMaker: 17,582 posts
AeroScale: 12,795 posts
Posted: Tuesday, September 16, 2014 - 07:36 AM UTC
Hi Martyn
I was sorry to read your tale of woe. I've built and rigged plenty of short-run kits - a good many of them moulded in softer styrene than Roden use, so I'm left wondering just how much tension your invisible thread put on the kit; it might have mangled other brands too. My preferred method in 1:48 is stretched sprue - it tightens up easily and puts minimal stress on a model.
All the best
Rowan

Mecenas
Joined: December 23, 2007
KitMaker: 1,596 posts
AeroScale: 1,275 posts
KitMaker: 1,596 posts
AeroScale: 1,275 posts

Posted: Tuesday, September 16, 2014 - 07:49 AM UTC
I had the same problem with rigging in my first biplane kit and it as also a Roden kit - too much tension on rigging. It is also adviced to make the rigging alternately for both sides, this way you also make the tension even at the same time. It is the same rule as for screwing nuts on the round rim.
highlandflinger
Joined: September 04, 2014
KitMaker: 53 posts
AeroScale: 53 posts
Posted: Tuesday, September 16, 2014 - 09:24 AM UTC
I was rigging the model as evenly as possible on both wings and the tension I was applying to it was not that great (I have seen some references to people hanging haemostats off the rigging line while gluing but I was just holding it between my fingers with moderate tension). This is the first kit I have had this problem with (and the first Roden I have tried). All the other biplane kits I have built of late have been Eduard. Revell(Eduard molds), and Lindberg. I do believe that the main fault lies with having rigged directly through the struts combined with the soft styrene as all my other kits have been rigged through the wings meaning that there is no stress on the struts apart from in the vertical axis where they are strongest.
BoRoss78
Joined: February 28, 2013
KitMaker: 36 posts
AeroScale: 36 posts
Posted: Sunday, September 21, 2014 - 03:12 PM UTC
Never rig through struts.
highlandflinger
Joined: September 04, 2014
KitMaker: 53 posts
AeroScale: 53 posts
Posted: Monday, September 22, 2014 - 01:33 AM UTC
Yup I reckon I won't try that again. I had not got much pleasure out of the build at any point and I am not inspired to do the work needed to repair it now. I think I will buy another of the Lindberg kits as I found it a joy to put together and I am sure I can tweak it a bit to give it a bit more detail.
If anyone from Eduard is listening a kit of the SE5a would be greatly appreciated
If anyone from Eduard is listening a kit of the SE5a would be greatly appreciated
BoRoss78
Joined: February 28, 2013
KitMaker: 36 posts
AeroScale: 36 posts
Posted: Monday, September 22, 2014 - 10:40 AM UTC
Honestly - you are the first I have heard to have problems with the Roden SE 5a (1/48 or 1/32). Stephen Lawson's link above really does speak to modeler's about detailing the kit.
I just wish that there was a decent Hisso or Viper motor available to put in it. Imagine a "Taurus" resin motor that would drop into a Roden SE 5a or an Eduard Spad XIII.
I vaguely remember the Laws of Modeling thread. One of the "laws" was "tossing a half built expensive kit against the farthest basement wall does not live up to the acclaimed hype". Or some such idea. At any rate here is to better experiences as you get back in the swing of building.
highlandflinger
Joined: September 04, 2014
KitMaker: 53 posts
AeroScale: 53 posts
Posted: Monday, September 22, 2014 - 01:14 PM UTC
I may have got a bad kit, the fuselage had rough patches at the seam between the upper deck and the rest of the fuselage and was extremely thin along the mating edge around the area of the cutouts where the cabane struts go (Why are there squared off cutouts when there is no matching peg on the strut to fit them?,the holes look very similar to those on the lindberg but in the Lindberg's case it is to give a secure mounting to the peg ended cabane struts) The thinness in this area meant mating the parts together was tricky as the thin plastic was likely to dissolve in the glue and with the stitching detail it was a hard job to fill gaps such that it didn't ruin the finish. There was a large gap and extremely thin plastic at the cutout behind the cockpit on the left hand side(Looking from the front). The plastic the kit was cast in was almost like expanded styrene in texture and very flexible. I have a Roden Nieuport 28 here which is the last Roden I intend to build and it has this very same texture to the plastic. Basically overall from start to finish I found building it a chore and dreaded taking each step forward. (So much so that I built and finished four Eduard kits before I got to putting the upper wing in place on the SE5).
To me they don't bear comparison to Eduard kits which I pick up for only a little more (or sometimes a fair bit less) and include PE and masks. I paid £15 plus postage for the Roden SE5a(pre owned) and the same day I bought a profipack spad 13(early) and Albatros D.Va new for around £13 each.
While I appreciate the challenge of making a great model out of a substandard kit(the challenge of applying your skills and intelligence to make things right). I would rather make a good model from a great kit. Different aims and goals involved. For me the aim is to have a detailed representation of a world war one aircraft with as much ease as possible while a the same time learning about(roughly) how the aircraft looked inside/instrument layout/engine design. The joy of the finished article and some education over the challenging of my skills and talents. I would like to try my hand at mastering the high-level skills at a later date but at the moment I want to build a detailed mini-museum as quickly and easily as possible.

amegan
#243

Joined: March 21, 2008
KitMaker: 996 posts
AeroScale: 915 posts

Posted: Friday, October 17, 2014 - 01:56 AM UTC
Although some time ago, I read your tale of woe with interest, for two reasons. First I built a Roden Strutter a couple of years ago and really enjoyed it. The kit went together well, the only problems being I lost a wheel cover, so used the other one to mould a new one in resin, and I could not get the invisible mending thread through the holes in the PE brackets for rigging, so I drilled the wings. The decals were rubbish and the ones on top of the wing broke up completely, so I stole some from an Eduard Biff. The second is that I have just ordered a Roden BE2c and it is a good reminder to build carefully.
I use clothes pegs to weight my invisible thread and find that is enough tension for most applications.
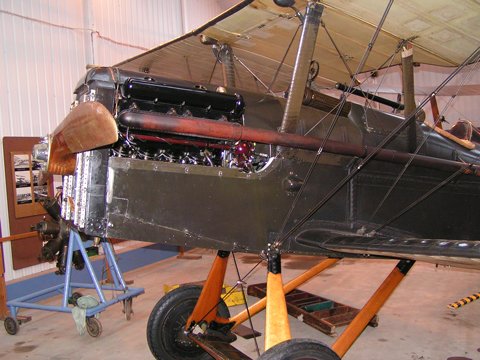
Most biplane rigging wire is attached to steel brackets bolted to the wing spars, the struts don't usually have the wires attached apart from possibly the cabanes struts as shown in this photo of the Shuttleworth collections SE5a
I use clothes pegs to weight my invisible thread and find that is enough tension for most applications.
Most biplane rigging wire is attached to steel brackets bolted to the wing spars, the struts don't usually have the wires attached apart from possibly the cabanes struts as shown in this photo of the Shuttleworth collections SE5a

Bink123
Joined: June 23, 2008
KitMaker: 414 posts
AeroScale: 364 posts
Posted: Friday, October 17, 2014 - 06:44 AM UTC
This is an interesting discussion. I have built only one Roden Kit - the Bristol Fighter.
I had some problems with construction, especially aligning the forest of struts in order to get the top wing mounted. I did have trouble with the decals shattering and becoming unusable. However I persevered and in end, I ended up with a good looking model. I decided not to even attempt anymore Roden kits because my skills weren't up to the task.
I have built several Eduard kits and though they were easier to build, there were issues, some with accuracy, and in the case of their lozenge decals, wrong colours, and sometimes the moulds were misaligned. So, as has been said no kit is perfect.
For me, the main issue with Roden is the quality of their decals, have they improved? I would like to get a 1/48 Fokker D.VII, and I would if I knew the decals were usable and of good quality.
I had some problems with construction, especially aligning the forest of struts in order to get the top wing mounted. I did have trouble with the decals shattering and becoming unusable. However I persevered and in end, I ended up with a good looking model. I decided not to even attempt anymore Roden kits because my skills weren't up to the task.
I have built several Eduard kits and though they were easier to build, there were issues, some with accuracy, and in the case of their lozenge decals, wrong colours, and sometimes the moulds were misaligned. So, as has been said no kit is perfect.
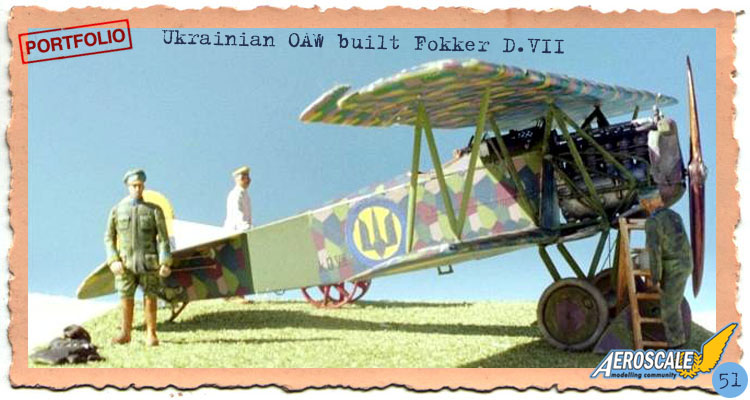
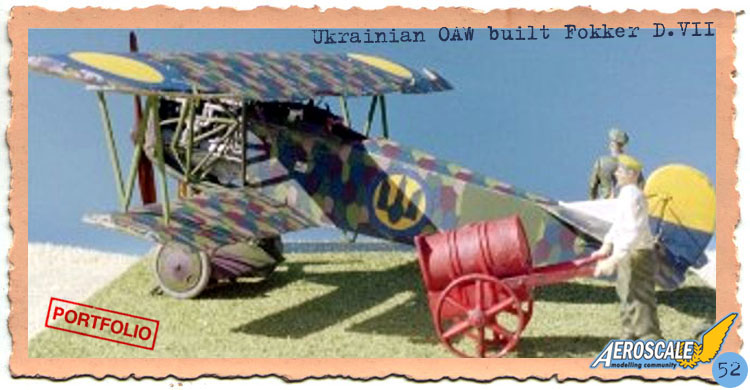
For me, the main issue with Roden is the quality of their decals, have they improved? I would like to get a 1/48 Fokker D.VII, and I would if I knew the decals were usable and of good quality.
Jessie_C
Joined: September 03, 2009
KitMaker: 6,965 posts
AeroScale: 6,247 posts
Posted: Friday, October 17, 2014 - 12:12 PM UTC
Quoted Text
For me, the main issue with Roden is the quality of their decals, have they improved? I would like to get a 1/48 Fokker D.VII, and I would if I knew the decals were usable and of good quality.
The decals in the newer kits are stronger, but still nowhere near some of the other manufacturers' kits. This is because despite everything, Roden is still a limited-run company, and their decals reflect that. Their business model prevents them from using an outside contractor so what's in the box is what has to do when it comes to Roden decals. Float them on with a puddle of Future if you want them to remain where they're put.
The Fokkers have the older decals (unless they've done a recent production run).
Bink123
Joined: June 23, 2008
KitMaker: 414 posts
AeroScale: 364 posts
Posted: Friday, October 17, 2014 - 12:32 PM UTC
Thanks.

 |

WEB HOSTING BY


Copyright ©2021 AeroScale and Kitmaker Network, a subsidiary of Silver Star Enterprises
All Rights Reserved. Please read our Conditions of Use and Privacy Policy.
All Rights Reserved. Please read our Conditions of Use and Privacy Policy.