_GOTOBOTTOM
Cold War (1950-1974)
Discuss the aircraft modeling subjects during the Cold War period.
Hosted by Tim Hatton
Roden's Fairchild C-123B
Mcleod
_VISITCOMMUNITY
Alberta, Canada
Joined: April 07, 2010
KitMaker: 1,028 posts
AeroScale: 939 posts
Posted: Thursday, September 04, 2014 - 02:58 PM UTC
Introduction

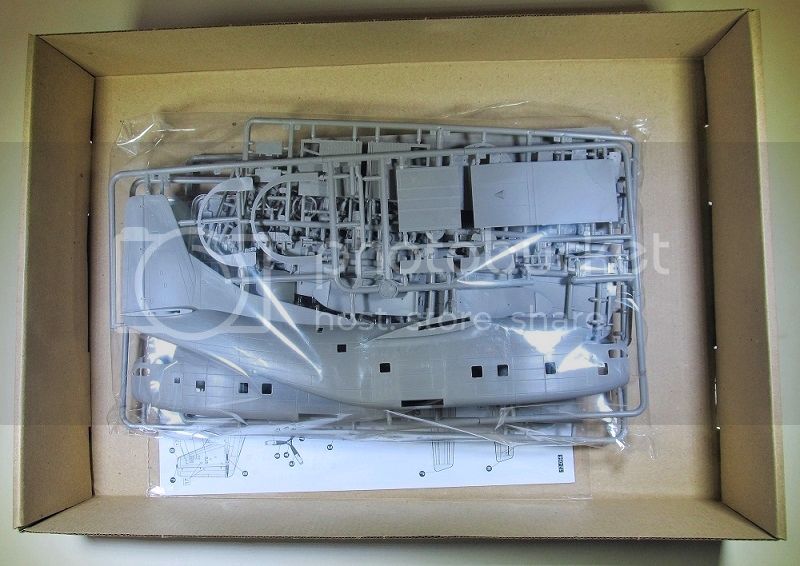
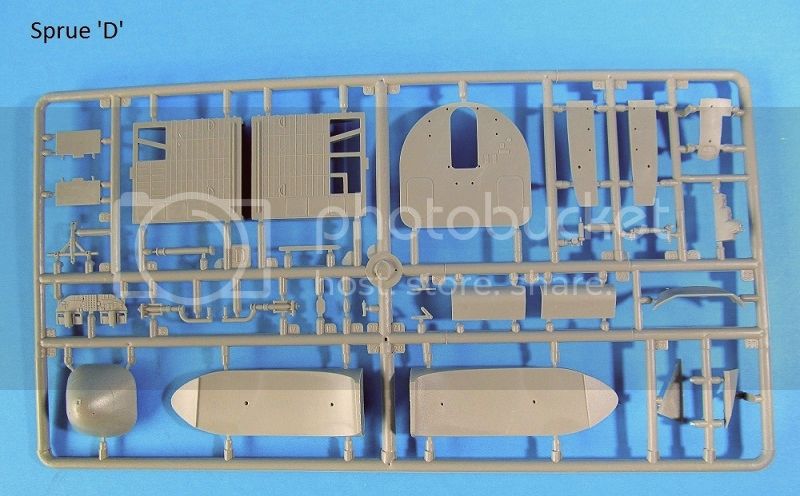
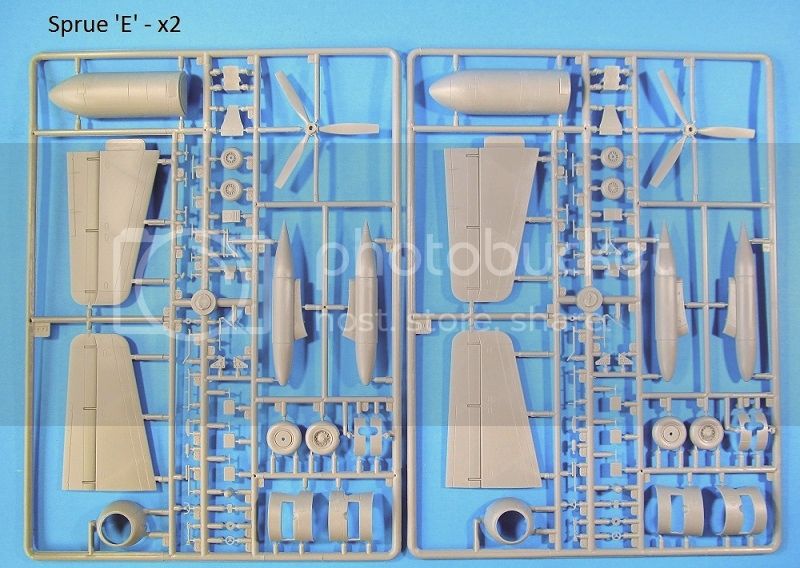
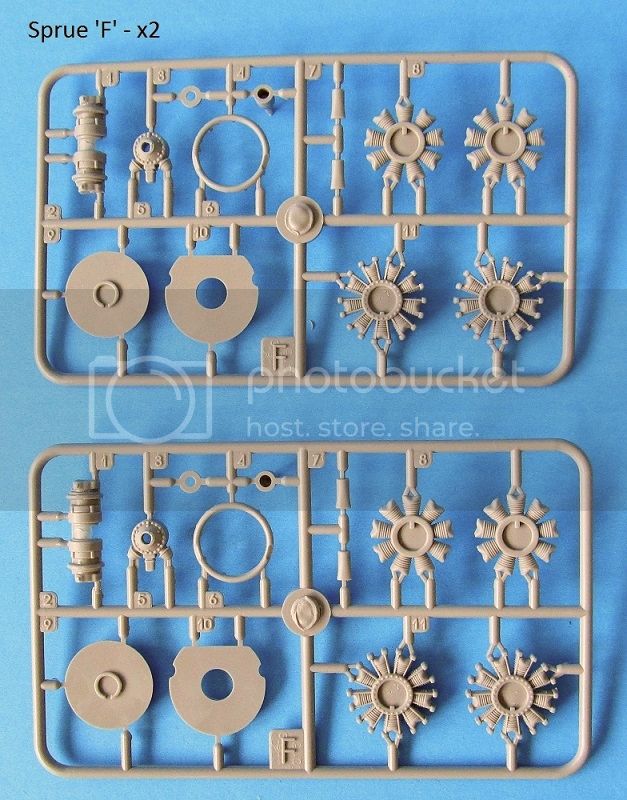
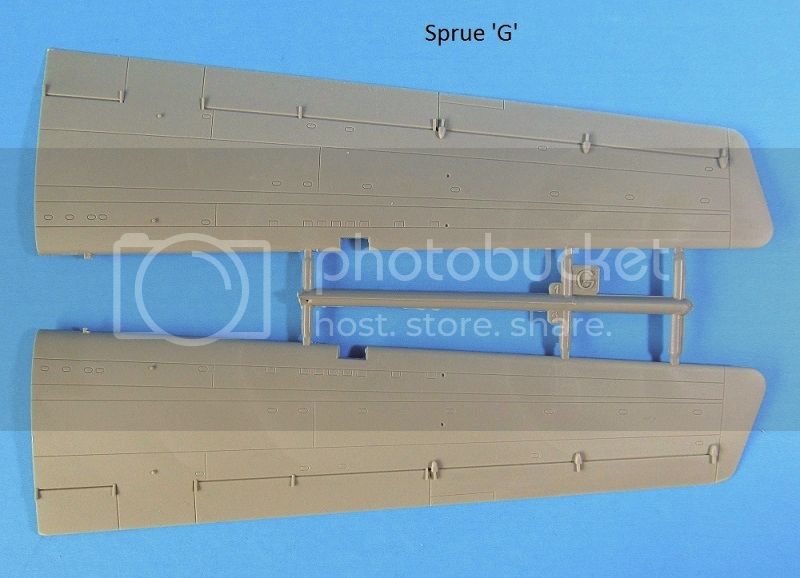
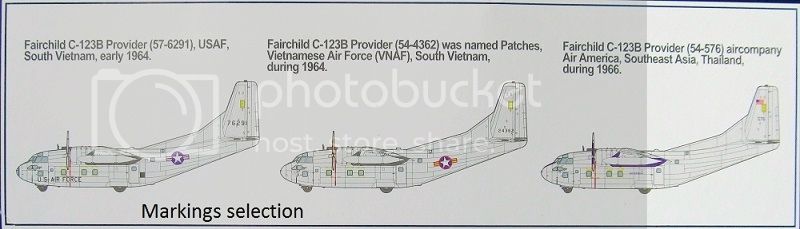
Military transport aircraft models usually fall short in garnering the same enthusiasm from modellers, as do aircraft bristling with guns. None-the-less, this 2014 Roden new-tool Fairchild C-123B kit in 1/72 scale, is an exciting model.


This particular sample was supplied by our friends at LuckyModel, for the sake of realizing a build review/blog here on AeroScale.
Also, there is an outstanding written review, located right here on AeroScale already.

This will be a build/review blog of this fine Roden kit. Although she will not be built overnight, I'm hoping the reader will find the blog both informative and entertaining.

How about starting out with a:

Brief History
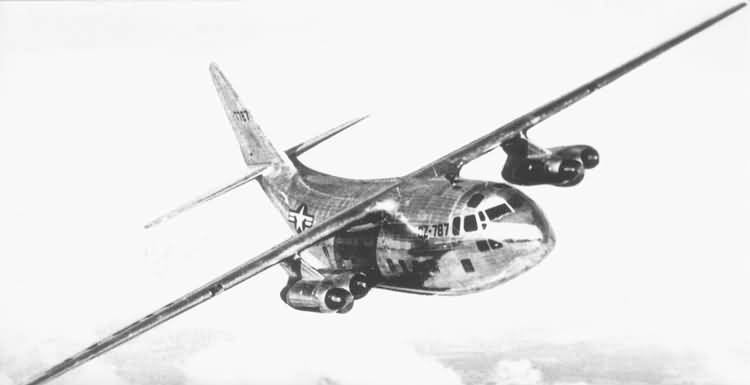
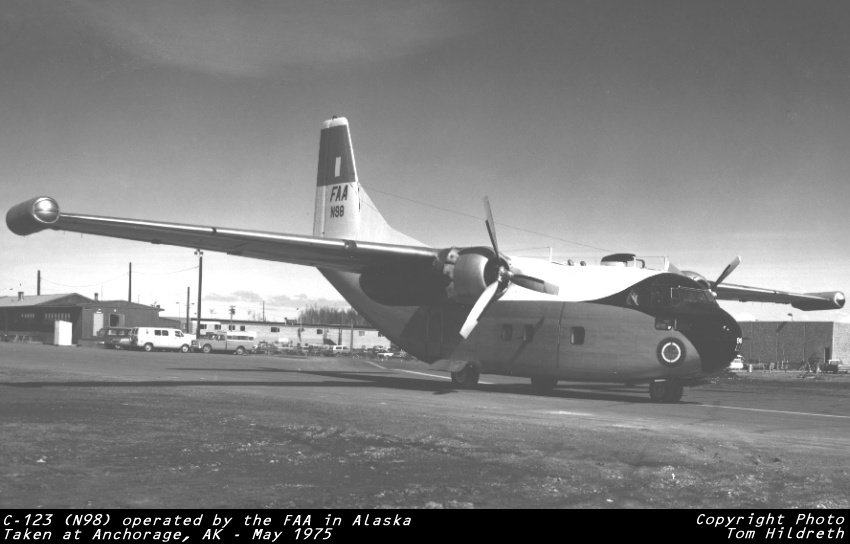
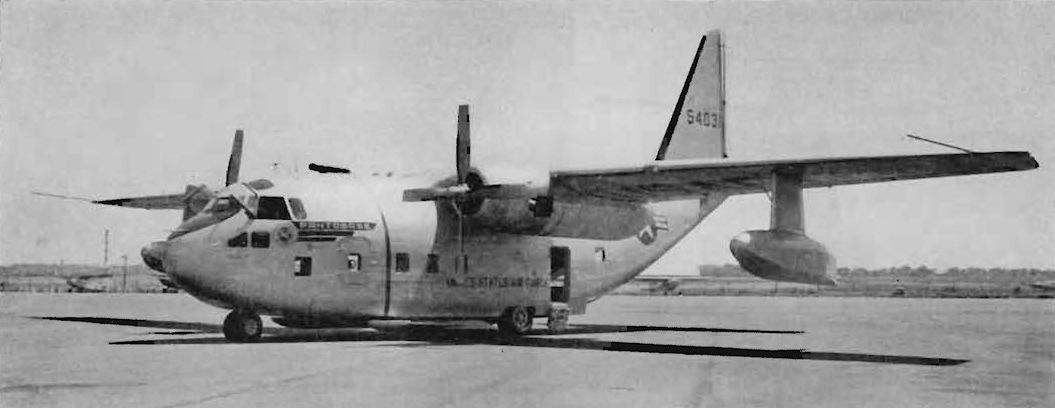
The Fairchild C-123B was the primary production model of a rugged military transport aircraft, evolved from an original Chase Aircraft Company glider design.


With sufficient lifting capacity for the time, the aircraft could operate reliably from unimproved, short airstrips, making it very attractive to military air arms.
Although there were various improved models upgraded for specific task requirements, these were drawn from existing C-123 stocks and modified to suit.
While not being necessarily famous, nor photogenic, the C-123 is the only aircraft type in history to have operated as a glider, with internal combustion piston power, turboprop, and with jet engines over the course of it's tenure. The C-123 remained in service with military air arms from 1955 thru to the 1980's with ANG units.
Mcleod
_VISITCOMMUNITY
Alberta, Canada
Joined: April 07, 2010
KitMaker: 1,028 posts
AeroScale: 939 posts
Posted: Thursday, September 04, 2014 - 03:17 PM UTC
When this Roden C-123B kit arrived in the post, my eldest grandson asked me, "Whats in the big box, Grumps?".
He was right, the box is big; somewhat over-sized. There's a whole lot of fun in it, though.:


The cellophane bag contains a number of warped, but, very nice sprues, which harbor exactly 200 highly detailed 1/72nd injection molded parts. 176 medium grey and 24 clear on 10 different sprue trees.


Jessie_C
_VISITCOMMUNITY
British Columbia, Canada
Joined: September 03, 2009
KitMaker: 6,965 posts
AeroScale: 6,247 posts
Posted: Thursday, September 04, 2014 - 03:23 PM UTC
For the sake of completeness, here's the jet-powered prototype

A pair of J-47s borrowed from a B-47 were attached under each wing. Unhappily, they were too thirsty for the C-123's small fuel tanks so the jet -123 never went anywhere (literally and figuratively).

Much later on, auxiliary jet engines were hung under the wings

Or on the wingtips


There was even an experimental amphibious version which used large water skis under the fuselage


This is the one I'm waiting for

Come on, aftermarket, don't let me down!
Mcleod
_VISITCOMMUNITY
Alberta, Canada
Joined: April 07, 2010
KitMaker: 1,028 posts
AeroScale: 939 posts
Posted: Thursday, September 04, 2014 - 03:39 PM UTC
Personally, I find all three of the color scheme's offered by Roden to be somewhat dry:


Especially since there were some very colorful Search and Rescue, and US Coast Guard examples. However, it is what it is, and a C-123B in SEA Vietnam era colors will still be extremely attractive.
I really do have to wonder about a natural metal scheme with the typical, grainy Roden surface texture common to their lines. More on that later, though.

The decals in this example look quite nice. From past experience with earlier Roden decals, though, I believe I'll do some testing before I give them the thumbs up.
Mcleod
_VISITCOMMUNITY
Alberta, Canada
Joined: April 07, 2010
KitMaker: 1,028 posts
AeroScale: 939 posts
Posted: Thursday, September 04, 2014 - 03:45 PM UTC

Quoted Text

For the sake of completeness, here's the jet-powered prototype


Thanks, Jessica. I guess you were typing while I was typing, but, with the usual lighting speed over my two fingers.
Really, though, thanks for the help. There's a-lot of work developing a thread like this, and its real easy to miss stuff.
Ben
Mcleod
_VISITCOMMUNITY
Alberta, Canada
Joined: April 07, 2010
KitMaker: 1,028 posts
AeroScale: 939 posts
Posted: Thursday, September 04, 2014 - 05:08 PM UTC
I can't seem to find where it's written on the boxing, but, I have heard that this kit is rated as a 5 on the 5 scale as far as difficulty goes. Not recommended for children under 14yrs. All that means to me is that this is a modellers model, and you have to take the good with the bad.

And there is some small bad to discover; in the early analysis it appears as the evil injection release pins and recessions, lots of them, showing up in areas that just have to make you wonder, 'why don't I just jump'.


These present small problem, more like annoyances, even if they are in a great number. Certainly, they will fall to the overwhelming superiority of the Dremel, the styrene disk, and the filler.

Looking beyond that, it is quite clear that Roden has given us a kit with luscious small details. In fact, likely the best injection molded 1/72 P&W R-2800 radial I've ever seen:


At the time of this writing, there is one AM outfit I can find that has already been busy nice extras for this kit, if you are so inclined:


Just a note. It has been said that this is a limited run kit, and certainly some of the kits molding makes it look like that. However, I would argue that idea may be the case for this boxing, but, I do believe it will appear with other markings in time, and perhaps as a 'K' model, or what-ever. That seems to be Roden's way of doing things. My opinion only.

Ben
Joel_W
Staff MemberAssociate Editor
AUTOMODELER
_VISITCOMMUNITY
New York, United States
Joined: December 04, 2010
KitMaker: 11,666 posts
AeroScale: 7,410 posts
Posted: Friday, September 05, 2014 - 05:56 AM UTC
Ben,
Will be following right along with your build, as I'm more then just casually interested in USA Transports, even though I've yet to actually build one.

My sincerest condolences for having to deal with so many injector pins spots. I'm also some what surprised at the rough texture of the plastic. Other then it's caused by non-super polished molds. As you said, it's going to take some serious polishing to prep the surface for a NMF, which will go a long ways to over coming those basically run of the mill paint schemes.

Joel
Jessie_C
_VISITCOMMUNITY
British Columbia, Canada
Joined: September 03, 2009
KitMaker: 6,965 posts
AeroScale: 6,247 posts
Posted: Friday, September 05, 2014 - 12:06 PM UTC
C-123s in Vietnam got incredibly hard use. They should not have showroom-quality gleaming spotless shiny metal finish. They should be dusty, dented, faded and used looking.
JPTRR
Staff MemberManaging Editor
RAILROAD MODELING
#051
_VISITCOMMUNITY
Tennessee, United States
Joined: December 21, 2002
KitMaker: 7,772 posts
AeroScale: 3,175 posts
Posted: Friday, September 05, 2014 - 01:26 PM UTC
Ben,

Great start! I look forward to this.

I wish they included decals for Bookie41, the C-123 of the Medal of Honor rescue known as the "Miracle at Kham Duc".
Removed by original poster on 09/06/14 - 01:26:33 (GMT).
Mcleod
_VISITCOMMUNITY
Alberta, Canada
Joined: April 07, 2010
KitMaker: 1,028 posts
AeroScale: 939 posts
Posted: Monday, September 08, 2014 - 03:19 PM UTC
Thanks for looking in folks.

The build itself has a beginning. The first job was to take a basket of parts down to the workshop and try to take the smile off as many injection release pins as I could.


I thought I should like to start on those model R-2800's, using ideas as posted right here on AeroScale, and the immense store of reference material available on the web:


The instruction Roden supplies is straight forward enough


The engine itself is a finicky adventure, that only requires this degree of complication if you intend to have maintenance panels open:


There is no perfect fit here and I've just started, but I like this kit already. It brings out healthy emotions, like happiness, confusion and anger. I'm inventing new words in this build.

JClapp
#259
_VISITCOMMUNITY
Massachusetts, United States
Joined: October 23, 2011
KitMaker: 2,265 posts
AeroScale: 1,715 posts
Posted: Tuesday, September 09, 2014 - 01:26 AM UTC
That's a great looking kit of a great aircraft.
A flying garbage truck - by some accounts one of the loudest aircraft (inside that is) of all time.
Please carry on, I will be monitoring this thread.
Joel_W
Staff MemberAssociate Editor
AUTOMODELER
_VISITCOMMUNITY
New York, United States
Joined: December 04, 2010
KitMaker: 11,666 posts
AeroScale: 7,410 posts
Posted: Wednesday, September 10, 2014 - 02:06 AM UTC
Ben,
Nice start to those engines. As you said just detailing the front of each engine with a wiring harness is all that is necessary except for adding details to those areas that will be exposed with the access panels removed.
Joel
Mcleod
_VISITCOMMUNITY
Alberta, Canada
Joined: April 07, 2010
KitMaker: 1,028 posts
AeroScale: 939 posts
Posted: Thursday, September 18, 2014 - 09:43 AM UTC
If you are able to formulate a mental picture of an old man humped over a desk, carefully drilling 90 tiny holes into plastic with a pin vise, then I welcome you into my hobby room.


After priming everything, I decided to paint the radial cylinders with Krylon gloss black. After about a week of curing time, I'll topcoat them with Tamiya XF-16 aluminum, so I can alcohol wipe them and get some definition on the cooling vanes. I'll pick-on the rest with a brush and various enamels.
The block is painted Tamiya XF-18(med.blue) 90% + XF-19(sky grey) 10%. Back plates are Krylon Camo-Green.
The wire harness material is copper painted black; likely to large, but, I'll keep searching.
These are all first paint, with much more color and weathering work to come.


Its really going slow with the limited time available. We will conquer the beast with perseverance, though.
tinbanger
_VISITCOMMUNITY
Ontario, Canada
Joined: February 04, 2008
KitMaker: 2,507 posts
AeroScale: 1,814 posts
Posted: Thursday, September 18, 2014 - 09:56 AM UTC
Hi Ben
I am following this build.
Good luck.
JPTRR
Staff MemberManaging Editor
RAILROAD MODELING
#051
_VISITCOMMUNITY
Tennessee, United States
Joined: December 21, 2002
KitMaker: 7,772 posts
AeroScale: 3,175 posts
Posted: Thursday, September 18, 2014 - 10:23 AM UTC
Ben,

Super effort! 90 holes!? I would be cross-eyed!


Quoted Text

...I like this kit already. It brings out healthy emotions, like happiness, confusion and anger. I'm inventing new words in this build.


That's me even with effortless models!
Joel_W
Staff MemberAssociate Editor
AUTOMODELER
_VISITCOMMUNITY
New York, United States
Joined: December 04, 2010
KitMaker: 11,666 posts
AeroScale: 7,410 posts
Posted: Friday, September 19, 2014 - 05:17 AM UTC
Ben,
And yes, I can most certainly envision a old man hunched over his workbench drilling a multitude of holes with a pin vice. That person from time to time has been yours truly. I did get into triple digits once when I drilled out all the dive brakes on my Hasegawa SBD-4 Build. Now here's he corollary to the story, I have a Dremel with a home made rheostat so that I can make it literally crawl, drills holes in plastic as smooth as silk, and yet I never use it! Go figure
Joel
JClapp
#259
_VISITCOMMUNITY
Massachusetts, United States
Joined: October 23, 2011
KitMaker: 2,265 posts
AeroScale: 1,715 posts
Posted: Friday, September 19, 2014 - 06:15 AM UTC

Quoted Text

Personally, I find all three of the color scheme's offered by Roden to be somewhat dry:

I really do have to wonder about a natural metal scheme with the typical, grainy Roden surface texture common to their lines. More on that later, though.


relevant to my interests,
The USCG bloody nose

aircraft had a big fat radar nose. Does the Roden kit offer that part, or must scratch up?

Mcleod
_VISITCOMMUNITY
Alberta, Canada
Joined: April 07, 2010
KitMaker: 1,028 posts
AeroScale: 939 posts
Posted: Friday, September 19, 2014 - 11:42 AM UTC

Quoted Text

Does the Roden kit offer that part, or must scratch up?


Sadly, Roden does not offer the part in this issue. However, I'm hearing through the wind another offering is coming. We'll see what version that is in future. I'm hoping Coast Guard.

I've gone ahead and ordered that NH detail set. I'm waiting for that to arrive before I get on with the cockpit. With 3 models on the bench, there's lots to do on the interim.
Winnie
_VISITCOMMUNITY
Manitoba, Canada
Joined: January 26, 2014
KitMaker: 6 posts
AeroScale: 6 posts
Posted: Sunday, September 21, 2014 - 03:56 AM UTC
Nobody thinking a shabby looking Nicholas Cage and a bunch of orange clad convicts and Con Air??

I am partial to the Camouflaged ones from Vietnam though. (USAF).

Cheers
Harald.
Mcleod
_VISITCOMMUNITY
Alberta, Canada
Joined: April 07, 2010
KitMaker: 1,028 posts
AeroScale: 939 posts
Posted: Friday, September 26, 2014 - 04:30 PM UTC

Quoted Text

Nobody thinking a shabby looking Nicholas Cage and a bunch of orange clad convicts and Con Air??

I am partial to the Camouflaged ones from Vietnam though. (USAF).

Cheers
Harald.


Your right, Harald. The C-123B looks great in camo.

Anyway, I must keep posting as I'm gathering so many photos it gets confusing and harder to keep in order. So here is a little bit:

The NH Detail PE set that I ordered came in the post.


I've also got considerable work done on the R-2800 radials, however I'm opting to post those photos in a group when they are complete. More to come soon; I hope you like what your seeing. Ben
Joel_W
Staff MemberAssociate Editor
AUTOMODELER
_VISITCOMMUNITY
New York, United States
Joined: December 04, 2010
KitMaker: 11,666 posts
AeroScale: 7,410 posts
Posted: Sunday, September 28, 2014 - 11:03 AM UTC
Ben,
I must say that those Photo etched parts look really quite nice, but way to small for my eye. The cockpit should really be outstanding once together and painted. Just hope that enough of it shows to make all that work worth it.

Your roller method for raised parts is something I've never seen before. I'm going to have to borrow it from you, and try it out.
Joel
Mcleod
_VISITCOMMUNITY
Alberta, Canada
Joined: April 07, 2010
KitMaker: 1,028 posts
AeroScale: 939 posts
Posted: Sunday, September 28, 2014 - 04:10 PM UTC

Quoted Text

Your roller method for raised parts is something I've never seen before. I'm going to have to borrow it from you, and try it out.


Please do try it, Joel. I think if one puts a 1/4" wide strip of masking tape above and below the PE piece being rolled, it might support the roller and prevent the paint from bleeding into the recesses. I'm going to try that on the rest of it.

Anyway, I'm using these photos as my engine building guide:


Here is the evolution of my R-2800's to date:


As you might have noticed, I'm a fairly rough edged modeller, and certainly no artist. None-the-less, I'm enjoying myself and I like the way its going.
Joel_W
Staff MemberAssociate Editor
AUTOMODELER
_VISITCOMMUNITY
New York, United States
Joined: December 04, 2010
KitMaker: 11,666 posts
AeroScale: 7,410 posts
Posted: Tuesday, September 30, 2014 - 03:58 AM UTC
Ben,
So far they look really quite good, especially when one considers their actual mini size.
Joel
Mcleod
_VISITCOMMUNITY
Alberta, Canada
Joined: April 07, 2010
KitMaker: 1,028 posts
AeroScale: 939 posts
Posted: Sunday, October 05, 2014 - 04:46 PM UTC
Just a small update


 _GOTOTOP