OFFICIAL: Sea Plane Campaign 2014
MichaelSatin
 Campaigns Administrator
Colorado, United States
Joined: January 19, 2008
KitMaker: 3,909 posts
AeroScale: 2,904 posts
Posted: Thursday, July 31, 2014 - 01:08 AM UTC
Welcome to the Sea Plane Campaign of 2014!
The campaign will run from August 1, 2014 through January 31, 2015.
If you haven't signed up yet, or want to see the rules, go
herePlease post your initial and in-progress photos as well as campaign discussion in this thread. Please post your finished build photos in the
campaign gallery.
Let's get those boats that fly off the water!
Michael

On the bench:
Sorta depends on your definition of "on the bench"...

#439
Washington, United States
Joined: November 05, 2005
KitMaker: 4,950 posts
AeroScale: 3,192 posts
Posted: Thursday, July 31, 2014 - 02:59 AM UTC
Oh great, it's not even August here and I'm already behind...

Hanger Queens in Waiting:
Monogram 1/72 F8F-1
Corsair the Sky Pirate - 1/72 Ace A-7D
Century Series - Airfix 1/72 F-105G
Anti Shipping - Academy 1/72 PBJ-1D
Academy 1/72 F-84E
Ontario, Canada
Joined: February 04, 2008
KitMaker: 2,507 posts
AeroScale: 1,814 posts
Posted: Thursday, July 31, 2014 - 03:58 AM UTC
Thank you Michael!
Welcome one and all

I have not had a chance to change the rules yet but "What If' decals will be allowed in this campaign.
Good luck!

" The Die Hards"
43rd MIDDLESEX REGIMENT
MACHINE GUN CORPS
XXX CORP
The most effective way to do it, is to do it.
- Amelia Earhart
England - South East, United Kingdom
Joined: August 15, 2012
KitMaker: 408 posts
AeroScale: 365 posts
Posted: Thursday, July 31, 2014 - 04:35 AM UTC
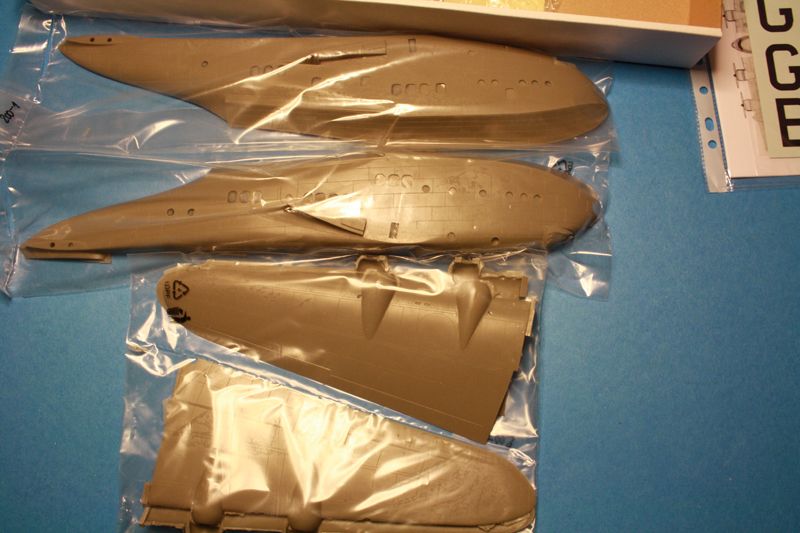
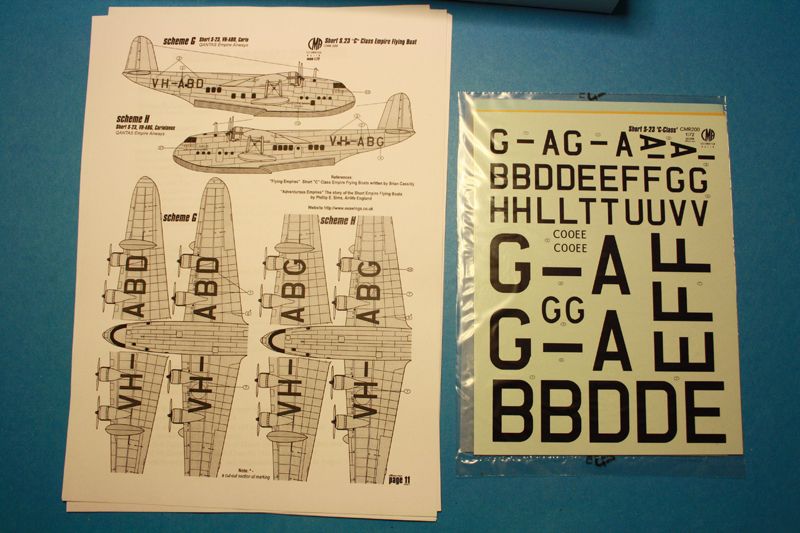
Here we go then! Here is everything I am throwing at this build. The model itself is a fairly uninvolved build, the real fun will be the paint scheme and the display base.
Cheers Everybody!
On the workbench
National Pride - 1/72 BAe Nimrod MR2.P
Tiger Meet! - 1/72 Panavia Tornado ECR (Luftwaffe)
Airfix III - 1/72 Hawker Hunter FGA.9
Hairy Brush - 1/72 P-51D Mustang
Mustang 75 - 1/72 P-51D "Ferocious Frankie"
#363
Pennsylvania, United States
Joined: January 08, 2014
KitMaker: 425 posts
AeroScale: 401 posts
Posted: Thursday, July 31, 2014 - 04:56 AM UTC
I am delaying the start of my OS2U until I get some serious progress made in the Bombers and Grumman campaigns.
On the Bench:
The Big Three: Eduard 1:48 Bf 109G-2 Trop
Radial Fighters: Hasegawa 1:48 Ki84 Frank
The Mighty Eighth: Eduard 1:48 P-51D-10
California, United States
Joined: October 08, 2013
KitMaker: 111 posts
AeroScale: 28 posts
Posted: Thursday, July 31, 2014 - 07:05 PM UTC
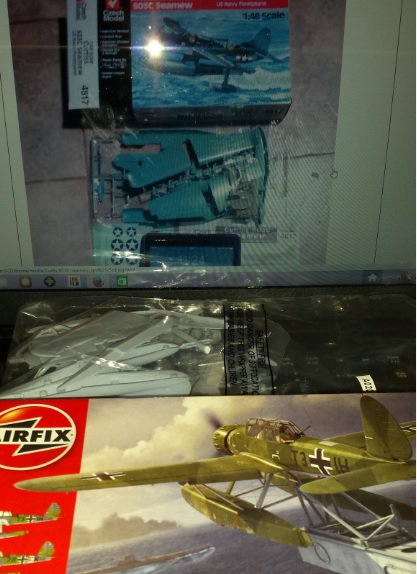
And here is my entry... the SO3C Seamew!

Looking forward to sanding, filing and filling! That's the smell of victory son, nothing beats the smell of Tamiya basic filler and acetone in the morning. :-)
Regards,
Joe Osborne
On the bench:
1/35 Tamiya Tiger I early Production
1/35 Tamiya Mid Production Tiger I
Merlin
Senior Editor #017
United Kingdom
Joined: June 11, 2003
KitMaker: 17,582 posts
AeroScale: 12,795 posts
Posted: Thursday, July 31, 2014 - 10:12 PM UTC
Hi there
I'll make a start on my SBS Model Latécoère 28-5 'La Frégate' (reviewed
HERE). First job is to tackle the real whopper of a casting block under the fuselage.
All the best
Rowan
BEWARE OF THE FEW...
As I grow older, I regret to say that a detestable habit of thinking seems to be getting a hold of me. - H. Rider Haggard
Ontario, Canada
Joined: February 04, 2008
KitMaker: 2,507 posts
AeroScale: 1,814 posts
Posted: Friday, August 01, 2014 - 11:20 AM UTC
" The Die Hards"
43rd MIDDLESEX REGIMENT
MACHINE GUN CORPS
XXX CORP
The most effective way to do it, is to do it.
- Amelia Earhart
England - South East, United Kingdom
Joined: August 15, 2012
KitMaker: 408 posts
AeroScale: 365 posts
Posted: Friday, August 01, 2014 - 07:52 PM UTC
A small point of interest for you Richard. Around 22 years ago
I used to work for a firm called Blaw-Knox, based in Rochester, Kent, on the bank of the River Medway. The firm manufactured road paving machines, but the factory had previously been Shorts, and they still had the slipways leading from the factory floor, into the River Medway. The nearest Pub, where we used to go for a "Liquid Lunch" was called "The Canopus". So, I'm fairly certain, that the subject of your build was built and launched there!
On the workbench
National Pride - 1/72 BAe Nimrod MR2.P
Tiger Meet! - 1/72 Panavia Tornado ECR (Luftwaffe)
Airfix III - 1/72 Hawker Hunter FGA.9
Hairy Brush - 1/72 P-51D Mustang
Mustang 75 - 1/72 P-51D "Ferocious Frankie"
Ontario, Canada
Joined: February 04, 2008
KitMaker: 2,507 posts
AeroScale: 1,814 posts
Posted: Friday, August 01, 2014 - 10:37 PM UTC
" The Die Hards"
43rd MIDDLESEX REGIMENT
MACHINE GUN CORPS
XXX CORP
The most effective way to do it, is to do it.
- Amelia Earhart
England - South East, United Kingdom
Joined: August 15, 2012
KitMaker: 408 posts
AeroScale: 365 posts
Posted: Saturday, August 02, 2014 - 12:31 AM UTC
Cheers Richard - that was a blast from the past! The map was very helpful. What it doesn't show is the tunnels directly behind the main factory sheds, where machinery and aircraft parts would be taken during air raids. Most of the equipment was on a railway system built into the factory floor, so it was quite easy to move it into the tunnels. I used to waste so much work time exploring down there!
On the workbench
National Pride - 1/72 BAe Nimrod MR2.P
Tiger Meet! - 1/72 Panavia Tornado ECR (Luftwaffe)
Airfix III - 1/72 Hawker Hunter FGA.9
Hairy Brush - 1/72 P-51D Mustang
Mustang 75 - 1/72 P-51D "Ferocious Frankie"
#335
Auckland, New Zealand
Joined: September 03, 2013
KitMaker: 1,808 posts
AeroScale: 195 posts
Posted: Saturday, August 02, 2014 - 02:38 PM UTC
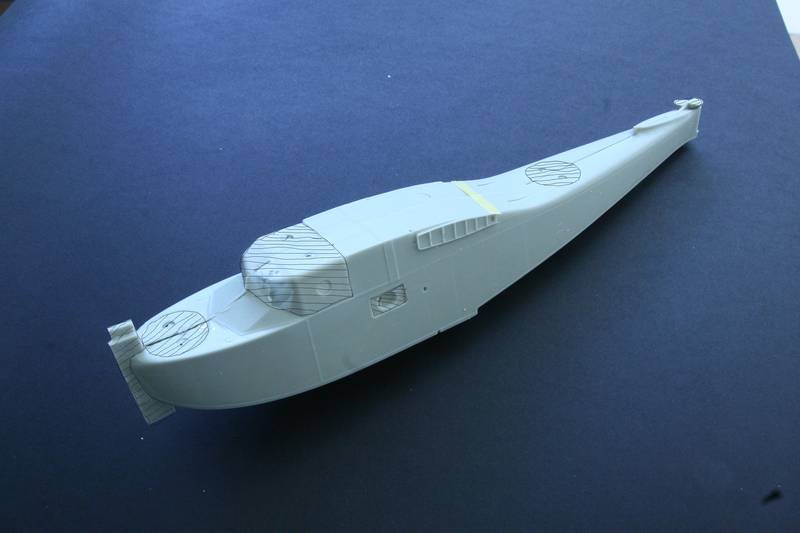
Some very interesting subjects going to built here. To join this campaign I am in floats and all with a Supermarine Walrus.
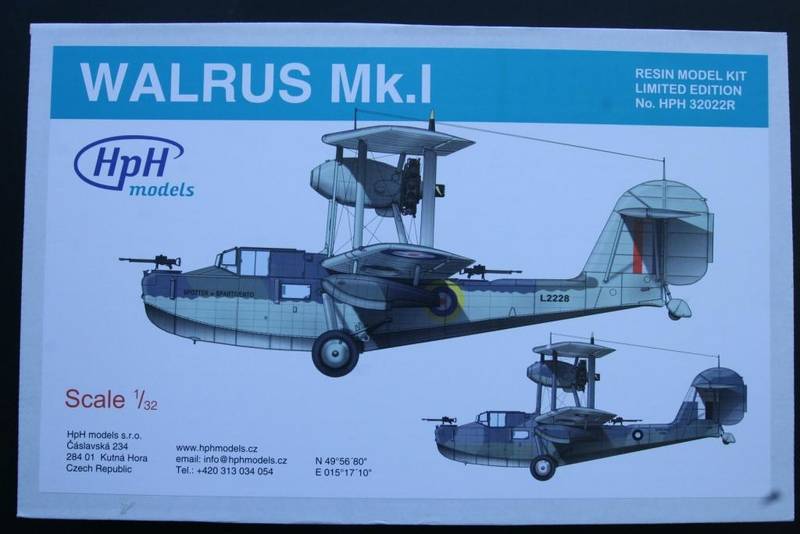
This is a first resin build for me (and first sea plane if comes to that). I will do a separate build log for this because I am certain I will need a fair amount of input. Like Rowan, the first order of business is to deal with the over pour and cast block on the nose.
cheers
Michael
Campaign:
Strip, Track and Trail - Porsche 917/20 - On the bench
Phantoms at 60 - F-4J Marines
Below 1000 tons - M50 minesweeper - Sailed for duty
British Columbia, Canada
Joined: September 03, 2009
KitMaker: 6,965 posts
AeroScale: 6,247 posts
Posted: Saturday, August 02, 2014 - 05:38 PM UTC
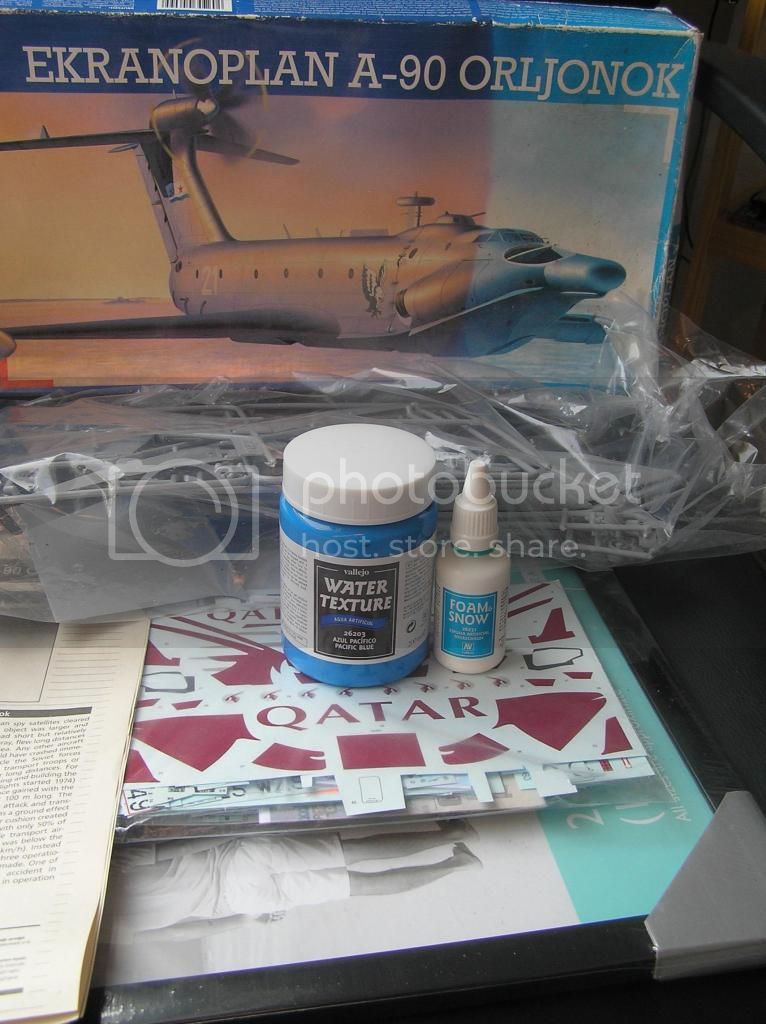
If things work well, I propose to do this
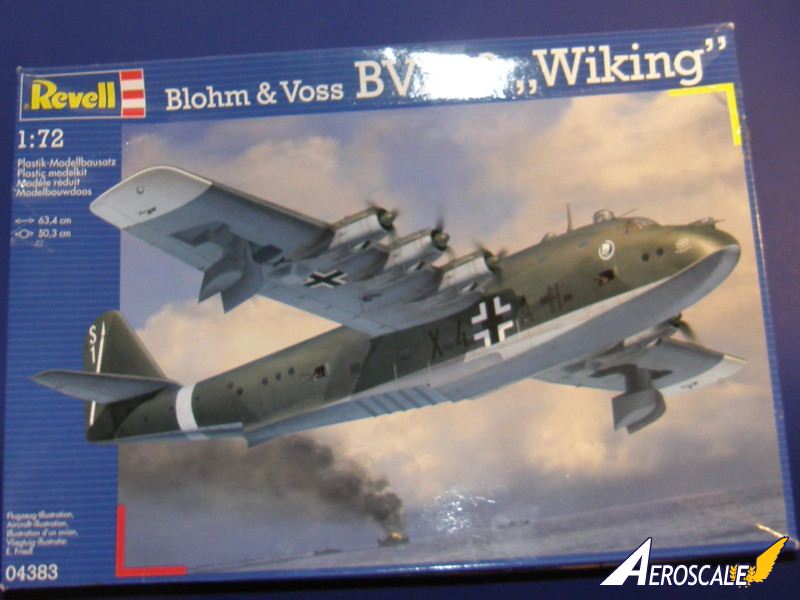
I could have wished to exercise my usual propensity to do civil subjects, but the gun turrets look to be rather difficult to eradicate so I shall just have to grit my teeth and do the military transport version instead.
When once you have tasted flight you will walk the Earth with your eyes turned skyward.
For there you have been, and there you will always long to return.
-Leonardo Da Vinci
#259
Massachusetts, United States
Joined: October 23, 2011
KitMaker: 2,265 posts
AeroScale: 1,715 posts
Posted: Saturday, August 02, 2014 - 11:53 PM UTC
Jessie, with or without guns, that will be a fabulous model

Ive decided to do a Catalina, in 1/144 scale of course - a postwar civil airliner conversion in fact, and I will be removing the turrets.
kit
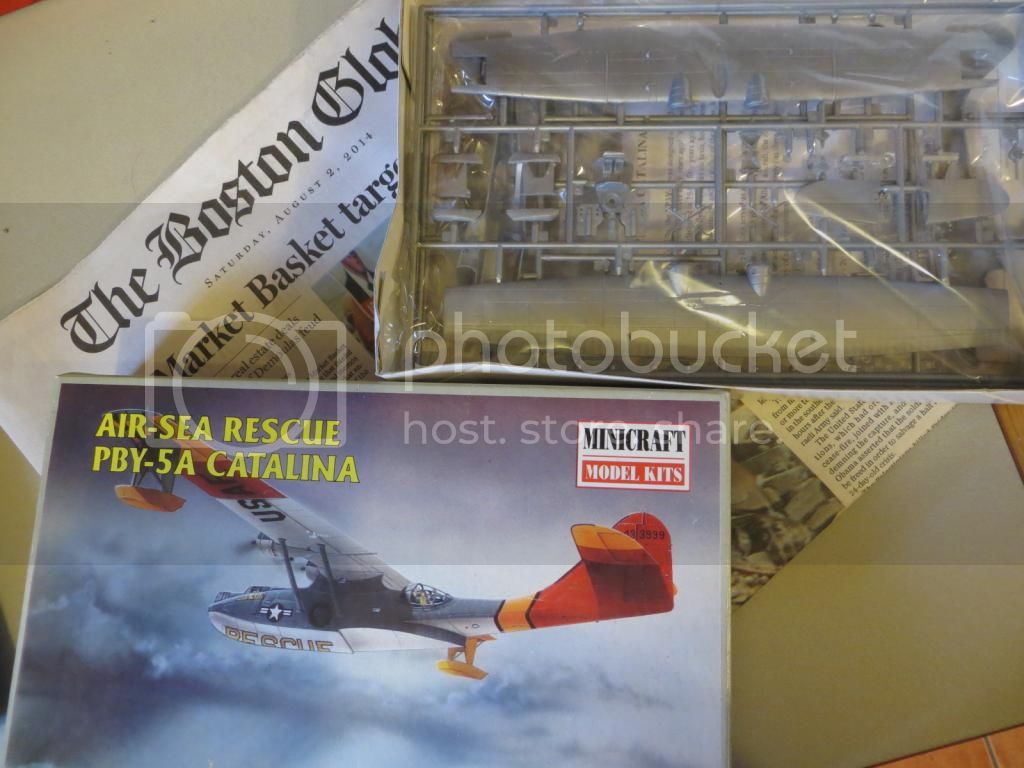
I recently learned that Transocean Airlines had a concession to fly air services in the Trust Territory of the Pacific from 1949 to 1960, and operated at least four (some sources say five) US Navy owned PBYs in that service. They called weekly at Kwjalein, or actually the seaplane base on nearby Ebeye.
prototype.

one of them, N31232 was named "TALOA Majuro" which is in the Marshall Islands, so Im going with that.
I have the art for the TALOA logo and the UN seal. The color appears to be overall aluminum dope.
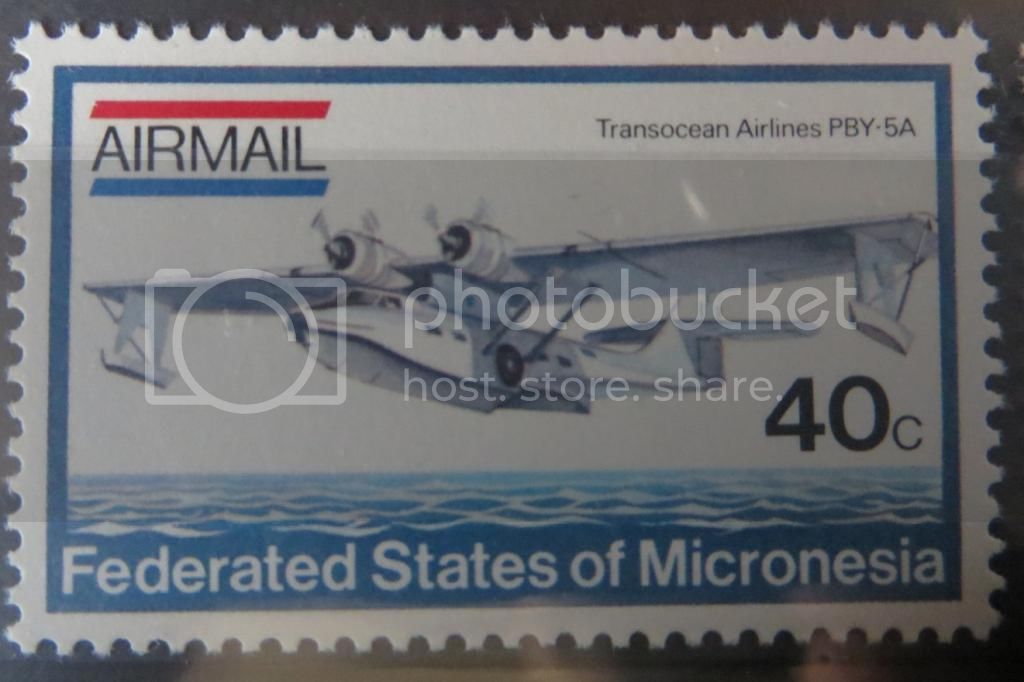
stamp in my collection
England - West Midlands, United Kingdom
Joined: January 03, 2006
KitMaker: 39 posts
AeroScale: 39 posts
Posted: Sunday, August 03, 2014 - 08:53 AM UTC
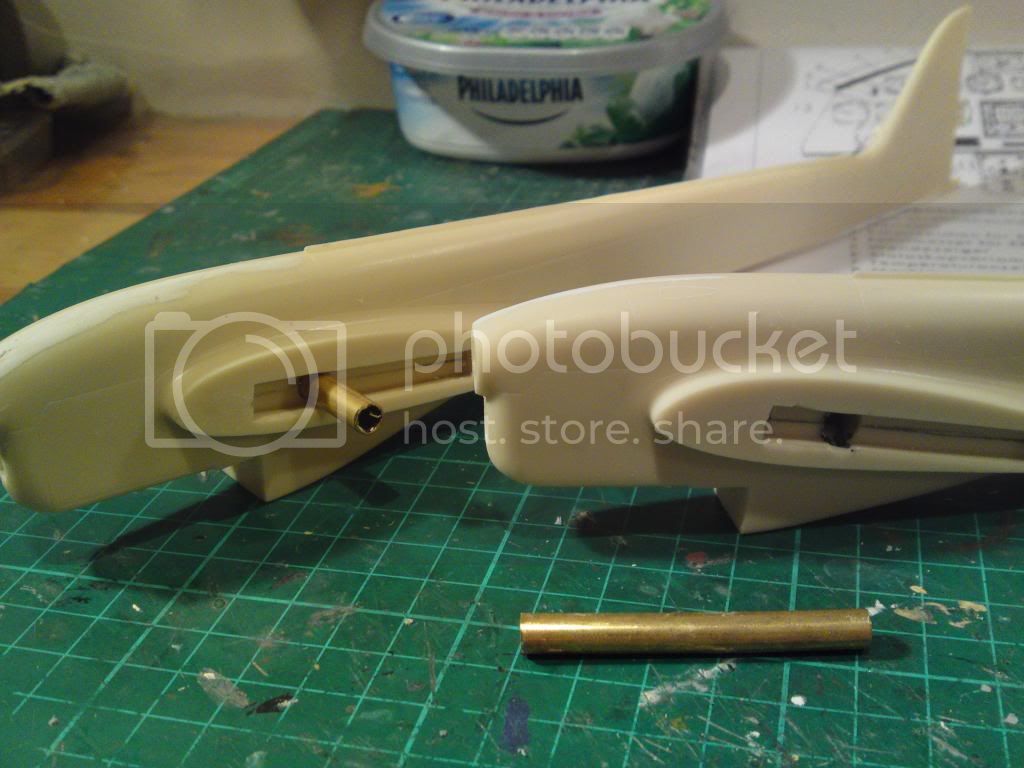
My contribution to this campaign is also a resin kit, namely the HMI Blohm und Voss Bv138 in 1/48 scale. A lot of resin to contend with!!

Below is a view of contents of kit. A start has been made all pouring blocks have been removed, ailerons, rudders & elevator have been separated to pose them in different angles. A small piece of brass tube has been passed through a hole drilled in each boom, to act as a spar. Portholes have been drilled out in each fuselage half & vac form canopy & turrets have been cut out.
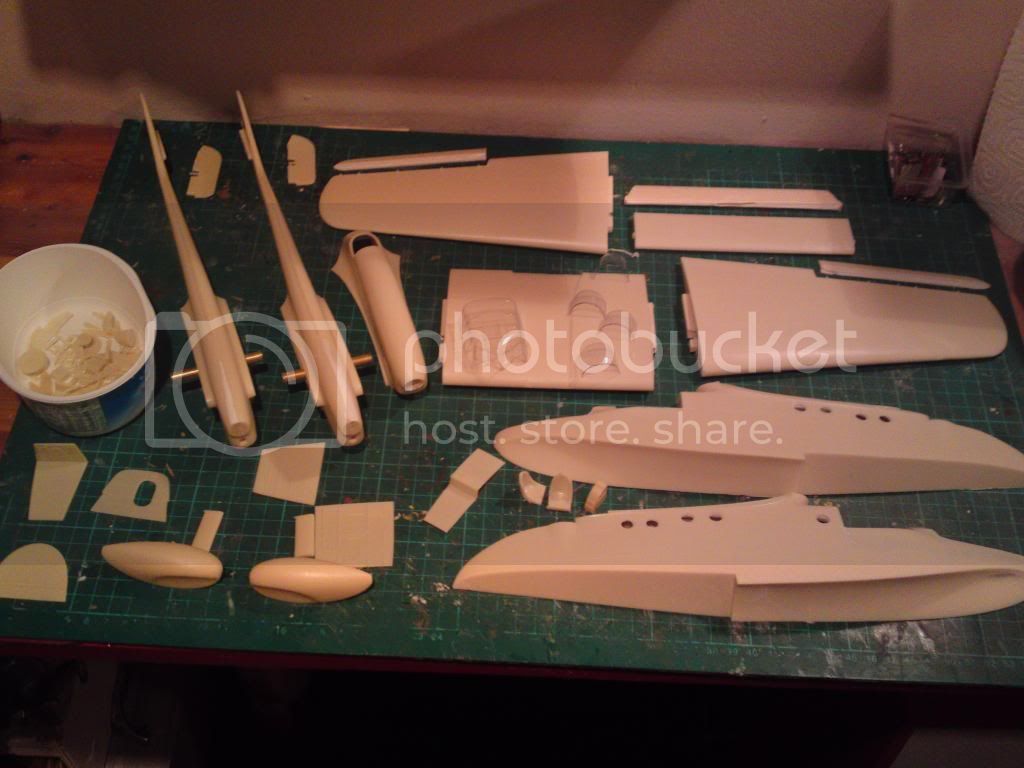
More to follow

Andy
England - East Anglia, United Kingdom
Joined: June 04, 2003
KitMaker: 1,405 posts
AeroScale: 97 posts
Posted: Sunday, August 03, 2014 - 09:31 AM UTC
Will be building the Arado Ar 196 for this. I haven't even taken the parts out of the plastic yet, so no idea what it looks like,
Might add the catapult if all goes well.
Nothing spoils your day like an AK!
Merlin
Senior Editor #017
United Kingdom
Joined: June 11, 2003
KitMaker: 17,582 posts
AeroScale: 12,795 posts
Posted: Tuesday, August 05, 2014 - 07:18 PM UTC
Quoted Text
My contribution to this campaign is also a resin kit, namely the HMI Blohm und Voss Bv138 in 1/48 scale...
Andy
Hi Andy
Wow! Gorgeous! I must admit I'm jealous of that one!
All the best
Rowan
BEWARE OF THE FEW...
As I grow older, I regret to say that a detestable habit of thinking seems to be getting a hold of me. - H. Rider Haggard
England - West Midlands, United Kingdom
Joined: January 03, 2006
KitMaker: 39 posts
AeroScale: 39 posts
Posted: Wednesday, August 06, 2014 - 06:31 AM UTC
Quoted Text
Quoted Text
My contribution to this campaign is also a resin kit, namely the HMI Blohm und Voss Bv138 in 1/48 scale...
Andy
Hi Andy
Wow! Gorgeous! I must admit I'm jealous of that one!
All the best
Rowan
Hi Rowan,
Kit came as a great suprise to me, my wife decided to suprise me at Christmas with it - she certainly did

regards Andy
England - West Midlands, United Kingdom
Joined: January 03, 2006
KitMaker: 39 posts
AeroScale: 39 posts
Posted: Wednesday, August 06, 2014 - 06:56 AM UTC
A catch up on my work with the Bv138. As stated previously I decided to add a couple of small brass tube spars. These were situated in a hole drilled through both booms to which the wings would be attached. Corresponding holes were drilled in the wings to take the spars.
I have also cut out the radiator outlet in order to use plasticard for the shutters.
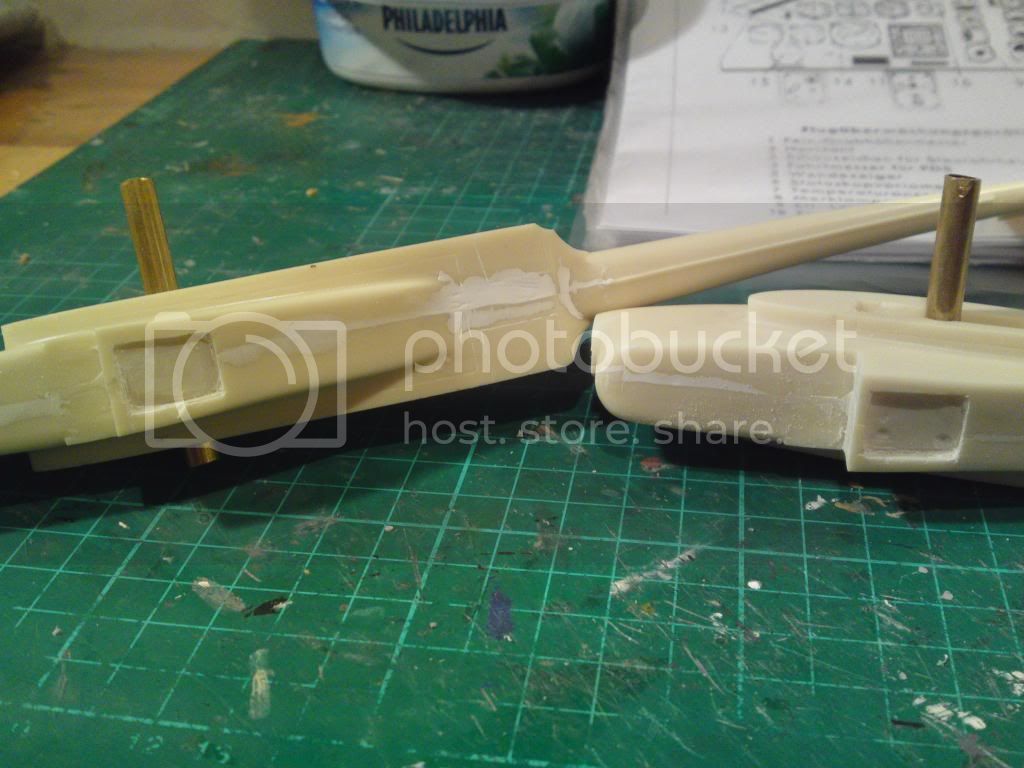
Note the amount of filler used to correct some of the slightly mis-matched mouldings.I leave you with a shot of the floors and bulkheads added to the fuselage half.
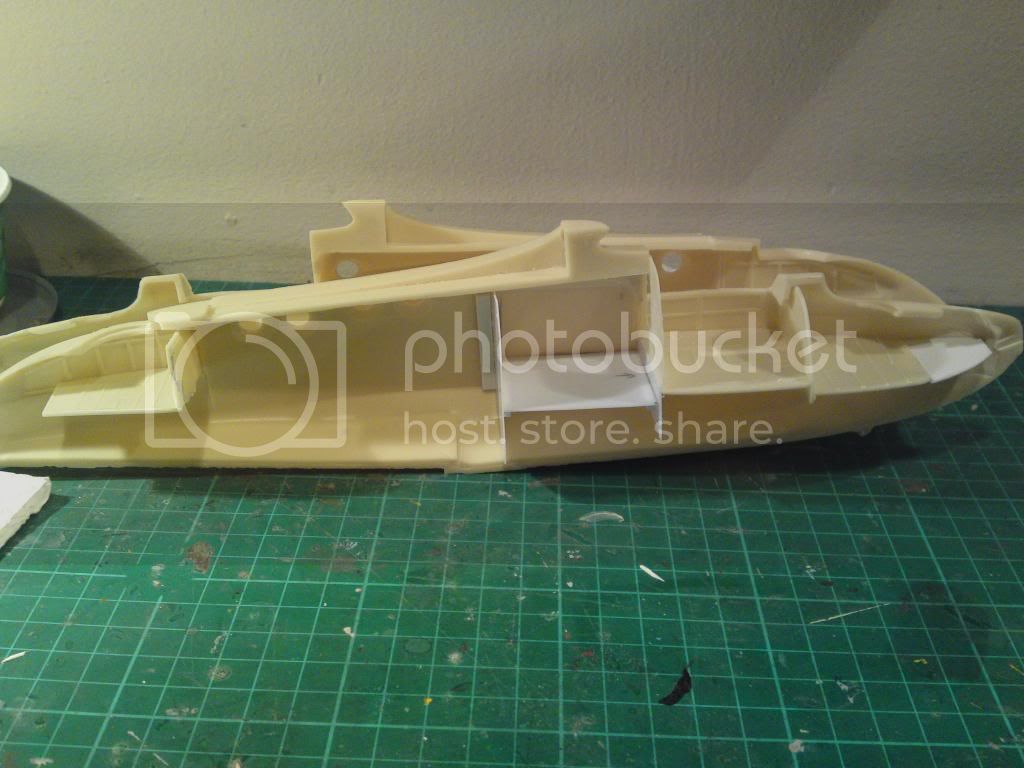
Andy
Ontario, Canada
Joined: February 04, 2008
KitMaker: 2,507 posts
AeroScale: 1,814 posts
Posted: Wednesday, August 06, 2014 - 08:17 AM UTC
Nice work Andy.
" The Die Hards"
43rd MIDDLESEX REGIMENT
MACHINE GUN CORPS
XXX CORP
The most effective way to do it, is to do it.
- Amelia Earhart
#439
Washington, United States
Joined: November 05, 2005
KitMaker: 4,950 posts
AeroScale: 3,192 posts
Posted: Wednesday, August 06, 2014 - 08:23 AM UTC
Andy, I've contemplated the tube thru support on a couple of projects. How to you manage to line the holes up to avoid getting everything out of alignment after all of that effort?

Hanger Queens in Waiting:
Monogram 1/72 F8F-1
Corsair the Sky Pirate - 1/72 Ace A-7D
Century Series - Airfix 1/72 F-105G
Anti Shipping - Academy 1/72 PBJ-1D
Academy 1/72 F-84E
England - West Midlands, United Kingdom
Joined: January 03, 2006
KitMaker: 39 posts
AeroScale: 39 posts
Posted: Thursday, August 07, 2014 - 08:38 AM UTC
Quoted Text
Andy, I've contemplated the tube thru support on a couple of projects. How to you manage to line the holes up to avoid getting everything out of alignment after all of that effort?
Hi Mark,
My method for tube wing spars on this particular kit was as follows:- on the booms I measured from the leading edge of the wing root to the thickest part i.e. the thickest part of the wing. I marked this, then measured the thickest part of the wing and where it bisected the mark from the leading edge of the of the wing root was the point where I drilled a pilot hole through the boom.
I then held the outer wing to the boom and taped it so it was joined fairly solidly to it, the Bv138 has no dihedral on the wings, then I drilled through the pilot hole into the wing. I repeated this on the other three wing parts. Finally I enlarged all the holes with a drill of the same diameter of the brass tube used.
The same method could be used where the wing is directly fitted to a fuselage.
Hope this gives you some idea of the method I used, although I'm sure someone out there has a better way of achieving this.
Regards Andy
#439
Washington, United States
Joined: November 05, 2005
KitMaker: 4,950 posts
AeroScale: 3,192 posts
Posted: Thursday, August 07, 2014 - 09:46 AM UTC
Thanks, actually, I hadn't thought about working from the wings in.
Hanger Queens in Waiting:
Monogram 1/72 F8F-1
Corsair the Sky Pirate - 1/72 Ace A-7D
Century Series - Airfix 1/72 F-105G
Anti Shipping - Academy 1/72 PBJ-1D
Academy 1/72 F-84E
England - West Midlands, United Kingdom
Joined: August 01, 2012
KitMaker: 960 posts
AeroScale: 391 posts
Posted: Saturday, August 09, 2014 - 01:04 PM UTC
I plan on building the 1/48 scale Ryan PT20 float-plane in US markings.

Ontario, Canada
Joined: February 04, 2008
KitMaker: 2,507 posts
AeroScale: 1,814 posts
Posted: Saturday, August 09, 2014 - 01:20 PM UTC
Quoted Text
I plan on building the 1/48 scale Ryan PT20 float-plane in US markings.
Welcome Brent .
I have never seen a Ryan PT20 float plane!
Looking forward to the build.
" The Die Hards"
43rd MIDDLESEX REGIMENT
MACHINE GUN CORPS
XXX CORP
The most effective way to do it, is to do it.
- Amelia Earhart