_GOTOBOTTOM
World War II: Germany
Aircraft of Germany in WWII.
Hosted by Rowan Baylis
Eduard Fw190A-6
FredrikA
_VISITCOMMUNITY
Uppsala, Sweden
Joined: January 09, 2008
KitMaker: 92 posts
AeroScale: 90 posts
Posted: Saturday, May 10, 2014 - 07:00 AM UTC
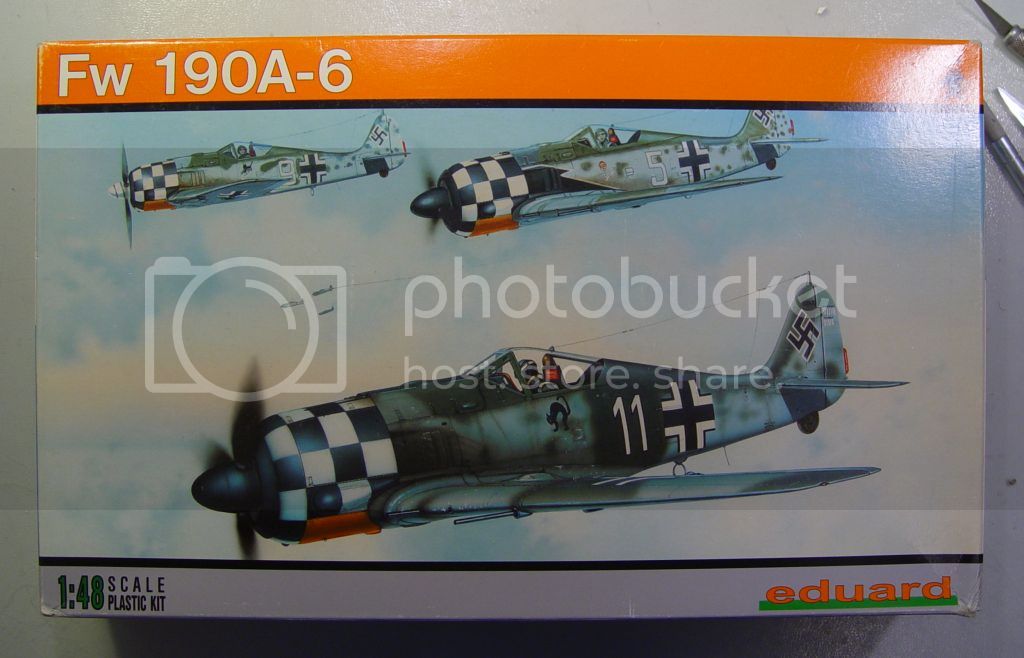
A new build... this time a Focke Wulf 190A-6 from Eduard.
I have built quite a few of Eduard's Fw 190A-family, five to be exact and they look like this...

Fw 190A-8 R2 - Eduard's Royal Class boxing and built in the beginning of my return to the hobby, which means few skills and no airbrush and an upside down "8".
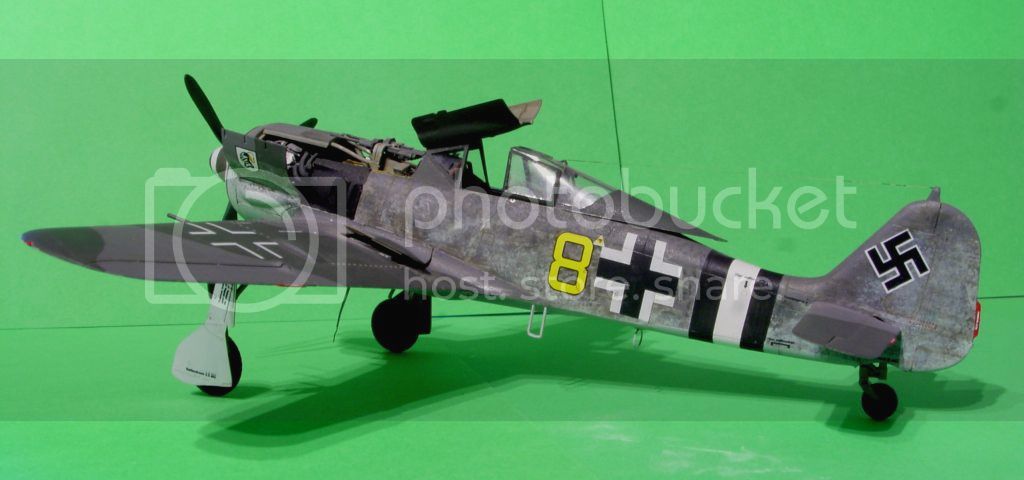

Fw 190A-8 R2 - a new version of the same aircraft as above.
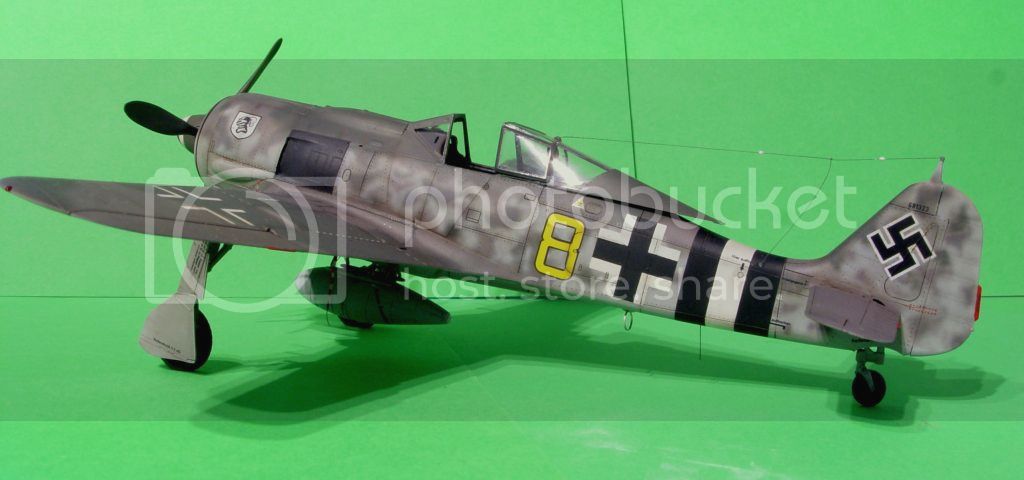

Fw 190A-8 - the other model from the Royal Class box.
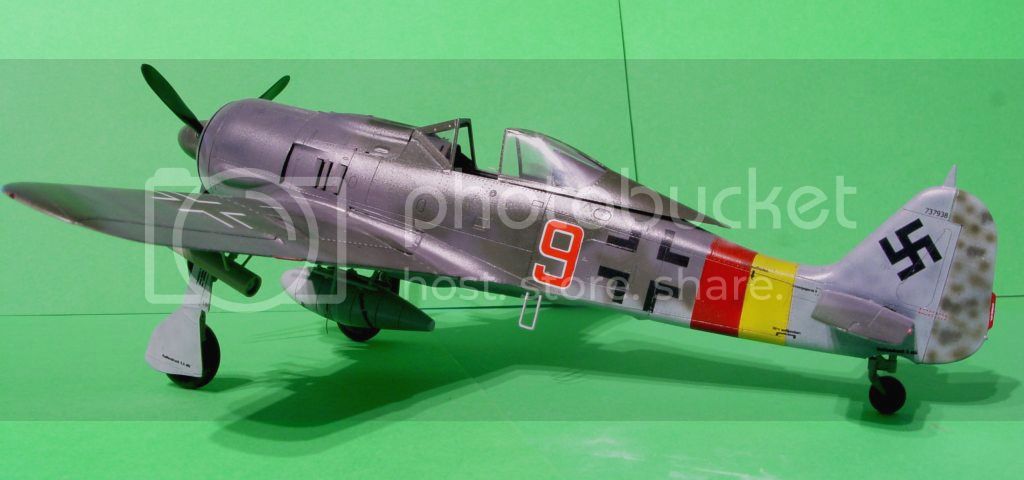

Fw 190A-7
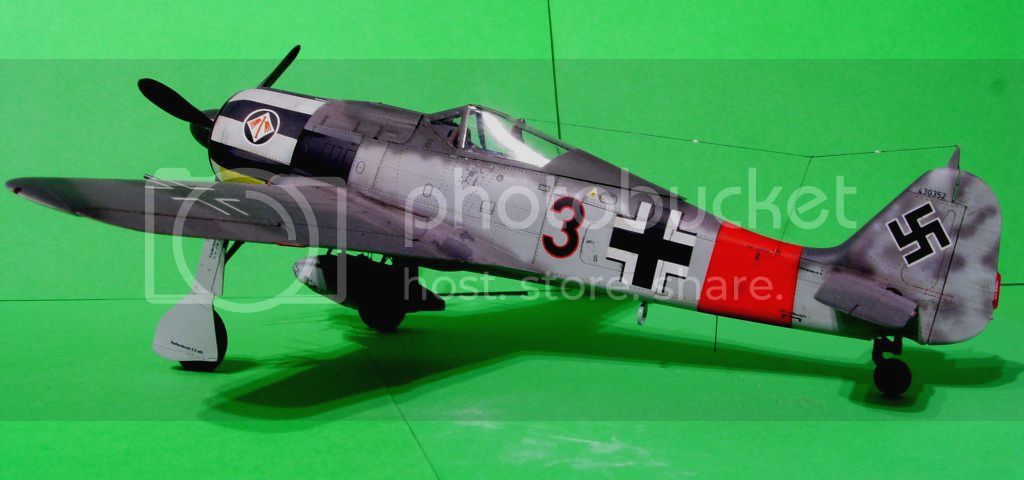

Fw 190A-8 R2 - my most serious attempt so far at super detailing.
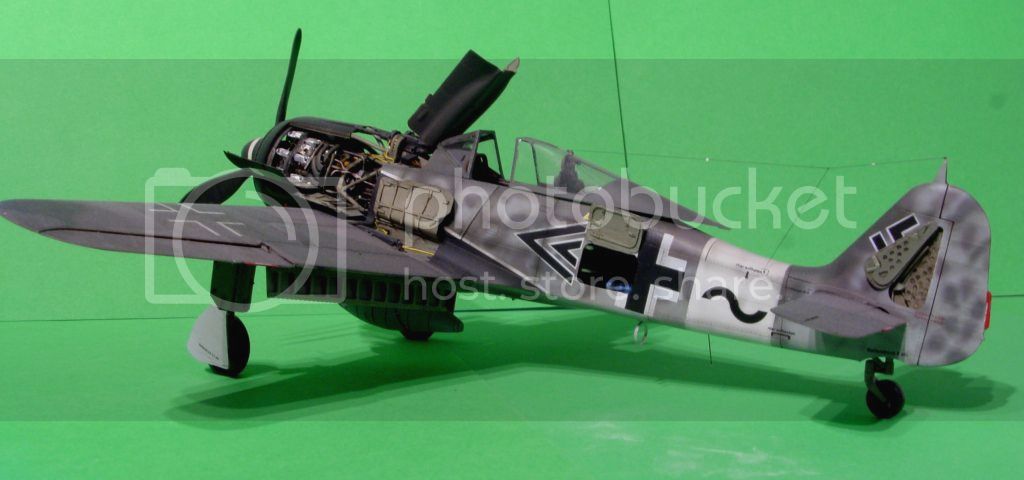

Fw 190A-6 - the new build. After this build there are only the A-5 and A-9 left from Eduard's 190A-family.

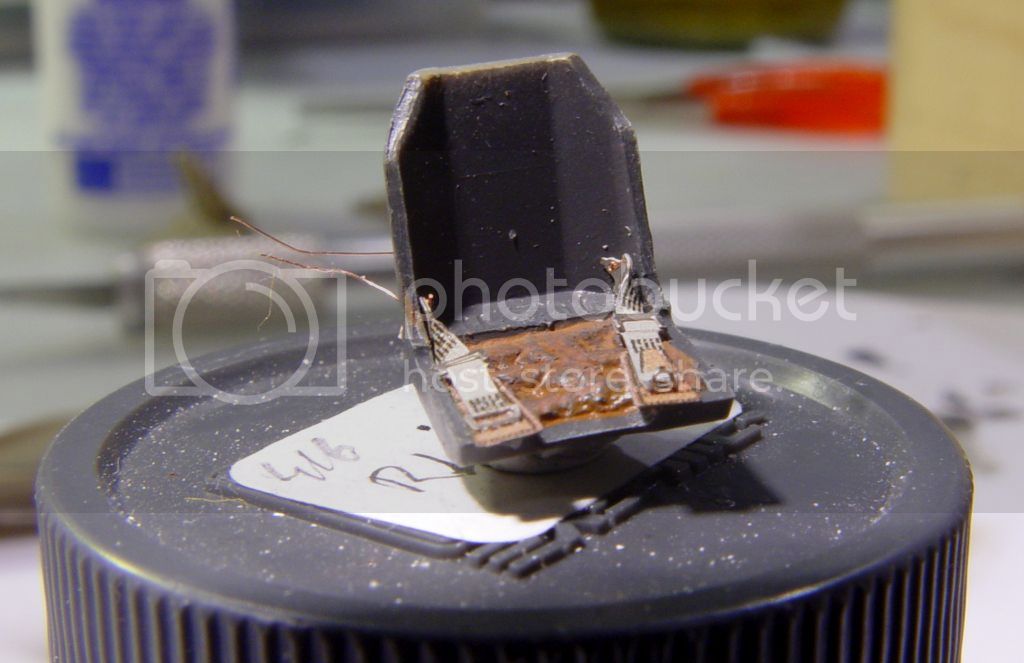
The build started with the cockpit and I've always had a problem with getting the seatbelts to stick to the seat. This time I drilled a hole in the seat and used a thin copper wire to form a bolt. A much more secure way of fastening the belts. I've also made a cushion out of Milliput.

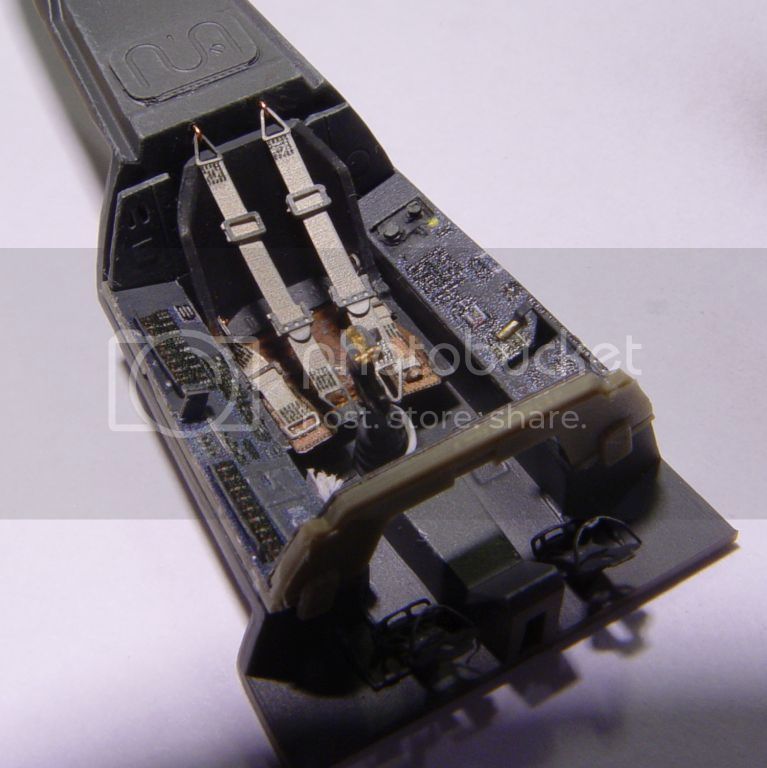
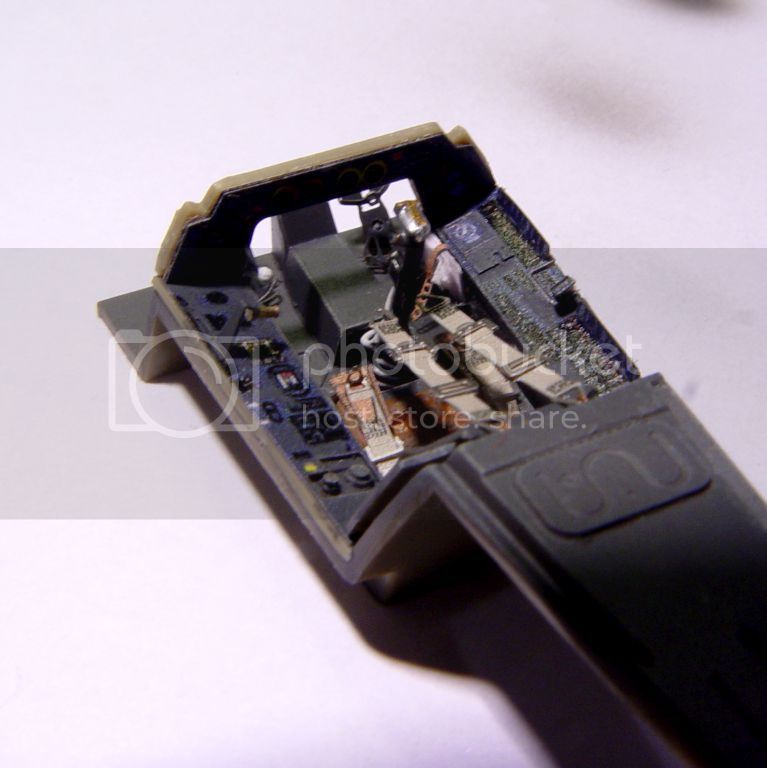
All the etched things have been installed in the cockpit. The shoulder straps have also been secured using copper wire, without these "loops" there are no attachment points for the seatbelts. You can also see that there is a colour difference between the RLM66 of the pre-coloured etch and the Gunze RLM66 that I've used. For this reason I had to over-paint the etch, but the blue tone still shows clearly in the photographs - it doesn't show as clearly in reality.


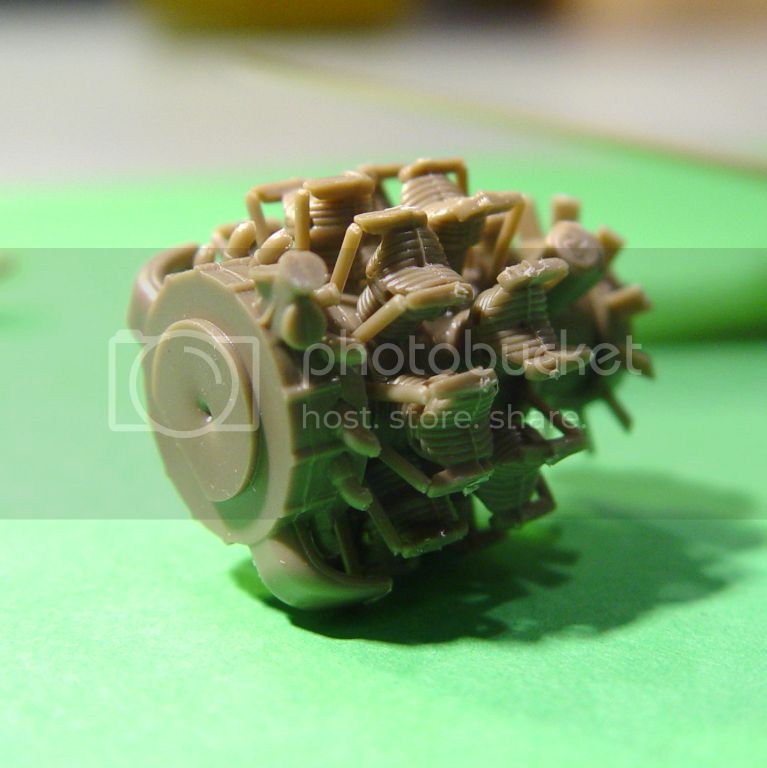
The engine will be painted black, but nothing but the fan at the front will be visible in the end. You still need the engine to fit the exhausts and the propeller, but this is clearly one area where the kit is problematic if not over-engineered. Eduard's 190A is problably easier to build if you leave the different engine and gun panels open. Problems do occur when you try to close everything up.
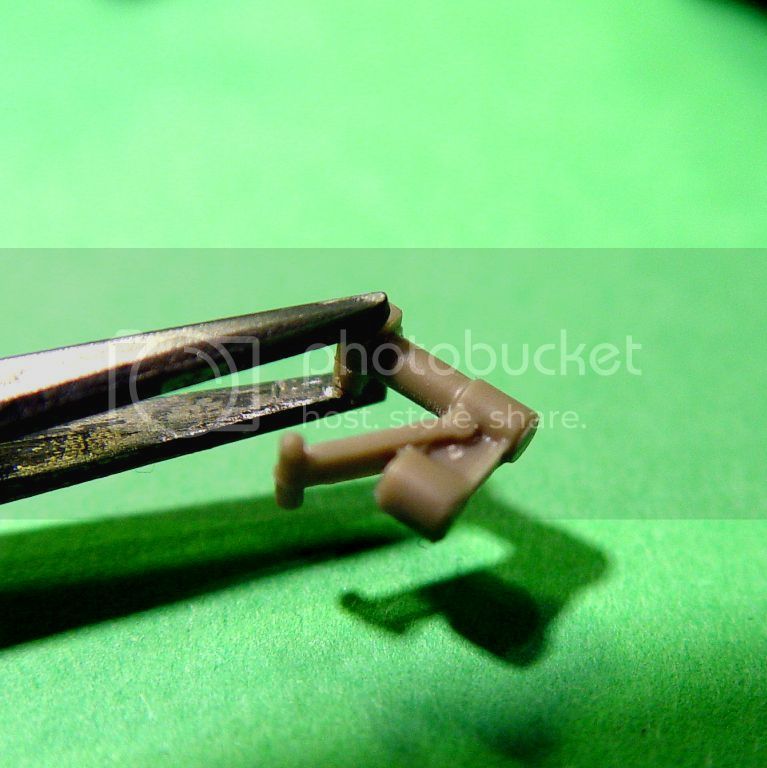
In the last couple of 190-builds I've managed to break of the fork of the tail wheel strut. This time I took it of from the beginning on purpose.

More progress in a later post...
/Fredrik
alpha_tango
_VISITCOMMUNITY
Germany
Joined: September 07, 2005
KitMaker: 5,609 posts
AeroScale: 5,231 posts
Posted: Sunday, May 11, 2014 - 11:35 PM UTC
Hi Fredrik

this is a nice collection of Eduard Fw190!

I though a while if I should comment on your current build. IMHO the lap belts were attached on the outside of the seat. Else it is a wonderful start! It maybe motivates me to continue with mine.....

all the best

Steffen
FredrikA
_VISITCOMMUNITY
Uppsala, Sweden
Joined: January 09, 2008
KitMaker: 92 posts
AeroScale: 90 posts
Posted: Monday, May 12, 2014 - 02:57 AM UTC
Thank you Steffen! Of course you should comment, how else will the rest of us learn and develop?!

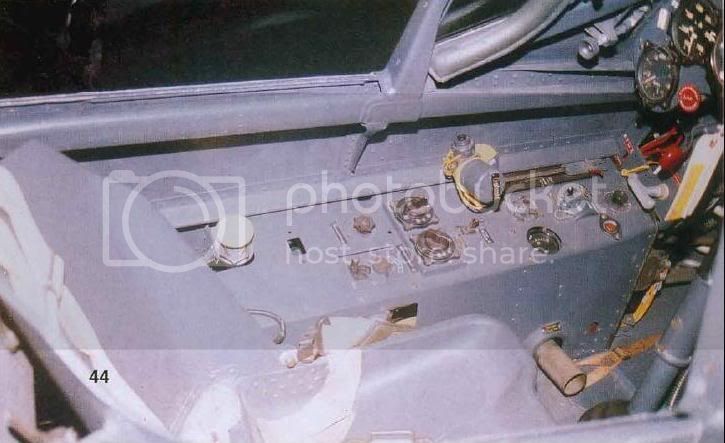
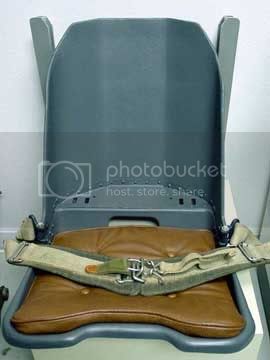
You're right about the seat belts or at least almost right... a very short research tour on Google gave me the picture below and it shows that the seat belts attach further to the front and at the rim of the chair instead. Not having looked further than this picture, I can't swear that this is the correct way though. I'll see if I can correct things...

Cheers
Fredrik

[edit] Forgot the pictures...


Joel_W
Staff MemberAssociate Editor
AUTOMODELER
_VISITCOMMUNITY
New York, United States
Joined: December 04, 2010
KitMaker: 11,666 posts
AeroScale: 7,410 posts
Posted: Monday, May 12, 2014 - 03:09 AM UTC
Fredrik,
That's some collection of Eduard FW190's you're amassing. Your 1st one, hand painted with the 8 upside down, still looks really good. You did an excellent job with the mottling especially since it's done with a brush.

Your last build, the Eduard Fw 190A-8 R2 certainly showed a huge improvement in your detailing. It really looks very good. The engine compartment is just excellent. A few close up pictures surely are in order.

I too struggle with PE seatbelts not sticking to the seat almost all the time. I found that scrapping a little paint off the seat attachment points really helps. I also "cheat" at times, and use a drop of 5 min epoxy. Your idea of drilling a hole and using a piece of wire as a bolt surely will help to keep it in place. One other thing, the harnesses need a little natural sag in them. Right now they both have a unnatural stretch to them.

Will be following your build with much interest.

Joel
thegirl
_VISITCOMMUNITY
Alberta, Canada
Joined: January 19, 2008
KitMaker: 6,743 posts
AeroScale: 6,151 posts
Posted: Monday, May 12, 2014 - 11:48 AM UTC
Very nice collection of 190 Fredrik Built a few of Eduards kit already , very enjoyable .


Terri
berndm
_VISITCOMMUNITY
Niedersachsen, Germany
Joined: March 26, 2014
KitMaker: 844 posts
AeroScale: 630 posts
Posted: Tuesday, May 13, 2014 - 05:55 AM UTC
Hi Fredrik
You got a great collection of Eduards 190,a very good inspiration to me!
I built two of them, a A-5 Profipack and a A-5 Weekend, both
got two large sinkholes in their left wing, did yours have the same problem ?
FredrikA
_VISITCOMMUNITY
Uppsala, Sweden
Joined: January 09, 2008
KitMaker: 92 posts
AeroScale: 90 posts
Posted: Wednesday, May 14, 2014 - 09:53 AM UTC
Thanks for your comments guys.
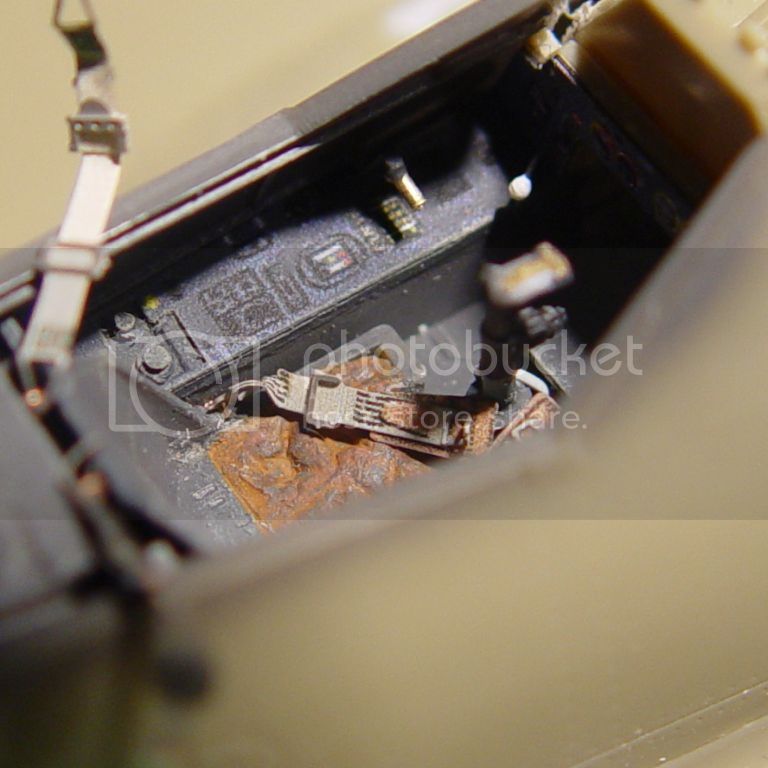
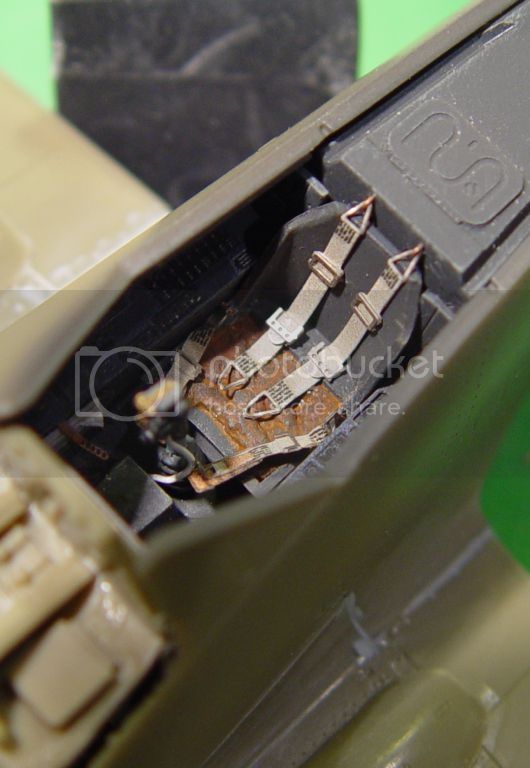
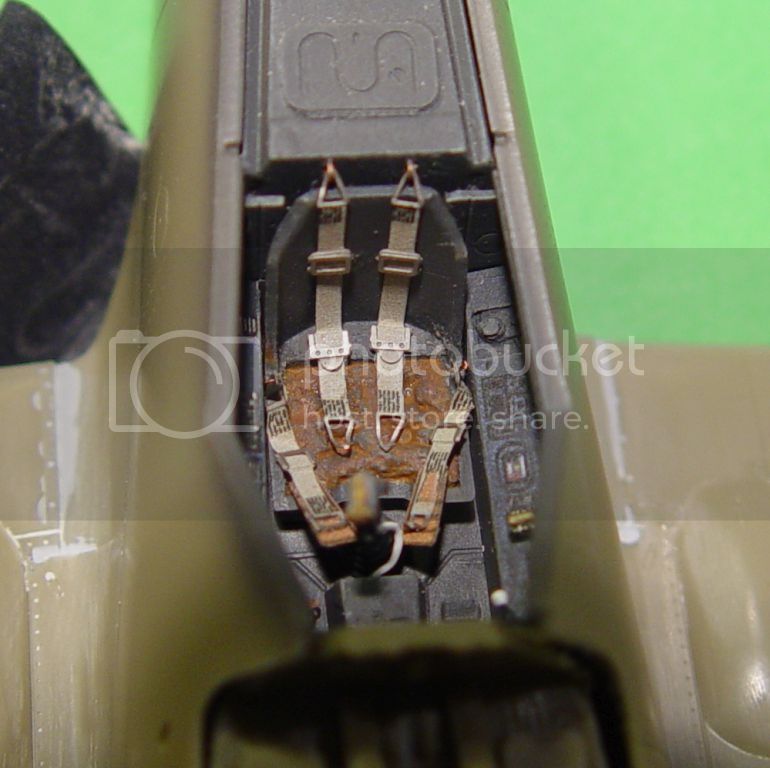
Joel, the sag, or lack of, has been attended to. You can see it in the pictures below.
Terri, I too find Eduard kits enjoyable. Have you built any from the 190A family? I find that they require a bit more skill and work than any other Eduard kit I've built. They still build into nice looking models though.
Bernd, good that I can inspire you. No I can't say that I have seen any large sink holes in any of the ten or so wings I've dealt with so far, but I haven't built the A-5 yet...

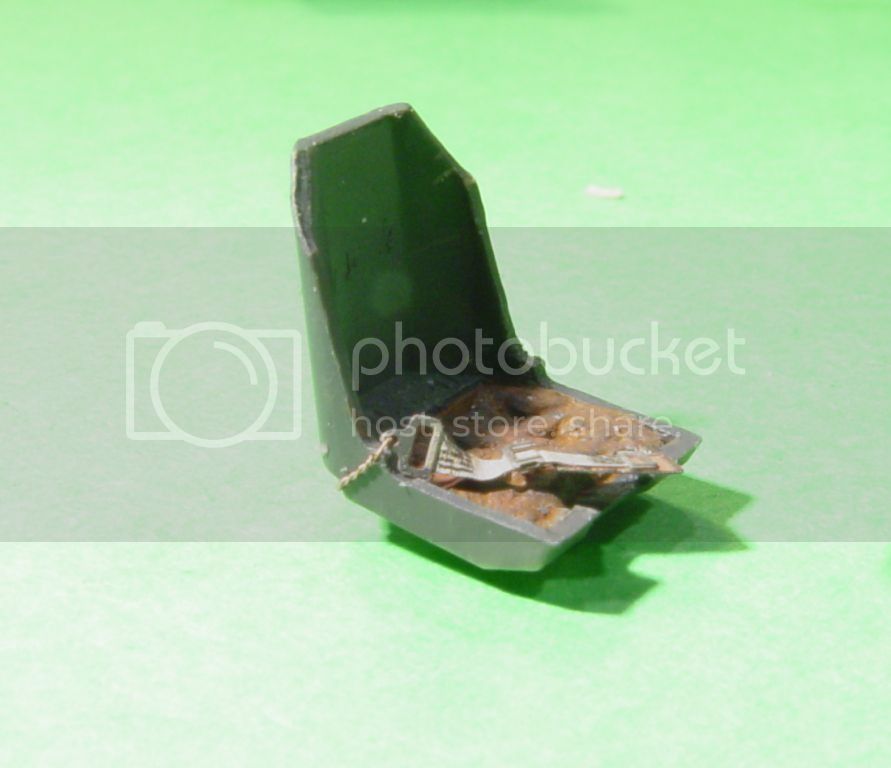
So there were those faulty seat belts. Normally I would leave them and change the approach in the next build, but I hadn't cemented the chair this time, so it was an issue possible to adress without too much work.

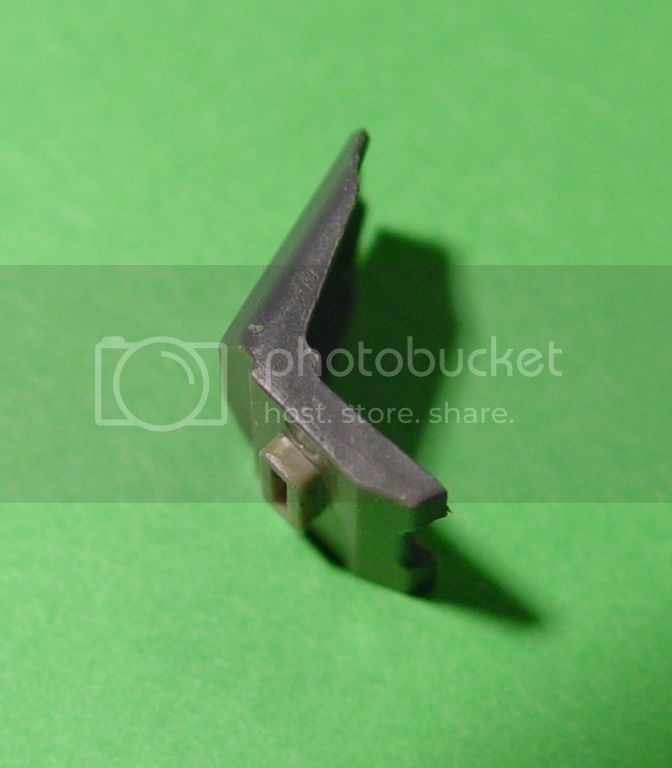
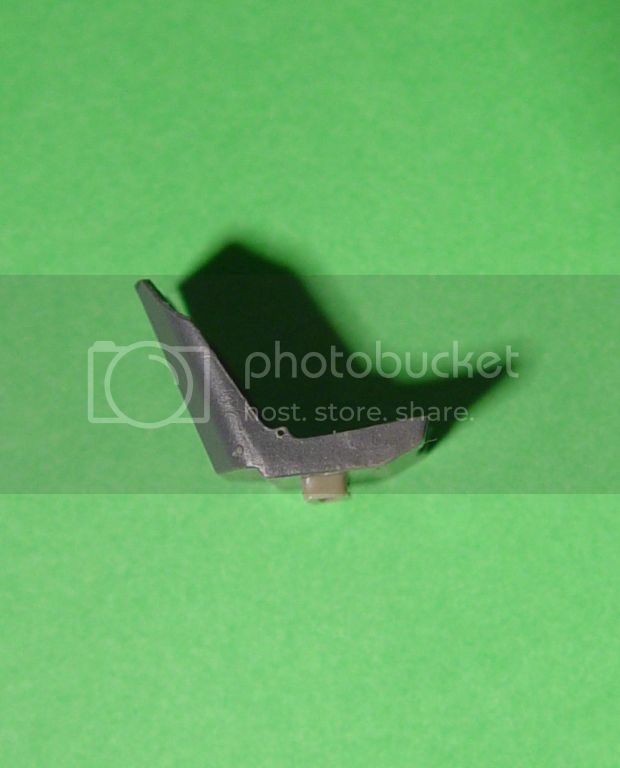
According to the pictures I found online and others found in my files, the belt should be attached to the edge of that corner between the back and the seat. Sticking to the idea of using copper wire to fix the belt to the chair, I drilled a 0.3mm hole in that corner.


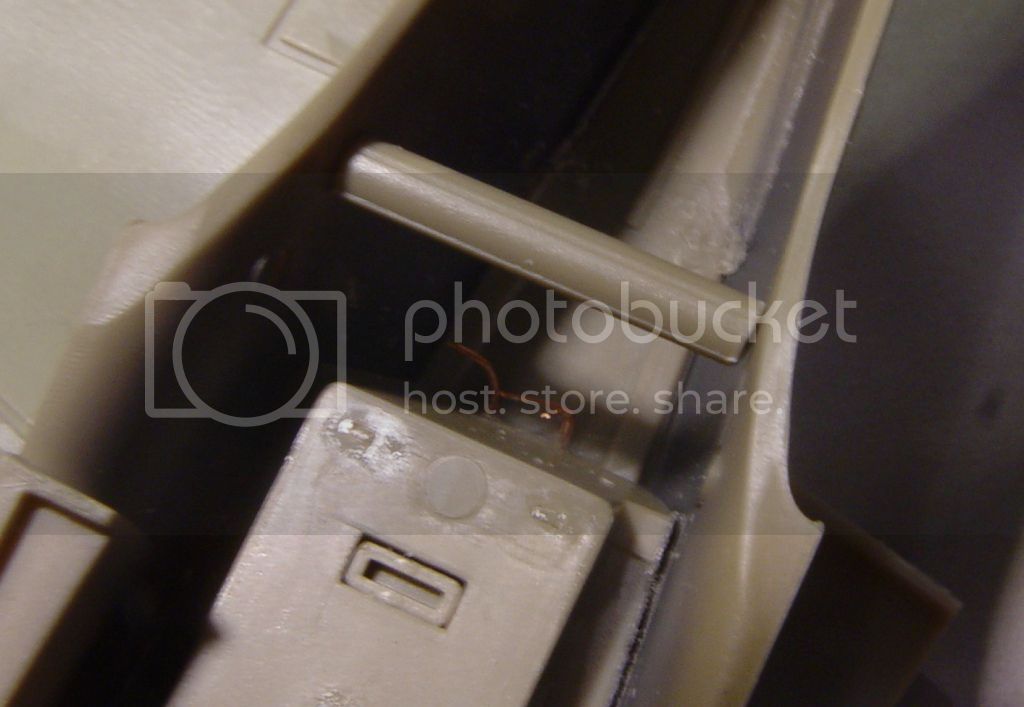
Using a thin copper wire from an old electrical cord, an attachment point was created for the seat belt. The loop was closed by simply twisting the wire and then tucking it under the seat. As you can see further down, the side of the chair won't be visible and therefore not the wire either.


Once both sides were completed, then the chair could be reinstalled and everything looked fine again. Taking good pictures of this wasn't that easy though. Getting enough light and getting close enough was problematic.


Wings and other things are up next.
Take care!
/F
berndm
_VISITCOMMUNITY
Niedersachsen, Germany
Joined: March 26, 2014
KitMaker: 844 posts
AeroScale: 630 posts
Posted: Wednesday, May 14, 2014 - 09:49 PM UTC
Hi Fredrik, it is looking good and the main parts are more or less together, i guess.
Will you use the kit decals/versions ?

Bernd
FredrikA
_VISITCOMMUNITY
Uppsala, Sweden
Joined: January 09, 2008
KitMaker: 92 posts
AeroScale: 90 posts
Posted: Thursday, May 15, 2014 - 10:18 PM UTC
Bernd, having used Mal's Miracle Masks for my last two builds - you can see them here Eduard Spitfire MkIX and Miracle Masks - I thought I would continue on that path. However, it is likely that I will do the version on the box "White 11". I really want to do one with a chequered cowl.

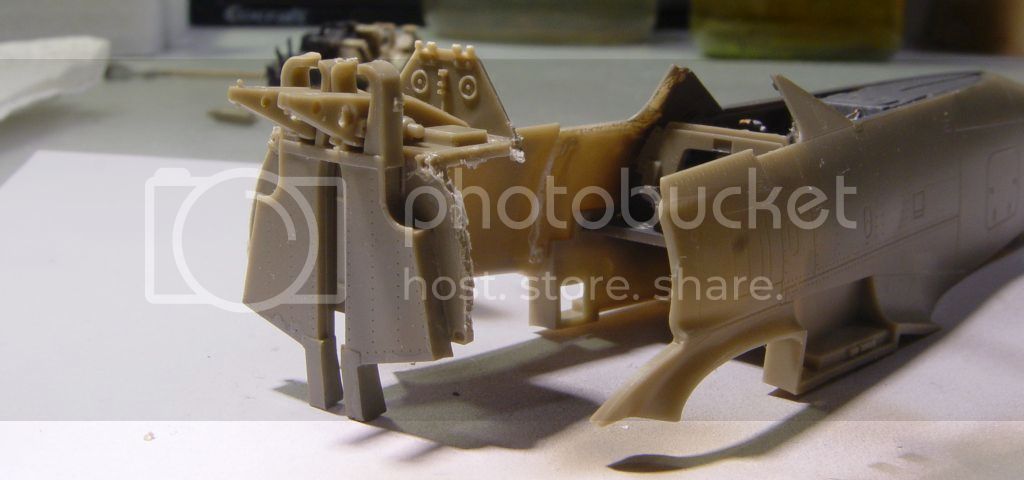
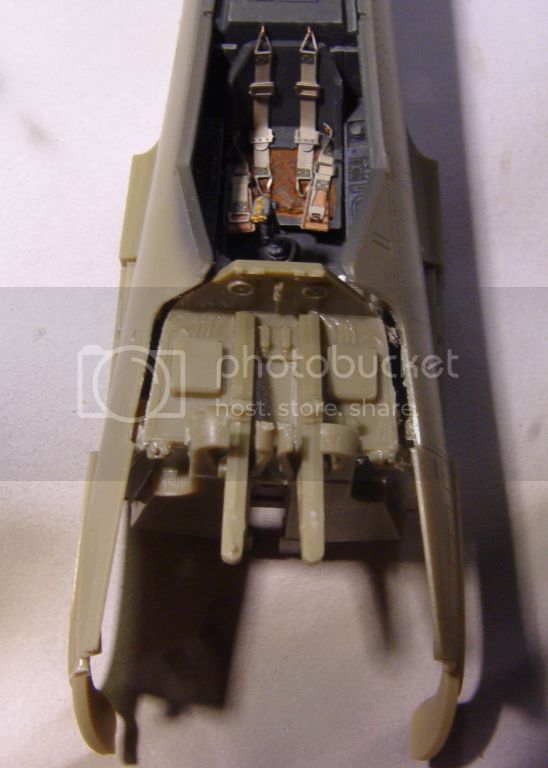
The build continues and let it be known that Eduard's 190-series doesn't fall together on its own. If you stick to the instructions, then you should install the firewall at the same time as you close up the fuselage and install the cockpit. The risk with this is that you pinch the fuselage a little too much and you might have some strange problems later. Having built no less than five of these kits previously, you would think that I should have remembered this... but no. Instead I had to take the firewall out again.


If you allow the model to have a say, then this is what it wants to look like. There is a small, it's almost impossible to miss it, gap that I will have to do something about later...


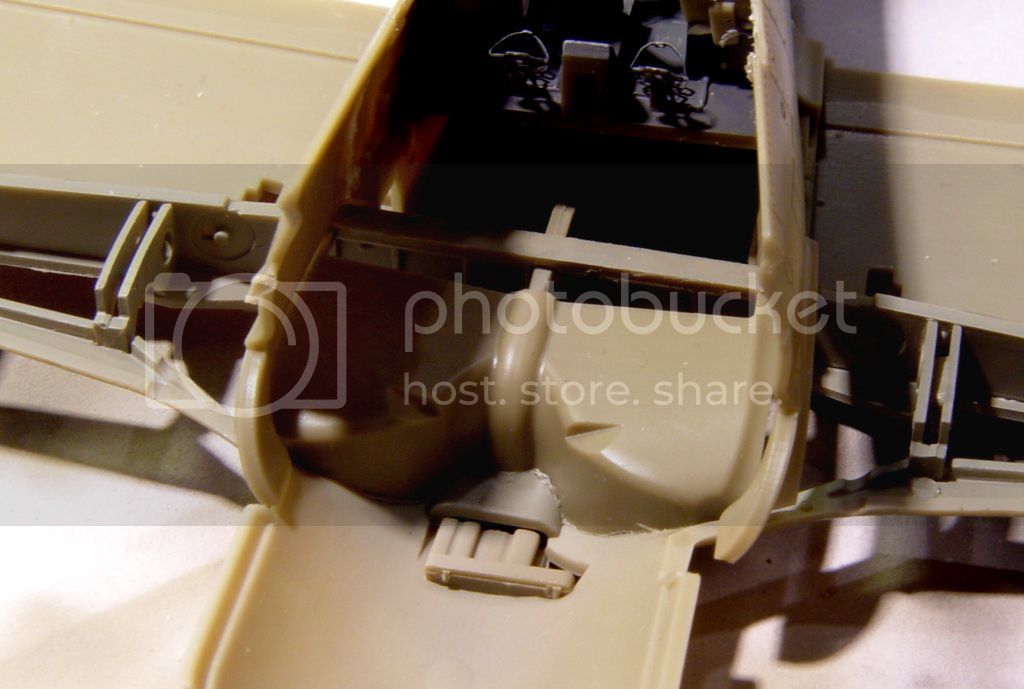
But the reason for not doing that until later is visible here. If you glue the fuselage to the wing before you install the firewall, then it will be a lot easier to get a perfect fit in this area. The firewall can be squeezed in later, but it is advisable that you put it in without glueing it in place before you glue the fuselage to the wing.


But before you commit glue to the front area, you'd better make sure that the fuselage matches the width of the wing at the back. I had to insert a piece of sprue to spread the fuselage a little.


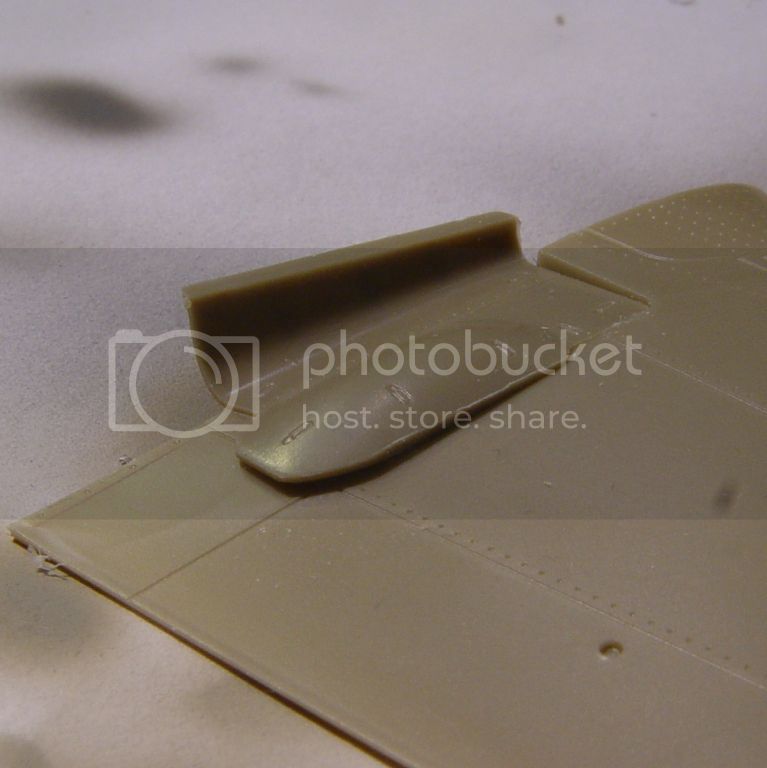
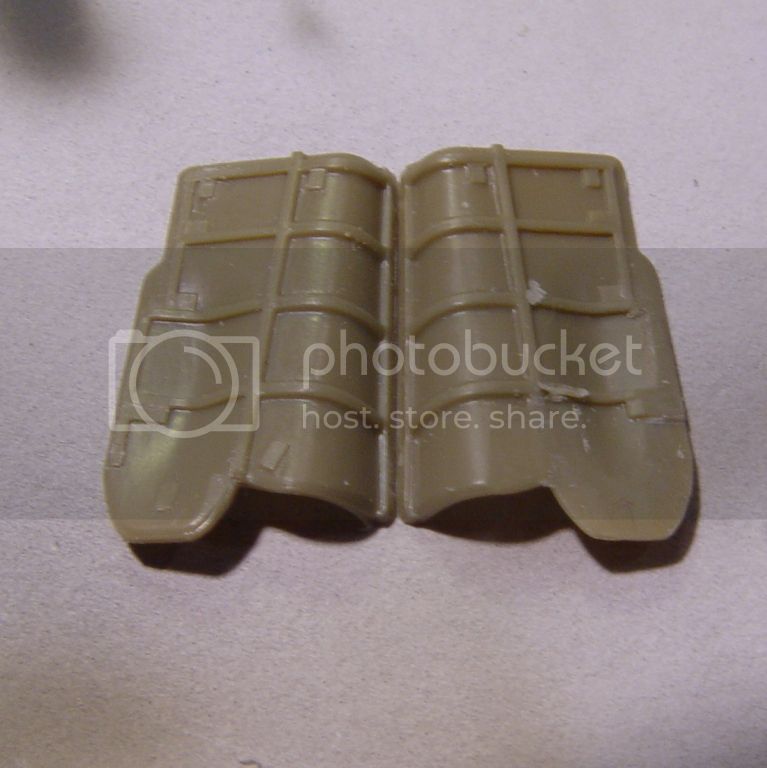
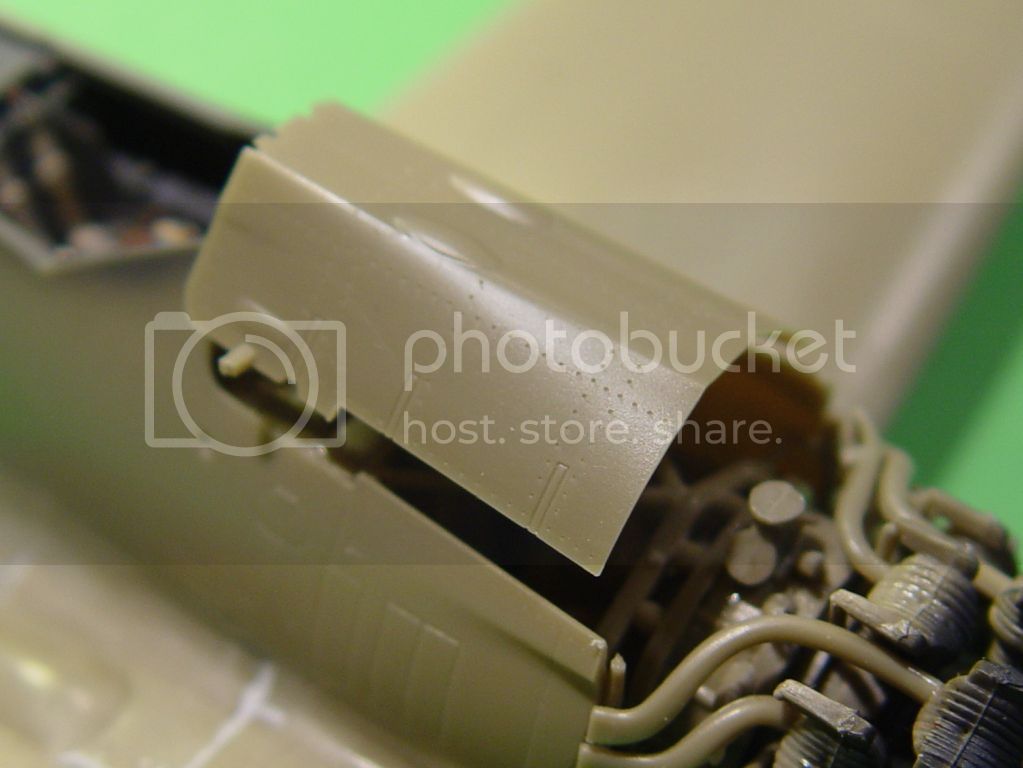
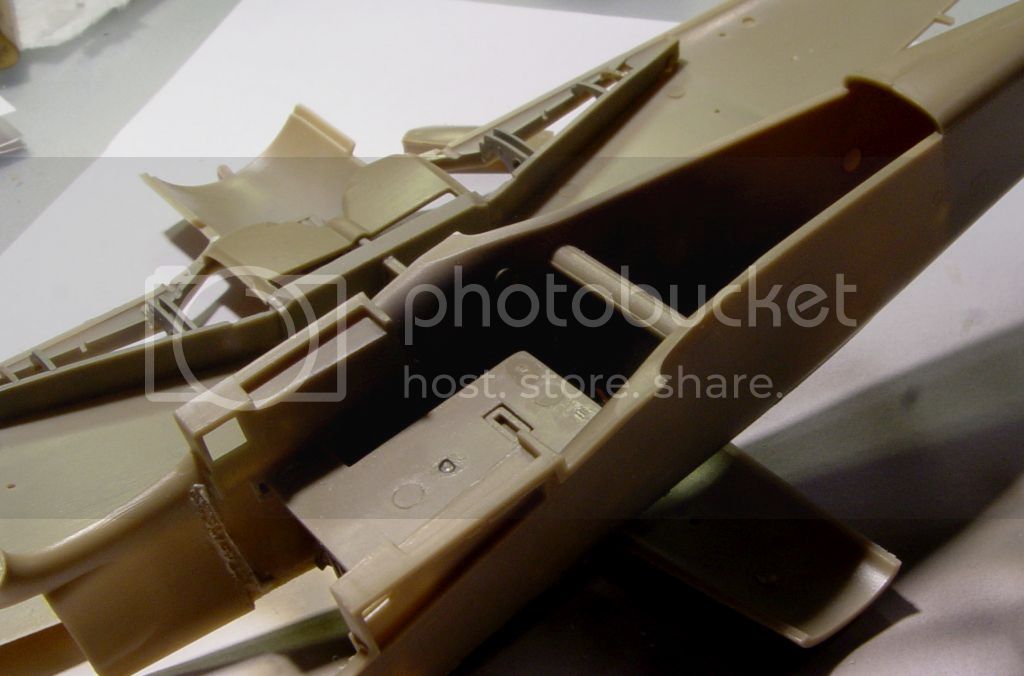
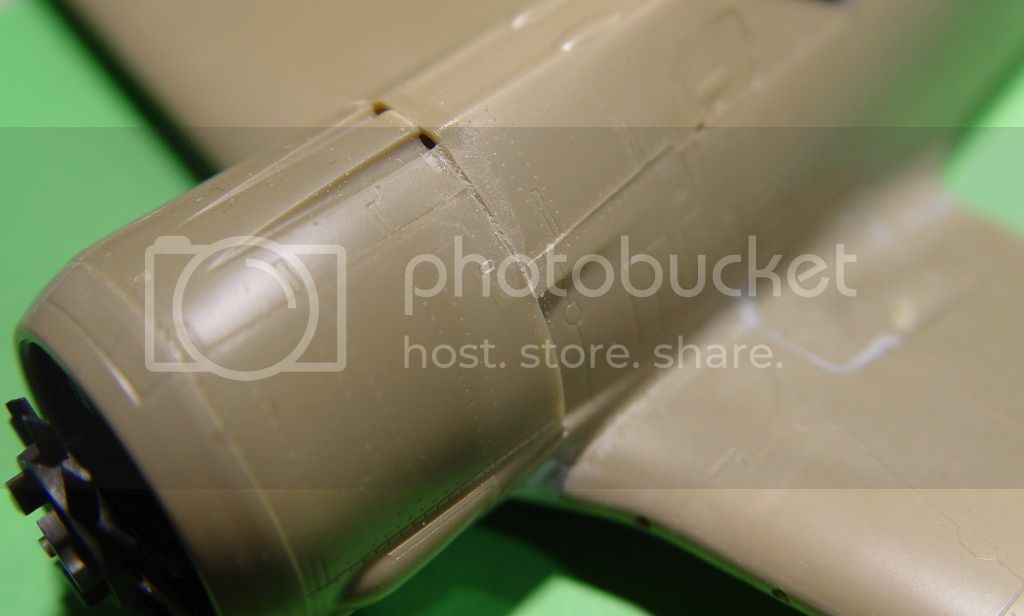
The next problem to adress is the ill fitting hatches for the wing root guns. They, if they will be closed, have to have quite a lot of material removed from the undersides. The reason for this is that the bulge should sit on top of the wing, where as the rest of the hatch should drop down and sit level with the wing. It might be possibe to see this problem in this picture.

This is not a very tricky thing to do. Turn the hatch over and file away. But make sure that you remove and thin out the bulge bit only. In the end there should be a step between the bulge underside and the rest of the underside.


Have a nice weekend!
/Fredrik
berndm
_VISITCOMMUNITY
Niedersachsen, Germany
Joined: March 26, 2014
KitMaker: 844 posts
AeroScale: 630 posts
Posted: Thursday, May 15, 2014 - 10:34 PM UTC
Hi Fredrik
I had the same problem with the firewall, and on the second as well. Great idea with the fuselage spread up !
Before i glued the firewall into the fuselage, i mounted the engine bearings to the firewall.I felt it was much easier, than
later.
And a nice WE for you too !

Bernd
FalkeEins
_VISITCOMMUNITY
England - South East, United Kingdom
Joined: March 07, 2005
KitMaker: 868 posts
AeroScale: 690 posts
Posted: Wednesday, May 28, 2014 - 04:17 AM UTC


..excellent work, hope we can see some more..
FredrikA
_VISITCOMMUNITY
Uppsala, Sweden
Joined: January 09, 2008
KitMaker: 92 posts
AeroScale: 90 posts
Posted: Wednesday, May 28, 2014 - 10:51 AM UTC
Bernd, thanks for the tip about the engine bearers. It might come in handy for my next build. You might know this, but if you are closing all hatches, then you don't have to fit all of the bearers in order to get a positive fit for the engine.

Thank you Neil and yes you can see some more! There has been some progress and it feels as if we are approaching the paint stage rather rapidly now.

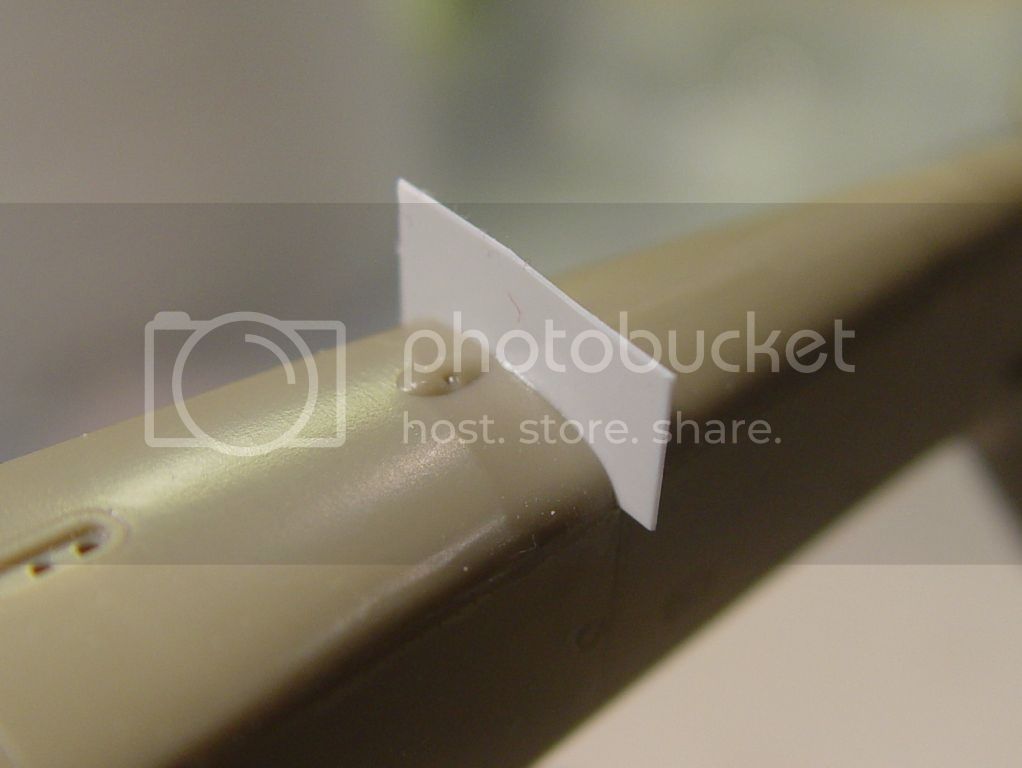
Plasticard was useful for filling the gap between the wing and the fuselage. This has now been trimmed and is now awaiting a little Mr Surfacer and a light sanding.


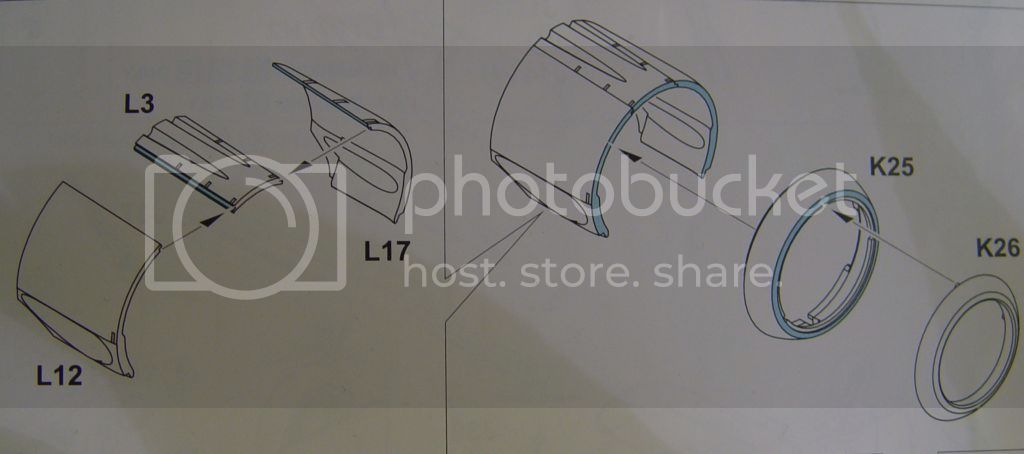
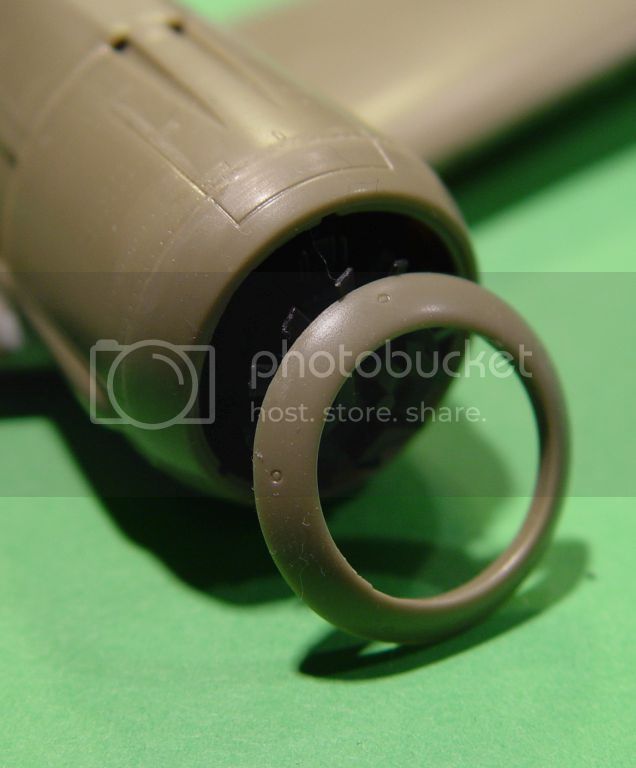
Eduard wants you to construct the nose section in this order. I think that there is a fairly large risk that you end up with a less than perfect fit between the cooler ring and the other elements, if you do it like that.


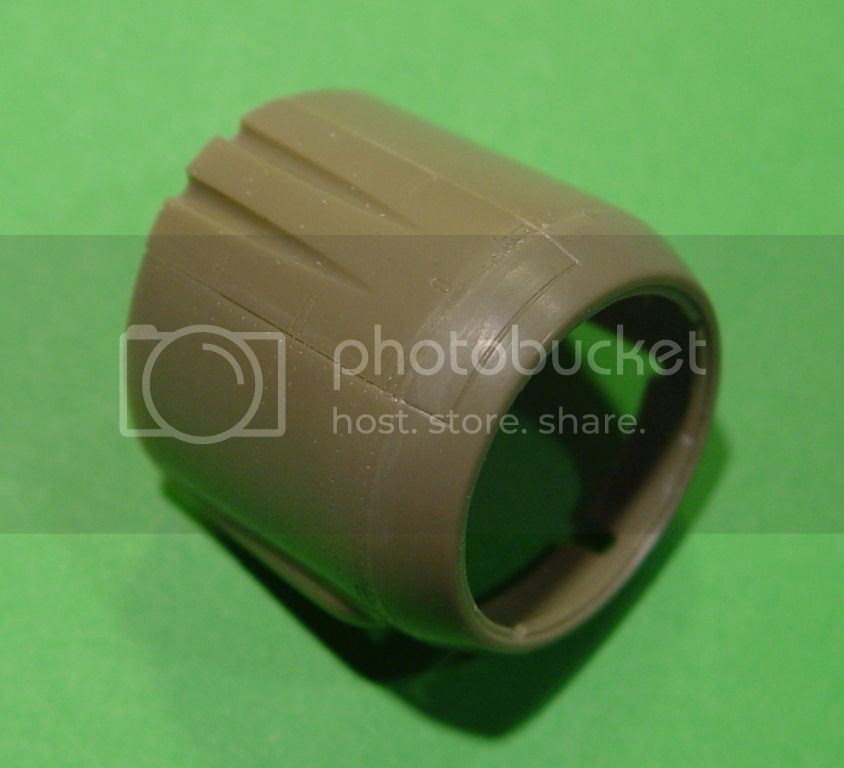
So therefore I suggest that you use the cooler ring as a guide and glue the other elements onto it directly.


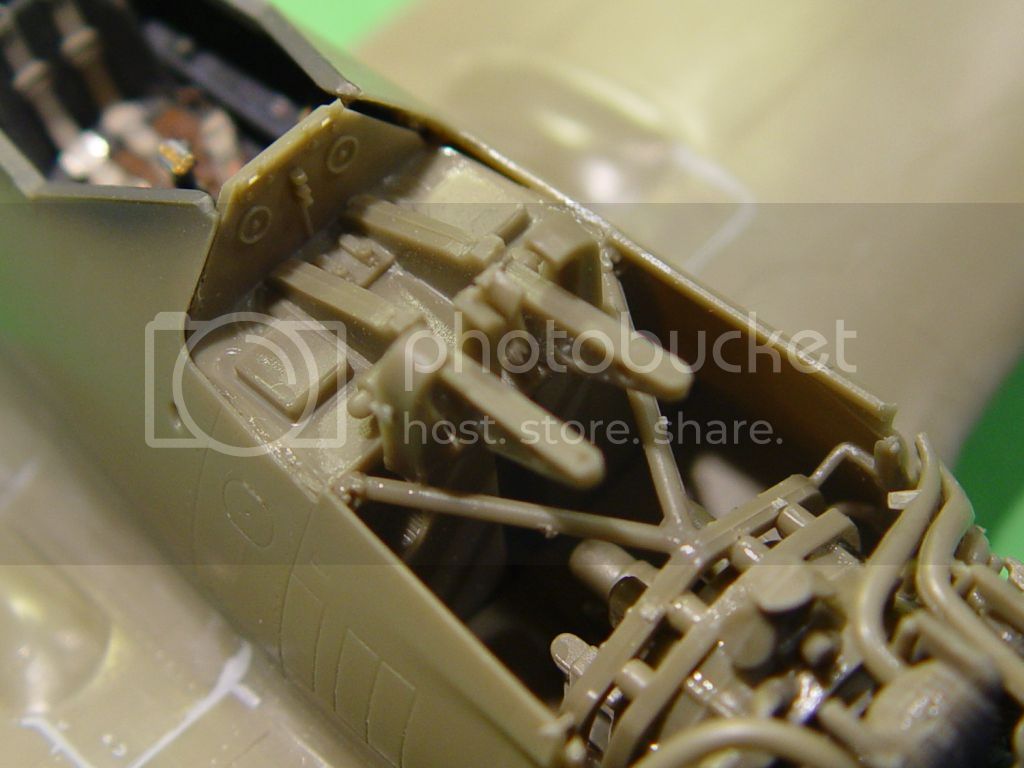
There seems to be a small problem getting the gun hatch to fit in the closed position.
In the instructions you are actually not even given the choice of having this hatch closed.


But the solution is pretty simple... a few quick cuts will remove the MG-bearers and other protruding parts and then the hatch will fit. This is obviously a before picture (and a lousy one as well) and I forgot to take a picture after the rather brutal surgery had been performed.


And now everything has been closed up. I will have to apply a little Mr Surfacer here and do some careful sanding before starting with paint.


The front armour ring will be left off to ease the painting. This ring will be in one colour - black I think - whereas the rest of the cowling will be chequered. Normally I attach the ring at this stage though.


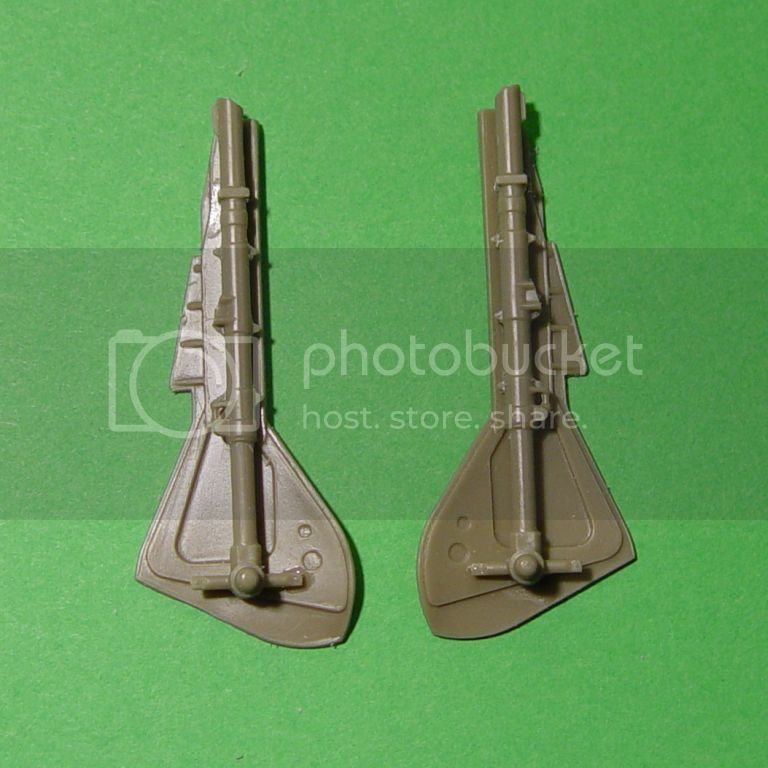
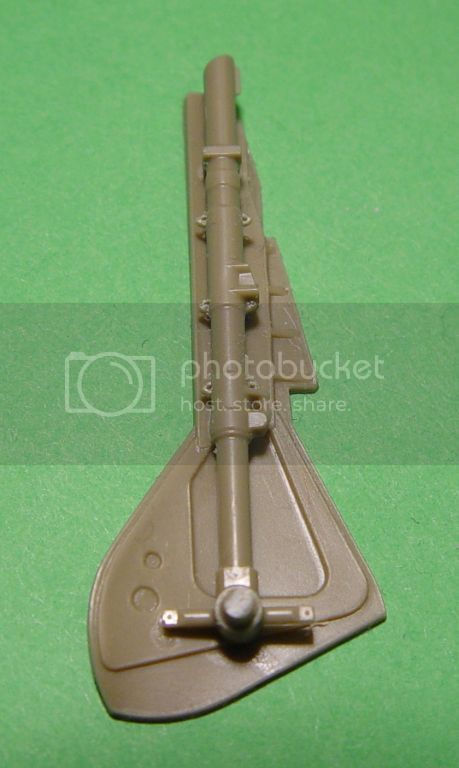
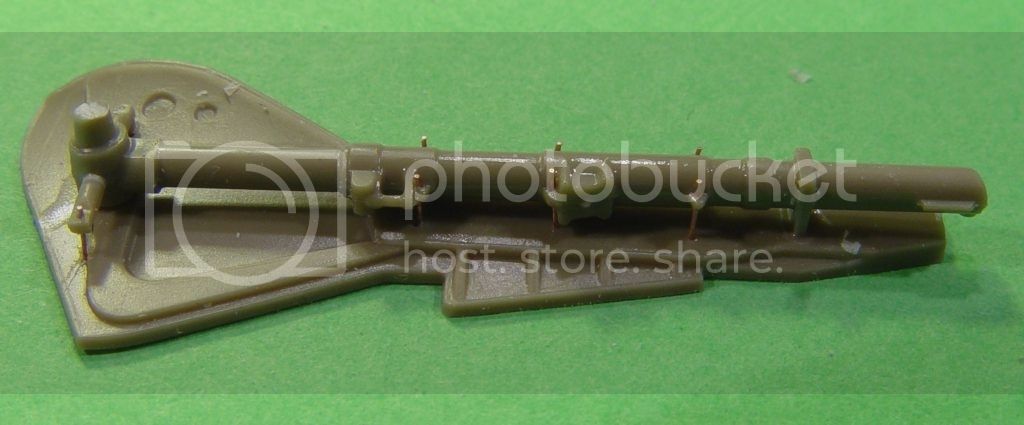
The landing gear legs have been glued to their covers...


... so that I could drill out the holes where, in reality, the legs would be attached to the covers ...


... which was simulated using a thin copper wire. The holes were drilled using a 0.3mm drill bit, so the wire is slightly thinner than that. Don't forget to make a guiding mark before you start drilling. Just take a sharp needle and make a small impression to guide the drill and avoid that it runs away and ruins something.


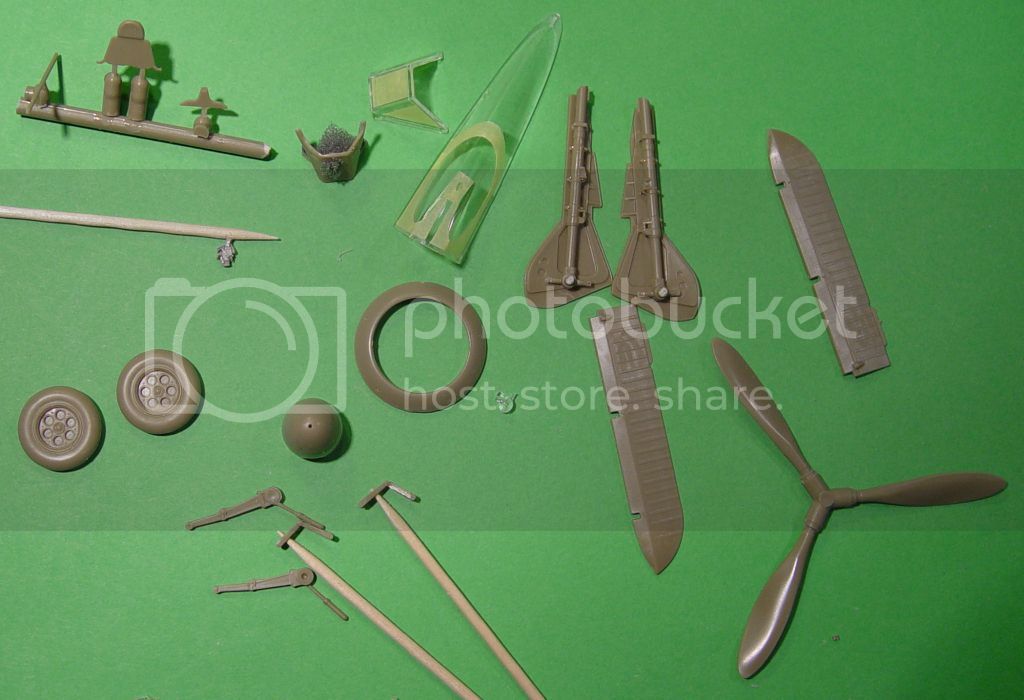
And this is what should be painted in different ways so that I can close the plane up and get on with painting the camouflage. It's a four day weekend now, so hopefully I will get some more modelling done in the next few days.


Take care!
/Fredrik
Joel_W
Staff MemberAssociate Editor
AUTOMODELER
_VISITCOMMUNITY
New York, United States
Joined: December 04, 2010
KitMaker: 11,666 posts
AeroScale: 7,410 posts
Posted: Thursday, May 29, 2014 - 03:02 AM UTC
Fredrik,
What huge improvement on the seatbelts. It's like night and day.

Each step had its issues that you dealt with so that the end result was a much better fit then what Eduard intended. Well done.

Looking forward to your next up date, that should have some paint on the FW190A-6

Joel

FredrikA
_VISITCOMMUNITY
Uppsala, Sweden
Joined: January 09, 2008
KitMaker: 92 posts
AeroScale: 90 posts
Posted: Saturday, June 07, 2014 - 10:13 AM UTC
Joel: Thanks for the support!

Paint has been administered, and with a good result I think!
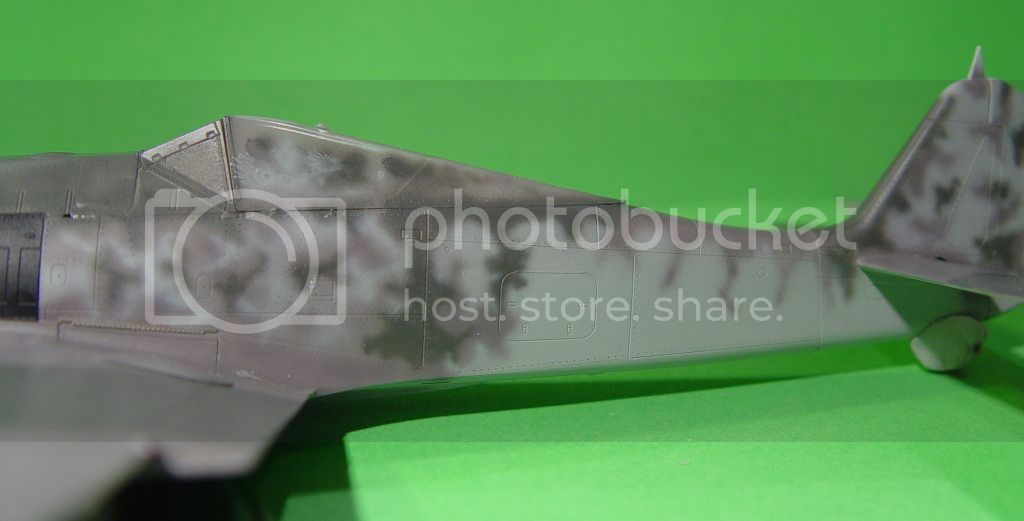
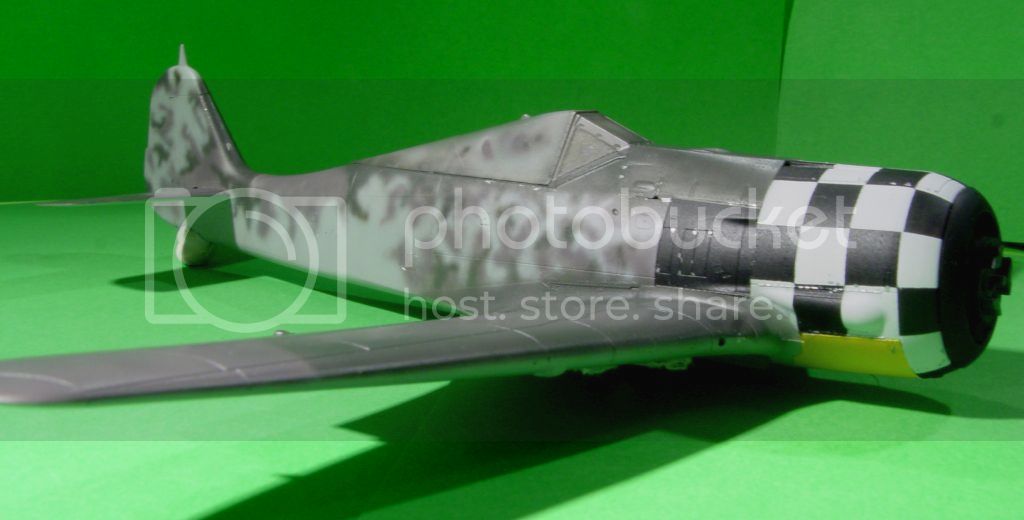
First up were the basic camouflage colours. More or less everything was painted RLM 76 and then RLM 74 and 75 were sprayed on top. All colours are from the Gunze range.


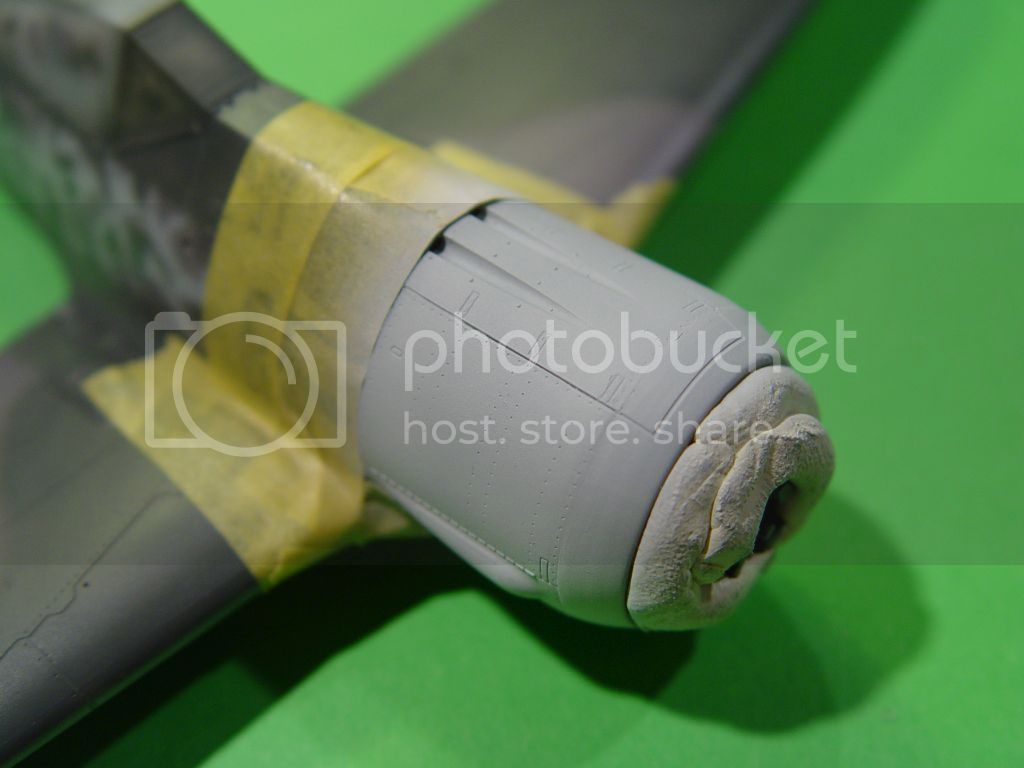
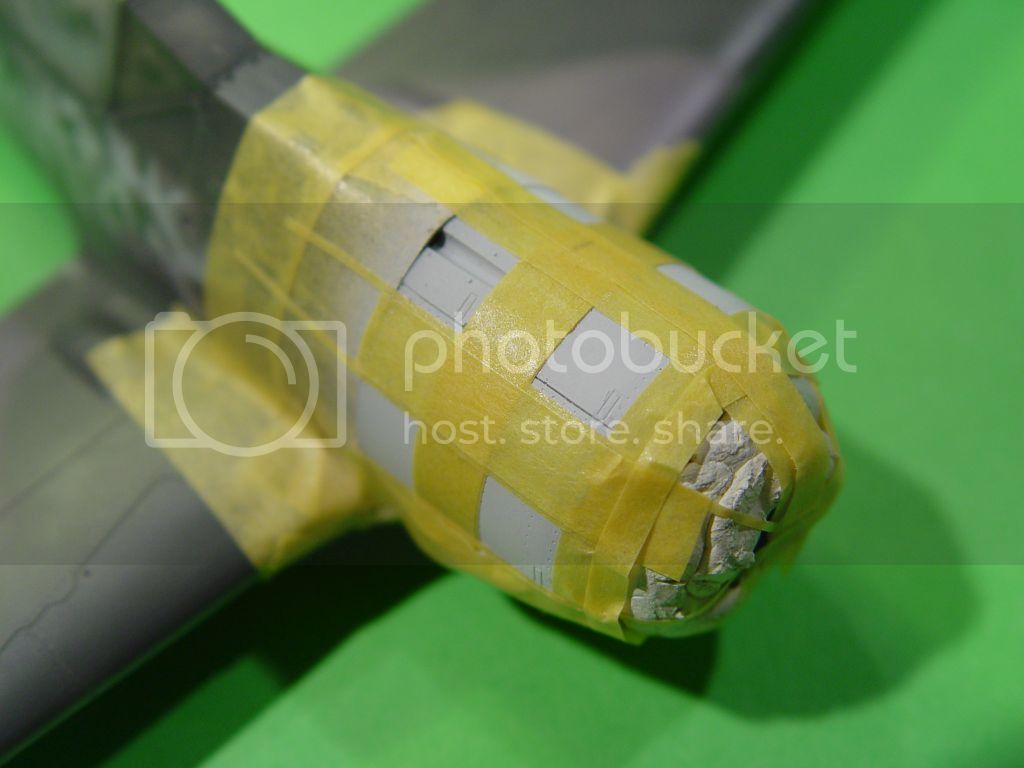
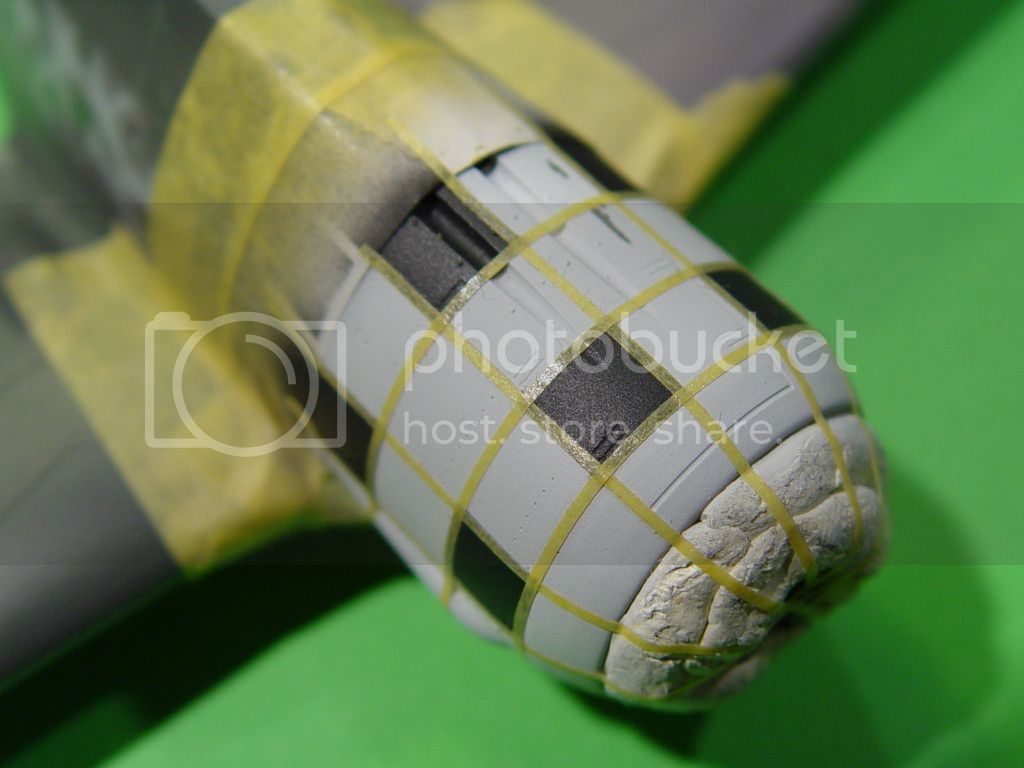
After the camouflage was done, it was time to adress the chequered nose. Eduard provides decals for these, but I wanted to have a go at masking and painting them. Masking proved to be somewhat challenging. First you have to figure out how you actually mask squares and then you have to put this to the test on a surface that is anything but straight and smooth. Well, the white base colour was simple enough at least.


Then you measure and measure and mask and mask. In the end a lot of the masking was done by eyeballing. It's interesting how the dividers will tell you that the measurements are correct and your eyes that they're not!


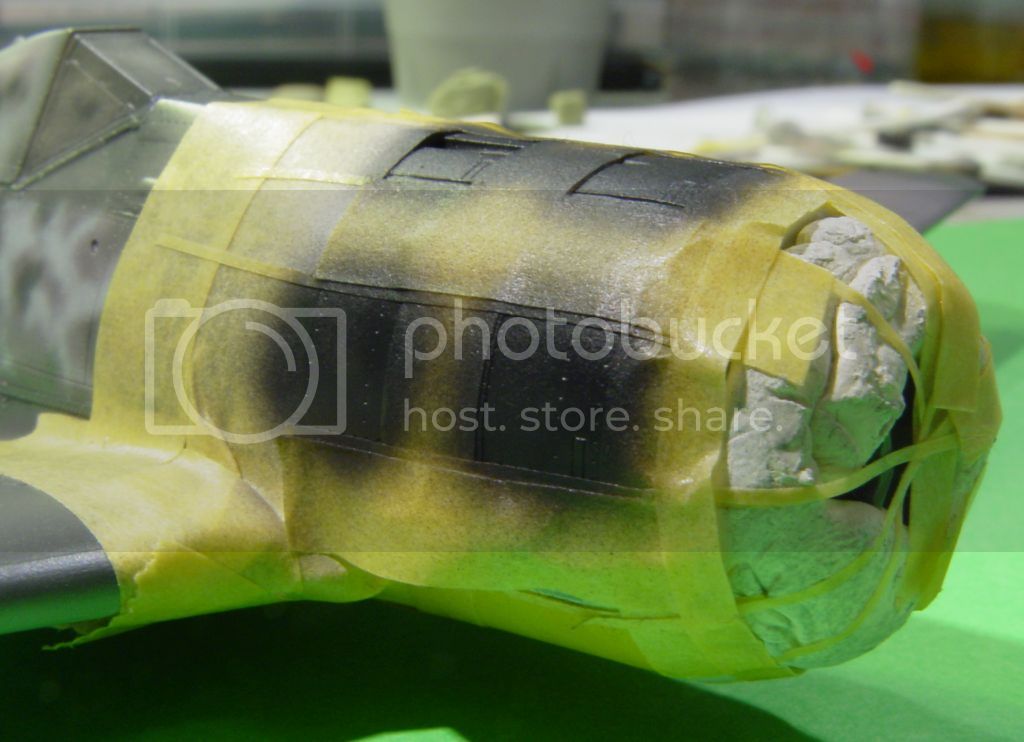
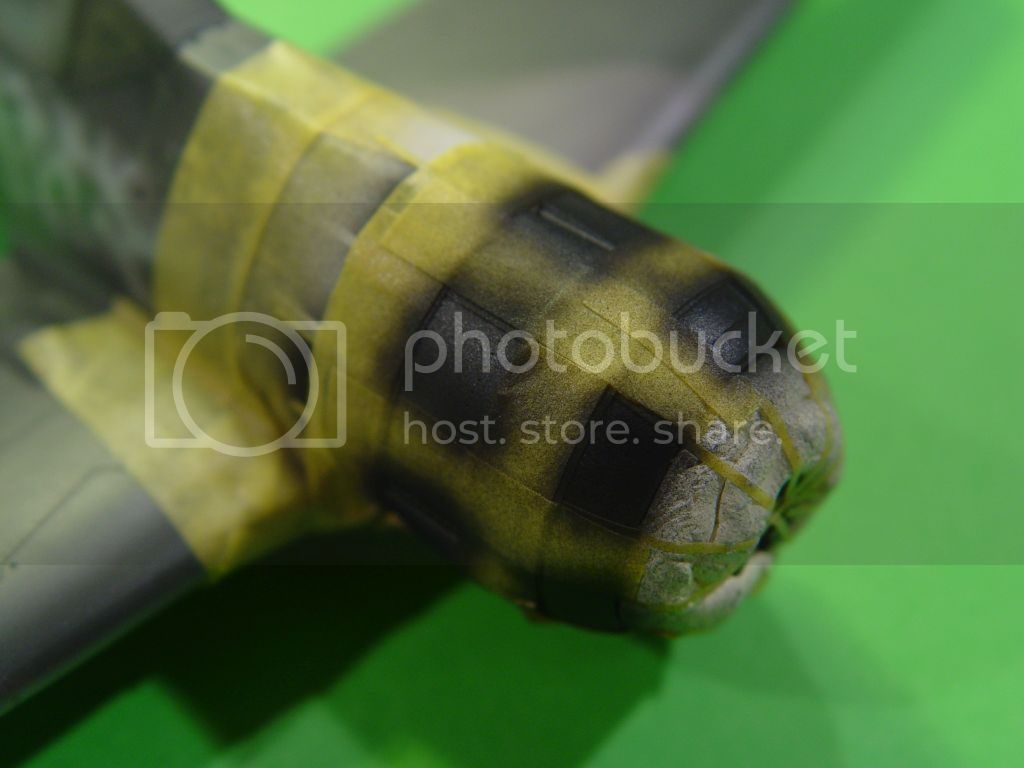
Black paint is on. I couldn't come up with an easy way to mask everything in one go, so this is the first of two black paint sessions.


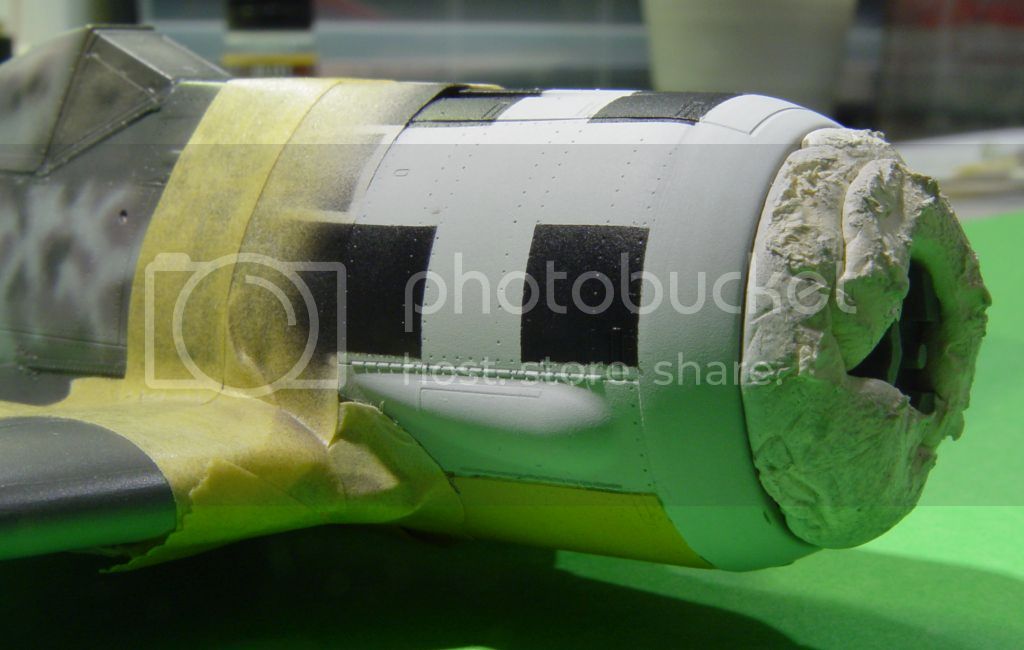
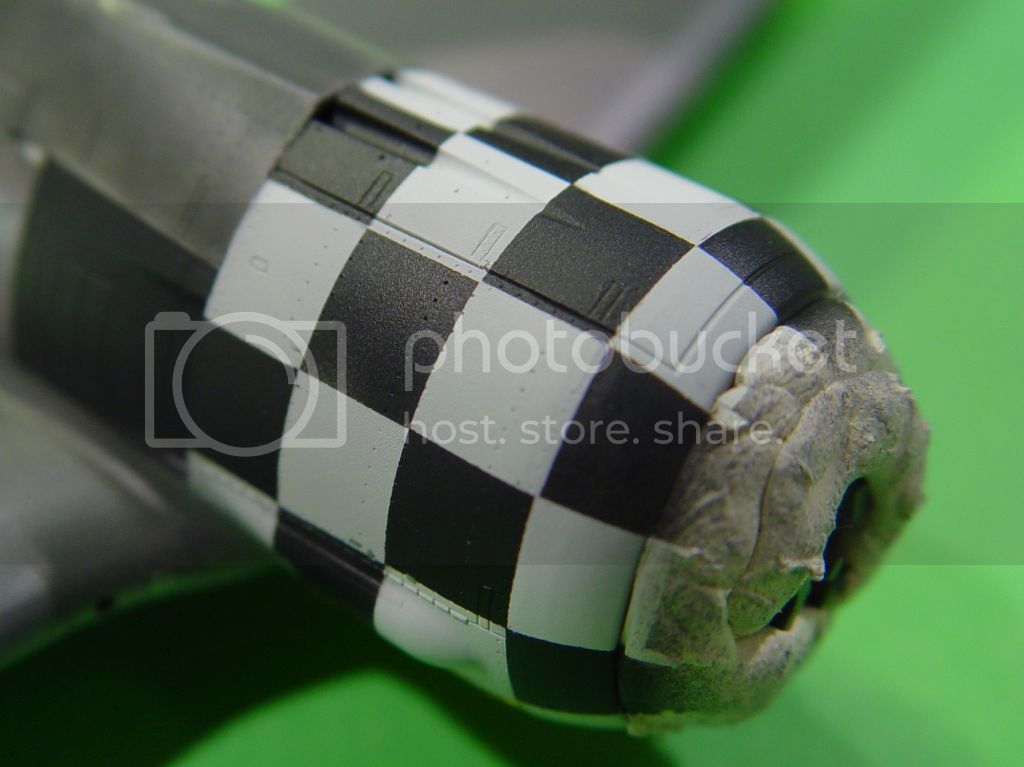
Demasked and looking good!


Thin masking tape used to create the setting for the next set of black squares.


More tape was used to complete the masking and then black paint was sprayed again.


Painting things like this is really fun, I think. The level of fun is of course dependent on the level of success and this was really fun!


Markings will be the next step, but I would like to paint those as well and I haven't gotten around to sending an order off to Mal, so they will have to wait for a while. So far it's been an easy build and it's not that much left. There is, however, one painting mistake that I might have to fix - masking squares is difficult!


Until next time...
/Fredrik
berndm
_VISITCOMMUNITY
Niedersachsen, Germany
Joined: March 26, 2014
KitMaker: 844 posts
AeroScale: 630 posts
Posted: Sunday, June 08, 2014 - 02:04 AM UTC
Hi Fredrik, your painting is awesome !

Bernd
Joel_W
Staff MemberAssociate Editor
AUTOMODELER
_VISITCOMMUNITY
New York, United States
Joined: December 04, 2010
KitMaker: 11,666 posts
AeroScale: 7,410 posts
Posted: Sunday, June 08, 2014 - 05:16 AM UTC
Fredrik,
Your camo paint scheme is absolutely perfect. But you showed your true talents and mastery of the art of air brushing with your B&W checkerboard patterned cowling. Looks dead on perfect.

Joel
TedMamere
_VISITCOMMUNITY
Moselle, France
Joined: May 15, 2005
KitMaker: 5,653 posts
AeroScale: 4,347 posts
Posted: Sunday, June 08, 2014 - 06:18 AM UTC
Hi Fredrik,

Excellent painting indeed! Top notch!

Jean-Luc
Panzercarlos
_VISITCOMMUNITY
Lara, Venezuela
Joined: February 27, 2007
KitMaker: 48 posts
AeroScale: 36 posts
Posted: Sunday, June 08, 2014 - 11:51 AM UTC
Hello!

Very good level of painting, the kit is complicated and I will follow in this project.

Carlos, Greetings!
FredrikA
_VISITCOMMUNITY
Uppsala, Sweden
Joined: January 09, 2008
KitMaker: 92 posts
AeroScale: 90 posts
Posted: Sunday, June 08, 2014 - 08:50 PM UTC
Bernd, Joel, Jean-Luc and Carlos, thank you for your praise!

I am quite happy with the result my self, although there might be two things to improve. The mottling on the starboard side might get a little more RLM76 to break up the other blotches, and you can see on the cowling that there is one black square that is too small and that there are two white squares that connect. I simply masked on the wrong side for that one.

I've now put the project to rest for a while. Instead I started on another Fw190, but an A5 and with the intention of superdetailing it... we'll have to see how that goes.

Take care
/F
FredrikA
_VISITCOMMUNITY
Uppsala, Sweden
Joined: January 09, 2008
KitMaker: 92 posts
AeroScale: 90 posts
Posted: Sunday, March 29, 2015 - 04:15 AM UTC
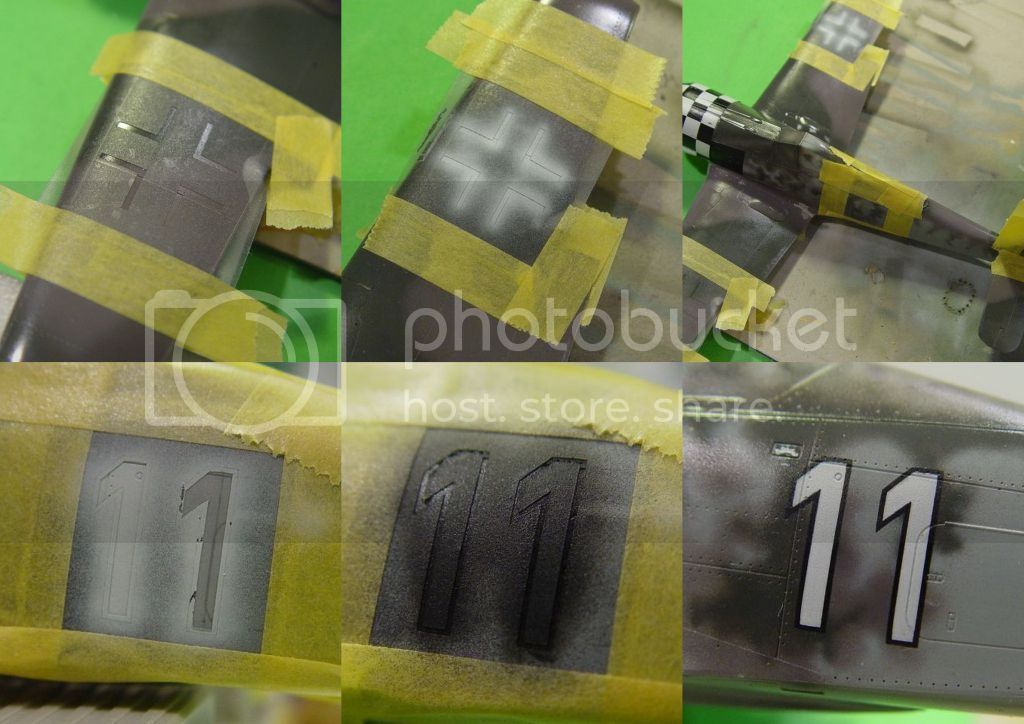
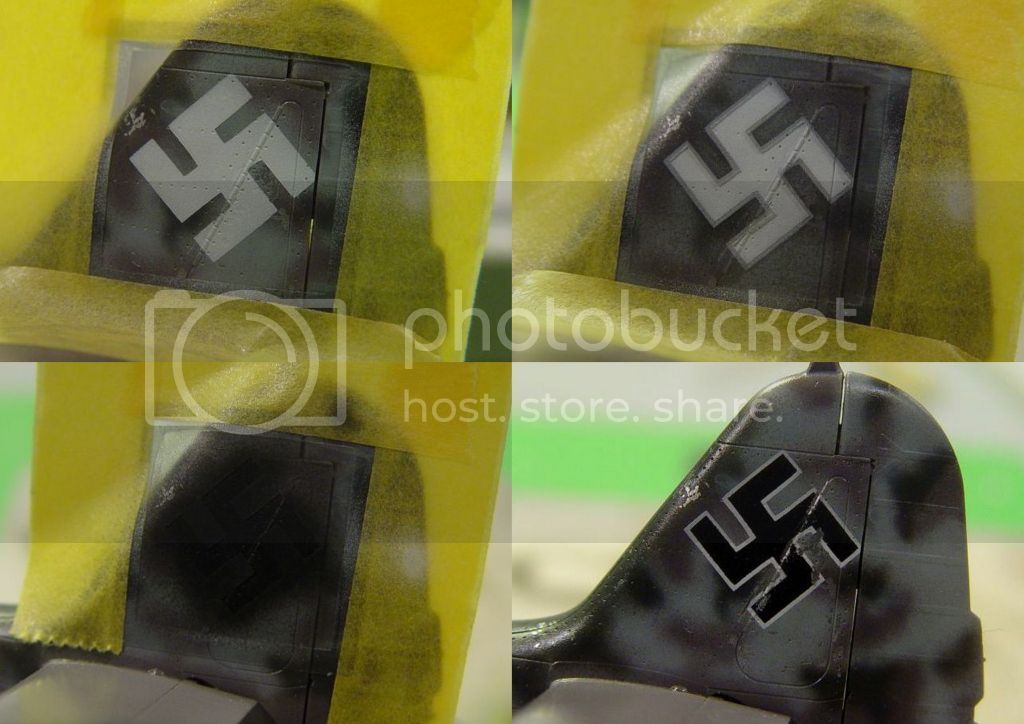
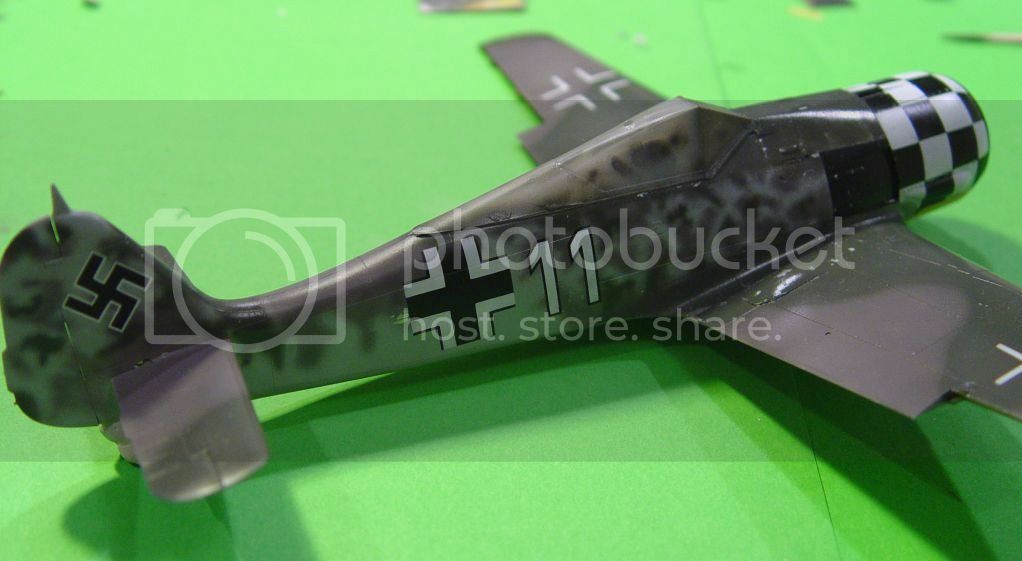
It's been a long time since I last did any work on this or any other model. This one has been waiting for its markings and a year ago I planned on having Mal make me some masks for that purpose. For different reasons this never happened, and in the end it was down to either using the kit decals or making my own masks. A supportive wife helped with the purchase of a plotter and some friendly advice from Mal helped me with the masking material. This is the result. Not too much left now...
/Fredrik


stooge
_VISITCOMMUNITY
South Australia, Australia
Joined: June 20, 2013
KitMaker: 210 posts
AeroScale: 210 posts
Posted: Sunday, March 29, 2015 - 08:01 AM UTC
That chequerboard work is inspirational.
Holdfast
Staff MemberPresident
IPMS-UK KITMAKER BRANCH
#056
_VISITCOMMUNITY
England - South West, United Kingdom
Joined: September 30, 2002
KitMaker: 8,581 posts
AeroScale: 4,913 posts
Posted: Sunday, March 29, 2015 - 11:35 AM UTC
Very nicely done Fredrik
Joel_W
Staff MemberAssociate Editor
AUTOMODELER
_VISITCOMMUNITY
New York, United States
Joined: December 04, 2010
KitMaker: 11,666 posts
AeroScale: 7,410 posts
Posted: Sunday, March 29, 2015 - 05:09 PM UTC
Fredrik,
Simply outstanding masking, you really nailed it. The markings look fantastic.
Joel
chukw1
_VISITCOMMUNITY
California, United States
Joined: November 28, 2007
KitMaker: 817 posts
AeroScale: 729 posts
Posted: Sunday, March 29, 2015 - 07:44 PM UTC
Fantastic work!
FredrikA
_VISITCOMMUNITY
Uppsala, Sweden
Joined: January 09, 2008
KitMaker: 92 posts
AeroScale: 90 posts
Posted: Sunday, March 29, 2015 - 09:32 PM UTC
Thank you, Carl! I draw inspiration from you lot here ar Aeroscale, so if I can inspire others then I'm happy.

Mal - Thank you! I only acknowledged your help with the masking material in the earlier post, but, truth be told, the really important thing you helped out with was producing your own masks and sharing them with the rest of us. Without the experience I had of your masks, I would never have done this myself.

Thanks Joel and Chuck! The end is in sight for this one.

/F
 _GOTOTOP