Ontario, Canada
Joined: February 04, 2008
KitMaker: 2,507 posts
AeroScale: 1,814 posts
Posted: Monday, April 07, 2014 - 09:49 AM UTC
Having completed the Trumpeter 1:48 scale Talon T-38A In-box review I will now do a Blog build of the model.
This will be an out of the box build.
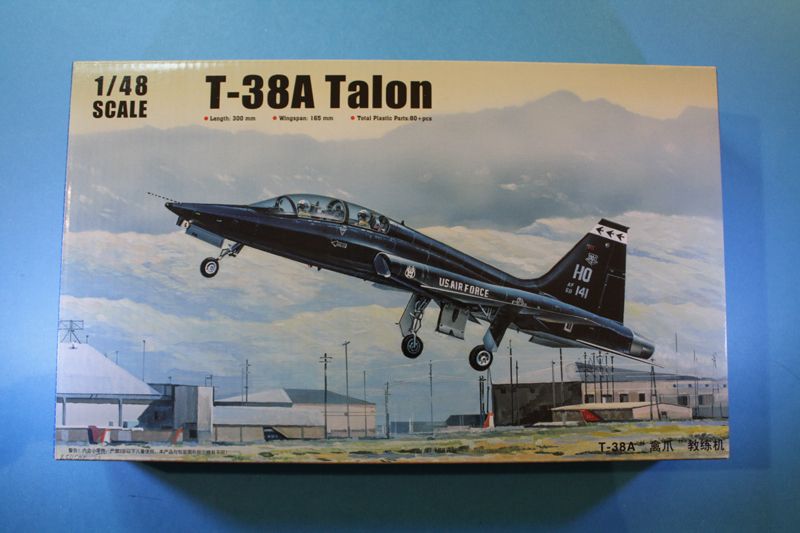


I will be building the Portuguese Air Force #2606 201Squadron version.

" The Die Hards"
43rd MIDDLESEX REGIMENT
MACHINE GUN CORPS
XXX CORP
The most effective way to do it, is to do it.
- Amelia Earhart
Ontario, Canada
Joined: February 04, 2008
KitMaker: 2,507 posts
AeroScale: 1,814 posts
Posted: Tuesday, April 08, 2014 - 01:26 PM UTC
" The Die Hards"
43rd MIDDLESEX REGIMENT
MACHINE GUN CORPS
XXX CORP
The most effective way to do it, is to do it.
- Amelia Earhart
Ontario, Canada
Joined: February 04, 2008
KitMaker: 2,507 posts
AeroScale: 1,814 posts
Posted: Sunday, June 01, 2014 - 08:27 AM UTC
" The Die Hards"
43rd MIDDLESEX REGIMENT
MACHINE GUN CORPS
XXX CORP
The most effective way to do it, is to do it.
- Amelia Earhart
Joel_W
 Associate Editor
New York, United States
Joined: December 04, 2010
KitMaker: 11,666 posts
AeroScale: 7,410 posts
Posted: Sunday, June 01, 2014 - 10:31 AM UTC
Richard,
The cockpit really came out quite nice.
Joel
On my Workbench:
Monogram 1/24 scale 427 Shelby Cobra
Just Completed:
Beemax 1/24 scale BMW M3 E30 1992 Evolution II
Ontario, Canada
Joined: February 04, 2008
KitMaker: 2,507 posts
AeroScale: 1,814 posts
Posted: Sunday, June 01, 2014 - 12:02 PM UTC
Thank you Joel!
To show off some of the cockpit detail I am leaving one of the canopys open.
Thanks for stopping by.
" The Die Hards"
43rd MIDDLESEX REGIMENT
MACHINE GUN CORPS
XXX CORP
The most effective way to do it, is to do it.
- Amelia Earhart
Ontario, Canada
Joined: February 04, 2008
KitMaker: 2,507 posts
AeroScale: 1,814 posts
Posted: Tuesday, June 03, 2014 - 12:40 AM UTC
After Step 1 is assembled:-

Step 2:- Cockpit, wheel wells are installed and fuselage half's are glued together:-


The two holes are for the travel pod which will not be used and will be filled.
As you can see there is some detail in the wheel wells.
A few things I would liked is more locating pins on the fuselage as care must be taken to align half's.
Probe on nose is prone to damage and should have been a added at the end and not moulded on.
Overall fit is good with little filler required.
Until next time!

" The Die Hards"
43rd MIDDLESEX REGIMENT
MACHINE GUN CORPS
XXX CORP
The most effective way to do it, is to do it.
- Amelia Earhart
Alabama, United States
Joined: December 05, 2007
KitMaker: 204 posts
AeroScale: 202 posts
Posted: Tuesday, June 03, 2014 - 05:51 AM UTC
Nice work on the cockpit. I was impressed with the detail, just too bad the seats are 1/50th scale. Nice how they set up the cockpit sidewalls.
Weird how Trumpeter under scaled the cockpit, but over scaled the airframe.
Curious why you didn't try to pick out the nice raised cockpit console and IP details, as I found the decals quite toyish and unrealistic. Since you used them, did they lay down ok over the raised and recessed detail?
Good call displaying the canopies open, as the Trumpeter made them squashed or too low in profile when closed.
Mike V
Ontario, Canada
Joined: February 04, 2008
KitMaker: 2,507 posts
AeroScale: 1,814 posts
Posted: Wednesday, June 04, 2014 - 12:59 AM UTC
Hi Mike.
Thank you for your comments.
The cockpit console decals looked very close to photos that I have seen and would look better than painted by me.
I removed all raised details on the panels and then applied the decals.
Thank's for stopping by.
" The Die Hards"
43rd MIDDLESEX REGIMENT
MACHINE GUN CORPS
XXX CORP
The most effective way to do it, is to do it.
- Amelia Earhart
Ontario, Canada
Joined: February 04, 2008
KitMaker: 2,507 posts
AeroScale: 1,814 posts
Posted: Sunday, June 15, 2014 - 09:43 AM UTC
" The Die Hards"
43rd MIDDLESEX REGIMENT
MACHINE GUN CORPS
XXX CORP
The most effective way to do it, is to do it.
- Amelia Earhart

#439
Washington, United States
Joined: November 05, 2005
KitMaker: 4,950 posts
AeroScale: 3,192 posts
Posted: Sunday, June 15, 2014 - 10:13 AM UTC
Looking good.

Doesn't sound like near the nightmare my Airfix F-5A build was.
Hanger Queens in Waiting:
Monogram 1/72 F8F-1
Corsair the Sky Pirate - 1/72 Ace A-7D
Century Series - Airfix 1/72 F-105G
Anti Shipping - Academy 1/72 PBJ-1D
Academy 1/72 F-84E
Ontario, Canada
Joined: February 04, 2008
KitMaker: 2,507 posts
AeroScale: 1,814 posts
Posted: Saturday, July 05, 2014 - 01:22 PM UTC
In steps 4 and 5 the wing half's are glued together and attached in step 6 along with the vertical and horizontal stabilizers.
Step 7 the canopy's are attached and now the Talon is ready to mask and prime:-


" The Die Hards"
43rd MIDDLESEX REGIMENT
MACHINE GUN CORPS
XXX CORP
The most effective way to do it, is to do it.
- Amelia Earhart
Joel_W
Associate Editor New York, United States
Joined: December 04, 2010
KitMaker: 11,666 posts
AeroScale: 7,410 posts
Posted: Sunday, July 06, 2014 - 03:04 AM UTC
Richard,
Looking good. The cockpit/IP really looks quite nice. Looking forward to seeing some paint on.
Joel
On my Workbench:
Monogram 1/24 scale 427 Shelby Cobra
Just Completed:
Beemax 1/24 scale BMW M3 E30 1992 Evolution II
Ontario, Canada
Joined: February 04, 2008
KitMaker: 2,507 posts
AeroScale: 1,814 posts
Posted: Sunday, July 06, 2014 - 03:16 AM UTC
Quoted Text
Richard,
Looking good. The cockpit/IP really looks quite nice. Looking forward to seeing some paint on.
Joel
Thank you Joel
" The Die Hards"
43rd MIDDLESEX REGIMENT
MACHINE GUN CORPS
XXX CORP
The most effective way to do it, is to do it.
- Amelia Earhart
Ontario, Canada
Joined: February 04, 2008
KitMaker: 2,507 posts
AeroScale: 1,814 posts
Posted: Saturday, August 02, 2014 - 11:11 PM UTC
With many build on the go right now I have managed to apply white top coat:-

Next up will be the masking of the nose cone for the black anti glare.
" The Die Hards"
43rd MIDDLESEX REGIMENT
MACHINE GUN CORPS
XXX CORP
The most effective way to do it, is to do it.
- Amelia Earhart
Ontario, Canada
Joined: February 04, 2008
KitMaker: 2,507 posts
AeroScale: 1,814 posts
Posted: Sunday, September 14, 2014 - 09:41 AM UTC
Today I have made decals for the flag on the tail, the green and red sizes are reversed on the kit decals.
The flags came out larger but I will trim them to size:-

" The Die Hards"
43rd MIDDLESEX REGIMENT
MACHINE GUN CORPS
XXX CORP
The most effective way to do it, is to do it.
- Amelia Earhart
Joel_W
Associate Editor New York, United States
Joined: December 04, 2010
KitMaker: 11,666 posts
AeroScale: 7,410 posts
Posted: Monday, September 15, 2014 - 01:24 AM UTC
Richard,
Really a nice job of correcting a major decal error by Trumpeter. It just constantly amazes me how a mainstream model company can make an error like this, and no one notices it!! This isn't even a language issue, it's just pure laziness, or not really caring one way or the other.


Joel
On my Workbench:
Monogram 1/24 scale 427 Shelby Cobra
Just Completed:
Beemax 1/24 scale BMW M3 E30 1992 Evolution II
Ontario, Canada
Joined: February 04, 2008
KitMaker: 2,507 posts
AeroScale: 1,814 posts
Posted: Monday, September 15, 2014 - 09:18 AM UTC
Hi Joel.
It never fails to amaze me the amount of mistakes made by most model manufactures!
With the amount of info and photos out there on the web there is no excuse for poor research.
" The Die Hards"
43rd MIDDLESEX REGIMENT
MACHINE GUN CORPS
XXX CORP
The most effective way to do it, is to do it.
- Amelia Earhart
Joel_W
Associate Editor New York, United States
Joined: December 04, 2010
KitMaker: 11,666 posts
AeroScale: 7,410 posts
Posted: Monday, September 15, 2014 - 09:29 AM UTC
Quoted Text
Hi Joel.
It never fails to amaze me the amount of mistakes made by most model manufactures!
With the amount of info and photos out there on the web there is no excuse for poor research.
Richard,
Unless the the person actually doing the decal sheet is Dyslexic, and no one wanted to hurt his/hers feelings, so they just let it go.
Joel
On my Workbench:
Monogram 1/24 scale 427 Shelby Cobra
Just Completed:
Beemax 1/24 scale BMW M3 E30 1992 Evolution II
Ontario, Canada
Joined: February 04, 2008
KitMaker: 2,507 posts
AeroScale: 1,814 posts
Posted: Thursday, November 06, 2014 - 03:19 PM UTC
Finaly I have got the decals on!.
The national flag decals not only had the size of the colour panels reversed and the decal colour placement sheet has the flags backwards!
It pays to check the web!
So here are the wrap up photos of this Blog:-
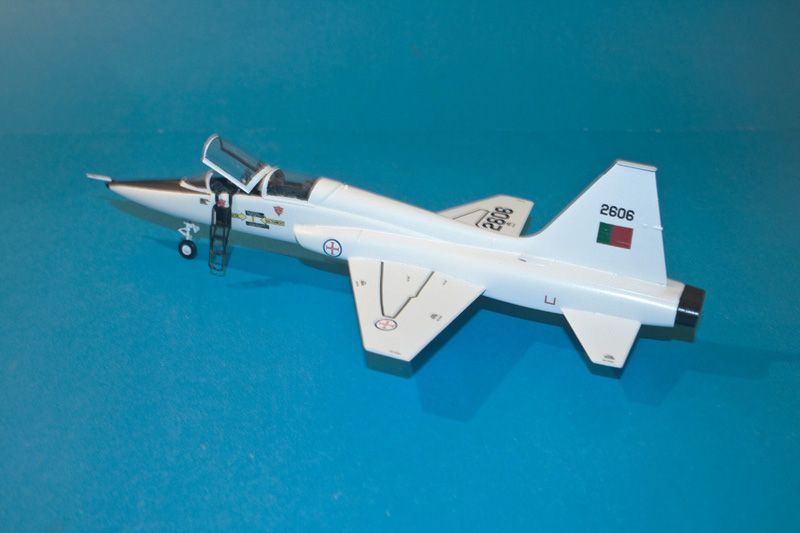
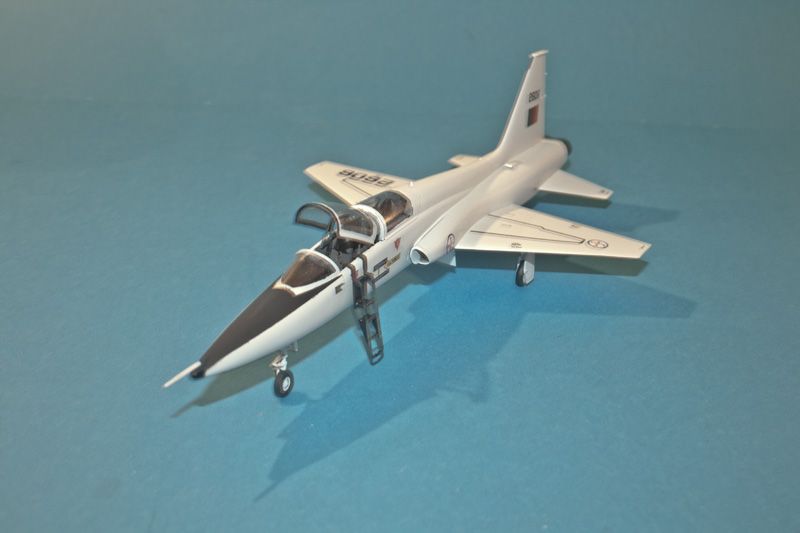
The Talon was built OOB and went together well.
To me it looks like a T-38 and thats good enought for me!
Thank you to all who stopped by.
" The Die Hards"
43rd MIDDLESEX REGIMENT
MACHINE GUN CORPS
XXX CORP
The most effective way to do it, is to do it.
- Amelia Earhart
Joel_W
Associate Editor New York, United States
Joined: December 04, 2010
KitMaker: 11,666 posts
AeroScale: 7,410 posts
Posted: Saturday, November 08, 2014 - 08:21 PM UTC
Richard,
Very nicely done. Solid OOB build. Paint and decaling looks perfect. And as you said, it sure looks like a T-38.
Joel
On my Workbench:
Monogram 1/24 scale 427 Shelby Cobra
Just Completed:
Beemax 1/24 scale BMW M3 E30 1992 Evolution II
Ontario, Canada
Joined: February 04, 2008
KitMaker: 2,507 posts
AeroScale: 1,814 posts
Posted: Sunday, November 09, 2014 - 04:44 AM UTC
" The Die Hards"
43rd MIDDLESEX REGIMENT
MACHINE GUN CORPS
XXX CORP
The most effective way to do it, is to do it.
- Amelia Earhart
Holdfast
President #056
England - South West, United Kingdom
Joined: September 30, 2002
KitMaker: 8,581 posts
AeroScale: 4,913 posts
Posted: Tuesday, December 30, 2014 - 07:38 PM UTC
Hi Richard,
My mate Tom is building one of these and we were wondering if it is possible to have both canopies closed by cutting off the front canopy mechanism?
MAL the MASK
BULLDOG # 6 (President)
BEWARE OF THE FEW
Sappers: First in, last out. (UBIQUE)
It's not the same, better, but not the same.
Ontario, Canada
Joined: February 04, 2008
KitMaker: 2,507 posts
AeroScale: 1,814 posts
Posted: Wednesday, December 31, 2014 - 02:49 AM UTC
Hi Mal
Here is a photo of the cockpit parts for the Canopy:-

For the Front Open C3 and C4 are used.
Closed C1 and C2 are used.
For the Rear Open C9 and C10 are used.
Closed C7 and C8 are used.
This info is from Kit MFG# 02852
I hope this helps.
Happy New Year!
" The Die Hards"
43rd MIDDLESEX REGIMENT
MACHINE GUN CORPS
XXX CORP
The most effective way to do it, is to do it.
- Amelia Earhart
Holdfast
President #056
England - South West, United Kingdom
Joined: September 30, 2002
KitMaker: 8,581 posts
AeroScale: 4,913 posts
Posted: Wednesday, December 31, 2014 - 12:46 PM UTC
Yep, ooops, I spotted the lowered canopy mechanisms after posting this. I posted to eagerly as I had looked in some time ago and it looks like I just assumed that the side walls had the open canopy mechanism moulded in place! This is my friend Tom's first model and he is referring to this build log
MAL the MASK
BULLDOG # 6 (President)
BEWARE OF THE FEW
Sappers: First in, last out. (UBIQUE)
It's not the same, better, but not the same.
Ontario, Canada
Joined: February 04, 2008
KitMaker: 2,507 posts
AeroScale: 1,814 posts
Posted: Wednesday, December 31, 2014 - 06:01 PM UTC
Hi Mal & Tom
I think that this is a good model to start of with in the hobby.
Good luck Tom.
Richard.
" The Die Hards"
43rd MIDDLESEX REGIMENT
MACHINE GUN CORPS
XXX CORP
The most effective way to do it, is to do it.
- Amelia Earhart


