_GOTOBOTTOM
Early Aviation
Discuss World War I and the early years of aviation thru 1934.
1:32 WnW Hannover CL.II build - Option
StukaJr
_VISITCOMMUNITY
California, United States
Joined: April 26, 2010
KitMaker: 346 posts
AeroScale: 292 posts
Posted: Friday, February 07, 2014 - 12:38 PM UTC
Greetings,

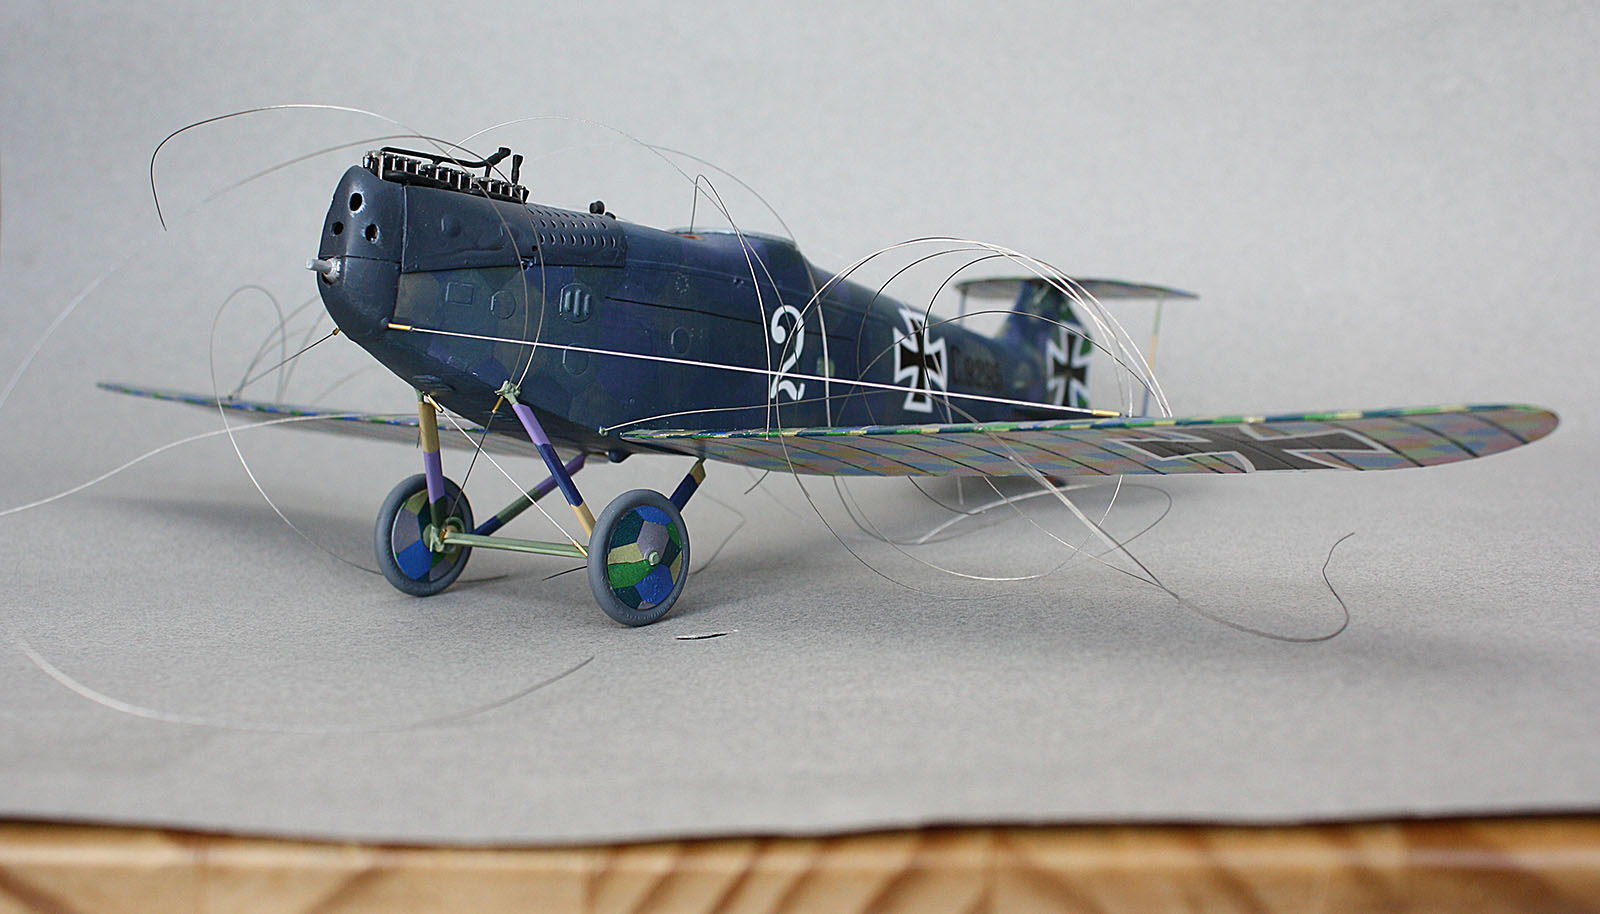
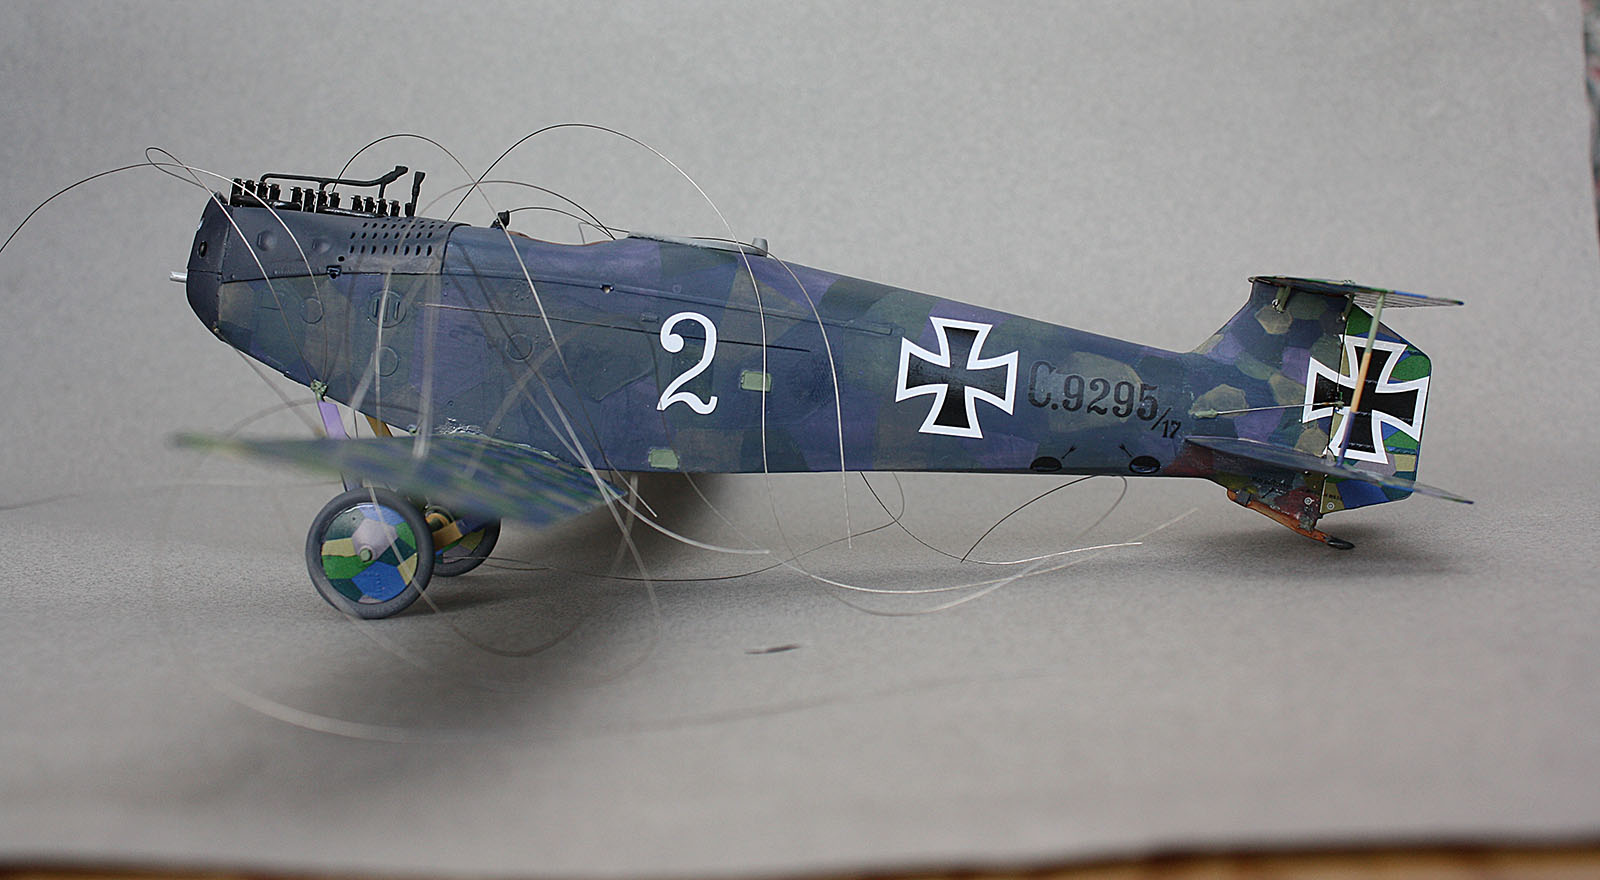
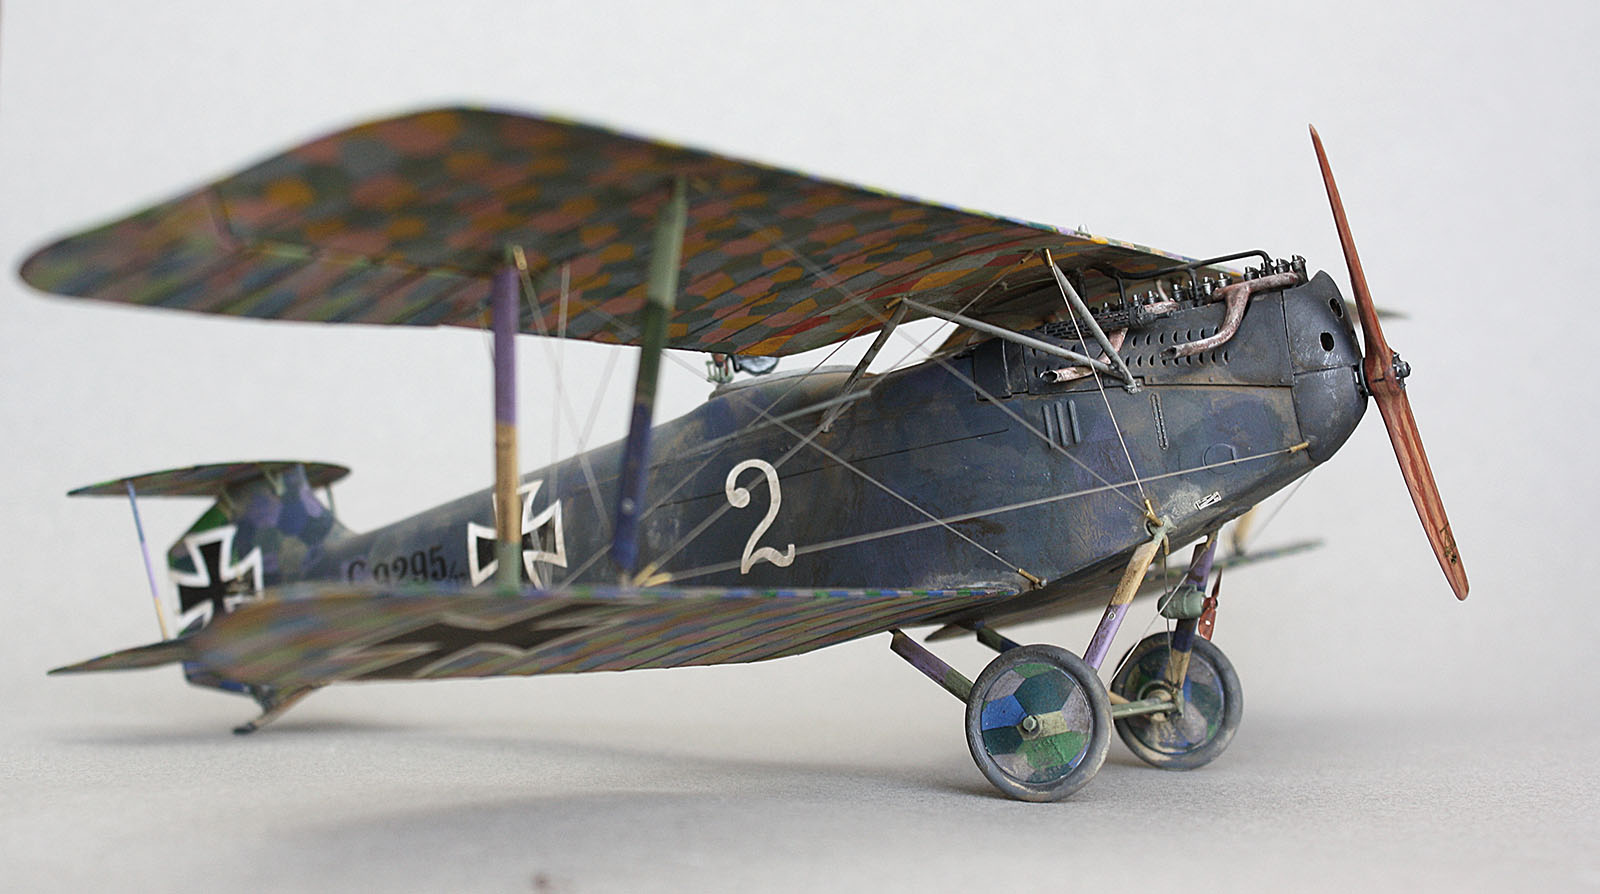
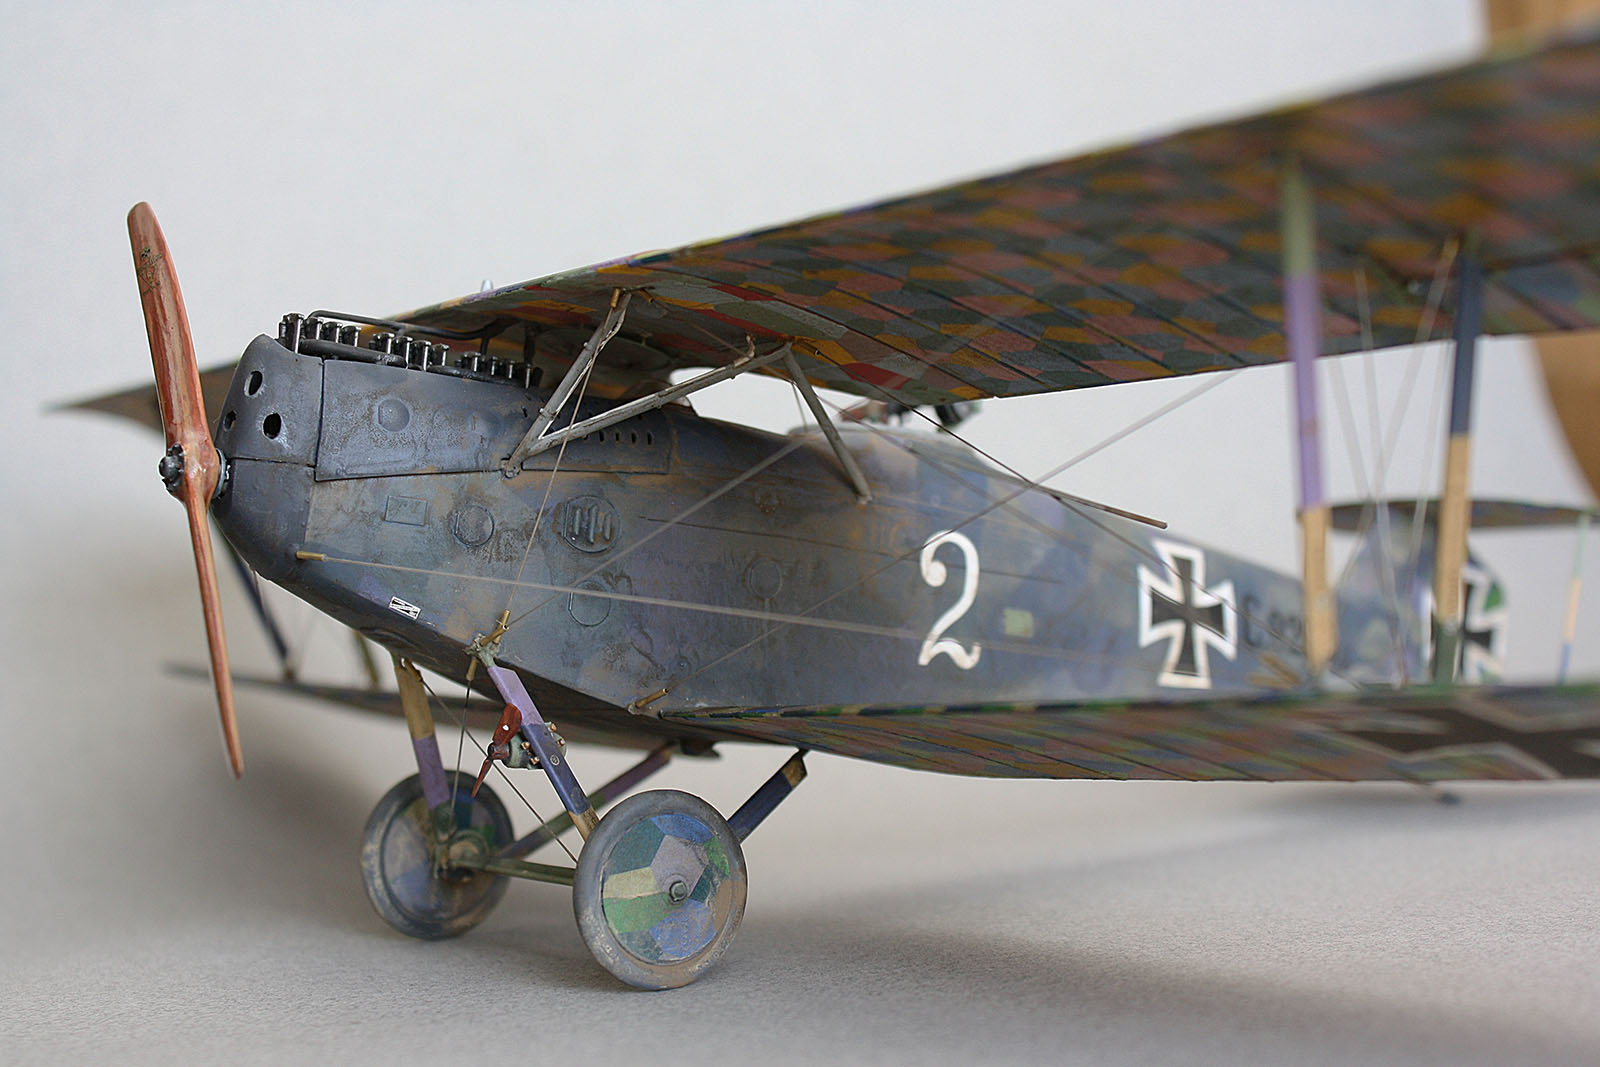
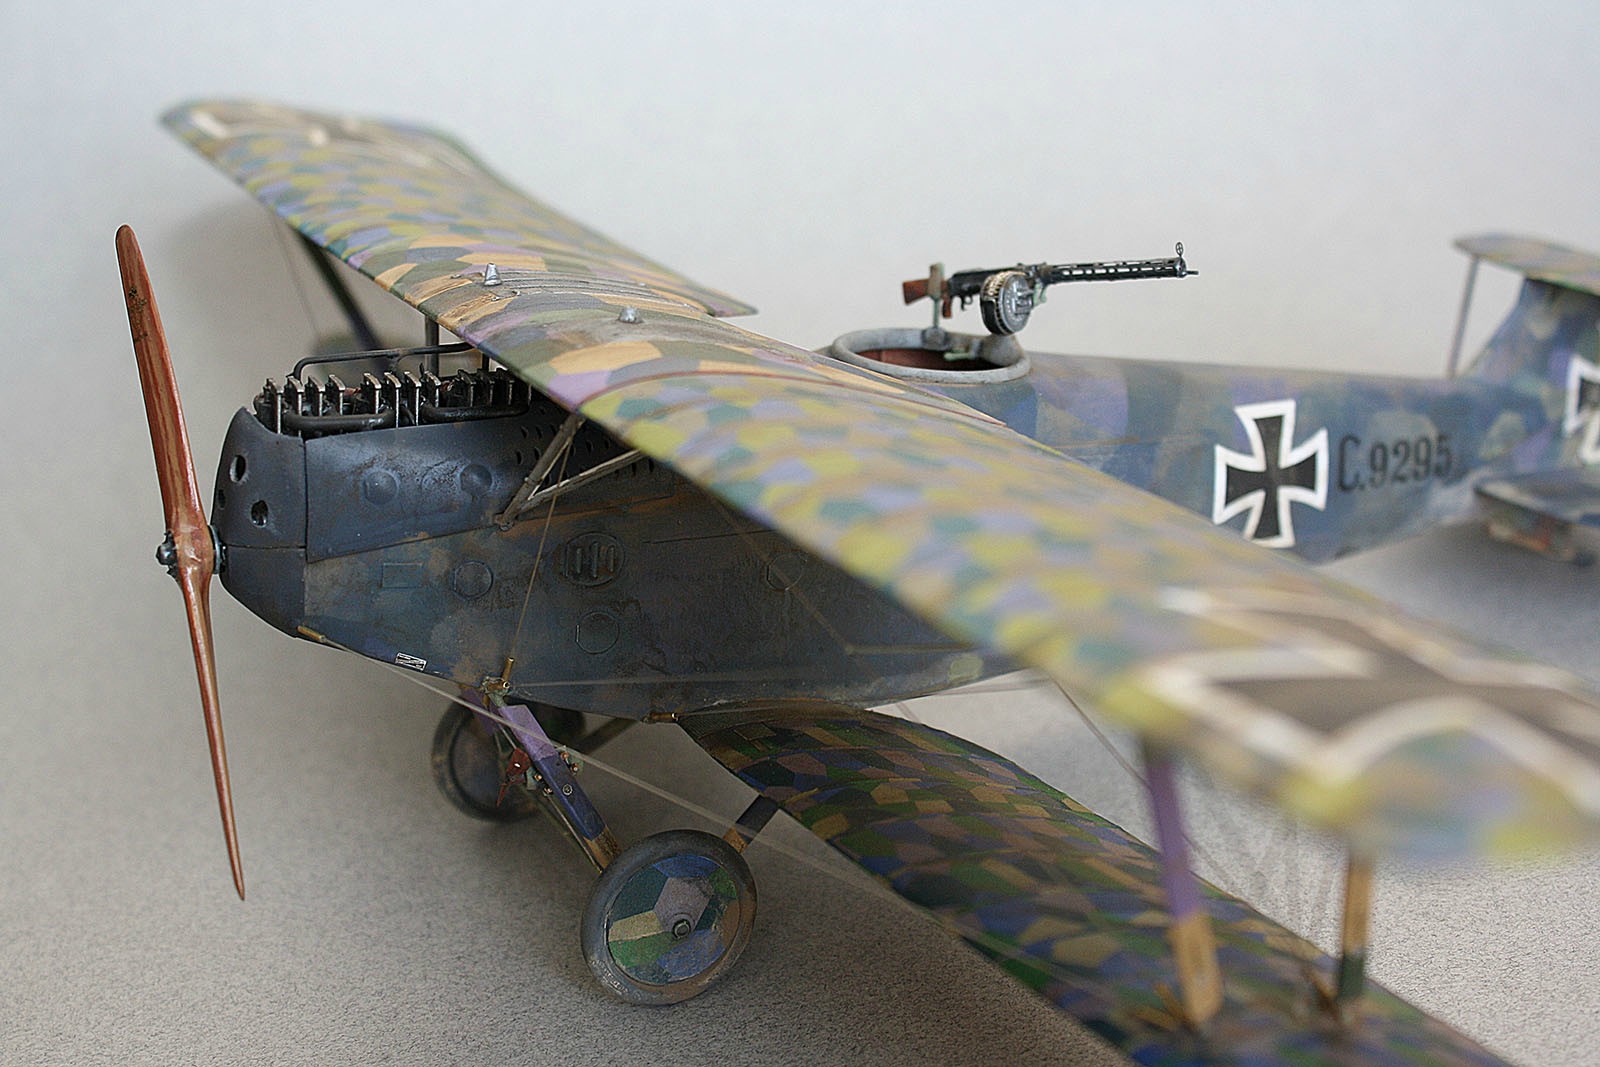
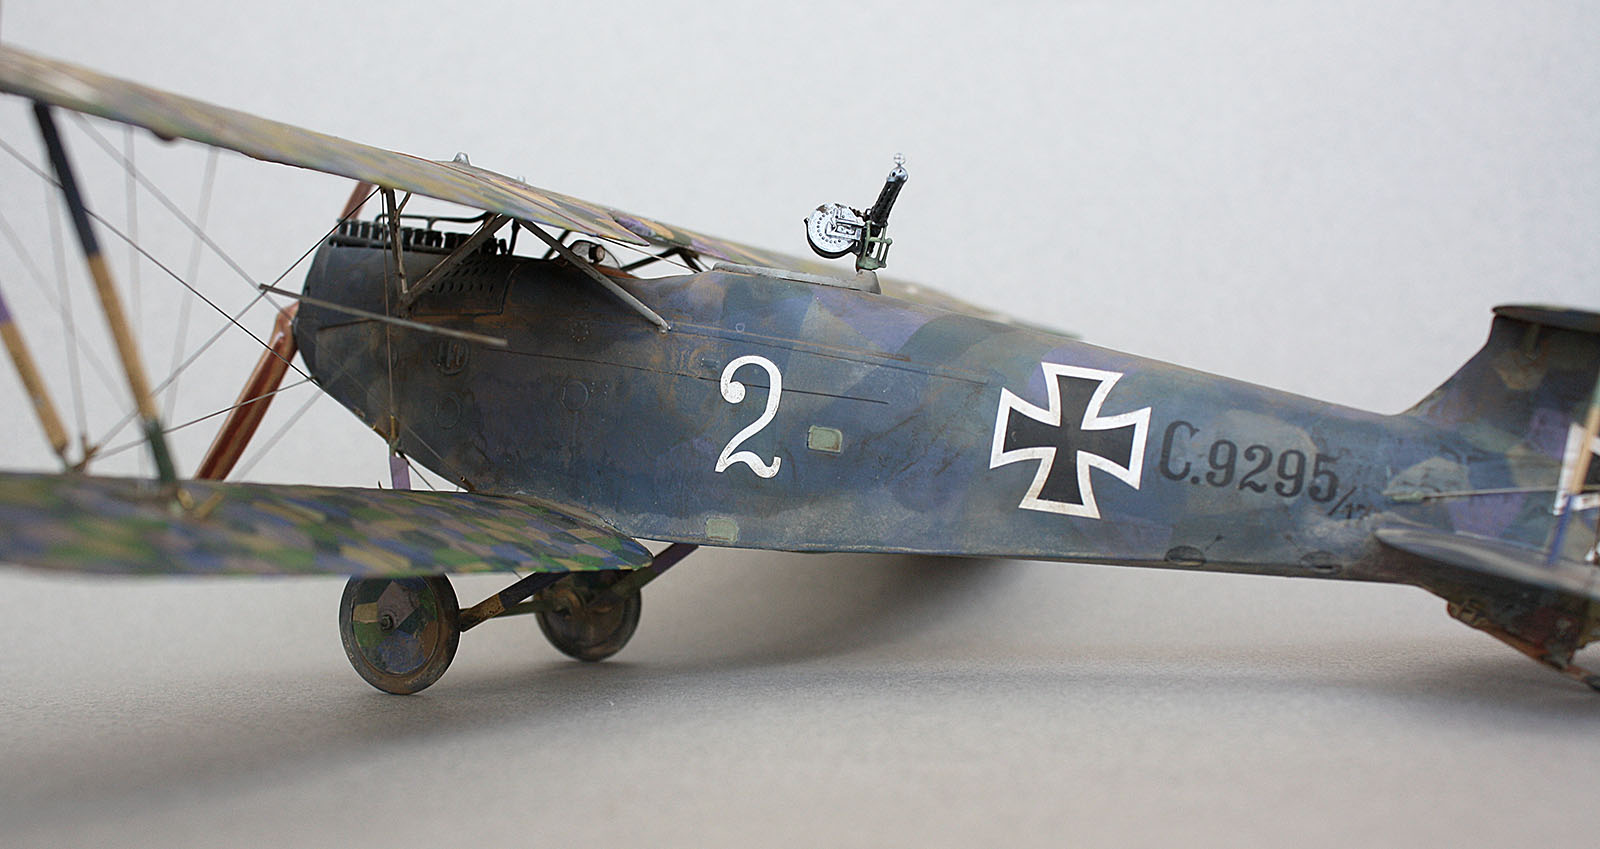
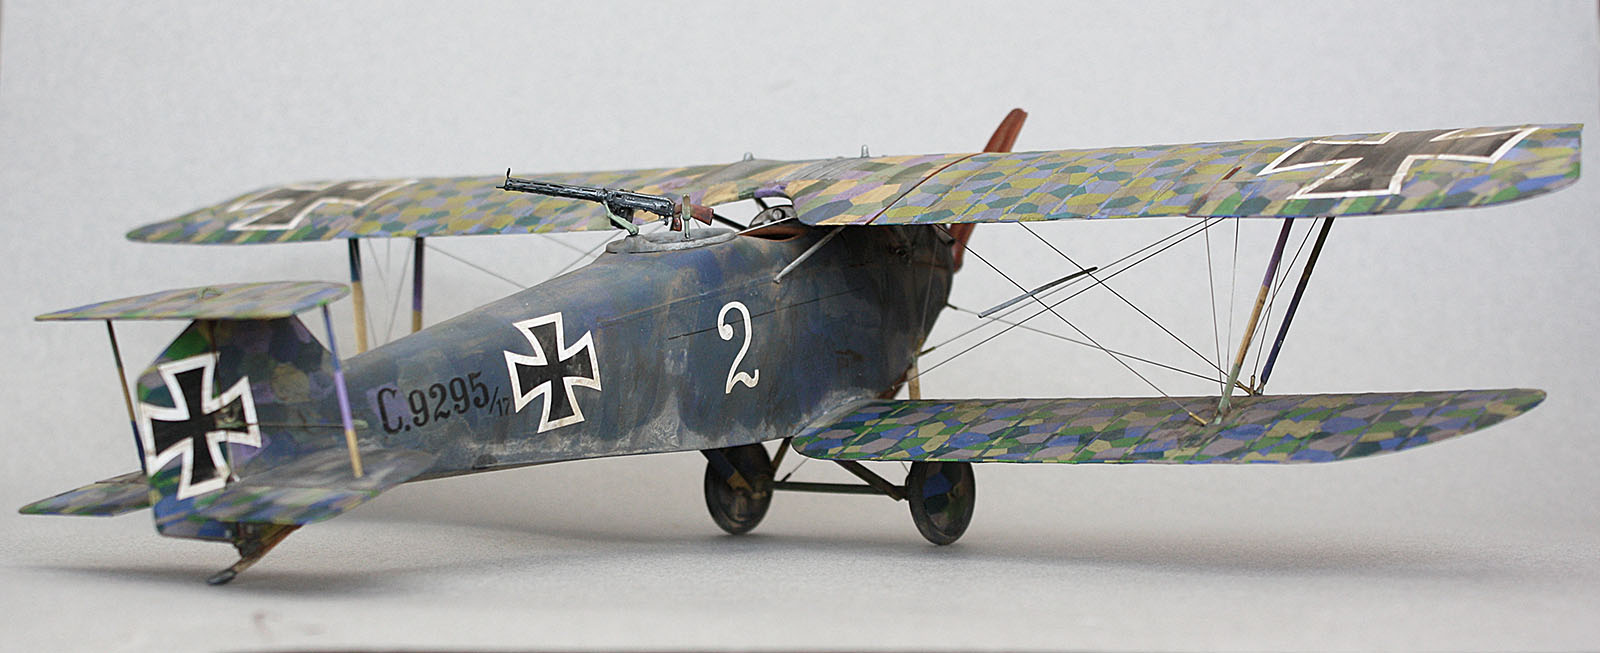
Would like to show progress (sort of a mini-blog) of the Hannover CL.II in 1/32 scale, built from Wingnut Wings kit. On the tail of excellent feature by Bucky Sheftall - I will be tackling option "A":


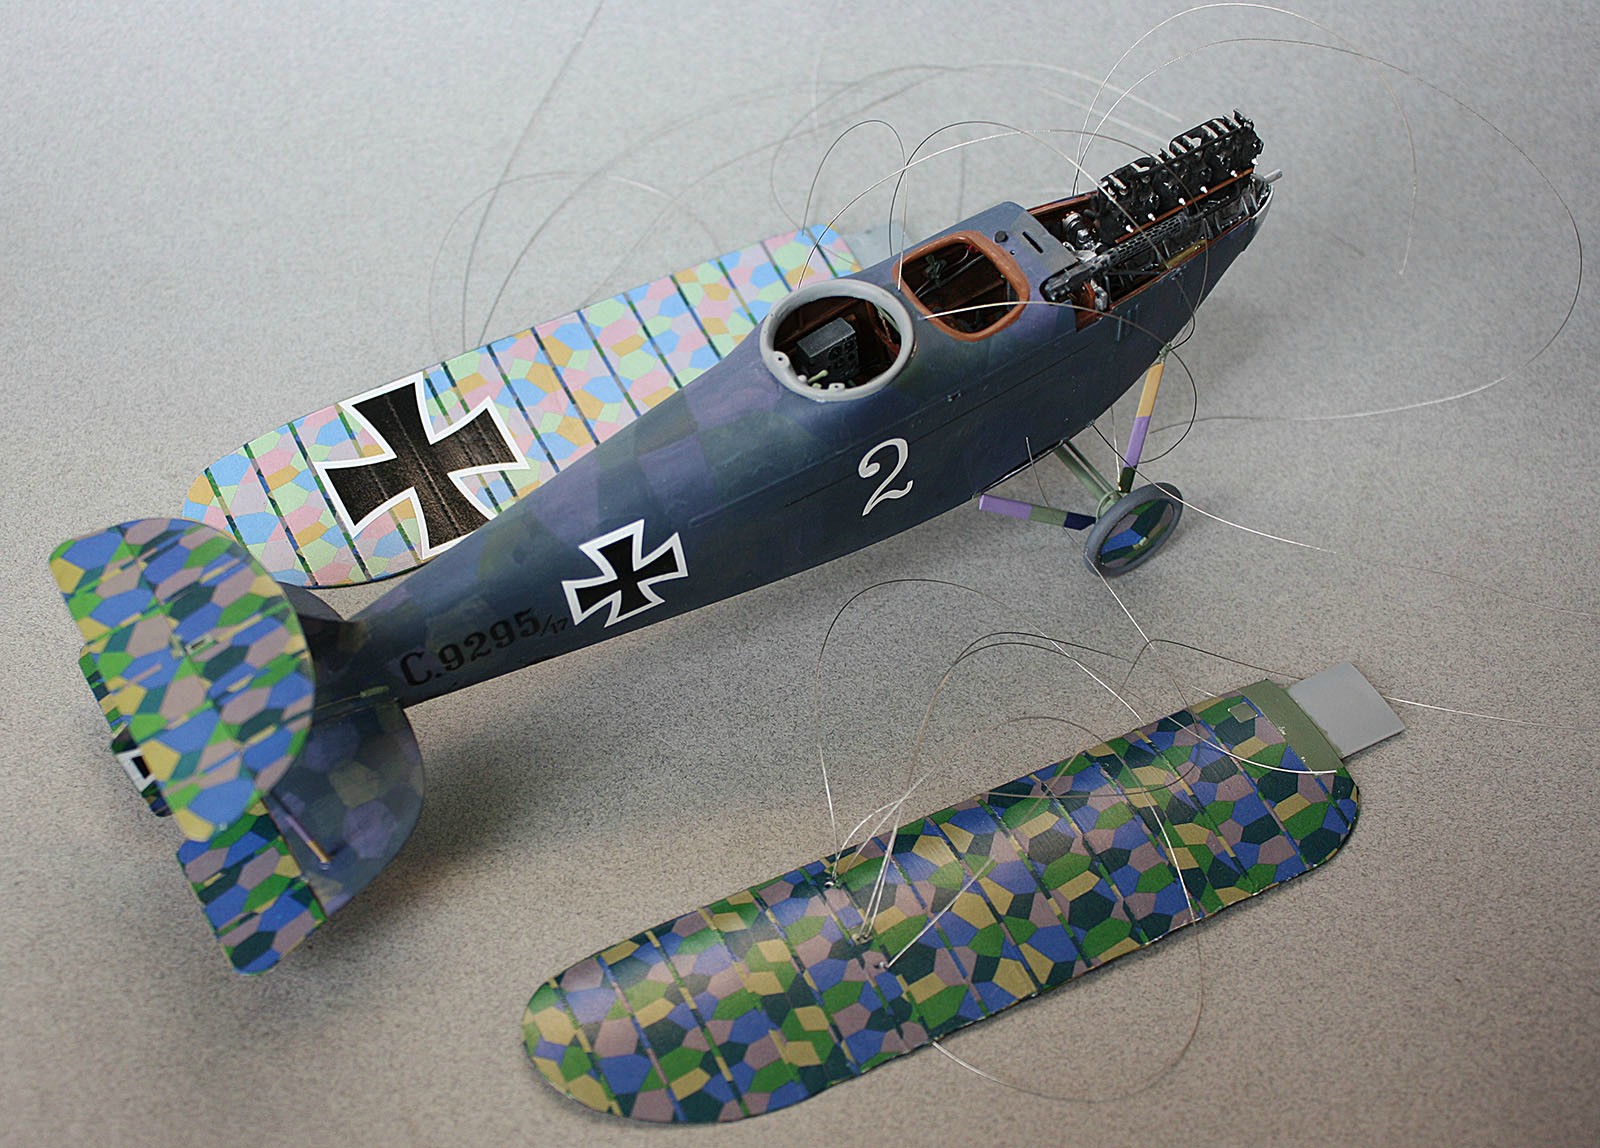
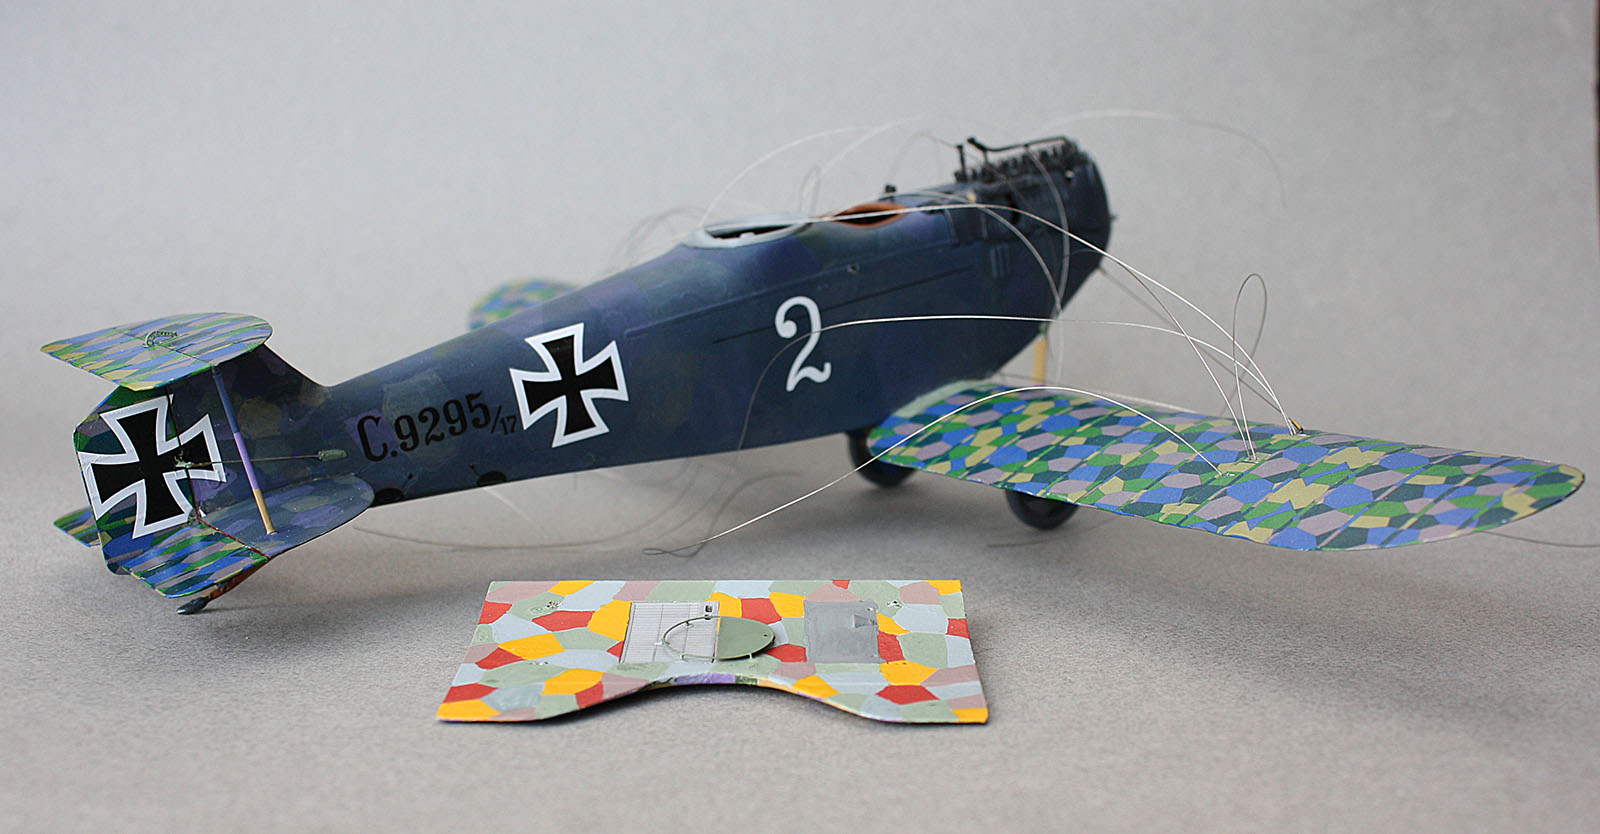
This will be a mini-blog, as I have only intermittent access to photographic set up - so we jump straight to completed cockpit / engine "bay", right as it's about to be closed up.


At this point, only gripes about the kit are:

The decals for radio dials are part on the lozenge decal sheet and part on the equipment portion of the decal sheet - making it a bit like a game of "Find Waldo". Looking for them late at night grew into frustration, so I found myself skipping some of the excellent (but largely invisible) dial detail

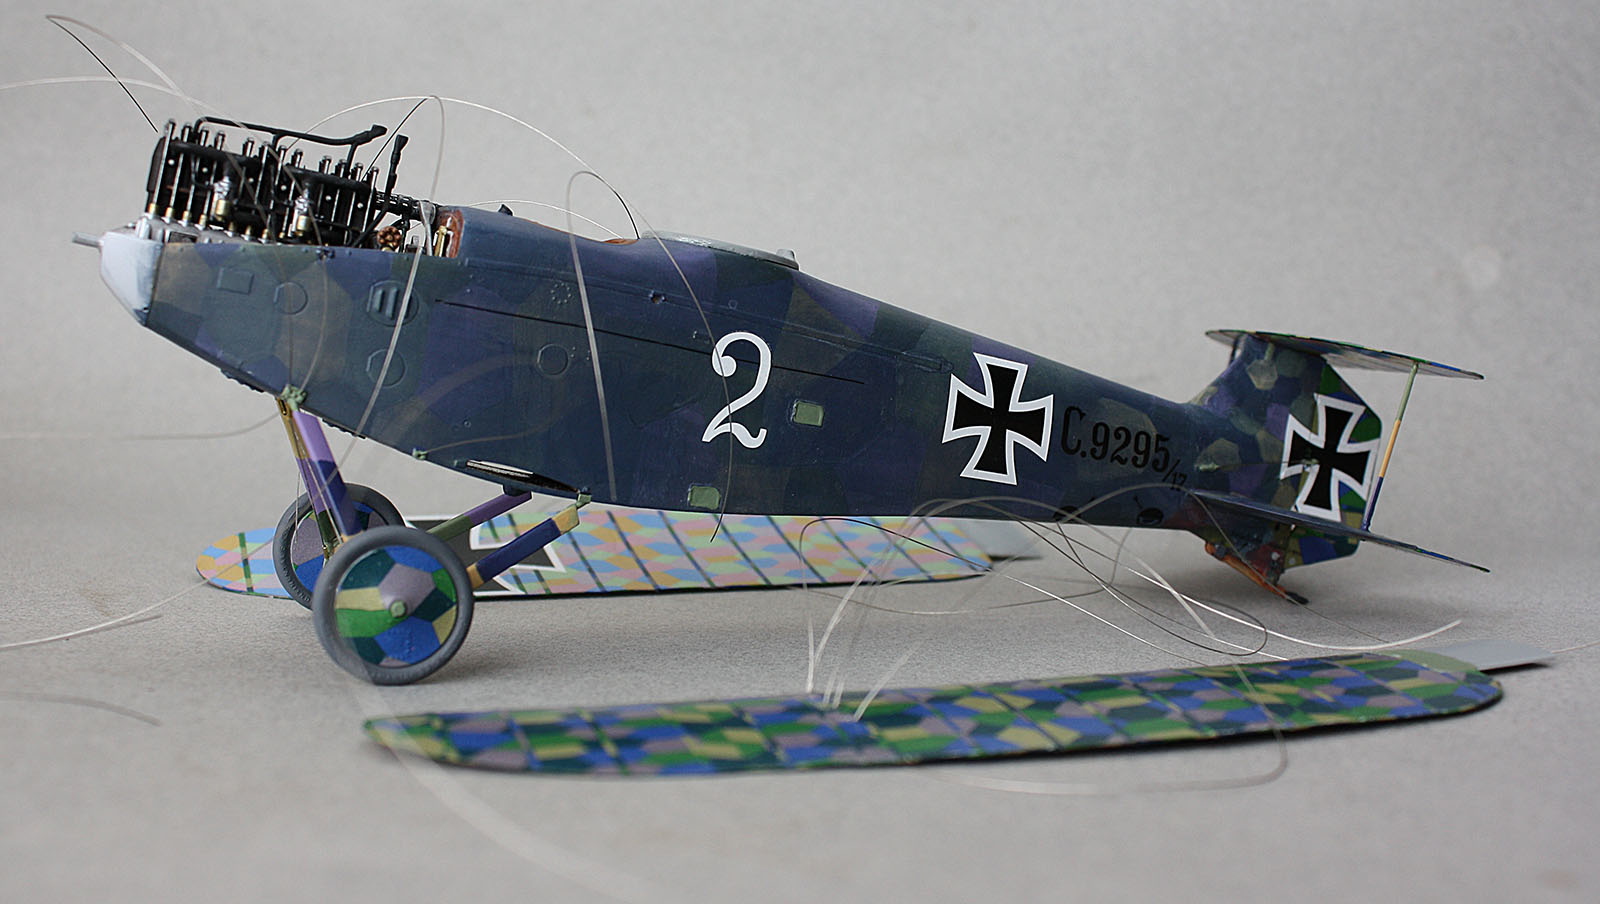
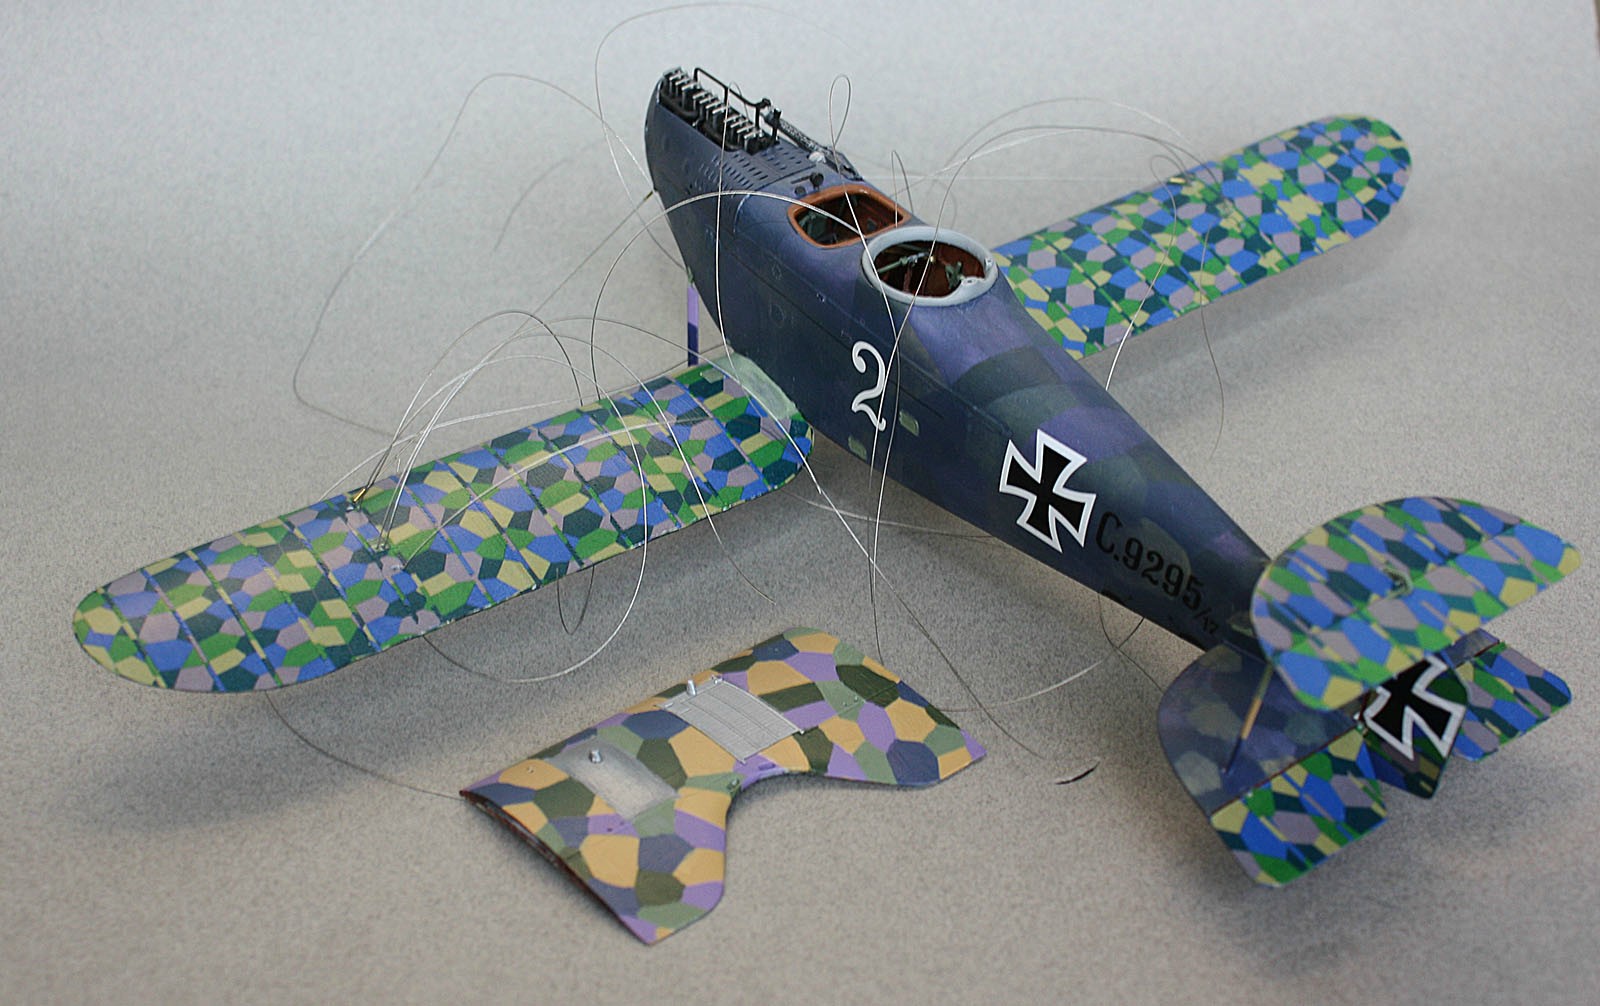
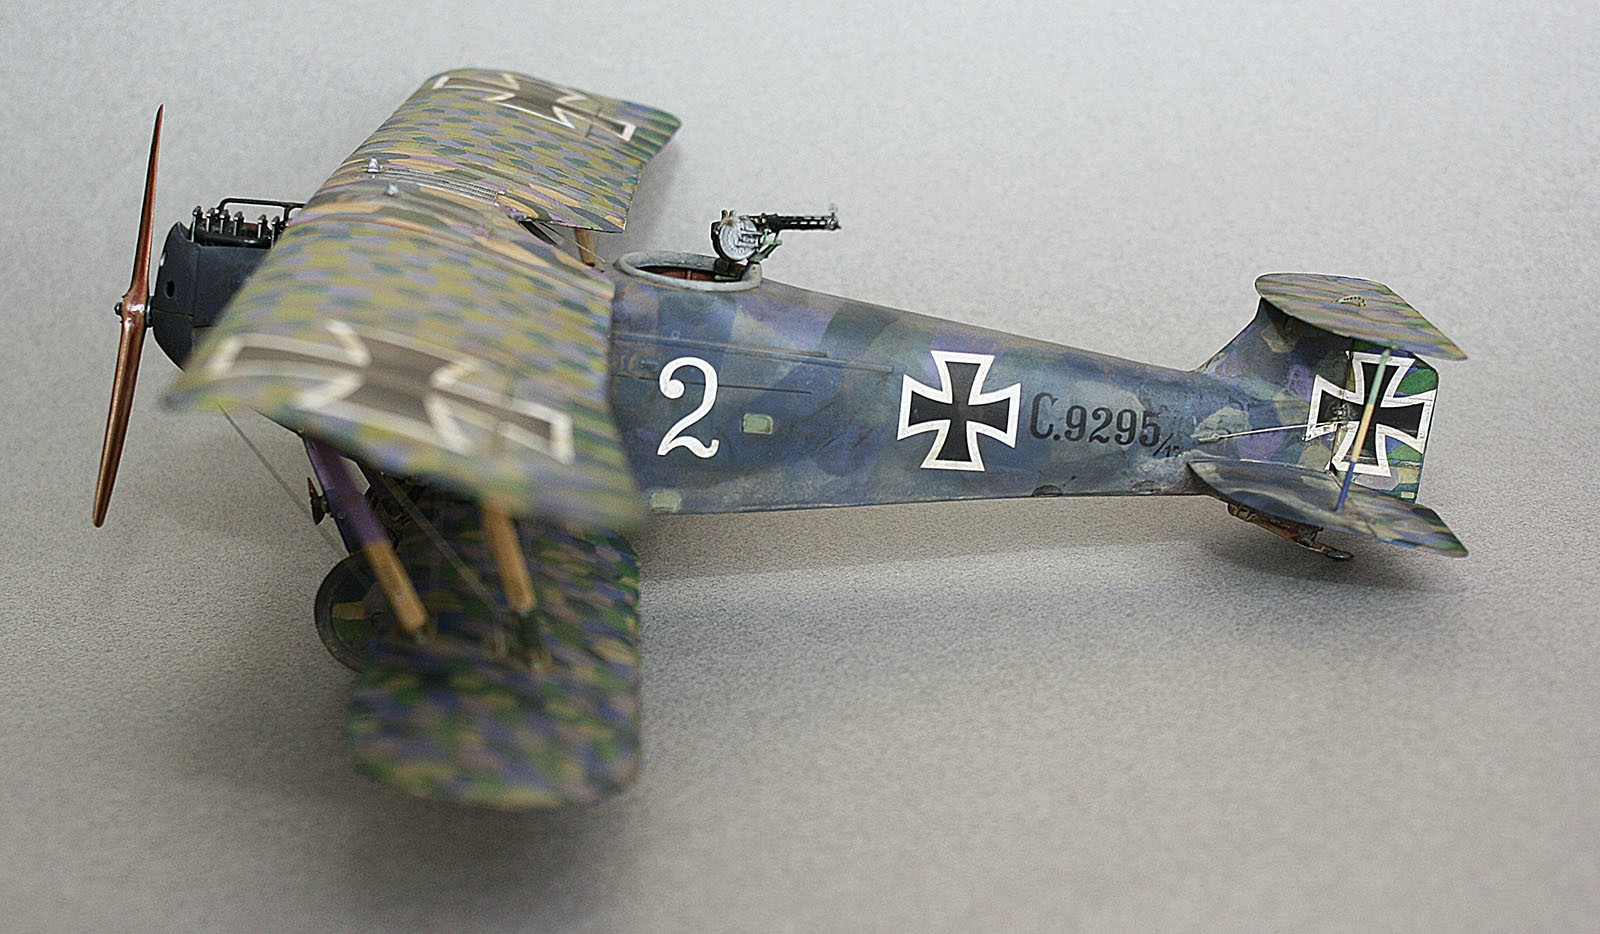
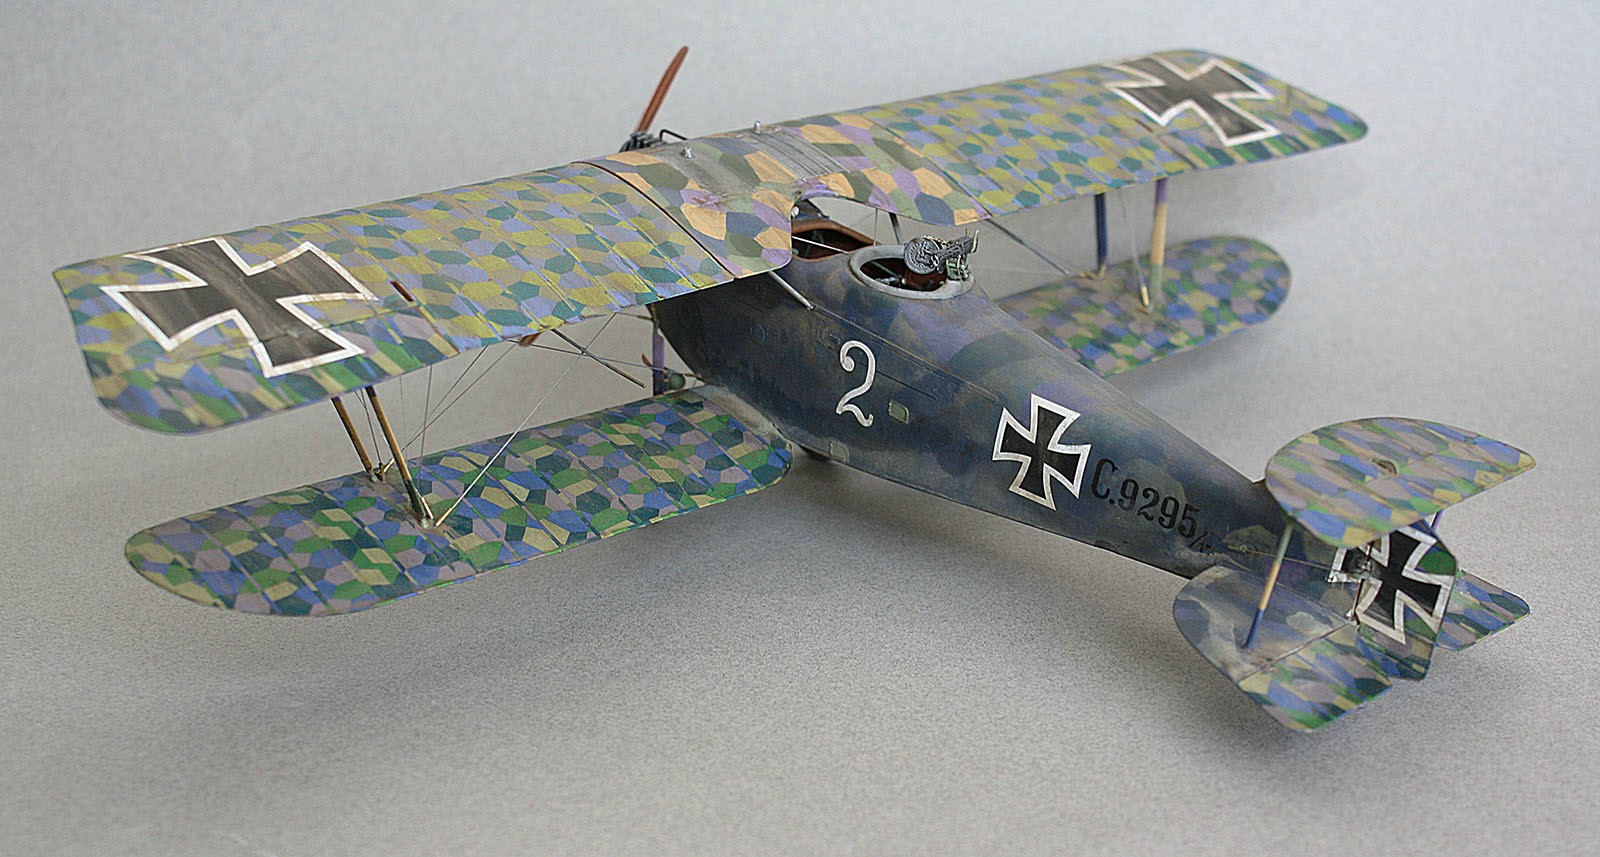
WnW provides decal for painted lozenge on the tail but not wooden center wing section (these would be hand painted lozenge over wood), which leaves an interesting dilemma of matching paints to decals, hand painting tail lozenge and center wing or acquiring decals that cover both tail end and center wing...

^^ My solution is to try my hand (again) at printing my own waterslide decals (hope to capture process in this blog + how to).

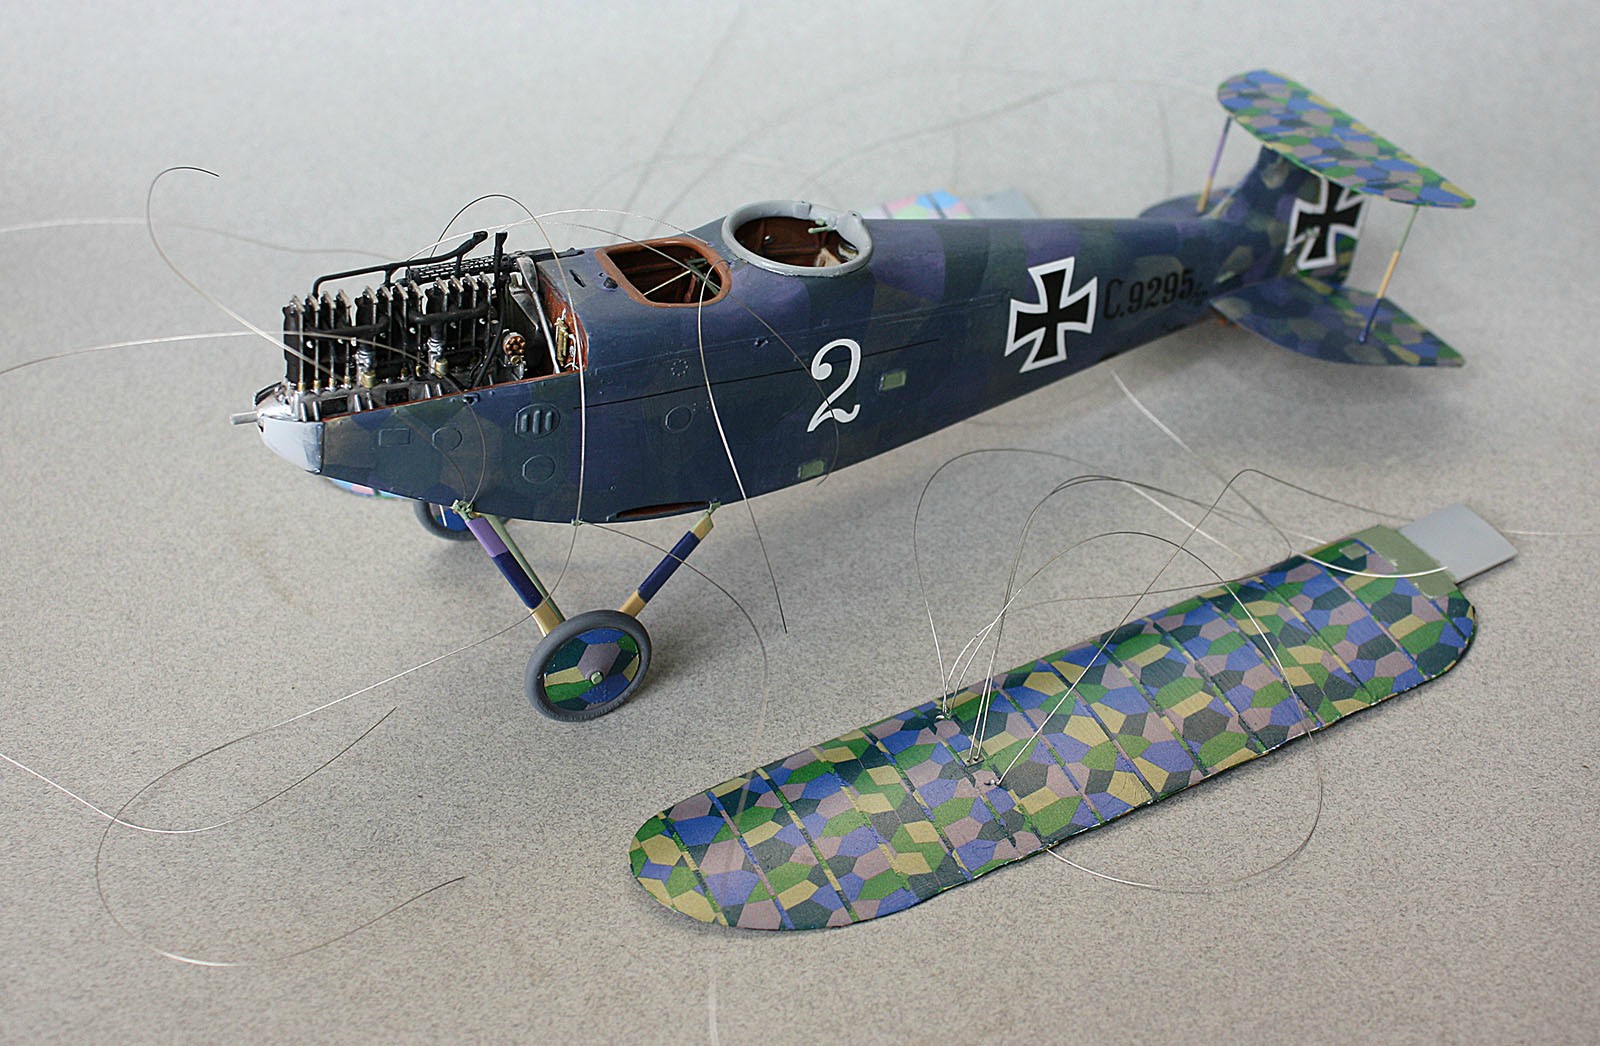
Everything lines up well and assembly is very straight forward (minus Waldo decal gripe). Level of detail in the cockpit and observer seat is very high.

Flying on observation mission, this aircraft is modeled with Fk.II camera and wireless radio installed - I have assembled the hatch open, so the lens will be visible in the opening.
thegirl
_VISITCOMMUNITY
Alberta, Canada
Joined: January 19, 2008
KitMaker: 6,743 posts
AeroScale: 6,151 posts
Posted: Sunday, February 09, 2014 - 03:38 PM UTC
Nice progress so far , I like how your wood effect turned out .


Terri
Jessie_C
_VISITCOMMUNITY
British Columbia, Canada
Joined: September 03, 2009
KitMaker: 6,965 posts
AeroScale: 6,247 posts
Posted: Sunday, February 09, 2014 - 05:52 PM UTC
Seeing these Wingnut kits makes me wish they had chosen 1/48 to work in...

That looks utterly delectable.
RAGIII
_VISITCOMMUNITY
North Carolina, United States
Joined: June 19, 2007
KitMaker: 604 posts
AeroScale: 600 posts
Posted: Saturday, February 15, 2014 - 12:27 AM UTC
Ivan,
Great start on this one! Like Terri I like your worn dark wood effect! Having just looked at your J1 I am sure we are in for a treat with the final paint scheme!
RAGIII
redcap
_VISITCOMMUNITY
England - East Midlands, United Kingdom
Joined: November 06, 2005
KitMaker: 753 posts
AeroScale: 311 posts
Posted: Saturday, February 15, 2014 - 04:17 AM UTC
Fabulous wood effects and internal detailing on your model - love it!

Gary
StukaJr
_VISITCOMMUNITY
California, United States
Joined: April 26, 2010
KitMaker: 346 posts
AeroScale: 292 posts
Posted: Monday, February 17, 2014 - 08:26 AM UTC
Thanks for the comments and encouragement!

Over the weekend, I have closed up the fuselage, prime, base and lozenge painted wooden surfaces. This image captures the point at which I have proceeded to "glaze" the fuselage with heavily diluted black and blue acryl mixture. Applied with flat soft bristle brush, in 3-4 layers.


The tail lozenge is (failed) experiment at printing my own waterslide decals - the inks cracked and split when setting, though did provide me with enough of a template to hand paint the squares... In the mid pictures one can notice where blue wash is setting differently on the decal surface than painted surface, requiring some touch up of individual squares.

Really looking towards picking up speed (wings, tails etc are pre-lozenged and ready to go) and then slowing down again (detailing and weathering).
JackFlash
_VISITCOMMUNITY
Colorado, United States
Joined: January 25, 2004
KitMaker: 11,669 posts
AeroScale: 11,011 posts
Posted: Monday, February 17, 2014 - 02:48 PM UTC
Excellent progress. The over all effect is very convincing.
StukaJr
_VISITCOMMUNITY
California, United States
Joined: April 26, 2010
KitMaker: 346 posts
AeroScale: 292 posts
Posted: Wednesday, February 26, 2014 - 01:04 PM UTC
The fun continues:


The tail is mostly done as well as the fuselage... Went out of instructions order and installed the landing gear before the wings (I hope I don't learn that the order of assembly has a specific reason here). Rigging lines are pre-installed before their locations get crowded by wings and struts. Mostly issue free with exception of:

I went maybe a millimeter too far when angling the upper tail plane supporting struts and the latter ended up a bit too short. I've re-enforced the ends with drops of CA, so assembly is solid (though maybe not as neat as it should be). There are no markings or pre-drilled locations for these struts as different planes have different strut location (really spoiled by dre-tapped strut locators).

The lower wing planes will need some touch up, especially on the edges with spare rib tapes.
StukaJr
_VISITCOMMUNITY
California, United States
Joined: April 26, 2010
KitMaker: 346 posts
AeroScale: 292 posts
Posted: Wednesday, March 05, 2014 - 01:48 PM UTC
The build continues:


The cowling is finished, the lower wings are installed and rigged to the nose, the tail is completed with all the extra supports... The lozenge painted wooden section of the top wing is painted by brush over failed decal lozenge test - the colors are rather gaudy, but I figure it stands to reason most of these aircraft fuselage were glazed or overpainted (justified by factory color I suppose).

Everything is fitting together nicely. Especially like the Wingnut Wing's separate radiators that can be painted and installed separate from the wing. Emergency gravity tank is part of the wing, so took some touch up.

Looking towards installing the struts, top wing and relatively easy rigging ahead.
dolly15
_VISITCOMMUNITY
Quebec, Canada
Joined: May 20, 2004
KitMaker: 8,227 posts
AeroScale: 3,915 posts
Posted: Thursday, March 06, 2014 - 01:26 AM UTC
Lookin' good !
StukaJr
_VISITCOMMUNITY
California, United States
Joined: April 26, 2010
KitMaker: 346 posts
AeroScale: 292 posts
Posted: Thursday, March 20, 2014 - 07:24 PM UTC
Hmmm - it looks like I've failed again to go beyond 4 updates until the finished pictures... I came very close to taking photos of more of the work in progress, but having photo set up and modeling set up at different locations interferes with the process greatly... Nevertheless, here we go:


Greatly enjoyed the multi-lozenge pattern - 4 and 5 color lozenge on top / lower wing, with mixed ailerons. First attempt at hand painting lozenge on fuselage / middle of top wing - it's not so bad, once you've done (sorta want to do it again).

Opted for rather "poisonous" colors on hand painted lozenge fuselage - as a theory to the dark blue glaze applied over most of it.

The WingNut Wings kit provides archival photograph of the crew posing in front of their aircraft with chalk/paint circled hits (via decals) from groundfire - I find this optional detail fascinating, though chose not to include it in the build (maybe next time around).

Installation of the struts offered no challenge - even with extreme angle of the outer struts, correct angle is assured by kit's engineering. Wings essentially fell into place when top wing was aligned.

Rigging is done the savage way - "through the wing" with Beadalon jeweler's wire and brass tubing from Alliance Modelworks. Because of the shear brutality of the method, the decals for the lozenge were applied onto the lower plane of the bottom wing and top plane of the top wing post clean up of the wire run-through.

Hannover CL.II is quite a nice kit from WnW - the resulting two-seater is not too big (thanks to original plane's design and requirements), offers a variety of paint schemes (from plain but striking Roland built to craziest of WWI camouflage schemes)and comes with a full 3 x frets of equipment detail to fulfill most diorama needs... It offers a variety of challenges that look easy on paper but also a list of challenges that are made easy by kit's excellent design and execution. The resulting build is very unique from other crates and I see at least another Hannover build in by future - I selfishly hope for a WnW attention to a CL.III and CL.IIIa... Pretty please!
Mgunns
_VISITCOMMUNITY
Arizona, United States
Joined: December 12, 2008
KitMaker: 1,423 posts
AeroScale: 1,319 posts
Posted: Thursday, April 10, 2014 - 05:03 AM UTC
Hello Ivan:

This really turned out nice. I did one when it first hit the streets and hand painted the lozenge. I like the way you did yours and how the lozenge is visible through the wash. Shows your handiwork to good effect. It is a beastly brute and no one could say the Hannover was a "pretty" airplane, but it did what it was supposed to. Your model really shows this quality.
Outstanding workmanship.

What's next?

Best

Mark
dolly15
_VISITCOMMUNITY
Quebec, Canada
Joined: May 20, 2004
KitMaker: 8,227 posts
AeroScale: 3,915 posts
Posted: Thursday, April 10, 2014 - 11:34 AM UTC
Very nice! Love it.
StukaJr
_VISITCOMMUNITY
California, United States
Joined: April 26, 2010
KitMaker: 346 posts
AeroScale: 292 posts
Posted: Tuesday, April 15, 2014 - 07:03 AM UTC
Hello, Mark! Thank you very much - it was a fun process of going in layers and building up to the final effect. As always, there was a bit of a "pucker" factor when I just wasn't sure but it all came out all right in the wash (pun intended).

Next on my bench are two Roden 1/32 kits - a DR.I and a Siemens-Schuckert D.III with PE updates... They are a bit of a "throwback" to the day of having kits that bang the head against the wall frustrating - approximate fit, flash and other headaches. Good news is that I've plead, begged and bartered to get WnW 1/32 Gotha for my B-Day so I'm becoming more and more spoiled for choices...

Thanks, John!
Merlin
Staff MemberSenior Editor
AEROSCALE
#017
_VISITCOMMUNITY
United Kingdom
Joined: June 11, 2003
KitMaker: 17,582 posts
AeroScale: 12,795 posts
Posted: Tuesday, April 15, 2014 - 06:18 PM UTC
Hi Ivan

Beautiful job! I really like the worn and dirty finish.
You should contact Jessie to get it onto the front page as a Feature.

All the best

Rowan
StukaJr
_VISITCOMMUNITY
California, United States
Joined: April 26, 2010
KitMaker: 346 posts
AeroScale: 292 posts
Posted: Friday, April 18, 2014 - 05:40 AM UTC
Thanks!

Will do
dolly15
_VISITCOMMUNITY
Quebec, Canada
Joined: May 20, 2004
KitMaker: 8,227 posts
AeroScale: 3,915 posts
Posted: Saturday, April 19, 2014 - 12:05 AM UTC

Quoted Text

Hello, Mark! Thank you very much - it was a fun process of going in layers and building up to the final effect. As always, there was a bit of a "pucker" factor when I just wasn't sure but it all came out all right in the wash (pun intended).

Next on my bench are two Roden 1/32 kits - a DR.I and a Siemens-Schuckert D.III with PE updates... They are a bit of a "throwback" to the day of having kits that bang the head against the wall frustrating - approximate fit, flash and other headaches. Good news is that I've plead, begged and bartered to get WnW 1/32 Gotha for my B-Day so I'm becoming more and more spoiled for choices...

Thanks, John!


I really admire your creativity,your "pucker factor."This is what I admire most in modeling those who are willing to risk "cutting edge" stuff. Congrats,Cheers!
Mgunns
_VISITCOMMUNITY
Arizona, United States
Joined: December 12, 2008
KitMaker: 1,423 posts
AeroScale: 1,319 posts
Posted: Sunday, April 27, 2014 - 10:28 AM UTC
Hello Ivan:

Looking forward to seeing your Roden Projects.

Best

Mark
 _GOTOTOP